The Recipe for Embossing Folder Sandwiches

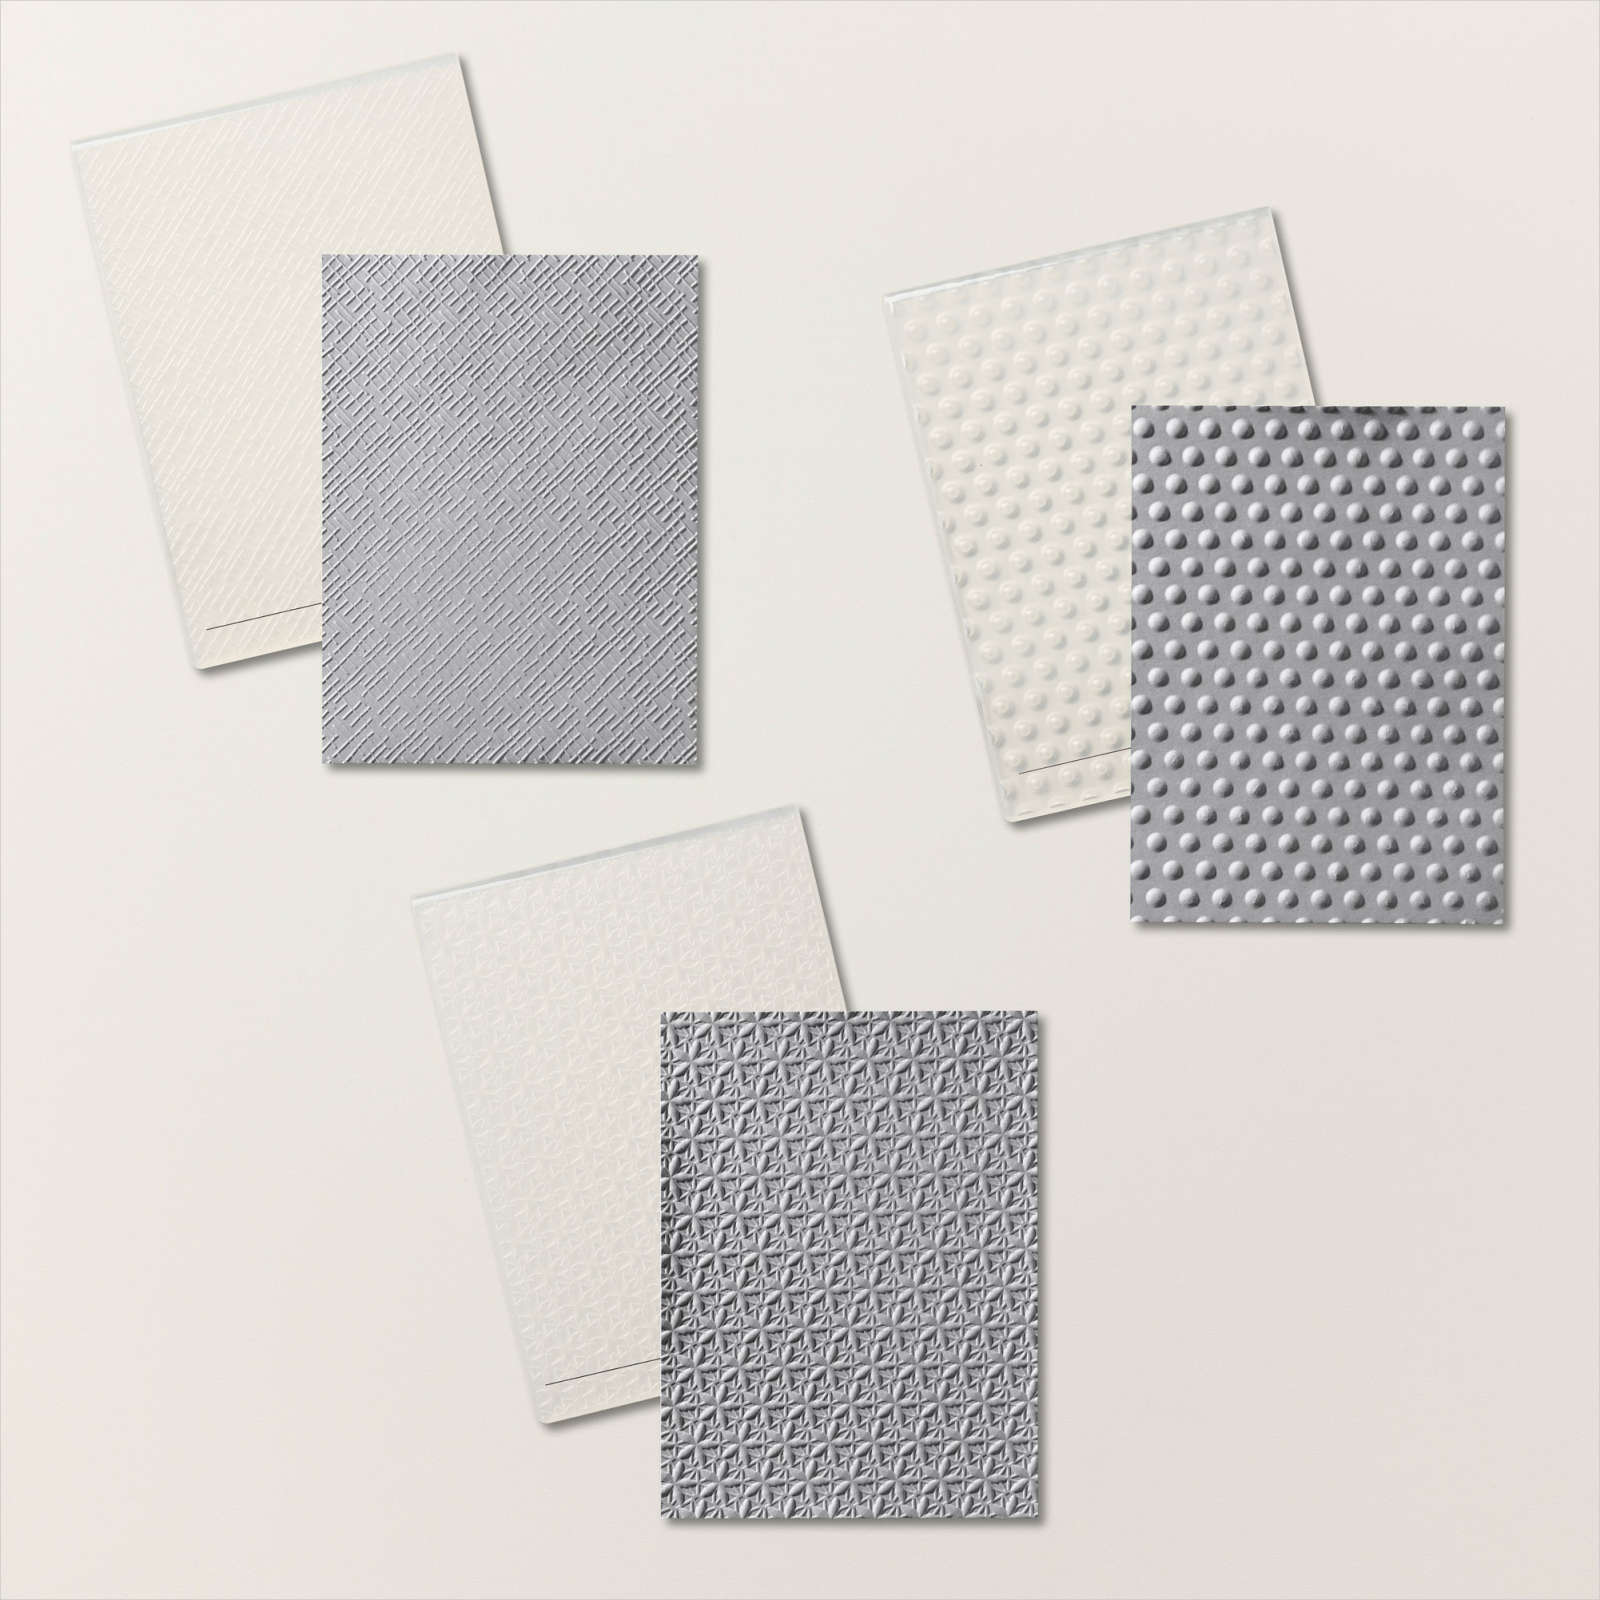
You may not have a preference for how your sandwiches are cut, but there is a CORRECT way to layer the “sandwich” for using embossing folders on your Stampin’ Cut & Emboss machine 🥪

Stampin’ Up! has three styles of embossing folders: Standard (approx. 1/16″ wide), 3D (approx. 1/8″ wide) and Hybrid (similar to 3D and will have a coordinating die to insert as desired). Each type of folder has a “Recipe” for successful texturizing, and if you forget, it’s PRINTED on the base plate/platform #1

Today’s LIVE video teaches the tips and tricks to remember for successful embossing:

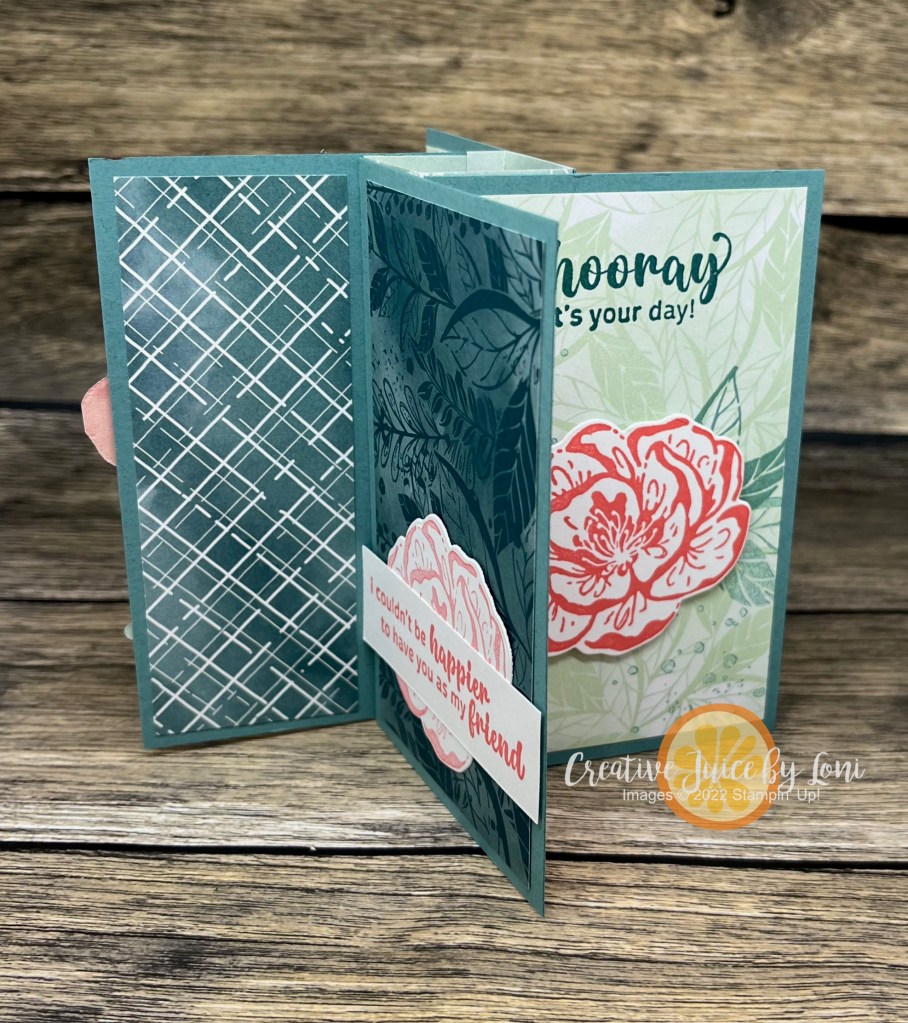
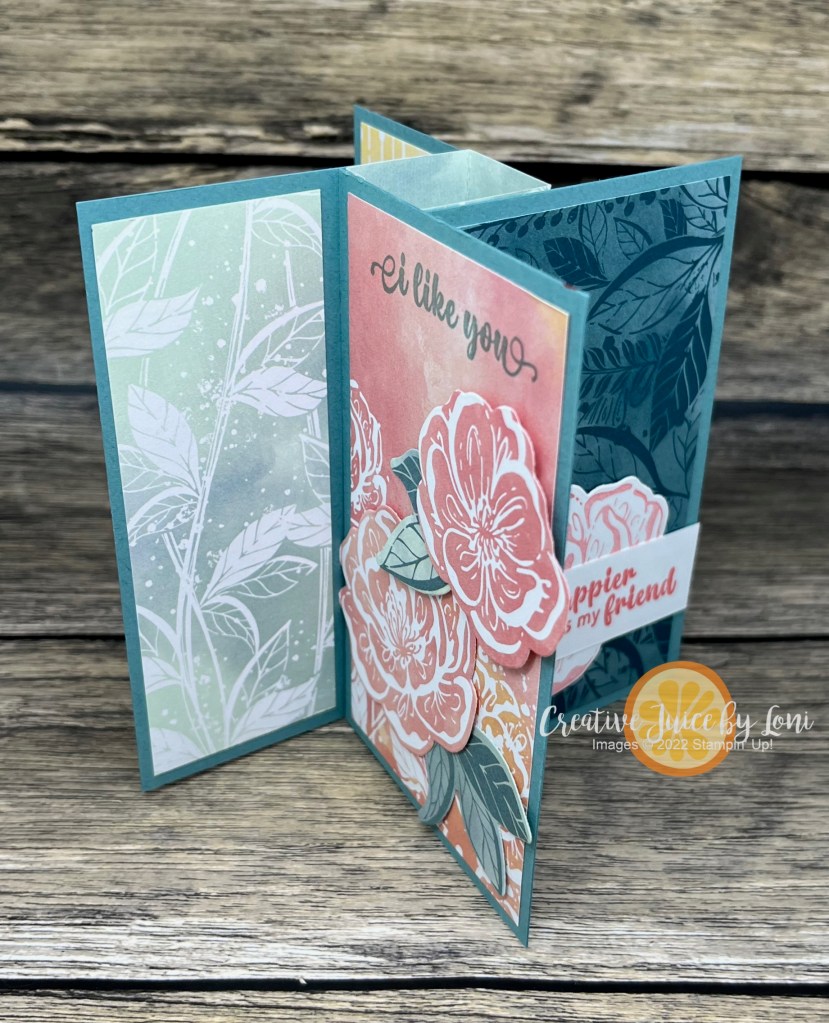
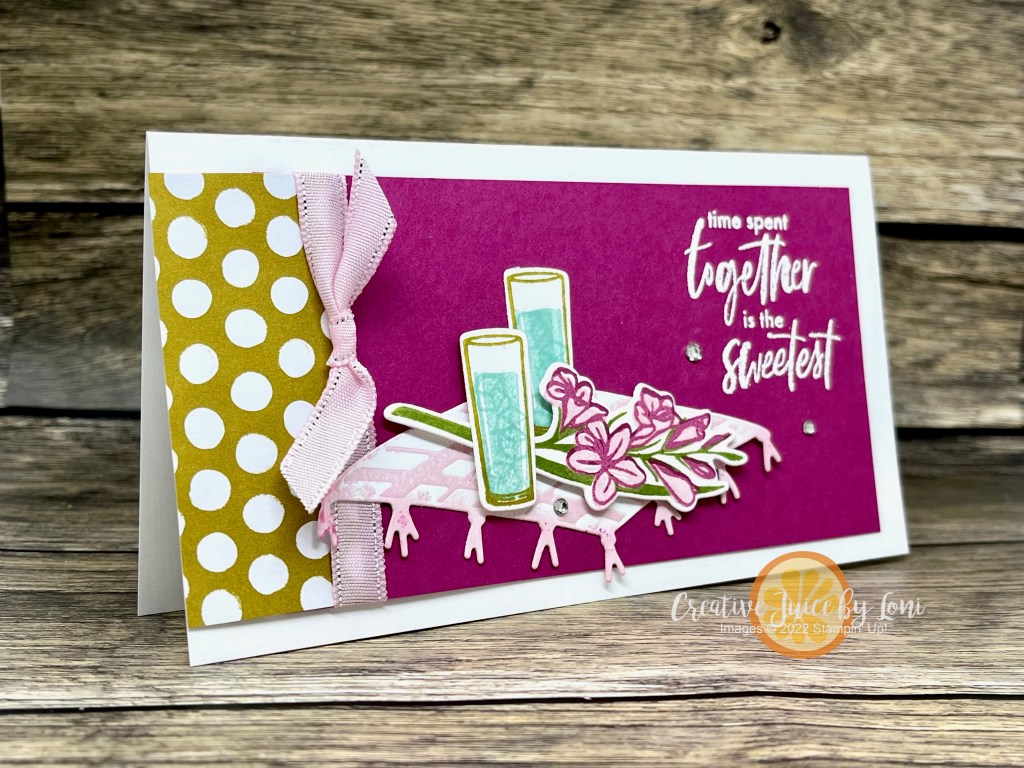
Because there are NEW items in the Online Exclusive section of my Stampin’ Store (some are being restocked as quickly as possible!), I am showcasing the 3-D Basics trio of embossing folders, starting with the 3-D Floral:

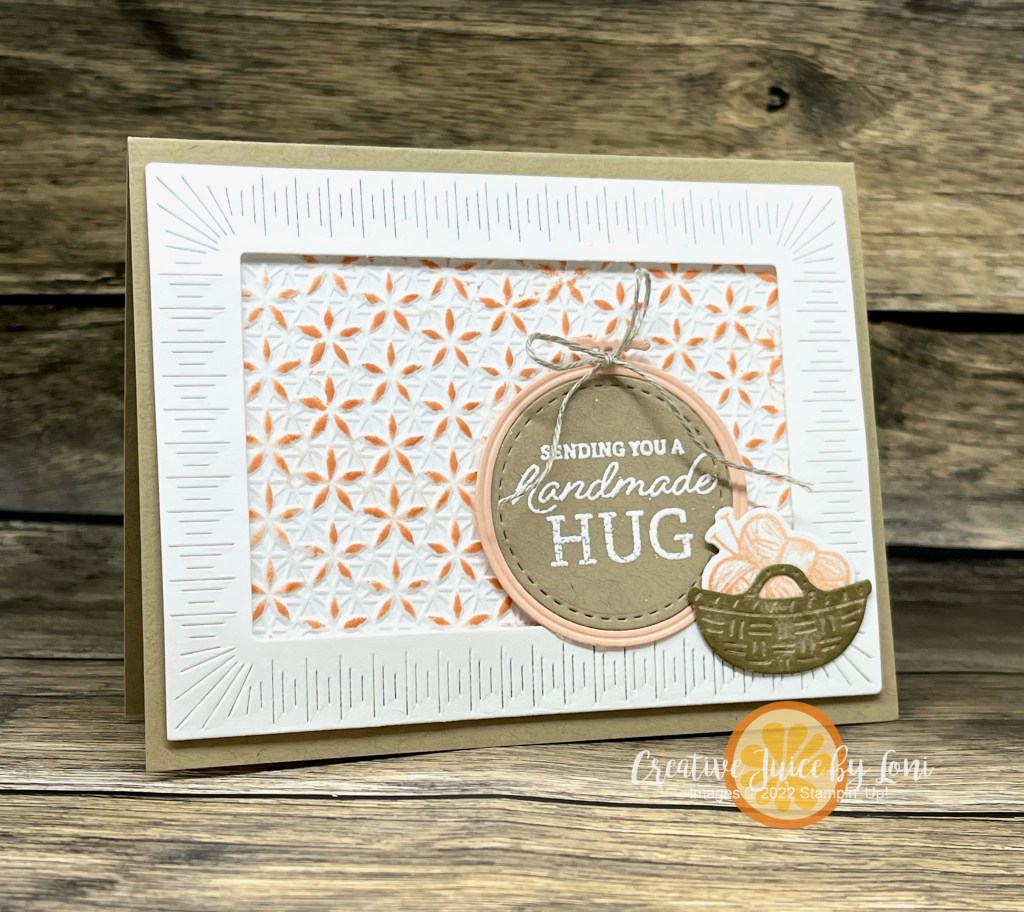
I lightly pulled/tapped my Petal Pink ink pad across the embossed layer to help the flowers POP and the other supplies are listed below. The Radiating Stitches Dies (which is what I used for the frame) are also part of the Online Exclusives!

Come back over the next few days to see all the cards, and remember it’s BONUS DAYS in July, so for each $50 spent before 7/31, you earn a $5 coupon to redeem in August!

Product List

I enjoy visitors AND COMMENTS, so thank you for reading and saying HI! Check back in for card #2 tomorrow.

Lemon Lolly, Sweet Sorbet and Black

Friday is a good day for stretching those creative muscles, so I jumped into this unique TGIF Color Challenge!

Once I saw the colors, I went to my stamp collection to choose a stamp set. I hadn’t inked up the new SUPER COOL stamps yet, and the cake roll image reminded me of a red velvet cake:

It needed just a little something after I stamped (and fussy cut) the greeting, so I pulled out the teensy strawberry die from the So Refreshing dies to mimic the fruit on top of the cakes. Just “dip” them into an ink pad to really show off the texture from the dies…

It’s BONUS DAYS at Stampin’ Up!

Hope you make time to ink up a new stamp this weekend, too!

Diagonal Cut Card: Show BOTH Sides of the Paper!

Sometimes I obsess over WHICH SIDE of my pretty Designer Series Paper I should use, and if this dilemma sounds familiar, you will like today’s card design because it allows you to show BOTH sides of the paper!

This example features the Masterfully Made Designer Series Paper and a set of dies you may not have noticed yet. The Paper Florist dies will have you putting together breathtaking blooms that never wilt!

You’ll be seeing more of these flowers next Monday, but I also wanted to point out the incredible detail of the photographic style of the Masterfully Made DSP~ I did NOT tear any of the Lemon Lime Twist paper, that is just a flat layer, but it LOOKS 3-D!!

Next, I created this version with the patterns slightly separated, and used the Delightfully Eclectic Designer Series Paper:

When you watch the replay of my live demonstration, you’ll learn how this MEGAPACK of paper patterns gives expanded options for some of the newer products in our catalog, and offers versatile designs to enhance any project.

Final reminder that most of our Designer Series Papers are 15% off through the end of June, 2023! Don’t miss a chance to stock up with paper that has new colors and textures to keep you crafting through the summer…

Looking for the supply list? Simply click on the orange buttons!

New at SU!- Level Complete Pull-Tab Flip Card

Zelda is a big deal for my granddaughter, so when the June “New at SU!” blog hop theme was Kid’s Cards, I thought maybe someone else has kids playing video games this summer. The new LEVEL COMPLETE stamp set is great for the young, and young-at-heart!

I wanted this to be an interactive card, as gamers love to “play” and fidget, and this one flips open when the tab is pulled on the right:

I saw Aubrey (of the Stampin’ Jill team) create a Pull-Tab Flip Card last week, I wanted to put my own spin on it!

To make it easy to assemble, here are the measurements (supply list at bottom of post), then you can watch either or both videos to put it together (my pieces are different sizes than Aubrey’s, as my card pulls from the right and hers from the bottom) :

Card base: 4-1/2″ x 5-1/2″

First layer: 3-3/4″ x 5″, cut the smallest banner from the Stylish Shapes dies about 1/3 in from the left side for the mechanism to slide through before attaching to card base with dimensionals in each corner.

Mechanism: 1-1/2″ x 7″, scored at 4-7/8″ and 5-1/4″

Flip Layer: 2-3/4″ x 4-1/2″. Adhere this to the 3/8″ piece only, under the left edge of the layer.

Inside layers (2): 2-1/4″ x 3-1/2″

TIP: Use strong adhesive, such as Stampin’ Seal+ or Tear & Tape because this card will be tugged and pulled over and over again!

Give this card a try- it comes together quickly when you have all the pieces cut and ready! If you can’t make it today, PIN it/save it for later and I’d love to see your version.

Off you pop to one of the other kid-friendly card ideas around the world:

June 2023 New at SU! Hop: Kid’s Cards

Previous BlogNext Blog
1.iHeartCards2 (US) – Zany Zoo Platform Pop Up Card
2.scraphexe (DE) – Kleine Träume | Little Dreamers
3.Joni in the Spotlight Stamping (US)-Hello Ladybug
4.The Tantalizing Stamper (UK)- Supremely Awesome
5.The Joy of Stampin’ with Rachael (US)- Reach for the Stars
6.Creative Juice by Loni (US) – Level Complete Pull-Tab Flip Card
7.Carterie Plus (CA)- Carte d’enfant
8.Playing with Papercrafting (CA) – Reach for the Stars
9.TanjasKartenwelt (DE)- Zuckersüsser Zoo
10.De Kijkkast (NL) – Kid’s Card with Little Monkey
11.Nature’s INKspirations (US) – Beside Me
12.Tricia’s Stamping Creations (US) – Zany Zoo
13.247Inkspiration (US) – Little Monkey
14.My Flutterby Moments (US)- It’s A Science Stamp Set
15.Stamping Flair (AU) – Construction Zone

Powered by blogcarousel.com

Product List

4 Backgrounds from 6×6 Paper: Corner Angle Layer Card

BREAKING NEWS: FREE SHIPPING day just announced! Set an alarm for Wednesday, June 21st and earn free shipping on your orders over $75 that day only!

Paper crafters pride themselves on using scraps, so when we find a way to NOT WASTE A PIECE of pretty paper, we must give it a try!

I appreciated this idea from fellow demonstrator Rachel Tessman, and with the Glorious Gingham Designer Series Paper ON SALE through June, knew it was time to share it with you! It’s a fabulous way to get 4 angled corner backgrounds from one 6″ x 6″ piece of Designer Series Paper, and you’ll love how simple it is.

Lay a ruler down and mark 1-1/2″ on each bottom right corner as you rotate the paper 90-degrees four times. Mark it on the BACK SIDE of the paper you want to use, then you don’t have to worry about erasing lines! Then connect the marks across from each other like this:

Use your Paper Trimmer to cut along each of your lines and you’ll have 4 angled pieces to put in the corners of your card fronts:

My card base is Thick Basic White Card stock: 5-1/2″ x 8-1/2″, scored in half at 4-1/4″

Pretty Peacock card stock: 5-1/8″ x 3-7/8″

Basic White card stock: 5″ x 3-3/4″

I used the So Refreshing Bundle to complete my cards, and here’s a video to watch & learn how to:

Filled my pitcher with “water” and stuck in the flowers:

Let me know if you try it, or share your version in my Creative Corner Facebook Group for my V.I.C.’s (Very Important Crafters). Now turn up the alarm to remind you to order on Free Shipping Day and add these supplies to your cart:

Product List

Paper “Quilts” for TGIF Sketch

Paper Crafting is a LOT like quilting: Take scraps and put them together, and you’ve got a completely NEW object!

Late last night I “stitched” together a few panels to use for the #tgifc424 sketch challenge:

And because I couldn’t decide which I liked best, I made TWO versions, one for “paper-piecers” and the other for “fabric-piecers”!

Which version do you like best? I really want to know!

I can see a quilter including the second card with a comforter they would gift to a loved one!

My scraps were pieces of the Countryside Inn Designer Series Paper (15% off during June!) and I paired my paper quilts with the Basics Floral 3D Embossing Folder…have you seen this bundle of *indispensible* textures? Only available in my online store, they are the ones I reach for the most because one of them will go with [almost] anything I’m creating!

And can we take a minute to admire the Boho Blue Limited Edition Mini Cut & Emboss Machine I stamped on my card and the actual one in my Stampin’ Store? I really did stamp it in Boho Blue for my card, but the lighting at night doesn’t look quite right. I love the mini machine for quick cutting and it’s the one that sits on my desk, but remember; the regular size embossing folders only fit in the regular Cut & Emboss Machine.

Use up your Designer Series Paper scraps with this technique: Glue pieces next to each other on a piece of card stock (in line or randomly), then cut to desired size and use it like you would a regular piece of patterned paper!

Product List

Pinwheel Tower Card

You are going to want to make this card, believe me!

Since most of our Designer Series Paper is discounted through June 30th, I’ll be demonstrating some projects to inspire you to pull out your patterned paper and use every last scrap. You can set an alarm for Mondays and join me live on my Facebook Page or YouTube Channel at 12:30 pm MT, or watch the replay at your convenience.

Without further adieu, here is the fabulous Pinwheel Tower Card I taught today:

It opens up to stand and displays 4 panels! This card is best created in landscape orientation, giving you plenty of area on each panel to decorate or write a message. The finished size of this card (laying flat) is 4.25″ x 5.5″, so it fits into our Basic Medium Stampin’ Up! envelopes perfectly.

You’ll be delighted at how EASY this fancy card is to create and if you want to craft along with my video below, gather these supplies:

  1. One 4-1/4″ x 4-1/4″ piece of Designer Series Paper
  2. Four pieces of 2-1/2″ x 4″ Designer Series Paper that coordinate (don’t have to be the same pattern, but from the same pack) with another four 1-1/2″ x 4″ pieces of Designer Series Paper.
  3. Four 2-3/4″ x 4-1/4″ panels of card stock that match one of the colors from your Designer Series Paper
  4. Simply Scored Board (or paper trimmer with scoring blade)
  5. Adhesive

Once you’ve made a Pinwheel Tower Card, you may want to make a larger version in a slimline card, which could also be a “mini album” if you add photos to some of the panels!

This version is 9″ x 4″ when flat, so it fits into a legal envelope (don’t forget to stamp your envelope, too).

For this larger version, here are the supplies you’ll need (and adjusted measurements):

  1. One 4″ x 4-1/4″ piece of Designer Series Paper (still score along the longest side at each inch)
  2. Four pieces of 3-3/4″ x 4-1/4″ Designer Series Paper (or cardstock) with another four 3-1/4″ x 3-3/4″ pieces of Designer Series Paper (or cardstock and scraps of Designer Series Paper, as shown)
  3. Four 4-1/2″ x 4″ panels of card stock that match one of the colors from your Designer Series Paper
  4. Simply Scored Board (or paper trimmer with scoring blade)
  5. Adhesive

I used the BRIGHT & BEAUTIFUL Designer Series Paper along with the Sweetest Cherries stamps and Cherry builder punch on the Slimline version, and will list the supplies for the Hello, Irresistible original card below.

REMEMBER THE PAPER IS ON SALE THROUGH JUNE 30, 2023 – SAVE 15%!

Product List

Cupcakes, Pop Art & Free Projects to Make!

On our last trip to Washington, D. C. my husband and I decided to step into the Hirshhorn Art museum, as it was one of a handful of Smithsonian buildings we hadn’t yet visited. It was a short tour, as most of the modern art didn’t appeal to either of us AT ALL. My personal philosophy on art is that it should do one- if not both- of the following:

  1. Uplift and Inspire
  2. Make the viewer happy

Big talk coming from a person whose biggest art influence was the game “Masterpiece” (do you remember that??) however, that’s my opinion and I stand by it.

One exception to my ambivalence toward modern art is Pop Art. I am attracted by color (no surprise) and bold images of pretty (or in this case, yummy) everyday objects!

Since I have a special offer (see below) for customers who purchase the Circle Sayings bundle from my Stampin’ Store, I wanted to show a card using the stamp set WITHOUT a circle. The cupcake image is my “food spirit animal” so I channeled my inner-Andy-Warhol to give you an eyeful of BRIGHT sweets!

Each section alternates between being raised by black dimensionals or having just the cupcake raised on a color adhered flat to the card:

Good thing card stock isn’t as dangerous as the food coloring it would take to make frosting in that color! These are the Stampin’ Up! colors I used: Calypso Coral, Tahitian Tide, Daffodil Delight, Melon Mambo, Parakeet Party, Gorgeous Grape

Here’s a special just for you:

Purchase the bundle from my Stampin’ Store and you’ll receive 3 never-seen project tutorials PLUS the consumable supplies to create all three projects! You’ll get the tutorials via email and the supplies in the mail by June 30th. Offer valid for U.S. customers only.

The Circle Sayings bundle includes a photopolymer stamp set and a NEW coordinating 2-3/8″ circle punch.

While I’ll send you all the card stock, paper, ribbon, etc. to create the projects from my tutorials, you may also need these items (found in my store, as well):

  • Memento Tuxedo Black ink pad
  • Tahitian Tide OR Azure Afternoon ink pad
  • Lost Lagoon ink pad
  • Colored Pencils (I used Stampin’ Up! Watercolor Pencils)
  • Suggested Stampin’ Blends combos (could use colored pencils or Stampin’ Write Markers): Lemon Lolly, Tahitian Tide, Berry Burst, Medium combo
  • OPTIONAL: Wink of Stella pen
  • Scissors and adhesive, clear blocks B, C & D for the stamps

Circling Round to Monochromatic Colors (Plus 3 for FREE)

It’s been fun to teach color theory in May and I really hope you’ve learned some skills to help you choose palettes for your paper crafting and rubber stamping projects! Today, I “circled around” to MONOCHROMATIC schemes, which isn’t limited to only one color, but can include 2 or 3 variations of the same HUE. Here are a few examples:

Stampin’ Up! yellows are a exquisite example of how 3 different tints, tones or shades can harmonize well: Crushed Curry (card base), Daffodil Delight (sentiment and banner) and NEW Lemon Lolly (focal point) are different depths of the same sunny color and coordinate together!

We have a variety of purples, and not all of them start in the same corner of the color wheel, so this is where you need to learn to “see” harmonizing colors. The three I used for this card were Gorgeous Grape (card base), Highland Heather (larger banner and cupcake frosting) and Fresh Freesia (background and cupcake liner).

The tutorial for this card style includes further explanation:

I chose to use the Circle Sayings Bundle for our lesson on monochromatic color ideas because I have an exclusive opportunity through June 15th for you: Purchase the bundle from my Stampin’ Store and you’ll receive 3 never-seen project tutorials PLUS the consumable supplies to create all three projects! You’ll get the tutorials via email and the supplies in the mail by June 30th.

Let me share a few additional Stampin’ Up! color trios that work well as monochromatic combinations. These are NOT all the possible pairings, only a few I came up with to get your juices flowing:

Now it’s your turn to give a “monochromatic” card a try!

Product List

Inside the cards:

New at SU!- Wild Wheat, So Refreshing

Welcome to the May 2023 New at SU! blog hop! As is our tradition with a new annual Stampin’ Up! catalog and the 2023-2025 IN COLORS (shown under our updated banner, above), we are here to help you fall in love with these hues!

I chose to use the In Color I liked **the least** to show you that it really can create a beautiful color scheme. Wild Wheat contrasts beautifully with Berry Burst (a returning core color I adore) and Bubble Bath (a NEW core color!).

My mini slimline card – finished size 6.25″ x 3.5″- uses the So Refreshing bundle that I had to collect to show off my creative juice (literally). It’s a clean card design accented by silver sparkles in the edge of the ribbon and rhinestone accents.

To get the plaid on the picnic blanket, I lightly tapped my Bubble Bath ink pad over the blanket die (included in the bundle) before running it through the Cut & Emboss Machine, then sponged the same color onto the tassels when it was cut out.

Wild Wheat is a GLUTEN-FREE color, so don’t be afraid to try it! I found my color palette in the 2023-2025 In Color Chart below, which you can download and print for reference.

Next, discover another lovely In Color + Core Color combination from our international design team and PIN your favorite color combinations onto your Pinterest boards! Click on any link below

May 2023 New at SU: In Color Inspiration
Previous BlogNext Blog
1.Joni in the Spotlight Stamping (US)-Boho Blue & Misty Moonlight
2.Playing with Papercrafting (CA) – Copper Clay & Pebbled Path
3.My Flutterby Moments (USA)- Moody Mauve, Lost Lagoon &
4.Stamping Flair (AU) – Pebbled Path
5.The Joy of Stampin’ with Rachael (USA)- Boho Blue, Lemon Lolly, Parak
6.Stampin Xime (DE) – Malve
7.Tricia’s Stamping Creations (US) – Boho Blue
8.Carterie Plus (CA) In Colors avec les couleurs de base/In Colors with
9.Creative Juice by Loni (US) – Wild Wheat, So Refreshing
10.247Inkspiration.com (US)-Moody Mauve
11.iHeartcards2 (US) – Moody Mauve, Bubble Bath &Blackberry Bliss
12.Annette Elias – De Kijkkast – NL – Wild Wheat-Copper Clay-Lost Lagoon

Powered by blogcarousel.com

Product List

Join my IN COLOR COLLECTORS CLUB and receive one set of all-new In Color products each month from May-September 2023! May is BOHO BLUE and club membership includes an exclusive project with prepared pieces and instructions in addition to all the Boho Blue products. Click image below to learn more or join.