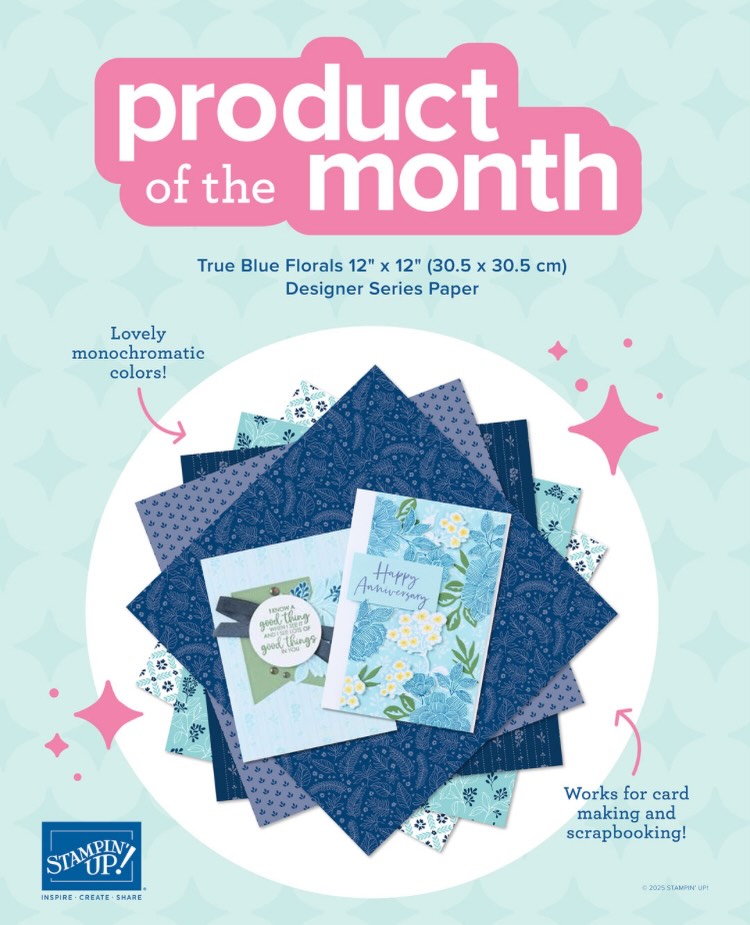
While it is bittersweet to bid adieu to Stampin’ Up! Sale-a-Bration, I am pleased to announce the Stampin’ Up!®️ Product of the Month, which gives you the opportunity to collect an exclusive product you can’t get anywhere else 12 times a year (with a qualifying order), starting with the True Blue Florals 12″ x 12″ Designer Series Paper in December, 2025:
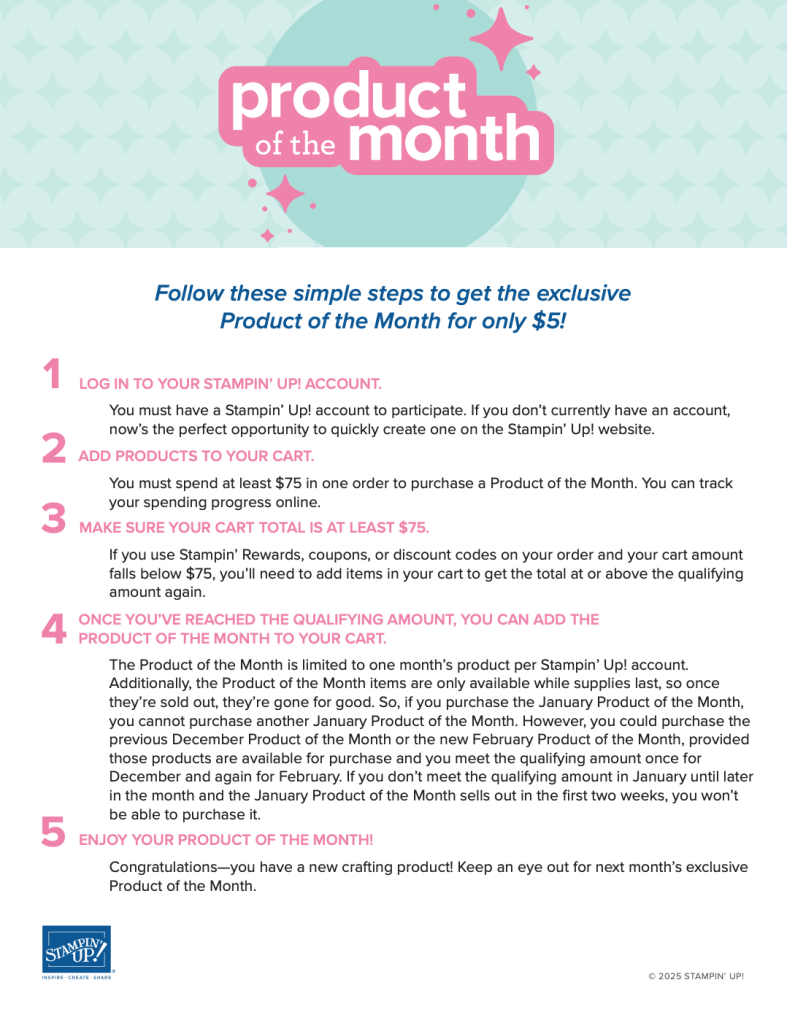
HOW DOES THE PRODUCT OF THE MONTH WORK?
Follow these steps, or watch the video below:
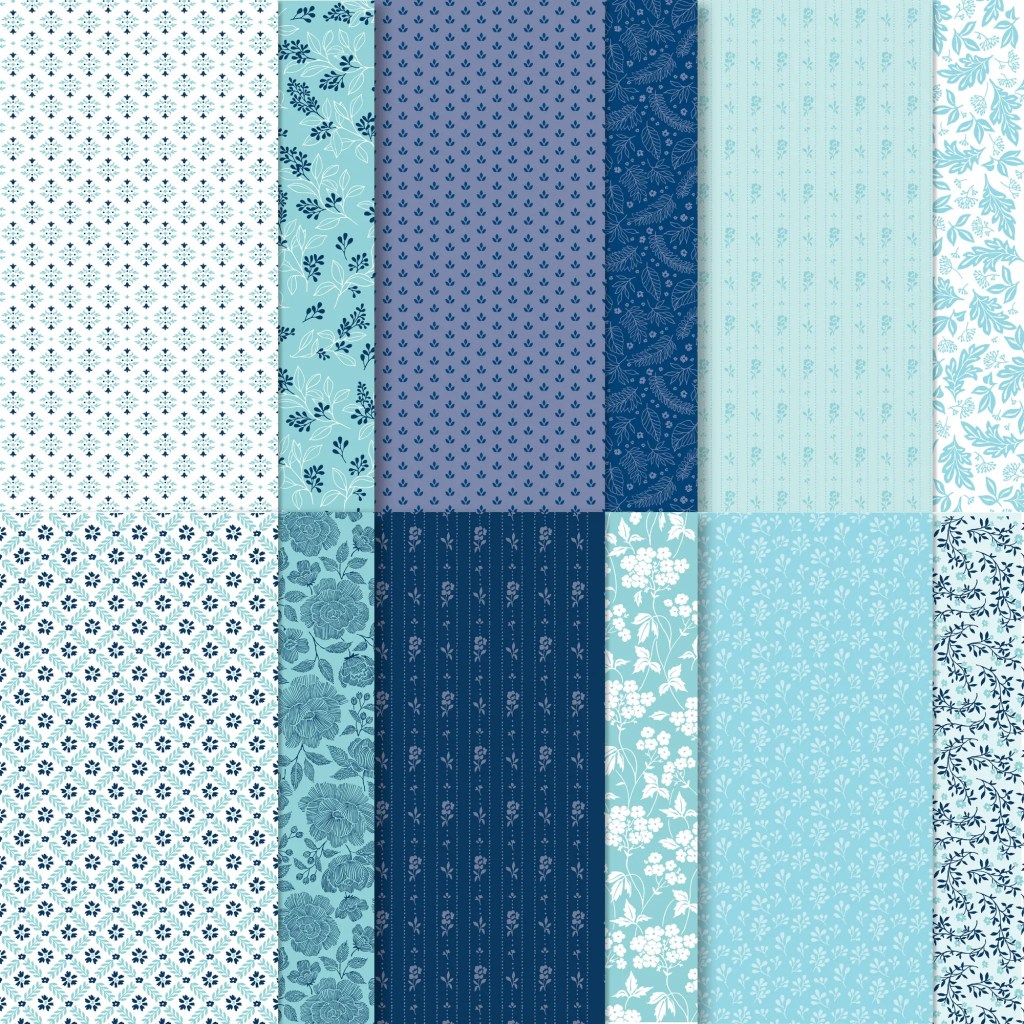
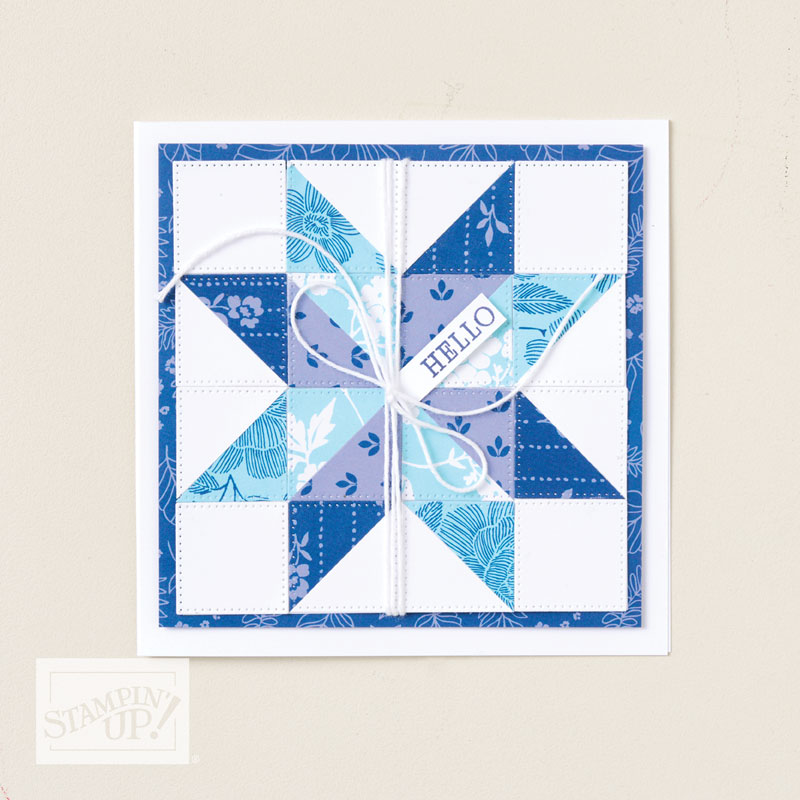
Let’s look at the December POTM and the calm vibe these patterns of paper provide:
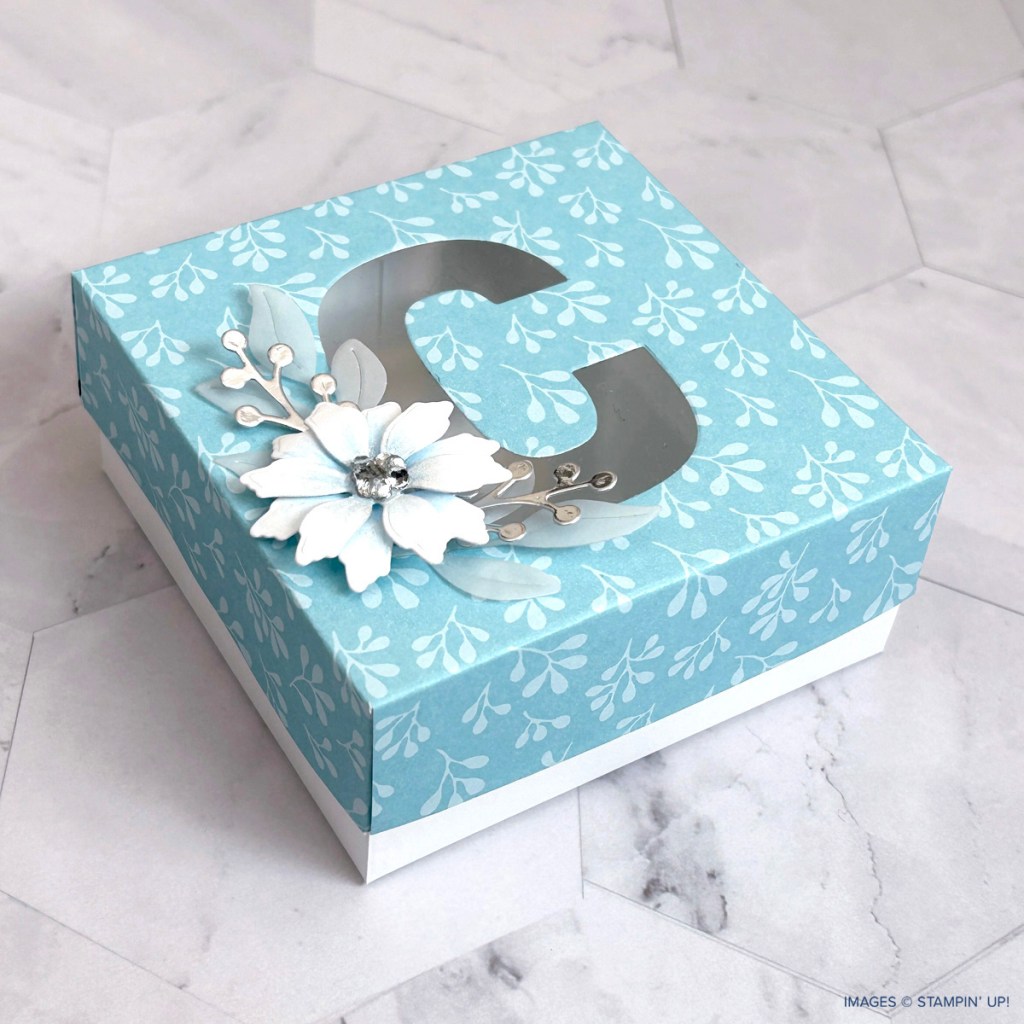
And a few projects you could create with them:
When you see a product you can’t resist, don’t hesitate, because these products are only while supplies last!
To help you reach the minimum order, you will be happy to know that the Last Chance List has been updated, and many holiday items are on sale:
Keep your creative juices flowing! 🍊🧡– Loni Spendlove
When my cousin Valarie asked if I could make a Gift Card Folio like one she had seen on a social media, I watched the video she shared and said ABSOLUTELY!
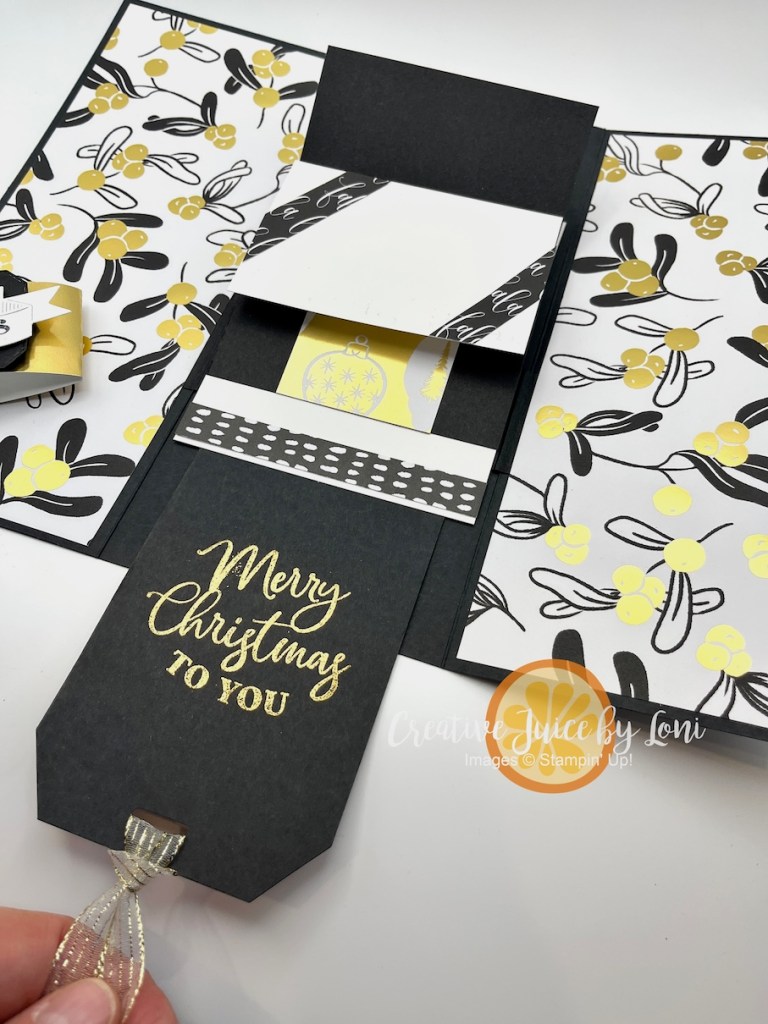
This is a larger version of a classic interactive card design called a “Waterfall Card”, and this one presents FIVE GIFT CARDS (or would be an excellent base for a mini photo album). After a few tries and tweaks, I was satisfied with the result – give this a try! You can follow along with the video instructions below 🖥️
I’ve used the Modern Christmas Designer Series Paper from Stampin’ Up!® to embellish this folio, though I show a few other versions made with the retired “Season of Green & Gold” DSP in the video. The black, white & gold is just so elegant, and of course, you can choose any colors/patterns/paper that fit your occasion.
TIP: Add gift cards to each of the five panels with mini glue dots, or use the panels and both sides of the folder for photos of a event to remember!
When you pull the tab, the “waterfall” begins to cascade, and a “secret message” appears:
Maximizing the use of materials was important to me, so this version uses a full sheet of 12″ x 12″ card stock (and a full sheet of 12″ x 12″ Designer Series Paper, if you cut it wisely), plus a few extra pieces. WATCH the tutorial to see HOW TO CUT the card stock!
Measurements:
11-7/8″ x 9″ Basic Black card stock, scored at 4″ and 8″
12″ x 3″ Basic Black card stock, scored at 1″, 2″, 3″, 4″ and 5″
6″ x 1-1/2″ Basic Black card stock, scored at 1″ and 4-7/8″
5 pieces of card stock 2-1/2″ x 3-3/4″
Designer Series Paper: TWO 8-3/4″ x 3-3/4″ and TWO 8-3/4″ x 3-5/8″
Gold Foil sheet: 1-1/2″ x 9-1/2″ for the belly band
Scraps of card stock for label, scraps of Designer Series Paper for embellishments inside.
Making paper crafting easy for you is my goal. What did you think about this tutorial? Please leave a comment and tell me what you’ll use this idea for (comments are found at the top of the post, next to the posting date).
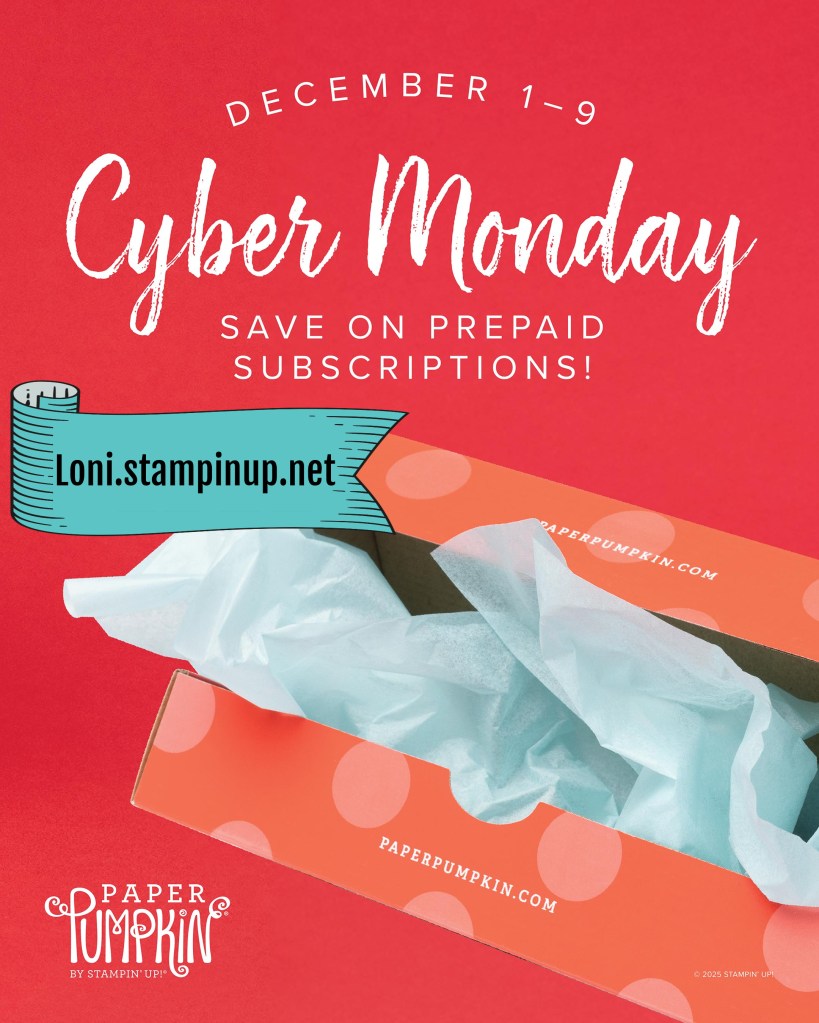
If you’ve been waiting for a good time to subscribe to the BEST MONTHLY CRAFT KIT, OR you need a unique and creative gift for a friend, this is your sign! From December 1-9, pre-paid Paper Pumpkin subscriptions are discounted as follows:
3-month prepaid: $61.00 (regular price $81.00)
6-month prepaid: $122.00 (regular price $162.00)
12-month prepaid: $244.00 (regular price $324.00)
This price includes shipping! Now, here’s the fine print:
* Subscriptions purchased during this promotion start immediately with the December Watercolor in Bloom Kit. This kit cannot be skipped.
* Do not purchase multiple subscriptions for the same recipient. The subscriptions will all start with the Watercolor in Bloom Kit, so the recipient will end up receiving duplicates of the same kit each month.
* If you are already a Paper Pumpkin monthly subscriber, this is a great opportunity to save on your upcoming kits!
* If you ALREADY HAVE a pre-paid subscription and wish to take advantage of the sale, go into your account and PAUSE your currrent December kit, unless you wish to have 2 of the same boxes shipped to you (the other would be a lovely gift to give!).
Christmas is the time to be joyful – not stressed – so the New at SU! Design Team is here to help simplify your holiday crafting!
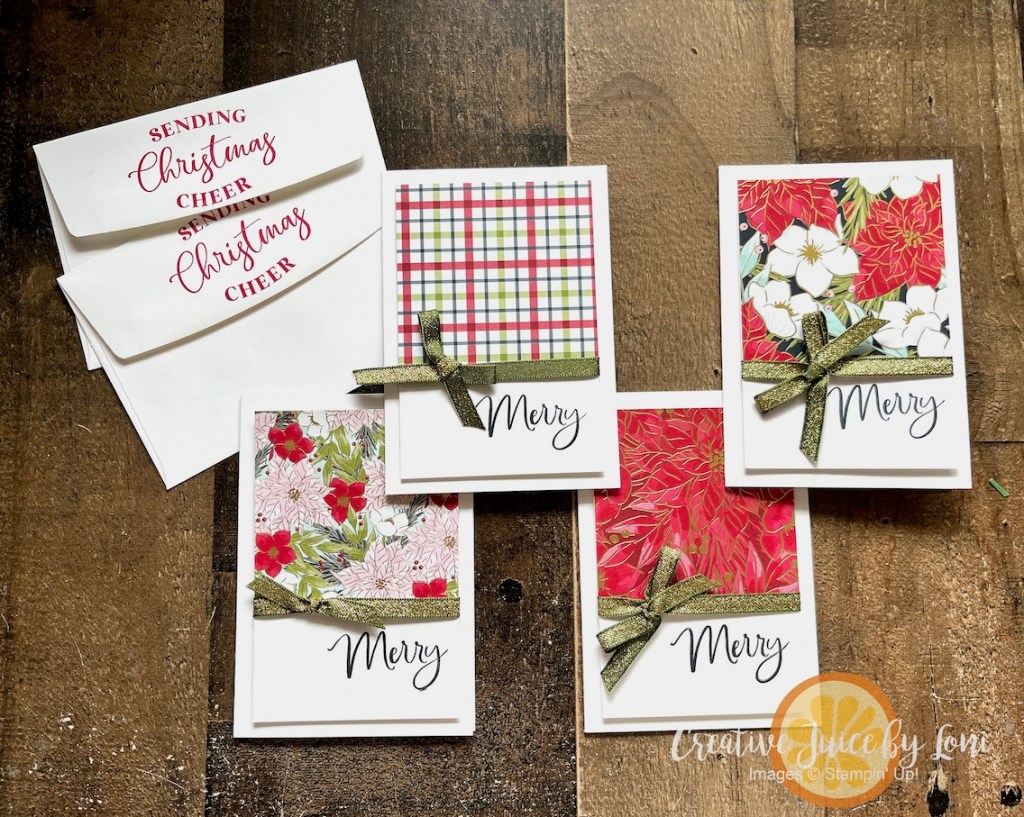
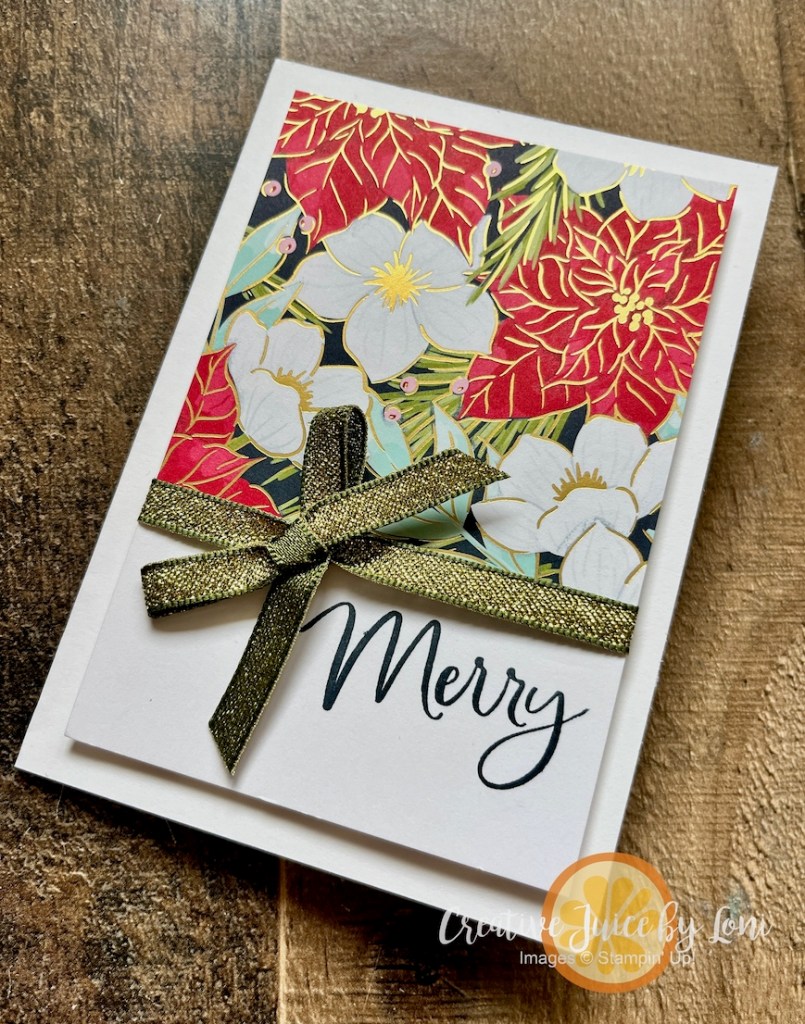
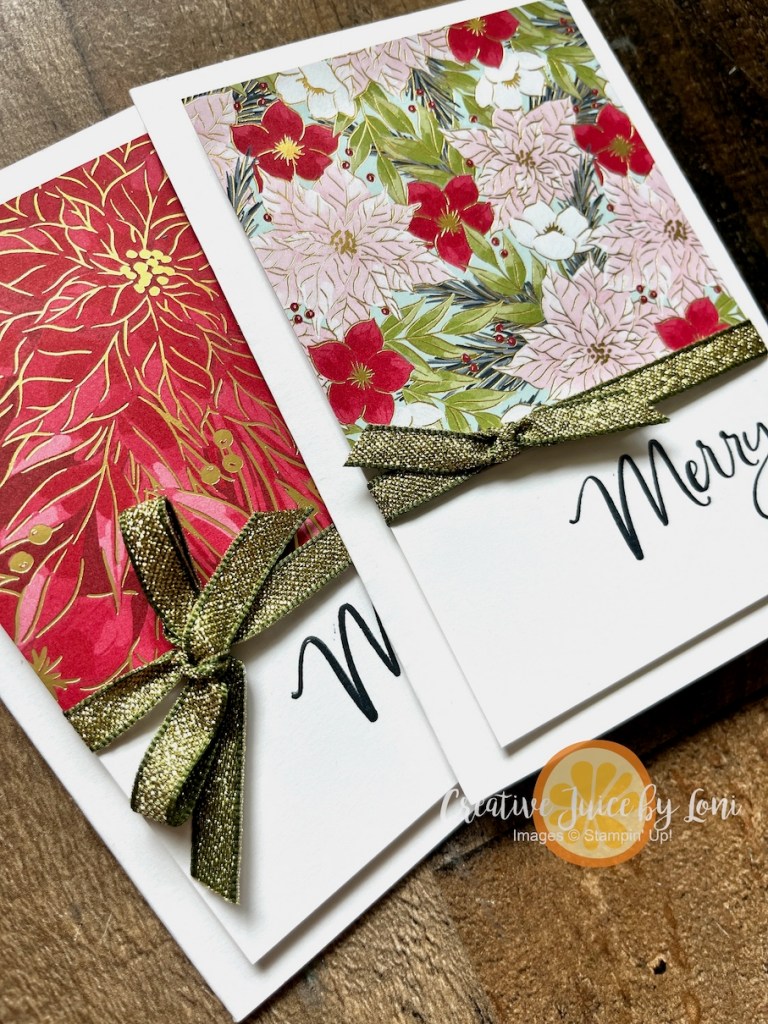
Ideally, a handmade Christmas card or gift lets someone know they are loved, but if time is running out, these demonstrators have united around the world to bring you quick & easy projects. Whenever I need a bunch of cards in a hurry, I turn to Stampin’ Up!® Note Cards & Envelopes because they are already cut, scored and ready to decorate…and they are only $10 US for a set of 20 cards and 20 envelopes!
The “recipe” for this card is as simple as 1, 2, 3:
You can then tie a knot or bow around the ribbon on the front left (optional):
Make your card MERRIER by stamping on the flap of the envelope (photo at top), and you are ready to mail (or gift) Christmas Wishes!
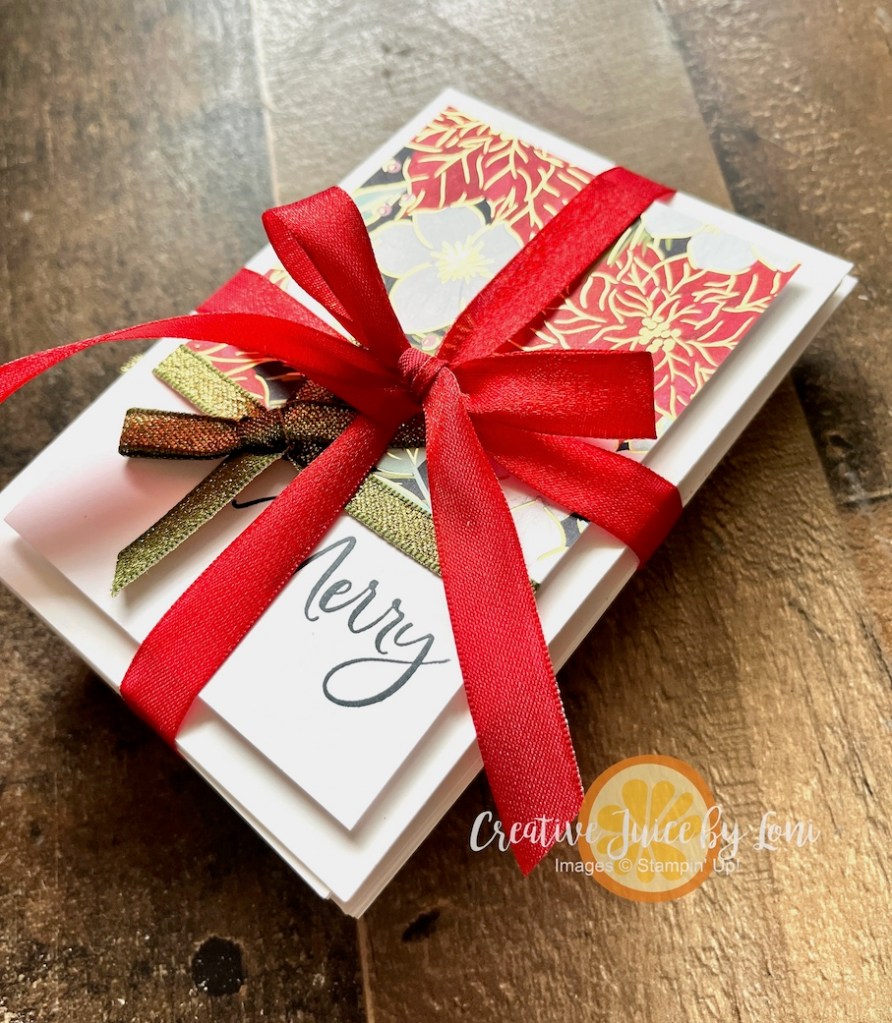
These make lovely gifts, and you could make 5 sets of four cards in less than 30 minutes, just wrap them up in a ribbon. Tip: Switch out “Merry” for “Thanks” and they’ll be sending one to you!
As you jump to the next “Simply Christmas” project, make sure to save or pin your favorites: You could even create a “Simple Stamping” folder for all these incredible ideas.
November 2025 New at SU! Blog Hop: Simply Christmas
There is still time to order supplies for Christmas crafting, and make your cards during one Hallmark Holiday Movie! If you live in the U.S. and don’t yet have a demonstrator serving you, pick me!
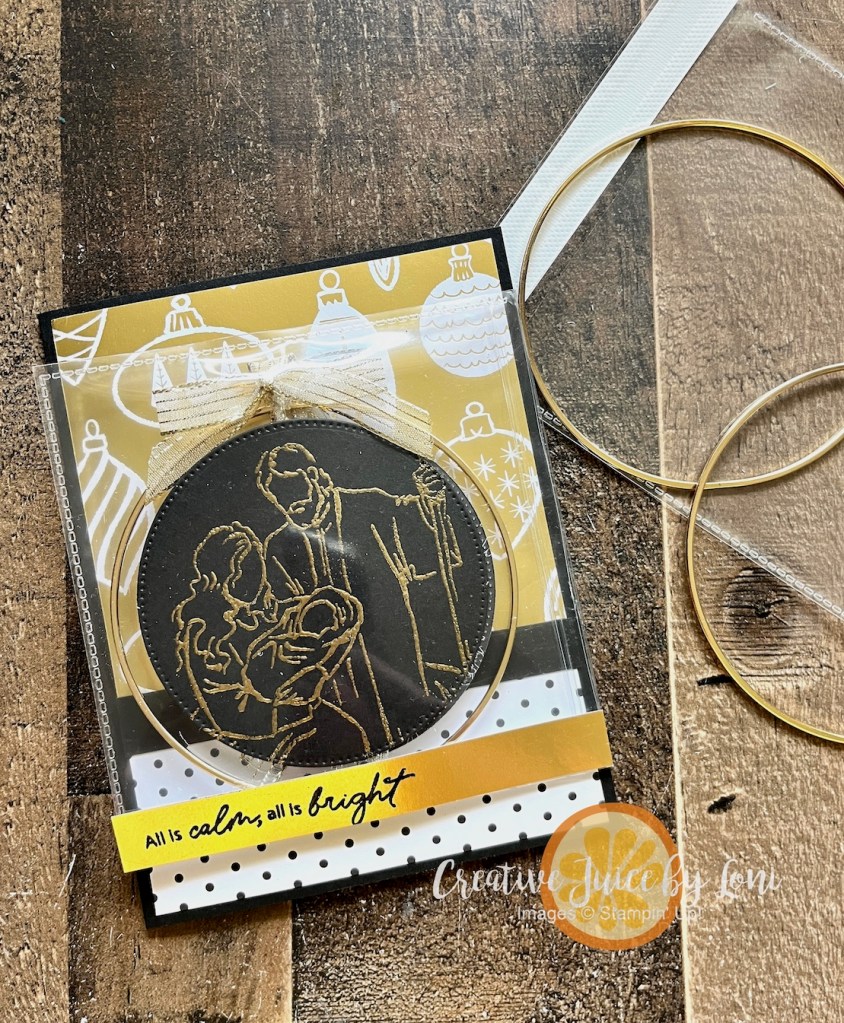
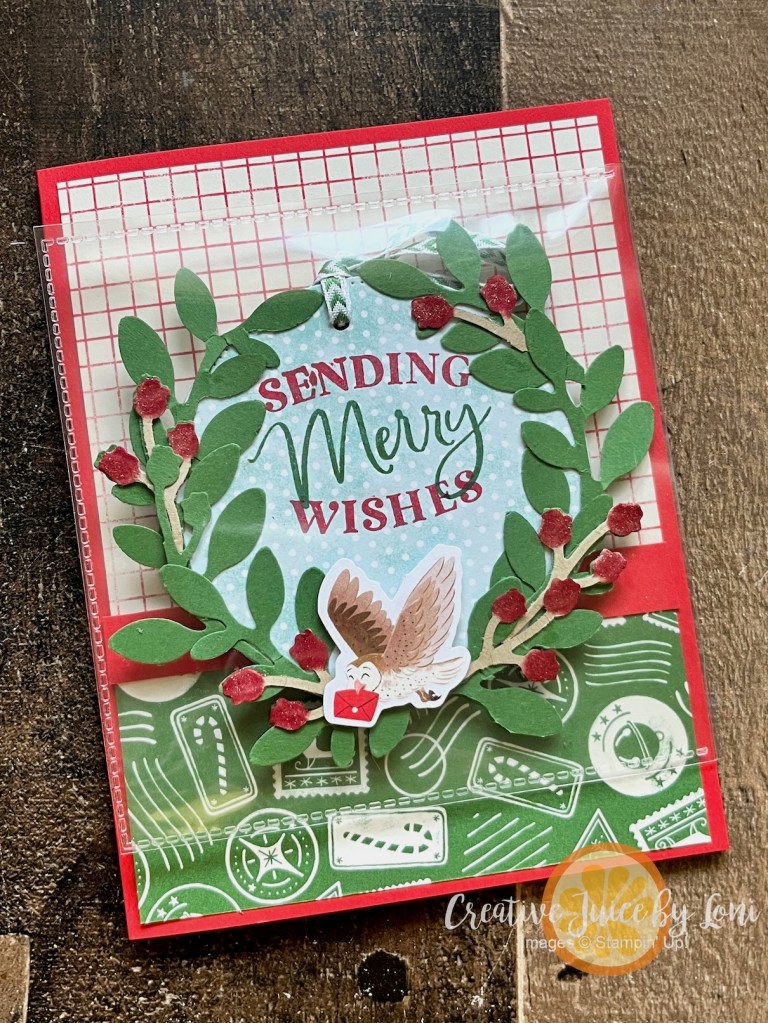
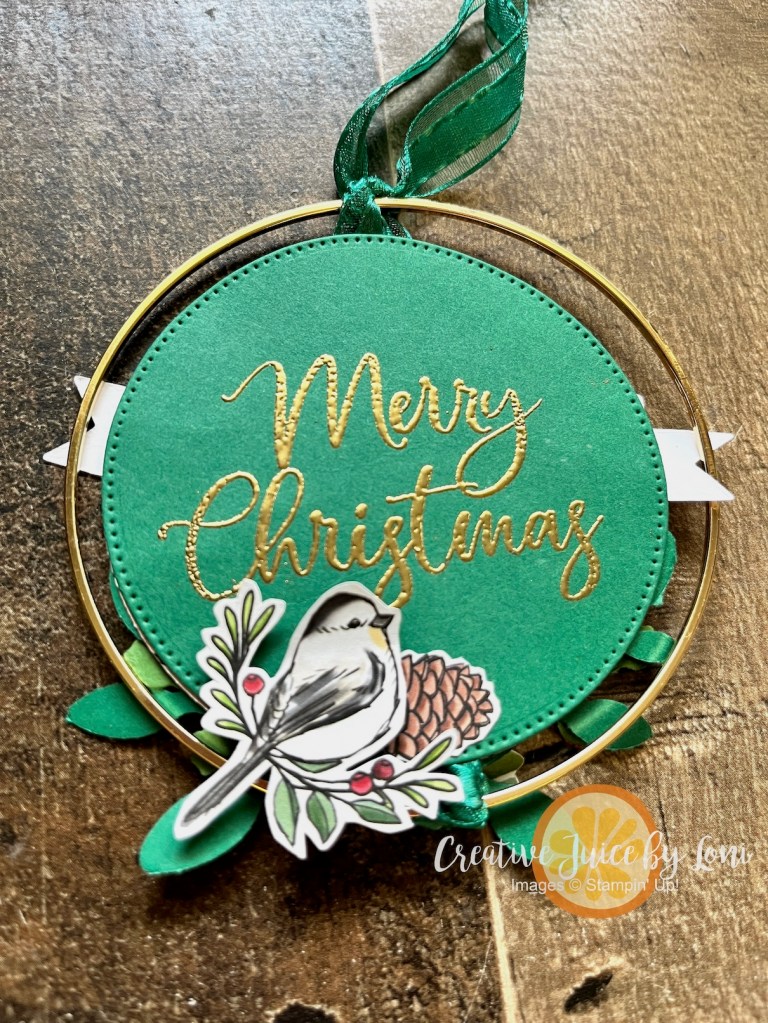
There have been a lot of MAILABLE GIFT IDEAS shared on my website this year, thus, it’s fitting that we add an ornament featuring the large Gold Hoops (also from my store) that could be hung on a Christmas tree. Awesomely, Stampin’ Up!’s new 4″ x 4″ FLIP-FLAPS allow the ornament to double as the decoration for the front of the card, and I have a video tutorial to help you learn how to make one!
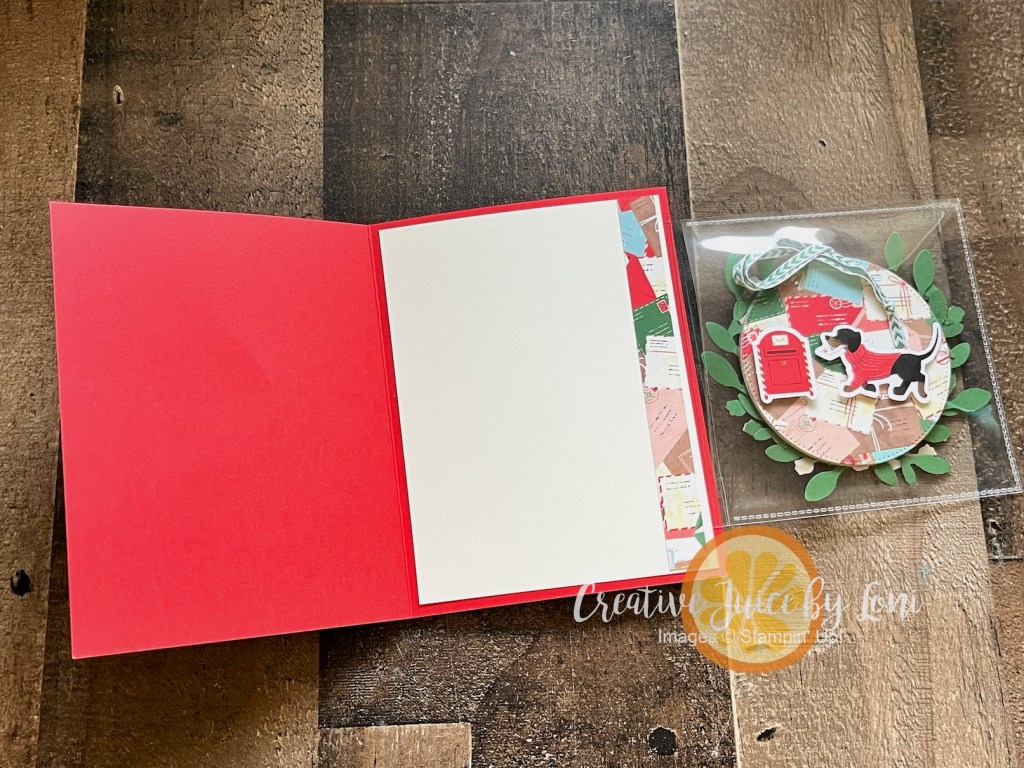
By folding the Flip Flap pocket over the front of the card, you can slide the ornament inside and lift the flap to open and get it out. NOTE: In my tutorial, I adhered the flip flap to the inside layer, but you’ll want to adhere it to the back panel inside the card instead, so the ornament doesn’t fall out until you open the flap!
This next version was inspired by an ornament my teammate Angaleen taught us in our November team virtual Stamp & Chat meeting, and uses the North Pole Delivery Specialty Designer Series Paper, which includes printed die cuts:
Here’s how it looks when you open it up, and the back side of the ornament:
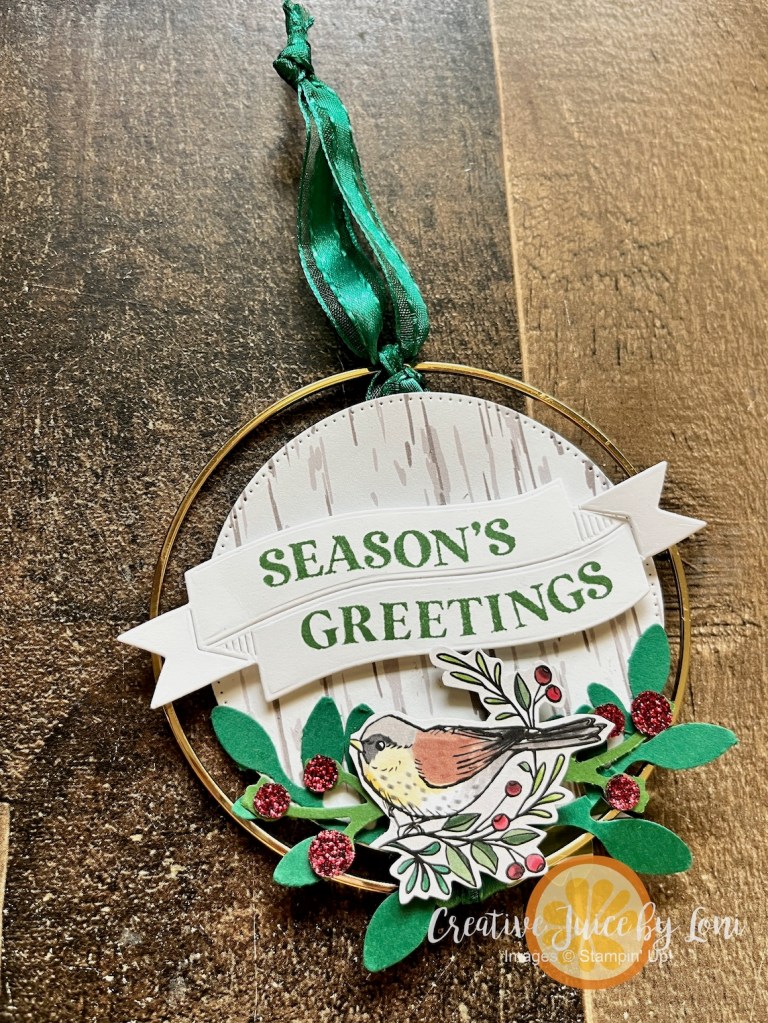
I didn’t use the Gold Hoop on this version, but will on the last one. Use any punch or die for your leaves. The recently retired “Bough Punch” was on my desk, so that’s what I grabbed for both the North Pole card and the next one, featuring my favorite Designer Series Paper from last year (and still available online), Nests of Winter.
The birds were fussy cut from the patterned paper and the sentiments came from the Traditional Labels bundle. I added some Cherry Cobbler delicate details from the Branching Out dies along the top and bottom of the Flip-Flap for this card (TIP: Add a piece of adhesive sheet to the card stock BEFORE you die cut them out, to make the berry branch stick without mess!)
Here is the card opened:
Ready to craft along with me? Watch the video (and rest assured, I usually don’t have such a beastly time with Stampin’ Seal + !!!). THANKS IN ADVANCE for choosing to shop with me! It allows me to have the time and resources to share more ideas with you without charging for the tutorials.
If you find these instructions useful, please shop by clicking any of the links to the products listed above! Another way to show your support: Scroll back to the comment section at the top of the post near the date and leave a COMMENT!
FINAL TIP for this card idea: Score your 4″ x 4″ Flip Flap at 4-1/4″ (the score will be close to the side with adhesive) before you attach it to the inside back panel of your card, so it folds over the front and lays flat.
Keep your creative juices flowing! 🍊🧡– Loni Spendlove
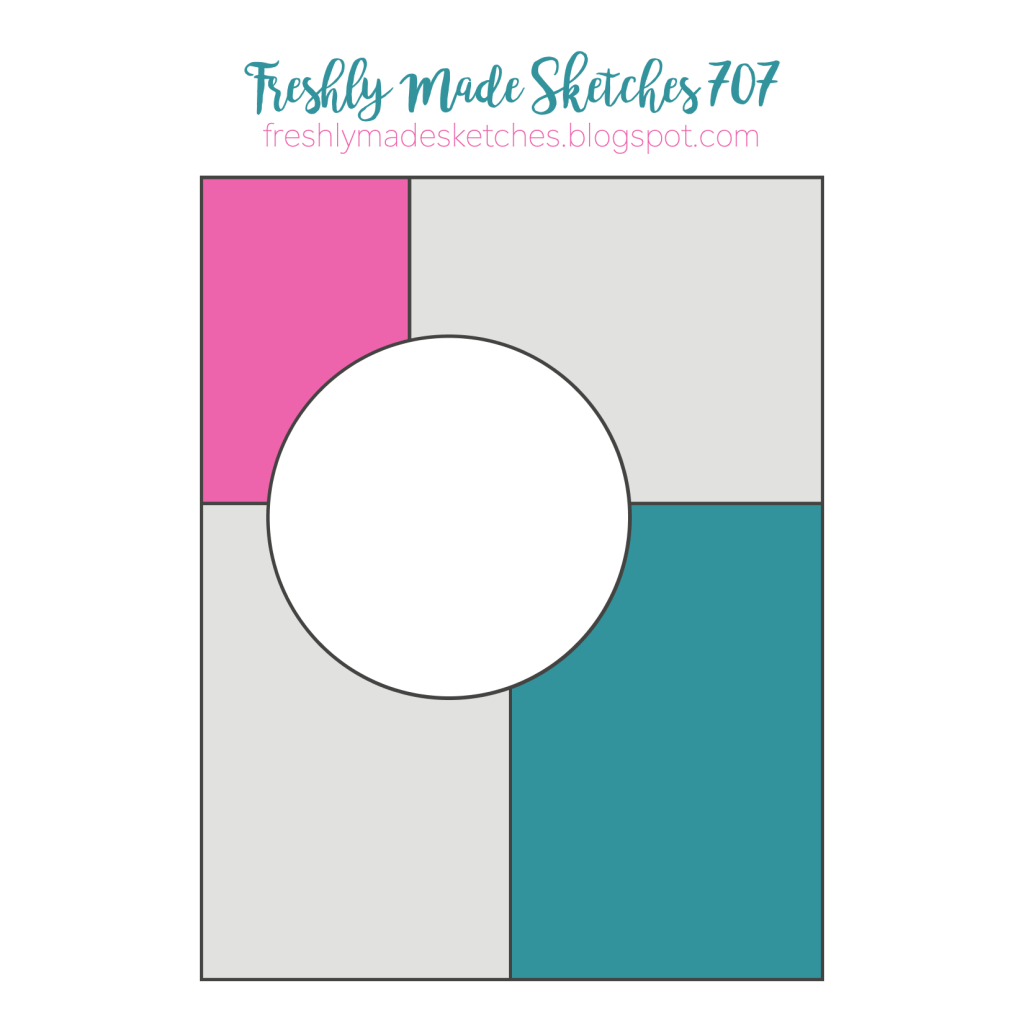
Some punny jokes begin with “What do you get when you mix a ____ with a ____?” but in paper crafting, MAGIC happens when you are given two different starting points, like a color palette and a sketch!
This card was born by marrying the Global Design Project Color Challenge #gdp517 with the Freshly Made Sketch Challenge #FMS707 …AND combining the Abundant Joy Paper Pumpkin Add-On dies with with the Traditions of Christmas Specialty Designer Series Paper! No stamping required for this project 😉
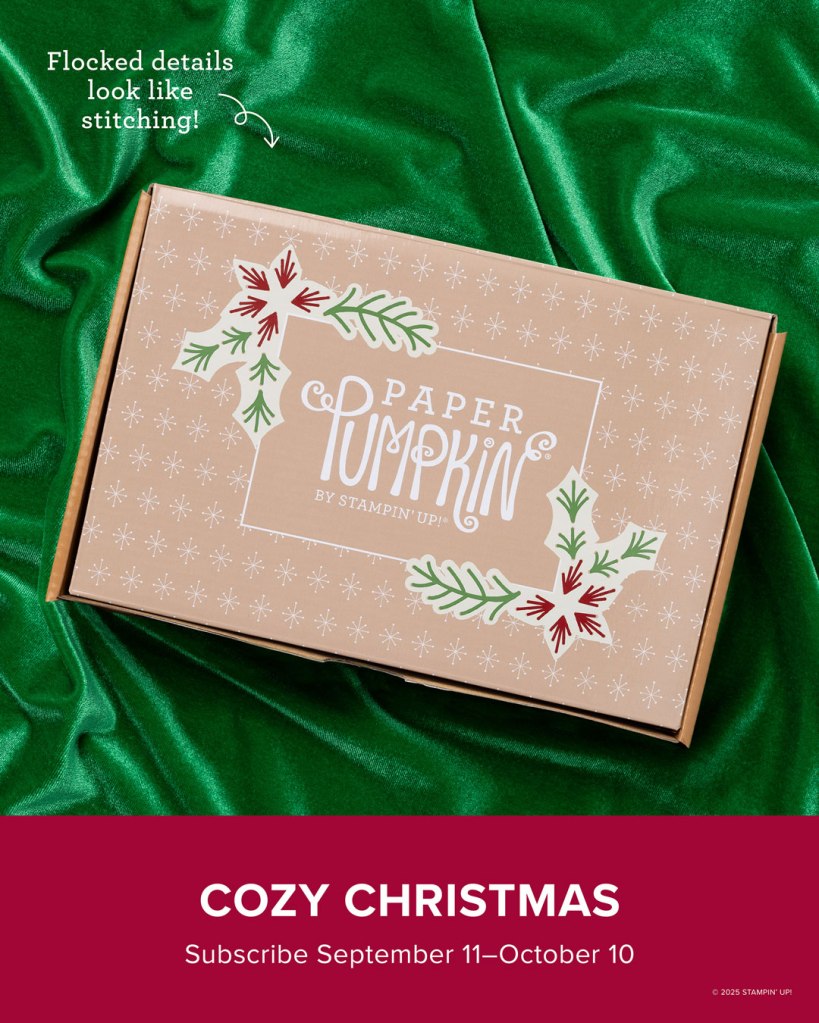
October 10th is the last day to subscribe for the Cozy Christmas card kit, and the dies are darling on their own, with just a bit of pretty paper, and using a bit of glimmer paper for the JOY makes the season sparkle:
Next time you are needing some creative inspiration to strike, pick a color palette and card sketch and make your own mash-up!
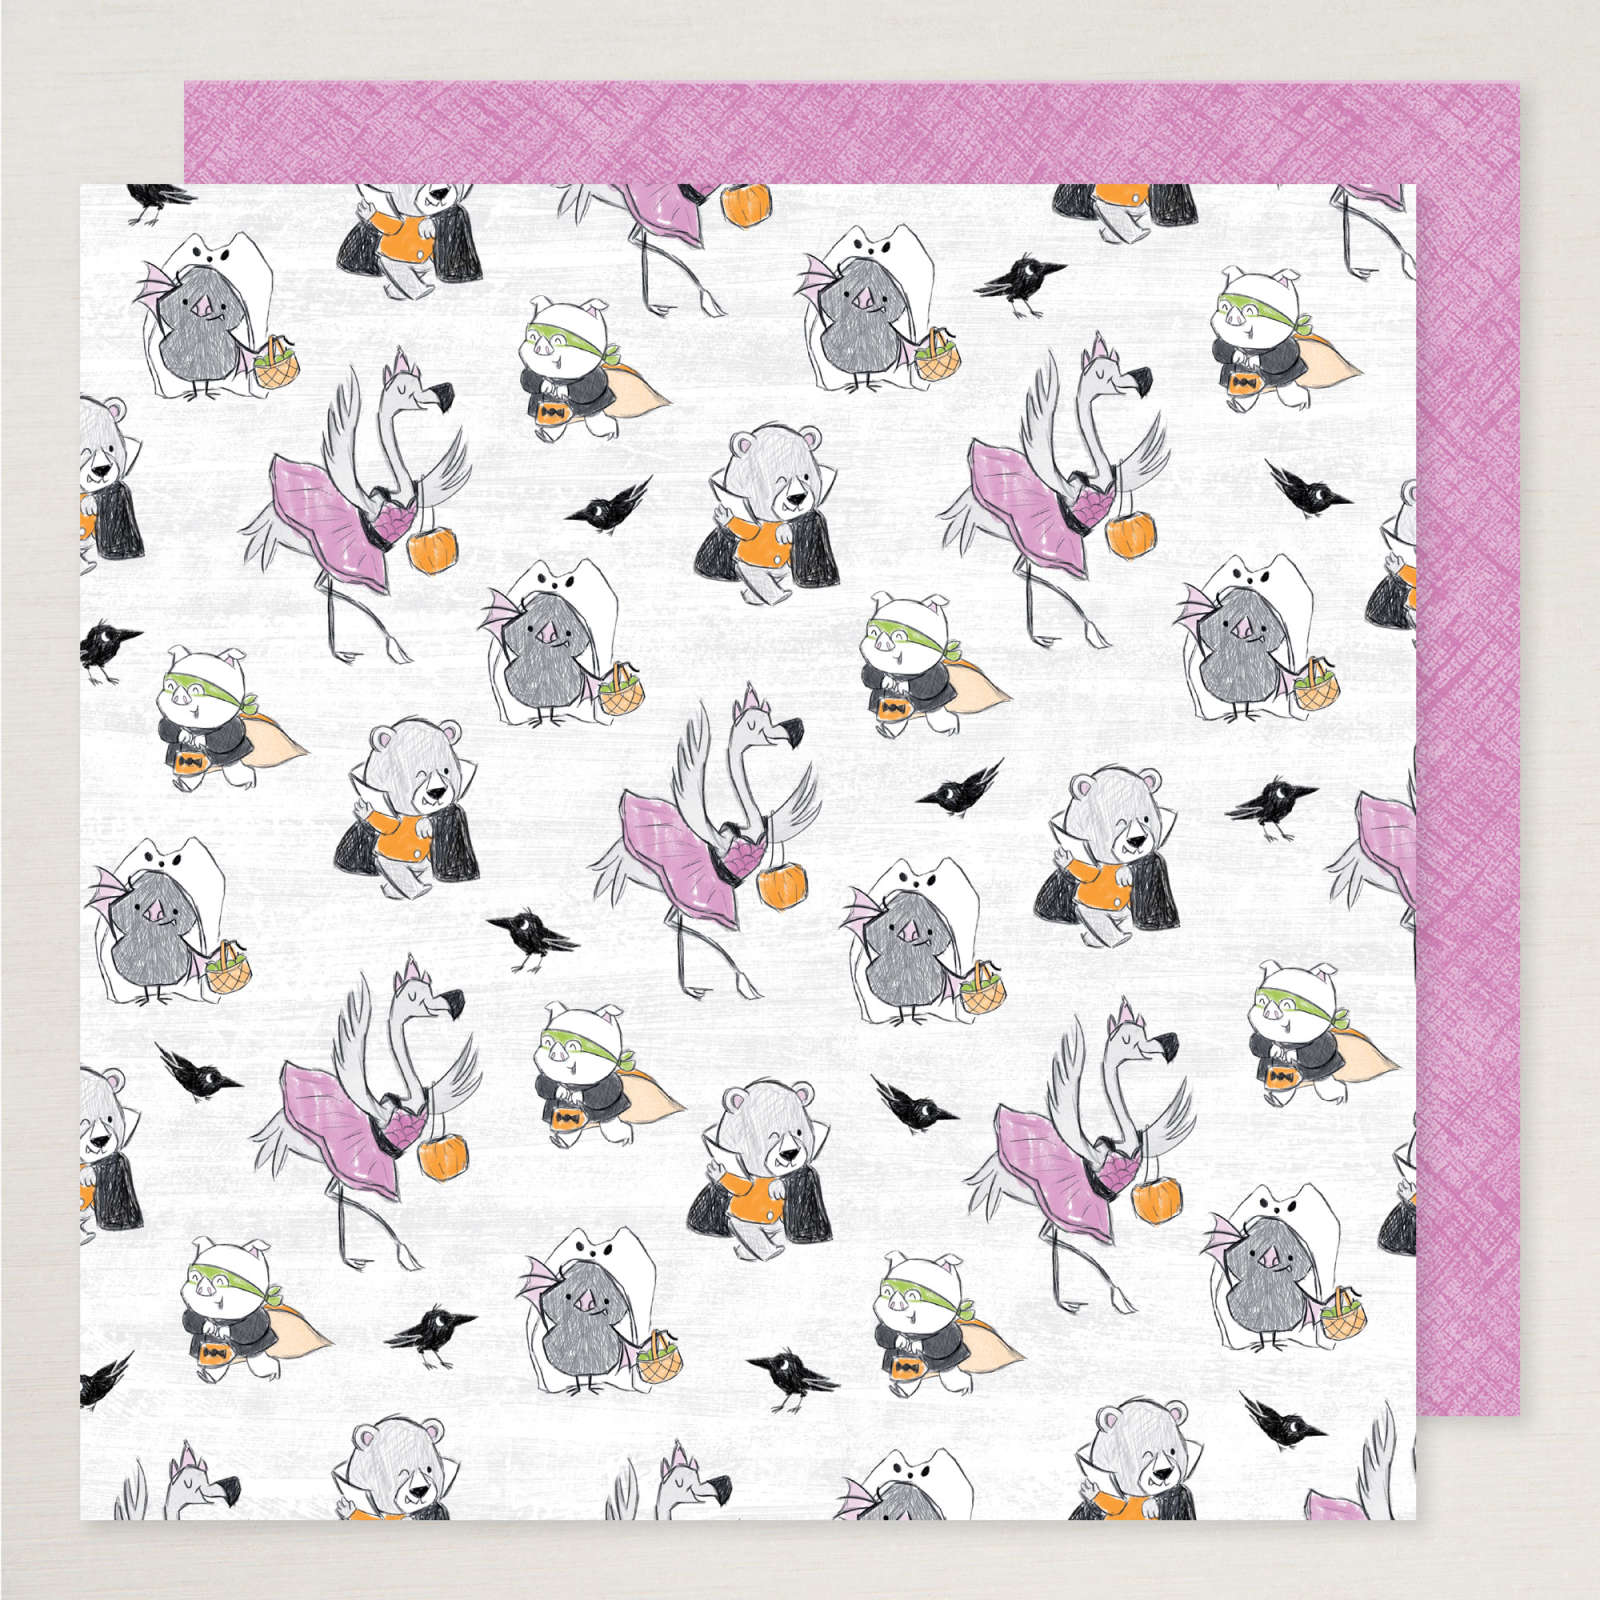
Halloween is around the corner, but you don’t need to be limited to the Trick or Treat season when crafting with the Stampin’ Up!®️ Spooky Sweet products, and particularly the Designer Series Paper. This sheet has a flamingo dressed in a tutu that I’m going to use on a birthday card:
It’s TOO TOO cute when paired with the Not 29 Anymore stamp set for a card you can send to “THAT FRIEND” who is fiesty & fabulous:
This card is called a “Missing Middle” card, and is easier than it looks: Start with a 4-1/4″ x 8 1/2″ piece of card stock (mine is Granny Apple Green) and score it at 5-1/2″ and cut it at 7″… leaving you a 1-1/2″ x 4-1/4″ piece of card stock for the bottom of the card. (All the supplies I used are listed at the bottom)
Fold the top 1-1/2″ down and add a layer of Designer Series Paper, if desired. Lay the section you cut off at the bottom edge of the card, and attach a 2-1/4″ x 4-1/4″ piece of card stock to the top section and bottom section only. Then it will open like this and you can add a white layer inside to write or stamp on:
My flamingo is layered over a piece of retired Be Dazzling specialty paper, but any of our current Glimmer Paper brings the bling when you need it.
Heading into the Halloween season, there are a few events (online and in-person) you’ll want to know about:
First: The VIRTUAL Spooky Sweet Class happens Thursday, October 2nd, and the last day you can order the suite and be invited to join the class is September 24th! This gives me time to prepare and mail the supplies you’ll need, and for you to have the suite ready to use. Learn more at the event description on Facebook by clicking the image below, or on my event calendar HERE.
Second: Stamping is the best medicine to make you feel good, and you’ll stamp 3 FALL paper crafting projects at ourStamp Therapy sessions in Hurricane, UT on October 9th. Choose to attend the 10 am session or the 6 pm session, but register early, because these seem to fill up quickly. Class fee: $15.
Southern Utah crafters: Here’s another tasty opportunity for more Spooky Sweet crafting at the Cookies, Cards & Cocoa class on Oct. 16th at 6:30 PM at the Strap Tank Restaurant in St. George, UT.
Decorate 4 Halloween sugar cookies and stamp two paper crafting projects, while enjoying a beverage from the restaurant. Class fee: $35 ALL SUPPLIES PROVIDED! Click HERE to register by Oct. 9th
There was one piece of Silent Snowfall Specialty Designer Series Paper left on my desk after cutting and mailing all the September paper shares, then I saw the Global Design Project sketch for the week, and imagined looking out a window on a quiet winter afternoon…
Here’s the prompt for the #gdp514 sketch:
Rummaged through more patterned paper for some worthy “wallpaper” and found the back side of one of the Autumn Toile papers would be perfect (isn’t the “front” or “back” irrelevant? The FRONT is whichever you want to use!).
Once it was adhered to the front, I cut the smaller arch from both layers, then added a dark wood window casing by cutting out two nested arches. In this picture you can really see the detail through the window:
The Silent Snowfall paper has a snowflake pattern dry embossed into it, so I heat embossed some random snowflake dots from the Branching Out stamp set over the debossed side to break up the repeating pattern and help it feel more natural and random. Once it was dry, I used a brayer to roll Cloud Cover ink over the top – the inlaid snowflakes are deep enough they don’t get any ink inside. I know that we don’t have a large Cloud Cover ink pad: You can use the refill to ink up an empty stampin’ spot, or use a piece of felt as the ink pad by squeezing some ink onto it.
Once the branches were stamped over the snowflakes, that layer was adhered to a 4″ x 5.25″ Cloud Cover card inside (8″ x 10.5″ when open), with the fold on the right:
This “card-in-a-card” design allows you to catch a few snowflakes on your tongue as you continue to unfold the greeting!
Finally, you open the inside to find a large area to write all the details a friend would love to hear from you.
Tomorrow, I’ll be mashing up the Branching Out bundle (there is a set of dies that coordinate with the stamp set) with another new bundle from the 2025 Sept-Dec Mini Catalog, and you’ll want to add it to your cart when you see how essential it is.
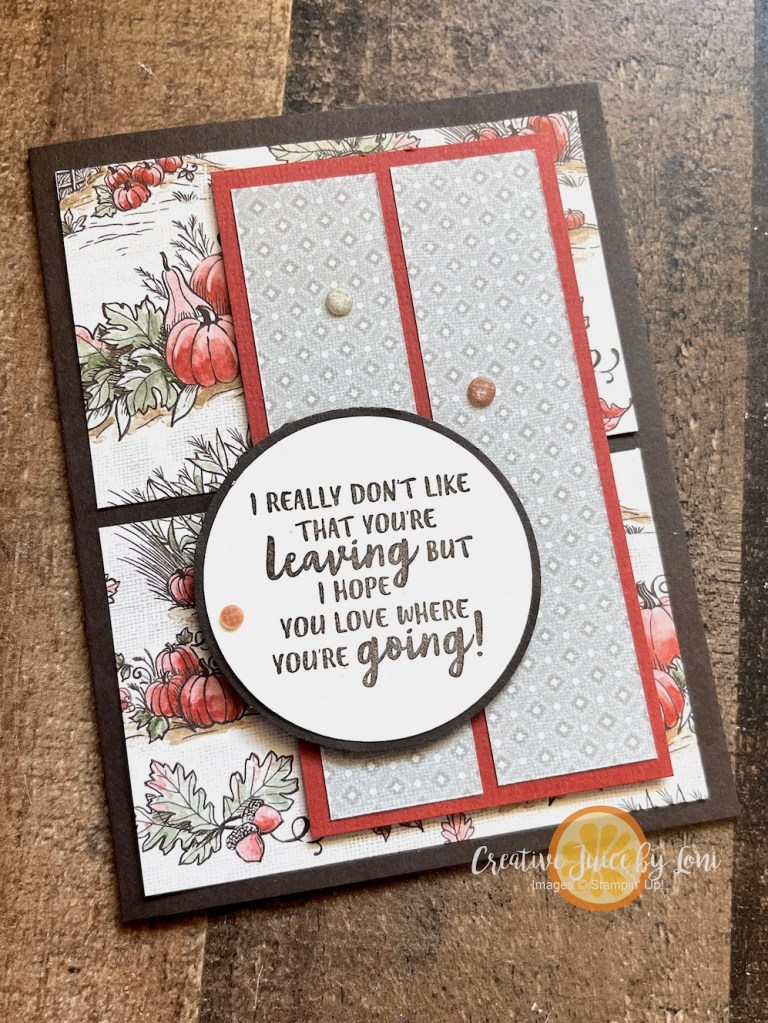
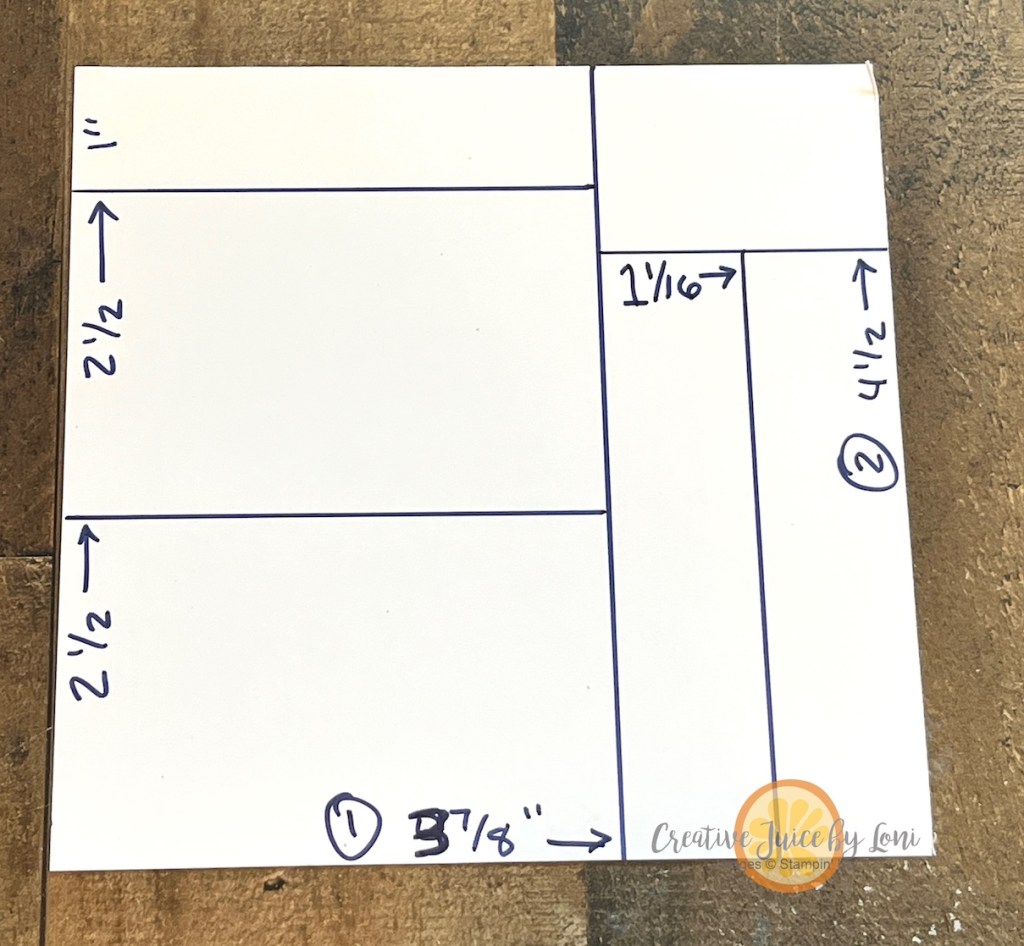
Have ever looked at a stack of pretty designer series paper and think, “It’s too pretty to cut”? I hear you—but here’s the good news: when you do cut it, you can get the most out of every single sheet! I created this cutting map that turns any 6” x 6” piece of designer paper into perfectly sized layers for the front of your cards:
In my live video today, I walked through the process step by step and made the card shown here from the Autumn Toile pack of paper that will be available on September 2nd. (You’ll find the replay below if you want to craft along!) The cutting map is below so you can print it out, tuck it near your paper trimmer, and use it anytime you want to make lovely layers of backgrounds for your greeting cards.
The first cut you make (circled) will be 3-7/8″ into the square. The second cut will be to cut the leftover pattern down to 4-1/2″ tall, then other cuts as shown.
Layer the two large rectangles on a contrasting card stock base, and the two long strips go on a piece of card stock that is 2-1/2″ x 4-3/4″, which can be attached with dimensionals to either the left or right side of the front of the card.
For my samples, I used a mix of Stampin’ Up! designer series paper. Four of the patterns come straight from the September Paper Share I’m offering — fifty-three 6″ x 6″ sheets of Stampin’ Up! Designer Series Paper, all cut down and ready for you to create with. It’s a perfect way to try every new design without committing to full packs, and it gives you plenty of variety for projects like this.
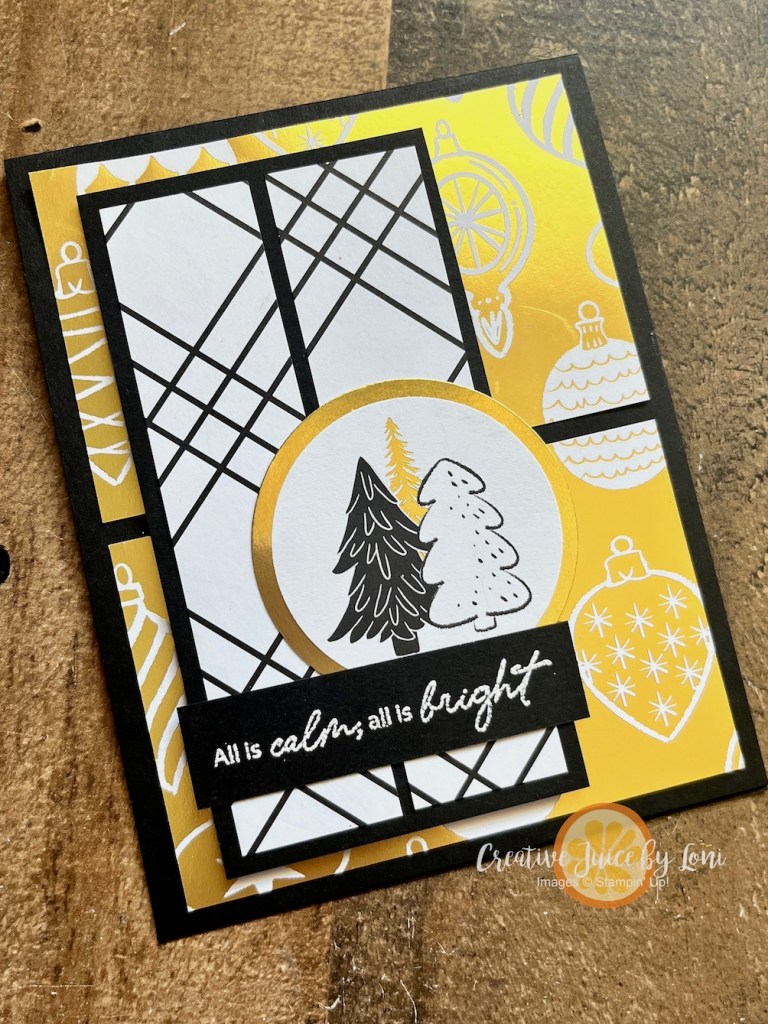
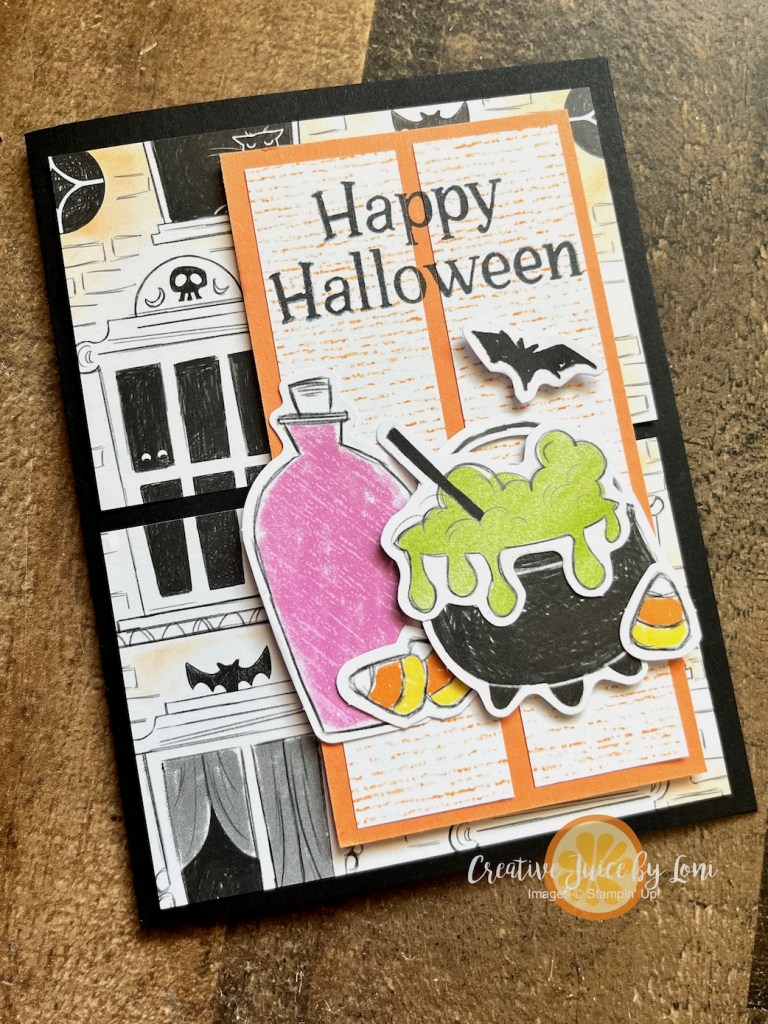
My last two examples of this sketch feature the Painterly Pears Suite and the Spooky Sweet Suite. Isn’t it terrific how the same cutting map works across completely different styles—fall-inspired pumpkins, happy holiday greetings, fresh pears, or playful Halloween motifs?! It’s proof that a simple template can stretch your supplies and spark new ideas.
Whether you’re making cards in bulk or just want a foolproof way to get more from your paper, this card design is one you’ll use again and again. Scroll down for the video, save all six card samples, and grab your trimmer—you’ll be amazed how quickly 6” x 6” papers can turn into a gallery of handmade cards.
The 1″ x 3-7/8″ piece from the cutting map goes INSIDE the cards, like this:
TWO more opportunities before you go:
The Autumn Toile paper (on the first card I demonstrated) coordinates with the September Paper Pumpkin kit, so if you adore autumn and those detailed designs, you will certainly want to subscribe by September 10th to receive a fall-filled box of coordinating crafting!
While the Spooky Sweet Suite paper is NOT included in the Paper Share, I *WILL* be teaching a Virtual Halloween class with the suite on October 2nd – Add the suite to your cart for an invitation to join the party, or visit the Facebook event page (link above) to find out how to register.
Keep your creative juices flowing! 🍊🧡– Loni Spendlove
With so many brilliant crafters in our New at SU! design team, the inspiration is always at our fingertips and this month I’m CASE-ing (Copy and Share Everything) the very artistic Annette Elias (De Kijkkast) with my Sunflower card:
I admired the unusual square shape of the card (mine is 5-1/4″ square), and all the amazing layers and details, though my version is simplified. The torn Designer Series Paper across the front was really beautiful! You can compare our cards side-by-side:
You can tell I prefer quick and easy crafting while Annette is an AVID crafter, but we can be inspired by each other!
The Sunflower 3-D embossing folder has been pretty popular this summer, and the sunflower paper (from Floral Impressions Designer Series Paper) lays over embossed and stamped sunflowers. I cut out one of the flowers and leaves to become my focal point. By using a sponge dauber and Pecan Pie ink pad, I make the center darker, and defined the petals.
Use the corners torn from the DSP to embellish the front of an envelope to let the recipient know they are about to open a delightfully sunny surprise!
Now you can hop over the Annette’s post to see how she copied Rochelle (of Stampinflair.com) and remember to PIN your favorite finds from our blog hop!
August 2025 New at SU! Hop: CASE a Design Team Member
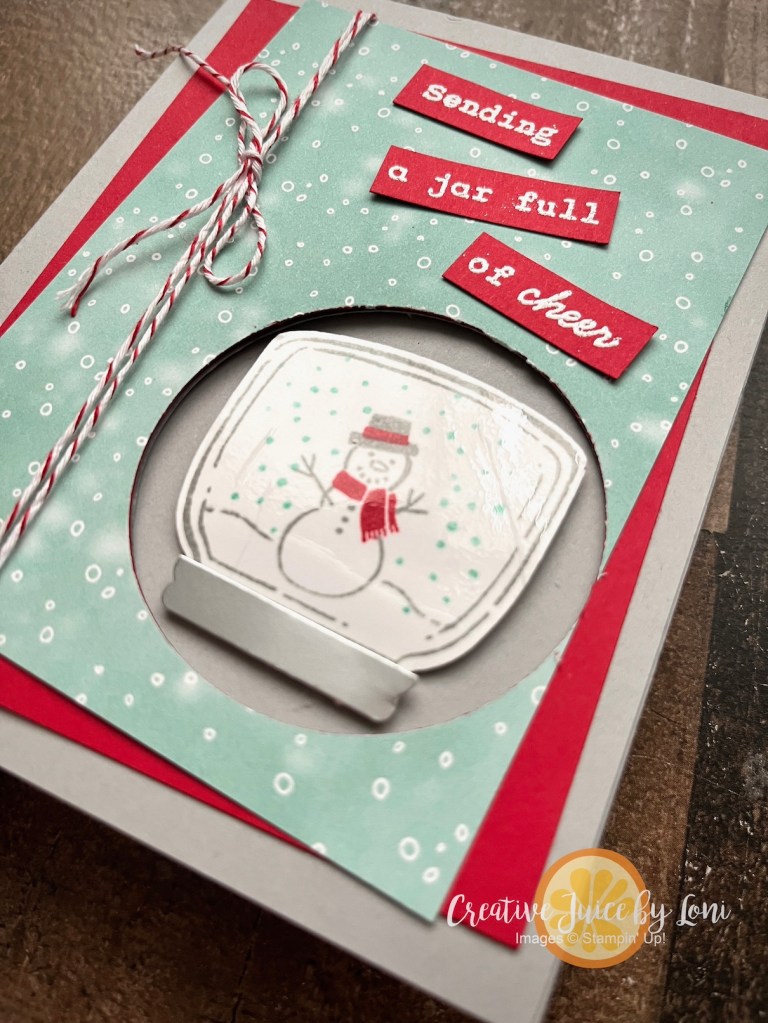
“The hot and the cold are just so intense, put ’em together, it just makes sense!” -Olaf ⛄️
Get ahead of the holidays by starting your Christmas cards now! The Jar of Joy stamp set (which coordinates with the Sweet Jar builder punch) will have you shaking up snow during the heat of summer:
Layers: 3.5″ x 4.75″ Designer Series Paper, 3.75″ x 5″ Real Red Card Stock
The way to make the jar shiny is by laying a piece of packing tape over the stamped image before punching it out (did the same for the sunglasses on my pop-up tote card here).
The way the snow globe pops through the front of the card from the inside is a delightful detail that gives the open card charm, as well.
This video shows how to create this card from start to finish in 90 seconds:
I am enjoying playing along with the Global Design Project “Christmas in July” #gdp507 challenge with this card! It’s simple enough you could easily make multiples at one time, too.


![Traditional Labels Bundle (English) [ 165865 ]](https://assets1.tamsnetwork.com/images/EC042017NF/165865s.jpg "Traditional Labels Bundle (English) [ 165865 ]")
![Basic Black 12" X 12" (30.5 X 30.5 Cm) Cardstock [ 166786 ]](https://assets1.tamsnetwork.com/images/EC042017NF/166786s.jpg "Basic Black 12\" X 12\" (30.5 X 30.5 Cm) Cardstock [ 166786 ]")
![Modern Christmas 12" X 12" (30.5 X 30.5 Cm) Specialty Designer Series Paper [ 165990 ]](https://assets1.tamsnetwork.com/images/EC042017NF/165990s.jpg "Modern Christmas 12\" X 12\" (30.5 X 30.5 Cm) Specialty Designer Series Paper [ 165990 ]")
![Basic White 8 1/2" X 11" Cardstock [ 166780 ]](https://assets1.tamsnetwork.com/images/EC042017NF/166780s.jpg "Basic White 8 1/2\" X 11\" Cardstock [ 166780 ]")
![Gold Foil Sheets [ 132622 ]](https://assets1.tamsnetwork.com/images/EC042017NF/132622s.jpg "Gold Foil Sheets [ 132622 ]")
![Gold Striped 3/8" (1 Cm) Mesh Ribbon [ 165599 ]](https://assets1.tamsnetwork.com/images/EC042017NF/165599s.jpg "Gold Striped 3/8\" (1 Cm) Mesh Ribbon [ 165599 ]")
![Hole Punch Assortment [ 165409 ]](https://assets1.tamsnetwork.com/images/EC042017NF/165409s.jpg "Hole Punch Assortment [ 165409 ]")
![Paper Trimmer [ 152392 ]](https://assets1.tamsnetwork.com/images/EC042017NF/152392s.jpg "Paper Trimmer [ 152392 ]")
![Tear & Tape Adhesive [ 154031 ]](https://assets1.tamsnetwork.com/images/EC042017NF/154031s.jpg "Tear & Tape Adhesive [ 154031 ]")
![Stampin' Seal [ 152813 ]](https://assets1.tamsnetwork.com/images/EC042017NF/152813s.jpg "Stampin' Seal [ 152813 ]")
![Black Stampin' Dimensionals Combo Pack [ 150893 ]](https://assets1.tamsnetwork.com/images/EC042017NF/150893s.jpg "Black Stampin' Dimensionals Combo Pack [ 150893 ]")


![Basic White Note Cards & Envelopes [ 159232 ]](https://assets1.tamsnetwork.com/images/EC042017NF/159232s.jpg "Basic White Note Cards & Envelopes [ 159232 ]")
![Traditional Labels Photopolymer Stamp Set (English) [ 165854 ]](https://assets1.tamsnetwork.com/images/EC042017NF/165854s.jpg "Traditional Labels Photopolymer Stamp Set (English) [ 165854 ]")
![Traditions Of Christmas 12" X 12" (30.5 X 30.5 Cm) Specialty Designer Series Paper [ 165853 ]](https://assets1.tamsnetwork.com/images/EC042017NF/165853s.jpg "Traditions Of Christmas 12\" X 12\" (30.5 X 30.5 Cm) Specialty Designer Series Paper [ 165853 ]")
![Secret Sea Classic Stampin' Pad [ 165285 ]](https://assets1.tamsnetwork.com/images/EC042017NF/165285s.jpg "Secret Sea Classic Stampin' Pad [ 165285 ]")
![Mossy Meadow & Gold 1/4" (6.4 Mm) [ 166158 ]](https://assets1.tamsnetwork.com/images/EC042017NF/166158s.jpg "Mossy Meadow & Gold 1/4\" (6.4 Mm) [ 166158 ]")
![Stampin' Dimensionals [ 104430 ]](https://assets1.tamsnetwork.com/images/EC042017NF/104430s.jpg "Stampin' Dimensionals [ 104430 ]")


![Abundant Joy Dies [ 167855 ]](https://assets1.tamsnetwork.com/images/EC042017NF/167855s.jpg "Abundant Joy Dies [ 167855 ]")
![Mini Stampin' Cut & Emboss Machine [ 150673 ]](https://assets1.tamsnetwork.com/images/EC042017NF/150673s.jpg "Mini Stampin' Cut & Emboss Machine [ 150673 ]")
![Peaceful Garden 12" X 12" (30.5 X 30.5 Cm) Glimmer Paper [ 165929 ]](https://assets1.tamsnetwork.com/images/EC042017NF/165929s.jpg "Peaceful Garden 12\" X 12\" (30.5 X 30.5 Cm) Glimmer Paper [ 165929 ]")
![Basic White 8 1/2" X 11" Thick Cardstock [ 159229 ]](https://assets1.tamsnetwork.com/images/EC042017NF/159229s.jpg "Basic White 8 1/2\" X 11\" Thick Cardstock [ 159229 ]")
![Crumb Cake 8-1/2" X 11" Cardstock [ 120953 ]](https://assets1.tamsnetwork.com/images/EC042017NF/120953s.jpg "Crumb Cake 8-1/2\" X 11\" Cardstock [ 120953 ]")
![Old Olive 8-1/2" X 11" Cardstock [ 100702 ]](https://assets1.tamsnetwork.com/images/EC042017NF/100702s.jpg "Old Olive 8-1/2\" X 11\" Cardstock [ 100702 ]")
![Cherry Cobbler 8-1/2" X 11" Cardstock [ 119685 ]](https://assets1.tamsnetwork.com/images/EC042017NF/119685s.jpg "Cherry Cobbler 8-1/2\" X 11\" Cardstock [ 119685 ]")
![Real Red & White Baker's Twine [ 164051 ]](https://assets1.tamsnetwork.com/images/EC042017NF/164051s.jpg "Real Red & White Baker's Twine [ 164051 ]")
![Mini Stampin' Dimensionals [ 144108 ]](https://assets1.tamsnetwork.com/images/EC042017NF/144108s.jpg "Mini Stampin' Dimensionals [ 144108 ]")


![Spooky Sweet 12" X 12" (30.5 X 30.5 Cm) Specialty Designer Series Paper [ 166191 ]](https://assets1.tamsnetwork.com/images/EC042017NF/166191s.jpg "Spooky Sweet 12\" X 12\" (30.5 X 30.5 Cm) Specialty Designer Series Paper [ 166191 ]")
![Not 29 Anymore Photopolymer Stamp Set (English) [ 166182 ]](https://assets1.tamsnetwork.com/images/EC042017NF/166182s.jpg "Not 29 Anymore Photopolymer Stamp Set (English) [ 166182 ]")
![Granny Apple Green 8-1/2" X 11" Cardstock [ 146990 ]](https://assets1.tamsnetwork.com/images/EC042017NF/146990s.jpg "Granny Apple Green 8-1/2\" X 11\" Cardstock [ 146990 ]")
![Petunia Pop 8 1/2" X 11" Cardstock [ 163801 ]](https://assets1.tamsnetwork.com/images/EC042017NF/163801s.jpg "Petunia Pop 8 1/2\" X 11\" Cardstock [ 163801 ]")
![Granny Apple Green Stampin' Pad [ 147095 ]](https://assets1.tamsnetwork.com/images/EC042017NF/147095s.jpg "Granny Apple Green Stampin' Pad [ 147095 ]")
![Petunia Pop Classic Stampin Pad [ 163811 ]](https://assets1.tamsnetwork.com/images/EC042017NF/163811s.jpg "Petunia Pop Classic Stampin Pad [ 163811 ]")
![Tuxedo Black Memento Ink Pad [ 132708 ]](https://assets1.tamsnetwork.com/images/EC042017NF/132708s.jpg "Tuxedo Black Memento Ink Pad [ 132708 ]")
![More Dazzle 6" X 6" (15.2 X 15.2 Cm) Specialty Paper [ 161749 ]](https://assets1.tamsnetwork.com/images/EC042017NF/161749s.jpg "More Dazzle 6\" X 6\" (15.2 X 15.2 Cm) Specialty Paper [ 161749 ]")
![Stampin' Seal+ [ 149699 ]](https://assets1.tamsnetwork.com/images/EC042017NF/149699s.jpg "Stampin' Seal+ [ 149699 ]")


![Branching Out Photopolymer Stamp Set (English) [ 165771 ]](https://assets1.tamsnetwork.com/images/EC042017NF/165771s.jpg "Branching Out Photopolymer Stamp Set (English) [ 165771 ]")
![Everyday Arches Dies [ 164629 ]](https://assets1.tamsnetwork.com/images/EC042017NF/164629s.jpg "Everyday Arches Dies [ 164629 ]")
![Silent Snowfall 12" X 12" (30.5 X 30.5 Cm) Specialty Designer Series Paper [ 166062 ]](https://assets1.tamsnetwork.com/images/EC042017NF/166062s.jpg "Silent Snowfall 12\" X 12\" (30.5 X 30.5 Cm) Specialty Designer Series Paper [ 166062 ]")
![Autumn Toile 12" X 12" (30.5 X 30.5 Cm) Designer Series Paper [ 165882 ]](https://assets1.tamsnetwork.com/images/EC042017NF/165882s.jpg "Autumn Toile 12\" X 12\" (30.5 X 30.5 Cm) Designer Series Paper [ 165882 ]")
![Early Espresso 8-1/2" X 11" Cardstock [ 119686 ]](https://assets1.tamsnetwork.com/images/EC042017NF/119686s.jpg "Early Espresso 8-1/2\" X 11\" Cardstock [ 119686 ]")
![Cloud Cover 8 1/2" X 11" Cardstock [ 165621 ]](https://assets1.tamsnetwork.com/images/EC042017NF/165621s.jpg "Cloud Cover 8 1/2\" X 11\" Cardstock [ 165621 ]")
![Stampin' Cut & Emboss Machine [ 149653 ]](https://assets1.tamsnetwork.com/images/EC042017NF/149653s.jpg "Stampin' Cut & Emboss Machine [ 149653 ]")
![Stampin' Brayer [ 162936 ]](https://assets1.tamsnetwork.com/images/EC042017NF/162936s.jpg "Stampin' Brayer [ 162936 ]")
![Cloud Cover Classic Stampin' Ink Refill [ 165279 ]](https://assets1.tamsnetwork.com/images/EC042017NF/165279s.jpg "Cloud Cover Classic Stampin' Ink Refill [ 165279 ]")
![Early Espresso Classic Stampin' Pad [ 147114 ]](https://assets1.tamsnetwork.com/images/EC042017NF/147114s.jpg "Early Espresso Classic Stampin' Pad [ 147114 ]")
![Shaded Spruce Classic Stampin' Pad [ 147088 ]](https://assets1.tamsnetwork.com/images/EC042017NF/147088s.jpg "Shaded Spruce Classic Stampin' Pad [ 147088 ]")
![Uninked Stampin’ Craft Pad & Whisper White Refill [ 147277 ]](https://assets1.tamsnetwork.com/images/EC042017NF/147277s.jpg "Uninked Stampin’ Craft Pad & Whisper White Refill [ 147277 ]")
![Basics Wow! Embossing Powder [ 165679 ]](https://assets1.tamsnetwork.com/images/EC042017NF/165679s.jpg "Basics Wow! Embossing Powder [ 165679 ]")
![Heat Tool (Us And Canada) [ 129053 ]](https://assets1.tamsnetwork.com/images/EC042017NF/129053s.jpg "Heat Tool (Us And Canada) [ 129053 ]")


![Sunflower 3 D Embossing Folder [ 166145 ]](https://assets1.tamsnetwork.com/images/EC042017NF/166145s.jpg "Sunflower 3 D Embossing Folder [ 166145 ]")
![Floral Impressions 12" X 12" (30.5 X 30.5 Cm) Designer Series Paper [ 165603 ]](https://assets1.tamsnetwork.com/images/EC042017NF/165603s.jpg "Floral Impressions 12\" X 12\" (30.5 X 30.5 Cm) Designer Series Paper [ 165603 ]")
![The Right Words Cling Stamp Set (English) [ 165316 ]](https://assets1.tamsnetwork.com/images/EC042017NF/165316s.jpg "The Right Words Cling Stamp Set (English) [ 165316 ]")
![Elements Of Text Cling Stamp Set [ 164774 ]](https://assets1.tamsnetwork.com/images/EC042017NF/164774s.jpg "Elements Of Text Cling Stamp Set [ 164774 ]")
![Pecan Pie 8 1/2" X 11" Cardstock [ 161717 ]](https://assets1.tamsnetwork.com/images/EC042017NF/161717s.jpg "Pecan Pie 8 1/2\" X 11\" Cardstock [ 161717 ]")
![Darling Duckling 8 1/2" X 11" Cardstock [ 165622 ]](https://assets1.tamsnetwork.com/images/EC042017NF/165622s.jpg "Darling Duckling 8 1/2\" X 11\" Cardstock [ 165622 ]")
![Mossy Meadow 8-1/2" X 11" Cardstock [ 133676 ]](https://assets1.tamsnetwork.com/images/EC042017NF/133676s.jpg "Mossy Meadow 8-1/2\" X 11\" Cardstock [ 133676 ]")
![Garden Green Classic Stampin' Pad [ 147089 ]](https://assets1.tamsnetwork.com/images/EC042017NF/147089s.jpg "Garden Green Classic Stampin' Pad [ 147089 ]")
![Pecan Pie Classic Stampin' Pad [ 161665 ]](https://assets1.tamsnetwork.com/images/EC042017NF/161665s.jpg "Pecan Pie Classic Stampin' Pad [ 161665 ]")
![Sponge Daubers [ 133773 ]](https://assets1.tamsnetwork.com/images/EC042017NF/133773s.jpg "Sponge Daubers [ 133773 ]")
![Perennial Postage Dies [ 162607 ]](https://assets1.tamsnetwork.com/images/EC042017NF/162607s.jpg "Perennial Postage Dies [ 162607 ]")
![Low Profile Sparkle Dots [ 166157 ]](https://assets1.tamsnetwork.com/images/EC042017NF/166157s.jpg "Low Profile Sparkle Dots [ 166157 ]")


![Jar Of Joy Photopolymer Stamp Set (English) [ 166176 ]](https://assets1.tamsnetwork.com/images/EC042017NF/166176s.jpg "Jar Of Joy Photopolymer Stamp Set (English) [ 166176 ]")
![Sweet Jar Builder Punch [ 165506 ]](https://assets1.tamsnetwork.com/images/EC042017NF/165506s.jpg "Sweet Jar Builder Punch [ 165506 ]")
![Nests Of Winter 12" X 12" (30.5 X 30.5 Cm) Designer Series Paper [ 164183 ]](https://assets1.tamsnetwork.com/images/EC042017NF/164183s.jpg "Nests Of Winter 12\" X 12\" (30.5 X 30.5 Cm) Designer Series Paper [ 164183 ]")
![Smoky Slate 8-1/2" X 11" Cardstock [ 131202 ]](https://assets1.tamsnetwork.com/images/EC042017NF/131202s.jpg "Smoky Slate 8-1/2\" X 11\" Cardstock [ 131202 ]")
![Real Red 8-1/2" X 11" Cardstock [ 102482 ]](https://assets1.tamsnetwork.com/images/EC042017NF/102482s.jpg "Real Red 8-1/2\" X 11\" Cardstock [ 102482 ]")
![Silver 12" X 12" (30.5 X 30.5 Cm) Foil Sheets [ 163387 ]](https://assets1.tamsnetwork.com/images/EC042017NF/163387s.jpg "Silver 12\" X 12\" (30.5 X 30.5 Cm) Foil Sheets [ 163387 ]")
![Smoky Slate Classic Stampin' Pad [ 147113 ]](https://assets1.tamsnetwork.com/images/EC042017NF/147113s.jpg "Smoky Slate Classic Stampin' Pad [ 147113 ]")
![Real Red Classic Stampin' Pad [ 147084 ]](https://assets1.tamsnetwork.com/images/EC042017NF/147084s.jpg "Real Red Classic Stampin' Pad [ 147084 ]")
![Coastal Cabana Classic Stampin' Pad [ 147097 ]](https://assets1.tamsnetwork.com/images/EC042017NF/147097s.jpg "Coastal Cabana Classic Stampin' Pad [ 147097 ]")
![2 3/8" (6 Cm) Circle Punch [ 161354 ]](https://assets1.tamsnetwork.com/images/EC042017NF/161354s.jpg "2 3/8\" (6 Cm) Circle Punch [ 161354 ]")
