
The answer is YES!
In today’s live demonstration on the Creative Juice Facebook Page and YouTube channel, I showed how to create two sizes of scrapbook pages (8.5″ x 11″ and 12″ x 12″) you can mail memories with~ .

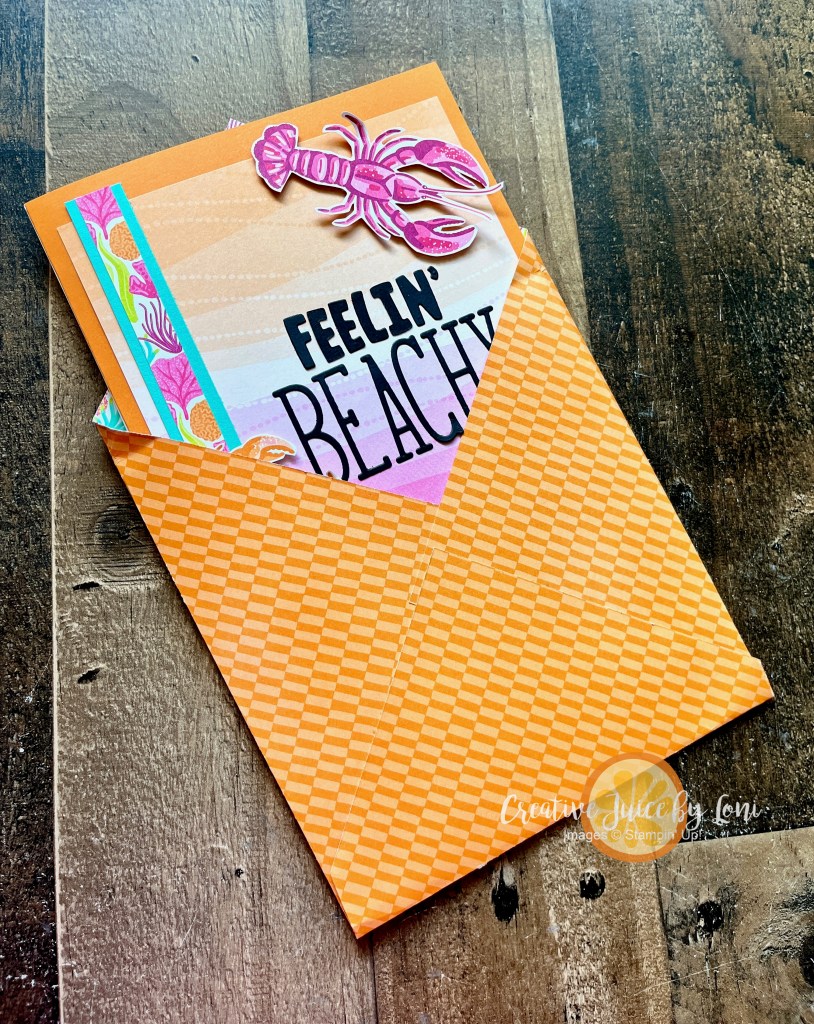
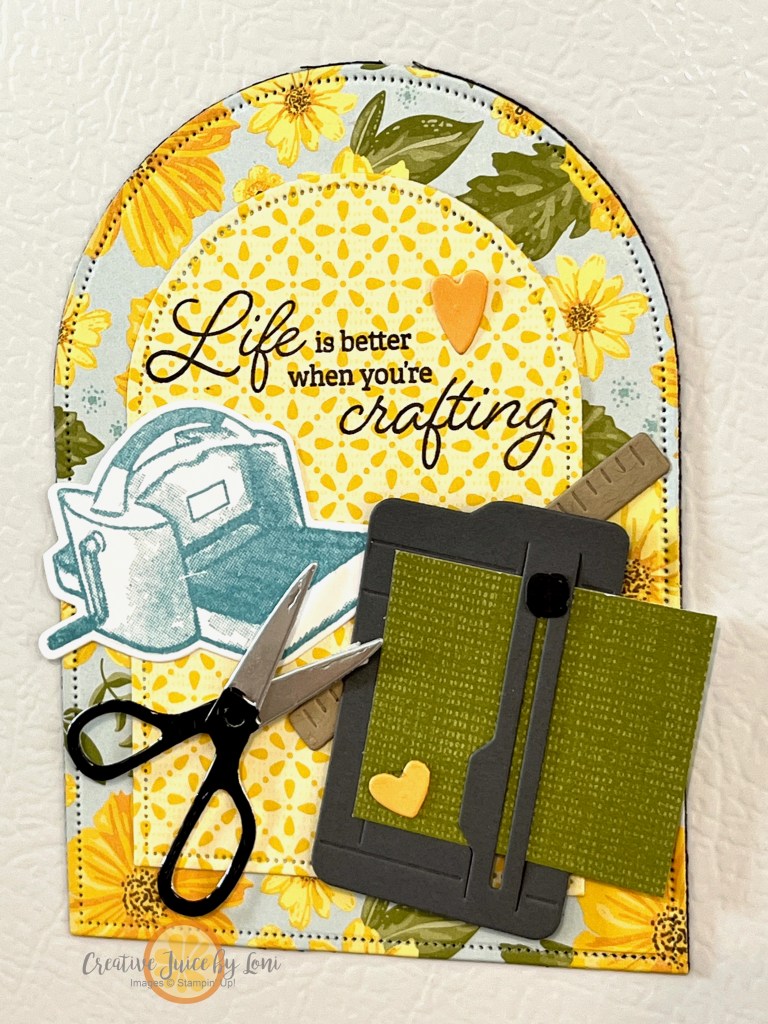
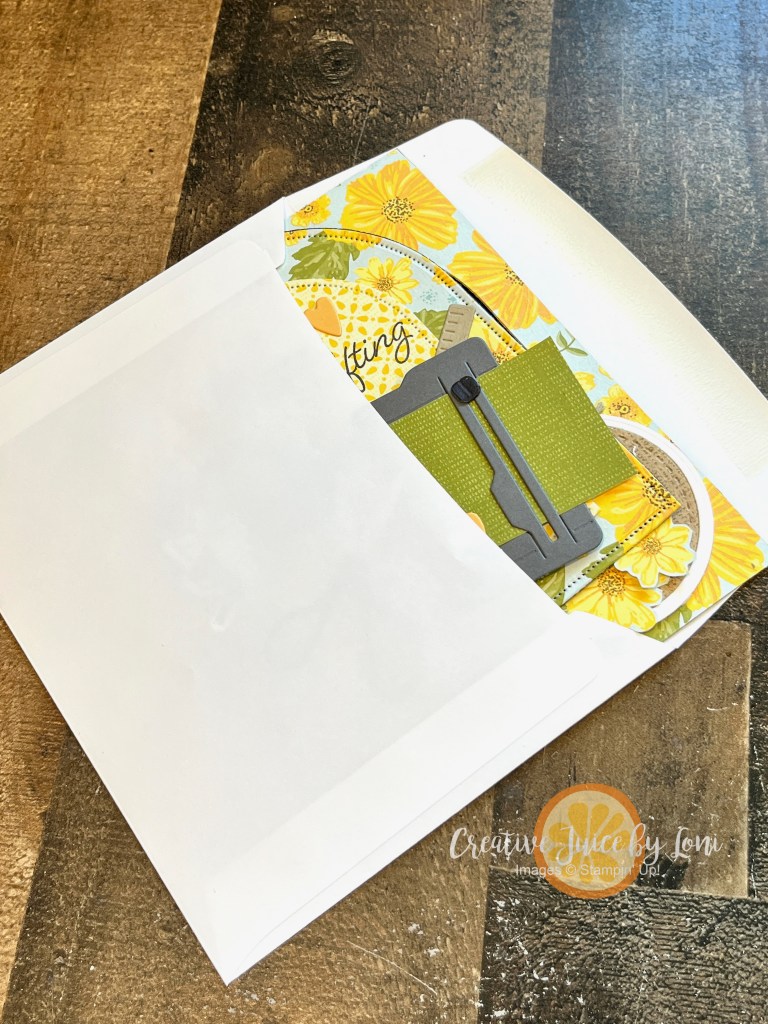
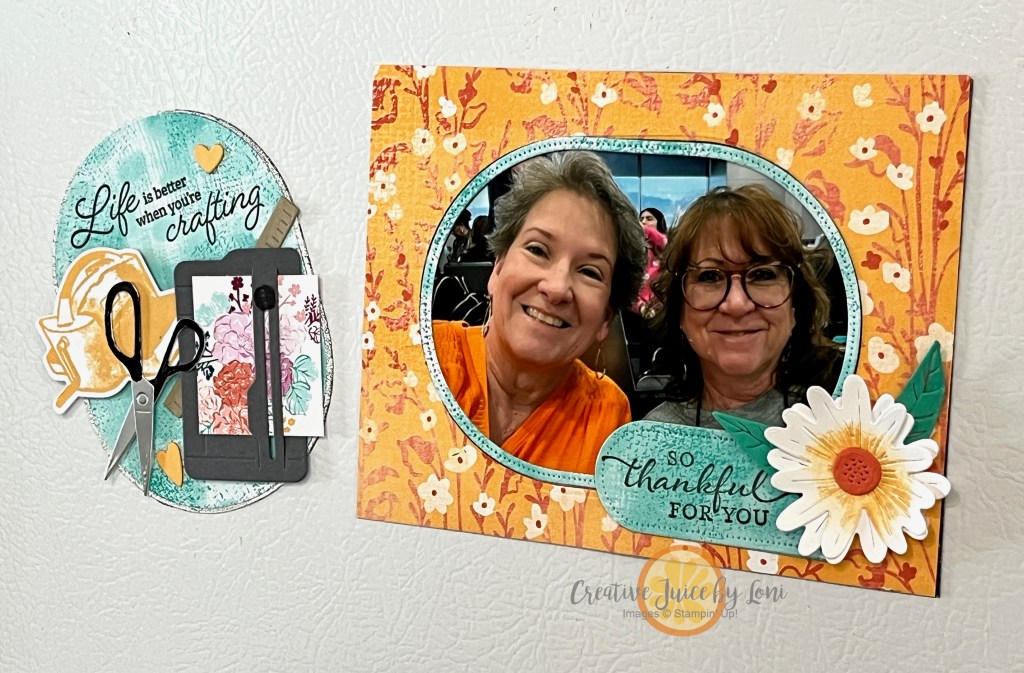
You’ll need a page layout that has quadrants, so you can fold it for mailing. This sketch features a long panel on the right and a cluster of photos on the left. Once you fold it up, it fits in a large envelope. I created the envelope from a 10″ x 10″ piece of the same Friends of the Ocean Designer Series Paper by Stampin’ Up! :
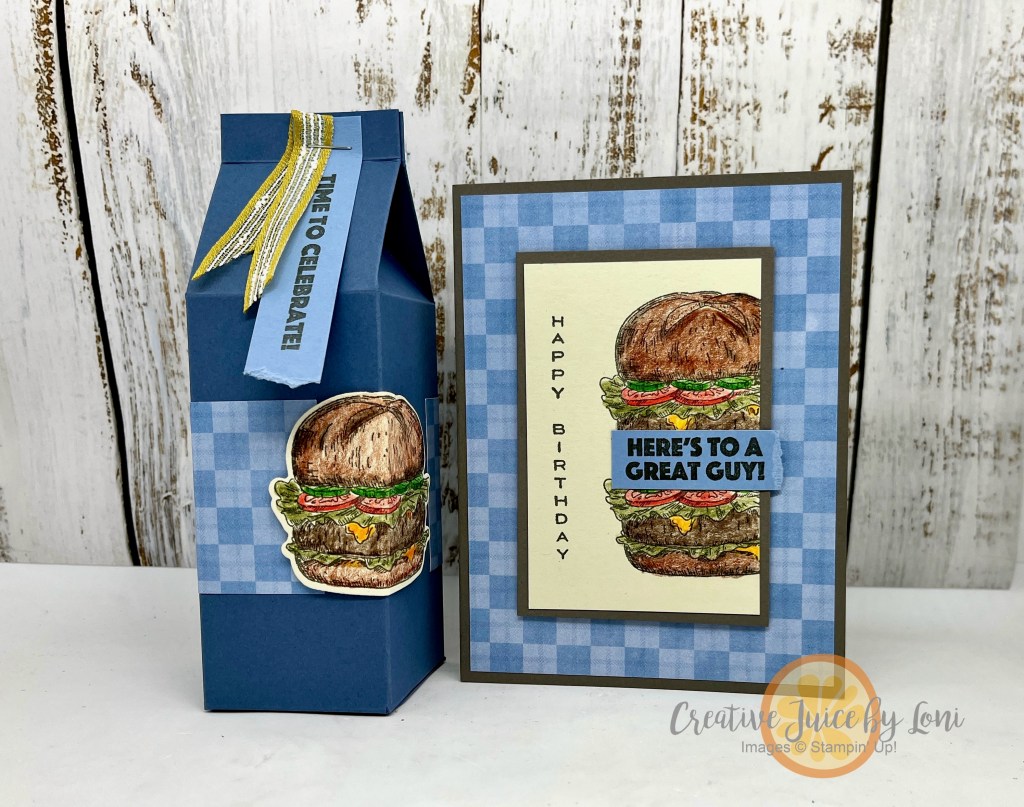
Both of these pages use the same layout and patterned paper, along with the Alphabet a la Mode and Mini Alphabet dies, fitting the bill for the TGIF Product Challenge this week #tgifc522:

These beloved funny faces were the inspiration for this project:

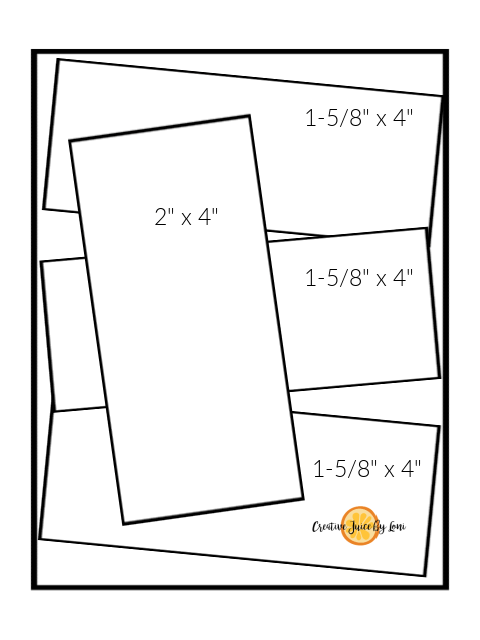
INSTRUCTIONS: Start by taking the card stock for your page and scoring it in half one direction, then in half the other way. You’ll cut along one of the score lines in to the middle – on my “Funny Faces” page, I cut it along the lower center score line, but if I were to do it again, I’d cut along the horizontal line on right or left, as I did for the “Feeling Beachy” 12×12 page.
Once folded, the 8.5″ x 11″ page fits into a Basic White Medium Envelope:

TIP for mailing in 2025: If it weighs more than 1 oz. you’ll need a two ounce postage stamp, or one regular stamp and an additional ounce postage stamp. For the 12×12 page, you’ll need a Non-Machinable 1 ounce stamp ($1.19) PLUS an additional ounce stamp ($.28) for a total of $1.47.
Use the faces from the Meant to Bee and/or Bee My Valentine on Daffodil Delight card stock and punch them out with a 1/2″ circle punch to create the emoji buttons!

I’ll add this to the list of Mailable Gifts we’ve been building- bookmark that list HERE, then watch the video for more information on how to #mailamemory :
![Friends Of The Ocean 12" X 12" (30.5 X 30.5 Cm) Designer Series Paper [ 164684 ]](https://assets1.tamsnetwork.com/images/EC042017NF/164684s.jpg "Friends Of The Ocean 12\" X 12\" (30.5 X 30.5 Cm) Designer Series Paper [ 164684 ]")
![Pumpkin Pie 8-1/2" X 11" Cardstock [ 105117 ]](https://assets1.tamsnetwork.com/images/EC042017NF/105117s.jpg "Pumpkin Pie 8-1/2\" X 11\" Cardstock [ 105117 ]")
![Basic Black 8-1/2" X 11" Cardstock [ 121045 ]](https://assets1.tamsnetwork.com/images/EC042017NF/121045s.jpg "Basic Black 8-1/2\" X 11\" Cardstock [ 121045 ]")
![Daffodil Delight 8-1/2" X 11" Cardstock [ 119683 ]](https://assets1.tamsnetwork.com/images/EC042017NF/119683s.jpg "Daffodil Delight 8-1/2\" X 11\" Cardstock [ 119683 ]")
![Summer Splash 8 1/2" X 11 Cardstock [ 163797 ]](https://assets1.tamsnetwork.com/images/EC042017NF/163797s.jpg "Summer Splash 8 1/2\" X 11 Cardstock [ 163797 ]")
![Adhesive Sheets [ 152334 ]](https://assets1.tamsnetwork.com/images/EC042017NF/152334s.jpg "Adhesive Sheets [ 152334 ]")
![Alphabet à La Mode Dies [ 160750 ]](https://assets1.tamsnetwork.com/images/EC042017NF/160750s.jpg "Alphabet à La Mode Dies [ 160750 ]")
![Mini Alphabet Dies [ 162934 ]](https://assets1.tamsnetwork.com/images/EC042017NF/162934s.jpg "Mini Alphabet Dies [ 162934 ]")
![Mini Stampin' Cut & Emboss Machine [ 150673 ]](https://assets1.tamsnetwork.com/images/EC042017NF/150673s.jpg "Mini Stampin' Cut & Emboss Machine [ 150673 ]")
![Tuxedo Black Memento Ink Pad [ 132708 ]](https://assets1.tamsnetwork.com/images/EC042017NF/132708s.jpg "Tuxedo Black Memento Ink Pad [ 132708 ]")
![Meant To Bee Photopolymer Stamp Set (English) [ 166583 ]](https://assets1.tamsnetwork.com/images/EC042017NF/166583s.jpg "Meant To Bee Photopolymer Stamp Set (English) [ 166583 ]")
![Bee My Valentine Photopolymer Stamp Set (English) [ 162547 ]](https://assets1.tamsnetwork.com/images/EC042017NF/162547s.jpg "Bee My Valentine Photopolymer Stamp Set (English) [ 162547 ]")
![Basic White Medium Envelopes [ 159236 ]](https://assets1.tamsnetwork.com/images/EC042017NF/159236s.jpg "Basic White Medium Envelopes [ 159236 ]")
![Paper Trimmer [ 152392 ]](https://assets1.tamsnetwork.com/images/EC042017NF/152392s.jpg "Paper Trimmer [ 152392 ]")
![Mini Glue Dots [ 103683 ]](https://assets1.tamsnetwork.com/images/EC042017NF/103683s.jpg "Mini Glue Dots [ 103683 ]")
![Stampin' Seal [ 152813 ]](https://assets1.tamsnetwork.com/images/EC042017NF/152813s.jpg "Stampin' Seal [ 152813 ]")
![Stampin' Dimensionals [ 104430 ]](https://assets1.tamsnetwork.com/images/EC042017NF/104430s.jpg "Stampin' Dimensionals [ 104430 ]")
Did you know it’s National Scrapbook Day this Saturday, May 3rd? Join Stampin’ Up! LIVE for a free kickoff event on Friday, May 2nd at 1 pm!


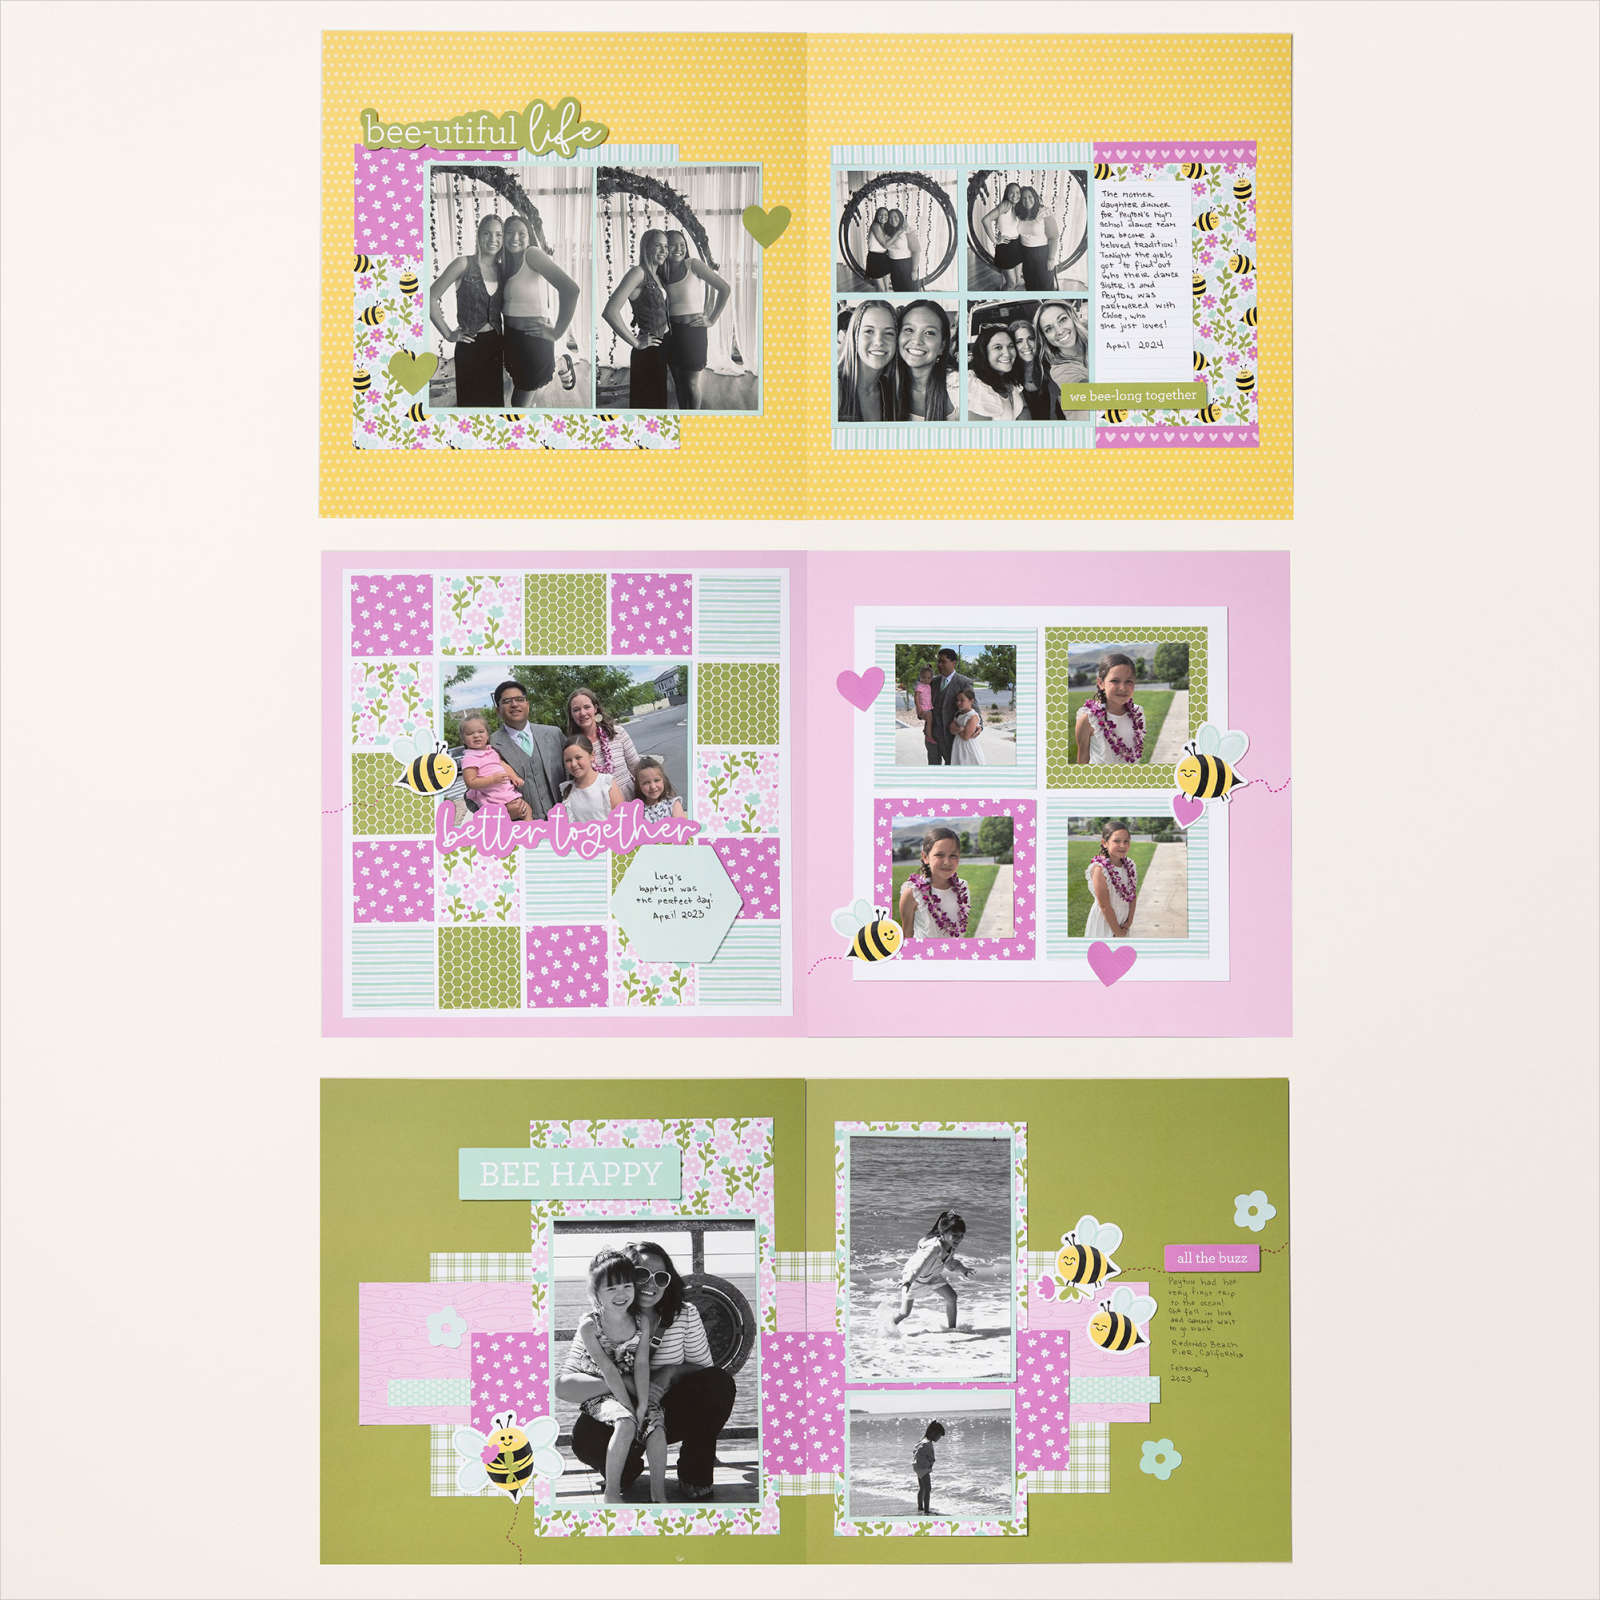
![Cute As Can Bee 12" X 12" (30.5 X 30.5 Cm) Designer Series Paper & Sticker Sheet (English) [ 166618 ]](https://assets1.tamsnetwork.com/images/EC042017NF/166618s.jpg "Cute As Can Bee 12\" X 12\" (30.5 X 30.5 Cm) Designer Series Paper & Sticker Sheet (English) [ 166618 ]")
![Basic White 12 X12 (30.5 X 30.5 Cm) Cardstock [ 159231 ]](https://assets1.tamsnetwork.com/images/EC042017NF/159231s.jpg "Basic White 12 X12 (30.5 X 30.5 Cm) Cardstock [ 159231 ]")
![Petunia Pop 12" X 12" (30.5 X 30.5 Cm) Two Tone Cardstock [ 166690 ]](https://assets1.tamsnetwork.com/images/EC042017NF/166690s.jpg "Petunia Pop 12\" X 12\" (30.5 X 30.5 Cm) Two Tone Cardstock [ 166690 ]")
![Pool Party 8-1/2" X 11" Cardstock [ 122924 ]](https://assets1.tamsnetwork.com/images/EC042017NF/122924s.jpg "Pool Party 8-1/2\" X 11\" Cardstock [ 122924 ]")


![Floral Delight 12" X 12" (30.5 X 30.5 Cm) Designer Series Paper [ 164700 ]](https://assets1.tamsnetwork.com/images/EC042017NF/164700s.jpg "Floral Delight 12\" X 12\" (30.5 X 30.5 Cm) Designer Series Paper [ 164700 ]")
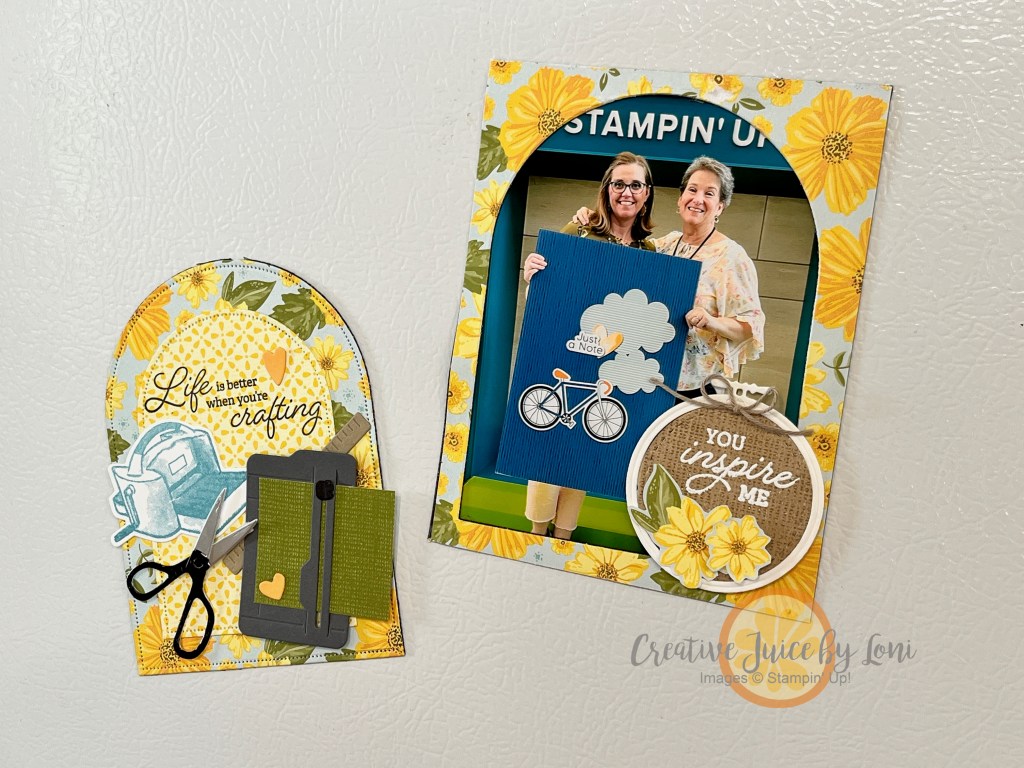
![Everyday Arches Dies [ 164629 ]](https://assets1.tamsnetwork.com/images/EC042017NF/164629s.jpg "Everyday Arches Dies [ 164629 ]")
![Crafting With You Dies [ 161225 ]](https://assets1.tamsnetwork.com/images/EC042017NF/161225s.jpg "Crafting With You Dies [ 161225 ]")
![Silver Foil Sheets [ 132178 ]](https://assets1.tamsnetwork.com/images/EC042017NF/132178s.jpg "Silver Foil Sheets [ 132178 ]")
![Early Espresso Classic Stampin' Pad [ 147114 ]](https://assets1.tamsnetwork.com/images/EC042017NF/147114s.jpg "Early Espresso Classic Stampin' Pad [ 147114 ]")
![Stampin' Cut & Emboss Machine [ 149653 ]](https://assets1.tamsnetwork.com/images/EC042017NF/149653s.jpg "Stampin' Cut & Emboss Machine [ 149653 ]")


![Meant To Bee Bundle (English) [ 167243 ]](https://assets1.tamsnetwork.com/images/EC042017NF/167243s.jpg "Meant To Bee Bundle (English) [ 167243 ]")
![Cute As Can Bee 12" X 12" (30.5 X 30.5 Cm) Designer Series Paper [ 166621 ]](https://assets1.tamsnetwork.com/images/EC042017NF/166621s.jpg "Cute As Can Bee 12\" X 12\" (30.5 X 30.5 Cm) Designer Series Paper [ 166621 ]")
![Simply Scored [ 122334 ]](https://assets1.tamsnetwork.com/images/EC042017NF/122334s.jpg "Simply Scored [ 122334 ]")
![Bubble Bath 8 1/2" X 11" Cardstock [ 161718 ]](https://assets1.tamsnetwork.com/images/EC042017NF/161718s.jpg "Bubble Bath 8 1/2\" X 11\" Cardstock [ 161718 ]")
![Petunia Pop 8 1/2" X 11" Cardstock [ 163801 ]](https://assets1.tamsnetwork.com/images/EC042017NF/163801s.jpg "Petunia Pop 8 1/2\" X 11\" Cardstock [ 163801 ]")
![Basic White 8 1/2" X 11" Cardstock [ 166780 ]](https://assets1.tamsnetwork.com/images/EC042017NF/166780s.jpg "Basic White 8 1/2\" X 11\" Cardstock [ 166780 ]")
![Daffodil Delight Classic Stampin' Pad [ 147094 ]](https://assets1.tamsnetwork.com/images/EC042017NF/147094s.jpg "Daffodil Delight Classic Stampin' Pad [ 147094 ]")
![Petunia Pop Classic Stampin Pad [ 163811 ]](https://assets1.tamsnetwork.com/images/EC042017NF/163811s.jpg "Petunia Pop Classic Stampin Pad [ 163811 ]")
![Bubble Bath Classic Stampin' Pad [ 161664 ]](https://assets1.tamsnetwork.com/images/EC042017NF/161664s.jpg "Bubble Bath Classic Stampin' Pad [ 161664 ]")
![Old Olive Classic Stampin' Pad [ 147090 ]](https://assets1.tamsnetwork.com/images/EC042017NF/147090s.jpg "Old Olive Classic Stampin' Pad [ 147090 ]")
![Tiny Bee Trinkets [ 164714 ]](https://assets1.tamsnetwork.com/images/EC042017NF/164714s.jpg "Tiny Bee Trinkets [ 164714 ]")
![Bone Folder [ 102300 ]](https://assets1.tamsnetwork.com/images/EC042017NF/102300s.jpg "Bone Folder [ 102300 ]")
![Tear & Tape Adhesive [ 154031 ]](https://assets1.tamsnetwork.com/images/EC042017NF/154031s.jpg "Tear & Tape Adhesive [ 154031 ]")


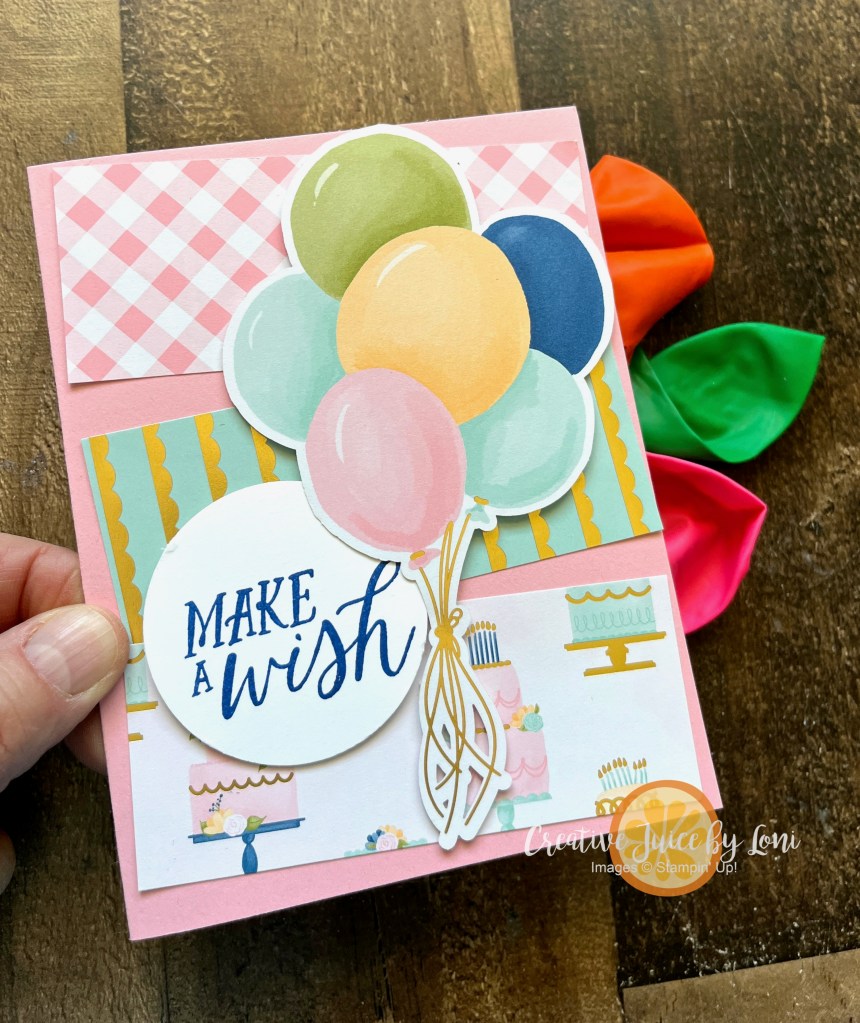
![Wildflower Birthday 12" X 12" (30.5 X 30.5 Cm) Specialty Designer Series Paper [ 164591 ]](https://assets1.tamsnetwork.com/images/EC042017NF/164591s.jpg "Wildflower Birthday 12\" X 12\" (30.5 X 30.5 Cm) Specialty Designer Series Paper [ 164591 ]")
![Birthday Celebration Photopolymer Stamp Set (English) [ 164592 ]](https://assets1.tamsnetwork.com/images/EC042017NF/164592s.jpg "Birthday Celebration Photopolymer Stamp Set (English) [ 164592 ]")
![Pretty In Pink 8 1/2" X 11" Cardstock [ 163793 ]](https://assets1.tamsnetwork.com/images/EC042017NF/163793s.jpg "Pretty In Pink 8 1/2\" X 11\" Cardstock [ 163793 ]")
![Misty Moonlight 8-1/2" X 11" Cardstock [ 153081 ]](https://assets1.tamsnetwork.com/images/EC042017NF/153081s.jpg "Misty Moonlight 8-1/2\" X 11\" Cardstock [ 153081 ]")
![Coastal Cabana 8-1/2" X 11" Cardstock [ 131297 ]](https://assets1.tamsnetwork.com/images/EC042017NF/131297s.jpg "Coastal Cabana 8-1/2\" X 11\" Cardstock [ 131297 ]")
![Misty Moonlight Classic Stampin' Pad [ 153118 ]](https://assets1.tamsnetwork.com/images/EC042017NF/153118s.jpg "Misty Moonlight Classic Stampin' Pad [ 153118 ]")
![Pretty In Pink 3/8" (1 Cm) Bordered Ribbon [ 163784 ]](https://assets1.tamsnetwork.com/images/EC042017NF/163784s.jpg "Pretty In Pink 3/8\" (1 Cm) Bordered Ribbon [ 163784 ]")
![Gold Twisted Thread [ 164603 ]](https://assets1.tamsnetwork.com/images/EC042017NF/164603s.jpg "Gold Twisted Thread [ 164603 ]")
![1-3/4" (4.4 Cm) Circle Punch [ 119850 ]](https://assets1.tamsnetwork.com/images/EC042017NF/119850s.jpg "1-3/4\" (4.4 Cm) Circle Punch [ 119850 ]")
![Layered Florals 3 D Embossing Folder [ 162935 ]](https://assets1.tamsnetwork.com/images/EC042017NF/162935s.jpg "Layered Florals 3 D Embossing Folder [ 162935 ]")
![Multipurpose Liquid Glue [ 110755 ]](https://assets1.tamsnetwork.com/images/EC042017NF/110755s.jpg "Multipurpose Liquid Glue [ 110755 ]")


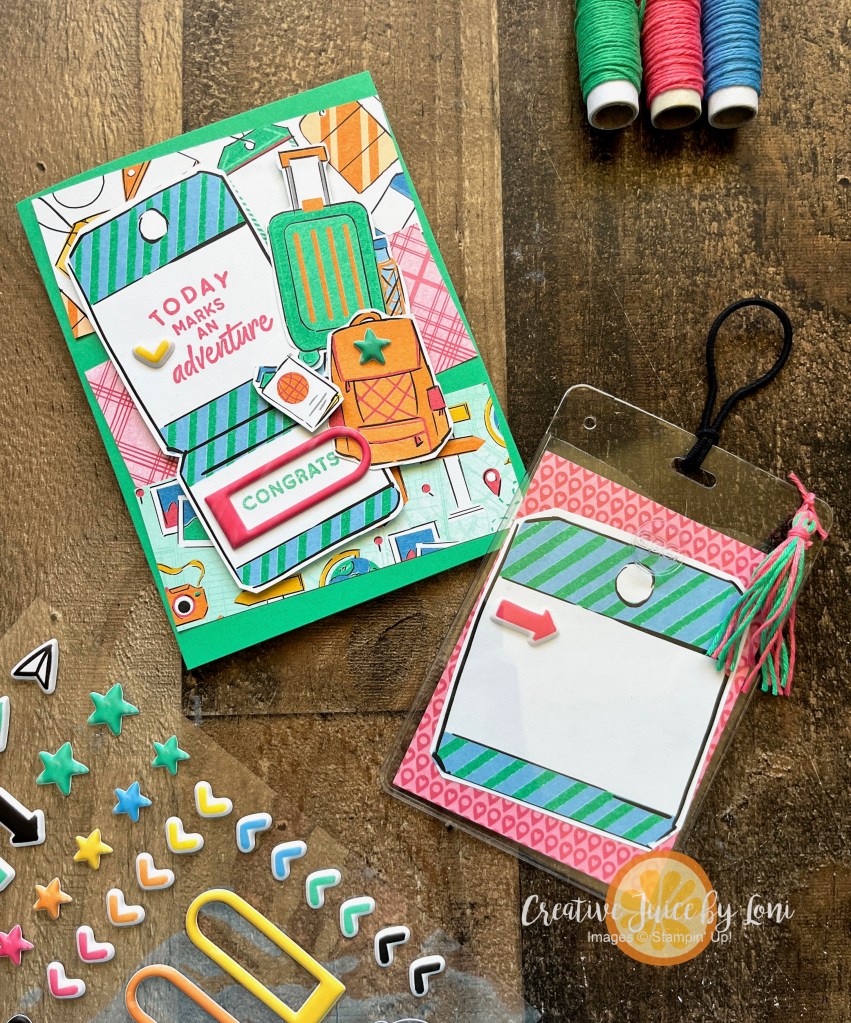
![Everyday Arches Bundle (English) [ 164630 ]](https://assets1.tamsnetwork.com/images/EC042017NF/164630s.jpg "Everyday Arches Bundle (English) [ 164630 ]")
![Storybook Moments 12" X 12" (30.5 X 30.5 Cm) Specialty Designer Series Paper [ 164662 ]](https://assets1.tamsnetwork.com/images/EC042017NF/164662s.jpg "Storybook Moments 12\" X 12\" (30.5 X 30.5 Cm) Specialty Designer Series Paper [ 164662 ]")
![Boho Blue 8 1/2" X 11" Cardstock [ 161724 ]](https://assets1.tamsnetwork.com/images/EC042017NF/161724s.jpg "Boho Blue 8 1/2\" X 11\" Cardstock [ 161724 ]")
![Copper Clay 8 1/2" X 11" Cardstock [ 161721 ]](https://assets1.tamsnetwork.com/images/EC042017NF/161721s.jpg "Copper Clay 8 1/2\" X 11\" Cardstock [ 161721 ]")
![Basic Beige 8 1/2" X 11" Cardstock [ 164511 ]](https://assets1.tamsnetwork.com/images/EC042017NF/164511s.jpg "Basic Beige 8 1/2\" X 11\" Cardstock [ 164511 ]")
![Wild Wheat 8 1/2" X 11" Cardstock [ 161725 ]](https://assets1.tamsnetwork.com/images/EC042017NF/161725s.jpg "Wild Wheat 8 1/2\" X 11\" Cardstock [ 161725 ]")
![2024–2026 In Color™ Glimmer 12" X 12" (30.5 X 30.5 Cm) Specialty Paper [ 163771 ]](https://assets1.tamsnetwork.com/images/EC042017NF/163771s.jpg "2024–2026 In Color™ Glimmer 12\" X 12\" (30.5 X 30.5 Cm) Specialty Paper [ 163771 ]")
![2022–2024 In Color Baker's Twine Pack [ 159195 ]](https://assets1.tamsnetwork.com/images/EC042017NF/159195s.jpg "2022–2024 In Color Baker's Twine Pack [ 159195 ]")
![Boho Blue Classic Stampin' Pad [ 161650 ]](https://assets1.tamsnetwork.com/images/EC042017NF/161650s.jpg "Boho Blue Classic Stampin' Pad [ 161650 ]")
![Copper Clay Classic Stampin' Pad [ 161647 ]](https://assets1.tamsnetwork.com/images/EC042017NF/161647s.jpg "Copper Clay Classic Stampin' Pad [ 161647 ]")
![Bee Builder Punch [ 162553 ]](https://assets1.tamsnetwork.com/images/EC042017NF/162553s.jpg "Bee Builder Punch [ 162553 ]")
![Stampin' Seal+ [ 149699 ]](https://assets1.tamsnetwork.com/images/EC042017NF/149699s.jpg "Stampin' Seal+ [ 149699 ]")
![Brushed Brass Butterflies [ 158136 ]](https://assets1.tamsnetwork.com/images/EC042017NF/158136s.jpg "Brushed Brass Butterflies [ 158136 ]")


")
 Designer Series Paper")
 Circle Punch")


![Wildflower Birthday Suite Collection (English) [ 164604 ]](https://assets1.tamsnetwork.com/images/EC042017NF/164604s.jpg "Wildflower Birthday Suite Collection (English) [ 164604 ]")
![Night Of Navy 8-1/2" X 11" Cardstock [ 100867 ]](https://assets1.tamsnetwork.com/images/EC042017NF/100867s.jpg "Night Of Navy 8-1/2\" X 11\" Cardstock [ 100867 ]")
![Soft Sea Foam 8-1/2" X 11" Cardstock [ 146988 ]](https://assets1.tamsnetwork.com/images/EC042017NF/146988s.jpg "Soft Sea Foam 8-1/2\" X 11\" Cardstock [ 146988 ]")
![Night Of Navy Classic Stampin' Pad [ 147110 ]](https://assets1.tamsnetwork.com/images/EC042017NF/147110s.jpg "Night Of Navy Classic Stampin' Pad [ 147110 ]")
![Pool Party Classic Stampin' Pad [ 147107 ]](https://assets1.tamsnetwork.com/images/EC042017NF/147107s.jpg "Pool Party Classic Stampin' Pad [ 147107 ]")
![Small Blending Brushes [ 160518 ]](https://assets1.tamsnetwork.com/images/EC042017NF/160518s.jpg "Small Blending Brushes [ 160518 ]")
![2 3/8" (6 Cm) Circle Punch [ 161354 ]](https://assets1.tamsnetwork.com/images/EC042017NF/161354s.jpg "2 3/8\" (6 Cm) Circle Punch [ 161354 ]")
![Baker's Twine Essentials Pack [ 155475 ]](https://assets1.tamsnetwork.com/images/EC042017NF/155475s.jpg "Baker's Twine Essentials Pack [ 155475 ]")
