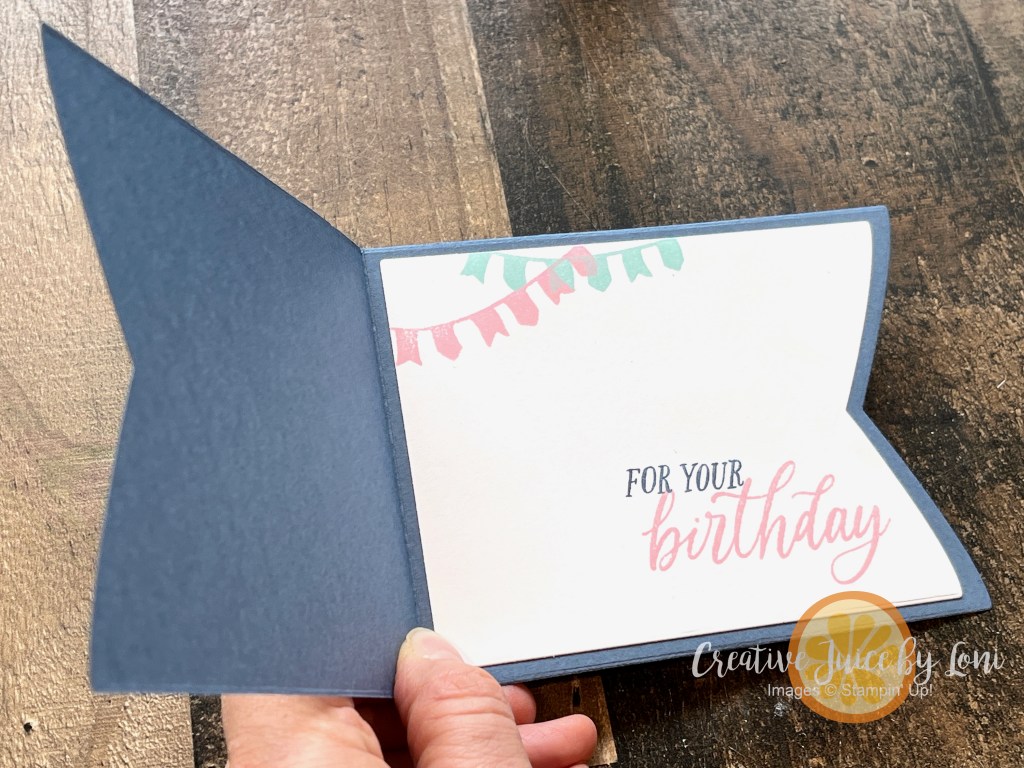
Having a “banner” month, as I’ve been playing with the new Party Banners Dies from Stampin’ Up!®
Since I’m traveling today, I don’t have a video for you, but I DO HAVE a tutorial you can print out for making this birthday cake card – and YES, it fits into an A2 envelope like the Medium Basic White Envelopes in my Stampin’ Store (which you always want to have on hand for your creations)!
As I prepare for my annual Stampin’ Soiree & BOGO Sale this Saturday (featuring a NEW Stampin’ Up!®️ Catalog and Online Exclusives), I wanted to make a few samples with some of the fresh products coming tomorrow, May 6th! Since multi-tasking is the only way this one-woman show can get things done, I chose a simple sketch, which doubles as a way to show the color palette, and used it for my lunchtime live crafting video, too:
The first card I demonstrated was inspired by the #tgifc523 color challenge of Petnunia Pop, Balmy Blue and Daffodil Delight:
Starting simple – no mat on this card (though you certainly could add one), I stamped flowers from a new Online Exclusive bundle, Impressions Abloom on top of the 3-1/2″ x 4-1/2″ panel, then added 1-3/16″ squares of the colored card stock to the bottom:
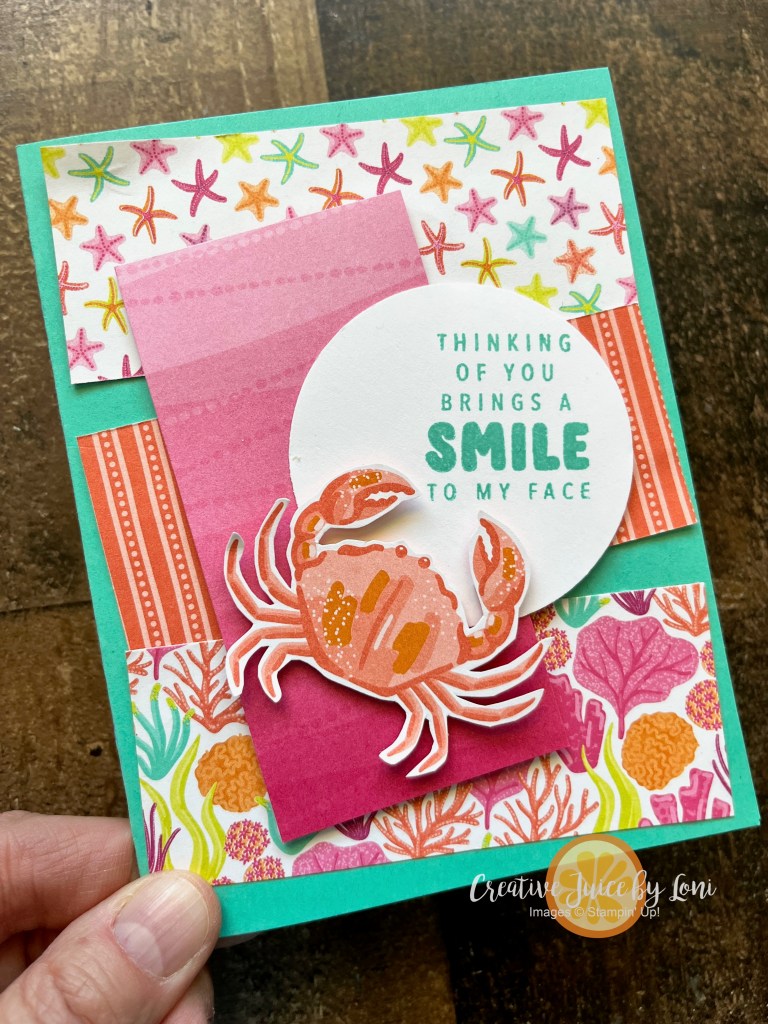
When crafting from a sketch, give yourself some freedom to make changes! I didn’t add the palette to the Poppin’ By card, but used the darling filmstrip die to add the border at the bottom:
My favorite thing about this set is probably the tennis shoes you could add to the bucket of popcorn:
Moving along, let’s take that sketch and turn it SIDEWAYS, which is what I did for the Notes & Totes bundle from the new catalog, which I paired with the 2025-2027 In Colors (from bottom to top: Secret Sea, Timid Tiger, Cloud Cover, Darling Duckling & Strawberry Slush):
And finally, I used some Celebration Expressions Memories & More Cards to make this Happy Birthday card, and my friend Barb’s Million Dollar Stamp Set Layered Thoughts, this time putting the color palette below the main panel:
To see me create two of these cards (and share some tips), watch this:
If one of these new items or colors is something you must have, visit my Stampin’ Store starting on May 6th to make an order, or click on the Stampin’ Supplies link under any card you love.
See all these samples IN PERSON – and MORE – at the Stampin’ Soiree, Saturday May 10th in Hurricane, UT. It’s FREE and open-house style, so plan to drop in with a friend between 1-4 pm!
One more announcement: If your wish list is long, the best value for Saavy Stampin’ Shoppers is the STARTER KIT, and starting tomorrow, May 6th, you can choose MORE in your starter kit, with no strings attached!
Let me make you feel better about scrapbooking, as we gear up for National Scrapbook Day this Saturday, May 3, 2025! I’m working on photos from 2006 (I am indeed 20 years behind) and my style is “Git ‘er done!” Take a look:
The “On The Go” Suite Collection is a must have for memory keepers who also love to travel! It includes a cling stamp set, coordinating dies, Designer Series Paper, suitcase boxes, twine and puffy stickers (which I will be adding to my page, now that I remembered I have them 🤪). Of course, each product can be purchase individually, as well.
One more way to use your alphabet dies (and in the spirit of the #tgifc522 product challenge) is to use the negative section of the letters you’ve cut out:
Remember to save the centers of letters – like the O, R, P and A – and if you put an adhesive sheet on your paper before die cutting, your letters, the centers and your negative image will already be sticky to put on the page, just like a sticker.
I’m not a person who thinks every scrapbook page has to be a show-piece, or even have a bold title. Especially when creating multiple pages of one event, give yourself permission to make them simple. The people who are looking at your albums are there for the PHOTOS & MEMORIES, not the design and composition! Here’s my next page (another day of our Orlando adventure in 2006) and in case you were wondering, I prefer 8.5″ x 11″ pages because the albums I put them in fit easier on my bookshelf:
Seriously. Just get those photos on the page. Add a cute embellishment, then let your family flip through the walk down memory lane.
To start (or re-ignite) your passion for preserving your photos, Stampin’ Up!®️ is offering shoppers 2x times the reward points for 2 days on Friday & Saturday on orders over $20:
If you haven’t heard of our new Rewards Program (or don’t have an account with Stampin’ Up!®️) here’s how they work:
In today’s live demonstration on the Creative Juice Facebook Page and YouTube channel, I showed how to create two sizes of scrapbook pages (8.5″ x 11″ and 12″ x 12″) you can mail memories with~ .
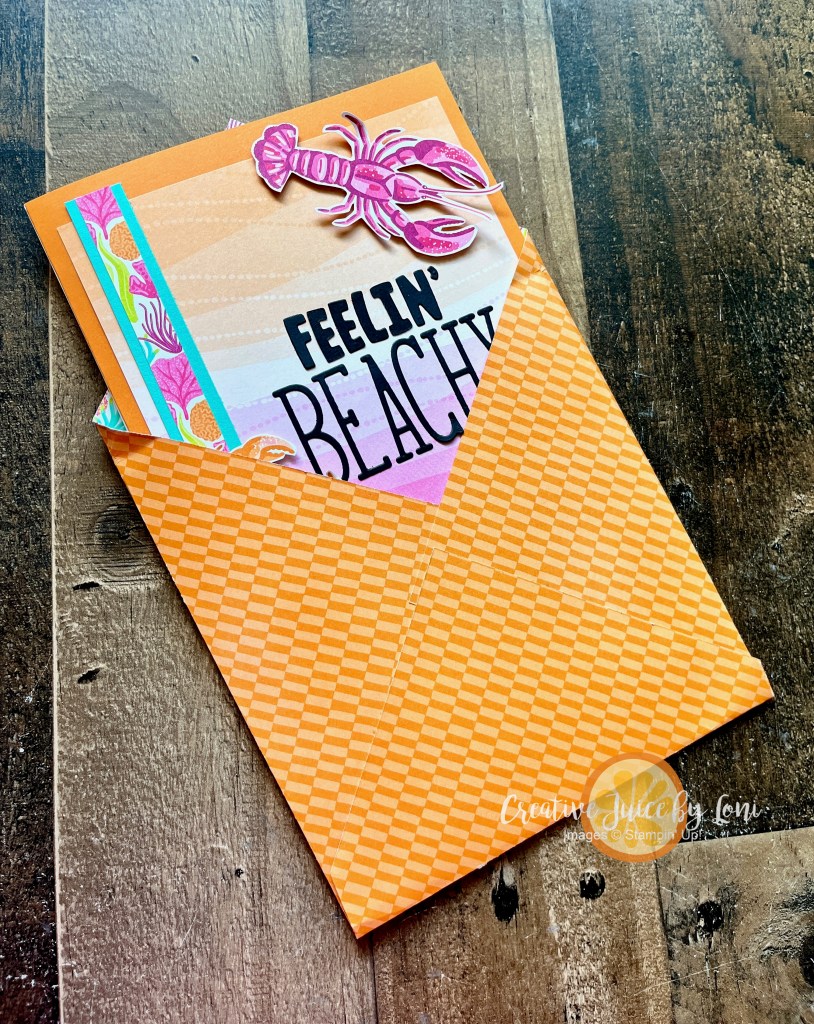
You’ll need a page layout that has quadrants, so you can fold it for mailing. This sketch features a long panel on the right and a cluster of photos on the left. Once you fold it up, it fits in a large envelope. I created the envelope from a 10″ x 10″ piece of the same Friends of the Ocean Designer Series Paper by Stampin’ Up! :
These beloved funny faces were the inspiration for this project:
INSTRUCTIONS: Start by taking the card stock for your page and scoring it in half one direction, then in half the other way. You’ll cut along one of the score lines in to the middle – on my “Funny Faces” page, I cut it along the lower center score line, but if I were to do it again, I’d cut along the horizontal line on right or left, as I did for the “Feeling Beachy” 12×12 page.
Once folded, the 8.5″ x 11″ page fits into a Basic White Medium Envelope:
TIP for mailing in 2025: If it weighs more than 1 oz. you’ll need a two ounce postage stamp, or one regular stamp and an additional ounce postage stamp. For the 12×12 page, you’ll need a Non-Machinable 1 ounce stamp ($1.19) PLUS an additional ounce stamp ($.28) for a total of $1.47.
Use the faces from the Meant to Bee and/or Bee My Valentine on Daffodil Delight card stock and punch them out with a 1/2″ circle punch to create the emoji buttons!
I’ll add this to the list of Mailable Gifts we’ve been building- bookmark that list HERE, then watch the video for more information on how to #mailamemory :
A sketch is a springboard for creativity, and today I dove into creating cards from my stash of Designer Series Paper using this sketch:
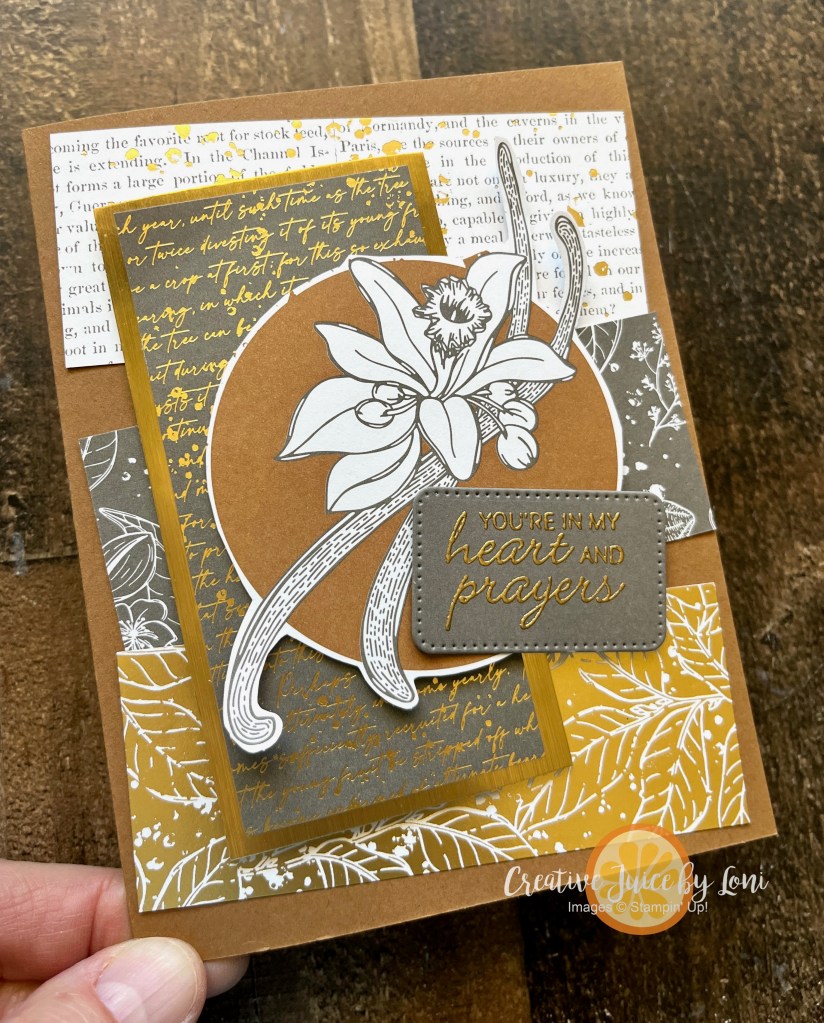
Card #1 was a sympathy card using some gilded botanical patterns that have been around Stampin’ Up! a long time, and I wanted to show it off! The Nature’s Sweetness Specialty Designer Series Paper only needed an embossed sentiment added to make this greeting card perfect:
You’ll notice that circle shapes draw the eye when used with rectangles!
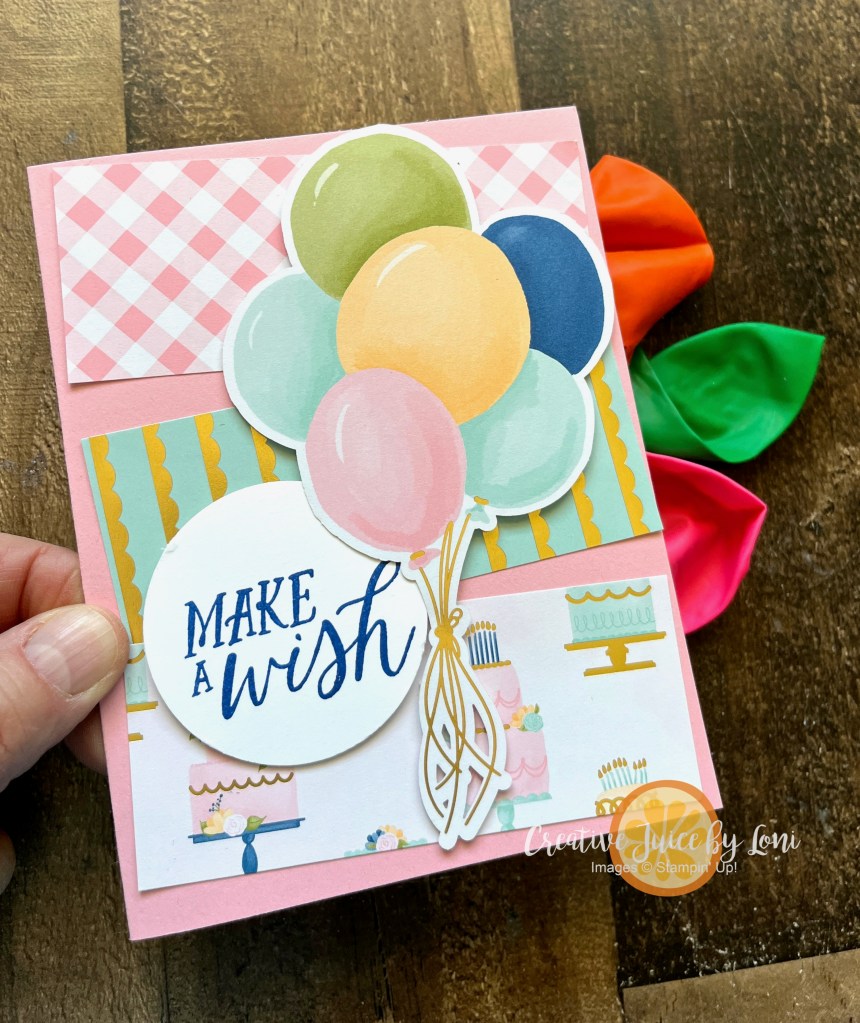
Card #3 brings us to another “mailable item” idea: BALLOONS!
In my demonstration video, I suggested blowing up a balloon and writing a message on it, then deflating it again to include inside the card. It’s double fun to have to blow it up to read the greeting! You could also “reveal” what experience you have planned to celebrate with (“I’ll pick you up for birthday lunch on me this Friday at noon!”) by writing it on the balloon.
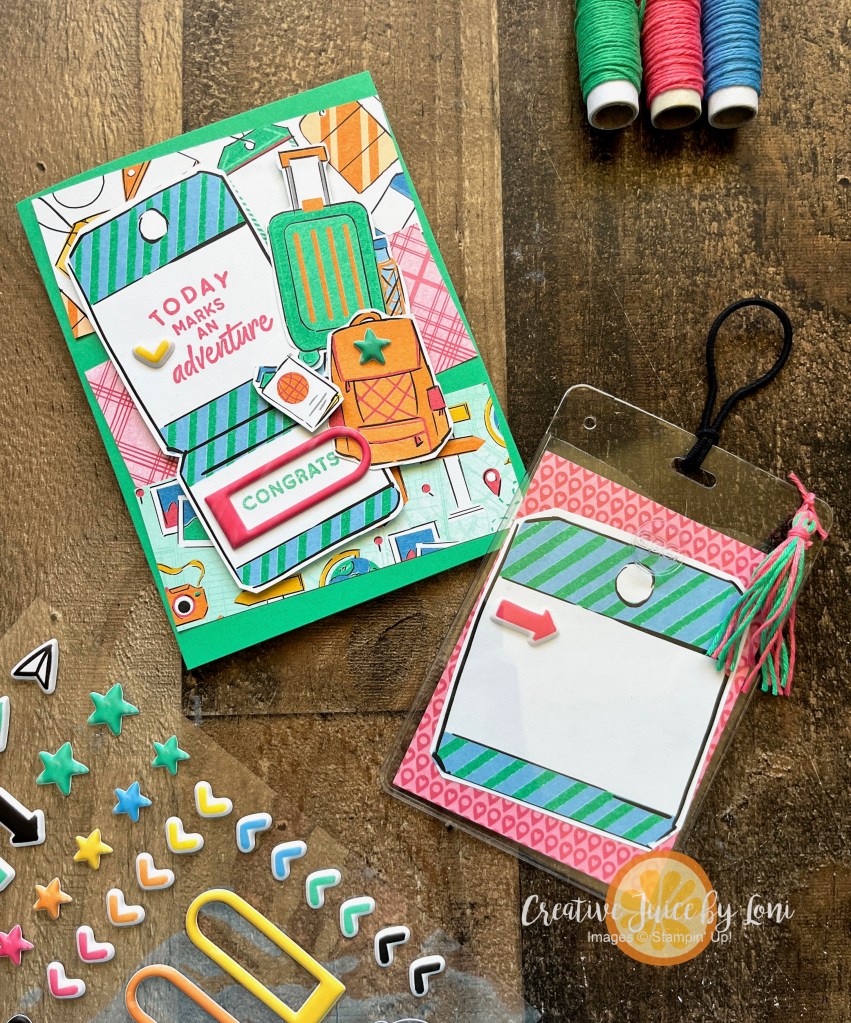
And finally, since Graduation season is imminent, Card #4 was created with the On the Go Suite Collection and includes a LUGGAGE TAG:
This will be for my niece who is graduating from High School this month and off on a grand European adventure to celebrate (remember when we were just happy to have cake & ice cream to mark a milestone like graduation 👩🎓 😂?)
I added the tassel after the demonstration in the video, and think the detail is adorable.
Missed the LONG LIST (and growing) OF MAILABLE GIFT ITEMS? Check it out HERE!
If you enjoy learning “how-to”, here’s today’s sketchy tutorial:
Thank you for choosing to shop with me. Most of the products used were linked throughout this post – just click on a product to add it to your cart…and watch for an exclusive tutorial bundle from me when you spend more than $50 in one month!
Connecting with you is a joy ~ Check out my upcoming events (in person AND online):
Have you ever made a scrapbook page and thought, “I should frame this!”?
You’ve visited during our New at SU! April Blog hop, where we are encouraging you to MAKE MEMORIES LAST with Stampin’ Up! products. You’ll want to visit all the other posts, too!
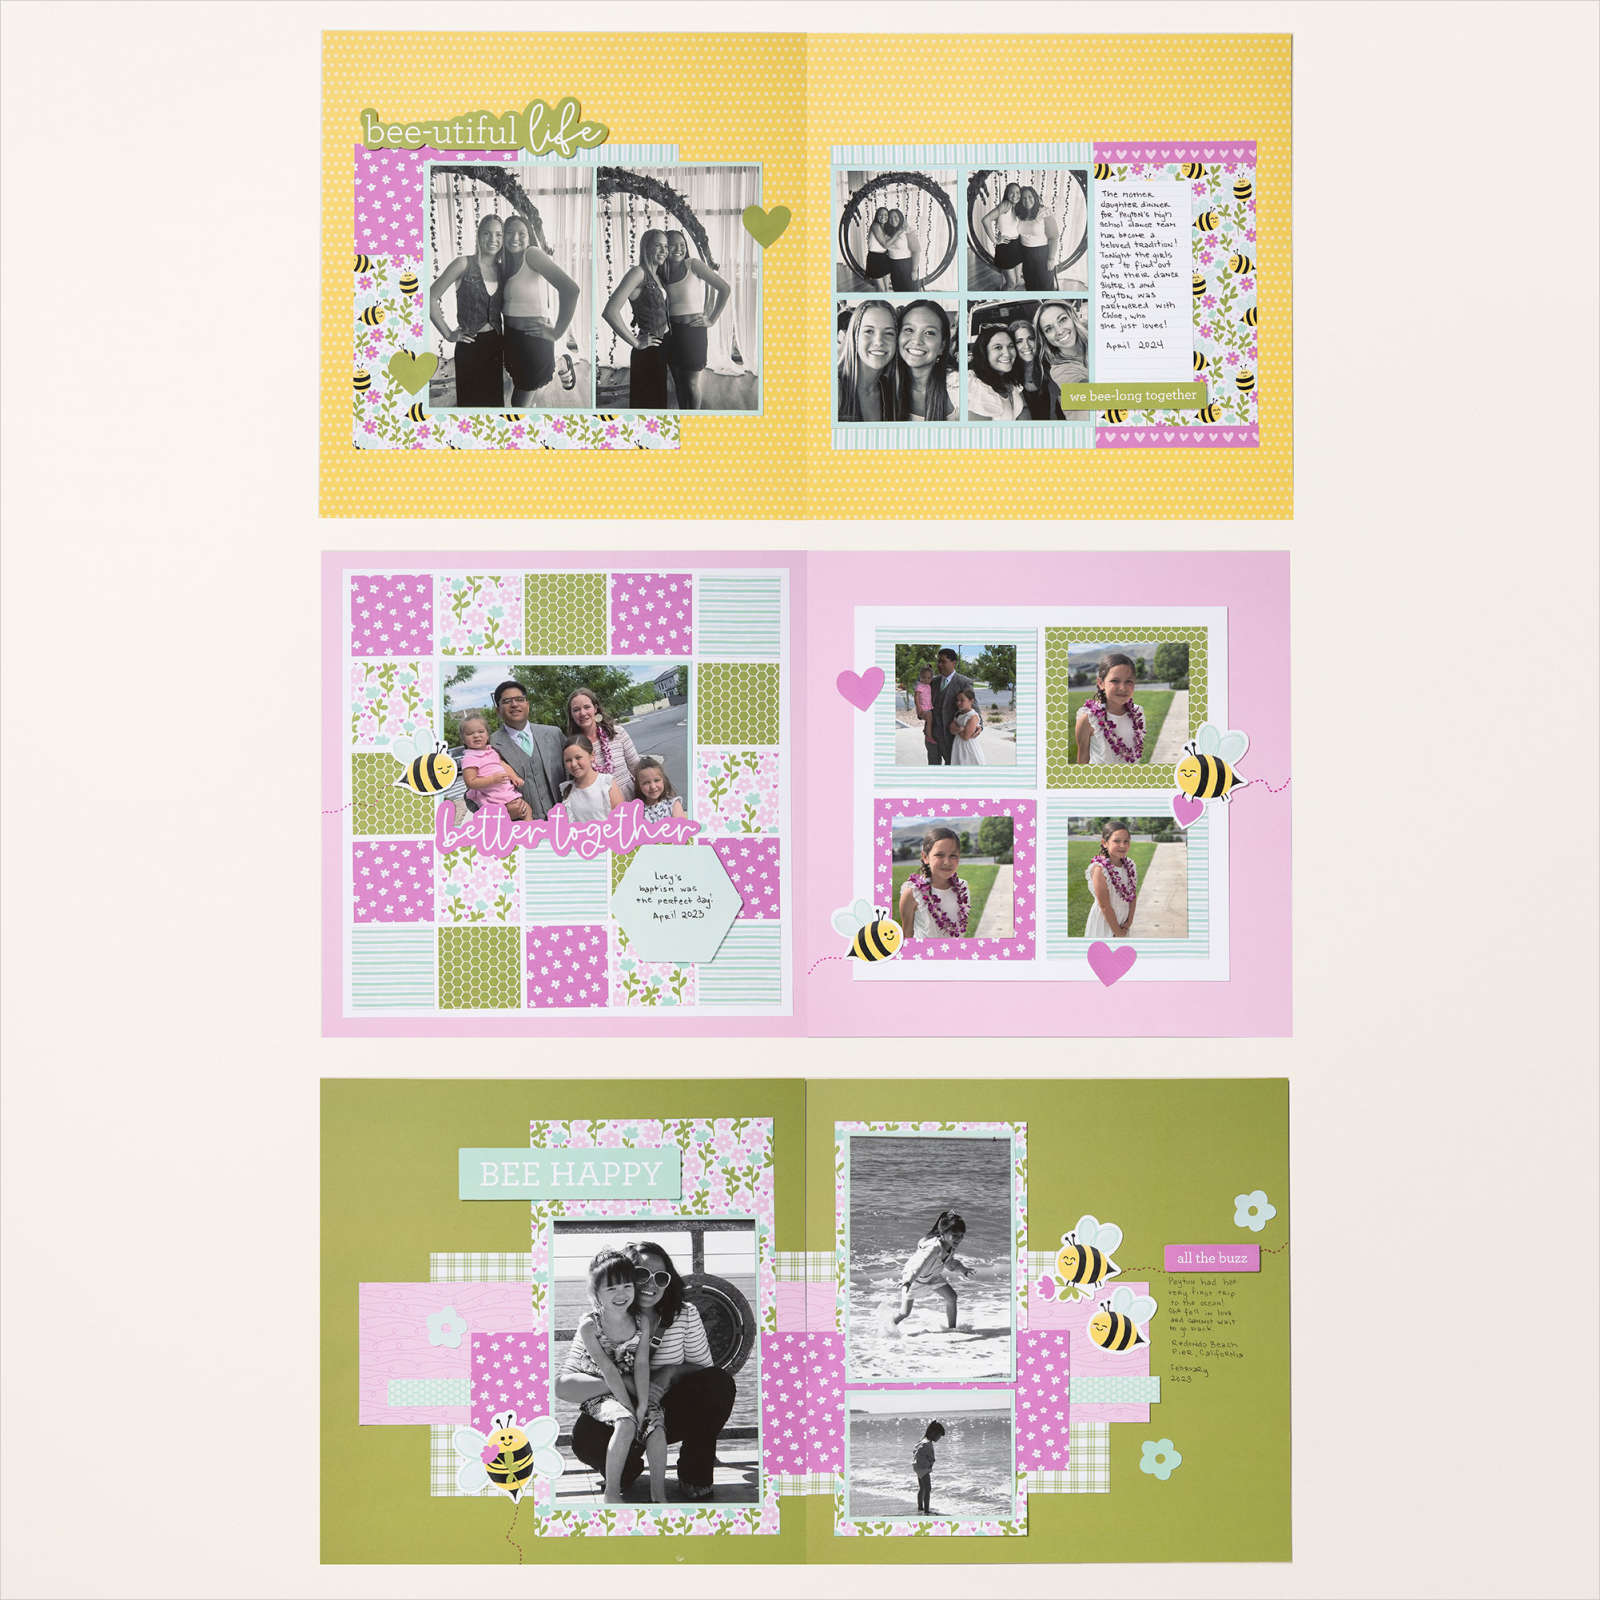
This 12″ x 12″ page came together in minutes, using only a few pieces of card stock and the pack of patterned paper and stickers. While I don’t love my handwriting, I know how much I cherish keepsakes with my grandmother’s penmanship (it’s a piece of her that remains), so I took time to pen a few things I love about my granddaughter.
This was my favorite selfie we took when she spent a few days here last summer, so I put it into a 12×12 frame to hang up and enjoy a while longer, before it ends up in an album.
There are enough supplies leftover from the Paper & Sticker Sheet pack to create at least another 3-4 pages, or you could use them for other projects, PLUS Stampin’ Up! has a coordinating bundle of stamps and dies that you’ll enjoy incorporating into all your BEE-utiful projects: Meant to Bee bundle.
Don’t want to design a page yourself? You’ll appreciate the Meant to Bee Scrapbook Workshop Kit which creates three double-page layouts (shown above) with detailed instructions and plenty of product left over to make a few more!
Next, BUZZ on over to Heather’s contribution using a beautiful new online exclusive suite: Botanical Textures! She’s up next and you can collect every sweet memory-keeping idea like pollen on a bee 🐝
April 2025 New at SU! Blog Hop: Making Memories Last
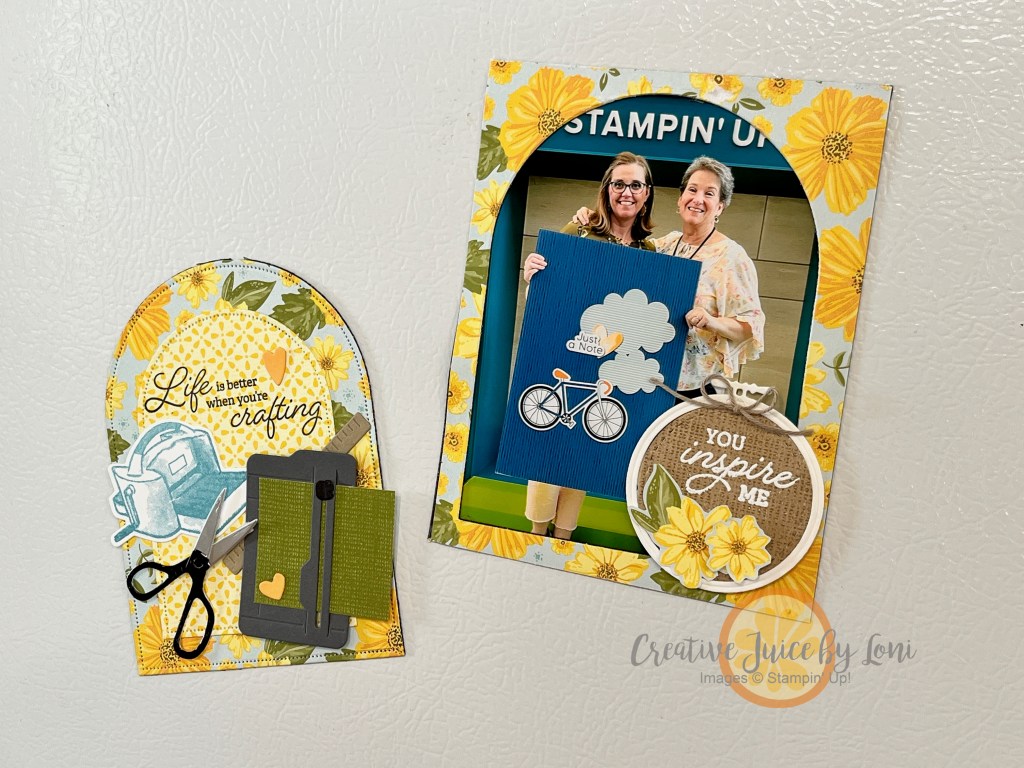
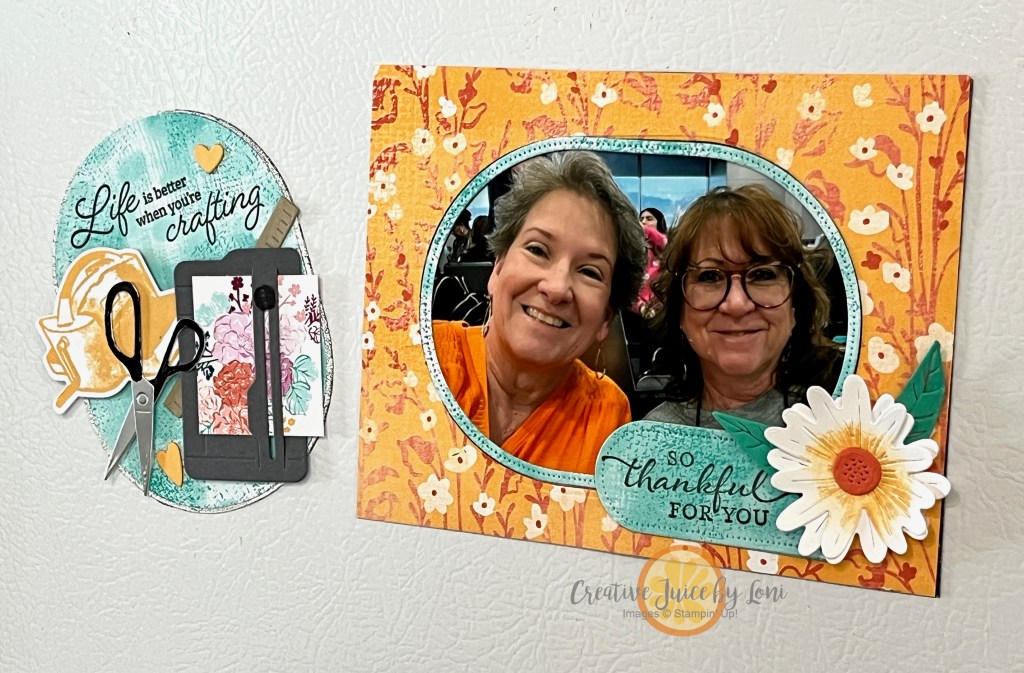
Back with another gift that fits inside an envelope for mailing (if you missed the previous ideas, bookmark that post HERE)! This magnet frame is a TWO-FER since you get two magnets from one project, and can include both the photo frame and extra magnet as a bonus gift.
These are actually on my fridge! I wanted to show that they do stick with the magnet sheetsused today (click link to shop on Amazon). You can use ANY Stampin’ Up! products (Designer Series Paper, stamps, dies, etc.) but I will link the ones I used for this version below – THANKS FOR SHOPPING WITH ME!
Let’s get right to the video tutorial, which will answer most of your questions:
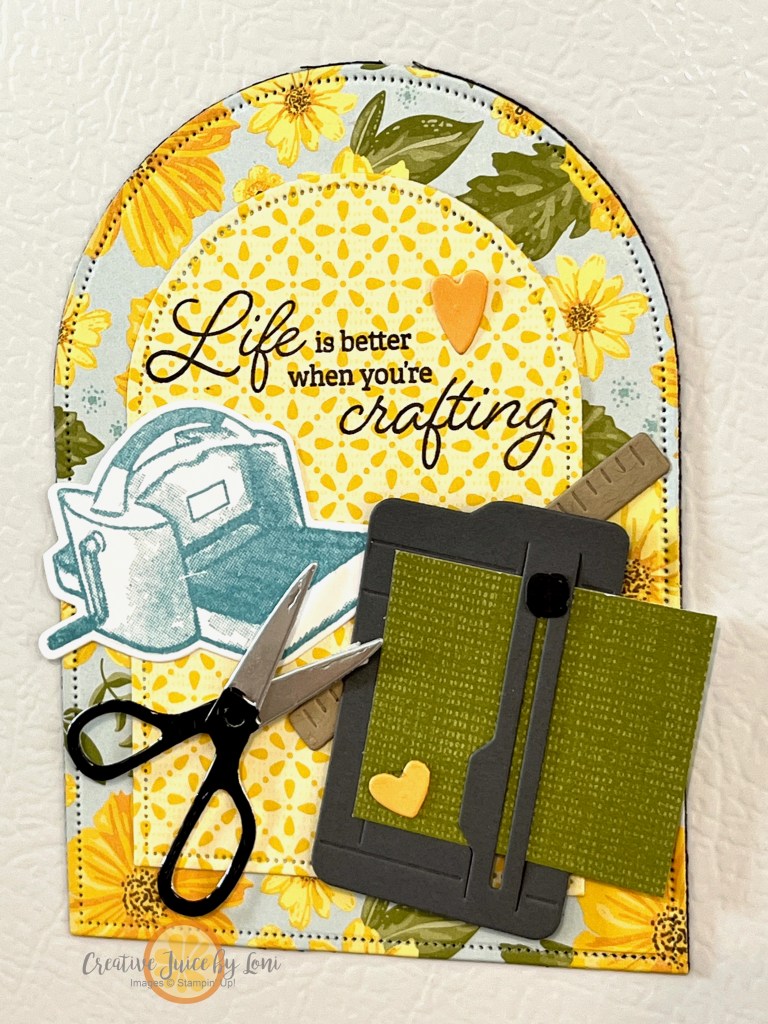
The Everyday Arches dies worked well for this frame: Roll it through the Cut & Emboss machine TWICE to cut through the layers of paper and magnet sheet.
Then use the inside arch for a second magnet. Think of it as a blank palette and “build” a scene just as you would a card front. I used the Crafting For You stamp set and dies, and just learned that the stamp set is already sold out/discontinued from the 2024-25 Catalog! Guess that’s a good reminder not to let something you love pass you by… at least the dies are still available, and many don’t need the stamps.
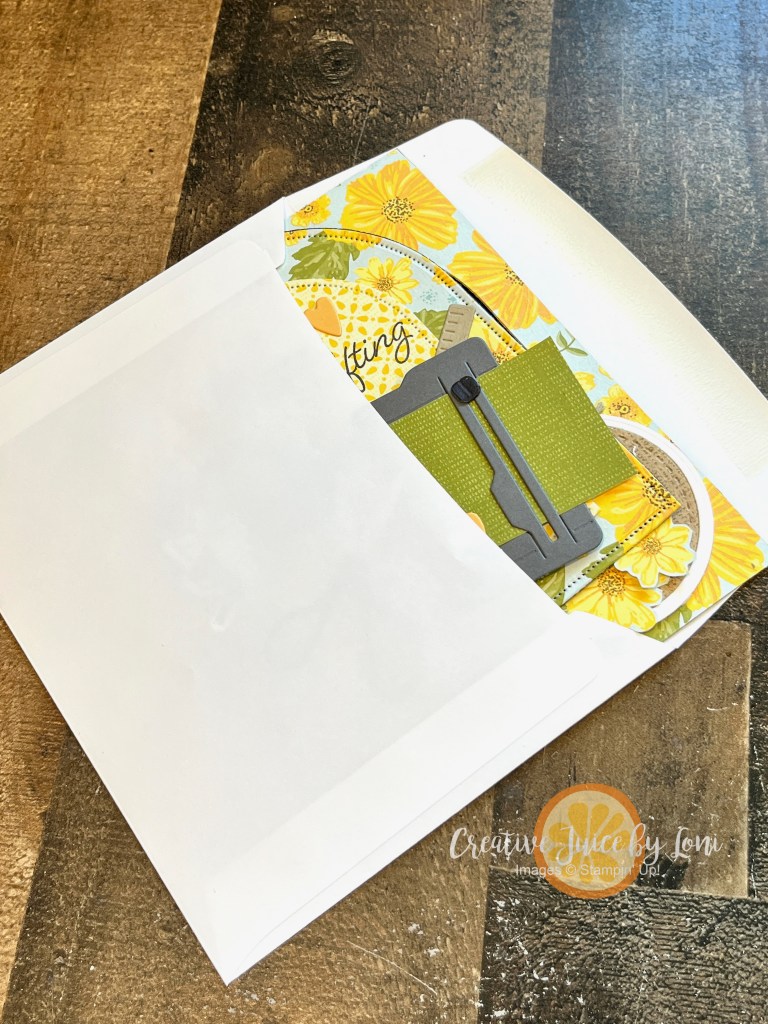
They can both be mailed in the same envelope. I made the magnet 4.25″ x 5.5″ to fit in the Basic White A2 envelopes, but you could certainly make a larger size if you have a larger envelope:
This version features an upcoming product (stamps & dies) called “Impressions Abloom” that will be released in the Online Exclusive section of my Stampin’ Store on May 6th. I paired it with the Unbounded Beauty Designer Series Paper. If you want to use the back side of the paper for the inside piece, remember to cut the shape from the paper BEFORE putting it on the magnet’s adhesive side, then run through the machine a second time to cut out the center piece.
Let me know if you’ll make one (blog comments at top of post by date) – or show me your version in my customer VIP Facebook Group, if you are a part of the Creative Juice Crafter’s Corner!
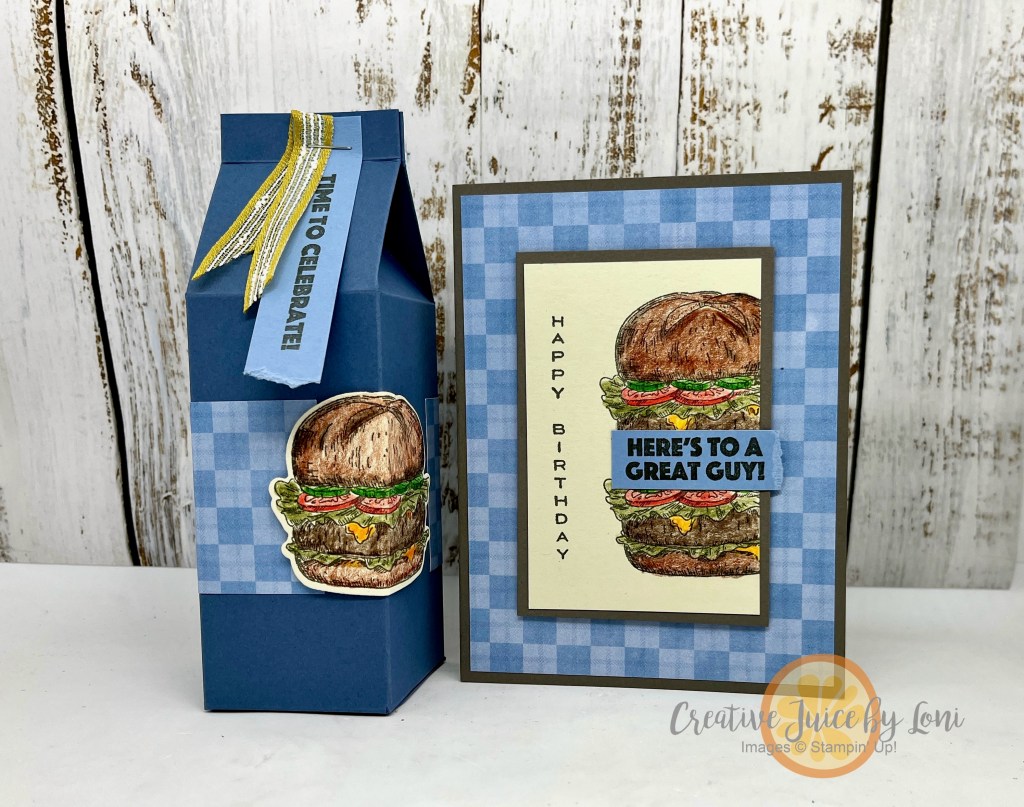
A double-patty burger is a satisfying meal for a birthday celebration AND makes a terrific card, thanks to Stampin’ Up!’s Burger Bistro bundle (stamps & dies). In particular, it also pairs well with the Timeless Plaid 6″ x 6″ Designer Series Paper, as you’ll see…
I like coloring this stamped image with our Watercolor Pencils, which you can use without water!
You can watch the tutorial for both card and gift box here:
It’s hard to stop with one card, when the plaid paper makes each card so unique!
A useful gift for the man who likes to grill burgers would be a shaker of hamburger seasoning, and this 2-4-6-8 box is just the right size. It’s speedy to make, starting with an 8-1/2″ square piece of card stock (instructions in the video).
SAVE/PIN this post, then give this card and gift box duo a try the next time you need a masculine birthday gift!
As we continue with the BIRTHDAY theme for March, today’s project is a Happy B-Day LOADED ENVELOPE! You saw the mini version a few weeks ago, and this time we started with a 12″ x 12″ piece of Designer Series Paper to make pockets that hold all the goodies a crafter could want.
On the side of the paper that you want for the outside of your envelope, score on each side at 3-1/4″, then turn 90 degrees and score 3-3/4″ from the bottom edge. You can watch the video below for exactly how to do this.
NOTE: This project works best if the pattern on the outside of your envelope is non-directional, like the flowers on this paper, which don’t have a right-side-up. I did make sure the bee paper was vertical on the back side, so the inside of my envelope shows them the correct direction.
Fold both sides toward the center and press open the “collar” and connect the sides in the front with Tear & Tape. Next, fold up along the 3-3/4″ score line to create the lower pocket(s). You may choose to cut about 1-1/2″ along the right side score line before folding up the pocket, so you can fold it down, as I did on the sample above, which allows you to fold the right edge down, revealing the back side of the paper, and forming a 3rd pocket (where the sticker is inserted).
Add finishing touches to decorate the front of the envelope, like the smallest hexagon focal point above, with a bee, flowers and sentiment. Follow along as I demonstrate:
Stuff your gift with a handmade card, paper snips, adhesives, embellishments (like the Tiny Bee Trinkets!) and other crafting essentials…like chocolate (dressed up in a sleeve of matching paper)!
I hope you’ll have as much fun making one of these as I did! Which crafty friend would appreciate this gift?
Thank you for shopping for the supplies below ~ your support means the world to me as a creator.
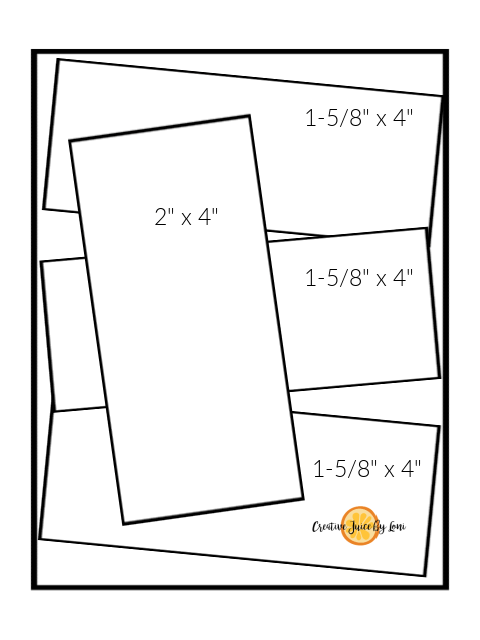
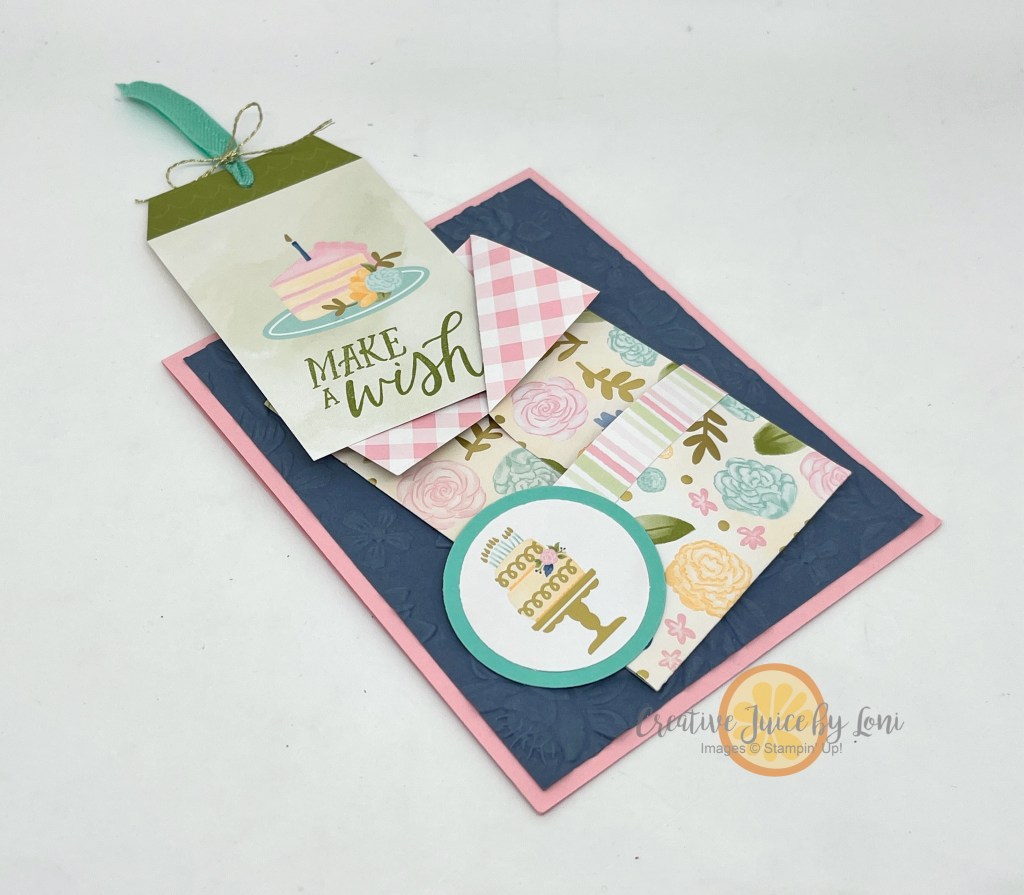
The month of March is a busy birthday month for my family, so you can expect to find a LOT of Birthday Inspo here for the next 4 weeks, starting with this fun pocket card, which fits one of the FIVE tags from the Designer Series Paper perfectly:
Yes, this is the SAME mini-loaded-envelope I created a few weeks ago using the Toadstool Gardens Designer Series Paper, and when I realized the tags fit perfectly, I had to make some birthday cards!
They come together quickly, and it would be easy to attach a gift card to the back of the tag with a strip of Stampin’ Seal! If you are handing it to the recipient in person, you could also slip a Ghiradelli square into the front pocket, as well.
Follow along with me in the video tutorial:
Instructions for POCKET: Start with a 6″ x 6″ piece of double-sided patterned paper, then score along two opposite sides at 1-5/8″. One the bottom, score at 1-7/8″. Fold paper in along both 1-5/8″ sides and on the top, fold out the corners in a “collar”, then adhere edges together in center. Next, fold up along 1-7/8″ score line and wrap a 1/2″ strip around the lower pocket edge (can adhere the lower pocket to the front, or along the sides, creating TWO smaller front pockets).
You really need to see this gorgeous paper in person to appreciate the gold foil accents, but here’s as close as I could get in a photo:
Thank you for purchasing the supplies from my Stampin’ Store to make your own~ watch for 30+ exclusive tutorials to be emailed to your inbox every month you order over $50 from my store AND a hand-stamped card to thank you for your business!


![On The Go Suite Collection (English) [ 165583 ]](https://assets1.tamsnetwork.com/images/EC042017NF/165583s.jpg "On The Go Suite Collection (English) [ 165583 ]")
![Shy Shamrock 8 1/2" X 11" Cardstock [ 163795 ]](https://assets1.tamsnetwork.com/images/EC042017NF/163795s.jpg "Shy Shamrock 8 1/2\" X 11\" Cardstock [ 163795 ]")
![Petunia Pop 8 1/2" X 11" Cardstock [ 163801 ]](https://assets1.tamsnetwork.com/images/EC042017NF/163801s.jpg "Petunia Pop 8 1/2\" X 11\" Cardstock [ 163801 ]")
![Basic White 8 1/2" X 11" Cardstock [ 166780 ]](https://assets1.tamsnetwork.com/images/EC042017NF/166780s.jpg "Basic White 8 1/2\" X 11\" Cardstock [ 166780 ]")
![Basic Black 8-1/2" X 11" Cardstock [ 121045 ]](https://assets1.tamsnetwork.com/images/EC042017NF/121045s.jpg "Basic Black 8-1/2\" X 11\" Cardstock [ 121045 ]")
![Pumpkin Pie 8-1/2" X 11" Cardstock [ 105117 ]](https://assets1.tamsnetwork.com/images/EC042017NF/105117s.jpg "Pumpkin Pie 8-1/2\" X 11\" Cardstock [ 105117 ]")
![Azure Afternoon 8 1/2" X 11" Cardstock [ 161719 ]](https://assets1.tamsnetwork.com/images/EC042017NF/161719s.jpg "Azure Afternoon 8 1/2\" X 11\" Cardstock [ 161719 ]")
![Adhesive Sheets [ 152334 ]](https://assets1.tamsnetwork.com/images/EC042017NF/152334s.jpg "Adhesive Sheets [ 152334 ]")
![Stampin' Seal [ 152813 ]](https://assets1.tamsnetwork.com/images/EC042017NF/152813s.jpg "Stampin' Seal [ 152813 ]")
![Stampin' Dimensionals [ 104430 ]](https://assets1.tamsnetwork.com/images/EC042017NF/104430s.jpg "Stampin' Dimensionals [ 104430 ]")


![Friends Of The Ocean 12" X 12" (30.5 X 30.5 Cm) Designer Series Paper [ 164684 ]](https://assets1.tamsnetwork.com/images/EC042017NF/164684s.jpg "Friends Of The Ocean 12\" X 12\" (30.5 X 30.5 Cm) Designer Series Paper [ 164684 ]")
![Daffodil Delight 8-1/2" X 11" Cardstock [ 119683 ]](https://assets1.tamsnetwork.com/images/EC042017NF/119683s.jpg "Daffodil Delight 8-1/2\" X 11\" Cardstock [ 119683 ]")
![Summer Splash 8 1/2" X 11 Cardstock [ 163797 ]](https://assets1.tamsnetwork.com/images/EC042017NF/163797s.jpg "Summer Splash 8 1/2\" X 11 Cardstock [ 163797 ]")
![Alphabet à La Mode Dies [ 160750 ]](https://assets1.tamsnetwork.com/images/EC042017NF/160750s.jpg "Alphabet à La Mode Dies [ 160750 ]")
![Mini Alphabet Dies [ 162934 ]](https://assets1.tamsnetwork.com/images/EC042017NF/162934s.jpg "Mini Alphabet Dies [ 162934 ]")
![Mini Stampin' Cut & Emboss Machine [ 150673 ]](https://assets1.tamsnetwork.com/images/EC042017NF/150673s.jpg "Mini Stampin' Cut & Emboss Machine [ 150673 ]")
![Tuxedo Black Memento Ink Pad [ 132708 ]](https://assets1.tamsnetwork.com/images/EC042017NF/132708s.jpg "Tuxedo Black Memento Ink Pad [ 132708 ]")
![Meant To Bee Photopolymer Stamp Set (English) [ 166583 ]](https://assets1.tamsnetwork.com/images/EC042017NF/166583s.jpg "Meant To Bee Photopolymer Stamp Set (English) [ 166583 ]")
![Bee My Valentine Photopolymer Stamp Set (English) [ 162547 ]](https://assets1.tamsnetwork.com/images/EC042017NF/162547s.jpg "Bee My Valentine Photopolymer Stamp Set (English) [ 162547 ]")
![Basic White Medium Envelopes [ 159236 ]](https://assets1.tamsnetwork.com/images/EC042017NF/159236s.jpg "Basic White Medium Envelopes [ 159236 ]")
![Paper Trimmer [ 152392 ]](https://assets1.tamsnetwork.com/images/EC042017NF/152392s.jpg "Paper Trimmer [ 152392 ]")
![Mini Glue Dots [ 103683 ]](https://assets1.tamsnetwork.com/images/EC042017NF/103683s.jpg "Mini Glue Dots [ 103683 ]")


![Cute As Can Bee 12" X 12" (30.5 X 30.5 Cm) Designer Series Paper & Sticker Sheet (English) [ 166618 ]](https://assets1.tamsnetwork.com/images/EC042017NF/166618s.jpg "Cute As Can Bee 12\" X 12\" (30.5 X 30.5 Cm) Designer Series Paper & Sticker Sheet (English) [ 166618 ]")
![Basic White 12 X12 (30.5 X 30.5 Cm) Cardstock [ 159231 ]](https://assets1.tamsnetwork.com/images/EC042017NF/159231s.jpg "Basic White 12 X12 (30.5 X 30.5 Cm) Cardstock [ 159231 ]")
![Petunia Pop 12" X 12" (30.5 X 30.5 Cm) Two Tone Cardstock [ 166690 ]](https://assets1.tamsnetwork.com/images/EC042017NF/166690s.jpg "Petunia Pop 12\" X 12\" (30.5 X 30.5 Cm) Two Tone Cardstock [ 166690 ]")
![Pool Party 8-1/2" X 11" Cardstock [ 122924 ]](https://assets1.tamsnetwork.com/images/EC042017NF/122924s.jpg "Pool Party 8-1/2\" X 11\" Cardstock [ 122924 ]")


![Floral Delight 12" X 12" (30.5 X 30.5 Cm) Designer Series Paper [ 164700 ]](https://assets1.tamsnetwork.com/images/EC042017NF/164700s.jpg "Floral Delight 12\" X 12\" (30.5 X 30.5 Cm) Designer Series Paper [ 164700 ]")
![Everyday Arches Dies [ 164629 ]](https://assets1.tamsnetwork.com/images/EC042017NF/164629s.jpg "Everyday Arches Dies [ 164629 ]")
![Crafting With You Dies [ 161225 ]](https://assets1.tamsnetwork.com/images/EC042017NF/161225s.jpg "Crafting With You Dies [ 161225 ]")
![Silver Foil Sheets [ 132178 ]](https://assets1.tamsnetwork.com/images/EC042017NF/132178s.jpg "Silver Foil Sheets [ 132178 ]")
![Early Espresso Classic Stampin' Pad [ 147114 ]](https://assets1.tamsnetwork.com/images/EC042017NF/147114s.jpg "Early Espresso Classic Stampin' Pad [ 147114 ]")
![Stampin' Cut & Emboss Machine [ 149653 ]](https://assets1.tamsnetwork.com/images/EC042017NF/149653s.jpg "Stampin' Cut & Emboss Machine [ 149653 ]")


![Meant To Bee Bundle (English) [ 167243 ]](https://assets1.tamsnetwork.com/images/EC042017NF/167243s.jpg "Meant To Bee Bundle (English) [ 167243 ]")
![Cute As Can Bee 12" X 12" (30.5 X 30.5 Cm) Designer Series Paper [ 166621 ]](https://assets1.tamsnetwork.com/images/EC042017NF/166621s.jpg "Cute As Can Bee 12\" X 12\" (30.5 X 30.5 Cm) Designer Series Paper [ 166621 ]")
![Simply Scored [ 122334 ]](https://assets1.tamsnetwork.com/images/EC042017NF/122334s.jpg "Simply Scored [ 122334 ]")
![Bubble Bath 8 1/2" X 11" Cardstock [ 161718 ]](https://assets1.tamsnetwork.com/images/EC042017NF/161718s.jpg "Bubble Bath 8 1/2\" X 11\" Cardstock [ 161718 ]")
![Daffodil Delight Classic Stampin' Pad [ 147094 ]](https://assets1.tamsnetwork.com/images/EC042017NF/147094s.jpg "Daffodil Delight Classic Stampin' Pad [ 147094 ]")
![Petunia Pop Classic Stampin Pad [ 163811 ]](https://assets1.tamsnetwork.com/images/EC042017NF/163811s.jpg "Petunia Pop Classic Stampin Pad [ 163811 ]")
![Bubble Bath Classic Stampin' Pad [ 161664 ]](https://assets1.tamsnetwork.com/images/EC042017NF/161664s.jpg "Bubble Bath Classic Stampin' Pad [ 161664 ]")
![Old Olive Classic Stampin' Pad [ 147090 ]](https://assets1.tamsnetwork.com/images/EC042017NF/147090s.jpg "Old Olive Classic Stampin' Pad [ 147090 ]")
![Tiny Bee Trinkets [ 164714 ]](https://assets1.tamsnetwork.com/images/EC042017NF/164714s.jpg "Tiny Bee Trinkets [ 164714 ]")
![Bone Folder [ 102300 ]](https://assets1.tamsnetwork.com/images/EC042017NF/102300s.jpg "Bone Folder [ 102300 ]")
![Tear & Tape Adhesive [ 154031 ]](https://assets1.tamsnetwork.com/images/EC042017NF/154031s.jpg "Tear & Tape Adhesive [ 154031 ]")


![Wildflower Birthday 12" X 12" (30.5 X 30.5 Cm) Specialty Designer Series Paper [ 164591 ]](https://assets1.tamsnetwork.com/images/EC042017NF/164591s.jpg "Wildflower Birthday 12\" X 12\" (30.5 X 30.5 Cm) Specialty Designer Series Paper [ 164591 ]")
![Birthday Celebration Photopolymer Stamp Set (English) [ 164592 ]](https://assets1.tamsnetwork.com/images/EC042017NF/164592s.jpg "Birthday Celebration Photopolymer Stamp Set (English) [ 164592 ]")
![Pretty In Pink 8 1/2" X 11" Cardstock [ 163793 ]](https://assets1.tamsnetwork.com/images/EC042017NF/163793s.jpg "Pretty In Pink 8 1/2\" X 11\" Cardstock [ 163793 ]")
![Misty Moonlight 8-1/2" X 11" Cardstock [ 153081 ]](https://assets1.tamsnetwork.com/images/EC042017NF/153081s.jpg "Misty Moonlight 8-1/2\" X 11\" Cardstock [ 153081 ]")
![Coastal Cabana 8-1/2" X 11" Cardstock [ 131297 ]](https://assets1.tamsnetwork.com/images/EC042017NF/131297s.jpg "Coastal Cabana 8-1/2\" X 11\" Cardstock [ 131297 ]")
![Misty Moonlight Classic Stampin' Pad [ 153118 ]](https://assets1.tamsnetwork.com/images/EC042017NF/153118s.jpg "Misty Moonlight Classic Stampin' Pad [ 153118 ]")
![Pretty In Pink 3/8" (1 Cm) Bordered Ribbon [ 163784 ]](https://assets1.tamsnetwork.com/images/EC042017NF/163784s.jpg "Pretty In Pink 3/8\" (1 Cm) Bordered Ribbon [ 163784 ]")
![Gold Twisted Thread [ 164603 ]](https://assets1.tamsnetwork.com/images/EC042017NF/164603s.jpg "Gold Twisted Thread [ 164603 ]")
![1-3/4" (4.4 Cm) Circle Punch [ 119850 ]](https://assets1.tamsnetwork.com/images/EC042017NF/119850s.jpg "1-3/4\" (4.4 Cm) Circle Punch [ 119850 ]")
![Layered Florals 3 D Embossing Folder [ 162935 ]](https://assets1.tamsnetwork.com/images/EC042017NF/162935s.jpg "Layered Florals 3 D Embossing Folder [ 162935 ]")
![Multipurpose Liquid Glue [ 110755 ]](https://assets1.tamsnetwork.com/images/EC042017NF/110755s.jpg "Multipurpose Liquid Glue [ 110755 ]")
