New at SU! A Lemony Sketch

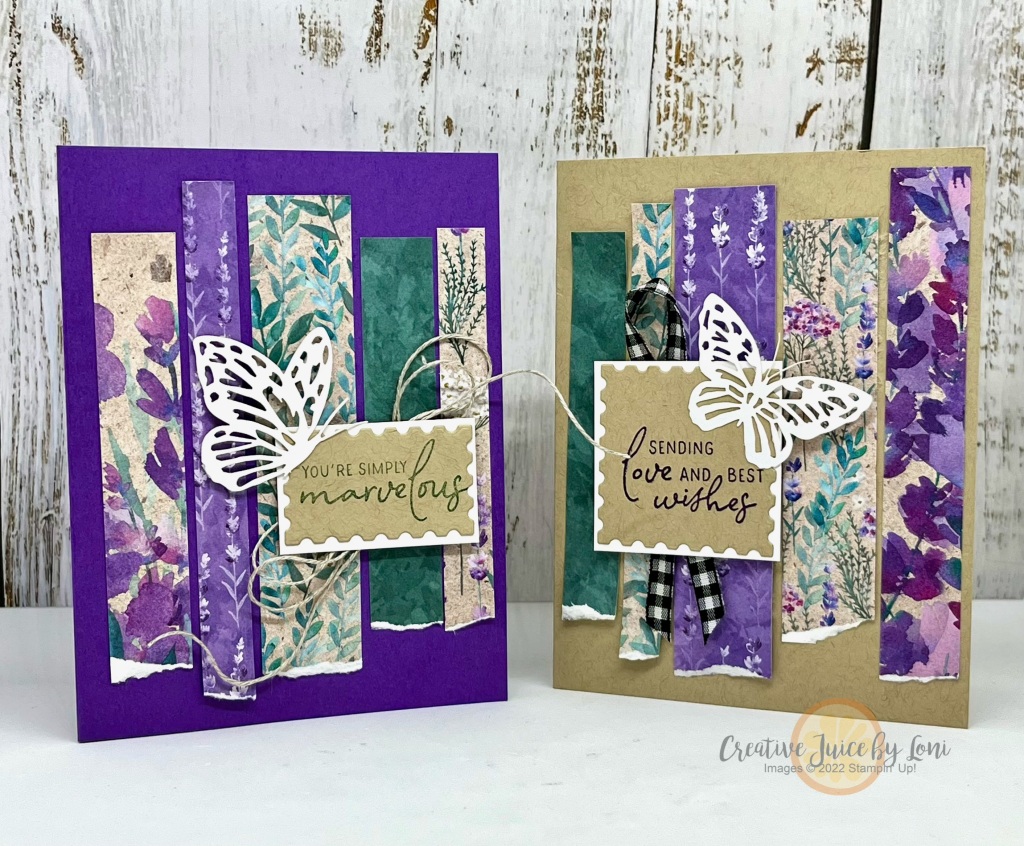
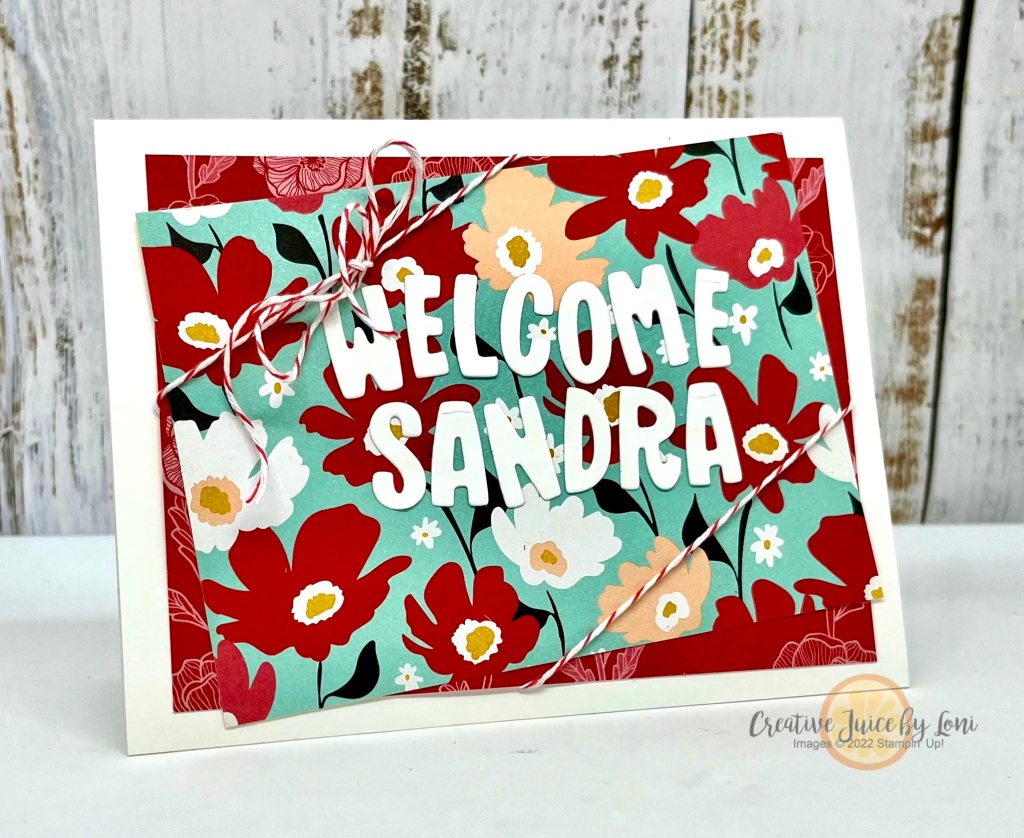
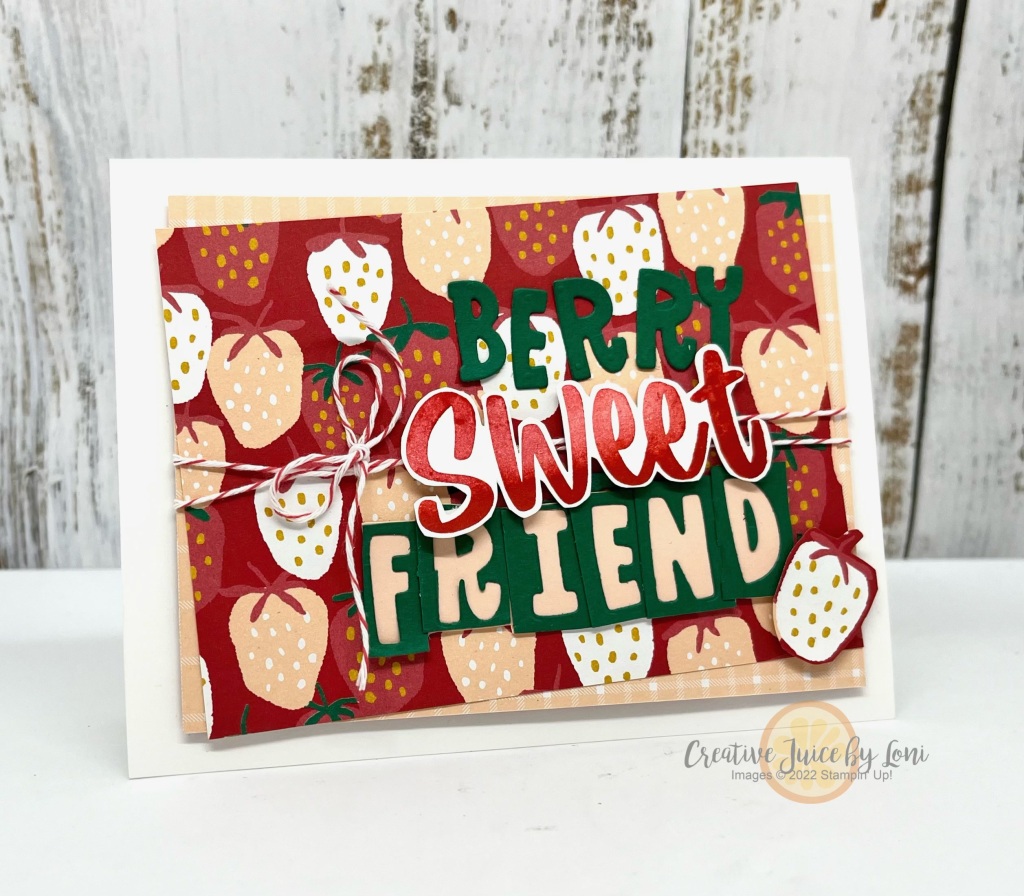
You’re here to see how Stampin’ Up! card sketches from the 2024-2025 catalog (pg 22) can improve your cardmaking skills, and our International #NewAtSU design team is taking the assignment seriously!

This is the sketch I chose:

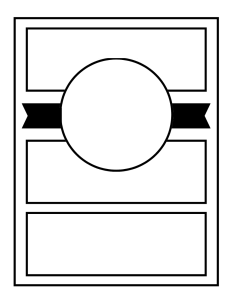
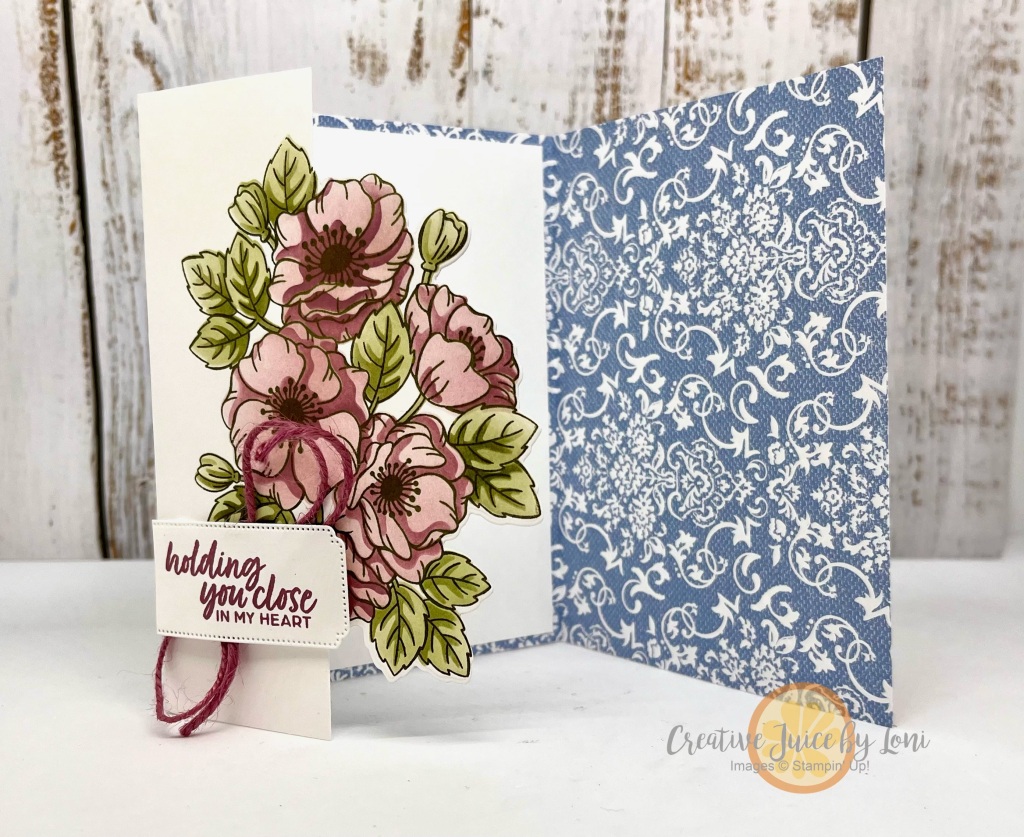
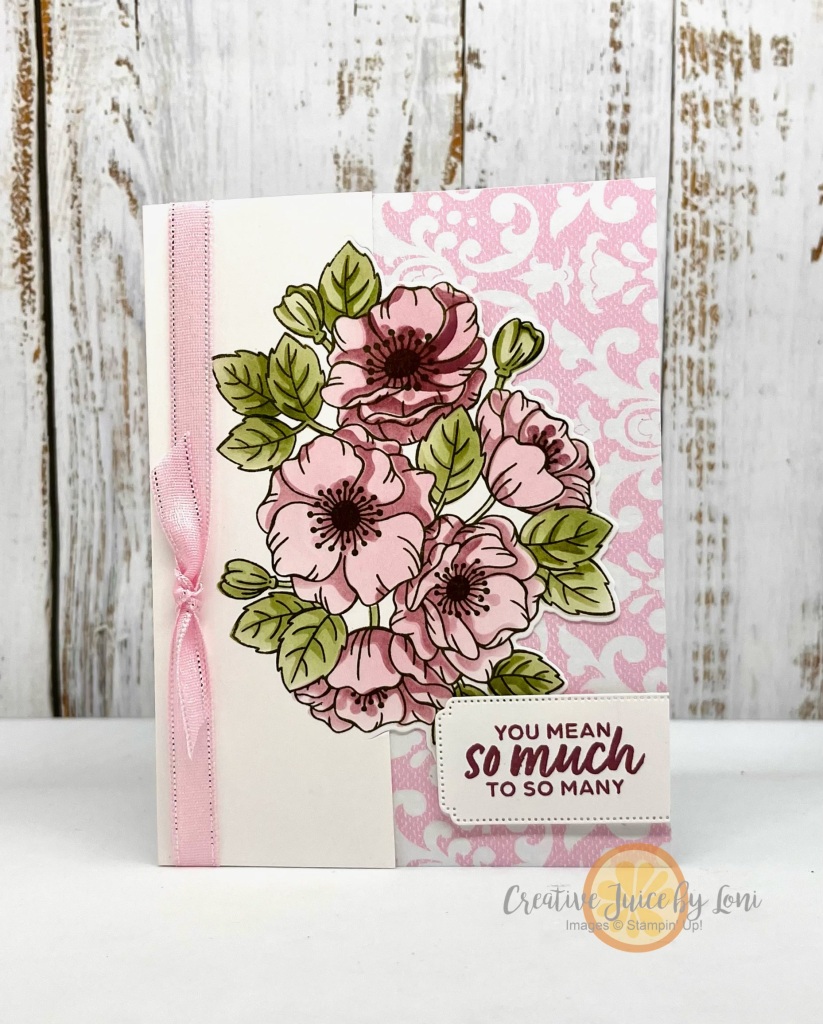
Here is how it inspired me:

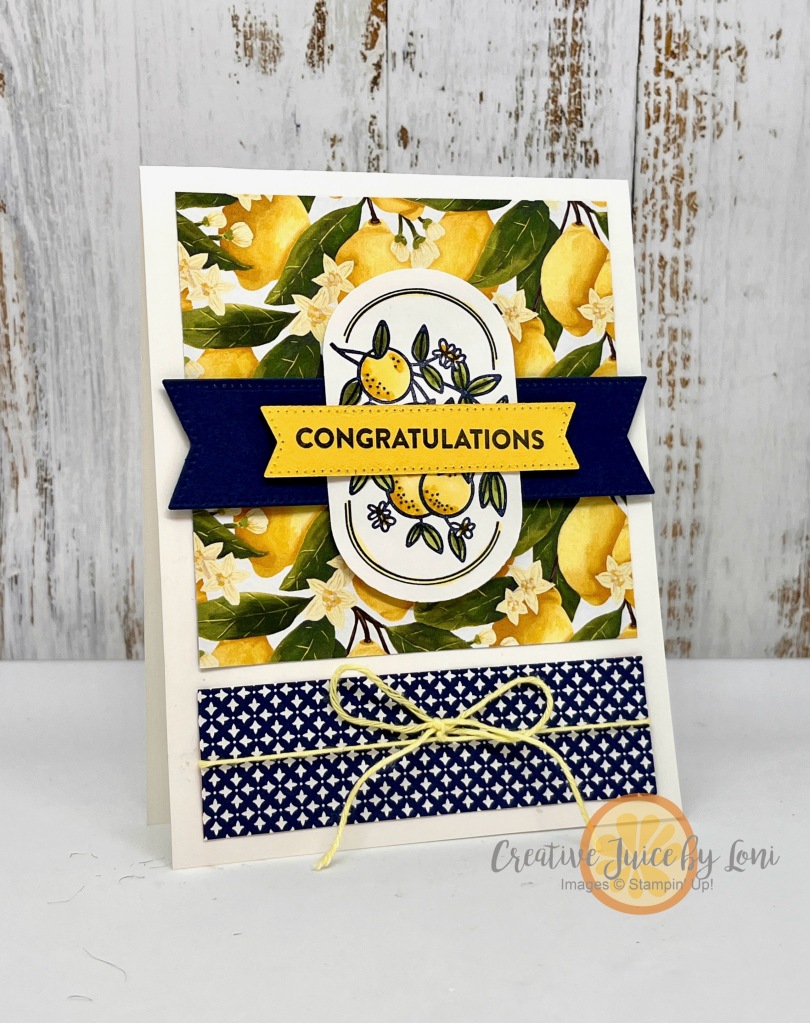
You’ll notice that I didn’t use 3 panels, but allowed my banner to visually divide the lemon Designer Series Paper. That’s the thing about a sketch = it’s there to give you a place to start, then run in whichever direction your heart takes you!

Try mixing up products, too! I thought the Mediterannean Blooms lemon paper would make a fabulous backdrop for the image from the Filled with Happiness set, and it did. That Navy & Yellow combination is summery and sweet.

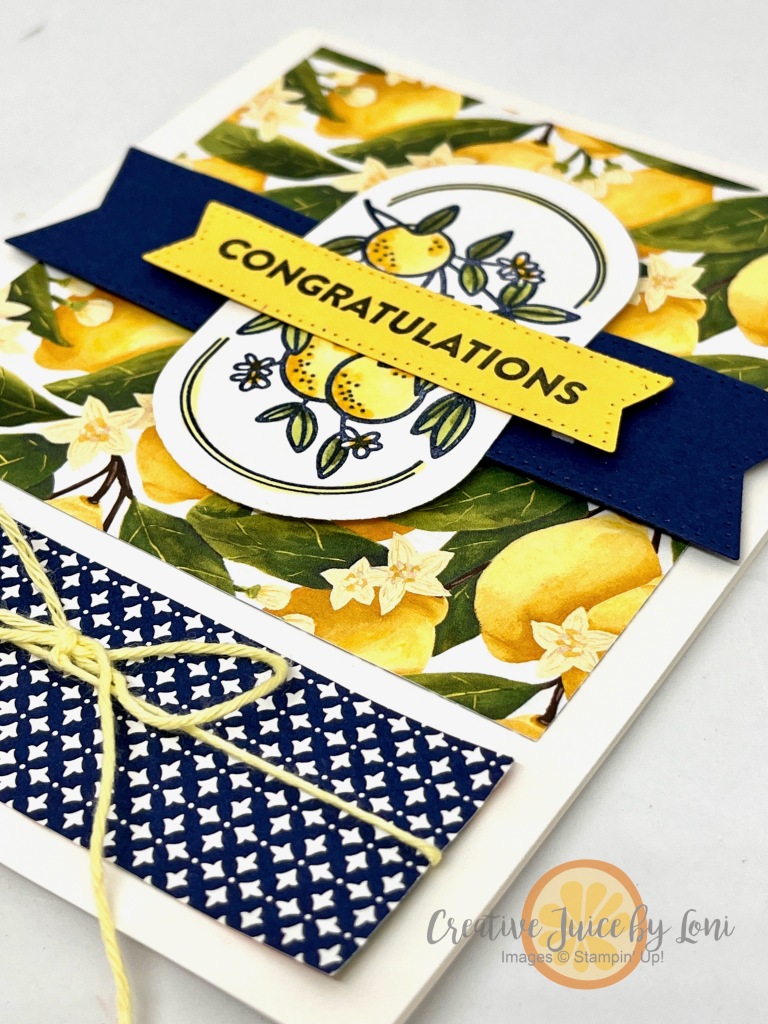
I cut both the navy banner and the lemon oval in half to stretch across the card and give room for the Congratulations sentiment. This would be a unique baby congrats card, or a wedding celebration! It’s just generic enough to fit any occasion.

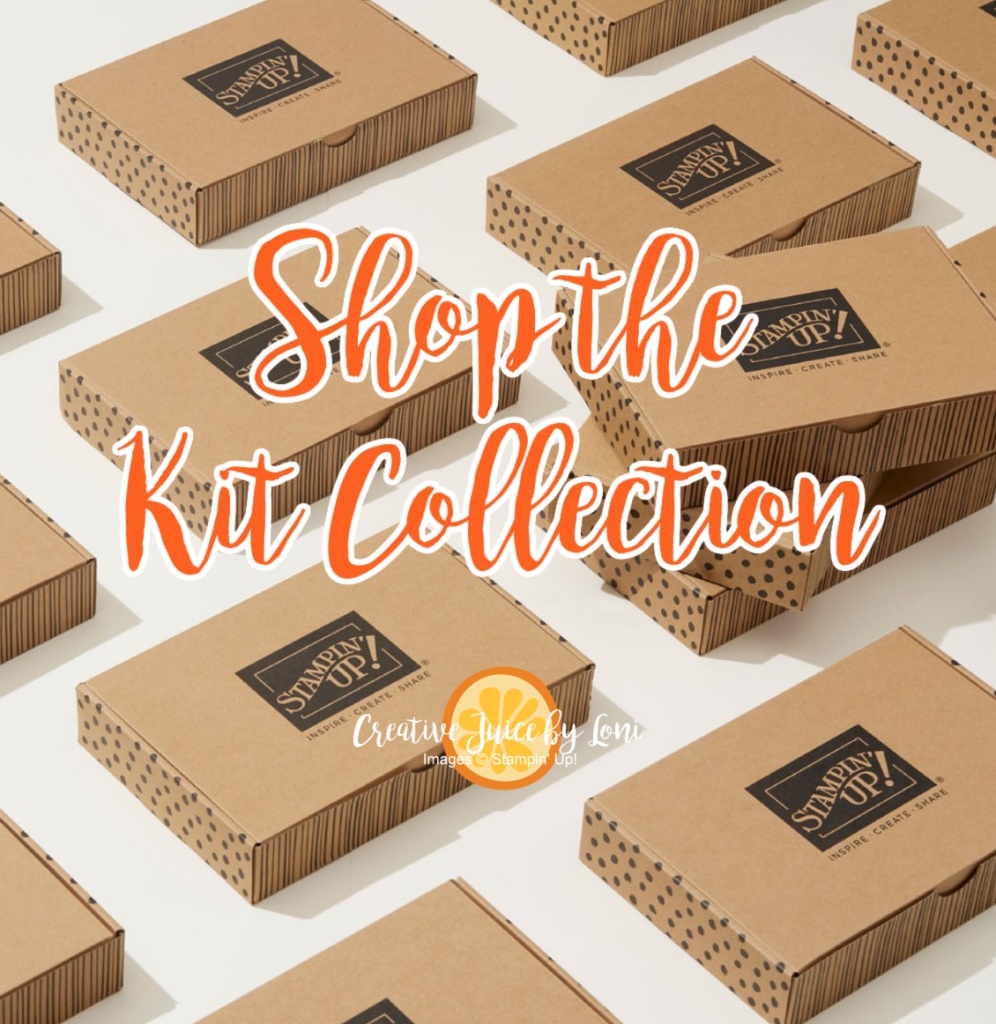
Once you’ve left me a comment and have filled your cup with creative juice (and your cart with supplies), move along to see how all the other stampers used these wonderful sketches, then TRY ONE YOURSELF.

June 2024 New at SU! Blog Hop: Catalog Sketch Inspiration – Visit them all!

1.Merrick Makings (AUS) – Secret Sketches of SU!
2.Creative Juice by Loni (US) – A Lemony Sketch, Congrats
3.I Heart Cards 2 (US)- Catalog Sketch with Country Woods Collection
4.Stamping Flair (AU) – Flower Cart Stamp Set
5.Furry Cat Designs (UK) – Sketched Butterflies Sketch
6.Nature’s INKspirations (US) – A Sketch Inspired Thoughtful Journey
7.scraphexe (DE) – Sketch Layers of beauty | Liebenswerte Lagen
8.Stampinxime (DE) – Tune In – Geburtstagskarte nach S
9.Tricia’s Stamping Creations (USA) – Latte Love
10.247 Inkspiration (US) – Happy Little Things
11.De Kijkkast (NL) – Veggies and a sketch!
12.Joni in the Spotlight Stamping (USA)-New at SU-Catalog Sketch with La

Powered by blogcarousel.com

Product List

Did you know the Boho Blue Mini Cut & Emboss Machine is less expensive than the white mini machine, with the same performance? AND all the machines are 10% off through June 30th – don’t miss it!

Zinnias for Catalog Sketch, June Bundle Sale

Have you noticed the 22 card sketches on page 22 of the Annual Catalog? You’ll want to turn to these any time you’ve lost your crafting mojo, for they will give you a “map” to follow as you get back into your stamping groove.

If you look closely, you may spy samples throughout the catalog that follow a sketch, as well.

I decided to use the Simply Zinnia bundle to follow this sketch for the #CreativeChallengeSU :

These colors feel like SUMMER and make me want to plant some in my yard.

I know that the Simply Zinnia bundle and Flowering Zinnia Suite are backordered (as of June 6, 2024) but they should be back in stock by the week of June 24th which will give you time to order the bundle during the June “Extra 10% Off” sale on all BUNDLES (Stamps + Dies)!

During June, the Stampin’ Cut & Emboss Machines are all 10% off as well – original size, mini and Boho Blue mini machine, too! Bring one (or a second one) home to your craft room.

Product List

Squash Fun-Fold Card

Usually, I’m a bit more timely in posting my finished project from my Monday Lunchtime Live crafting videos, but we were focused on tending the grandkids. I’m just now getting settled back at home and sharing this (late Saturday night)…better late than never!

This fun-fold card is called a “squash card” and begins with an 8.5″ square piece of card stock. Once finished, the card squashes (or smashes) flat to fit into a standard Stampin’ Up! envelope.

Measurements for the pieces:

  • 8.5″ square card stock, scored at 4.25″ horizontally and vertically AND once diagonally.
  • Designer Series Paper: One 3.75″ square and two 3.5″ square
  • Basic White card stock: Two 3.75″ squares, plus a piece to stamp a greeting and/or images to embellish with.

I die cut images from the Designer Series Paper for the front of my cards, but you could just as easily stamp what you’d like for the top of your cards.

Now peek inside:

TIP: The same design can be used on a 12″ x 12″ piece of card stock to create a mailable scrapbook page! Place photos where any of the paper or card stock layers are, and save a spot to journal about the memories, then fold it up to send to a friend to remember a happy day together.

Watch for instructions:

Thanks for ordering the supplies from my Stampin’ Store so I may continue to bring you ideas to try!

Product List

Good news! Starting June 5th, both the standard and mini Cut & Emboss Machines will be 10% off (they have NEVER been on sale before!) PLUS stamp + die bundles- which are already 10% off – will be available for an ADDITIONAL 10% discount through June 30, 2024.

Simply Zinnia Thank You Card Slanted Background In Color 2024-2026

In Color Zinnia Card Duos

If there were a contest for the “most cheerful flower”, don’t you think ZINNIAS would take the prize?

Today’s card(s) feature the Simply Zinnia bundle (an online exclusive available now in my Stampin’ Store) as well as the 2024-2026 In Color products that will be in my store on May 1st!

This slanted background is a handy template to remember (or PIN!) because you can create TWO cards in about the same time it takes to make just one!

It all starts with a 6″ x 3-3/4″ piece of In-Color Designer Series Paper. Mark it at 2″ on the bottom long edge (on the back side of the design you want to use) and at 4″ on the top long edge. Then cut it from the 2″ mark to the 4″ mark. Layer each of those pieces onto a 4″ x 5-1/4″ piece of Basic Black card stock and you are halfway done.

TIP: The leftover 6″ x 2-1/4″ piece of Designer Series Paper fits perfectly on the flap of your envelope, giving you terrific coordination!

Watch the tutorial (speed it up, if desired) to learn how to finish up the card:

And why stop at 2 cards when you can make 10? Two in each of the 2024-26 In Colors: Petunia Pop (shown above), Summer Splash, Peach Pie, Pretty In Pink and Shy Shamrock!

These colors coordinate beautifully, so you can even mix up the colors on the flowers- with the alcohol-based Stampin’ Blends markers, the colors bleed together smoothly:

Here are a few wonderful ways to collect the new IN COLORS:

  • Join my IN COLOR COLLECTORS CLUB and receive a package each month (May-September) filled with a sampling of ALL the products in each of the colors, including an exclusive projects each month…PLUS a FREE BASIC BEIGE BONUS the last month!
  • Too impatient to collect slowly? Purchase ALL the colors in May or June from my Stampin’ Store and earn the Basic Beige Bonus FREE!
  • Join my Sprinkled Ink Team in May and receive 4 new In Color Products in the Starter Kit FREE!! Offer good May 1-31, 2024.
Life is Grand Mini Album, Lighter than Air Designer Series Paper

New at SU!- CASEing Karen’s Mini Album

What a creative challenge we have for April’s New at SU! Blog Hop! We are “CASE”ing (= Copy And Share Everything) each other on the design team, and I was inspired by Karen Henderson’s fabulous MINI ALBUM that she made for our last hop AND her OnStage 2024 experience!

If you didn’t see Karen’s album last month, you’ll be visiting her Furry Cat Designs blog next, or you can click on the link above to see how she used the Nature’s Sweetness products to create her album in March.

I chose to use the Lighter Than Air Designer Series Paper and the Mini Alphabet Dies to capture the fun of being GRANDparents and make my album with a fold over closure to keep it all together.

Karen’s idea to score the 6″x6″ pages at 4″ was brilliant, so I did the same. On the “short” pages, I added a photo or journaling flap:

Here are some of the pages in my album (just starting to journal our recent visit to see the grandkids…):

Because my pictures are larger, I cut some of them to spread across two pages.

The album base is 6.5″ x 11″, scored at 4.25″, 4.75″, 9″ and 9.5″ and used 11 sheets of the 6″ Designer Series Paper to create the pages, gluing them back to back. On a few (like the tulip page above), I just adhered the edges and bottom of two pages together, so I could create a pocket between them with a large tag I can pull out and journal on! Other supplies listed below.

Perhaps this type of album should be a class? Would you be interested in attending?

I’m so glad you visited me and hope you’ll leave a message for me before you hop over to Furry Cat Designs to see how Karen was inspired by Angie!

April 2024 New at SU! Blog Hop: CASE a Team Member

Previous Blog Next Blog
1.247 Inkspiration (US) – Submarine Life
2.scraphexe (DE) – Case a Team Member (Rochelle)
3.Stamping Flair (AU) – Case a Team Member with Adventurous Sky
4.Playing with Papercrafting (CA) – CASEing Lynda Jacobson Day for New
5.My Flutterby Moments (US)-C.A.S.E Copy and Share Everything
6.De Kijkkast (NL) – Coffee Collagecard – Casing Tricia
7.Tricia’s Stamping Creations (US) – CASEing Nina’s Southern Accents
8.Nina’s Southern Accents (US) -New at SU! Blog Hop-Case a Team Member
9.Creative Juice by Loni (US) – Casing Karen’s Mini Album
10.Furry Cat Designs (UK) – Casing Angie’s Treat Box
11.Nature’s INKspirations (US) – CAS(e) a Team Member
12.Studio Shabaz (AU) – CASE A Member – Jan Musselman
13.iHeartCards2 (US) – Case A Team Member
14.Joni in the Spotlight Stamping (US) Sending Smiles & Countryside
15.The Joy of Stampin’ with Rachael (US)- CASE a Team Member

Powered by blogcarousel.com

Product List

Coloring with Masks (Enduring Beauty)

Masks (the fancy Stampin’ Up! term for stencils) make coloring stamped images speedy and simple!

I was truly WOWed with how quickly I was able to color the floral spray image from the Enduring Beauty bundle with the coordinating masks, blending brushes and ink pads. This is a technique you may embrace if you don’t love to color, OR if you are just getting started, you can stamp and color this image with just two ink pads! Watch & learn how:

Did you catch how to die cut just half the image so you can add a layer of Designer Series Paper as the background? For the video, I added a second fold that opens on the right:

But you can just add a 4 1/4″ x 5 1/2″ layer of Designer Series Paper behind the flowers to make it a regular card. I really like the look of the Poetic Expressions designs with the flowers, and used the colors of that paper for coloring the flowers, as well.

Turn the design sideways and try different colors, too.

It’s a beautiful stamp set to use for so many projects, and if you haven’t seen my two previous posts using this set this week, check out the Notebook Cover project HERE and the color challenge card HERE.

THANK YOU for shopping in my Stampin’ Store for GENUINE Stampin’ Up! products!!! It enables me to continue bringing you creative ideas and you are guaranteed high quality products with service from someone who cares about you.

Product List

Upcycle a Kit Box into a Gorgeous Gift

Maybe it’s because we’ve searched for a good box previously to no avail, but I am of the age that it’s difficult for me to throw away the boxes from Stampin’ Up! kits, or the pretty Paper Pumpkin boxes! They are such a perfect size for a half batch of BROWNIES, that it *almost* makes me want to bake a pan of ooey-gooey goodness, but then I’d want to eat the other half…

But what can we DO with those wonderful Stampin’ Up! boxes (aside from delivering goodies)??

Turn them into STATIONERY GIFT SETS!

Begin by covering the top with a piece of card stock and/or Designer Series Paper and embellish as desired. The February Paper Pumpkin kit box was also one I kept to modify, and because it was pre-printed, it took a smaller piece of card stock that I embossed for the center:

Next, you’ll also re-cycle the cardboard backing from a package of Designer Series Paper by cutting it into two pieces:

  • 12″ x 6 1/4″ – scored at 4 1/2″, 6″ and 7 1/2″
  • 4 1/2″ x 9 1/8″ – scored at 2 1/2″, 4″ and 6 1/2″

Those two pieces will create the dividers for your box. These easily fit 6-8 cards & envelopes on the large sections, a small book of postage stamps in the smallest section and your could add tags, small gift enclosures, a pad of post-it notes or a treat in the medium section:

Here’s the video tutorial to discover how simple it is to make this handy project:

After the video, I remembered I had some Dollar Tree goodies to send to my grandkids, and lo-and-behold, they fit in a 2-section box… just leave out the second section divider and you could also put twice as many A2-sized cards inside:

As demonstrated in the tutorial, I made a few simple cards using up the scraps from my pack of Perennial Lavender DSP and the Paper Butterfly Accents, along with the Perennial Postage bundle:

What are you going to put in your boxes? I’d love to see how *you* upcycle an empty kit box…share your creativity in my VIP Facebook Group!

Now that you’ve seen what you can make with the boxes, shop for more in the current Kit Collection:

Don’t miss the chance to subscribe before April 10, 2024 for the Delicate Wings Paper Pumpkin Kit, and add the “Thanks & Beyond Dies” to coordinate with the April, May AND June Paper Pumpkin kits!

Product List

Birthday: Game On!

Our family loves to play games together- from board games to video games! A few of our favorites are:

  • Killer Uno (card game)
  • Perpetual Commotion (some call it Nertz)
  • Splendor (strategy)
  • Anything Mario (video)
  • Overcooked (video)

Seeing the “Level Complete” stamp set on my shelf reminded me that my son (an avid gamer) is adding an extra (year to his) life this month, so that’s where my imagination went when I saw today’s #tgifc463 Sketch Challenge.

I turned the sketch sideways and used the game controllers as the focal point:

The black & white designs on the Rock & Roll Designer Series Paper are truly awesome whenever you need a masculine background!

A black card is striking with Daffodil Delight and Tahitian Tide, just remember to add a white layer on the inside to write on.

While we are the subject of Tahitian Tide (a 2022-2024 In Color), remember that it’s one of these bright hues retiring at the end of April, 2024, and we don’t really have any bright turquoise to replace it right now, so order an ink refill for your ink pads and card stock of the same color for coordination!

Does your family have a favorite game to play together? Tell me!

To re-create this card, you can click on the supplies listed and order from my Stampin’ Store- that helps me so I can continue to bring you great ideas you are welcome to copy. or spark your own imagination!

Product List

Say What You Wanna Say

When you don’t have the right stamps to express yourself (or your quirky personality), reach for the Mini Alphabet Dies and spell it out (or make it personal)!

I demonstrated tips and tricks for using these very versatile letters to set you up for success in your crafting in a live video, and remember that while I used two Sale-a-Bration Designer Series Papers for my simple card designs (which papers are only available FREE with purchase for a few more days- through 2/29/24), you can use ANY patterned paper collections you have to make similar cards!

For the first card (above, top) I showed how to use Adhesive Sheets to cut a whole alphabet, for letters ready to adhere to a card anytime (plus how to store the leftover letters), but don’t throw away the negatives! Cut them into squares and use the outlines, too:

You can also make a master template with a window sheet to trace letters, add diagonal lines to create a shadow effect, then adhere die cut letters over the top of each letter:

Mix & Match them with other stamps you have, or use both letters and outlines:

If you’ve read this far, here’s a bonus card and tutorial to download!

It’s a pleasure to serve your creativity~ Share what you make with the Mini Alphabet Dies when you buy them from my Stampin’ Store, and I may spotlight your creativity in my VIP Facebook Group: Creative Juice Crafter’s Corner!

Product List

New at SU!- Blueberries Simple to Stepped Up

Welcome to the February New at SU! Blog hop! We want to show you how to use products from the January-April Mini catalog to create simple cards, with the option to “step them up”. Hop all around the world to see what our design team created for you!

Starting off simple: Blueberry Bunches are beautiful simply stamped on a Crumb Cake background and a white focal point! A strip of Glorious Gingham DSP brings a country-fair feel to this simple card.

Step it up by die cutting the top layer from the Everyday Details dies and color the blueberries with Stampin’ Blends.

For AVID crafters, you can really create a masterpiece when you:

  • Emboss blueberry branches in white on a Blueberry Bushel card base
  • Add a few layers of card stock and Designer Series Paper
  • Watercolor the fruit on watercolor paper using ink refills or watercolor pencils (use StazOn ink to stamp image for watercoloring).
  • Fussy cut the blueberry bunch and pop it up using dimensionals
  • Use Stampin’ Blends to color basic rhinestone jewels for added sparkle

Remember to stamp a layer for inside the card, if the base is a dark color, and don’t forget to stamp your envelope to match!

Scoot off to visit these simple-to-stepped-up ideas and leave a comment on your favorite posts or projects…and save them to give it a try:

February New at SU! Hop: Mini Catalog, Simple & Stepped Up
Previous BlogNext Blog
1.Joni in the Spotlight Stamping (US) Thoughtful Expressions Simple &am
2.Nature’s INKspirations (US) – Enduring Beauty
3.iHeartCards2 (US) – Stippled Roses
4.Creative Juice by Loni (US)- Blueberries Simple to Stepped Up
5.Attelyootje (NL) – Simple Stepped Up
6.Tricia’s Stamping Creations (US) – Perennial Lavender Suite
7.The Joy of Stampin’ with Rachael (US)-Easter Lilies
8.scraphexe (DE) – Stippled Roses | Rare Rose
9.247 Inkspiration (US) – Hills of Tuscany
10.Rebecca-Jo Unwin (AU)- Everyday Details
11.Stamping Flair (AU) – Beach Day Bundle
12.De Kijkkast (NL)- Lovely & Sweet

Powered by blogcarousel.com

It makes my day when you leave a comment!

Product List