After succumbing to temptation and adding the Pick of the Patch bundle to my crafting collection, I dreamed of combining it with the Abundant Beauty Masks (will hopefully be back in stock the week of Oct. 16!)
Pumpkin patches and sunflowers are the objects to take pictures with right now, and here are a couple of the cutest pumpkins in the sunflower patch (at least their grandmother thinks so):
Those adorable faces were the inspiration for today’s Lunchtime Live Crafting, and there are a few tips you’ll want to remember for aligning your stamps to make it easy to punch and how to use the masks, so here’s the replay:
DID YOU CATCH THAT THERE IS FREE SHIPPING TODAY through October 11, 2023 on orders over $75? That’s 3 days to replenish your supplies or get a start on holiday gifts!
That is a terrific deal (save 11%!) AND two more options to remember is our 35th Anniversary Starter Kit offer through October 31st(Starter Kits ALWAYS have free shipping, too!):
Choose 35% off the Starter Kit (normally $99): Select your own products ($125 worth) for just $64.35, free shipping, a free registration to OnStage@Home in November AND 20% off future orders through March 2024!
Choose 35% MORE in your starter kit: Select $168.75 in products for ONLY $99 (plus free shipping) and you also receive a free registration to OnStage@Home in November AND 20% off future orders through March 2024!
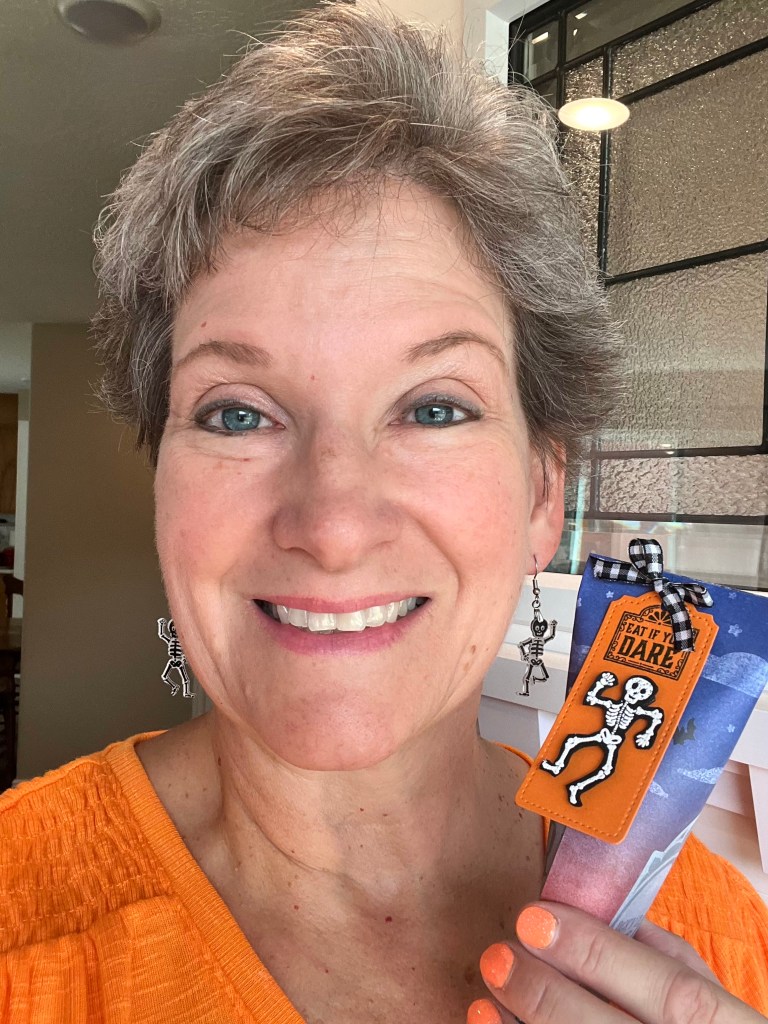
The “Sour Cream” package favor has been around for a while, but it’s a classic project to craft because it’s fast and adorable!
Obviously, they don’t usually stand up, but I wanted you to see how they “twist”!
It all starts with a 6″ x 6″ piece of Designer Series Paper and adhesive, then I added tags to coordinate using the Tailor Made Tags dies.
You can craft along with me in this video tutorial:
I wore my skeleton earrings to match the favor I demonstrated in the video! My Stampin’ Mama Sherrill Graff made them for me with the Bag of Bones bundle, black StazOn ink and shrink plastic:
Through October, Stampin’ Up! has an outstanding opportunity for the Starter Kit:
The Starter Kit is always the best value, but in honor of Stampin’ Up!s 35th anniversary this month, it’s absolutely irresistible!
35% OFF= Select $125 in product (including early release items only for demonstrators) for only $64.35, free shipping on the kit, PLUS a free ticket to our virtual OnStage event in November!
35% MORE= Select $168.75 worth of product and only pay $99 with free shipping, PLUS a free ticket to our virtual OnStage event!
With either Starter Kit, you’ll have the opportunity to see if the demonstrator life is for you! You’ll get to purchase your own supplies at a 20% discount through January 2024, get early access to new products and mingle with my Sprinkled Ink team. If you love it, you can keep going! I’m here to help you along the path and guide you as you explore the possibilities.
There are NO STRINGS ATTACHED…just a wonderful discount and a chance to try being a demonstrator with a warm & friendly group of creative people, and a peek behind the curtain at Stampin’ Up!
The Starter Kit is available to everyone, as many times as you’d like to take advantage of it, so click the image or Choose One button above to get started!
What a delight to have my dear friend and Sprinkled Ink teammate Ann Olsen in the studio with me! We got to stamp and visit together, and reminisce about some of our fun times together as demonstrators over 27 years together. PLUS, we stamped a few cards with current sets of In Colors, the Layering Leaves stamp set and the BOUGH PUNCH, which is finally back in stock!
My card started with Very Vanilla card stock and the 2023-2025 In Colors (Copper Clay, Wild Wheat, Moody Mauve, Pebbled Path and Boho Blue). Ann’s card is the same layout on a white card stock base, but with 2022-2024 In Colors (Tahitian Tide, Starry Sky, Sweet Sorbet, Parakeet Party and Orchid Opulence).
Each colored section started out as 2″ x 1-1/4″ rectangles, which I forgot to mention during the video. Trim off the section on the top and bottom that hang over, after you adhere them to the front layer.
Which color combination do you like best? I usually prefer the vivid colors, but am feeling the fall weather and leaning into the vanilla/earthy tones today. The brighter colors are available through April 2024, so make sure you have ink refills and paper stocked up!
27 years ago, Ann had to ask me how to join Stampin’ Up! but I’ve become better at offering this opportunity to others! If you are interested in joining a creative community and expanding your circle of friendships, we have an AMAZING offer coming October 3-31, 2023:
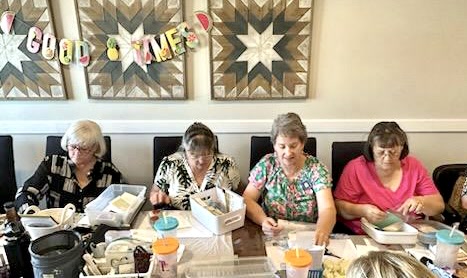
At the Sprinkled Ink Retreat last weekend, we participated in a Shoebox Swap, but that doesn’t mean we exchanged empty shoeboxes 😜
Each demonstrator brought a #simplestamping card (some were not so simple!) and had all the pieces cut and prepared for everyone else to make, in a box (about the size of a shoebox, hence the name). We passed boxes around the table and you would make one as it came to you. It was a **flurry** of activity for a few hours…
Who knew crafting could feel like a workout? We were exhausted – but happy stampers! – by the time we finished 15 cards.
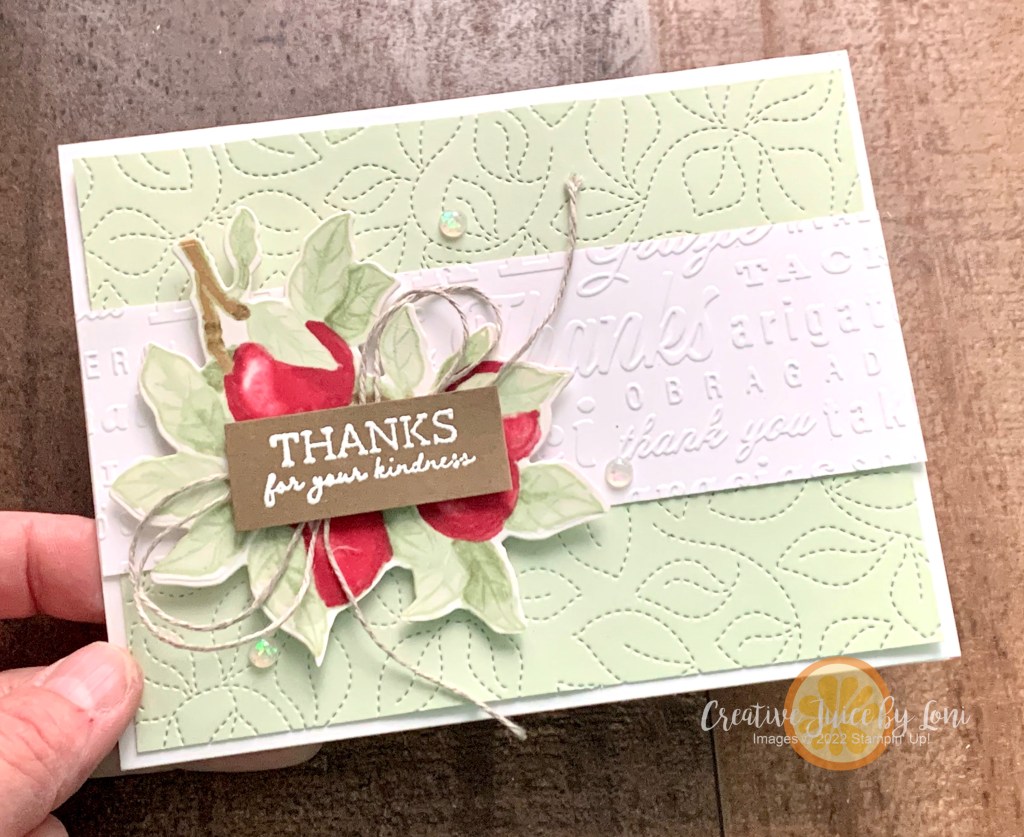
Place background stamp face up and ink it with Soft Seafoam ink. Then dip a sponge dauber into Highland Heather ink and daub it onto the stamp where the berries are.
Lay a 3″ x 4″ piece of Soft Seafoam card stock on top of the stamp, cover it with scrap paper and rub to transfer the image.
Cut the stamped card into 1″ pieces on a paper trimmer and adhere in same order to front of Basic White 8.5″ x 5.5″ card using dimensionals, leaving a small space between each panel.
Stamp sentiment on white scrap in Highland Heather ink and adhere to right panel(s).
Add small bow of white twine on a glue dot.
Here’s a quick look at all the cards we created that night! WOW!
Just a reminder- ANY DAY is a great day to join my Sprinkled Ink Family and start your own Stampin’ Up! journey, but TODAY (June 30, 2023) is the LAST DAY of the Starter Kit+ Promotion. There is no risk to give it a try…and I am here to help you get the most from your experience! Click the image to get going:
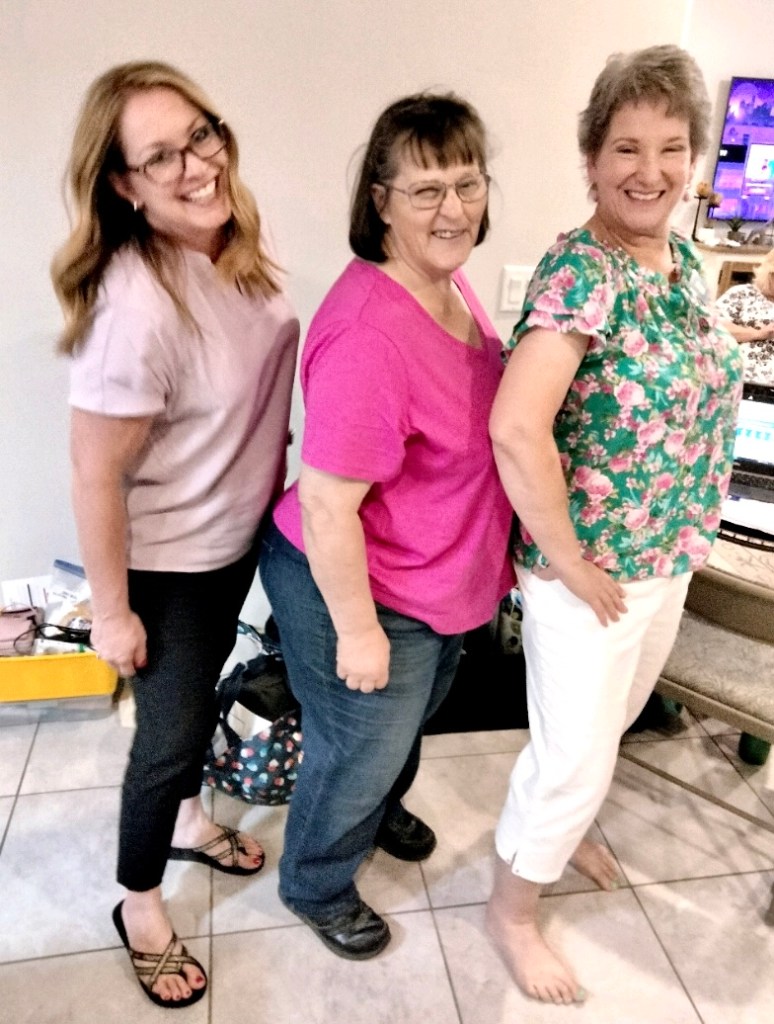
The #1 reason I’m still stamping after 30+ years is my family of demonstrators!
These women (and a few more who aren’t in the picture) give me a reason to jump out of bed and get into my Stampin’ Studio every day! It makes me happy to serve them and cheer them on in their business, too.
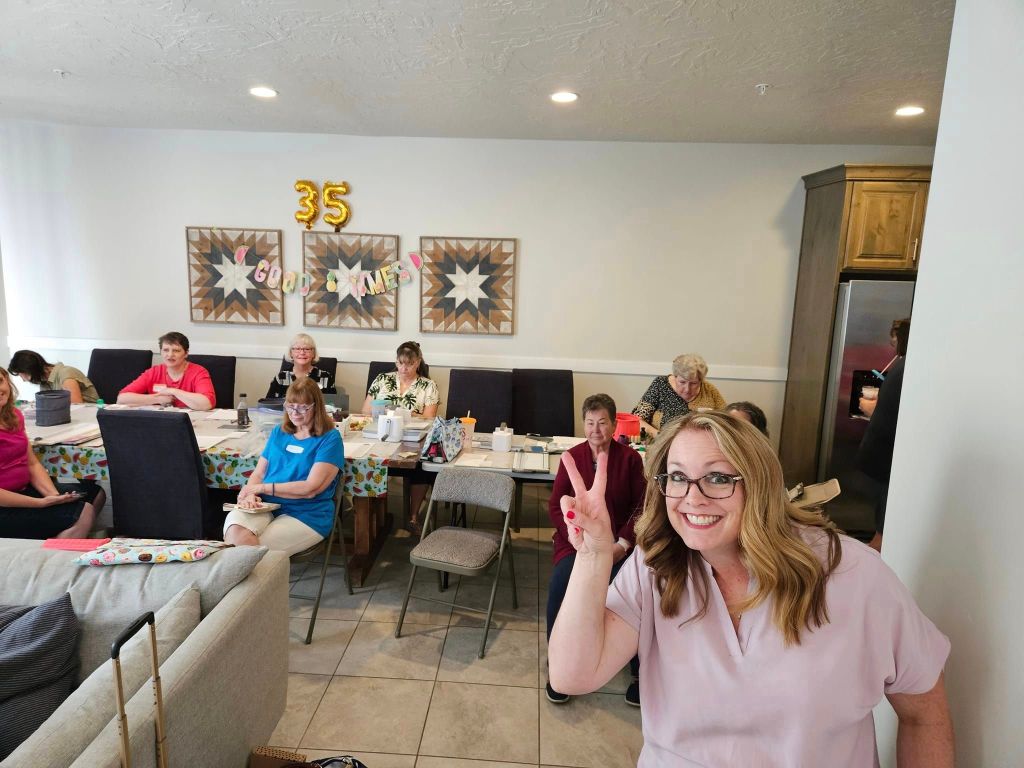
We held our first ever Sprinkled Ink Retreat this past weekend in Southern Utah and let me tell you…so many friendships were forged or strengthened, fingers (and clothes!) got inky, we laughed, ate well, played, learned and GREW stronger together. It was magical.
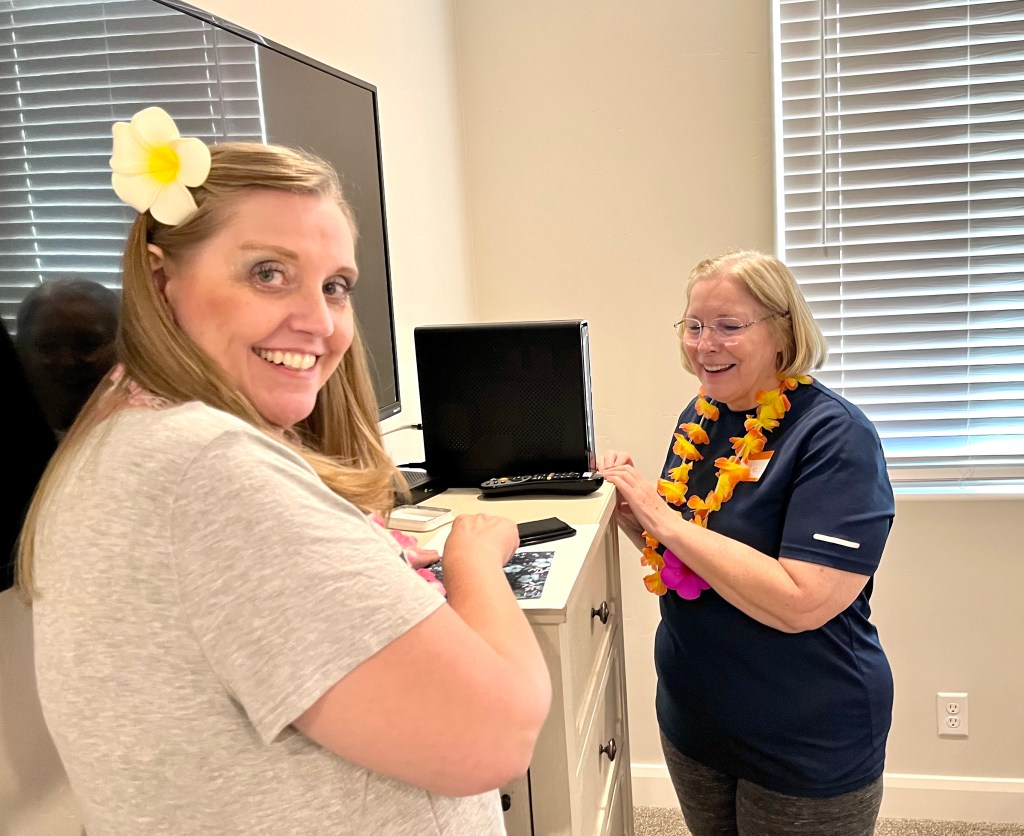
As the Inkers arrived (coming from Idaho, Nevada, Arizona, Utah and even Georgia!) they received a swag bag with gifts & goodies:
We started off with a Stampin’ Escape Room Game on Friday night, and there was some serious competition between the 3 teams. They worked together well to figure out the clues.
Because we are celebrating Stampin’ Up!’s 35 Anniversary in 2023, the home office chose 35 demonstrator-sponsored events to send a member of the executive team to attend, and we were lucky to have Jill Taylor, Stampin’ Up! Vice President of Sales attend our event on Saturday! She was so friendly and fun-loving, she fit right in and made everyone feel valued.
She also gave us a sneak peek at an upcoming kit, and all I can say is IT’S RIGHT UP MY ALLEY!
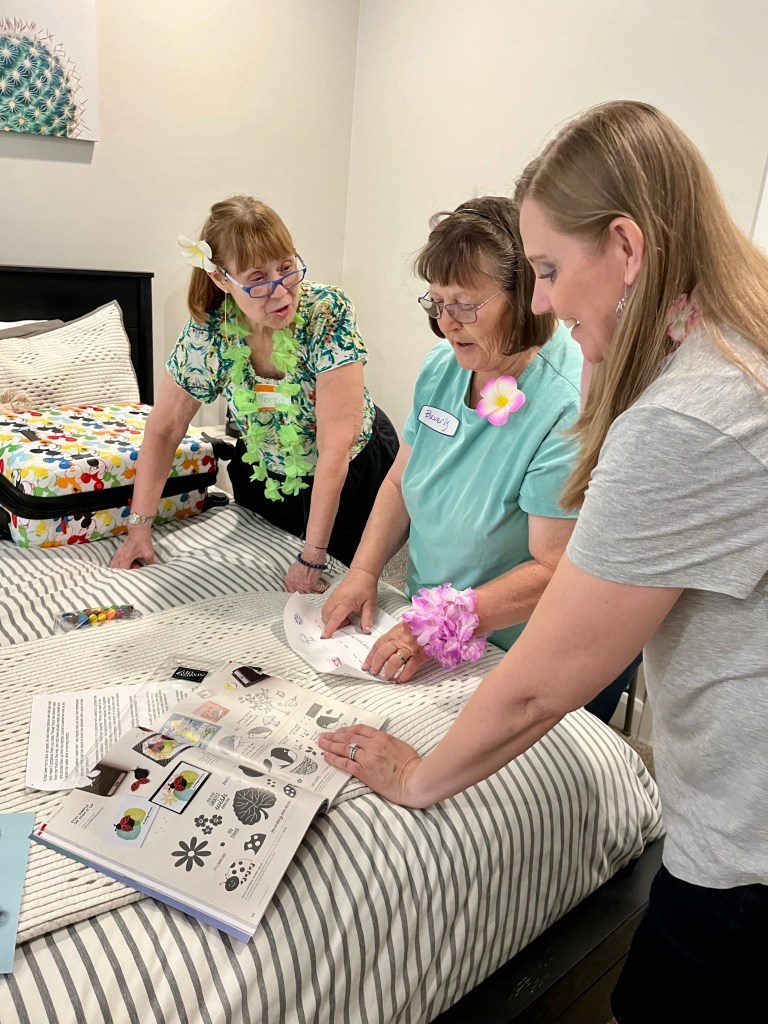
Next we participated in Creativity Now, a company sponsored demonstrator event where watched demonstrations of new products, stamped along with a presentations, learned how much research and thought goes into designing a products like the Earthen Elegance Suite (they rolled out and fired multiple clay samples and made sure the greetings would translate to Spanish)
Following Creativity Now, Jill gave us some business training and we had some hands-on technology training, too. Then it was time for dinner catered by Costa Vida and a Shoebox swap (which I’ll share tomorrow). Some of us enjoyed sitting in the jacuzzi and visiting in the evening, and all of us made memories together!
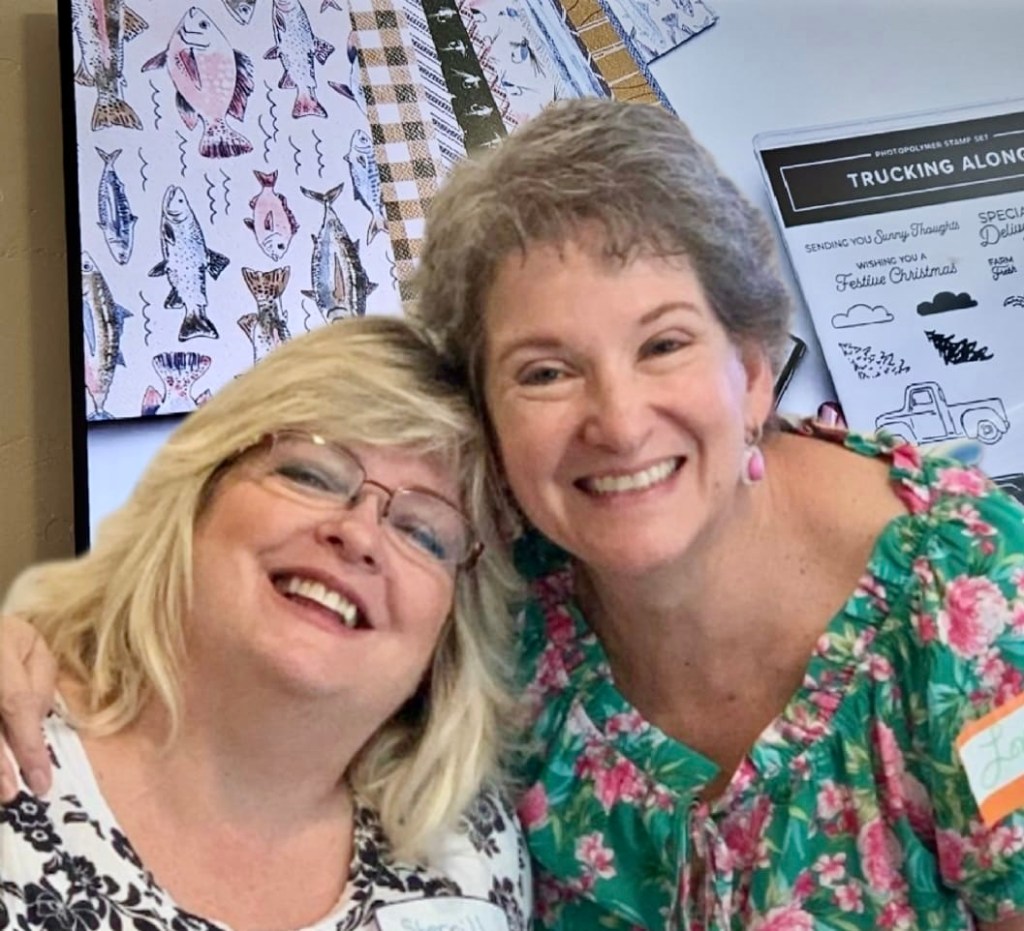
It was wonderful that my “Stampin’ Mom” Sherrill Graff (who helped me get started back in 1992!) attended with us! She is a beautiful, generous, loving and creative woman who does her best to emulate Jesus Christ. We took a “4 generation” picture with my first recruit Ann Olsen (in the palm frond top) and her team member Kim Clark. This is the family you CHOOSE!
If this might be a community you didn’t even KNOW you needed, there is room FOR YOU at our table! All you have to do is TRY the Starter Kit and you’ll be added to our Sprinkled Ink Facebook Group and have the opportunity to join us as the next In-Person or Virtual event. There are no strings attached, so you can buy the kit, save money, get a discount and see if our Stampin’ Family feels like home.
During June 2023, you get to choose MORE in the starter kit, too:
What questions about the opportunity to discover a creative community do you have? It would be a pleasure to help you find your place here, so ask away!
Today’s project encourages you to USE THAT PRETTY PAPER- Don’t hoard it! This hinge-lidded gift box (3.5″ x 4″ x 1-1/4″ finished size) is speedy to make, and begins with a 6″ x 12″ piece of Designer Series Paper.
Score along each long size at 1-1/4″ in (or if you are using a Simply Scored board, put the short end at the top and score at 1-1/4″ and 4-3/4″)
Turn the 12″ side of the paper along the top of your trimmer or Simply Scored, then score at 4″, 5-1/4″, 9-1/4″ and 10-1/2″. You’ll trim at each of these score lines from the long edges just into the intersecting 1-1/4″ score line.
**If your paper is DIRECTIONAL (meaning there is a top and bottom to the pattern), watch the video to see instructions- or make sure that the top of your design is at the left when you make the first 4″ score along the long side.
This box is ideal for 2 bolts of Stampin’ Up! ribbon (or one large bolt, like the Boho Blue one I showed in the video), and it’s tight, but will work for 2 classic ink pads, or a myriad of other small gifts!
Three things to note if you are reading this in June 2023:
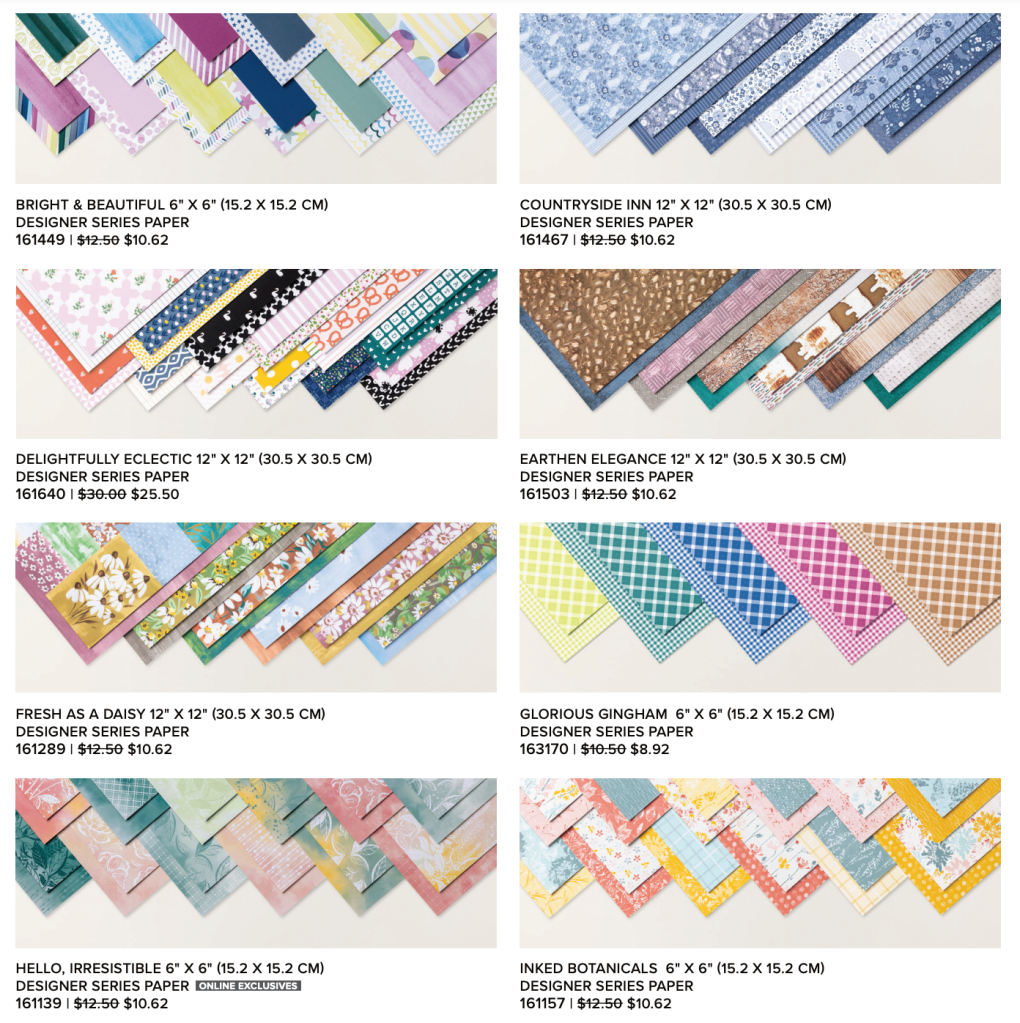
Most of the Designer Series Paper in the Stampin’ Up! Annual Catalog is 15% off during June only!
You CAN add discounted paper to the Starter Kit+ Special Offer in June! It’s the best VALUE for anyone with a long wishlist or who wants to try a new adventure- no obligation to try it out.
The Circle Sayings 3-for-Free offer ends June 15th!
When you purchase the Circle Sayings bundle from my Stampin’ Store by 6/15/23, I’ll email you a tutorial for 3 exclusive cards you won’t find anywhere else PLUS I send you the supplies (card stock, ribbon, paper, etc) to make those three cards with your new stamp set and coordinating punch! This is the bundle I used on my box today:
Rounding up all the JUNE 2023 Stampin’ Up! goodness you need to know about in one place!
Let’s start with a story.
While other teenagers were taking the ACT for college prep and planning out their lives, my goal as a Junior in High School was to work at Disneyland or fly the Millennial Falcon. When my career counselor dashed the dreams of flying the falcon, I thought perhaps I’d drive an 18-wheeler—the closest comparable for a girl with terrible vision who knew she wouldn’t legally be allowed to fly a plane.
When I eventually had to choose a major in college, I chose Travel & Tourism for the adventure it promised, then I got married just before my senior year and ended up at a different university that didn’t offer Travel as a major, so I switched to (and graduated in) Music Education.
Fast forward a few years and with two babies to take care of, I gave up teaching piano lessons for a season to be a mom. It was wonderful, but I needed adult conversation and affirmation (funny how no one gives you kudos for a clean bathroom or balanced meal). It was at that time I “discovered” rubber stamping and what a fabulously flexible and comfortingly creative career that has been!
While I started for the fun and joy it brought (and a reason to “play” in the evenings at workshops with women who connected through creativity), I’ve STAYED for the relationships…many of them gathered into the Sprinkled Ink Team. Supporting my creative community makes me thrilled to get up in the morning, and Monday is my favorite day of the week, for I get to “see” you on my YouTube/Facebook lunchtime crafting!
NOW is the time to begin **YOUR** Stampin’ Up! Story – or just take advantage of the best shopping deal – with the Starter Kit+
There is NO OBLIGATION when purchasing the Starter Kit+ and if you have a wish list over $100, give it a try! You’ll get to peek behind the Stampin’ Up! demonstrator curtain (and my Sprinkled Ink Team support) for 3 full months to see if it’s a path you’d like to continue, all while getting a discount on your own purchases as you make up your mind.
Having some of this pretty patterned paper on hand helps you flow into your “Maker Mode” when you are in the zone! Which will you order first?
ADDED VALUE: Choose Designer Series Paper at the discounted price to add to the Starter Kit+ this month, stretching the value that you can add even more amazing!
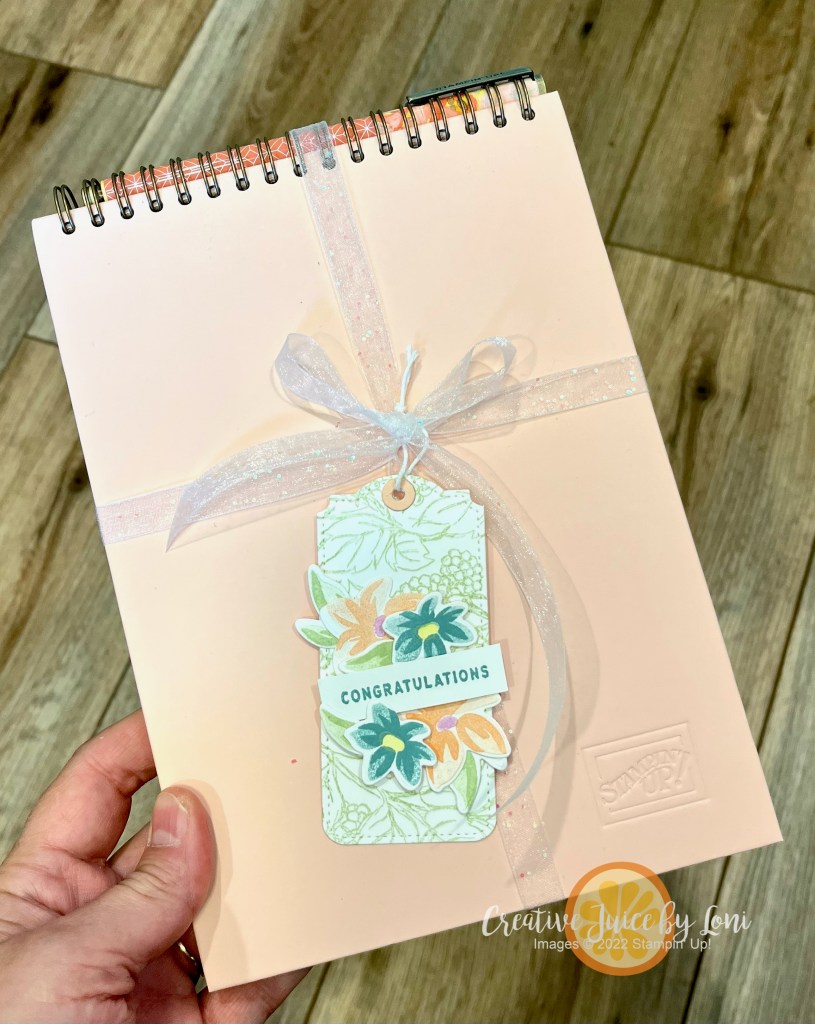
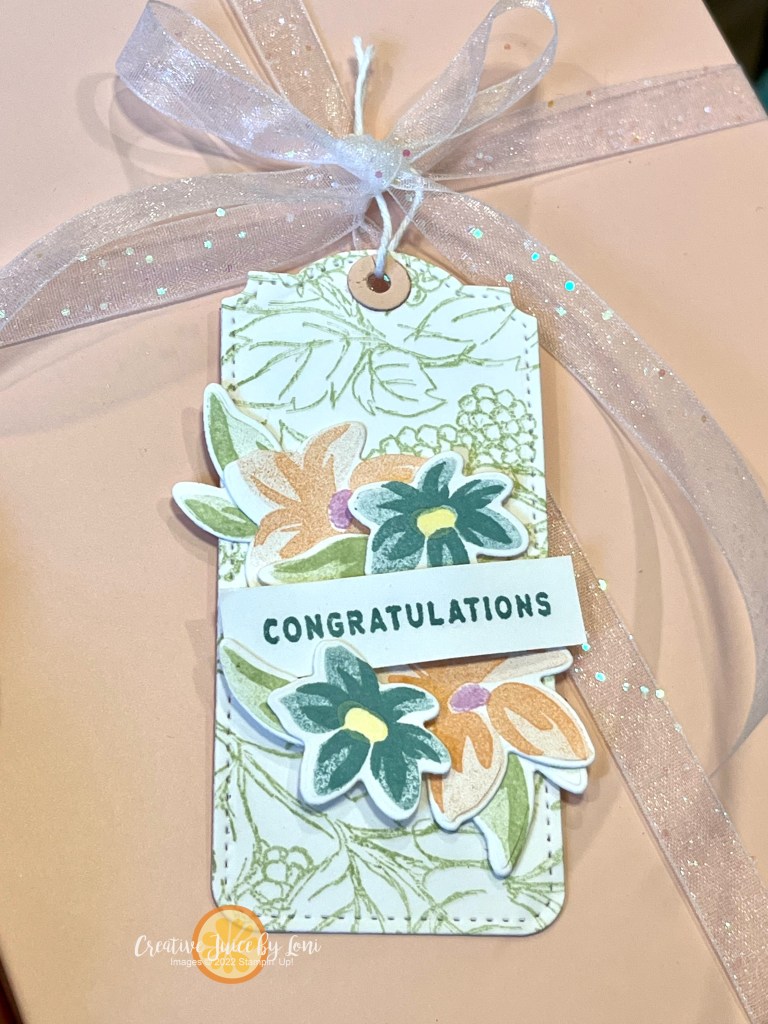
Something that makes my heart swell is when a member of my Sprinkled Ink team promotes to a new level, and I get to celebrate their accomplishment! I’m like a proud mama! If it’s one of my own direct demonstrators, I send a gift to reward their hard work. Today I got to drop off a special notebook & pen with a one-of-a-kind tag created just for Paula’s promotion to Bronze Elite Demonstrator, and look forward to cheering her on as her business/her way just gets better!
Often I am pleasantly surprised by a suite of Stampin’ Up! products that I didn’t expect to love. The Ready to Ride Suite is a perfect example!
While my single motorcycle riding experience didn’t endear me to riding the big bikes, I can see where the wind-in-your-hair-open-road-big-sky kind of day could be very appealing. This collection of products: Legendary Ride stamps and coordinating Dies, Metal Plat Embossing Folder and most spectacularly, the Ready to Ride 12″ x 12″ Designer Series Paper…all come together in SUCH an AWESOME way for some revved-up greeting cards like this one I demonstrated today:
There are a few tricks I wanted to show you about easily cutting and adhering the pieces to create a very detailed motorcycle…and the video begins with an unboxing of a LIMITED EDITION Boho Blue Mini Cut & Emboss Machine (with details on how you can get it!):
To help you put it together, I made this Motorcycle piece guide. You can change colors and “chrome” as desired…on my card, I used the gunmetal silver foil sheet and the bright silver is shown below. Feel free to print off the picture and slide it into your die envelope or stamp case to refer to when building your bike!
If you are “Ready to Ride”…these are the supplies you’ll need:
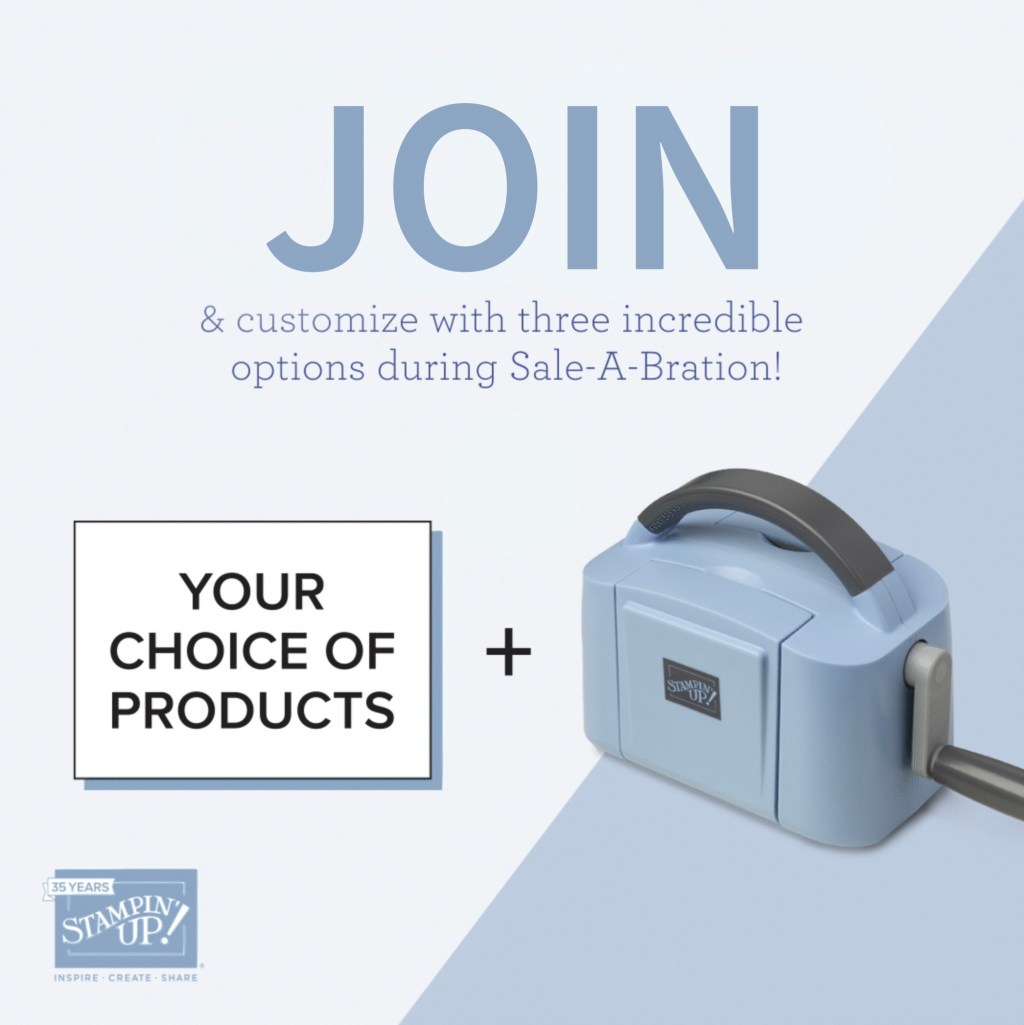
Did that Boho Blue Mini Cut & Emboss call your name? Join my team during Sale-a-Bration (January-February 2023) and you could choose Starter Kit option #1 to receive this Limited Edition machine PLUS choose $175 in products for just $129!
If you have questions about the starter kit or any of the products/techniques used here, shoot me a message and I’m happy to help!
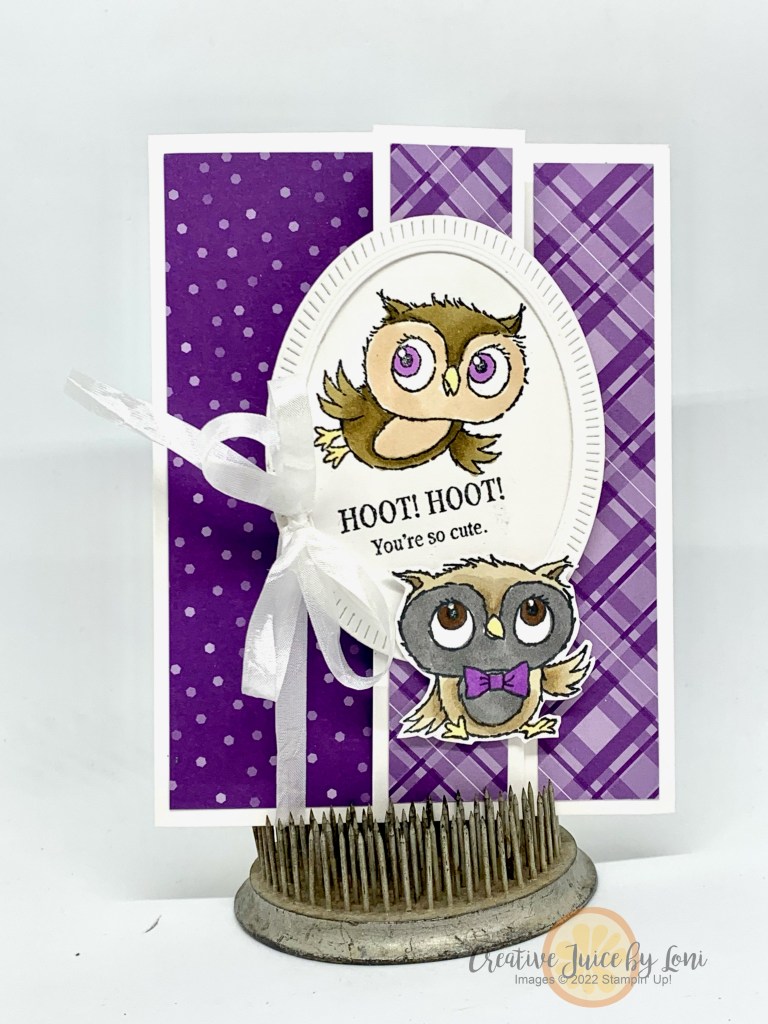
Oh my, these Adorable Owls live up to their name…and may be the first stamps you choose FREE for a $50 order during Sale-a-Bration, starting today!
Demonstrators have the opportunity to pre-order from the January-April mini catalog a month early (AND earn Sale-a-Bration products first, too!), so I’ve been playing with these sweet things in preparation for the launch of this favorite event. If you like being the first to party with new products, you will want to take advantage of the special Starter Kit offer for Sale-a-Bration because how cute is the exclusive BOHO BLUE Mini Cut & Emboss Machine? PLAY this video to peek…
With that mini – but mighty – machine (or the classic white option), you’ll be ready to cut the Framed Florets oval dies to create this Adorable Owl card, and have less fussy cutting in the future!
The contrasting Designer Series Paper really makes this simple fun-fold feel fancy, and there is plenty of room to write a message, slip in a gift card or cash into this greeting card:
Do you say “I’m sorry” too much? Women are the worst at apologizing, even when we haven’t done anything wrong!
I’m working on replacing “Sorry” with “Thank You” and had the opportunity to practice on Sunday when my husband was waiting for to go to church while I finished handouts for my primary class. When I was done (we weren’t late), I said “Thank You for your patience!” instead of ”Sorry to make you wait” and he was more gracious about the wait.
Of course, an apology when I HAVE done something wrong is appropriate, but when I can use THANK YOU instead, it feels more validating for both parties: “Thank you for listening” rather than “I’m sorry I’ve been talking so much”!
My card today is one I can use when someone has sacrificed their time to help me (and I have a friend in mind)…so instead of saying “Sorry I took your time” I can express my appreciation for their assistance!
It’s also a #multicrafting project: I used the Global Design Project sketch #gdp366 , the Apple Harvest stamp set to participate in the Stampin’ Through the Catalog challenge on Instagram and the colors Soft Sea Foam and Cherry Cobbler so I could share it for a Red & Green creative challenge I gave my Sprinkled Ink team.
Speaking of my team…there are just a few days left to take advantage of the Starter Kit+ promotion…just in time to buy your Christmas gifts from yourself as a demonstrator, or jump start a business to earn extra during the holidays 🎁
It’s a risk-free opportunity to join my Sprinkled Ink team and see if your passion for rubber stamps, ink and paper could also be your purpose! Click here to get $30 extra in your starter kit (already an awesome value) and see if you like being a demonstrator.


")


")


 Gingham Ribbon")


 Textured Ribbon")


 Designer Series Paper")

")


 Bordered Ribbon")


")
 Specialty Designer Series Paper")
 Specialty Pack")


")


