

Would you agree that everything is cuter when it’s TINY? The Stampin’ Up! demonstrators of the New at SU! Design Team are here to prove that small paper crafting projects are more adorable, as we showcase some of our 2025 January – April Mini Catalog products as MINI PROJECTS!
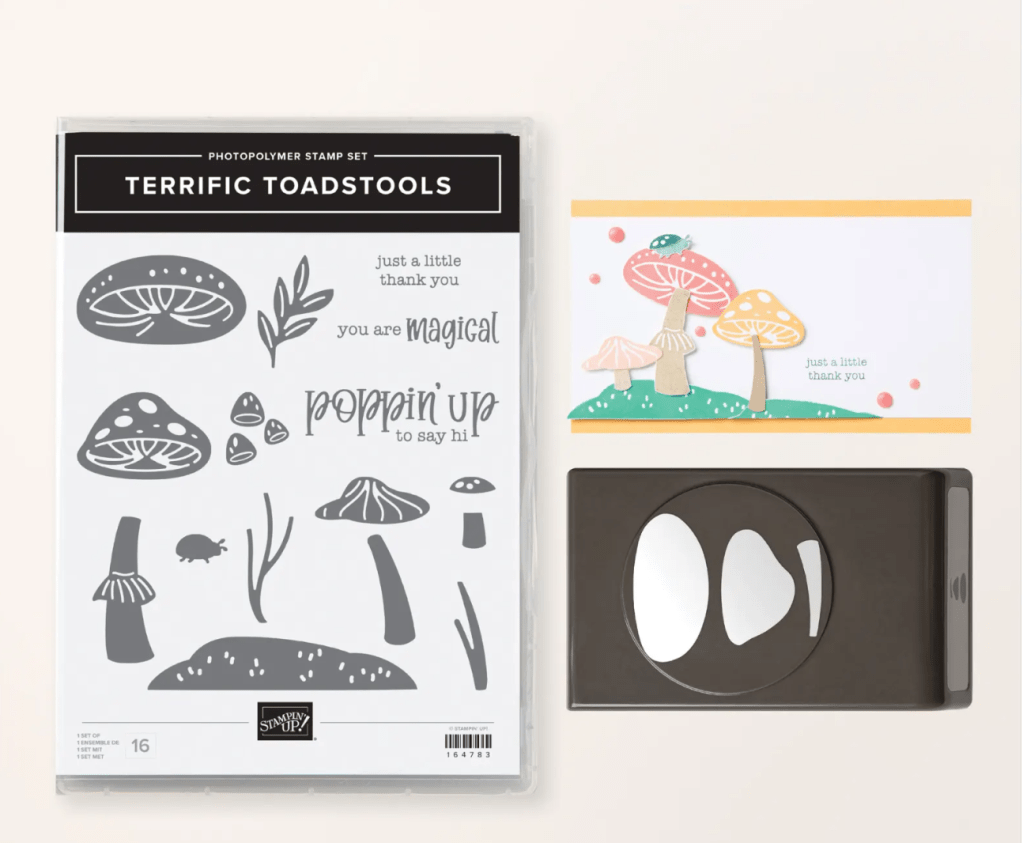

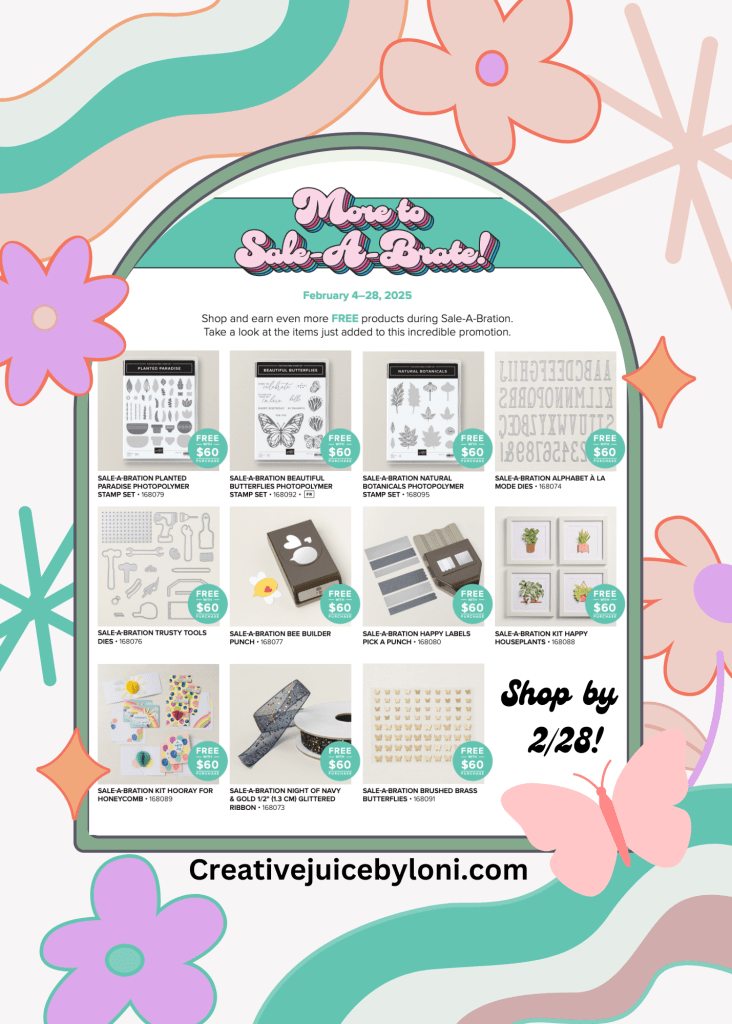
The Terrific Toadstool bundle (stamps + coordinating punch) was my choice from the J-A catalog, and since there are just 10 days left of Sale-a-Bration, I had to include the coordinating Toadstool Gardens Designer Series Paper (a free Sale-a-Bration item you can choose with a $60 order by February 28th).
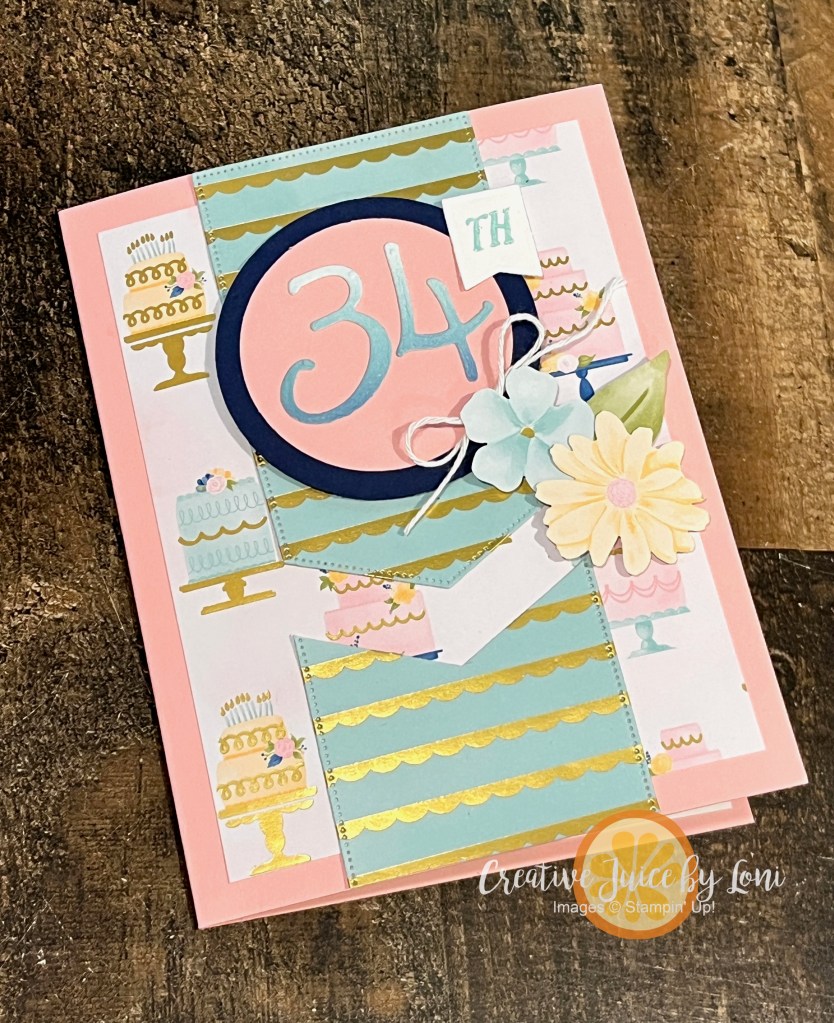
And this is my tiny project: A Mini Loaded Envelope!
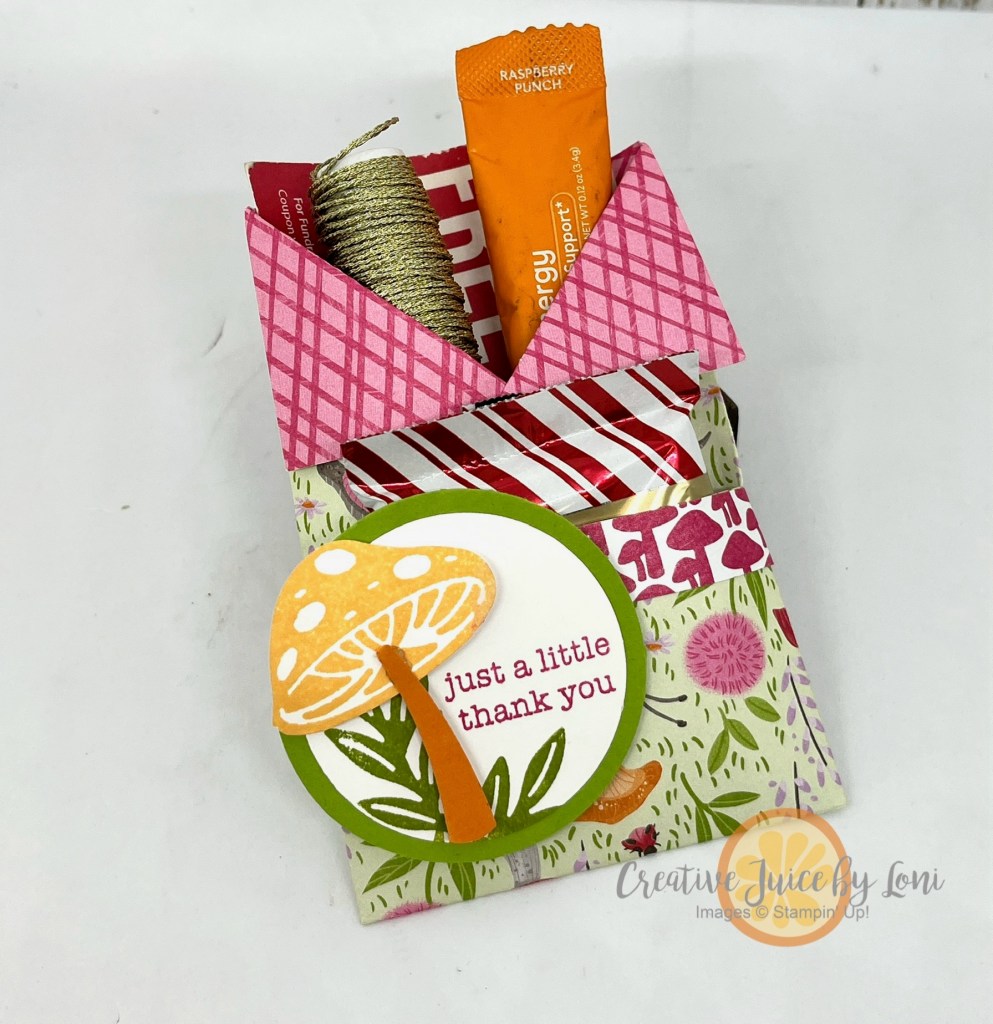
The idea came from fellow demonstrator Kimberly Smith’s Instagram page (@Paperedchef) and is a piece of cake to make from one piece of 6″ x 6″ paper. I’m sure I’ll be using this pattern for many occasions, as the finished 2-3/4″ x 4″ size is perfect for tucking in gift cards, stickers, temporary tattoos, tiny treats, tea bags, and even small embellishments such as twine!
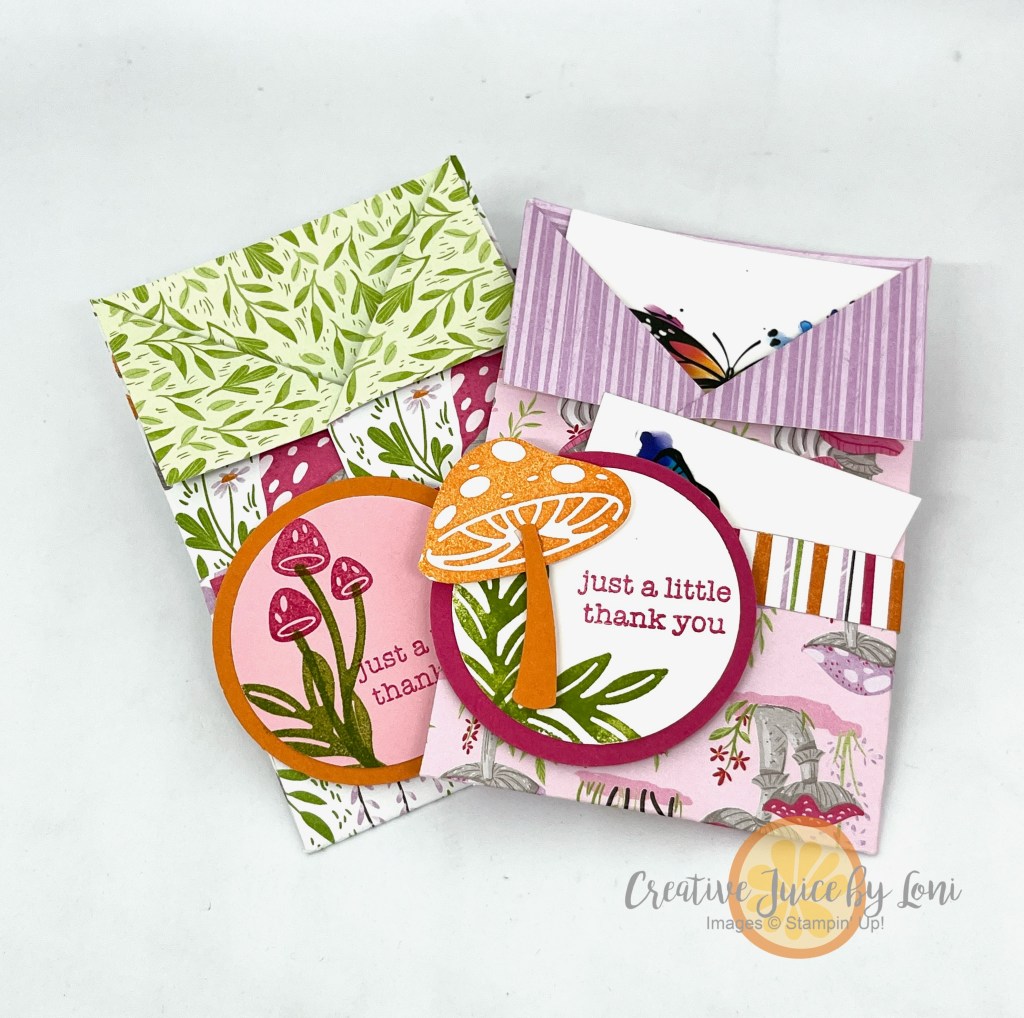
Adding two layered circles with punches gives you a place to add some wee words and a small element, such as a tiny toadstool.
Quick how-to video:
Get your fill of more adorable miniature projects by visiting each of these posts from demonstrators around the world~ remember to PIN or save your favorite projects to try:
February 2025 N@SU! Hop: Make it MINI
Powered by blogcarousel.com
Product List")
 Designer Series Paper")
 Circle Punch")
 Circle Punch")


![Thanking You Photopolymer Stamp Set (English) [ 163718 ]](https://assets1.tamsnetwork.com/images/EC042017NF/163718s.jpg "Thanking You Photopolymer Stamp Set (English) [ 163718 ]")
![Basic White 8 1/2" X 11" Thick Cardstock [ 159229 ]](https://assets1.tamsnetwork.com/images/EC042017NF/159229s.jpg "Basic White 8 1/2\" X 11\" Thick Cardstock [ 159229 ]")
![Perennial Postage Dies [ 162607 ]](https://assets1.tamsnetwork.com/images/EC042017NF/162607s.jpg "Perennial Postage Dies [ 162607 ]")
![Versamark Pad [ 102283 ]](https://assets1.tamsnetwork.com/images/EC042017NF/102283s.jpg "Versamark Pad [ 102283 ]")
![Tuxedo Black Memento Ink Pad [ 132708 ]](https://assets1.tamsnetwork.com/images/EC042017NF/132708s.jpg "Tuxedo Black Memento Ink Pad [ 132708 ]")
![Heat Tool (Us And Canada) [ 129053 ]](https://assets1.tamsnetwork.com/images/EC042017NF/129053s.jpg "Heat Tool (Us And Canada) [ 129053 ]")
![Basics Wow! Embossing Powder [ 165679 ]](https://assets1.tamsnetwork.com/images/EC042017NF/165679s.jpg "Basics Wow! Embossing Powder [ 165679 ]")
![Fresh Freesia Classic Stampin' Pad [ 155611 ]](https://assets1.tamsnetwork.com/images/EC042017NF/155611s.jpg "Fresh Freesia Classic Stampin' Pad [ 155611 ]")
![Stampin' Dimensionals [ 104430 ]](https://assets1.tamsnetwork.com/images/EC042017NF/104430s.jpg "Stampin' Dimensionals [ 104430 ]")


![Wildflower Birthday Suite Collection (English) [ 164604 ]](https://assets1.tamsnetwork.com/images/EC042017NF/164604s.jpg "Wildflower Birthday Suite Collection (English) [ 164604 ]")
![Pretty In Pink 8 1/2" X 11" Cardstock [ 163793 ]](https://assets1.tamsnetwork.com/images/EC042017NF/163793s.jpg "Pretty In Pink 8 1/2\" X 11\" Cardstock [ 163793 ]")
![Night Of Navy 8-1/2" X 11" Cardstock [ 100867 ]](https://assets1.tamsnetwork.com/images/EC042017NF/100867s.jpg "Night Of Navy 8-1/2\" X 11\" Cardstock [ 100867 ]")
![Pool Party 8-1/2" X 11" Cardstock [ 122924 ]](https://assets1.tamsnetwork.com/images/EC042017NF/122924s.jpg "Pool Party 8-1/2\" X 11\" Cardstock [ 122924 ]")
![Soft Sea Foam 8-1/2" X 11" Cardstock [ 146988 ]](https://assets1.tamsnetwork.com/images/EC042017NF/146988s.jpg "Soft Sea Foam 8-1/2\" X 11\" Cardstock [ 146988 ]")
![Night Of Navy Classic Stampin' Pad [ 147110 ]](https://assets1.tamsnetwork.com/images/EC042017NF/147110s.jpg "Night Of Navy Classic Stampin' Pad [ 147110 ]")
![Pool Party Classic Stampin' Pad [ 147107 ]](https://assets1.tamsnetwork.com/images/EC042017NF/147107s.jpg "Pool Party Classic Stampin' Pad [ 147107 ]")
![Small Blending Brushes [ 160518 ]](https://assets1.tamsnetwork.com/images/EC042017NF/160518s.jpg "Small Blending Brushes [ 160518 ]")
![2 3/8" (6 Cm) Circle Punch [ 161354 ]](https://assets1.tamsnetwork.com/images/EC042017NF/161354s.jpg "2 3/8\" (6 Cm) Circle Punch [ 161354 ]")
![Mini Stampin' Cut & Emboss Machine [ 150673 ]](https://assets1.tamsnetwork.com/images/EC042017NF/150673s.jpg "Mini Stampin' Cut & Emboss Machine [ 150673 ]")
![Stampin' Seal [ 152813 ]](https://assets1.tamsnetwork.com/images/EC042017NF/152813s.jpg "Stampin' Seal [ 152813 ]")
![Stampin' Seal+ [ 149699 ]](https://assets1.tamsnetwork.com/images/EC042017NF/149699s.jpg "Stampin' Seal+ [ 149699 ]")
![Adhesive Sheets [ 152334 ]](https://assets1.tamsnetwork.com/images/EC042017NF/152334s.jpg "Adhesive Sheets [ 152334 ]")
![Mini Glue Dots [ 103683 ]](https://assets1.tamsnetwork.com/images/EC042017NF/103683s.jpg "Mini Glue Dots [ 103683 ]")
![Multipurpose Liquid Glue [ 110755 ]](https://assets1.tamsnetwork.com/images/EC042017NF/110755s.jpg "Multipurpose Liquid Glue [ 110755 ]")
![Baker's Twine Essentials Pack [ 155475 ]](https://assets1.tamsnetwork.com/images/EC042017NF/155475s.jpg "Baker's Twine Essentials Pack [ 155475 ]")


 Designer Series Paper")
")
")
")


 Large Check Ribbon")

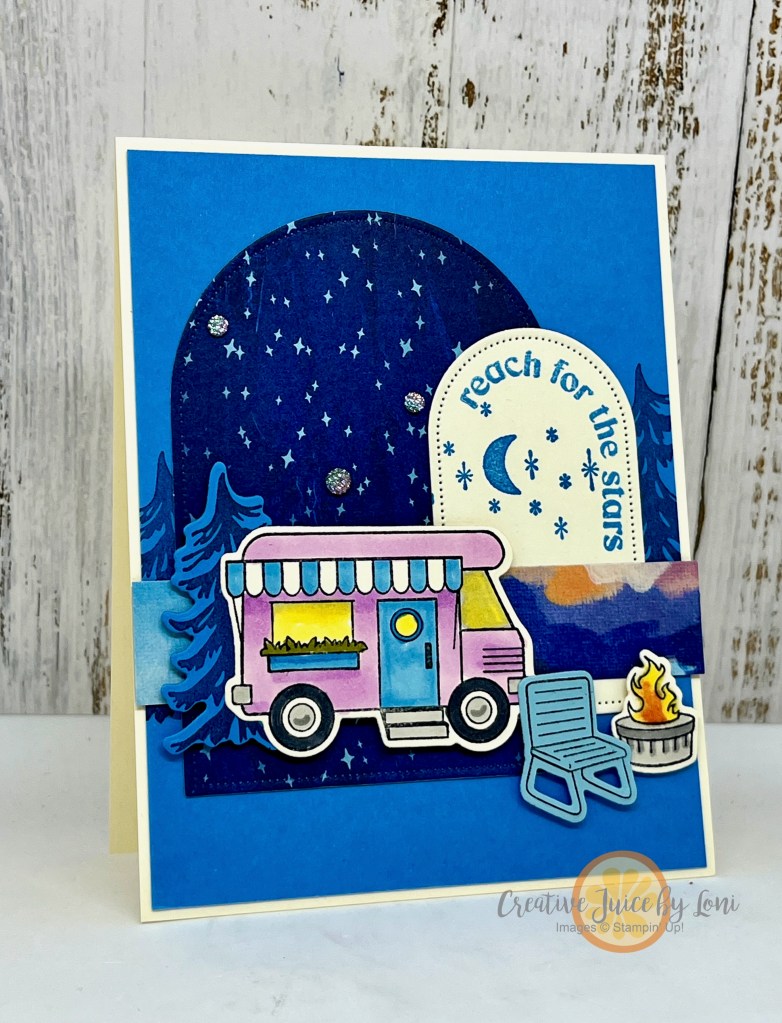
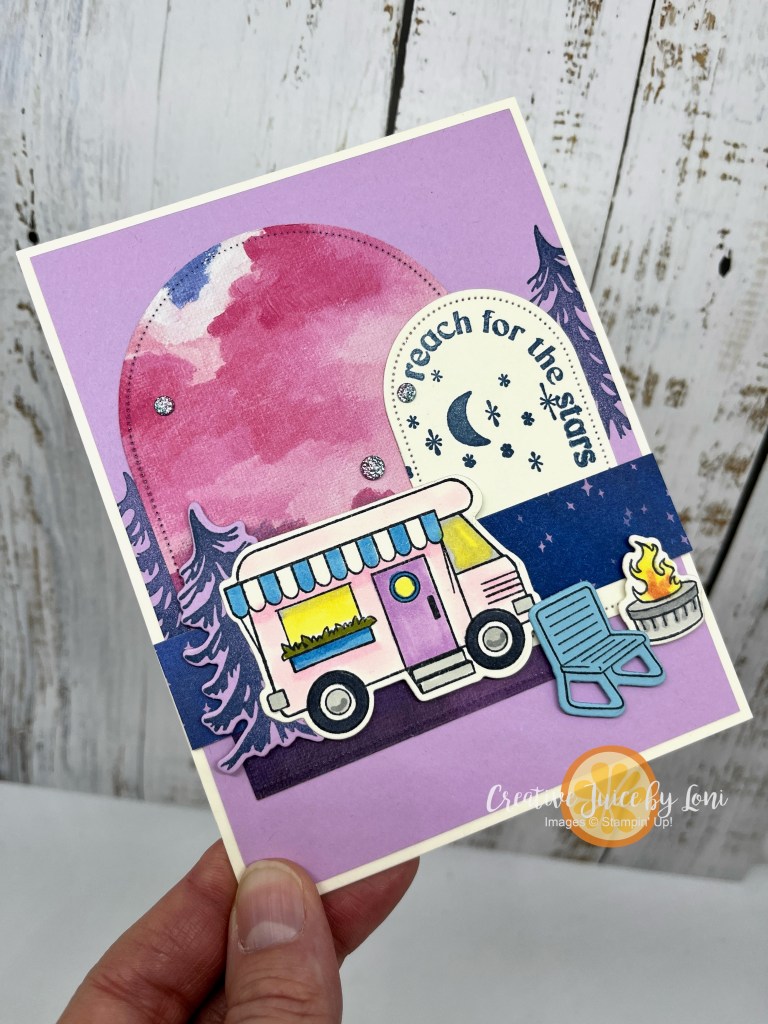

![Adventure Together Bundle (English) [ 164850 ]](https://assets1.tamsnetwork.com/images/EC042017NF/164850s.jpg "Adventure Together Bundle (English) [ 164850 ]")
![Everyday Arches Bundle (English) [ 164630 ]](https://assets1.tamsnetwork.com/images/EC042017NF/164630s.jpg "Everyday Arches Bundle (English) [ 164630 ]")
![Everyday Skies 6" X 6" (15.2 X 15.2 Cm) Designer Series Paper [ 164622 ]](https://assets1.tamsnetwork.com/images/EC042017NF/164622s.jpg "Everyday Skies 6\" X 6\" (15.2 X 15.2 Cm) Designer Series Paper [ 164622 ]")
![Azure Afternoon 8 1/2" X 11" Cardstock [ 161719 ]](https://assets1.tamsnetwork.com/images/EC042017NF/161719s.jpg "Azure Afternoon 8 1/2\" X 11\" Cardstock [ 161719 ]")
![Fresh Freesia 8 1/2" X 11" Cardstock [ 155613 ]](https://assets1.tamsnetwork.com/images/EC042017NF/155613s.jpg "Fresh Freesia 8 1/2\" X 11\" Cardstock [ 155613 ]")
![Azure Afternoon Classic Stampin' Pad [ 161663 ]](https://assets1.tamsnetwork.com/images/EC042017NF/161663s.jpg "Azure Afternoon Classic Stampin' Pad [ 161663 ]")
![Misty Moonlight Classic Stampin' Pad [ 153118 ]](https://assets1.tamsnetwork.com/images/EC042017NF/153118s.jpg "Misty Moonlight Classic Stampin' Pad [ 153118 ]")
![Fresh Freesia Stampin' Blends Combo Pack [ 155518 ]](https://assets1.tamsnetwork.com/images/EC042017NF/155518s.jpg "Fresh Freesia Stampin' Blends Combo Pack [ 155518 ]")
![Bubble Bath Stampin’ Blends Combo Pack [ 161675 ]](https://assets1.tamsnetwork.com/images/EC042017NF/161675s.jpg "Bubble Bath Stampin’ Blends Combo Pack [ 161675 ]")
![Azure Afternoon Stampin’ Blends Combo Pack [ 161672 ]](https://assets1.tamsnetwork.com/images/EC042017NF/161672s.jpg "Azure Afternoon Stampin’ Blends Combo Pack [ 161672 ]")
![Lemon Lolly Stampin’ Blends Combo Pack [ 161673 ]](https://assets1.tamsnetwork.com/images/EC042017NF/161673s.jpg "Lemon Lolly Stampin’ Blends Combo Pack [ 161673 ]")
![Smoky Slate Stampin' Blends Combo Pack [ 154904 ]](https://assets1.tamsnetwork.com/images/EC042017NF/154904s.jpg "Smoky Slate Stampin' Blends Combo Pack [ 154904 ]")
![Basic Black Stampin' Blends Combo Pack [ 154843 ]](https://assets1.tamsnetwork.com/images/EC042017NF/154843s.jpg "Basic Black Stampin' Blends Combo Pack [ 154843 ]")
![Old Olive Stampin' Blends Combo Pack [ 154892 ]](https://assets1.tamsnetwork.com/images/EC042017NF/154892s.jpg "Old Olive Stampin' Blends Combo Pack [ 154892 ]")
![Stampin' Cut & Emboss Machine [ 149653 ]](https://assets1.tamsnetwork.com/images/EC042017NF/149653s.jpg "Stampin' Cut & Emboss Machine [ 149653 ]")
![Two Tone Sparkle Gems [ 164633 ]](https://assets1.tamsnetwork.com/images/EC042017NF/164633s.jpg "Two Tone Sparkle Gems [ 164633 ]")


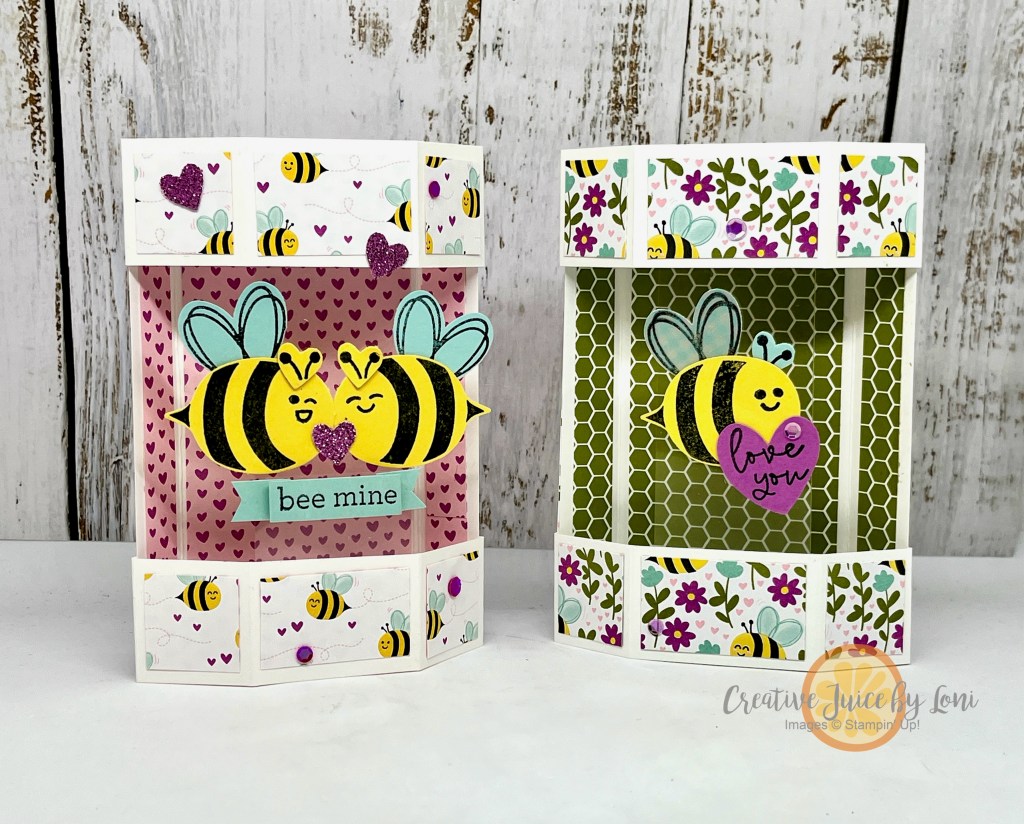


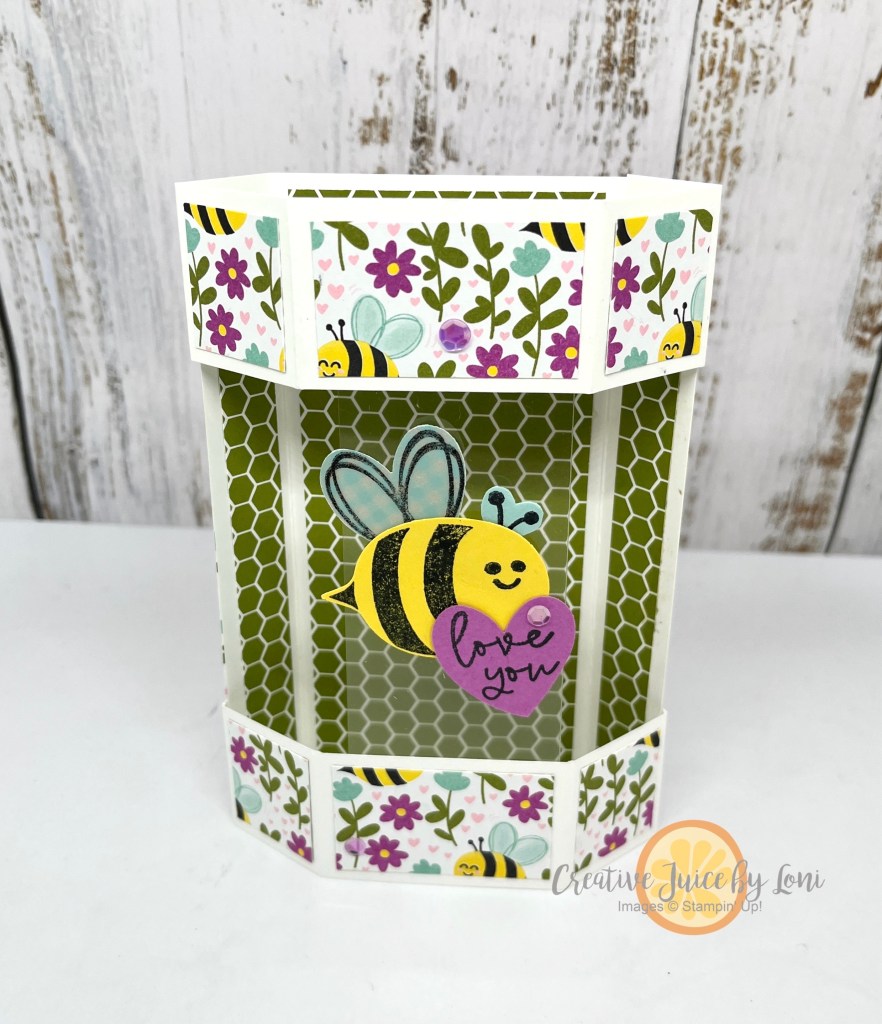


![Bee My Valentine Photopolymer Stamp Set (English) [ 162547 ]](https://assets1.tamsnetwork.com/images/EC042017NF/162547s.jpg "Bee My Valentine Photopolymer Stamp Set (English) [ 162547 ]")
![Bee Builder Punch [ 162553 ]](https://assets1.tamsnetwork.com/images/EC042017NF/162553s.jpg "Bee Builder Punch [ 162553 ]")
![Cute As Can Bee 12" X 12" (30.5 X 30.5 Cm) Designer Series Paper [ 166621 ]](https://assets1.tamsnetwork.com/images/EC042017NF/166621s.jpg "Cute As Can Bee 12\" X 12\" (30.5 X 30.5 Cm) Designer Series Paper [ 166621 ]")
![Floral & Gingham Vellum 12" X 12" (30.5 X 30.5 Cm) Specialty Designer Series Paper [ 164713 ]](https://assets1.tamsnetwork.com/images/EC042017NF/164713s.jpg "Floral & Gingham Vellum 12\" X 12\" (30.5 X 30.5 Cm) Specialty Designer Series Paper [ 164713 ]")
![2024–2026 In Color™ Glimmer 12" X 12" (30.5 X 30.5 Cm) Specialty Paper [ 163771 ]](https://assets1.tamsnetwork.com/images/EC042017NF/163771s.jpg "2024–2026 In Color™ Glimmer 12\" X 12\" (30.5 X 30.5 Cm) Specialty Paper [ 163771 ]")
![Daffodil Delight 8-1/2" X 11" Cardstock [ 119683 ]](https://assets1.tamsnetwork.com/images/EC042017NF/119683s.jpg "Daffodil Delight 8-1/2\" X 11\" Cardstock [ 119683 ]")
![Petunia Pop 8 1/2" X 11" Cardstock [ 163801 ]](https://assets1.tamsnetwork.com/images/EC042017NF/163801s.jpg "Petunia Pop 8 1/2\" X 11\" Cardstock [ 163801 ]")
![Window Sheets [ 142314 ]](https://assets1.tamsnetwork.com/images/EC042017NF/142314s.jpg "Window Sheets [ 142314 ]")
![Petunia Pop Classic Stampin Pad [ 163811 ]](https://assets1.tamsnetwork.com/images/EC042017NF/163811s.jpg "Petunia Pop Classic Stampin Pad [ 163811 ]")


![Darling Dinos Bundle (English) [ 164735 ]](https://assets1.tamsnetwork.com/images/EC042017NF/164735s.jpg "Darling Dinos Bundle (English) [ 164735 ]")
![Bright & Beautiful 6" X 6" (15.2 X 15.2 Cm) Designer Series Paper [ 161449 ]](https://assets1.tamsnetwork.com/images/EC042017NF/161449s.jpg "Bright & Beautiful 6\" X 6\" (15.2 X 15.2 Cm) Designer Series Paper [ 161449 ]")
![Brights Stampin' Write Markers [ 161696 ]](https://assets1.tamsnetwork.com/images/EC042017NF/161696s.jpg "Brights Stampin' Write Markers [ 161696 ]")


![Friendly Seagulls Photopolymer Stamp Set (English) [ 164961 ]](https://assets1.tamsnetwork.com/images/EC042017NF/164961s.jpg "Friendly Seagulls Photopolymer Stamp Set (English) [ 164961 ]")
![Mini Alphabet Dies [ 162934 ]](https://assets1.tamsnetwork.com/images/EC042017NF/162934s.jpg "Mini Alphabet Dies [ 162934 ]")
![Spring Is In The Air Dies [ 166237 ]](https://assets1.tamsnetwork.com/images/EC042017NF/166237s.jpg "Spring Is In The Air Dies [ 166237 ]")
![Basic Beige 8 1/2" X 11" Cardstock [ 164511 ]](https://assets1.tamsnetwork.com/images/EC042017NF/164511s.jpg "Basic Beige 8 1/2\" X 11\" Cardstock [ 164511 ]")
![Watercolor Pencils Assortment 1 [ 161700 ]](https://assets1.tamsnetwork.com/images/EC042017NF/161700s.jpg "Watercolor Pencils Assortment 1 [ 161700 ]")


