
In a touching moment when two different girls connect as friends in the movie “WICKED”, Galinda makes the (grammatically incorrect) observation that “Pink goes good with green,” and it’s true not only because these two colors are part of a triad of colors that are proved to coordinate!

I met Cathy (and Janet, across the street from her) when I moved to Southern Utah in 1973 and we became dear friends and playmates. Something we ALWAYS looked forward to each year was the evening that the WIZARD OF OZ movie was shown on television, and since we had to watch it at the time it was scheduled to be broadcast (no “on demand video” back then), we made it a watch PARTY!
2024 was the 75th anniversary of the classic film, so we went to view it in the theater in January (with our friend Jolene, left, as Janet was out of town).

They have a poster from the Wizard of Oz hanging in the theater, as Cathy is pointing out. OBVIOUSLY, we had to repeat the party when WICKED arrived in theaters last month…however…guess who forgot to take a photo while 8 of us were gathered at the movie…

Never fear, we meet for lunch about once a month, and I’m going to snap a picture of us in December
This 2-page 8.5″ x 11″ layout was created in landscape orientation so you can imagine that it would make a terrific 12″ x 12″ layout as well. The teeny-tiny stars connect the pages from top to bottom, with a bit of sparkle. Isn’t it WONDERFUL that WICKED gave us a reason to use the Spells & Potions dies for more than Halloween? They may not last long, so don’t hesitate to grab them if you think you may want to use a broomstick or a witch hat for any memory keeping.

The titles on these pages come from the musical number “For Good” which will be in PART 2 of WICKED, coming to theaters in November 2025. This song really captures how a friend can make us better through their good influence, and I can say that Cathy has shaped who I’ve become. She is loyal, filled with faith, and truly good. BONUS: She has the world’s best MEMORY, so as friends, we rely on her to remember the things we don’t!

Some handy tips are shared in the “How-To” Video for laying out titles and extending an embossed design when the folder is small, among other things:
Follow me on Facebook for more Pink & Green projects this week!
Product List![Pretty In Pink 8 1/2" X 11" Cardstock [ 163793 ]](https://assets1.tamsnetwork.com/images/EC042017NF/163793s.jpg "Pretty In Pink 8 1/2\" X 11\" Cardstock [ 163793 ]")
![Old Olive 8-1/2" X 11" Cardstock [ 100702 ]](https://assets1.tamsnetwork.com/images/EC042017NF/100702s.jpg "Old Olive 8-1/2\" X 11\" Cardstock [ 100702 ]")
![Basic Beige 8 1/2" X 11" Cardstock [ 164511 ]](https://assets1.tamsnetwork.com/images/EC042017NF/164511s.jpg "Basic Beige 8 1/2\" X 11\" Cardstock [ 164511 ]")
![Adhesive Sheets [ 152334 ]](https://assets1.tamsnetwork.com/images/EC042017NF/152334s.jpg "Adhesive Sheets [ 152334 ]")
![Silver Foil 12" X 12" (30.5 X 30.5 Cm) Specialty Pack [ 163096 ]](https://assets1.tamsnetwork.com/images/EC042017NF/163096s.jpg "Silver Foil 12\" X 12\" (30.5 X 30.5 Cm) Specialty Pack [ 163096 ]")
![Eyelet 3 D Embossing Folder [ 163414 ]](https://assets1.tamsnetwork.com/images/EC042017NF/163414s.jpg "Eyelet 3 D Embossing Folder [ 163414 ]")
![Potions & Spells Dies [ 164141 ]](https://assets1.tamsnetwork.com/images/EC042017NF/164141s.jpg "Potions & Spells Dies [ 164141 ]")
![Alphabet à La Mode Dies [ 160750 ]](https://assets1.tamsnetwork.com/images/EC042017NF/160750s.jpg "Alphabet à La Mode Dies [ 160750 ]")
![Mini Alphabet Dies [ 162934 ]](https://assets1.tamsnetwork.com/images/EC042017NF/162934s.jpg "Mini Alphabet Dies [ 162934 ]")
![Stampin' Cut & Emboss Machine [ 149653 ]](https://assets1.tamsnetwork.com/images/EC042017NF/149653s.jpg "Stampin' Cut & Emboss Machine [ 149653 ]")
![Stampin' Seal+ [ 149699 ]](https://assets1.tamsnetwork.com/images/EC042017NF/149699s.jpg "Stampin' Seal+ [ 149699 ]")


![Winterly Tree Tops Bundle (English) [ 164066 ]](https://assets1.tamsnetwork.com/images/EC042017NF/164066s.jpg "Winterly Tree Tops Bundle (English) [ 164066 ]")
![Nests Of Winter 12" X 12" (30.5 X 30.5 Cm) Designer Series Paper [ 164183 ]](https://assets1.tamsnetwork.com/images/EC042017NF/164183s.jpg "Nests Of Winter 12\" X 12\" (30.5 X 30.5 Cm) Designer Series Paper [ 164183 ]")
![Gray Granite 8-1/2" X 11" Cardstock [ 146983 ]](https://assets1.tamsnetwork.com/images/EC042017NF/146983s.jpg "Gray Granite 8-1/2\" X 11\" Cardstock [ 146983 ]")
![Garden Green 8-1/2" X 11" Cardstock [ 102584 ]](https://assets1.tamsnetwork.com/images/EC042017NF/102584s.jpg "Garden Green 8-1/2\" X 11\" Cardstock [ 102584 ]")
![Pool Party 8-1/2" X 11" Cardstock [ 122924 ]](https://assets1.tamsnetwork.com/images/EC042017NF/122924s.jpg "Pool Party 8-1/2\" X 11\" Cardstock [ 122924 ]")
![Garden Green Classic Stampin' Pad [ 147089 ]](https://assets1.tamsnetwork.com/images/EC042017NF/147089s.jpg "Garden Green Classic Stampin' Pad [ 147089 ]")
![Pool Party 5/8" (1.6 Cm) Pompom Ribbon [ 164129 ]](https://assets1.tamsnetwork.com/images/EC042017NF/164129s.jpg "Pool Party 5/8\" (1.6 Cm) Pompom Ribbon [ 164129 ]")
![Earth Tones Shimmer Gems [ 164070 ]](https://assets1.tamsnetwork.com/images/EC042017NF/164070s.jpg "Earth Tones Shimmer Gems [ 164070 ]")
![Multipurpose Liquid Glue [ 110755 ]](https://assets1.tamsnetwork.com/images/EC042017NF/110755s.jpg "Multipurpose Liquid Glue [ 110755 ]")
![Stampin' Dimensionals [ 104430 ]](https://assets1.tamsnetwork.com/images/EC042017NF/104430s.jpg "Stampin' Dimensionals [ 104430 ]")


![Festive Tags Kit [ 162485 ]](https://assets1.tamsnetwork.com/images/EC042017NF/162485s.jpg "Festive Tags Kit [ 162485 ]")
![Festive 12" X 12" (30.5 X 30.5 Cm) Glimmer Paper [ 164106 ]](https://assets1.tamsnetwork.com/images/EC042017NF/164106s.jpg "Festive 12\" X 12\" (30.5 X 30.5 Cm) Glimmer Paper [ 164106 ]")
![Basic White 8 1/2" X 11" Cardstock [ 159276 ]](https://assets1.tamsnetwork.com/images/EC042017NF/159276s.jpg "Basic White 8 1/2\" X 11\" Cardstock [ 159276 ]")
![Small Blending Brushes [ 160518 ]](https://assets1.tamsnetwork.com/images/EC042017NF/160518s.jpg "Small Blending Brushes [ 160518 ]")
![Poppy Parade Classic Stampin' Pad [ 147050 ]](https://assets1.tamsnetwork.com/images/EC042017NF/147050s.jpg "Poppy Parade Classic Stampin' Pad [ 147050 ]")
![Shaded Spruce Classic Stampin' Pad [ 147088 ]](https://assets1.tamsnetwork.com/images/EC042017NF/147088s.jpg "Shaded Spruce Classic Stampin' Pad [ 147088 ]")
![Pool Party Classic Stampin' Pad [ 147107 ]](https://assets1.tamsnetwork.com/images/EC042017NF/147107s.jpg "Pool Party Classic Stampin' Pad [ 147107 ]")
![Shaded Spruce 1/2" (1.3 Cm) Satin & Sheer Ribbon [ 164224 ]](https://assets1.tamsnetwork.com/images/EC042017NF/164224s.jpg "Shaded Spruce 1/2\" (1.3 Cm) Satin & Sheer Ribbon [ 164224 ]")
![Poppy Parade 8-1/2" X 11" Cardstock [ 119793 ]](https://assets1.tamsnetwork.com/images/EC042017NF/119793s.jpg "Poppy Parade 8-1/2\" X 11\" Cardstock [ 119793 ]")
![Lost Lagoon 8-1/2" X 11" Cardstock [ 133679 ]](https://assets1.tamsnetwork.com/images/EC042017NF/133679s.jpg "Lost Lagoon 8-1/2\" X 11\" Cardstock [ 133679 ]")
![Bubble Bath 8 1/2" X 11" Cardstock [ 161718 ]](https://assets1.tamsnetwork.com/images/EC042017NF/161718s.jpg "Bubble Bath 8 1/2\" X 11\" Cardstock [ 161718 ]")
![Snowflake Sky 3 D Embossing Folder [ 162026 ]](https://assets1.tamsnetwork.com/images/EC042017NF/162026s.jpg "Snowflake Sky 3 D Embossing Folder [ 162026 ]")
![Everyday Details Dies [ 162864 ]](https://assets1.tamsnetwork.com/images/EC042017NF/162864s.jpg "Everyday Details Dies [ 162864 ]")


![Mossy Meadow 8-1/2" X 11" Cardstock [ 133676 ]](https://assets1.tamsnetwork.com/images/EC042017NF/133676s.jpg "Mossy Meadow 8-1/2\" X 11\" Cardstock [ 133676 ]")
![Moody Mauve 8 1/2" X 11" Cardstock [ 161723 ]](https://assets1.tamsnetwork.com/images/EC042017NF/161723s.jpg "Moody Mauve 8 1/2\" X 11\" Cardstock [ 161723 ]")
![Season Of Green & Gold 12" X 12" (30.5 X 30.5 Cm) Specialty Designer Series Paper [ 164324 ]](https://assets1.tamsnetwork.com/images/EC042017NF/164324s.jpg "Season Of Green & Gold 12\" X 12\" (30.5 X 30.5 Cm) Specialty Designer Series Paper [ 164324 ]")
![Stylish Shapes Dies [ 159183 ]](https://assets1.tamsnetwork.com/images/EC042017NF/159183s.jpg "Stylish Shapes Dies [ 159183 ]")
![Christmas Labels Dies [ 164100 ]](https://assets1.tamsnetwork.com/images/EC042017NF/164100s.jpg "Christmas Labels Dies [ 164100 ]")
![Mossy Meadow Classic Stampin' Pad [ 147111 ]](https://assets1.tamsnetwork.com/images/EC042017NF/147111s.jpg "Mossy Meadow Classic Stampin' Pad [ 147111 ]")
![Moody Mauve Classic Stampin' Pad [ 161649 ]](https://assets1.tamsnetwork.com/images/EC042017NF/161649s.jpg "Moody Mauve Classic Stampin' Pad [ 161649 ]")
![Early Espresso Classic Stampin' Pad [ 147114 ]](https://assets1.tamsnetwork.com/images/EC042017NF/147114s.jpg "Early Espresso Classic Stampin' Pad [ 147114 ]")
![Pecan Pie Stampin’ Blends Combo Pack [ 161674 ]](https://assets1.tamsnetwork.com/images/EC042017NF/161674s.jpg "Pecan Pie Stampin’ Blends Combo Pack [ 161674 ]")
![Crumb Cake Stampin' Blends Combo Pack [ 154882 ]](https://assets1.tamsnetwork.com/images/EC042017NF/154882s.jpg "Crumb Cake Stampin' Blends Combo Pack [ 154882 ]")
![Moody Mauve Stampin’ Blends Combo Pack [ 161660 ]](https://assets1.tamsnetwork.com/images/EC042017NF/161660s.jpg "Moody Mauve Stampin’ Blends Combo Pack [ 161660 ]")
![Bubble Bath Stampin’ Blends Combo Pack [ 161675 ]](https://assets1.tamsnetwork.com/images/EC042017NF/161675s.jpg "Bubble Bath Stampin’ Blends Combo Pack [ 161675 ]")
![Basic White Medium Envelopes [ 159236 ]](https://assets1.tamsnetwork.com/images/EC042017NF/159236s.jpg "Basic White Medium Envelopes [ 159236 ]")
![Clear Wink Of Stella Glitter Brush [ 141897 ]](https://assets1.tamsnetwork.com/images/EC042017NF/141897s.jpg "Clear Wink Of Stella Glitter Brush [ 141897 ]")


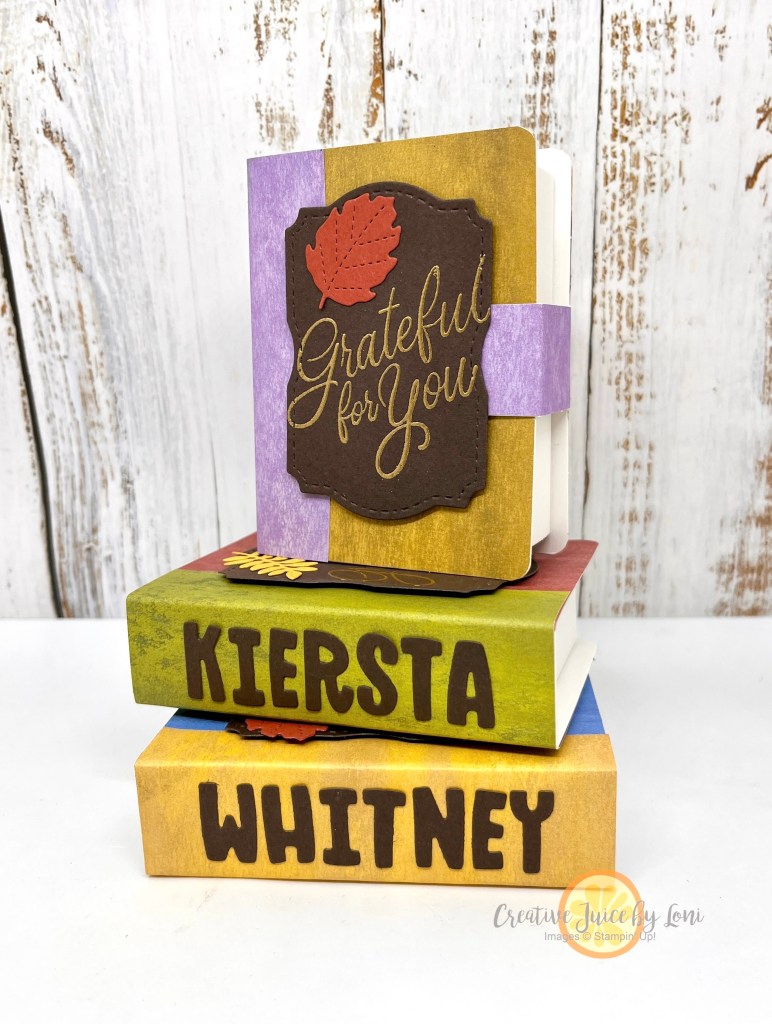


![Book Treat Boxes [ 164048 ]](https://assets1.tamsnetwork.com/images/EC042017NF/164048s.jpg "Book Treat Boxes [ 164048 ]")
![Splendid Autumn 6" X 6" (15.2 X 15.2 Cm) Designer Series Paper [ 164173 ]](https://assets1.tamsnetwork.com/images/EC042017NF/164173s.jpg "Splendid Autumn 6\" X 6\" (15.2 X 15.2 Cm) Designer Series Paper [ 164173 ]")
![Autumn Expressions Bundle (English) [ 164056 ]](https://assets1.tamsnetwork.com/images/EC042017NF/164056s.jpg "Autumn Expressions Bundle (English) [ 164056 ]")
![Early Espresso 8-1/2" X 11" Cardstock [ 119686 ]](https://assets1.tamsnetwork.com/images/EC042017NF/119686s.jpg "Early Espresso 8-1/2\" X 11\" Cardstock [ 119686 ]")
![Versamark Pad [ 102283 ]](https://assets1.tamsnetwork.com/images/EC042017NF/102283s.jpg "Versamark Pad [ 102283 ]")
![Metallics Wow! Embossing Powder [ 165678 ]](https://assets1.tamsnetwork.com/images/EC042017NF/165678s.jpg "Metallics Wow! Embossing Powder [ 165678 ]")
![Heat Tool (Us And Canada) [ 129053 ]](https://assets1.tamsnetwork.com/images/EC042017NF/129053s.jpg "Heat Tool (Us And Canada) [ 129053 ]")


![Hello Hollyhocks Kit [ 164458 ]](https://assets1.tamsnetwork.com/images/EC042017NF/164458s.jpg "Hello Hollyhocks Kit [ 164458 ]")
![Simply Zinnia Bundle (English) [ 163480 ]](https://assets1.tamsnetwork.com/images/EC042017NF/163480s.jpg "Simply Zinnia Bundle (English) [ 163480 ]")
![Tuxedo Black Memento Ink Pad [ 132708 ]](https://assets1.tamsnetwork.com/images/EC042017NF/132708s.jpg "Tuxedo Black Memento Ink Pad [ 132708 ]")
![Pumpkin Pie Stampin' Blends Markers Combo Pack [ 144599 ] (Retired)](https://assets1.tamsnetwork.com/images/EC042017NF/144599s.jpg "Pumpkin Pie Stampin' Blends Markers Combo Pack [ 144599 ] (Retired)")
![Copper Clay Stampin’ Blends Combo Pack [ 161662 ]](https://assets1.tamsnetwork.com/images/EC042017NF/161662s.jpg "Copper Clay Stampin’ Blends Combo Pack [ 161662 ]")
![Old Olive Stampin' Blends Combo Pack [ 154892 ]](https://assets1.tamsnetwork.com/images/EC042017NF/154892s.jpg "Old Olive Stampin' Blends Combo Pack [ 154892 ]")
![Very Vanilla 8-1/2" X 11" Thick Cardstock [ 144237 ]](https://assets1.tamsnetwork.com/images/EC042017NF/144237s.jpg "Very Vanilla 8-1/2\" X 11\" Thick Cardstock [ 144237 ]")
![Copper Clay 8 1/2" X 11" Cardstock [ 161721 ]](https://assets1.tamsnetwork.com/images/EC042017NF/161721s.jpg "Copper Clay 8 1/2\" X 11\" Cardstock [ 161721 ]")
![Mini Stampin' Cut & Emboss Machine [ 150673 ]](https://assets1.tamsnetwork.com/images/EC042017NF/150673s.jpg "Mini Stampin' Cut & Emboss Machine [ 150673 ]")
![Three Twine Combo Pack [ 160597 ]](https://assets1.tamsnetwork.com/images/EC042017NF/160597s.jpg "Three Twine Combo Pack [ 160597 ]")
![Sentimental Wishes Bundle (English) [ 164220 ]](https://assets1.tamsnetwork.com/images/EC042017NF/164220s.jpg "Sentimental Wishes Bundle (English) [ 164220 ]")
![Take A Bow 6" X 6" (15.2 X 15.2 Cm) Designer Series Paper [ 164309 ]](https://assets1.tamsnetwork.com/images/EC042017NF/164309s.jpg "Take A Bow 6\" X 6\" (15.2 X 15.2 Cm) Designer Series Paper [ 164309 ]")
![Real Red Classic Stampin' Pad [ 147084 ]](https://assets1.tamsnetwork.com/images/EC042017NF/147084s.jpg "Real Red Classic Stampin' Pad [ 147084 ]")
![Basic White 8 1/2" X 11" Thick Cardstock [ 159229 ]](https://assets1.tamsnetwork.com/images/EC042017NF/159229s.jpg "Basic White 8 1/2\" X 11\" Thick Cardstock [ 159229 ]")
![Granny Apple Green 8-1/2" X 11" Cardstock [ 146990 ]](https://assets1.tamsnetwork.com/images/EC042017NF/146990s.jpg "Granny Apple Green 8-1/2\" X 11\" Cardstock [ 146990 ]")
![Petal Pink 8-1/2" X 11" Cardstock [ 146985 ]](https://assets1.tamsnetwork.com/images/EC042017NF/146985s.jpg "Petal Pink 8-1/2\" X 11\" Cardstock [ 146985 ]")
![Mini Stampin' Dimensionals [ 144108 ]](https://assets1.tamsnetwork.com/images/EC042017NF/144108s.jpg "Mini Stampin' Dimensionals [ 144108 ]")


![Sentimental Christmas 12" X 12" (30.5 X 30.5 Cm) Designer Series Paper [ 164209 ]](https://assets1.tamsnetwork.com/images/EC042017NF/164209s.jpg "Sentimental Christmas 12\" X 12\" (30.5 X 30.5 Cm) Designer Series Paper [ 164209 ]")
![Greetings Of The Season Dies [ 164112 ]](https://assets1.tamsnetwork.com/images/EC042017NF/164112s.jpg "Greetings Of The Season Dies [ 164112 ]")
![Nested Essentials Dies [ 161597 ]](https://assets1.tamsnetwork.com/images/EC042017NF/161597s.jpg "Nested Essentials Dies [ 161597 ]")
![Shaded Spruce 8-1/2" X 11" Cardstock [ 146981 ]](https://assets1.tamsnetwork.com/images/EC042017NF/146981s.jpg "Shaded Spruce 8-1/2\" X 11\" Cardstock [ 146981 ]")
![Real Red 8-1/2" X 11" Cardstock [ 102482 ]](https://assets1.tamsnetwork.com/images/EC042017NF/102482s.jpg "Real Red 8-1/2\" X 11\" Cardstock [ 102482 ]")
![Watercolor Pencils Assortment 1 [ 161700 ]](https://assets1.tamsnetwork.com/images/EC042017NF/161700s.jpg "Watercolor Pencils Assortment 1 [ 161700 ]")
![Blender Pens [ 102845 ]](https://assets1.tamsnetwork.com/images/EC042017NF/102845s.jpg "Blender Pens [ 102845 ]")
![Gold & Silver 1/8" (3.2 Mm) Trim Combo Pack [ 161633 ]](https://assets1.tamsnetwork.com/images/EC042017NF/161633s.jpg "Gold & Silver 1/8\" (3.2 Mm) Trim Combo Pack [ 161633 ]")
