Do you feel like you make the same style of card over and over again? The best way to STRETCH your creative muscles is with a SKETCH!
For my Lunchtime LIve Crafting on my Facebook page today, I started with the #TGIFC329 sketch challenge and the Feels Like Home Sale-a-Bration stamp set…I’m having a ball using these freebies in my Monday videos to help inspire YOU on ways to use the gifts/supplies you earn for each $50 spent through September 30th, and if you want to watch today’s video tutorial, click here!
This is the TGIF sketch challenge and here are my finished card(s):
When you buy the supplies to create this card, you could choose the stamp set FREE!
I thought it was fun to flip the embossed layer over so the mortar is squeezing out between the bricks. It feels very “Mediterranean Seaside” to me… like an armchair vacation to Greece.
My only dilemma is which card do I love more: The card version with the white or sand colored bricks? Product List
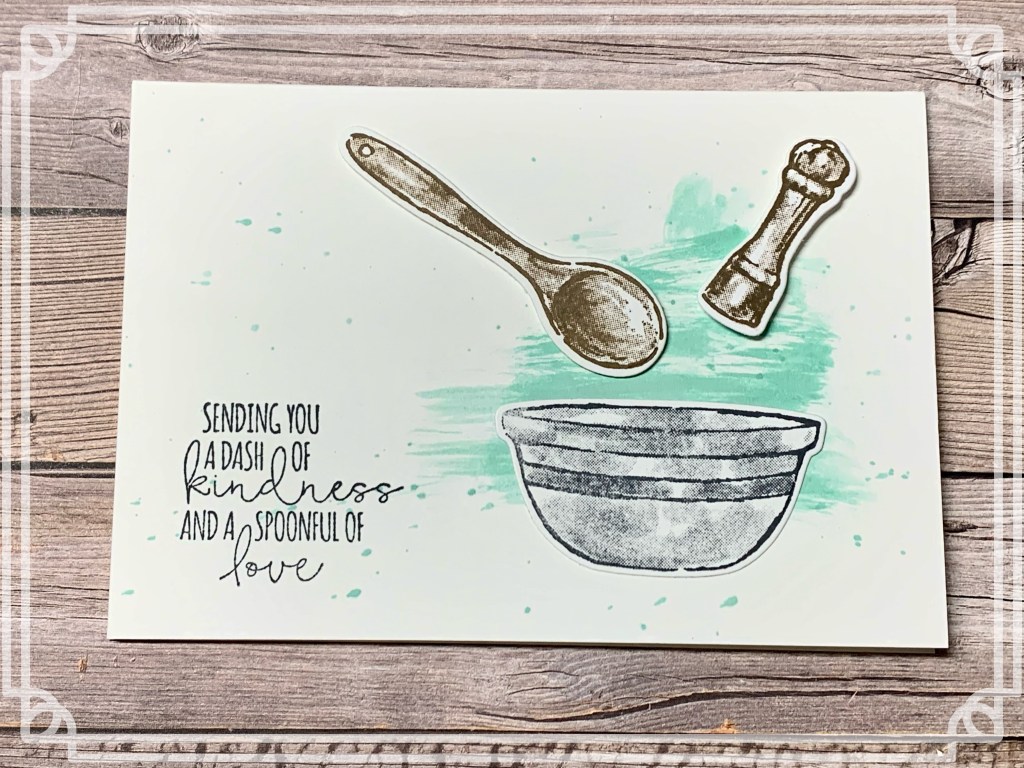
My stampin’ friends and I plan a day of creative play twice a year and it’s a labor of love for our customers and teams! We call it StampFest we present it twice: Once in Southern Utah and again in Utah County. We plan and prepare multiple crafting projects for our guests to assemble, stamp beautiful display boards, find gifts to give, prizes to disperse and create cards to swap… and while it’s labor intensive, it’s worth the smiles the day brings!
Friends come together and meet other like-minded crafters, and many wonderful relationships have been formed from these events. Mothers & Daughters love attending together too ❤
Registration is OPEN for our Fall StampFest events and we invite you to play with us!
Our Southern Utah event will be held at the Hurricane Rec Center on Saturday, September 25th and the Utah County event is on Saturday, October 9th at RK Creative Studio in Spanish Fork.
What to expect: Paper crafting projects, door prizes, card swaps, sweet treats and friendships!
What to bring: Scissors and adhesive (adhesive will also be available to purchase at the event)
Registration: Early Bird price is $50 until two weeks before each event. Regular price is $60.
**Cancellation policy**: You may request a refund if cancellation is received 2 weeks prior to event. Registration may be transferred to another person at any time.
Register by clicking the buttons below each banner, or click the pictures to go to the Facebook event pages, where you will get updates and can invite friends to attend with you!
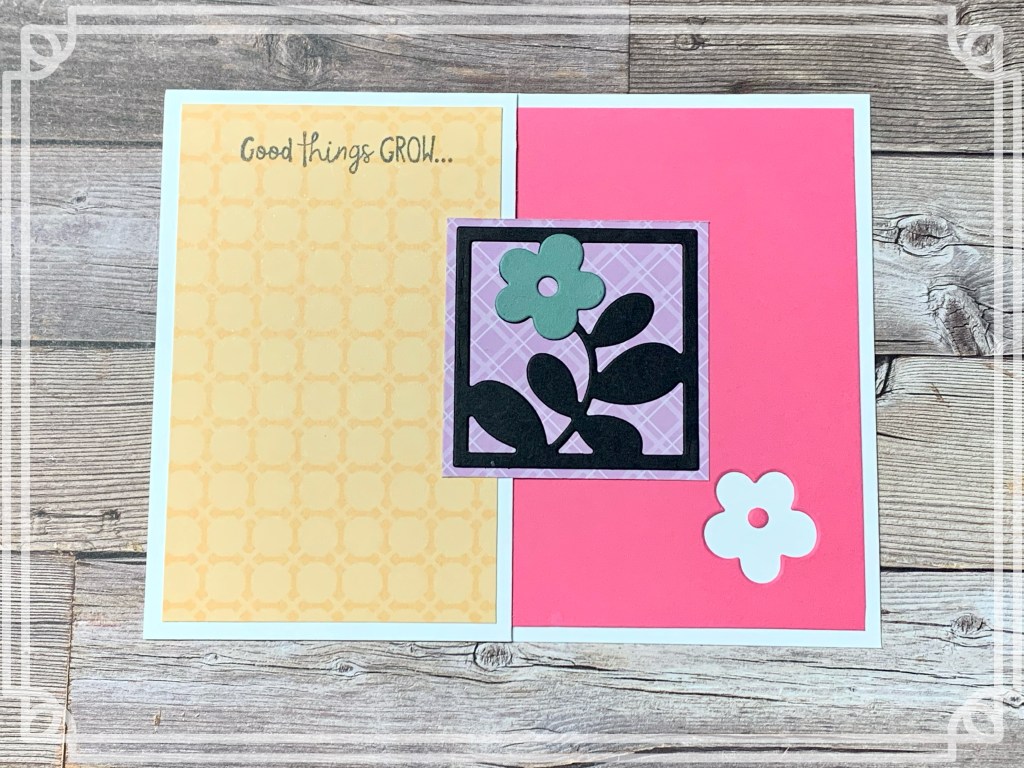
As you begin the transition to Autumn, it’s hard to leave Summer behind…the Harvest Meadow suite helps you straddle the seasons with craftivity!
The Nature’s Harvest stamp set blooms with both beautiful flowers, and sentiments you’ll cherish. The coordinating Harvest Die set includes dies that match the stamped images, plus additional coordinating images and labels.
Enjoy the feeling of earth beneath your fingers as you create with the beautiful crafting tools in this collection:
EMBELLISHMENTS
(#155475) Baker’s Twine Essentials Pack, (#155816) Pale Papaya & White 1/2″ (1.3 Cm) Woven Ribbon
TIPS: Create custom ribbon with Stampin’ Blends. Start with a white ribbon or a light color ribbon similar in tone to your chosen color. Color the ribbon using the brush tip of a Stampin’ Blends marker. You can create a solid color, ombre, or rainbow effect. Because Stampin’ Blends are alcohol-based the colored ribbon dries quickly and is ready to use without a long drying time.
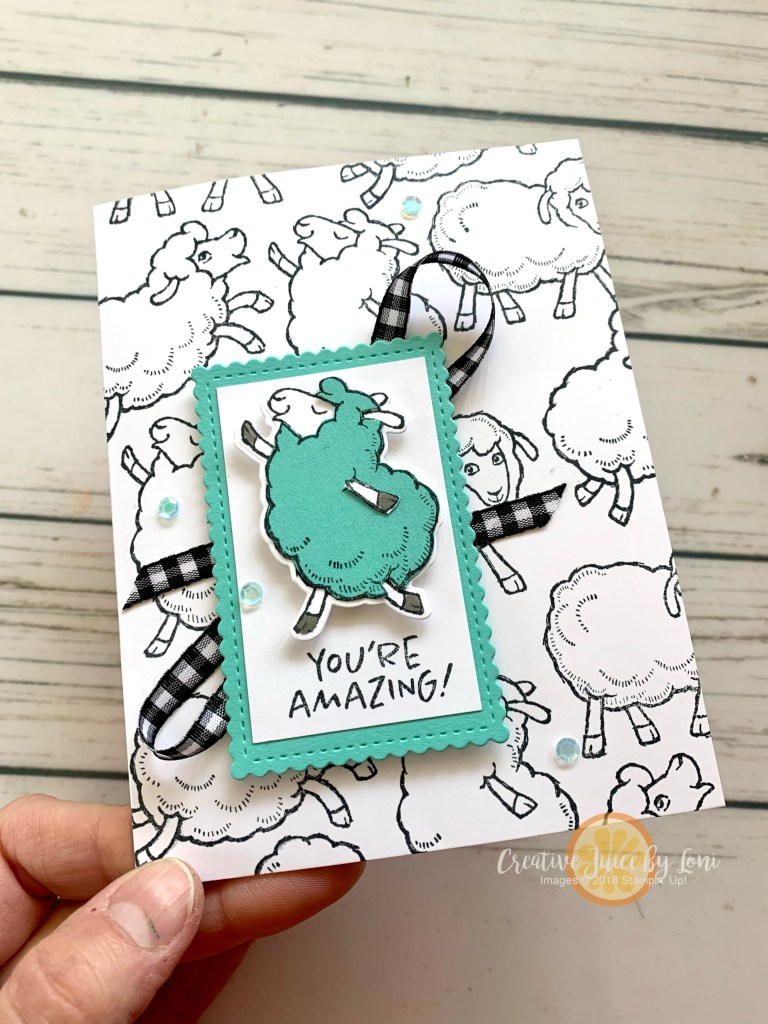
Pondering the current TGIF color challenge last night and this card interrupted my sleep…but I filed it to memory and made it this morning!
I was going to color the amazing sheep with markers, then I realized we have a horrible, awful oversight by Stampin’ Up! — NO COASTAL CABANA Stampin’ Blends? I considered making signs and picketing at the home office, but a protest of one may not get their attention.
So I stamped it on card stock and fussy cut around it.
Still looks awesome, so I’ll save my signs for later…
The Counting Sheep stamp set and Sheep Dies are both items you can choose FREE with a $50 order during Sale-a-Bration, but if you have to get one at a time, select the dies first, as they are only available while supplies last!
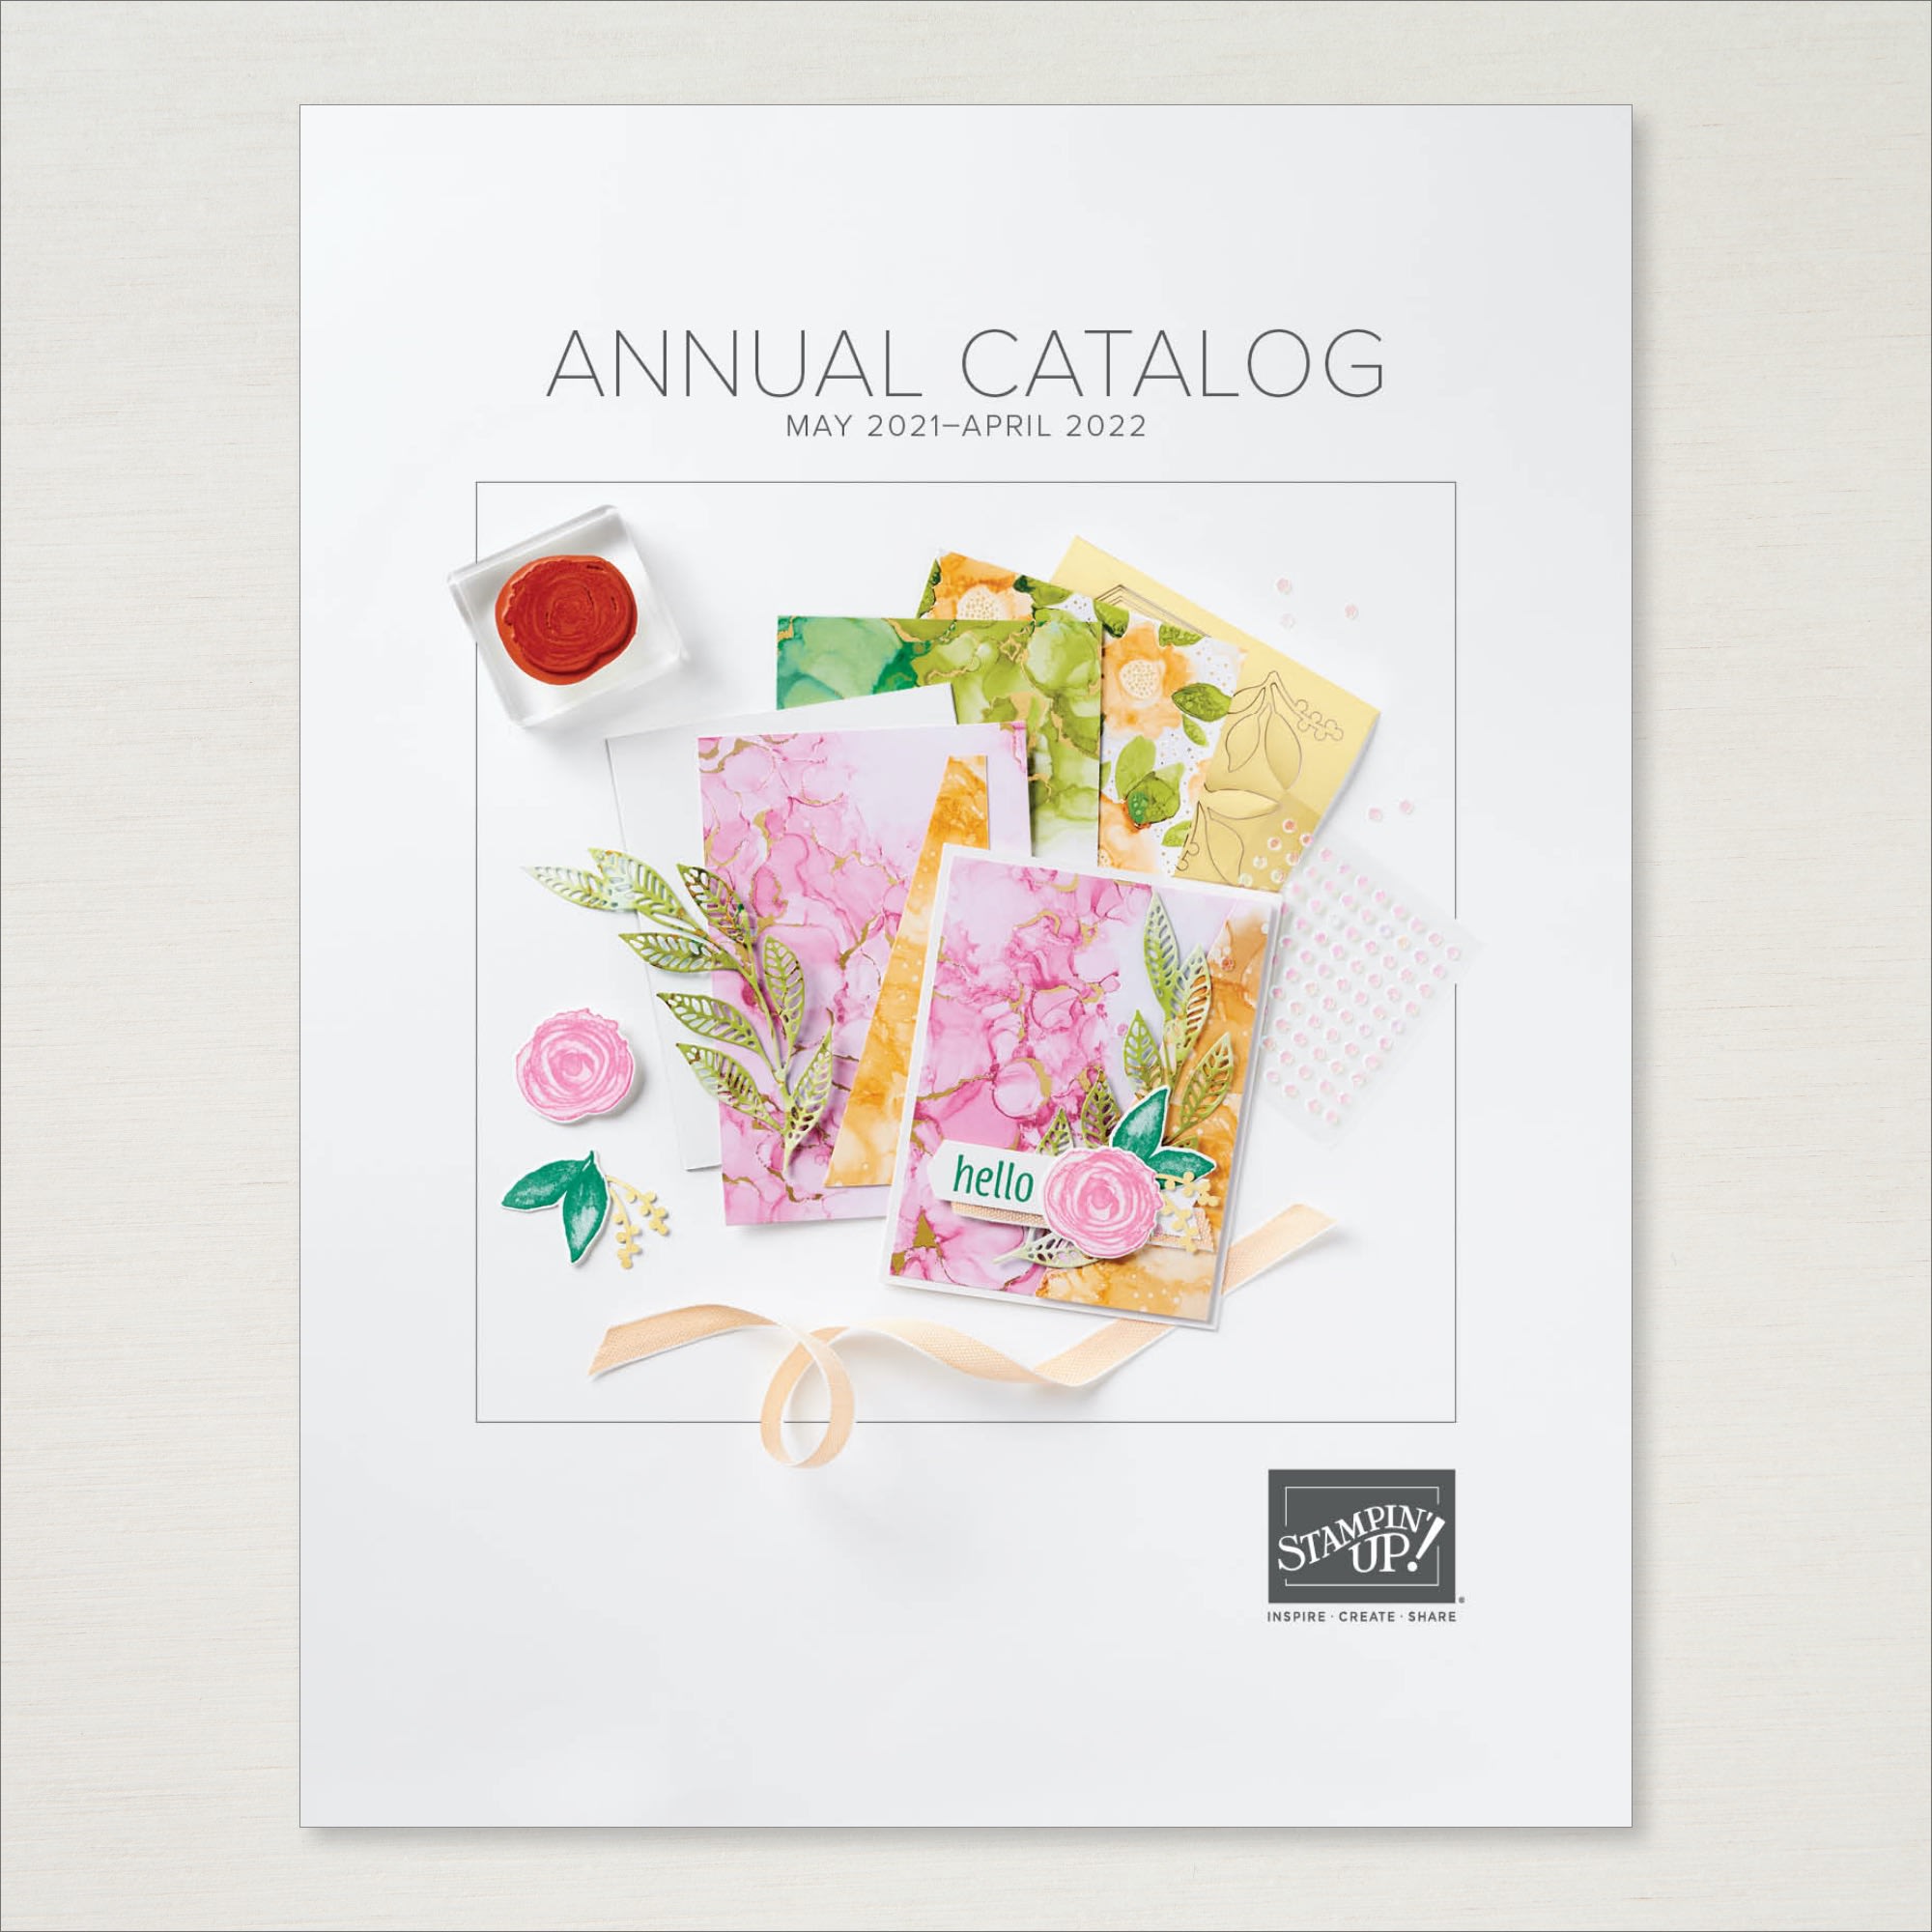
Have you heard the news? Stampin’ Up! just released an exciting new Sale-a-Bration catalog full of rewards!
Wait…what? Sale-a-Bration in the fall?
You heard it right – it’s our first time to celebrate Sale-a-Bration twice in one year!
Now you’ll earn Sale-a-Bration rewards while getting all the gorgeous goodies you need for your Autumn and holiday projects from the newly released July-December Mini Catalog (see below)
Sale-a-Bration is the most popular sale of the year because you earn MORE whether you shop, host, or join:
SHOP – Choose exclusive reward stamp sets or other items with each purchase of $50. Earn even bigger rewards when you spend $100.
JOIN – Choose $125 in Stampin’ Up! products for only $99! We’ll also throw in a bundle of your choice FROM OUR CURATED LIST.
From August 3 through September 30th, when you join my Sprinkled Ink team, you can choose a bundle from our curated list from the new August-December 2021 Mini Catalog to your Starter Kit for FREE…it the icing on the cake!
The NEW August-December Mini Catalog also goes LIVE today, giving you more options for all the crafting you’ll want to do as the events of the fall come along! Click on the links to browse both catalog online or reach out and request a hard copy from me:
Today I opened and played with the Be Dazzling Designer Series Paper that is going to be a free product to choose with a $50 (US) order for Sale-a-Bration (starting tomorrow, 8/3/21) and let me tell you, I’ve looked around my studio for anything else I can “Be Dazzle”!
Until I took this paper out of the package, I didn’t realize how the faceted pieces caught the light and reflected it! It’s a lovely champagne color and coordinates with gold, so I embossed the greeting in gold embossing powder for the first card and used the Stitched Rectangle dies to cut a “frame” from the Be Dazzling paper. The sneak peek of the Pretty Pumpkins stamp set is from the Aug-Dec mini catalog which goes live tomorrow as well!
You can also add COLOR to this sparkling paper: I used a blending brush with the Pumpkin Pie ink pad on this pumpkin and it took the color beautifully. Then I tried a Stampin’ Blends marker to color the leaf, and it worked too! HOWEVER: I would use OLD Stampin’ Blends markers if you want to color the paper, as it’s very rough and may cause the tip of your marker to fray.
This simple card would be a lovely invitation for a fall party or Thanksgiving feast!
When you purchase the supplies to make these cards (list below), you could choose the Be Dazzling paper FREE (while supplies last) for Sale-a-Bration and may even qualify for more than one S-A-B reward!
Whenever a new catalog debuted, my demonstrator friends participate in a card swap. I’ve been a part of many swaps, and I think our group (the Stitched Stampers~ a society of stampers including my Sprinkled Ink team and other demonstrator friends) has the BEST crafters! Even new stampers expand their creativity and abilities by exchanging cards and seeing how to improve.
Each person designs one card and makes multiples of the same card to trade. These were the fabulous creations from our last swap:
Lillian Williamson
Kara Preston
Amy Minson
Kristi Kelly
Jenn Seaver
Beverly Benson
Heather Bakker
Pam Clyde
Michelle Scott
Krystal Owens
Mary McGill
Mary McGill
(My swap was the 🍑 Peach card I shared in this post)
It’s a nice perk that demonstrators get to order before a catalog goes live, and our stamping friends truly enjoy exchanging ideas! There is always room for you: Would you like to join us?
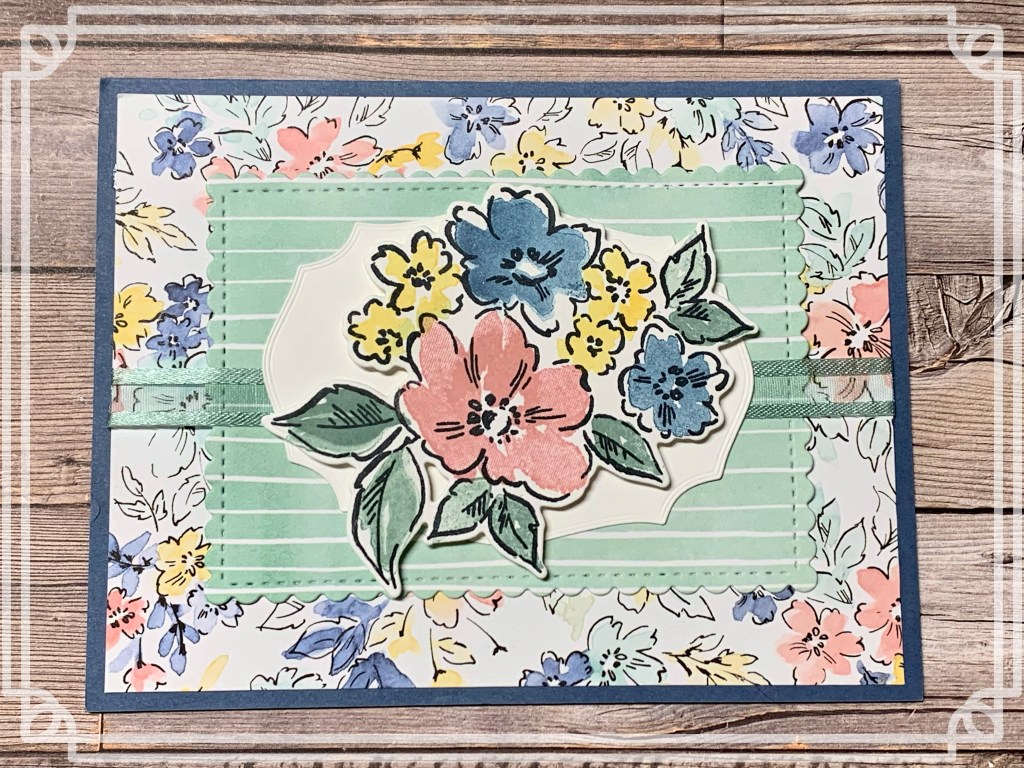
You don’t have to be able to draw to be artistic: Rubber stamps are the tools that give you the creativity without the time and commitment of becoming a master!
The Hand-Penned Petals suite has stamps that appear hand-drawn, with two step-stamping images to “fill in” colors and hand-penned greetings.
Pair the stamps with the coordinating dies and Designer Series Paper and you’ll be creating keepsakes your friends will treasure for years to come. When you choose the suite of products, it includes the stamp set, dies, Designer Series Paper and Genial Gems embellishments!
TIPS: Create Customized Designer Series Paper to go with any project! Color areas or patterns of the paper with Stampin’ Blends, Stampin’ Write Markers, or watercoloring. This works especially well with black and white patterned papers
DOWNLOAD OUR LATEST CATALOG
Add an extra package of Hand-Penned 12″x12″ Designer Series Paper to your order for 15% off in July so you can keep crafting with easy coordination all year long.
In true re-cycle fashion, tie dying is back on trend! And it seems a bit more classy than the first time around, don’t you agree?
Naturally, Stampin’ Up! saw this coming and created the Spiral Dye stamp: It creates GROOVY backgrounds for cards (at 4-1/2″ x 5-3/4″, it covers a standard A2 size card front).
The COOL thing about this stamp is that when you spin the stamped image 180 degrees, you can stamp it a second time with another color and get the Tie-Dye effect! The Stamparatus tool makes it SUPER easy:
Looking at the spiral, it reminded my how often my “well-laid plans” get changed and I have to make adjustments. It happens to you, too, right? Learning to pivot and change directions is a skill that takes practice, but will help us learn to deal more smoothly with life’s unexpected challenges. Which is where I got the inspiration for this card:
Tell me you can relate.
Using Magenta Madness and Granny Apple Green as my colors, I stamped the Spiral Dye on a 4″ x 4″ piece of Basic White card stock, then used my trimmer to cut it into 6 random pieces before adding it to my card front. Demonstrators call it the “Scrappy Strip” technique.
To get a perfect edge around the word PIVOT (cut from the very versatile Playful Alphabet Dies), use an old fashioned compass drawing tool on the smallest width and lightly trace around the letters glued to white card stock with a sharp pencil. After fussy cutting, erase any leftover pencil marks.
The Lighthearted Lines had the perfect sentiments to go with it (PLOT TWIST!) and on the inside of the card I used another quote from the set:
Another Lighthearted Line sentiment that would have worked says, “When nothing goes right, go left”
Next I wanted to try embossing with the Spiral Dye and it worked out spectacularly:
It’s even more shiny in person!
I made you a tutorial for this one which you can download by clicking the button…and BTW, if you don’t have Silver Foil Sheets from last year’s catalog, there will be some in the August-December mini catalog coming 8/3!
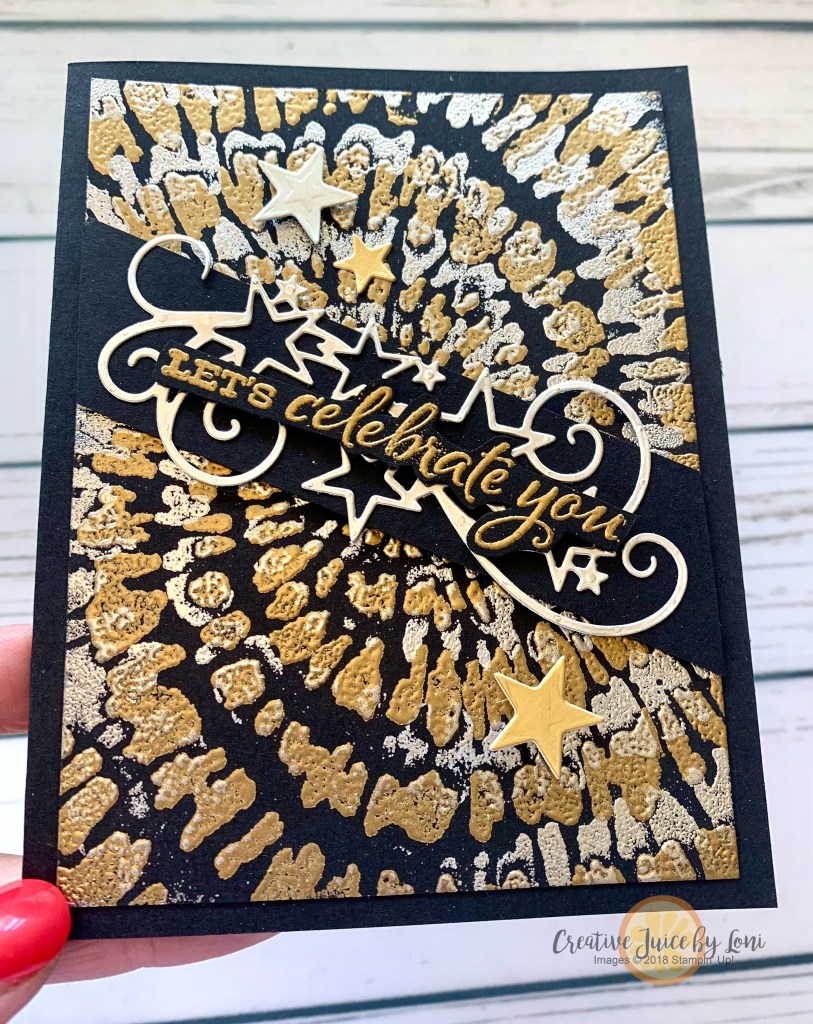
We’re back with project ideas from around the globe to help you use your favorite Designer Series Paper! And what perfect timing, as many of our pretty patterned papers are ON SALE this month (July 2021) for 15% off:
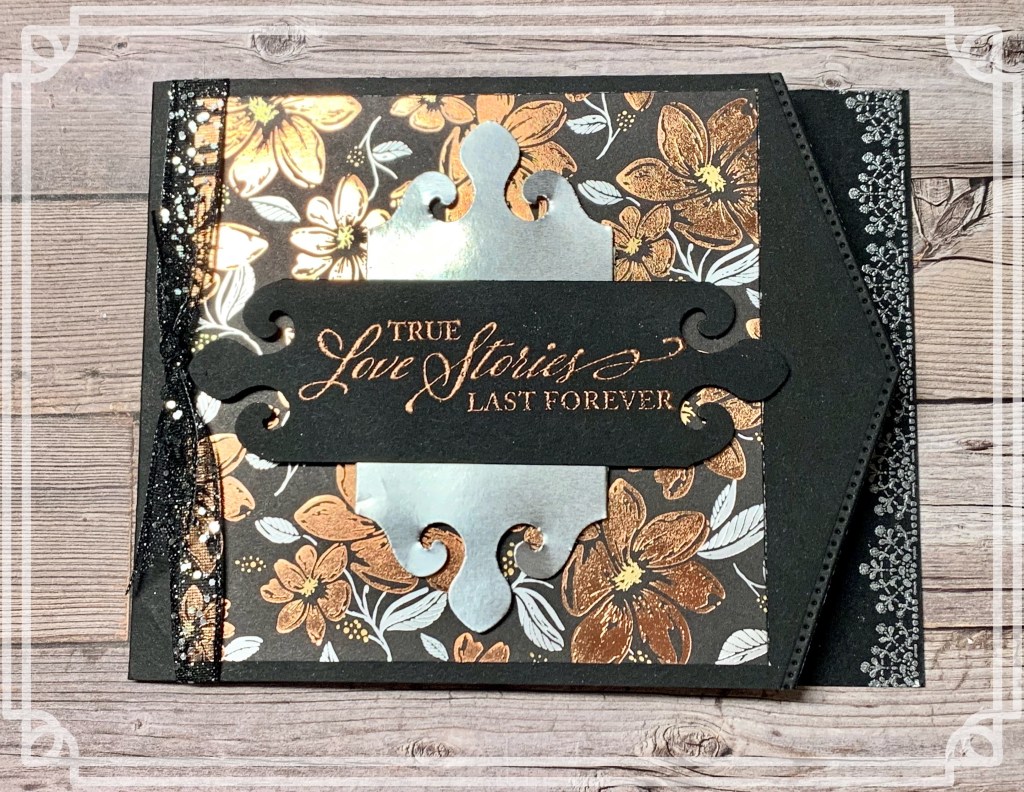
While the Expressions in Ink paper is a SPECIALTY paper (and not on sale), I wanted you to see how gorgeous it is with the gold veins running through the watercolor images, so take a look:
This is a fancy fold that shows off BOTH sides of your DSP and you can use as a card (portrait) OR a pocket card (landscape).
To make the card, begin with a 5-1/4″ x 11-3/4″ piece of Designer Series Paper and score it along the long side at 1-3/4″, 4-3/4″ and 7-3/4″. Next, accordion fold it so that you have the piece you want on top, then adhere the back of the largest panel to a 4-1/4″ x 5-1/2″ piece of card stock for a sturdy matte around your paper.
Here is the card open. I did tie the ribbon around the smallest panel and adhere it down so the ribbon won’t slide off, but you can leave the front flap free, if you’d like.
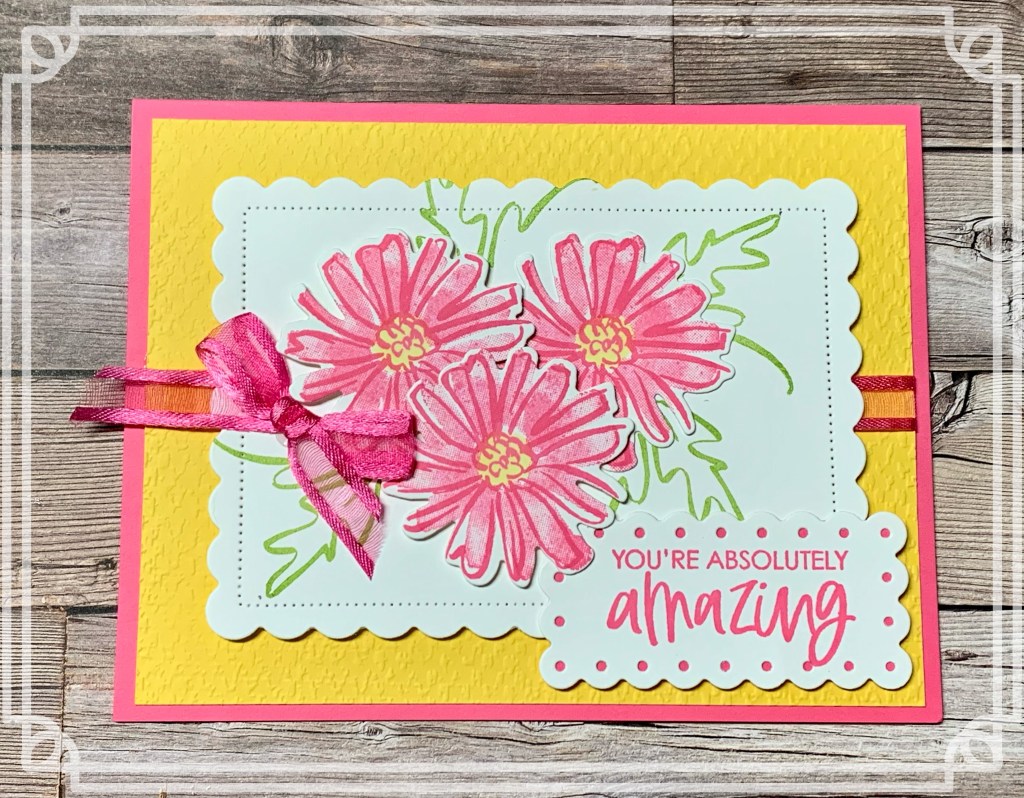
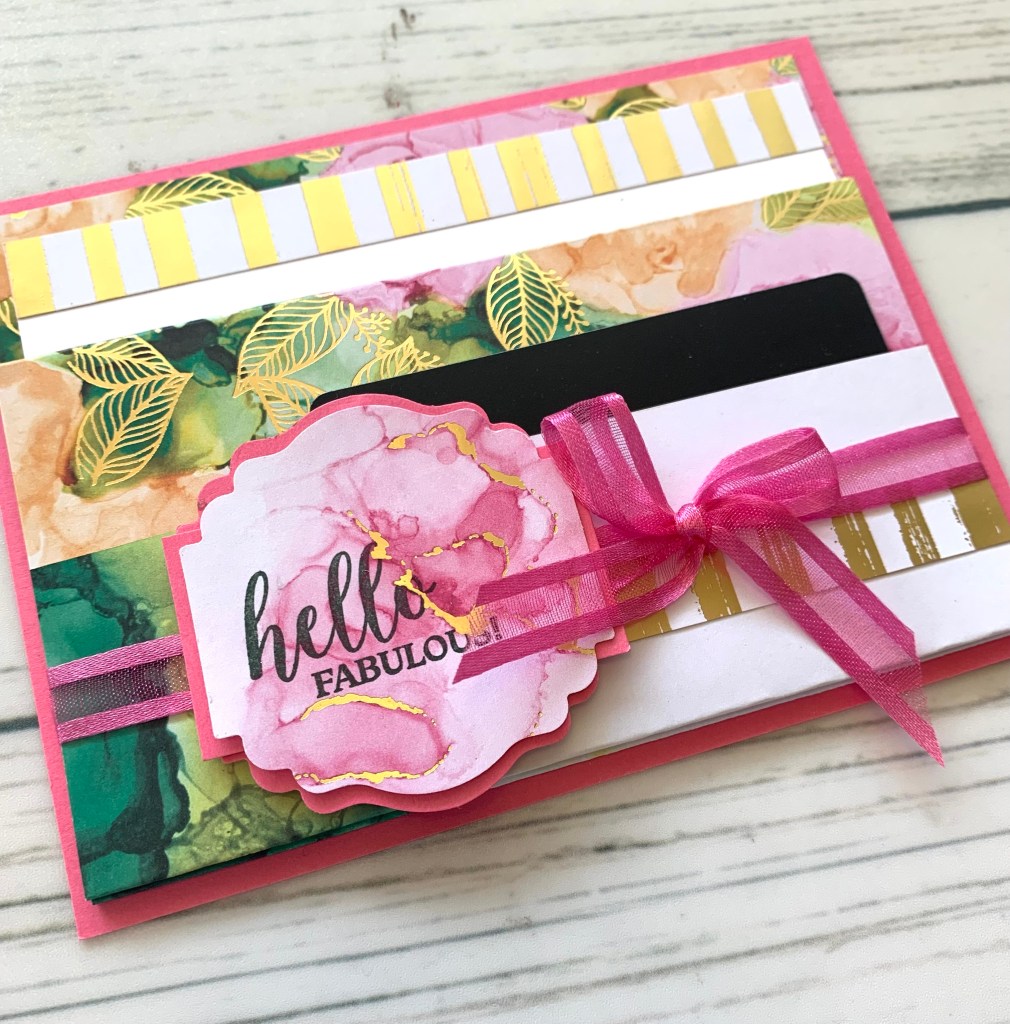
The Expressions in Ink Designer Series Paper also coordinates with the 2021-2023 In-Colors, so you can mix and match the designs and colors!
For this version, the measurements are the same, but I tied the ribbon all the way around all the layers of DSP before attaching it to the card stock matte, creating two “pockets” where you can slide the card you’ll write in in the top pocket and a gift card into the shorter pocket.
The photos really don’t do the sparkle justice, but I hope you get the feel for what you could create with it! I’ll list the supplies used at the bottom of this post.
Now it’s time to hop over to Linda’s blog to see what she’s created with the Hand-Penned paper~


")


")
")
")


")


 Gingham Ribbon")


 Specialty Paper")


")
")


 Specialty Designer Series Paper")

 Open Weave Ribbon")

 Open Weave Ribbon")

 Open Weave Ribbon")

")
")

")


