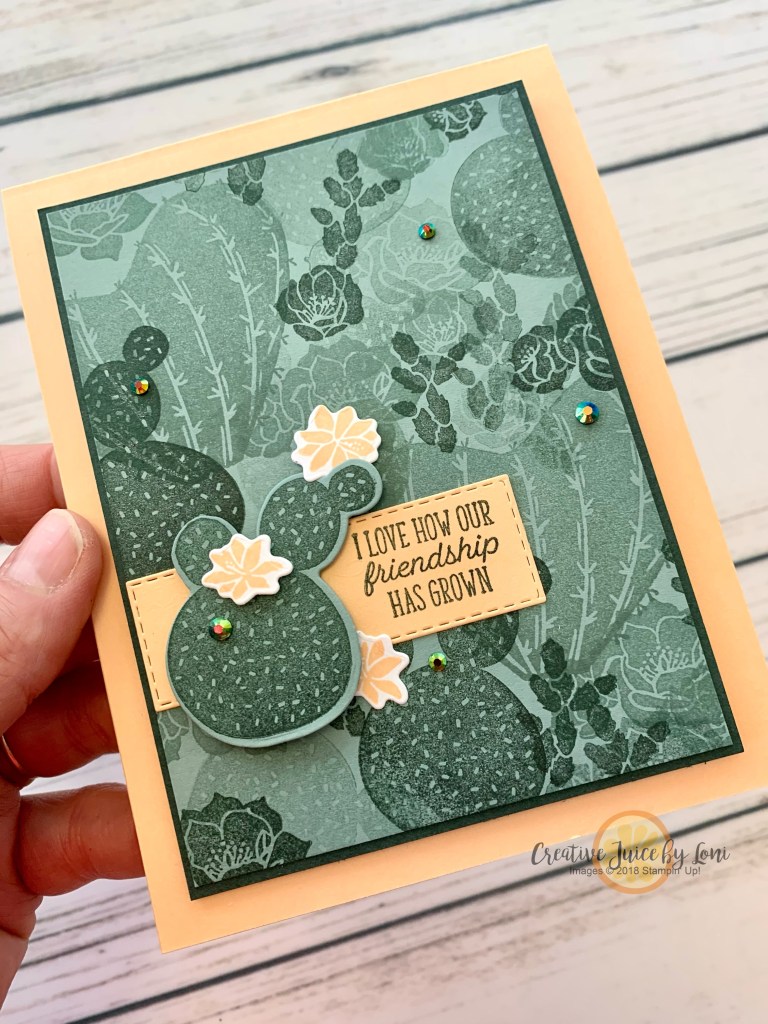
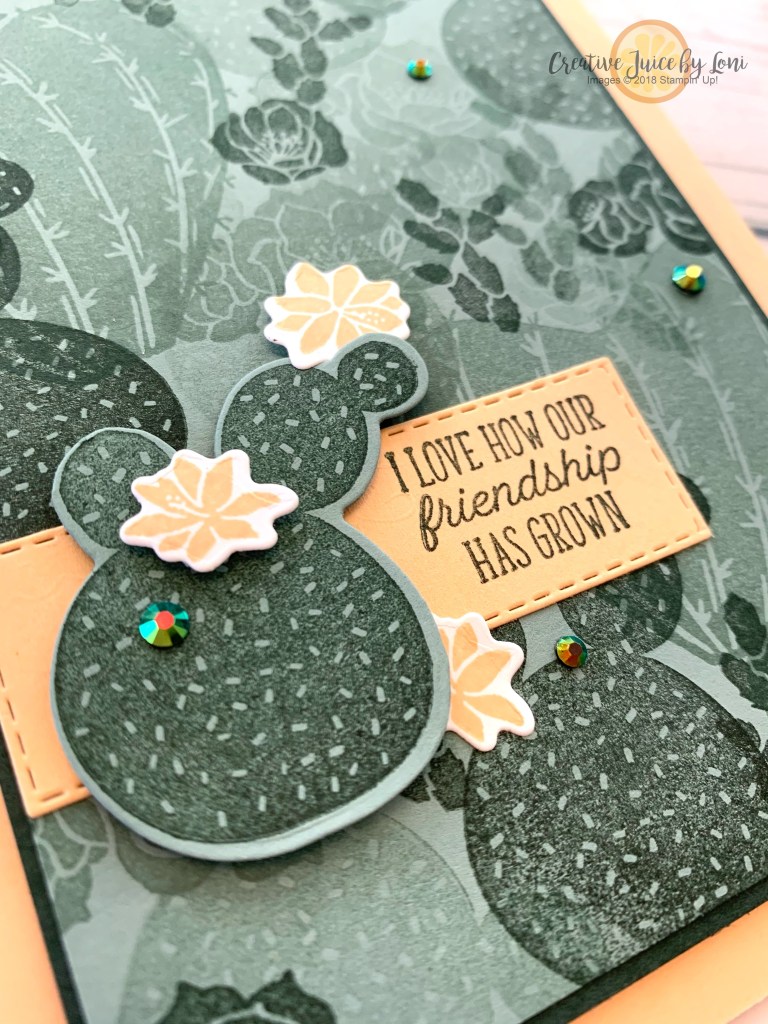
While I’m a native southwestern girl, I confess I’m not really into southwestern decor. However, the Flowering Cactus Product Medley caught my attention in the Jan-June Catalog with a fresh palette and adorable images and fonts that really made me want to play with it.
Enter the #GDP293 color challenge with 3 new In Colors, and they’ve got me reaching for that Flowering Cactus…
While stamping the background, it’s not going to look good until you are almost finished stamping…don’t worry if it looks a mess, it will all work out fine!
This is the type of card you have to intentionally mail: Can you think of a friendship that has become richer through the years because you’ve been through a lot of “sticky” situations and “dry” seasons? Write down those memories and be grateful that you are closer because of them.
Don’t miss the chance to add the Flowering Cactus Product Medley to your stamping stash: It retires in June!
In September 1992 I was a young mother with two children under 2 and while I loved being a mom and adored my babies, I also craved a creative outlet (aside from fixing endless meals) and adult conversation.
One Sunday at church, my husband took our fussy baby out to the foyer where he ran into a classmate from High School. As they visited, LaVonne told him that she and her sister had started a direct sales company selling rubber stamps. Cody knew of my love for all things paper and my scrapbooking habit, so he introduced us after the service. Once she handed me a Stampin’ Up! catalog from her Suburban, I was hooked.
The experiences I’ve had as a demonstrator in the ensuing 29 years have added so much value to my life! There is a joy to making and mailing cards and crafting something permanent, together with the relationships I’ve forged with some of the kindest and most creative people around the globe that is glorious!
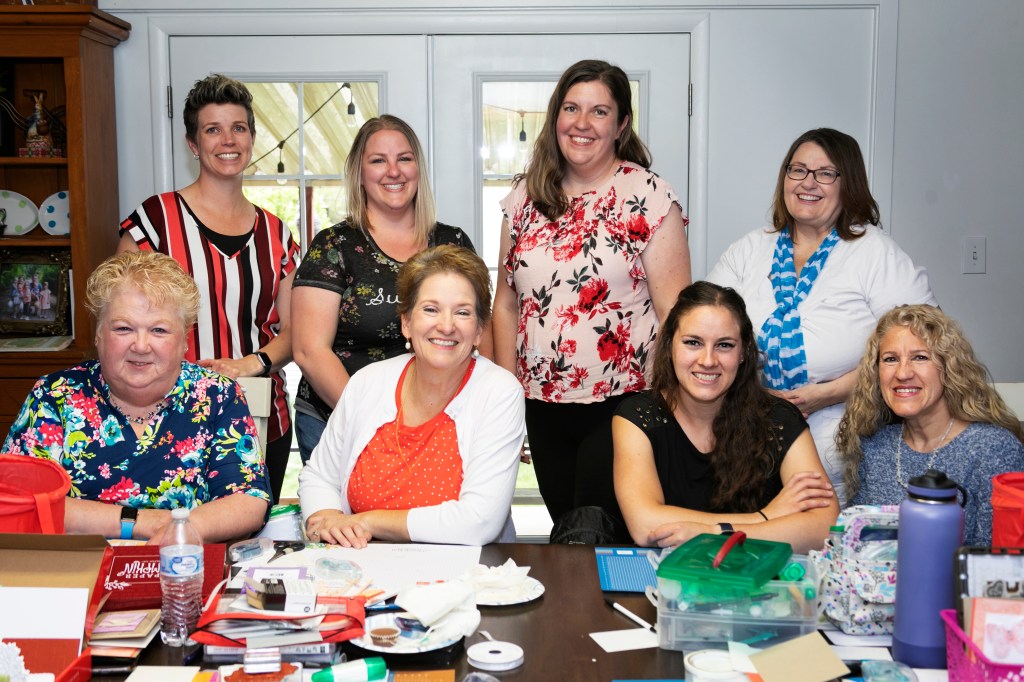
At our April Demonstrator Gathering, we had a Shoebox Swap and Dessert Bar with our stamping friends!
If you love crafting and are looking for more connection, being a Stampin’ Up! demonstrator is a great way to do both. and now is a fabulous time to join my stamping family: Through May 31st you’ll get a bonus of even MORE FREE products in you customizable Starter Kit!
If you don’t think demonstrating is for you, joining to get the discount on your personal purchases is a great benefit. You can enjoy a discount of 20% or more on all future orders. Whether you join to share creativity, hold workshops and earn money, or get a great discount on your orders, we have options. There is no obligation for purchasing the Starter kit: Just a risk-free opportunity to see where it may fit in your life.
RISK FREE DISCOUNTS
So let’s recap – For only $99:
Choose up to $155 of any Stampin’ Up! products of your choice for your kit. Choose from current catalogs, bundles, and Clearance Rack.
20% discount! Enjoy a minimum of a 20% demonstrator discount every day.
Free Shipping! The starter kit ships FREE for another 10% savings.
No risk! You’ll have through the end of your first full quarter (September 2020) to “test drive” demonstrator discounts and benefits.
No penalty! If you reach $300 in sales during July-September, you automatically remain active for another quarter. If you don’t reach $300 in sales, you can “drop” with no penalty, and you keep everything from your Starter Kit.
No catch! There’s no obligation to hold workshops or parties, sell products to others or personally purchase anything beyond the kit.
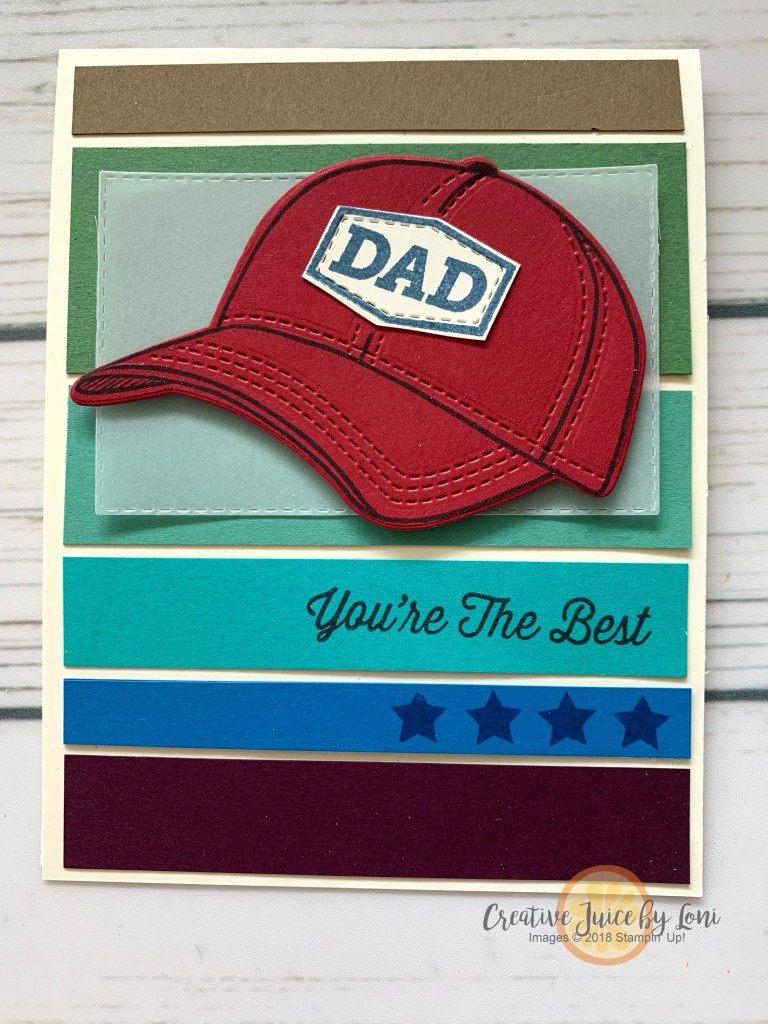
This is the time of year I make the most masculine cards. With Father’s Day coming up (and plenty of boy birthdays), I wanted to take the #TGIFC316 sketch and try it with the new Hats Off stamp set and dies.
The result was a card that reminds me of my both my father and father-in-love (a term borrowed from my friend Jan). What do you think?
Masculine cards don’t need a lot of embellishments, so once I figured out the width for the card stock strips, it didn’t take long to put together. They are all 4″ long and from the top, the widths are: 1/2″, 1-1/2″, 1″, 3/4″, 1/2″ and 3/4″. Choose any color combination you love, and I’ll put my supply list below if you want to copy it.
The stitching around the hat are from the dies and add just the right touch. TIP:Adhere your vellum to the card under the hat and you won’t see the adhesive showing through.
I think you’ll find plenty of occasions to use this very versatile hat, so order it in time to put it to use for Father’s Day!
New Stampin’ Year, NEW IN COLORS! Welcome to our May 2021 New at SU! Blog Hop where we are sharing the 2021-2023 In Colors with you in a fresh new way: by sharing Fun Fold Cards to try in your own craft studio! You’ll want to PIN all these terrific card ideas, so let’s get hopping around the world with our design team so you can give it a try sooner than later!
I chose to focus on the Pale Papaya color because it happens to match my favorite Designer Series Paper, “You’re a Peach” and I started with the In Color Vellum – which is shimmery on one side, and oh, so pretty!
On to my project, a Vellum Slide-Out-Pocket gift card holder:
My card was inspired by fellow demonstrator Rachel Tessman
What a PEACHY way to give a gift card!
Here are the pieces you need to make this card:
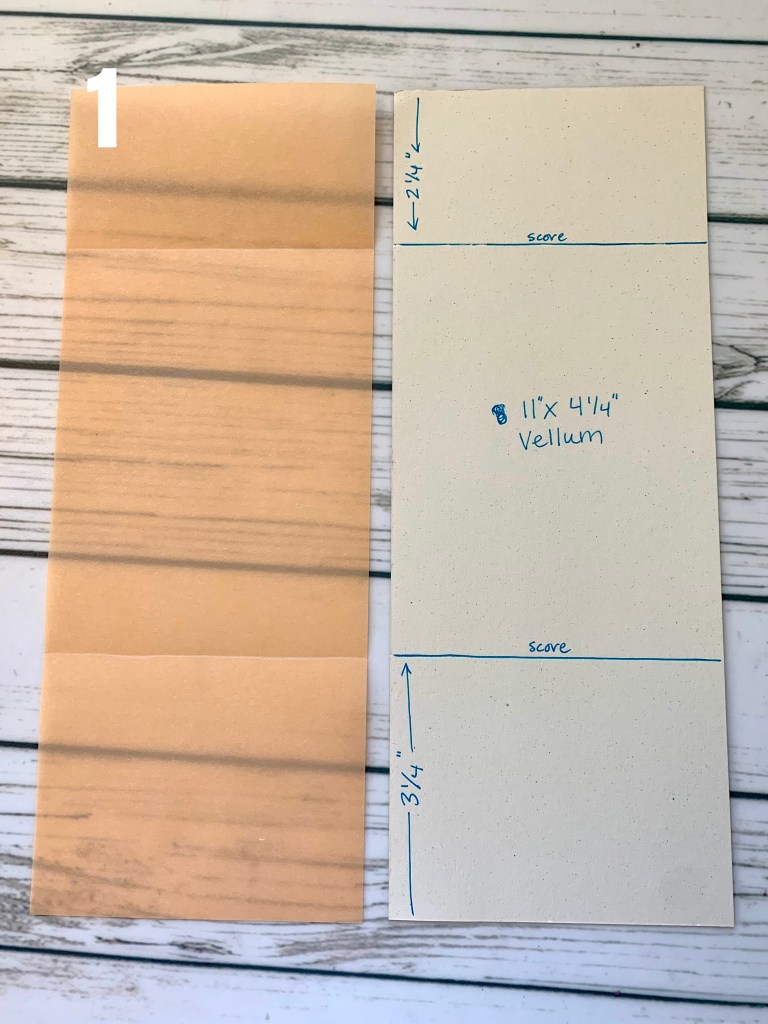
Pale Papaya Vellum: 11″ x 4-1/4″ scored at 2-1/4 from one end and 3-1/4″ from the opposite end.
Designer Series Paper: 7-3/8″ x 3-1/2″. If your paper has a direction, you’ll want to score at 2-5/8″ from the top (so your pattern will go the correct way on the pocket) and 3/8″ from the bottom. When you assemble the pocket, the 3/8″ edge will actually adhere toward the top of the card (see image 3)
Basic White card stock: 3-1/2″ x 2-1/2″ plus scraps to stamp on
Pear Pizzazz card stock: 3-3/8″ x 2-3/8″
Pale Papaya ribbon: 18″
I embossed the Pear Pizzazz card stock with the lovely Stitched Greenery die, then stamped and die cut my peach images (TIP: Ink up your peach stamp with Pale Papaya ink, then use a sponge dauber to lightly add a bit of Polished Pink ink to the edges)
Then follow these steps to assemble your card:
There is only Tear & Tape adhesive on the edges of the Designer Series Paper pocket and the 3/8″ top edge of the pocket, and then on the same spot on TOP of the vellum to adhere the card stock panel to the front of the card. No other adhesive is necessary!
I stamped “Happy BIrthday” on the back side of the front panel before assembling the card so it shows through when you open it.
Products used are listed below, and I appreciate your comments! Then jump over the pond to our Columbian in Germany~ Ximena’s post to find another fancy fold card featuring the In Colors:
Do the happy dance with me ~ the new 2021-2022 Annual Catalog is here!
Don’t have this hot read in your hands? You can view the catalog online, pick up a copy at my New Catalog Reception this Saturday, May 8th or contact me to get your own copy!
JOIN A CLUB! The Creative Juice Stamp Club meets every other month and new this year~ membership in the 5 month In Color Club from May-September means you will stock up on new In Color products (and projects) from anywhere in the U.S.!
Starting May 7th (while supplies last) subscribe to Paper Pumpkin for just $5 the first month with promo code HOMERUN0521 while supplies last (new subscribers only)
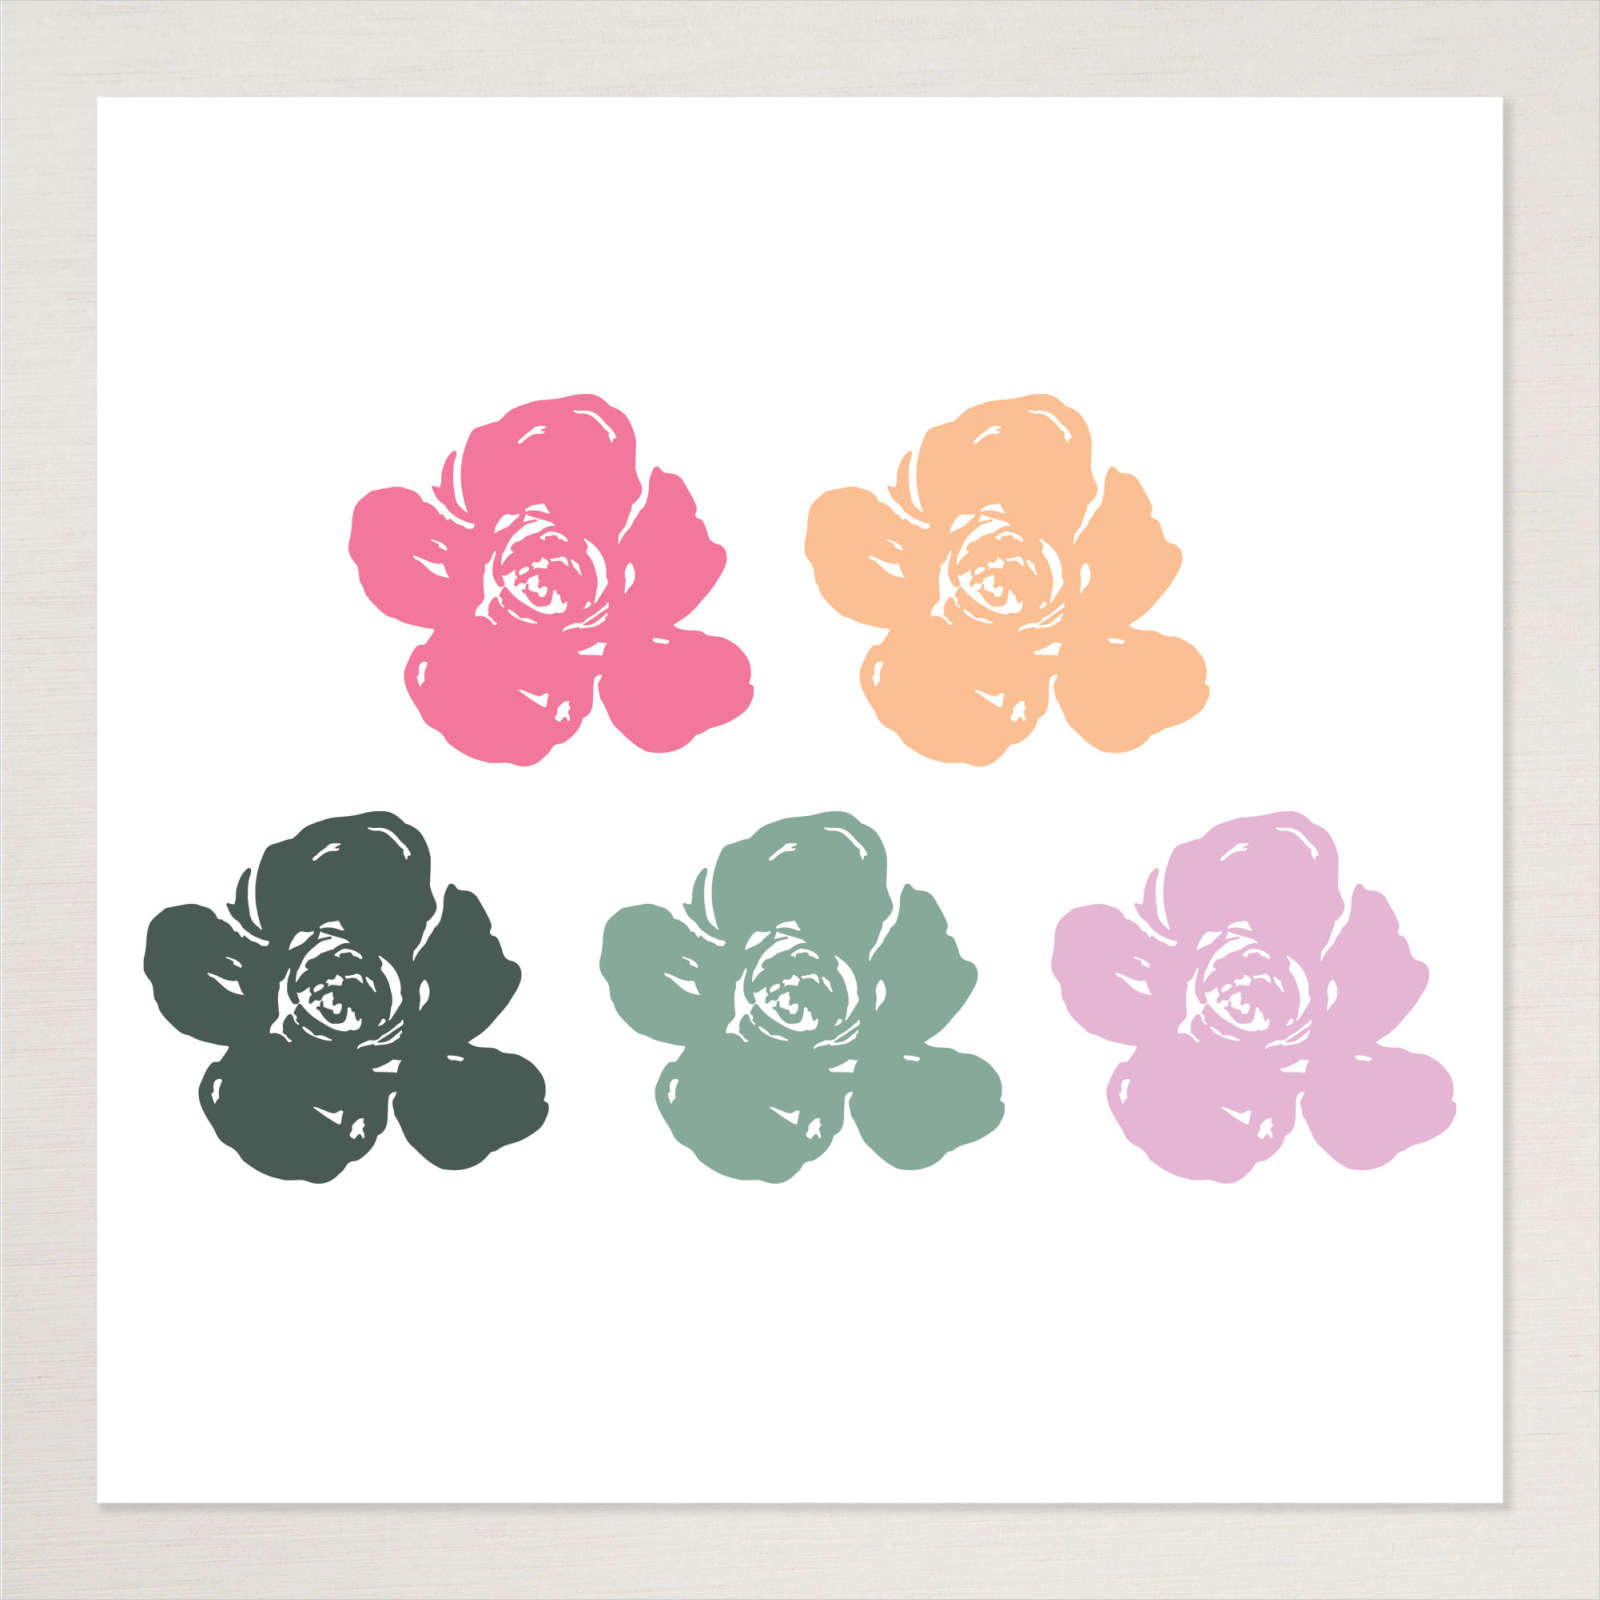
NEW 2021-2023 IN COLORS
New colors are the perfect springboard for fresh creativity and that’s exactly the idea around the In Colors. 5 new on-trend colors are released each year. These are a great modern take on the colors of nature and the best way to collect them all would be to join my In Color Club: You can be a member anywhere in the United States and it lasts from May-September 2021.
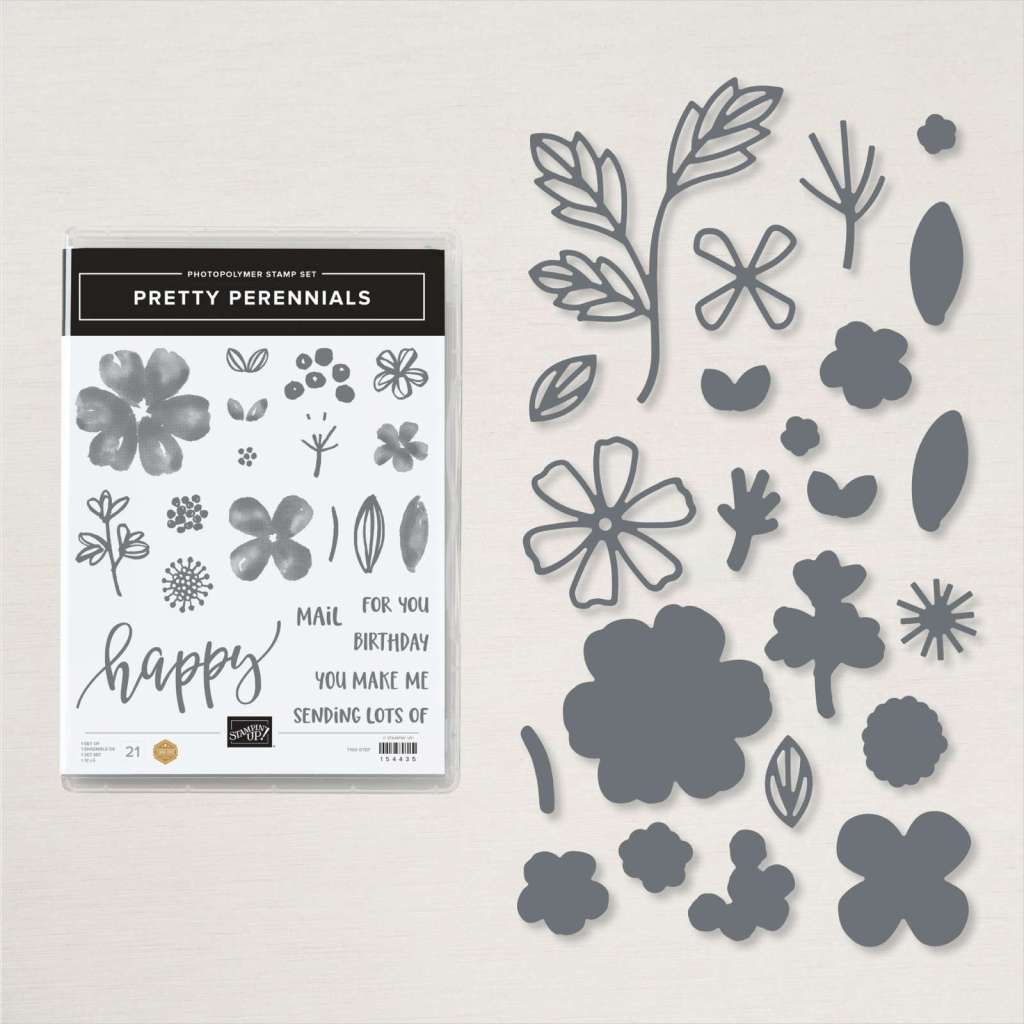
Stamping is one of those things that make me doubly happy: When I create something lovely AND when I send it to someone I love and it makes THEM joyful too! The Pretty Perennials bundle in the January-June mini catalog spreads happiness in a BIG way:
The large scripty “HAPPY” is like a strong suggestion! Choose a colorful palette and create joyful celebrations:
I’ll list the supplies I used for this birthday card below, and while this bundle will NOT be appearing in the 2021-2022 Annual catalog, it is available through June in the mini catalog that is crossing over for a few months.
I chose it for my May 3-for-Free kit and will send you the consumable supplies to create 3 projects in the mail and the tutorial via email when you purchase the bundle from my stampin’ store in May 2021!
Here are the suggested supplies you’ll need to complete the 3-for-Free projects:
Ink pads: Memento Tuxedo Black (132708), Whisper White Craft (147277); Bumblebee (153116), Night of Navy (147110), Granny Apple (147095); Poppy Parade (147050); Mango Melody (147093)
Other: Mini Stampin’ Dimensionals (144108), Heat Tool (129053), White Stampin’ Emboss Powder (109132) – NOTE:The white emboss powder will only be available in a bundle with other colors after May 4th, so order a single one TODAY!
This card is a BONUS one you can create with the supplies listed below!
Yesterday was a tragic comedy at my house: In an attempt to help, my son updated the OS on my MacBook…and the result was that I lost everything. That was just the beginning of my trauma, but I won’t bore you with how I ended up crying myself to sleep in the parking lot of Simply Mac as they reset my computer to factory settings.
Those days happen to everyone.
When things like this happen, I remind myself that I wouldn’t recognize happiness if I wasn’t familiar with misery. T The scripture that was on repeat in my head yesterday was from Doctrine & Covenants 29:39: “…if they never should have bitter they could not know the sweet” (The D&C is a collection of modern day revelations from the Church of Jesus Christ of Latter Day Saints) I’m just grateful that the sun rose this morning and I can start again!
One GOOD thing that happened while I was on the phone for 4 hours with Apple yesterday: I got to stamp a card for the Global Design Project Color Challenge #GDP289
This color combination made me smile when I saw it and the first set that came to mind was my beloved Cute Fruit stamp set that is retiring next week.
Just like the fruit on the card, I had to stamp on a happy face for the day and keep moving forward.
Lesson to be learned: When technology fails, we’ll always be able to STAMP!
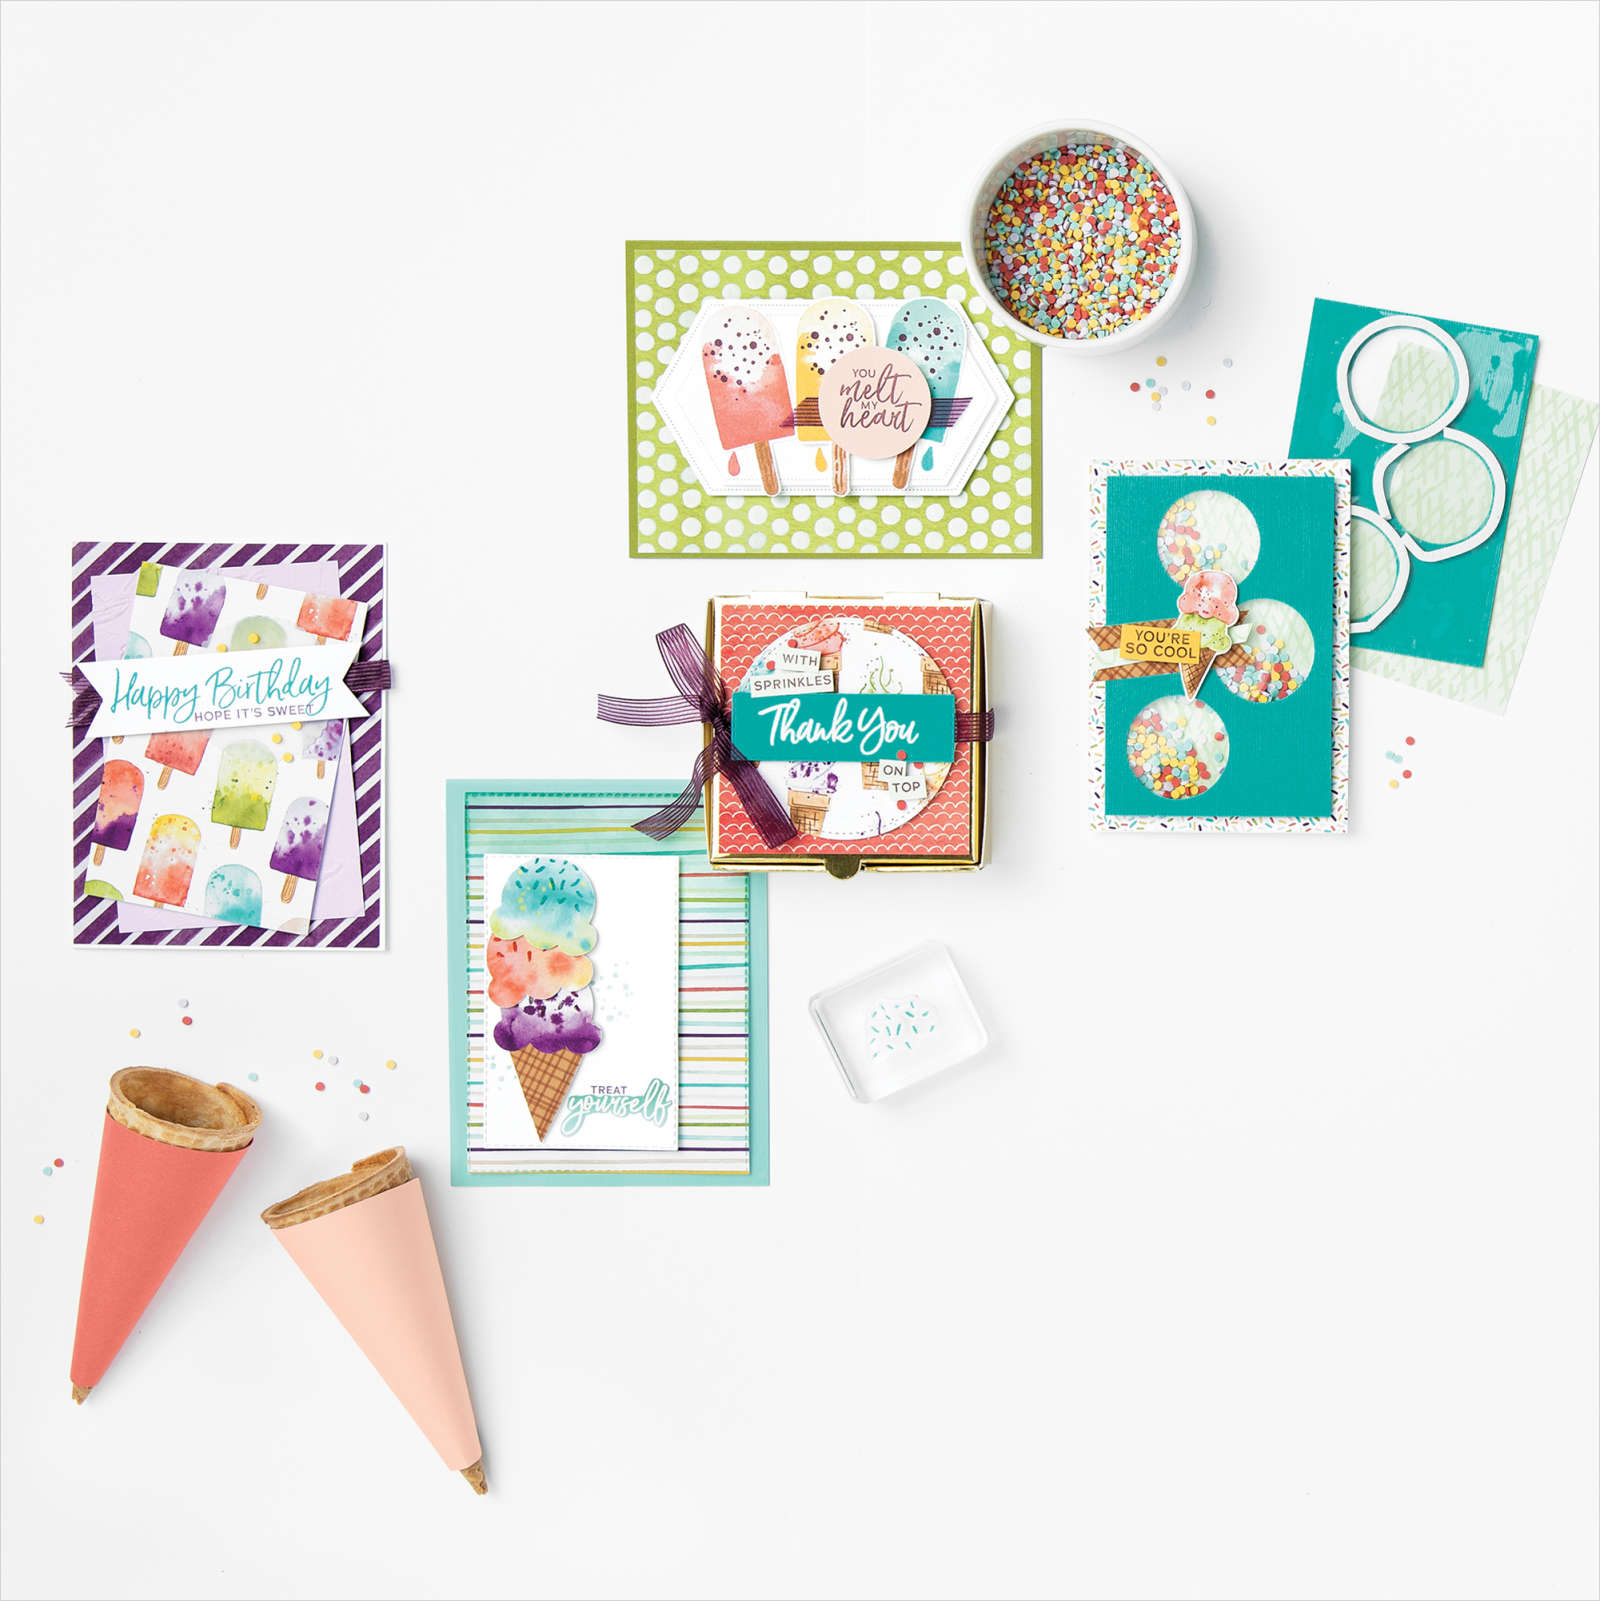
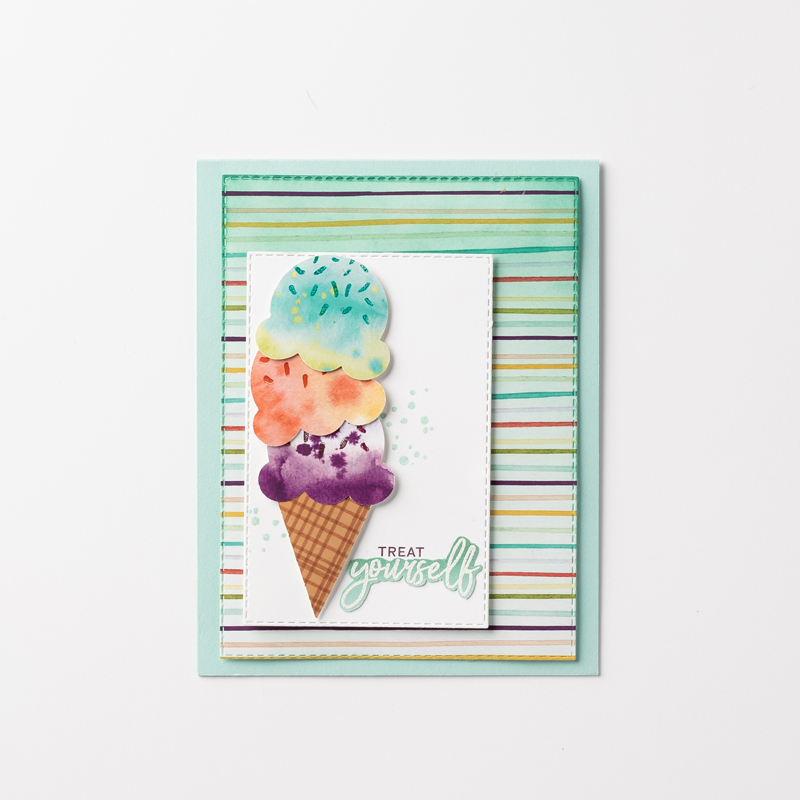
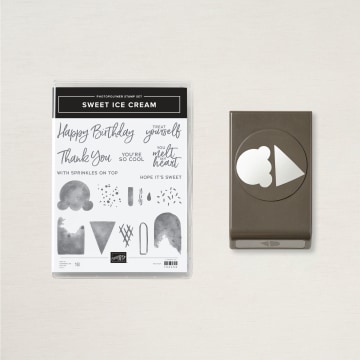
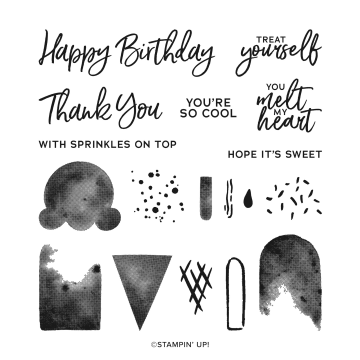
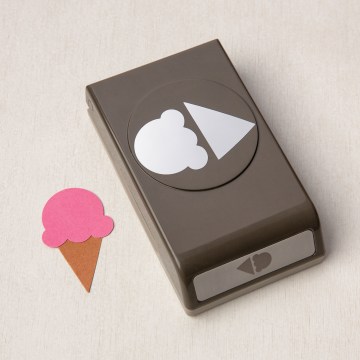
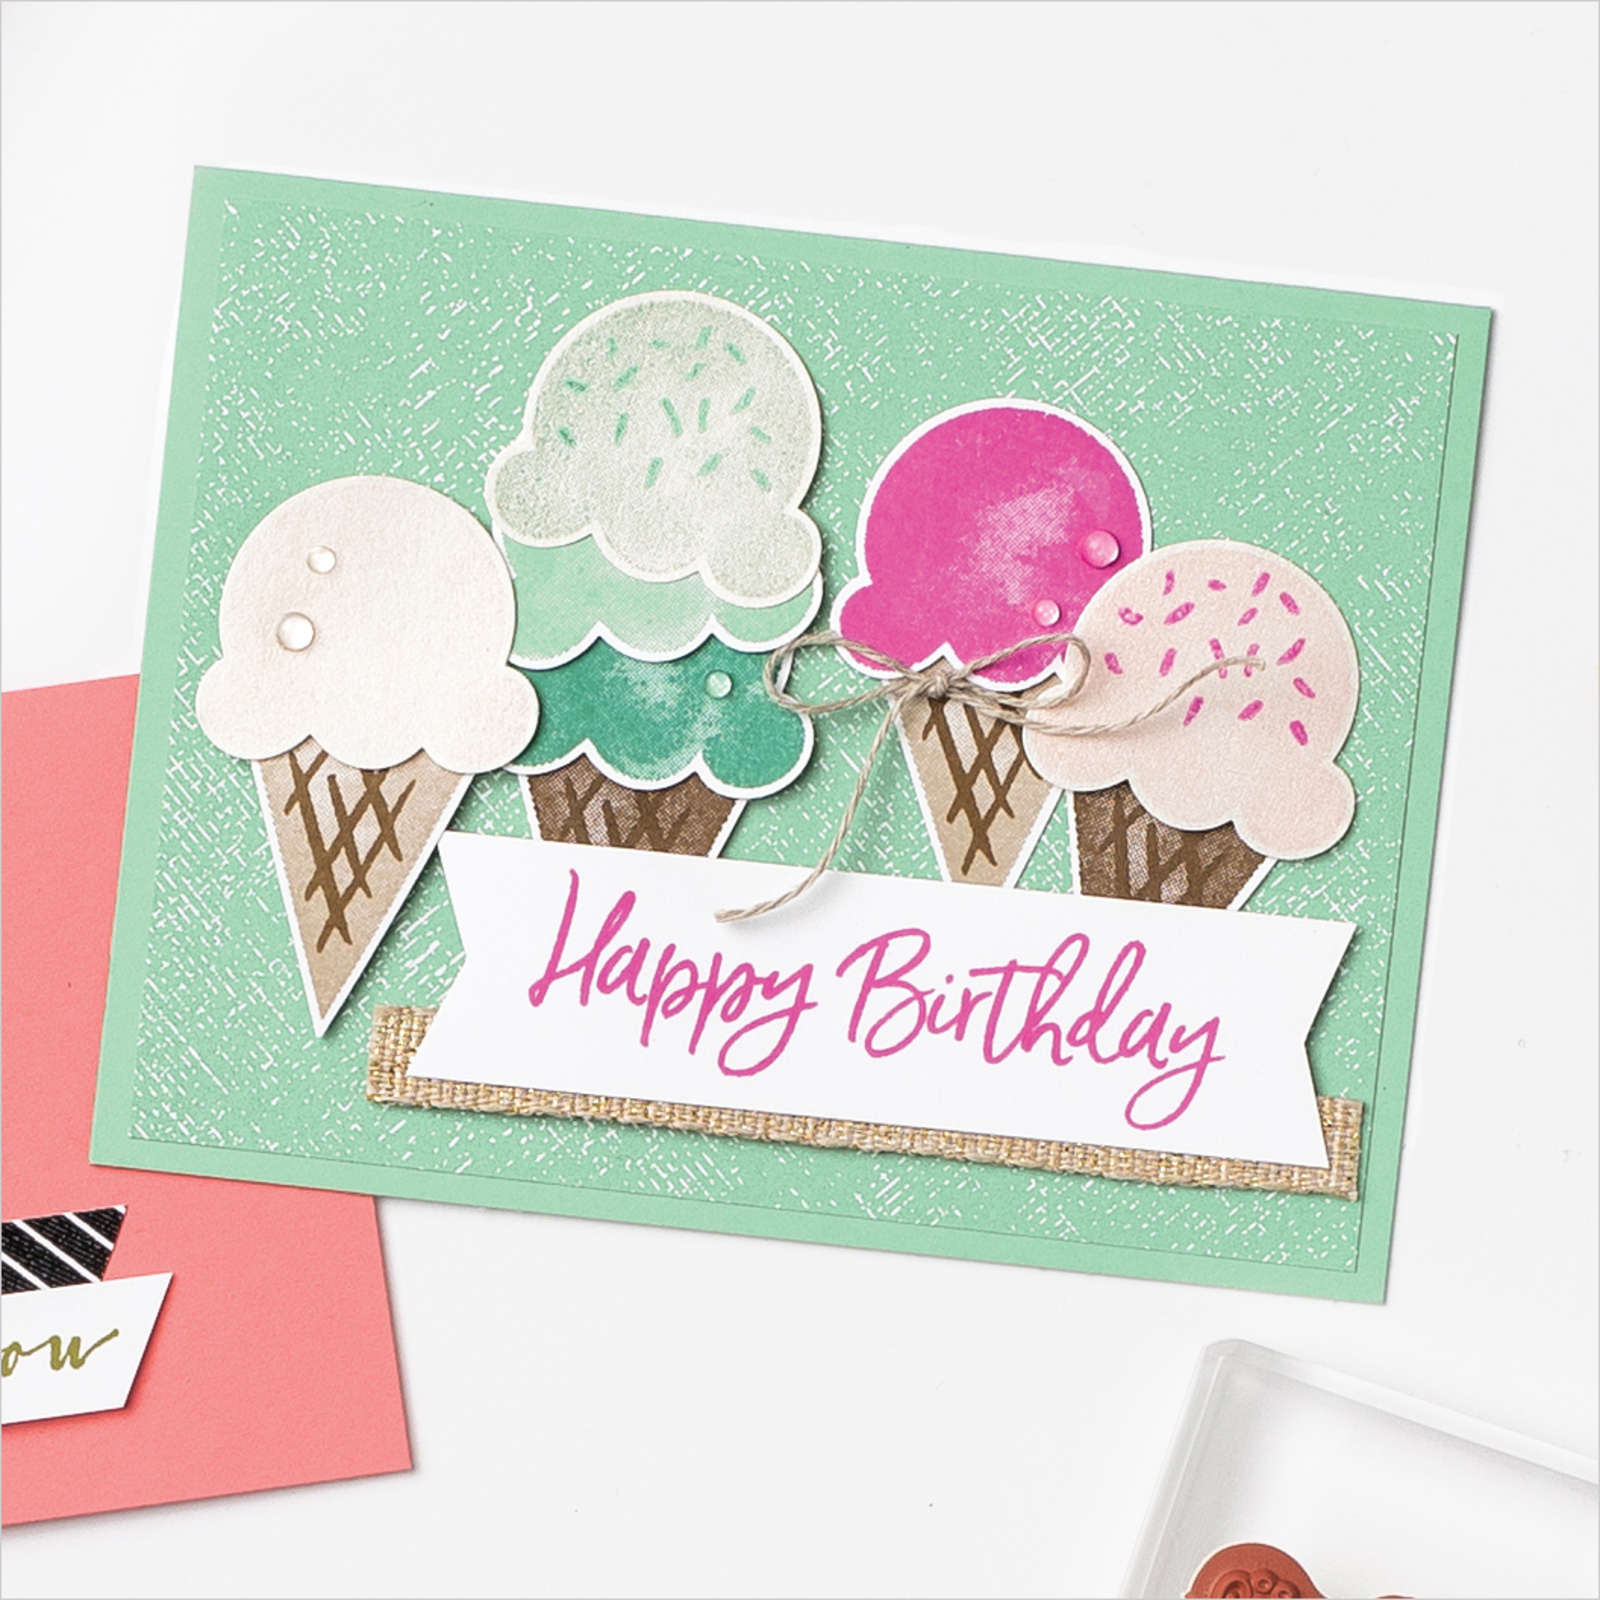
I’m so pleased that you like the Ice Cream Corner Suite as much as I do! I’m all-in for any rubber stamps with a coordinating punch: It makes paper crafting so easy.
This is the last week to order the bundle or suite and receive my April 3-for-Free kit:
While the stamp set and punch will be in the 2021-22 Annual catalog, they won’t be bundled together with the 10% discount like they are right now, and the coordinating Designer Series Paper will be retiring by the end of June!
This is a card we created at our last Stamp Club…and by the way, Stamp Club begins again in MAY, and we’d love to have you JOIN THE CLUB!
Don’t limit your creativity to cards…I even used the supplies to create this with a Rusch clock from Ikea:
Here’s the video tutorial taken from my Facebook Live demonstration:
What melts hearts, but won’t melt in the mail? Cards, gifts and decor created with the Ice Cream Corner Suite!
Sprinkle beautiful colors together with sweet images, add a hint of nostalgia, and you’ve created the perfect recipe for the Ice Cream Corner Suite!
Whether you are sending sweet thoughts and birthday wishes or creating cool summer memories, this coordinating two-step stamp set and punch bundle are a must-have combo.
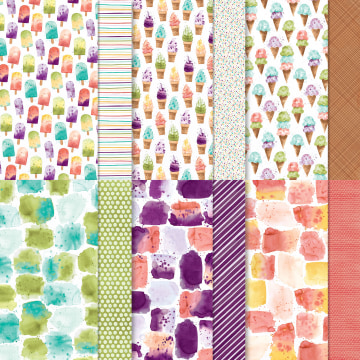
The bright, fun Ice Cream Corner Designer Series Paper coordinates so you can punch swirly ice cream scoops and waffle cones with or without stamping.
————————————————–
Ice Cream Corner Ombre Card
SUPPLIES:
STAMPS
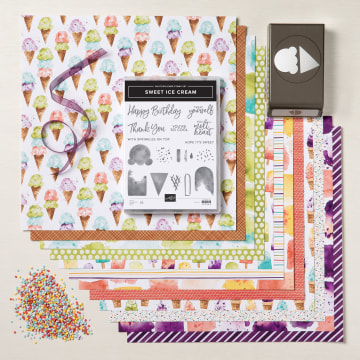
Sweet Ice Cream Photopolymer stamp set (#154456)
PAPER
Pool Party (#122924), Thick Basic White (#159229), Ice Cream Corner Designer Series Paper (#154567)
INK
Blackberry Bliss Pad (#147092), Terracotta Tile (#150086), Bermuda Bay (#147096), Pool Party (#147107), VersaMark Pad (#102283)
TOOLS
Paper Snips (#103579), Rectangle Stitched Dies (#151820), Blending Brushes (#153611), Ice Cream Cone Builder Punch (#154241), Heat Tool (#129053)
EMBELLISHMENTS
White Stampin’ Emboss Powder (#109132) When you scoop up the bundle or the entire suite from my Stampin’ Store in April, you’ll receive 3 tutorials via email AND the consumable supplies (paper, embellishments, etc.) for those projects in the mail!
You know we bring you the latest and greatest from Stampin’ Up! in our monthly “New at SU!” blog hops, but this month is a little different: Our design team decided to showcase some of our favorite RETIRING stamp sets *AND* show you some fabulous stamping techniques in the process.
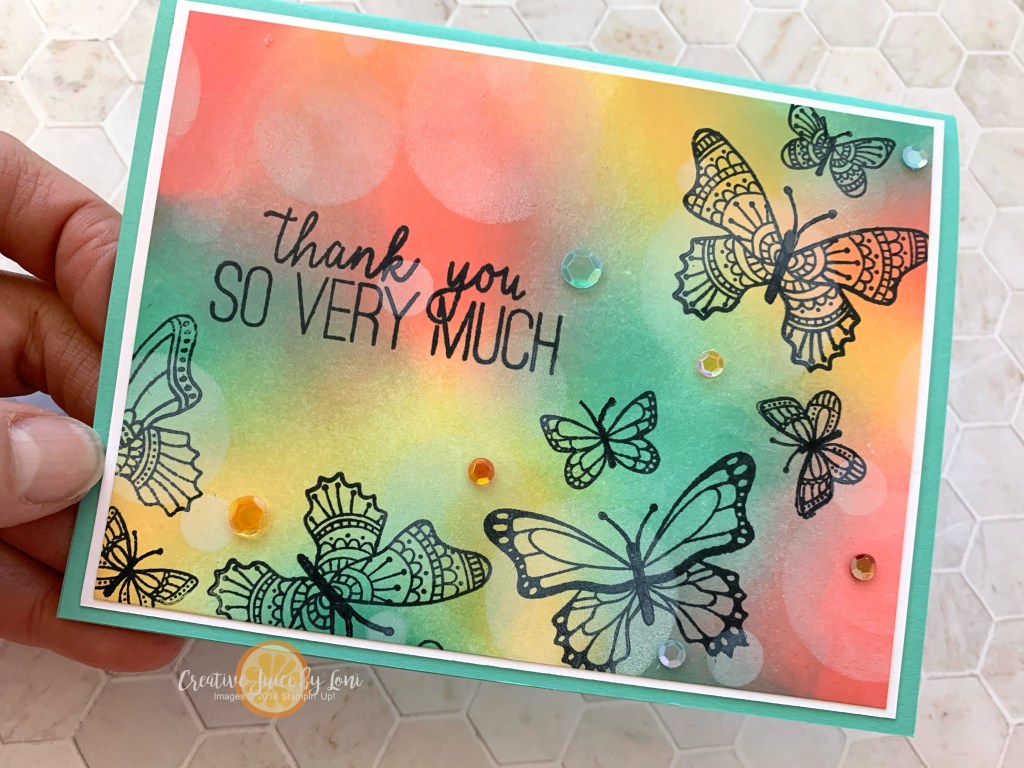
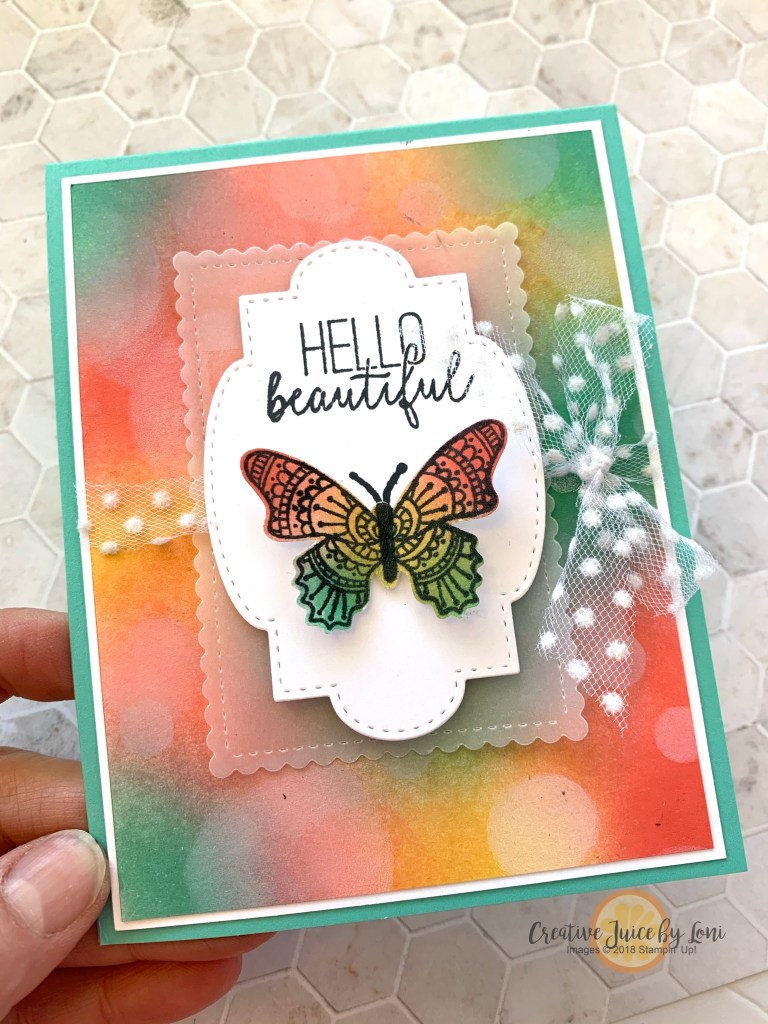
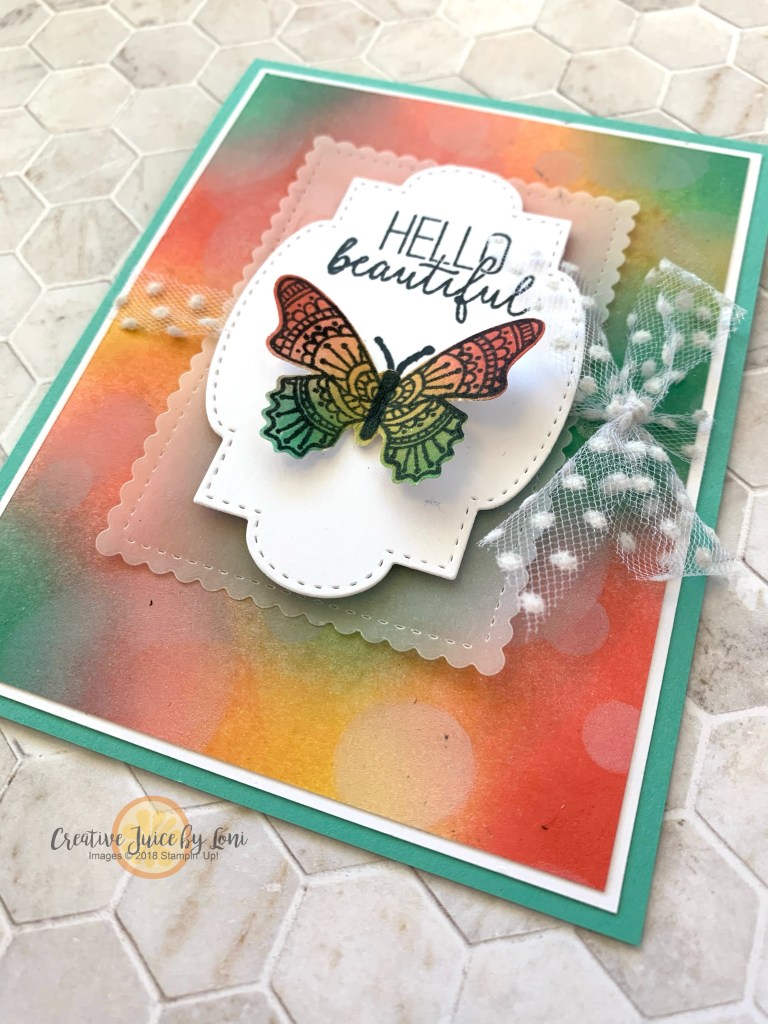
I chose to use the Butterfly Gala stamp set and the coordinating Butterfly Duet punch to teach you the Bokeh technique. Yes, there are more butterflies coming (I’ve shown you the Butterfly Brilliance bundle available now as an early release) but there are none that coordinate with a punch, so if you don’t have a Stampin’ Cut & Emboss machine (yet) or simply enjoy the convenience of a stamp set with a coordinating punch…NOW is the time to add both to your crafting arsenal.
Bokeh is a “blurry light” look in photography, and the concept converts well to paper crafting. I made two cards to show you how pretty the effect is as well as a few ideas on how to incorporate it into your crafting.
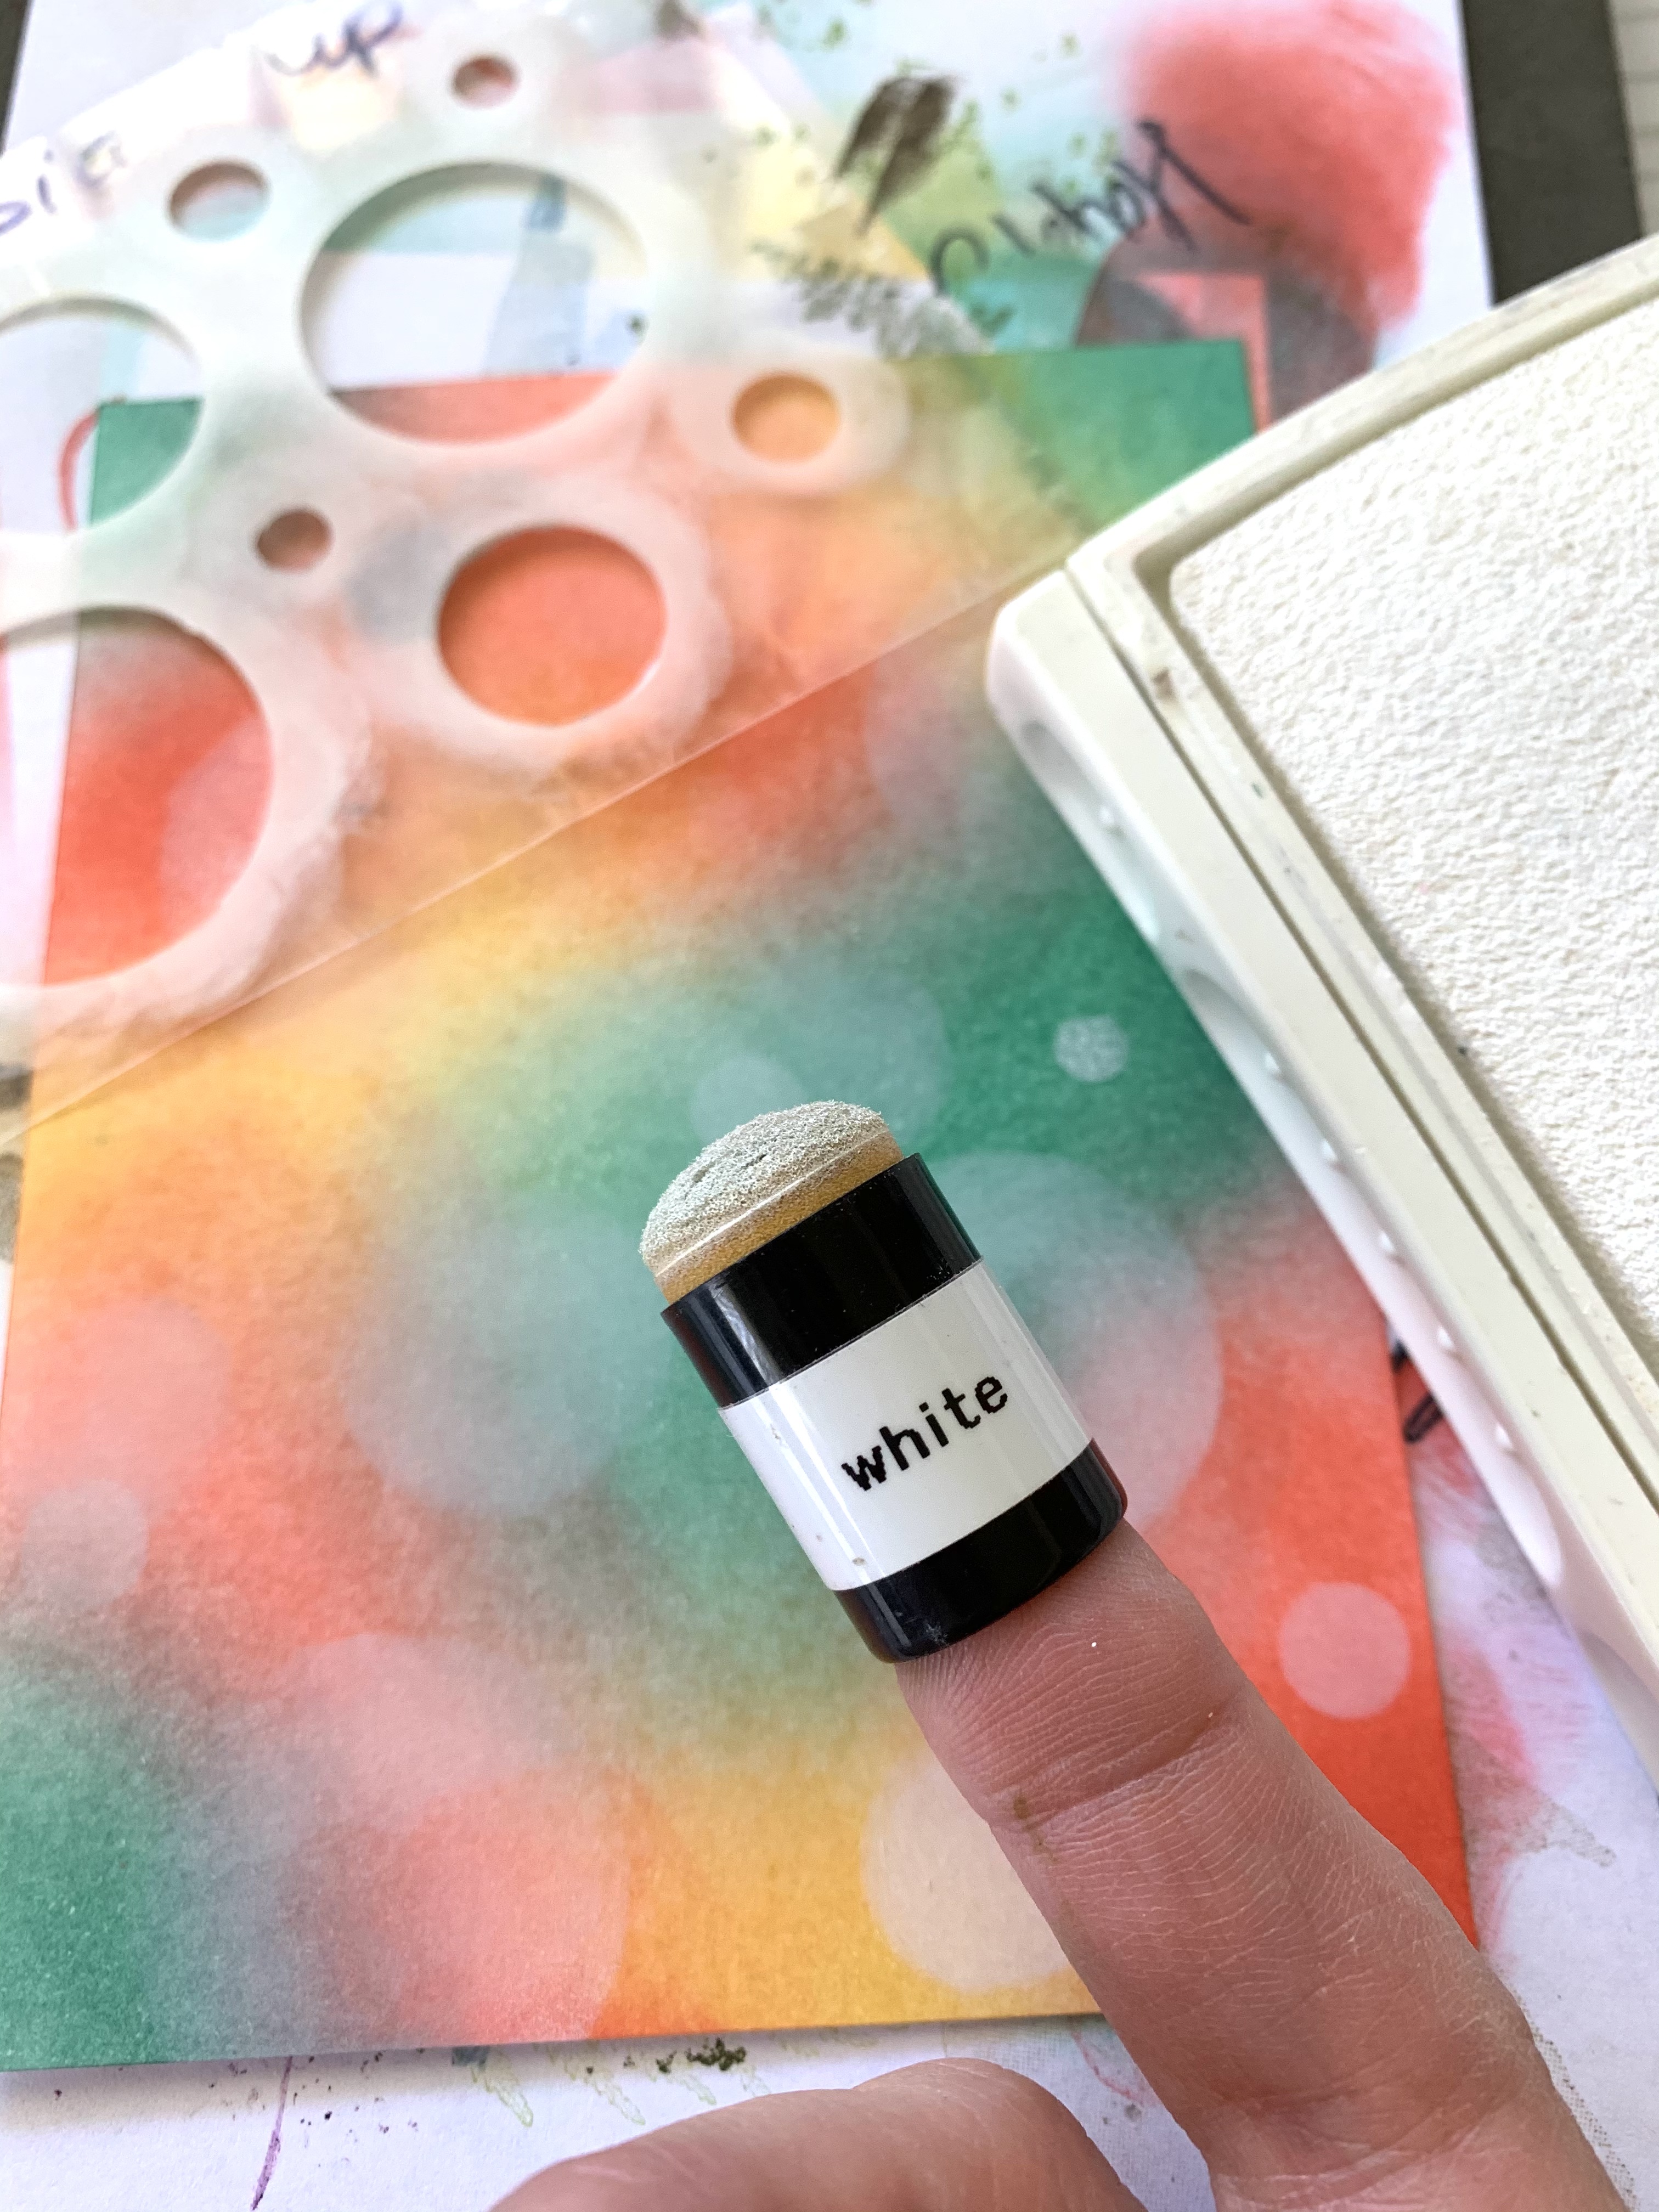
The Blending Brushes work beautifully for Bokeh: Begin by blending your colors onto a white piece of card stock.
Next, use a sponge dauber to add various depths of “blurry light” by sponging white ink through a template using a sponge dauber. I used different sized circle punches or circle layering framelits and a piece of window sheet so I could see where I wanted the circles to be. Did I mention that all our circle punches are also retiring???
After creating your Bokeh background, you can stamp directly on it with black in (as the first card sample shows) OR layer some small focal point on your card, leaving enough space to enjoy the background as well, as the “Hello Beautiful” card displays.
Now it’s on to Diane’s post to learn the Baby Wipe technique~ she is using the Arrange a Wreath stamp set that has been very popular with my customers this year!

")


 Designer Series Paper")
")


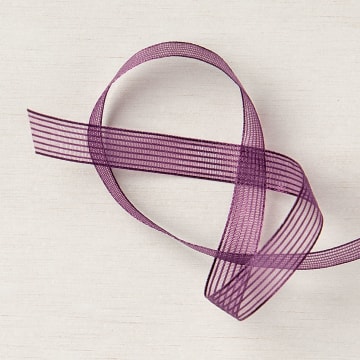
 Open Weave Ribbon")


 CARDSTOCK PACK #155642")


 Polka Dot Tulle Ribbon")

