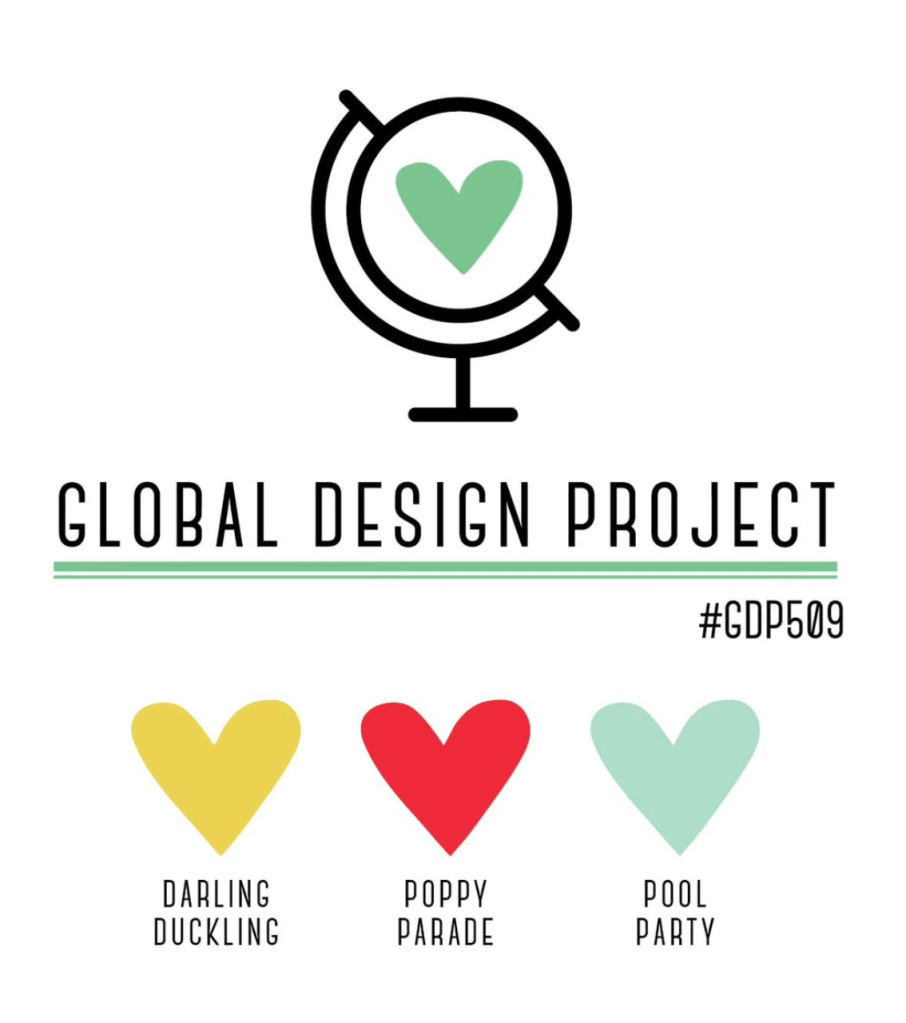
I’ve been making samples for Fall StampFest (spoiler alert!) and while I was doing some “research” on social media, these bright colors – Darling Duckling, Poppy Parade & Pool Party – scrolled by, and then I couldn’t really get any work done until I pulled the colors out and put it onto paper, so-to-speak.
Plaid, cornfields and tractors MUST go together, but I also love a peek of the torn leafy Darling Duckling Designer Series Paper, just beneath the farm vehicle.
But my FAVORITE detail is the blue ribbon! Can you tell what I used to make it?
The ribbon medallion is made with the TIRE DIES!
Pull in a sentiment from the “More than Autumn” stamp set and the card is worthy of grand prize at the county fair, don’t you think?
Another winning opportunity: Darling Duckling is a 2025-2027 IN COLOR, thus the ink, card stock and the patterned paper are all on sale for 15% off during August 2025!
When you are ready to make a tractor card of your own, you can add all the supplies you need to your cart here:
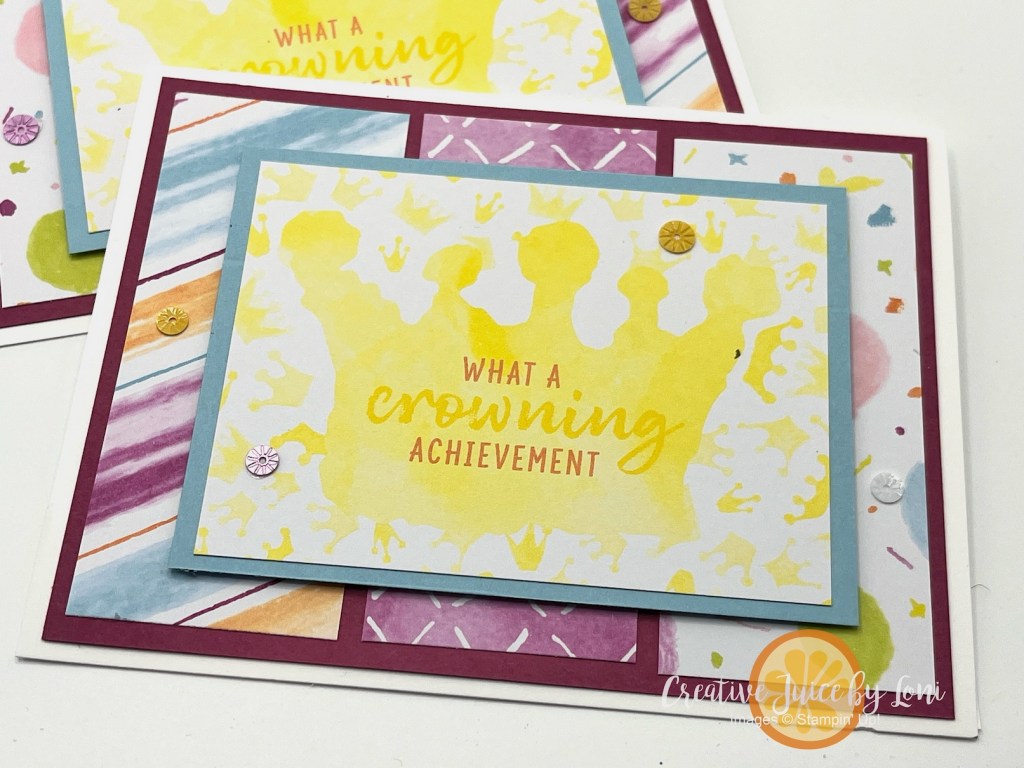
Today’s creation is proof that you don’t need a craft room full of supplies (or a time machine to the Cretaceous period) to make something “dino-mite.” This cheerful congratulations card came together in minutes using the Celebrations Expressions Memories & More card pack from Stampin’ Up! and the adorable Darling Dinos stamp & die bundle.
If you’ve been around my blog for a while, you know I love a good sketch challenge to get the creative juices flowing. This design was inspired by Freshly Made Sketches #698. When you’ve got a great sketch, half the work is already done for you!
The Recipe for Easy Cardmaking
Card Base: Balmy Blue cardstock, because the white background of the cards need a contrasting color to stand out.
Panels: I cut down three different cards from the Celebrations Expressions pack to fit the sketch—two with fun, hand-painted patterns and one with bright, festive banners. Pre-printed designs are the secret sauce for fast crafting: no stamping, coloring, or choosing a color palette required – it’s done for you!
Focal Point: That sweet brontosaurus is stamped in Memento Tuxedo Black ink directly onto Balmy Blue card stock and simply colored with Stampin’ Blends.
Finishing Touches: A few Starburst Sequins add sparkle, and a simple “CONGRATULATIONS” sentiment was trimmed from the card pack itself. Easy-peasy.
Leftover 1″ squares of the pre-printed cards pull the party all the way to the inside of the card:
Why Memories & More Packs Are a Game-Changer
If you’ve never crafted with Memories & More cards, think of them as your personal cardmaking shortcut. They’re designed for pocket scrapbooking, but their patterns, colors, and ready-to-use sentiments make them perfect for quick cards, too. In this project, I didn’t have to stamp the sentiment or create background layers from scratch—they were already there, waiting to be trimmed and glued in place.
Because I also have team members whose promotions I want to recognize, I created a second set of cards from the same card pack:
No stamping on this one! Just the Memories & More cards and coordinating card stock paired together so the celebration can get started quickly.
Give yourself the tools to create happy mail whenever the occasion pops up—because a handmade card always makes the celebration a little brighter.
You can watch a lot of videos, but nothing compares to getting your fingers IN THE INK! If you are like most people, you learn best by DOING, and there are so many exciting stamping events coming up, so choose the one(s) that work best for you:
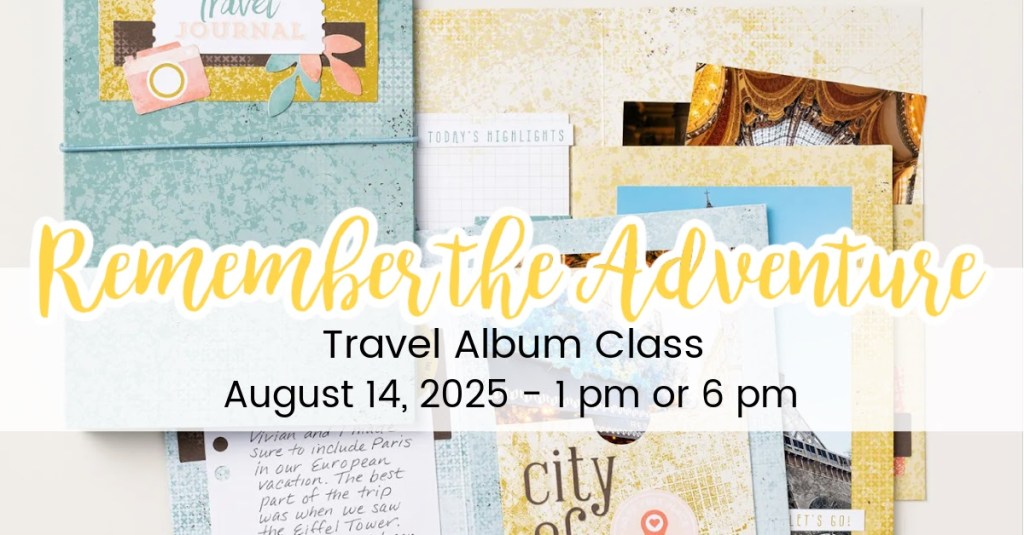
Coming first is the “Remember the Adventure” Travel Journal class that is one week away in Hurricane, UT, so register quickly to ensure your seat! Bring 20-35 photos of a recent adventure and you can complete the album to show off your last adventure. Class Fee: $20 (a STEAL!) Find class details on the Facebook event HERE.
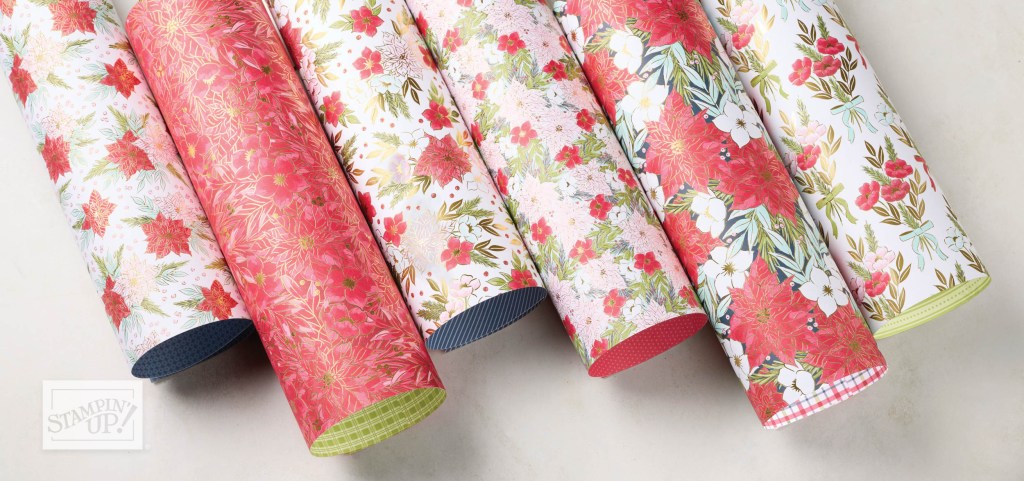
Twice a year I offer a 6″ x 6″ sampler of all the new Designer Series Paper released by Stampin’ Up! in a mini catalog. With the September-December mini catalog coming (AND the September Online Exclusive release), there are 53 pieces of gorgeous papers that span through autumn and the holidays, and you can get a piece of each one to play with! Learn more HERE and reserve a share by September 1st!
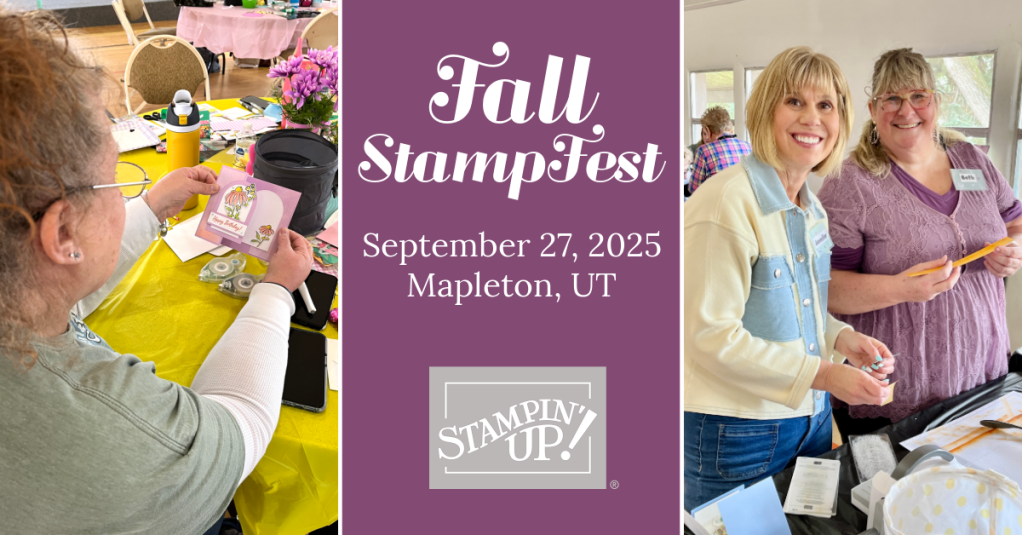
The Southern Utah Fall StampFest will be Saturday, September 13th and you will want to bring a friend to this cozy crafternoon event! Save $10 when you register by August 30th!.
We’ll be offering the same projects to happy crafters in Utah County just a few weeks later (on September 27th). Grab your spot early before someone schedules your day for you!
Spooky Sweet Suite Class: October 2nd at 4 pm MT
The creativity continues into October, this time in a VIRTUAL CLASS for all those who love Halloween! The Spooky Sweet class will be one you can participate in while in your pajamas, as it will be broadcast on a private YouTube video for those who register and purchase the Spooky Sweet Suite Collection. If you order the Suite from my store, the class is just $10 (includes shipping to you) and I’ll email asking if you’d like to join the class, once you’ve checked out with the suite in your cart!
If you have purchased the suite collection from another demonstrator (or as a demonstrator), the fee is $20 – contact me to register.
Craft along LIVE with me -OR- watch later at your convenience.
Class kit includes card stock and envelopes, dimensionals, cutting guide and goodies for creating 5 projects SO CUTE, THEY ARE SPOOKY!
You will also need: Spooky Sweet Suite Collection, Adhesive, Paper Trimmer, Memento Tuxedo Black ink pad and the following Stampin’ Blends: Granny Apple Green, Petunia Pop, Pumpkin Pie, Smoky Slate.
Finally, put these events in your calendar and watch for details coming soon:
Stamp Therapy Class – October 9th (Hurricane, UT)
Christmas Cards & Cocoa Class – November 20th (Hurricane, UT)
Keep your creative juices flowing at a class! 🍊🧡– Loni Spendlove
Creative Juice LIVE Crafting (on YouTube & Facebook) IS BACK…with a twist! Going forward, I’ll be going live in my channels at 12:30 p.m. MT ON THE FIRST MONDAY OF EACH MONTH. As I *pop* back into your social feed, I have an a-maize-ing Faux Shaker Card tutorial to share with you in today’s video!
Traditional shaker cards are quite thick, so using a clear envelope to hold the shaker elements makes the card thinner to mail, and easy to make.
Colors used: Darling Duckling, Strawberry Slush and Secret Sea, which are all 2025-2027 In Colors, and an announcement you’ll appreciate is that tomorrow (August 5th) is the beginning of an IN COLOR SALE!
Many In Color products are 15% off through August 31st, and I need to remember to order refills for my ink pads…my shopping list is started.
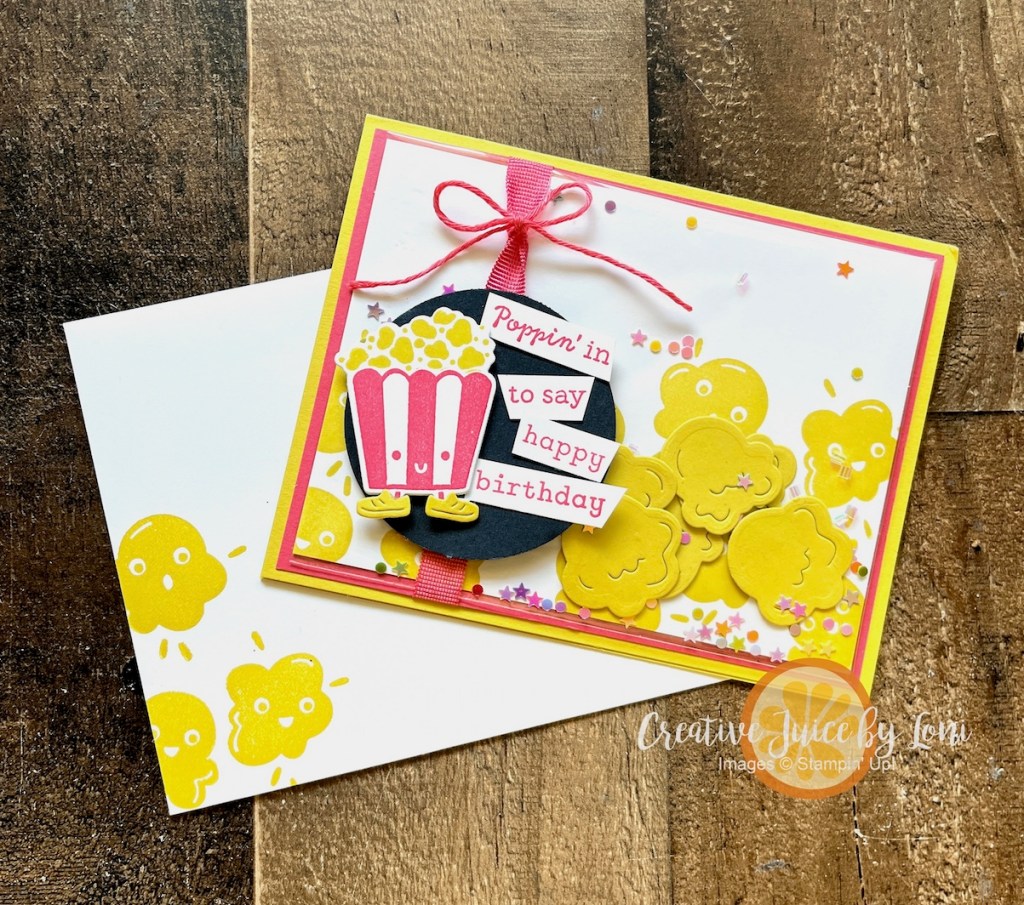
Without further adieu, here is the VIDEO TUTORIAL for the Faux Shaker Popcorn Birthday card, and you may add the supplies to your cart with the list below the video:
Rifling through my specialty paper, the In Color 2024-2026 Glimmer Paper caught my eye (because it *is* very sparkly)! I wanted to use it, because these colors are on the last-chance list (and discounted), so the #tgifc536 color challenge gave me the perfect excuse:
Peach Pie brought to mind the popcorn I picked up at Costco earlier in the day, and the “Poppin’ By” stamp set was chosen for my stamping project.
The Shy Shamrock glimmer paper gives just the right amount of bling for the background layer, but I didn’t want to waste the part I covered up, so my tip is to use your Paper Trimmer (or a punch!) to cut a section out of the center to use on another project, and no one will be the wiser:
Here’s to being a bit “corny” and crafting a cute card of your own this weekend with the same color combo!
“The hot and the cold are just so intense, put ’em together, it just makes sense!” -Olaf ⛄️
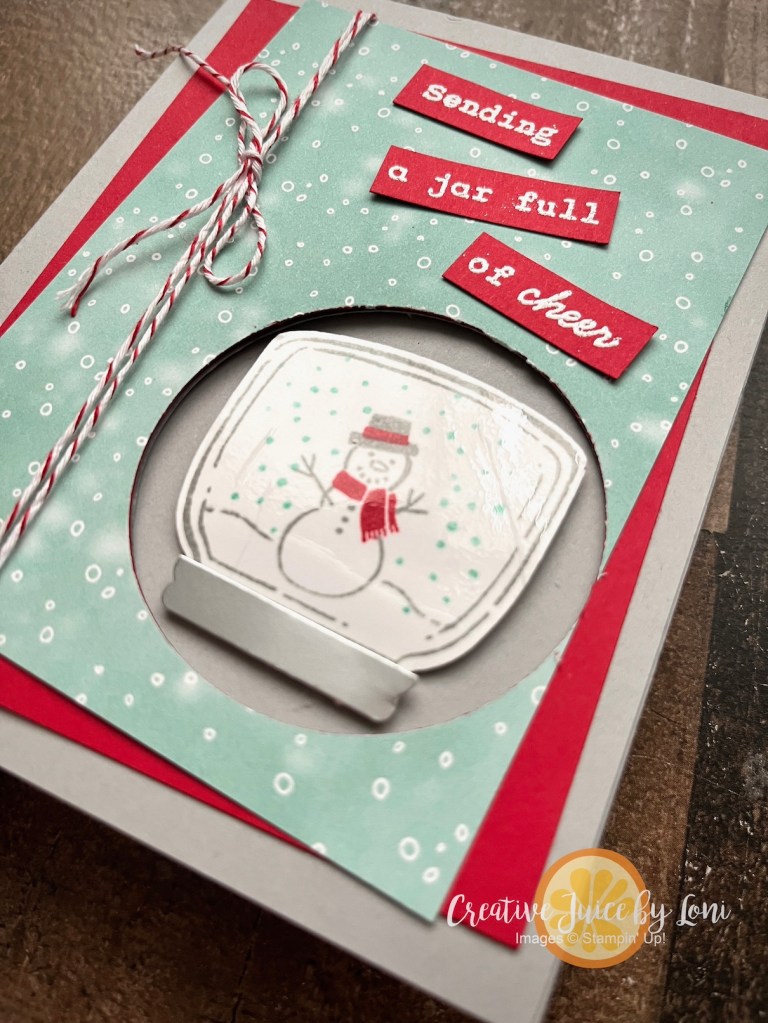
Get ahead of the holidays by starting your Christmas cards now! The Jar of Joy stamp set (which coordinates with the Sweet Jar builder punch) will have you shaking up snow during the heat of summer:
Layers: 3.5″ x 4.75″ Designer Series Paper, 3.75″ x 5″ Real Red Card Stock
The way to make the jar shiny is by laying a piece of packing tape over the stamped image before punching it out (did the same for the sunglasses on my pop-up tote card here).
The way the snow globe pops through the front of the card from the inside is a delightful detail that gives the open card charm, as well.
This video shows how to create this card from start to finish in 90 seconds:
I am enjoying playing along with the Global Design Project “Christmas in July” #gdp507 challenge with this card! It’s simple enough you could easily make multiples at one time, too.
Pears have long held a place in the world of art~ they’ve been painted for centuries as a way to capture natural beauty and evoke a sense of calm and abundance. Let me share a handmade card inspired by that same timeless charm—created with the brand-new Painterly Pears Suite from Stampin’ Up!®️
This easy card layout is one you could use with practically every stamp set you own that matches some beautiful Stampin’ Up!®️ Designer Series Paper!
Have you ever added watercolor pencil OVER your stamped image? To shade the pears and flowers, that’s just what I did, no water added. They do blend better when the tip of the pencil is dull.
Use a strip of the same pattern on the inside of the card to carry the theme all the way through:
Isn’t this pretty? Sometimes simple is the loveliest, and the Painterly Pears will make you feel like a classic artist, without paying tuition or spending years learning painting techniques (which is why I love rubber stamping).
It’s a Birthday Bash for our July New at SU! Blog Hop, and our demonstrator design team from around the globe will inspire you to create a personalized birthday celebration using your Stampin’ Up! supplies!
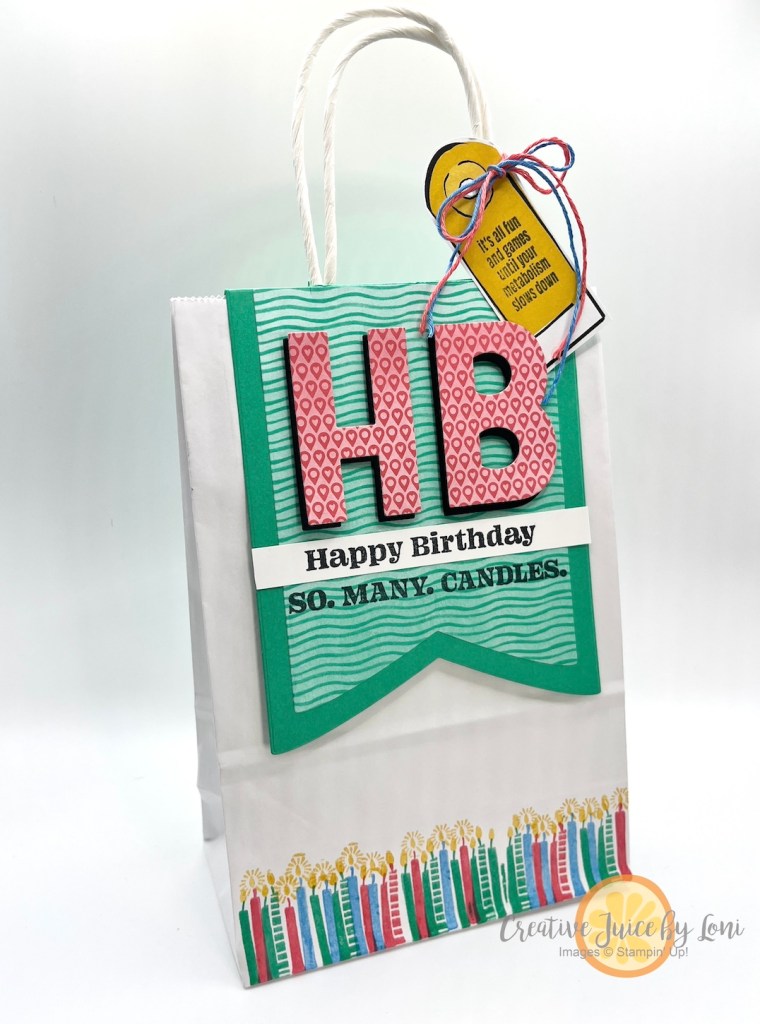
Remember the classic handled-gift-bag topper? I’m giving it a fresh look with the fabulous Party Dies Bundle (banners + big alphabet)!
Stampin’ Up!’s Sweet Jar stamp set has the perfect candles to stamp along the bottom edge of the bag in colors to match your theme!
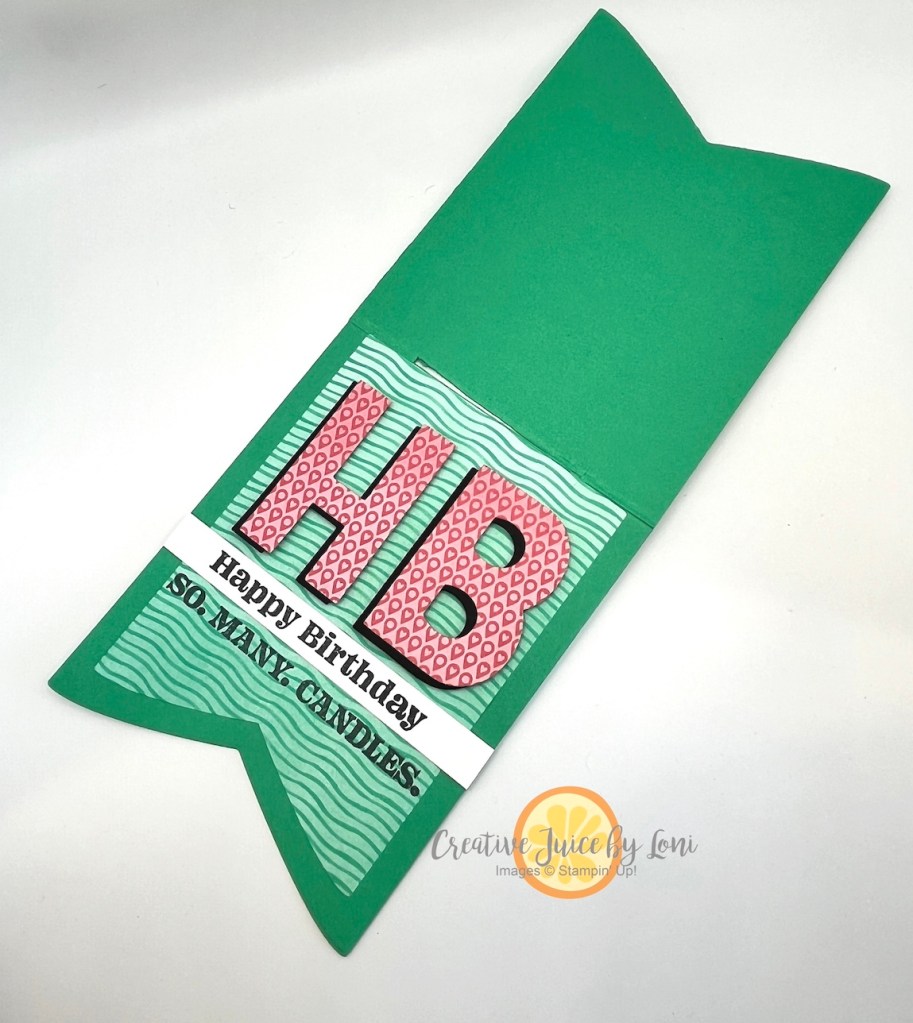
The largest banner die is approx. 5″ x 7″ so you could create a topper for various sizes of bags. The plain white bag I used is about 5″ wide by 8.5″ tall, so I used the 4th largest banner die on a 4.5″ x 11″ piece of Shy Shamrock card stock (folded in half) for this topper:
Make sure the top of the banner die lays just off the folded edge as you cut through both layers with the bottom part of the die, so you don’t cut this piece into two pieces! Once you’ve die cut the banner, hold the fold up to the top of the bag and mark just outside the edges of the handles, then use a paper trimmer or snips to cut along the folded edge BETWEEN the two marks. This gives you a slit to slide over the handles (after decorating the topper and inserting your gift into the bag)
The On the Go Designer Series Paper gave me the color palette and the patterned paper for this project, and has a full page of adorable luggage tags that make perfect gift tags, too! Sentiments come from the hilarious new stamp set in my Online Exclusives called “Not 29 Anymore” and I also cut a second set of letters from Basic Black card stock to give it a shadow behind the DSP:
I’ll be making more of these to wrap birthday presents in, giving someone a laugh when I gift it! Would it make you giggle?Give me your thoughts in the comments at the top of the post, next to posting date.
Be sure to visit the other party-people participating in sharing birthday ideas this month:
Cleaning off my stamping surface, I found pieces for a card I had started to make showing how lovely Secret Sea and Cloud Cover card stock pair together. Since I had already embossed the background with the Happy Hibiscus Hybrid Embossing folder and stamped the background on the large label, all I had to do was stamp some Hibiscus flowers in Strawberry Slush (also a Stampin’ Up!®️ 2025-2027 In Color).
You can get TWO shades of the same color by stamping off the bold flower filler stamp onto a scrap paper once before stamping it inside the outline (stamped in full strength ink of same color). Do the same for the leaves!
TIP: If you haven’t created an ink spot with a Cloud Cover Ink refill and uninked stampin’ spot (because the ink formula didn’t work correctly for a full-sized foam ink pad), YOU CAN STAMP OFF WITH SECRET SEA for an in-between color, as shown in the leaves on this card. I also used VERSAMARK ink on the Cloud Cover label, which turns the stamped images a shade darker.
To make the background pop a bit, I softly sponged some Whisper White craft ink over the raised images. Top off the card with an elegant Cloud Cover bow and some Rhinestone Jewels in the center of the flowers.
One more suggestion: Make four of the same cards at one time! Why four? For this card, you’ll use two full sheets of Cloud Cover for the card bases, one full sheet of Secret Sea card stock for the 4 backgrounds and almost a full additional sheet of cloud cover for the large label: It makes the best use of your supplies, and takes LESS time to create four of the same cards than to come back later and make the same card another time!
Thank you for ordering the supplies from my Stampin’ Store – you are supporting a home-based business and allowing me the time to bring you more creative ideas!
A simple card can be transformed by an easy fun-fold element, and in today’s free tutorial, I’ll show you how to make someone’s birthday brighter!
Behind this simple facade lies a fancy surprise as you open the card:
The Everyday Arches dies are the star of this card, and an essential set of paper crafting tools that belong in every stamper’s arsenal.
Let me know if you like this idea by leaving a comment (top of post, near posting date), order the supplies you need below the button, then download the tutorial and give it a go!


![Tractor & Co Bundle (English) [ 166116 ]](https://assets1.tamsnetwork.com/images/EC042017NF/166116s.jpg "Tractor & Co Bundle (English) [ 166116 ]")
![More Than Autumn Photopolymer Stamp Set (English) [ 164228 ]](https://assets1.tamsnetwork.com/images/EC042017NF/164228s.jpg "More Than Autumn Photopolymer Stamp Set (English) [ 164228 ]")
![Darling Duckling 8 1/2" X 11" Cardstock [ 165622 ]](https://assets1.tamsnetwork.com/images/EC042017NF/165622s.jpg "Darling Duckling 8 1/2\" X 11\" Cardstock [ 165622 ]")
![Poppy Parade 8-1/2" X 11" Cardstock [ 119793 ]](https://assets1.tamsnetwork.com/images/EC042017NF/119793s.jpg "Poppy Parade 8-1/2\" X 11\" Cardstock [ 119793 ]")
![Pool Party 8-1/2" X 11" Cardstock [ 122924 ]](https://assets1.tamsnetwork.com/images/EC042017NF/122924s.jpg "Pool Party 8-1/2\" X 11\" Cardstock [ 122924 ]")
![Basic White 8 1/2" X 11" Cardstock [ 166780 ]](https://assets1.tamsnetwork.com/images/EC042017NF/166780s.jpg "Basic White 8 1/2\" X 11\" Cardstock [ 166780 ]")
![Basic Black 8-1/2" X 11" Cardstock [ 121045 ]](https://assets1.tamsnetwork.com/images/EC042017NF/121045s.jpg "Basic Black 8-1/2\" X 11\" Cardstock [ 121045 ]")
![2025–2027 In Color™ 6" X 6" (15.2 X 15.2 Cm) Designer Series Paper [ 165300 ]](https://assets1.tamsnetwork.com/images/EC042017NF/165300s.jpg "2025–2027 In Color™ 6\" X 6\" (15.2 X 15.2 Cm) Designer Series Paper [ 165300 ]")
![Silver Foil Sheets [ 132178 ]](https://assets1.tamsnetwork.com/images/EC042017NF/132178s.jpg "Silver Foil Sheets [ 132178 ]")
![Darling Duckling Classic Stampin' Pad [ 165277 ]](https://assets1.tamsnetwork.com/images/EC042017NF/165277s.jpg "Darling Duckling Classic Stampin' Pad [ 165277 ]")
![Old Olive Classic Stampin' Pad [ 147090 ]](https://assets1.tamsnetwork.com/images/EC042017NF/147090s.jpg "Old Olive Classic Stampin' Pad [ 147090 ]")
![Crumb Cake Classic Stampin' Pad [ 147116 ]](https://assets1.tamsnetwork.com/images/EC042017NF/147116s.jpg "Crumb Cake Classic Stampin' Pad [ 147116 ]")
![Tuxedo Black Memento Ink Pad [ 132708 ]](https://assets1.tamsnetwork.com/images/EC042017NF/132708s.jpg "Tuxedo Black Memento Ink Pad [ 132708 ]")
![Forever Plaid 3 D Embossing Folder [ 164049 ]](https://assets1.tamsnetwork.com/images/EC042017NF/164049s.jpg "Forever Plaid 3 D Embossing Folder [ 164049 ]")
![Stampin' Cut & Emboss Machine [ 149653 ]](https://assets1.tamsnetwork.com/images/EC042017NF/149653s.jpg "Stampin' Cut & Emboss Machine [ 149653 ]")
![Adhesive Sheets [ 152334 ]](https://assets1.tamsnetwork.com/images/EC042017NF/152334s.jpg "Adhesive Sheets [ 152334 ]")
![Stampin' Dimensionals [ 104430 ]](https://assets1.tamsnetwork.com/images/EC042017NF/104430s.jpg "Stampin' Dimensionals [ 104430 ]")
![Blending Brushes [ 153611 ]](https://assets1.tamsnetwork.com/images/EC042017NF/153611s.jpg "Blending Brushes [ 153611 ]")
![Two Tone Sparkle Gems [ 164633 ]](https://assets1.tamsnetwork.com/images/EC042017NF/164633s.jpg "Two Tone Sparkle Gems [ 164633 ]")


![Celebration Expressions Memories & More Card Pack [ 165307 ]](https://assets1.tamsnetwork.com/images/EC042017NF/165307s.jpg "Celebration Expressions Memories & More Card Pack [ 165307 ]")
![Darling Dinos Bundle (English) [ 164735 ]](https://assets1.tamsnetwork.com/images/EC042017NF/164735s.jpg "Darling Dinos Bundle (English) [ 164735 ]")
![Balmy Blue 8-1/2" X 11" Cardstock [ 146982 ]](https://assets1.tamsnetwork.com/images/EC042017NF/146982s.jpg "Balmy Blue 8-1/2\" X 11\" Cardstock [ 146982 ]")
![Timid Tiger 8 1/2" X 11" Cardstock [ 165626 ]](https://assets1.tamsnetwork.com/images/EC042017NF/165626s.jpg "Timid Tiger 8 1/2\" X 11\" Cardstock [ 165626 ]")
![Berry Burst 8-1/2" X 11" Cardstock [ 144243 ]](https://assets1.tamsnetwork.com/images/EC042017NF/144243s.jpg "Berry Burst 8-1/2\" X 11\" Cardstock [ 144243 ]")
![Balmy Blue Stampin' Blends Combo Pack [ 148544 ] (Retired)](https://assets1.tamsnetwork.com/images/EC042017NF/148544s.jpg "Balmy Blue Stampin' Blends Combo Pack [ 148544 ] (Retired)")
![Starburst Sequins [ 165539 ]](https://assets1.tamsnetwork.com/images/EC042017NF/165539s.jpg "Starburst Sequins [ 165539 ]")
![Mini Stampin' Dimensionals [ 144108 ]](https://assets1.tamsnetwork.com/images/EC042017NF/144108s.jpg "Mini Stampin' Dimensionals [ 144108 ]")
![Stampin' Seal [ 152813 ]](https://assets1.tamsnetwork.com/images/EC042017NF/152813s.jpg "Stampin' Seal [ 152813 ]")
![Mini Stampin' Cut & Emboss Machine [ 150673 ]](https://assets1.tamsnetwork.com/images/EC042017NF/150673s.jpg "Mini Stampin' Cut & Emboss Machine [ 150673 ]")


![Poppin' By Bundle (English) [ 165489 ]](https://assets1.tamsnetwork.com/images/EC042017NF/165489s.jpg "Poppin' By Bundle (English) [ 165489 ]")
![Strawberry Slush 8 1/2" X 11" Cardstock [ 165625 ]](https://assets1.tamsnetwork.com/images/EC042017NF/165625s.jpg "Strawberry Slush 8 1/2\" X 11\" Cardstock [ 165625 ]")
![Secret Sea 12" X 12" (30.5 X 30.5 Cm) Two Tone Cardstock [ 166709 ]](https://assets1.tamsnetwork.com/images/EC042017NF/166709s.jpg "Secret Sea 12\" X 12\" (30.5 X 30.5 Cm) Two Tone Cardstock [ 166709 ]")
![Strawberry Slush Classic Stampin' Pad [ 165286 ]](https://assets1.tamsnetwork.com/images/EC042017NF/165286s.jpg "Strawberry Slush Classic Stampin' Pad [ 165286 ]")
![Strawberry Slush 3/8" (1 Cm) Faux Linen Ribbon [ 165274 ]](https://assets1.tamsnetwork.com/images/EC042017NF/165274s.jpg "Strawberry Slush 3/8\" (1 Cm) Faux Linen Ribbon [ 165274 ]")
![Pack Your Bags Twine Three Pack [ 165582 ]](https://assets1.tamsnetwork.com/images/EC042017NF/165582s.jpg "Pack Your Bags Twine Three Pack [ 165582 ]")
![Clear Medium Envelopes [ 102619 ]](https://assets1.tamsnetwork.com/images/EC042017NF/102619s.jpg "Clear Medium Envelopes [ 102619 ]")
![Loose Shaker Elements [ 165268 ]](https://assets1.tamsnetwork.com/images/EC042017NF/165268s.jpg "Loose Shaker Elements [ 165268 ]")
![Stampin' Seal+ [ 149699 ]](https://assets1.tamsnetwork.com/images/EC042017NF/149699s.jpg "Stampin' Seal+ [ 149699 ]")


![2024–2026 In Color™ Glimmer 12" X 12" (30.5 X 30.5 Cm) Specialty Paper [ 163771 ]](https://assets1.tamsnetwork.com/images/EC042017NF/163771s.jpg "2024–2026 In Color™ Glimmer 12\" X 12\" (30.5 X 30.5 Cm) Specialty Paper [ 163771 ]")
![Crumb Cake 8-1/2" X 11" Cardstock [ 120953 ]](https://assets1.tamsnetwork.com/images/EC042017NF/120953s.jpg "Crumb Cake 8-1/2\" X 11\" Cardstock [ 120953 ]")
![Peach Pie Classic Stampin Pad [ 163810 ]](https://assets1.tamsnetwork.com/images/EC042017NF/163810s.jpg "Peach Pie Classic Stampin Pad [ 163810 ]")
![Shy Shamrock Classic Stampin Pad [ 163808 ]](https://assets1.tamsnetwork.com/images/EC042017NF/163808s.jpg "Shy Shamrock Classic Stampin Pad [ 163808 ]")
![Paper Trimmer [ 152392 ]](https://assets1.tamsnetwork.com/images/EC042017NF/152392s.jpg "Paper Trimmer [ 152392 ]")
![Multipurpose Liquid Glue [ 110755 ]](https://assets1.tamsnetwork.com/images/EC042017NF/110755s.jpg "Multipurpose Liquid Glue [ 110755 ]")
![2024 2026 In Color™ Flat Pearls [ 165266 ]](https://assets1.tamsnetwork.com/images/EC042017NF/165266s.jpg "2024 2026 In Color™ Flat Pearls [ 165266 ]")


![Jar Of Joy Photopolymer Stamp Set (English) [ 166176 ]](https://assets1.tamsnetwork.com/images/EC042017NF/166176s.jpg "Jar Of Joy Photopolymer Stamp Set (English) [ 166176 ]")
![Sweet Jar Builder Punch [ 165506 ]](https://assets1.tamsnetwork.com/images/EC042017NF/165506s.jpg "Sweet Jar Builder Punch [ 165506 ]")
![Nests Of Winter 12" X 12" (30.5 X 30.5 Cm) Designer Series Paper [ 164183 ]](https://assets1.tamsnetwork.com/images/EC042017NF/164183s.jpg "Nests Of Winter 12\" X 12\" (30.5 X 30.5 Cm) Designer Series Paper [ 164183 ]")
![Smoky Slate 8-1/2" X 11" Cardstock [ 131202 ]](https://assets1.tamsnetwork.com/images/EC042017NF/131202s.jpg "Smoky Slate 8-1/2\" X 11\" Cardstock [ 131202 ]")
![Real Red 8-1/2" X 11" Cardstock [ 102482 ]](https://assets1.tamsnetwork.com/images/EC042017NF/102482s.jpg "Real Red 8-1/2\" X 11\" Cardstock [ 102482 ]")
![Silver 12" X 12" (30.5 X 30.5 Cm) Foil Sheets [ 163387 ]](https://assets1.tamsnetwork.com/images/EC042017NF/163387s.jpg "Silver 12\" X 12\" (30.5 X 30.5 Cm) Foil Sheets [ 163387 ]")
![Smoky Slate Classic Stampin' Pad [ 147113 ]](https://assets1.tamsnetwork.com/images/EC042017NF/147113s.jpg "Smoky Slate Classic Stampin' Pad [ 147113 ]")
![Real Red Classic Stampin' Pad [ 147084 ]](https://assets1.tamsnetwork.com/images/EC042017NF/147084s.jpg "Real Red Classic Stampin' Pad [ 147084 ]")
![Coastal Cabana Classic Stampin' Pad [ 147097 ]](https://assets1.tamsnetwork.com/images/EC042017NF/147097s.jpg "Coastal Cabana Classic Stampin' Pad [ 147097 ]")
![Real Red & White Baker's Twine [ 164051 ]](https://assets1.tamsnetwork.com/images/EC042017NF/164051s.jpg "Real Red & White Baker's Twine [ 164051 ]")
![2 3/8" (6 Cm) Circle Punch [ 161354 ]](https://assets1.tamsnetwork.com/images/EC042017NF/161354s.jpg "2 3/8\" (6 Cm) Circle Punch [ 161354 ]")
![Uninked Stampin’ Craft Pad & Whisper White Refill [ 147277 ]](https://assets1.tamsnetwork.com/images/EC042017NF/147277s.jpg "Uninked Stampin’ Craft Pad & Whisper White Refill [ 147277 ]")
![Basics Wow! Embossing Powder [ 165679 ]](https://assets1.tamsnetwork.com/images/EC042017NF/165679s.jpg "Basics Wow! Embossing Powder [ 165679 ]")
![Heat Tool (Us And Canada) [ 129053 ]](https://assets1.tamsnetwork.com/images/EC042017NF/129053s.jpg "Heat Tool (Us And Canada) [ 129053 ]")


![Painterly Pears Suite Collection (English) [ 166159 ]](https://assets1.tamsnetwork.com/images/EC042017NF/166159s.jpg "Painterly Pears Suite Collection (English) [ 166159 ]")
![Misty Moonlight 8-1/2" X 11" Cardstock [ 153081 ]](https://assets1.tamsnetwork.com/images/EC042017NF/153081s.jpg "Misty Moonlight 8-1/2\" X 11\" Cardstock [ 153081 ]")
![Very Vanilla 8 1/2" X 11" Cardstock [ 166784 ]](https://assets1.tamsnetwork.com/images/EC042017NF/166784s.jpg "Very Vanilla 8 1/2\" X 11\" Cardstock [ 166784 ]")
![Misty Moonlight Classic Stampin' Pad [ 153118 ]](https://assets1.tamsnetwork.com/images/EC042017NF/153118s.jpg "Misty Moonlight Classic Stampin' Pad [ 153118 ]")
![Petal Pink Classic Stampin' Pad [ 147108 ]](https://assets1.tamsnetwork.com/images/EC042017NF/147108s.jpg "Petal Pink Classic Stampin' Pad [ 147108 ]")
![Watercolor Pencils Assortment 2 [ 149014 ]](https://assets1.tamsnetwork.com/images/EC042017NF/149014s.jpg "Watercolor Pencils Assortment 2 [ 149014 ]")
![Perennial Postage Dies [ 162607 ]](https://assets1.tamsnetwork.com/images/EC042017NF/162607s.jpg "Perennial Postage Dies [ 162607 ]")


![Not 29 Anymore Photopolymer Stamp Set (English) [ 166182 ]](https://assets1.tamsnetwork.com/images/EC042017NF/166182s.jpg "Not 29 Anymore Photopolymer Stamp Set (English) [ 166182 ]")
![Sweet Jar Photopolymer Stamp Set (English) [ 165501 ]](https://assets1.tamsnetwork.com/images/EC042017NF/165501s.jpg "Sweet Jar Photopolymer Stamp Set (English) [ 165501 ]")
![Party Dies Bundle [ 165265 ]](https://assets1.tamsnetwork.com/images/EC042017NF/165265s.jpg "Party Dies Bundle [ 165265 ]")
![On The Go 12" X 12" (30.5 X 30.5 Cm) Designer Series Paper [ 165566 ]](https://assets1.tamsnetwork.com/images/EC042017NF/165566s.jpg "On The Go 12\" X 12\" (30.5 X 30.5 Cm) Designer Series Paper [ 165566 ]")
![Azure Afternoon Classic Stampin' Pad [ 161663 ]](https://assets1.tamsnetwork.com/images/EC042017NF/161663s.jpg "Azure Afternoon Classic Stampin' Pad [ 161663 ]")
![Shy Shamrock 8 1/2" X 11" Cardstock [ 163795 ]](https://assets1.tamsnetwork.com/images/EC042017NF/163795s.jpg "Shy Shamrock 8 1/2\" X 11\" Cardstock [ 163795 ]")


![Happy Hibiscus Bundle (English) [ 164880 ]](https://assets1.tamsnetwork.com/images/EC042017NF/164880s.jpg "Happy Hibiscus Bundle (English) [ 164880 ]")
![Cloud Cover 8 1/2" X 11" Cardstock [ 165621 ]](https://assets1.tamsnetwork.com/images/EC042017NF/165621s.jpg "Cloud Cover 8 1/2\" X 11\" Cardstock [ 165621 ]")
![Secret Sea 8 1/2" X 11" Cardstock [ 165624 ]](https://assets1.tamsnetwork.com/images/EC042017NF/165624s.jpg "Secret Sea 8 1/2\" X 11\" Cardstock [ 165624 ]")
![Versamark Pad [ 102283 ]](https://assets1.tamsnetwork.com/images/EC042017NF/102283s.jpg "Versamark Pad [ 102283 ]")
![Secret Sea Classic Stampin' Pad [ 165285 ]](https://assets1.tamsnetwork.com/images/EC042017NF/165285s.jpg "Secret Sea Classic Stampin' Pad [ 165285 ]")
![Sponge Daubers [ 133773 ]](https://assets1.tamsnetwork.com/images/EC042017NF/133773s.jpg "Sponge Daubers [ 133773 ]")
![Cloud Cover 3/8" (1 Cm) Faux Linen Ribbon [ 165271 ]](https://assets1.tamsnetwork.com/images/EC042017NF/165271s.jpg "Cloud Cover 3/8\" (1 Cm) Faux Linen Ribbon [ 165271 ]")
![Rhinestone Basic Jewels [ 144220 ]](https://assets1.tamsnetwork.com/images/EC042017NF/144220s.jpg "Rhinestone Basic Jewels [ 144220 ]")


![Arched Wishes Cling Stamp Set (English) [ 165428 ]](https://assets1.tamsnetwork.com/images/EC042017NF/165428s.jpg "Arched Wishes Cling Stamp Set (English) [ 165428 ]")
![Painted Stripes Cling Stamp Set [ 165437 ]](https://assets1.tamsnetwork.com/images/EC042017NF/165437s.jpg "Painted Stripes Cling Stamp Set [ 165437 ]")
![Everyday Arches Dies [ 164629 ]](https://assets1.tamsnetwork.com/images/EC042017NF/164629s.jpg "Everyday Arches Dies [ 164629 ]")
![Highland Heather 8-1/2" X 11" Cardstock [ 146986 ]](https://assets1.tamsnetwork.com/images/EC042017NF/146986s.jpg "Highland Heather 8-1/2\" X 11\" Cardstock [ 146986 ]")
![Summer Splash 8 1/2" X 11 Cardstock [ 163797 ]](https://assets1.tamsnetwork.com/images/EC042017NF/163797s.jpg "Summer Splash 8 1/2\" X 11 Cardstock [ 163797 ]")
![Daffodil Delight 8-1/2" X 11" Cardstock [ 119683 ]](https://assets1.tamsnetwork.com/images/EC042017NF/119683s.jpg "Daffodil Delight 8-1/2\" X 11\" Cardstock [ 119683 ]")
![Highland Heather Classic Stampin' Pad [ 147103 ]](https://assets1.tamsnetwork.com/images/EC042017NF/147103s.jpg "Highland Heather Classic Stampin' Pad [ 147103 ]")
![Daffodil Delight Classic Stampin' Pad [ 147094 ]](https://assets1.tamsnetwork.com/images/EC042017NF/147094s.jpg "Daffodil Delight Classic Stampin' Pad [ 147094 ]")
![Summer Splash Classic Stampin Pad [ 163809 ]](https://assets1.tamsnetwork.com/images/EC042017NF/163809s.jpg "Summer Splash Classic Stampin Pad [ 163809 ]")
![Highland Heather Stampin' Blends Combo Pack [ 154887 ]](https://assets1.tamsnetwork.com/images/EC042017NF/154887s.jpg "Highland Heather Stampin' Blends Combo Pack [ 154887 ]")
![Flirty Flamingo Stampin' Blends Combo Pack [ 154884 ]](https://assets1.tamsnetwork.com/images/EC042017NF/154884s.jpg "Flirty Flamingo Stampin' Blends Combo Pack [ 154884 ]")
![Summer Splash Stampin’ Blends Combo Pack [ 163826 ]](https://assets1.tamsnetwork.com/images/EC042017NF/163826s.jpg "Summer Splash Stampin’ Blends Combo Pack [ 163826 ]")
![Clear Wink Of Stella Glitter Brush [ 141897 ]](https://assets1.tamsnetwork.com/images/EC042017NF/141897s.jpg "Clear Wink Of Stella Glitter Brush [ 141897 ]")
