

Ever wish you could attend one of my classes in person, but you don’t live in my area? This is your chance to attend a VIRTUAL class from anywhere in the USA!
What: Crafting Happiness Virtual Class, featuring the Sweet Jar -OR- Humble Home bundles (stamps + coordinating punch). You’ll receive all the consumable supplies in a class packet mailed to you, then you can choose to use either bundle (NOT INCLUDED)
When: Wednesday, May 28th at 4 pm MT (replay will be available for guests- it’s fun to join LIVE, but you can always catch or re-watch the video) **REGISTER BY MAY 20th**
Where: Private YouTube video for registered guests!


This class is designed with crafters of all levels in mind, and while it spotlights the NEW Sweet Jar bundle, it could be completed with the Humble Home bundle. CHOOSE which you’ll use and when you order either bundle from my store before May 20th, I’ll email you a coupon for $5 off the class fee!

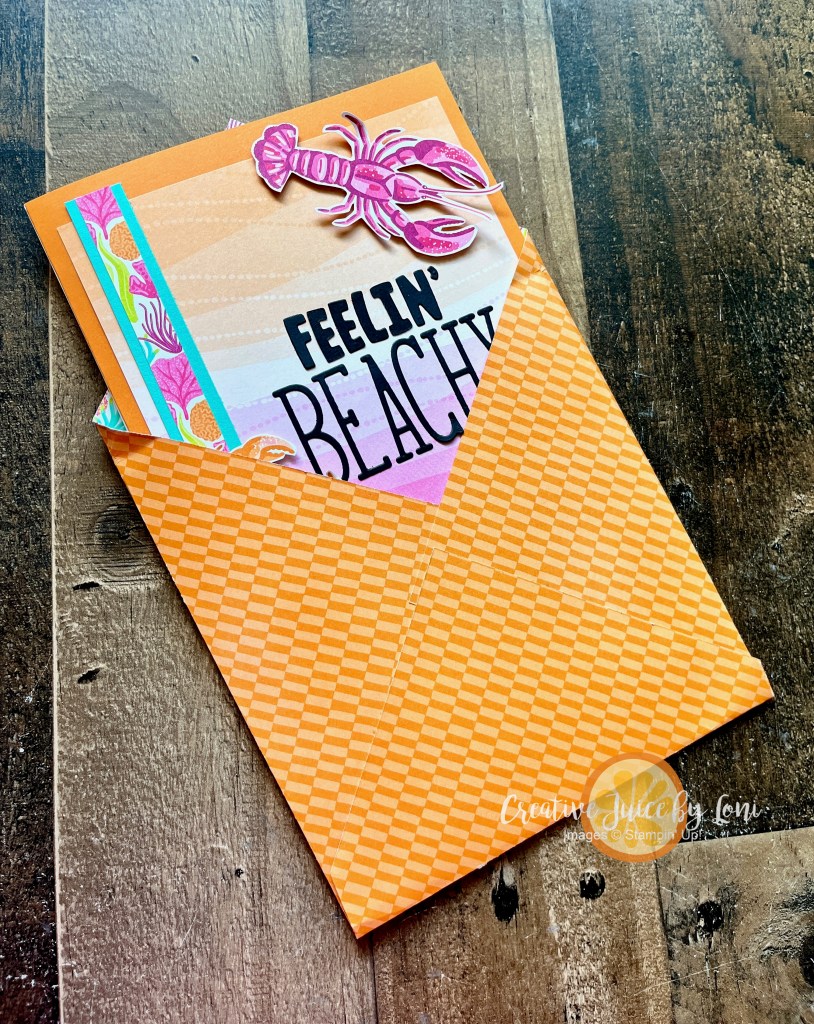
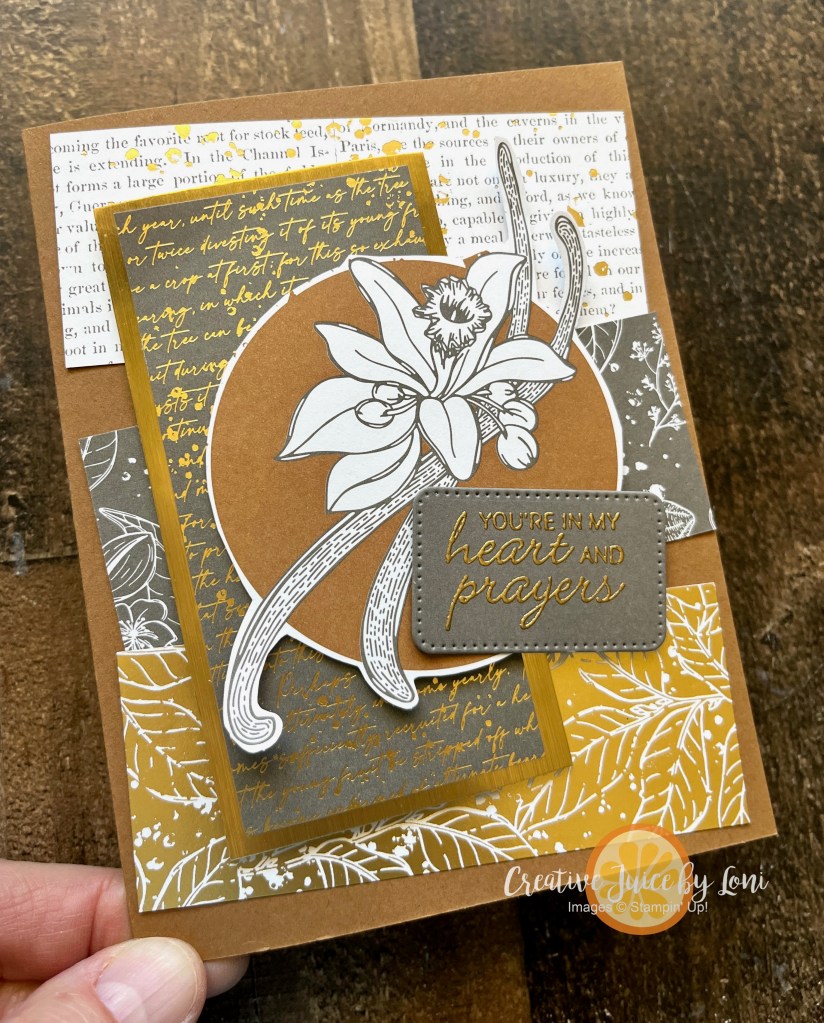
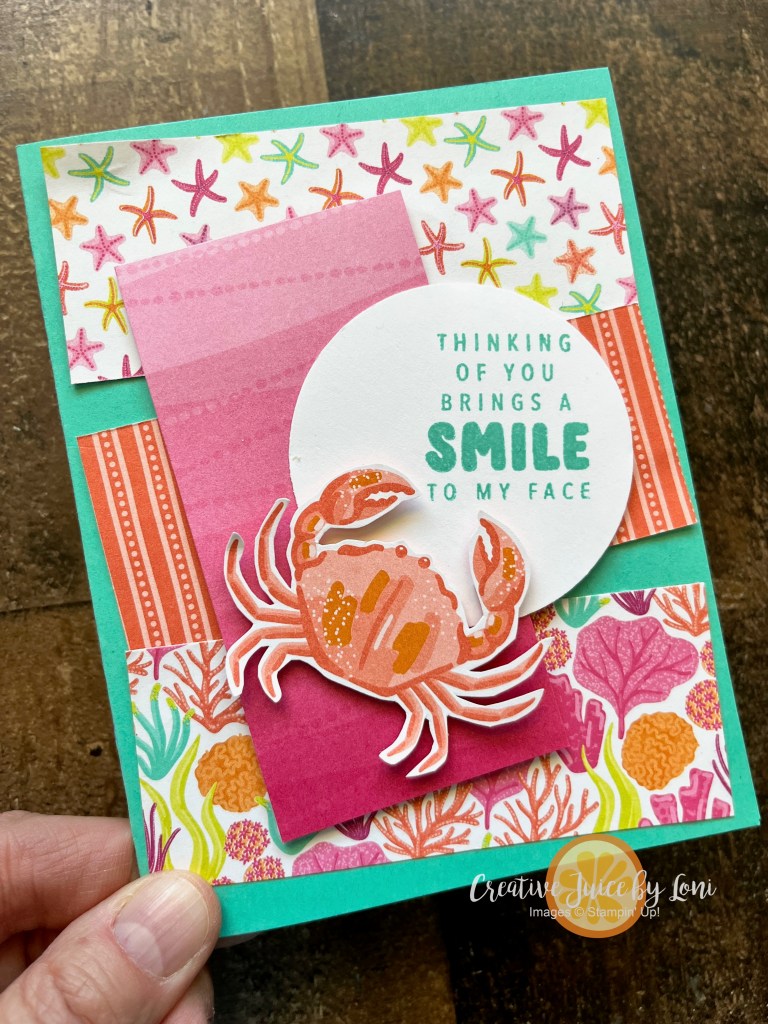
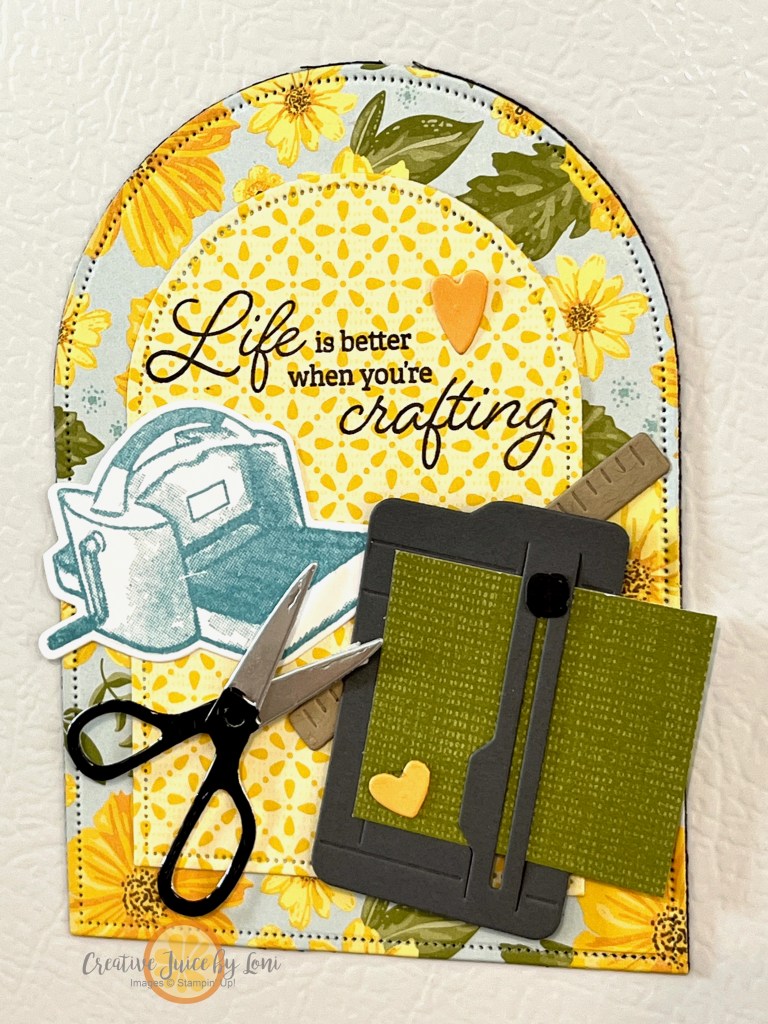
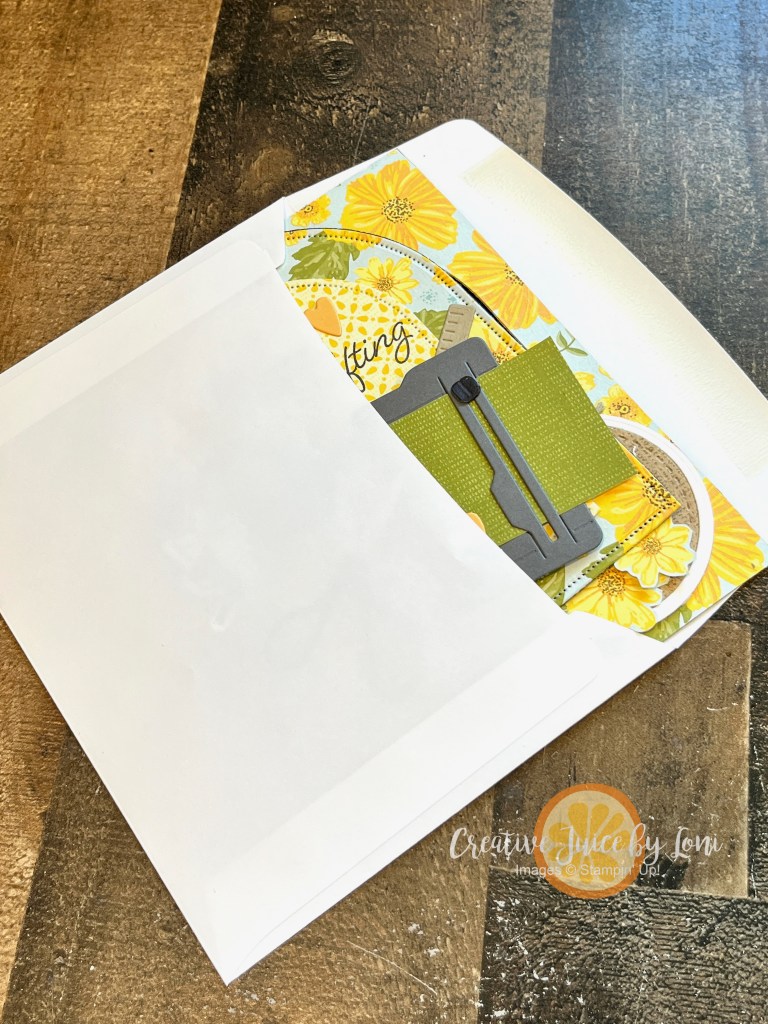
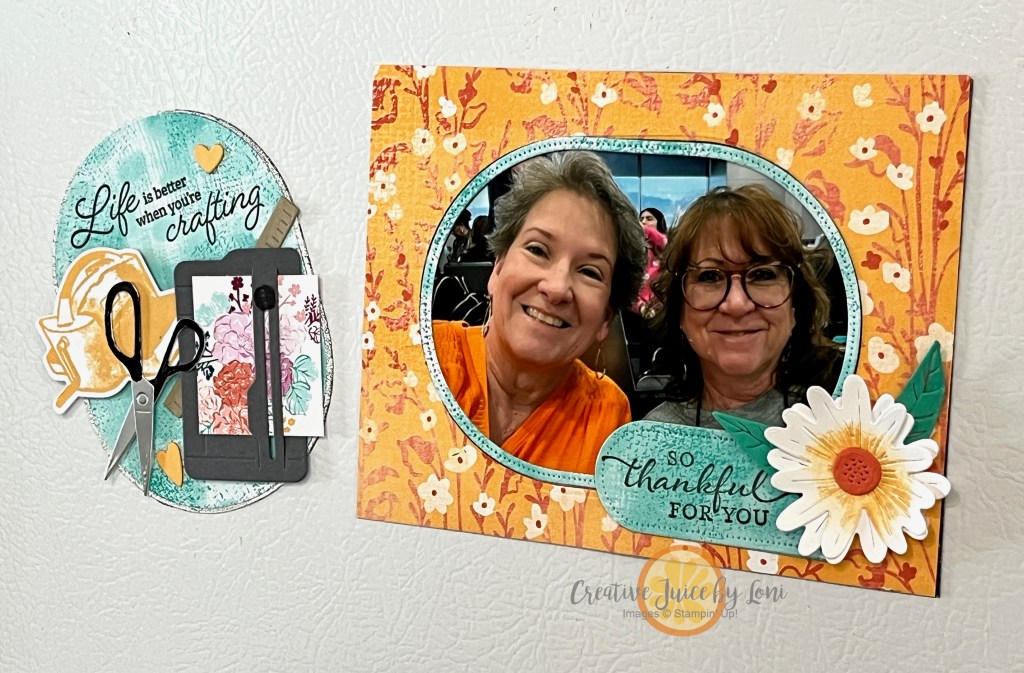
These cards were created as an example of how each bundle is interchangeable, though they are NOT part of the 5 projects you’ll make during the class:


The Class Packet you’ll receive by mail includes*:
- Rhinestone Basic Jewels (item #144220)
- Sponge Dauber (1) (Item #133773)
- Card Stock, Designer Series Paper, packaging, envelopes and accessories cut for all five projects
- One sheet of Stampin’ Dimensionals
- Sweet surprises!
- Colored copy of all the projects for reference.
(* while supplies last- if items sell out before packets are mailed, items of equal value may be substituted)
Also needed (not included in class fee):
- Ink Pads: Smoky Slate (#147113), Pool Party (#147107), Shy Shamrock (#163808), Pretty in Pink (#163807), Pecan Pie (#161665), Petunia Pop (#163811), Daffodil Delight (#147094). Optional: Early Espresso (#147114), Shaded Spruce (#147088)
The class fee is $37 (includes shipping to you) and watch for a coupon in your email quickly after you order one of the bundles from my store!

You’ll love the adorable things you create during the class, so don’t hesitate: Register today!


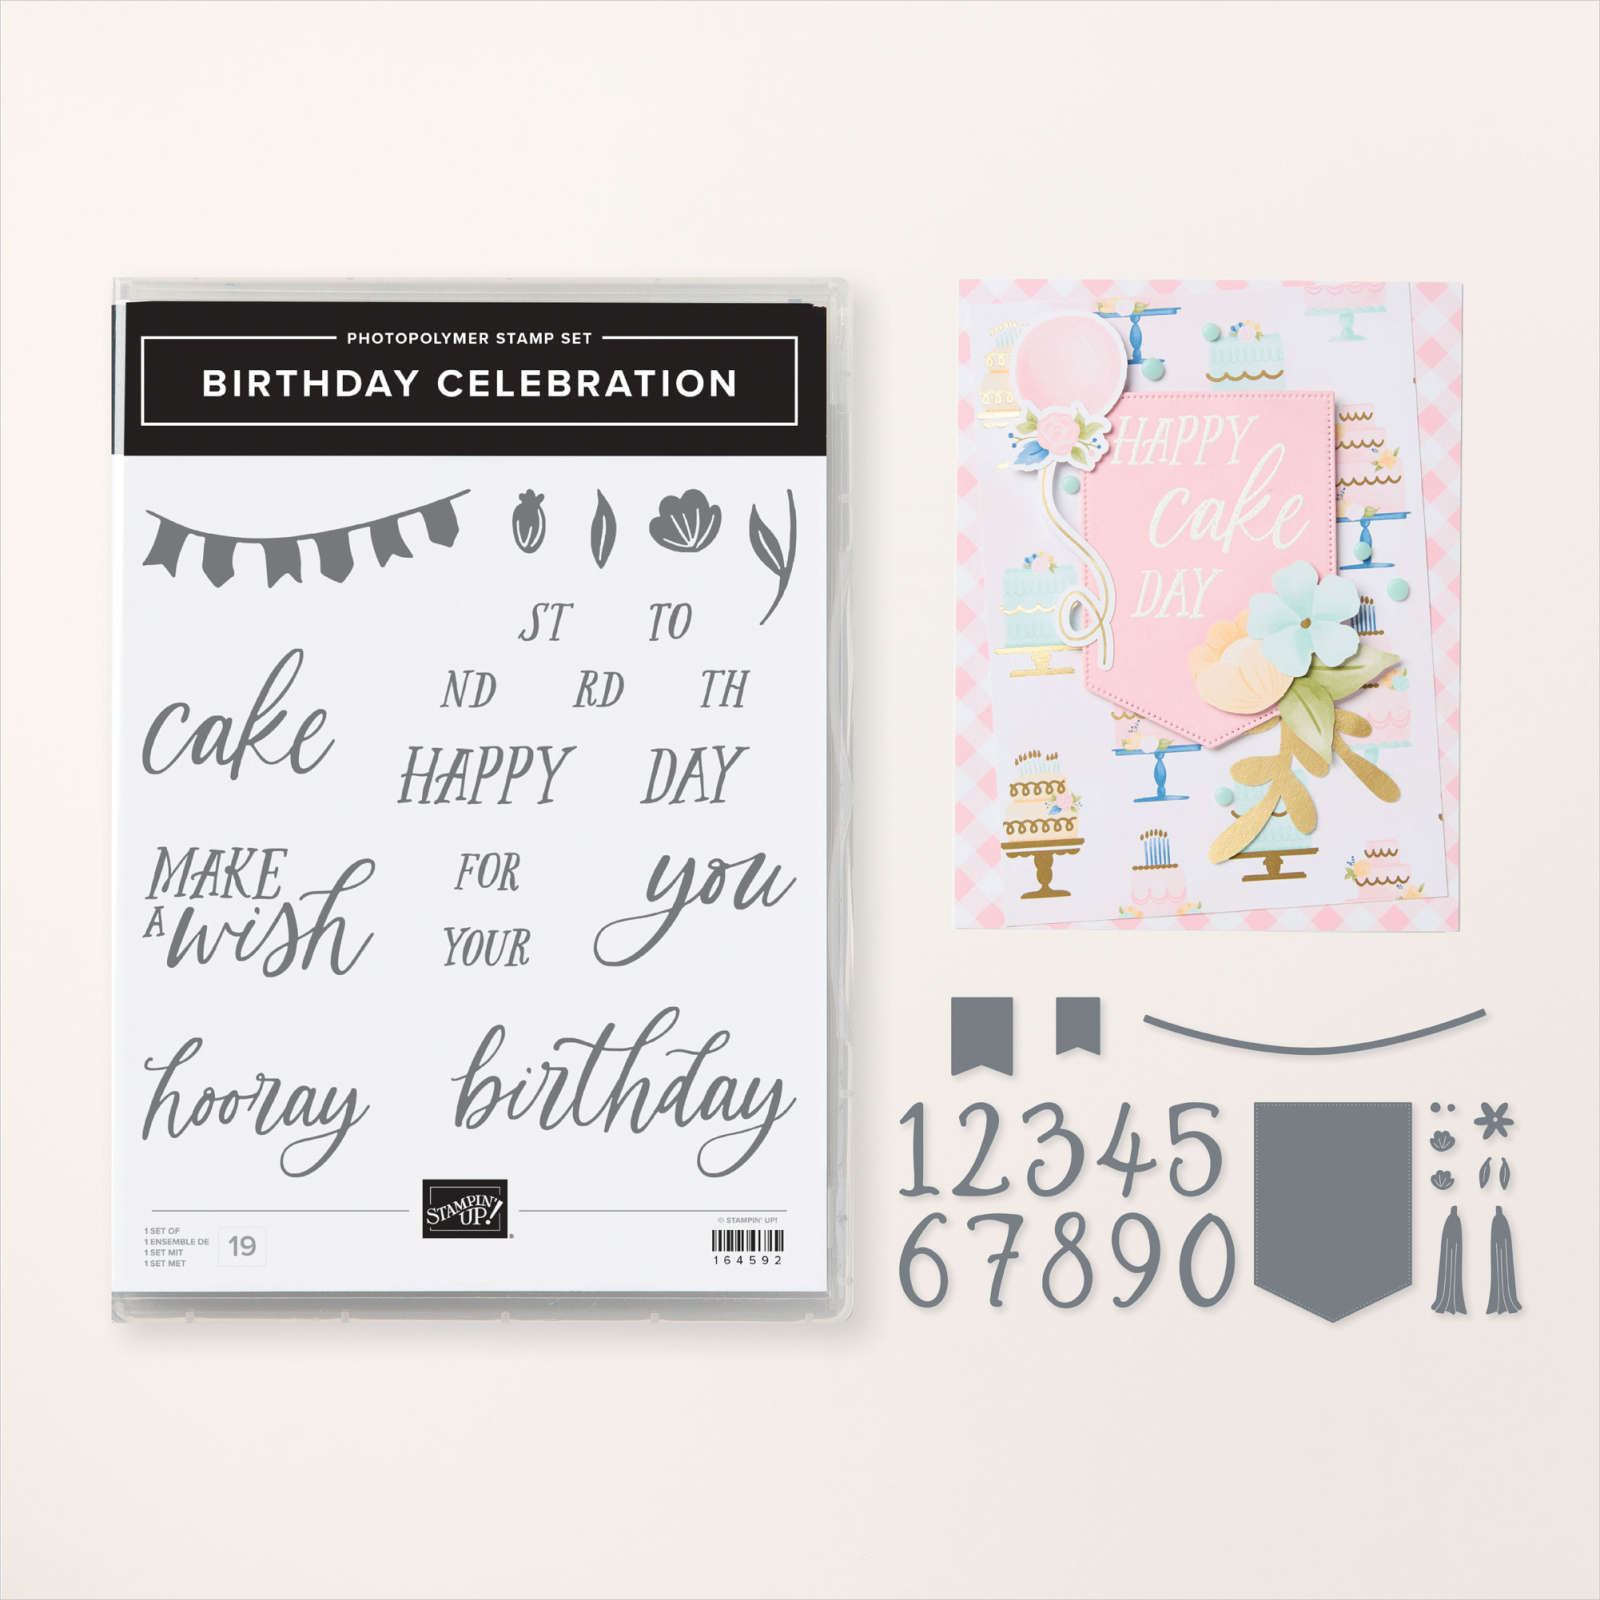
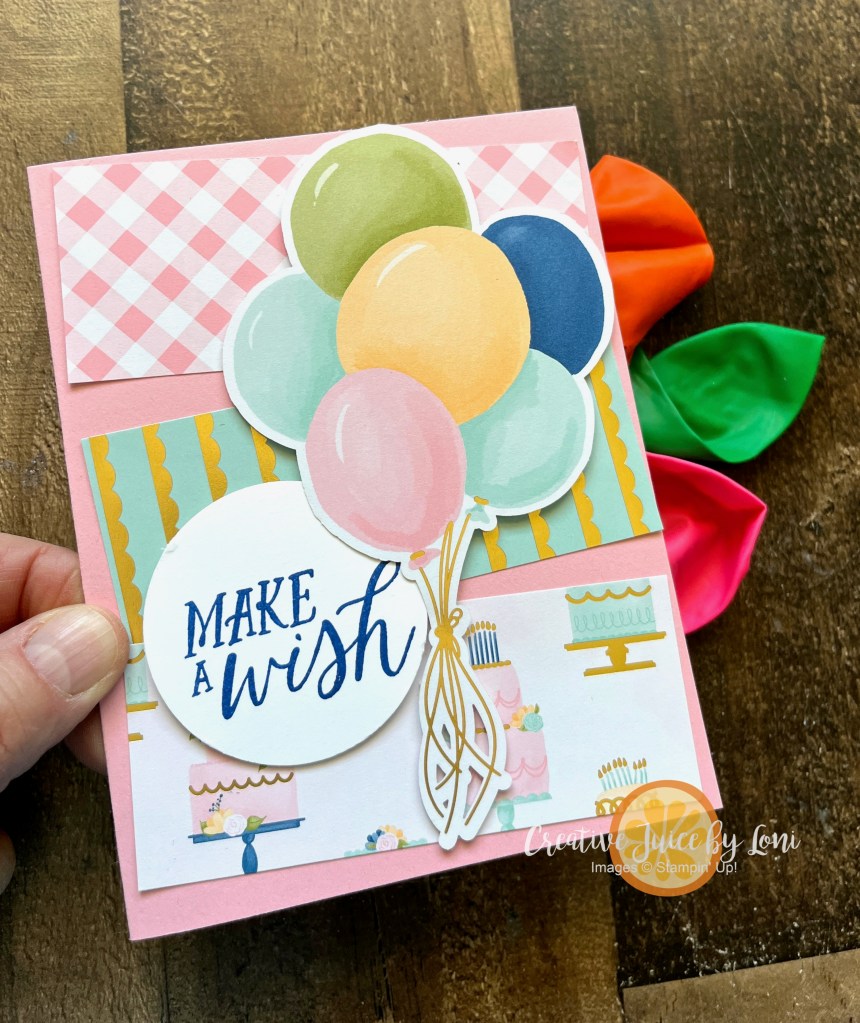
![Birthday Celebration Bundle (English) [ 164599 ]](https://assets1.tamsnetwork.com/images/EC042017NF/164599s.jpg "Birthday Celebration Bundle (English) [ 164599 ]")
![Basic Black 8-1/2" X 11" Cardstock [ 121045 ]](https://assets1.tamsnetwork.com/images/EC042017NF/121045s.jpg "Basic Black 8-1/2\" X 11\" Cardstock [ 121045 ]")
![Real Red 8-1/2" X 11" Cardstock [ 102482 ]](https://assets1.tamsnetwork.com/images/EC042017NF/102482s.jpg "Real Red 8-1/2\" X 11\" Cardstock [ 102482 ]")
![Festive 12" X 12" (30.5 X 30.5 Cm) Glimmer Paper [ 164106 ]](https://assets1.tamsnetwork.com/images/EC042017NF/164106s.jpg "Festive 12\" X 12\" (30.5 X 30.5 Cm) Glimmer Paper [ 164106 ]")
![Silver 12" X 12" (30.5 X 30.5 Cm) Foil Sheets [ 163387 ]](https://assets1.tamsnetwork.com/images/EC042017NF/163387s.jpg "Silver 12\" X 12\" (30.5 X 30.5 Cm) Foil Sheets [ 163387 ]")
![Adhesive Sheets [ 152334 ]](https://assets1.tamsnetwork.com/images/EC042017NF/152334s.jpg "Adhesive Sheets [ 152334 ]")
![Window Sheets [ 142314 ]](https://assets1.tamsnetwork.com/images/EC042017NF/142314s.jpg "Window Sheets [ 142314 ]")
![Versamark Pad [ 102283 ]](https://assets1.tamsnetwork.com/images/EC042017NF/102283s.jpg "Versamark Pad [ 102283 ]")
![Basics Wow! Embossing Powder [ 165679 ]](https://assets1.tamsnetwork.com/images/EC042017NF/165679s.jpg "Basics Wow! Embossing Powder [ 165679 ]")
![Heat Tool (Us And Canada) [ 129053 ]](https://assets1.tamsnetwork.com/images/EC042017NF/129053s.jpg "Heat Tool (Us And Canada) [ 129053 ]")
![Tear & Tape Adhesive [ 154031 ]](https://assets1.tamsnetwork.com/images/EC042017NF/154031s.jpg "Tear & Tape Adhesive [ 154031 ]")
![Mini Stampin' Cut & Emboss Machine [ 150673 ]](https://assets1.tamsnetwork.com/images/EC042017NF/150673s.jpg "Mini Stampin' Cut & Emboss Machine [ 150673 ]")


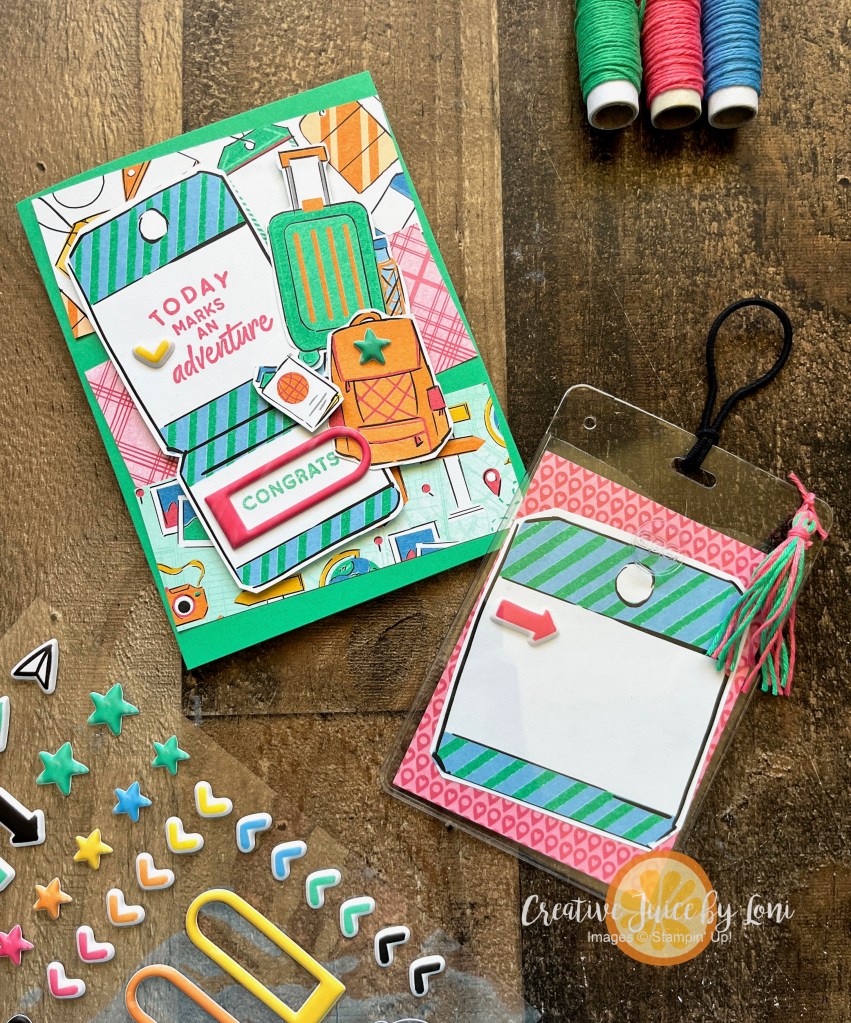
![On The Go Suite Collection (English) [ 165583 ]](https://assets1.tamsnetwork.com/images/EC042017NF/165583s.jpg "On The Go Suite Collection (English) [ 165583 ]")
![Shy Shamrock 8 1/2" X 11" Cardstock [ 163795 ]](https://assets1.tamsnetwork.com/images/EC042017NF/163795s.jpg "Shy Shamrock 8 1/2\" X 11\" Cardstock [ 163795 ]")
![Petunia Pop 8 1/2" X 11" Cardstock [ 163801 ]](https://assets1.tamsnetwork.com/images/EC042017NF/163801s.jpg "Petunia Pop 8 1/2\" X 11\" Cardstock [ 163801 ]")
![Basic White 8 1/2" X 11" Cardstock [ 166780 ]](https://assets1.tamsnetwork.com/images/EC042017NF/166780s.jpg "Basic White 8 1/2\" X 11\" Cardstock [ 166780 ]")
![Pumpkin Pie 8-1/2" X 11" Cardstock [ 105117 ]](https://assets1.tamsnetwork.com/images/EC042017NF/105117s.jpg "Pumpkin Pie 8-1/2\" X 11\" Cardstock [ 105117 ]")
![Azure Afternoon 8 1/2" X 11" Cardstock [ 161719 ]](https://assets1.tamsnetwork.com/images/EC042017NF/161719s.jpg "Azure Afternoon 8 1/2\" X 11\" Cardstock [ 161719 ]")
![Stampin' Seal [ 152813 ]](https://assets1.tamsnetwork.com/images/EC042017NF/152813s.jpg "Stampin' Seal [ 152813 ]")
![Stampin' Dimensionals [ 104430 ]](https://assets1.tamsnetwork.com/images/EC042017NF/104430s.jpg "Stampin' Dimensionals [ 104430 ]")


![Friends Of The Ocean 12" X 12" (30.5 X 30.5 Cm) Designer Series Paper [ 164684 ]](https://assets1.tamsnetwork.com/images/EC042017NF/164684s.jpg "Friends Of The Ocean 12\" X 12\" (30.5 X 30.5 Cm) Designer Series Paper [ 164684 ]")
![Daffodil Delight 8-1/2" X 11" Cardstock [ 119683 ]](https://assets1.tamsnetwork.com/images/EC042017NF/119683s.jpg "Daffodil Delight 8-1/2\" X 11\" Cardstock [ 119683 ]")
![Summer Splash 8 1/2" X 11 Cardstock [ 163797 ]](https://assets1.tamsnetwork.com/images/EC042017NF/163797s.jpg "Summer Splash 8 1/2\" X 11 Cardstock [ 163797 ]")
![Alphabet à La Mode Dies [ 160750 ]](https://assets1.tamsnetwork.com/images/EC042017NF/160750s.jpg "Alphabet à La Mode Dies [ 160750 ]")
![Mini Alphabet Dies [ 162934 ]](https://assets1.tamsnetwork.com/images/EC042017NF/162934s.jpg "Mini Alphabet Dies [ 162934 ]")
![Tuxedo Black Memento Ink Pad [ 132708 ]](https://assets1.tamsnetwork.com/images/EC042017NF/132708s.jpg "Tuxedo Black Memento Ink Pad [ 132708 ]")
![Meant To Bee Photopolymer Stamp Set (English) [ 166583 ]](https://assets1.tamsnetwork.com/images/EC042017NF/166583s.jpg "Meant To Bee Photopolymer Stamp Set (English) [ 166583 ]")
![Bee My Valentine Photopolymer Stamp Set (English) [ 162547 ]](https://assets1.tamsnetwork.com/images/EC042017NF/162547s.jpg "Bee My Valentine Photopolymer Stamp Set (English) [ 162547 ]")
![Basic White Medium Envelopes [ 159236 ]](https://assets1.tamsnetwork.com/images/EC042017NF/159236s.jpg "Basic White Medium Envelopes [ 159236 ]")
![Paper Trimmer [ 152392 ]](https://assets1.tamsnetwork.com/images/EC042017NF/152392s.jpg "Paper Trimmer [ 152392 ]")
![Mini Glue Dots [ 103683 ]](https://assets1.tamsnetwork.com/images/EC042017NF/103683s.jpg "Mini Glue Dots [ 103683 ]")


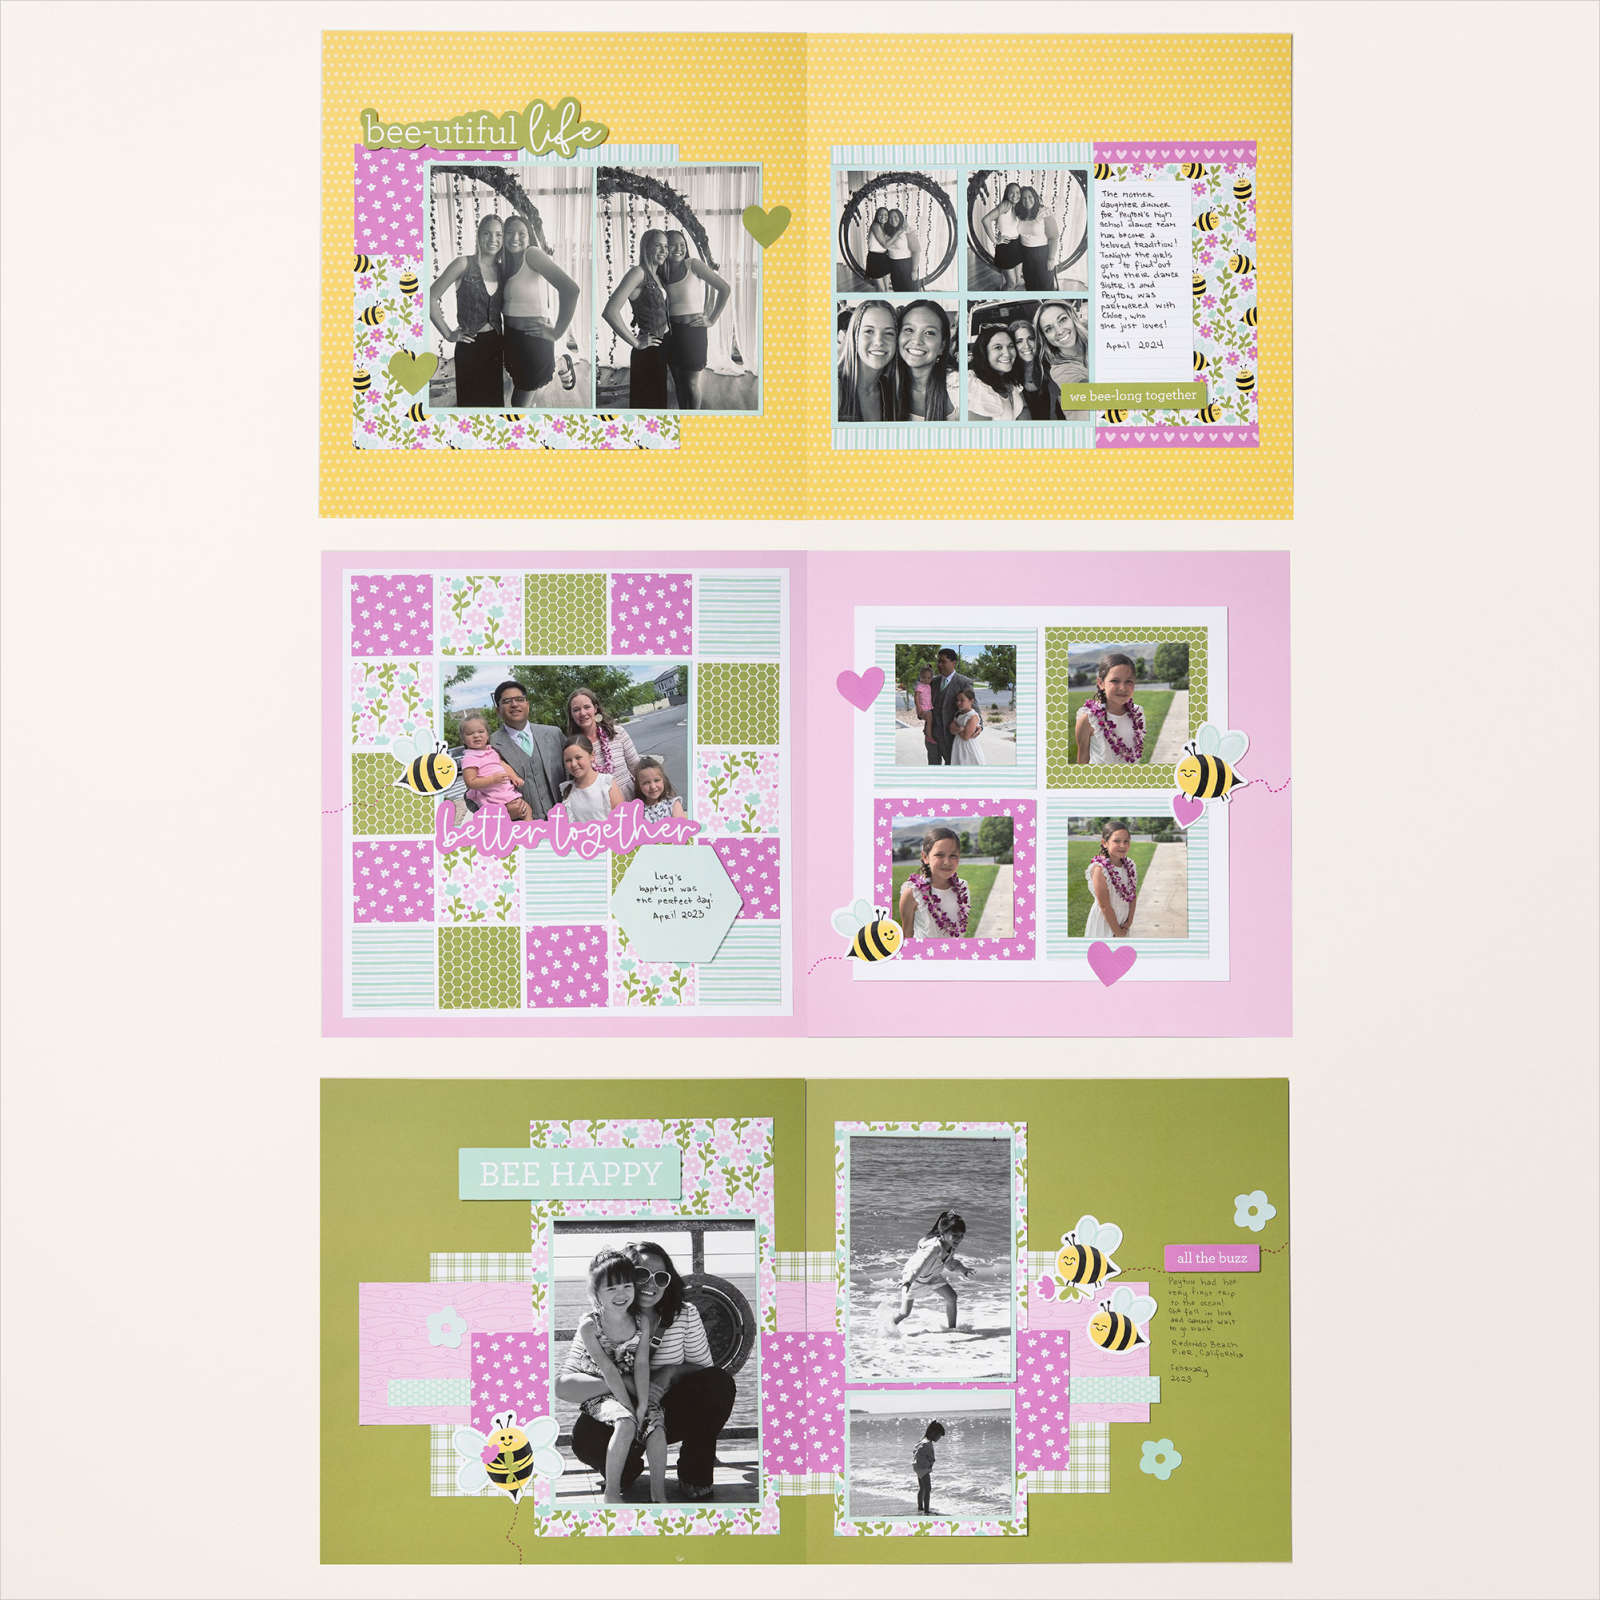
![Cute As Can Bee 12" X 12" (30.5 X 30.5 Cm) Designer Series Paper & Sticker Sheet (English) [ 166618 ]](https://assets1.tamsnetwork.com/images/EC042017NF/166618s.jpg "Cute As Can Bee 12\" X 12\" (30.5 X 30.5 Cm) Designer Series Paper & Sticker Sheet (English) [ 166618 ]")
![Basic White 12 X12 (30.5 X 30.5 Cm) Cardstock [ 159231 ]](https://assets1.tamsnetwork.com/images/EC042017NF/159231s.jpg "Basic White 12 X12 (30.5 X 30.5 Cm) Cardstock [ 159231 ]")
![Petunia Pop 12" X 12" (30.5 X 30.5 Cm) Two Tone Cardstock [ 166690 ]](https://assets1.tamsnetwork.com/images/EC042017NF/166690s.jpg "Petunia Pop 12\" X 12\" (30.5 X 30.5 Cm) Two Tone Cardstock [ 166690 ]")
![Pool Party 8-1/2" X 11" Cardstock [ 122924 ]](https://assets1.tamsnetwork.com/images/EC042017NF/122924s.jpg "Pool Party 8-1/2\" X 11\" Cardstock [ 122924 ]")


![Floral Delight 12" X 12" (30.5 X 30.5 Cm) Designer Series Paper [ 164700 ]](https://assets1.tamsnetwork.com/images/EC042017NF/164700s.jpg "Floral Delight 12\" X 12\" (30.5 X 30.5 Cm) Designer Series Paper [ 164700 ]")
![Everyday Arches Dies [ 164629 ]](https://assets1.tamsnetwork.com/images/EC042017NF/164629s.jpg "Everyday Arches Dies [ 164629 ]")
![Crafting With You Dies [ 161225 ]](https://assets1.tamsnetwork.com/images/EC042017NF/161225s.jpg "Crafting With You Dies [ 161225 ]")
![Silver Foil Sheets [ 132178 ]](https://assets1.tamsnetwork.com/images/EC042017NF/132178s.jpg "Silver Foil Sheets [ 132178 ]")
![Early Espresso Classic Stampin' Pad [ 147114 ]](https://assets1.tamsnetwork.com/images/EC042017NF/147114s.jpg "Early Espresso Classic Stampin' Pad [ 147114 ]")
![Stampin' Cut & Emboss Machine [ 149653 ]](https://assets1.tamsnetwork.com/images/EC042017NF/149653s.jpg "Stampin' Cut & Emboss Machine [ 149653 ]")


![Tune In Photopolymer Stamp Set (English) [ 163633 ]](https://assets1.tamsnetwork.com/images/EC042017NF/163633s.jpg "Tune In Photopolymer Stamp Set (English) [ 163633 ]")
![Tune In Dies [ 163636 ]](https://assets1.tamsnetwork.com/images/EC042017NF/163636s.jpg "Tune In Dies [ 163636 ]")
![Flirty Flamingo 8-1/2" X 11" Cardstock [ 141416 ]](https://assets1.tamsnetwork.com/images/EC042017NF/141416s.jpg "Flirty Flamingo 8-1/2\" X 11\" Cardstock [ 141416 ]")
![Lemon Lolly 8 1/2" X 11" Cardstock [ 161720 ]](https://assets1.tamsnetwork.com/images/EC042017NF/161720s.jpg "Lemon Lolly 8 1/2\" X 11\" Cardstock [ 161720 ]")
![Flirty Flamingo Classic Stampin' Pad [ 147052 ]](https://assets1.tamsnetwork.com/images/EC042017NF/147052s.jpg "Flirty Flamingo Classic Stampin' Pad [ 147052 ]")
![Lemon Lolly Classic Stampin' Pad [ 161666 ]](https://assets1.tamsnetwork.com/images/EC042017NF/161666s.jpg "Lemon Lolly Classic Stampin' Pad [ 161666 ]")
![Pool Party Classic Stampin' Pad [ 147107 ]](https://assets1.tamsnetwork.com/images/EC042017NF/147107s.jpg "Pool Party Classic Stampin' Pad [ 147107 ]")
![Low Profile Dots [ 164658 ]](https://assets1.tamsnetwork.com/images/EC042017NF/164658s.jpg "Low Profile Dots [ 164658 ]")
![Uninked Stampin’ Craft Pad & Whisper White Refill [ 147277 ]](https://assets1.tamsnetwork.com/images/EC042017NF/147277s.jpg "Uninked Stampin’ Craft Pad & Whisper White Refill [ 147277 ]")
