Cutting Map for 6×6 Designer Series Paper

If you create cards, you know the satisfaction of using EVERY. INCH. of patterned paper! Let me use the Stampin’ Up! Fruit Salad Designer Series Paper for Sale-a-Bration to show you how to quickly cut a sheet of 6″ x 6″ paper to make TWO cards!

The first cut you make will be 1″ off the side, then turn your DSP 90 degrees and cut an inch off the other side (you’ll have a 5″ x 5″ piece left over):

The third cut you make will be to cut your 5″ square into two 2.5″ sections. BEFORE YOU CUT, make sure you know which orientation you want your card to be, if there is a direction in the pattern! Watch the video below to see me explain.

The last cut is to take 1″ off the 6″ x 1″ strip, but DON’T THROW THAT TINY SQUARE AWAY!

Once you have your two sets of paper pieces, lay them onto a 4″ x 5.25″ card stock, leaving space in between them. Embellish, then mount the layers onto a card base:

Video instructions:

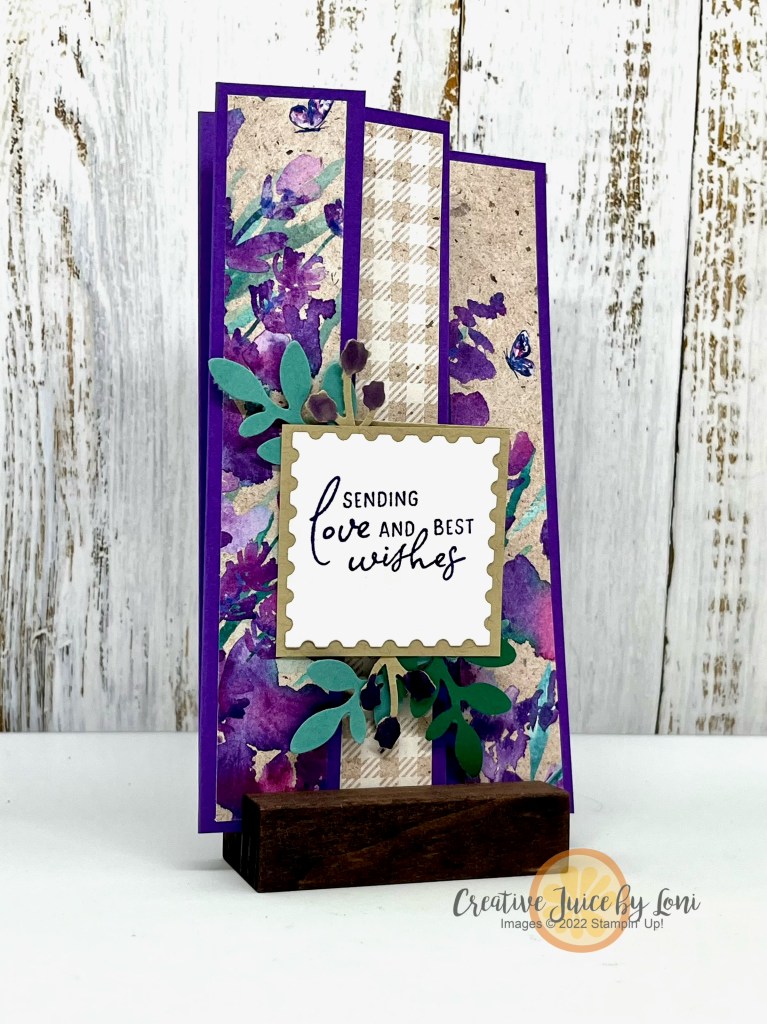
Here are the cards I created or showed using the Fruit Salad paper and the cutting guide. Add ribbon, a greeting, a focal point, a strip of card stock:

This pattern/layout is good for most double sided paper, especially when one side has a bold pattern and the back side has more subtle pattern. Try mixing up patterns from a package, like this card using the Sale-a-Bration Toadstool Gardens paper:

A sentiment stamp set and coordinating punch make finishing these greeting cards speedy, or create a scene (like the toadstools) on a 2″ x 3-1/4″ rectangle. Alternatively, fussy cut an image from the paper itself:

Don’t miss the chance to get some lovely paper free during Sale-a-Bration! Only 4 weeks left.

Come back tomorrow to see what you can do with all the last inches left over from your DSP!

Product List

Use a 6″x6″ Designer Series Paper for This Card!

Some patterned paper comes as 12″ x 12″ and a few of our fancy designs are 6″ x 6″, so today (and to help you use up your Paper Share!), I’ve got a fun fold slimline card which uses a 6″ x 6″ piece of Perennial Lavender Designer Series Paper:

On the left is the card closed flat, and on the right, it’s open to see all the panels.

Cut two 2″ wide and two 1″ wide pieces from one 6″ x 6″ piece of pretty paper to fit into each section. You’ll also need a 1″ x 6″ and 2″ x 6″ panel of card stock to fit where you will write a message. The finished size is 3.5″ x 6.25″ when folded flat.

Here’s a different version with a piece of the Lighter Than Air Designer Series Paper, which already comes as 6″ x 6″-

I created a belly band for this one to keep it closed, then when you slide it off, it opens to wish you a Happy Birthday:

If you didn’t snag a stack of patterned paper in my Designer Series Paper Share, I have a few left! Get one piece of EVERY paper in the 2024 Jan-April Mini catalog for $18 (if you pick up from me in Hurricane, UT) or $22 shipped to you, while supplies last. Both pieces used on these cards ARE INCLUDED IN THE SHARE.

Need more ideas to try for 6″ x 6″ paper?

I love making Sour Cream treat containers or use the Corner Angle card technique to get 4 cards from one piece of paper!


The Perennial Lavender Designer Series Paper (and Perennial Lavender suite) coordinates with the January Paper Pumpkin craft kit! Subscribe by January 10th to receive the Lovely Lavender kit:

Make love-themed cards for special occasions, Valentine’s Day, anniversaries, and more with this all-inclusive kit that arrives in your mailbox in January. The kit includes a unique photopolymer stamp set and ink spot and…

• Makes 8 cards: 4 each of 2 designs with 8 coordinating envelopes

• 4 bonus tags that punch out from the card front

• Precut paper pieces and linen thread

• Coordinating colors: Garden Green, Pretty Peacock, Lost Lagoon, Highland Heather, Gorgeous Grape (Classic Stampin’ Spot), Berry Burst

Product List