New at SU! Dino-Mite Backgrounds!

For our March New at SU! Blog Hop, we are bringing BACKGROUNDS to the front and center! You are sure to find unique ideas to save/remember as you hop through the projects our world-wide design team have created.

My card features a new Online Exclusive background stamp named Painted Stripes:

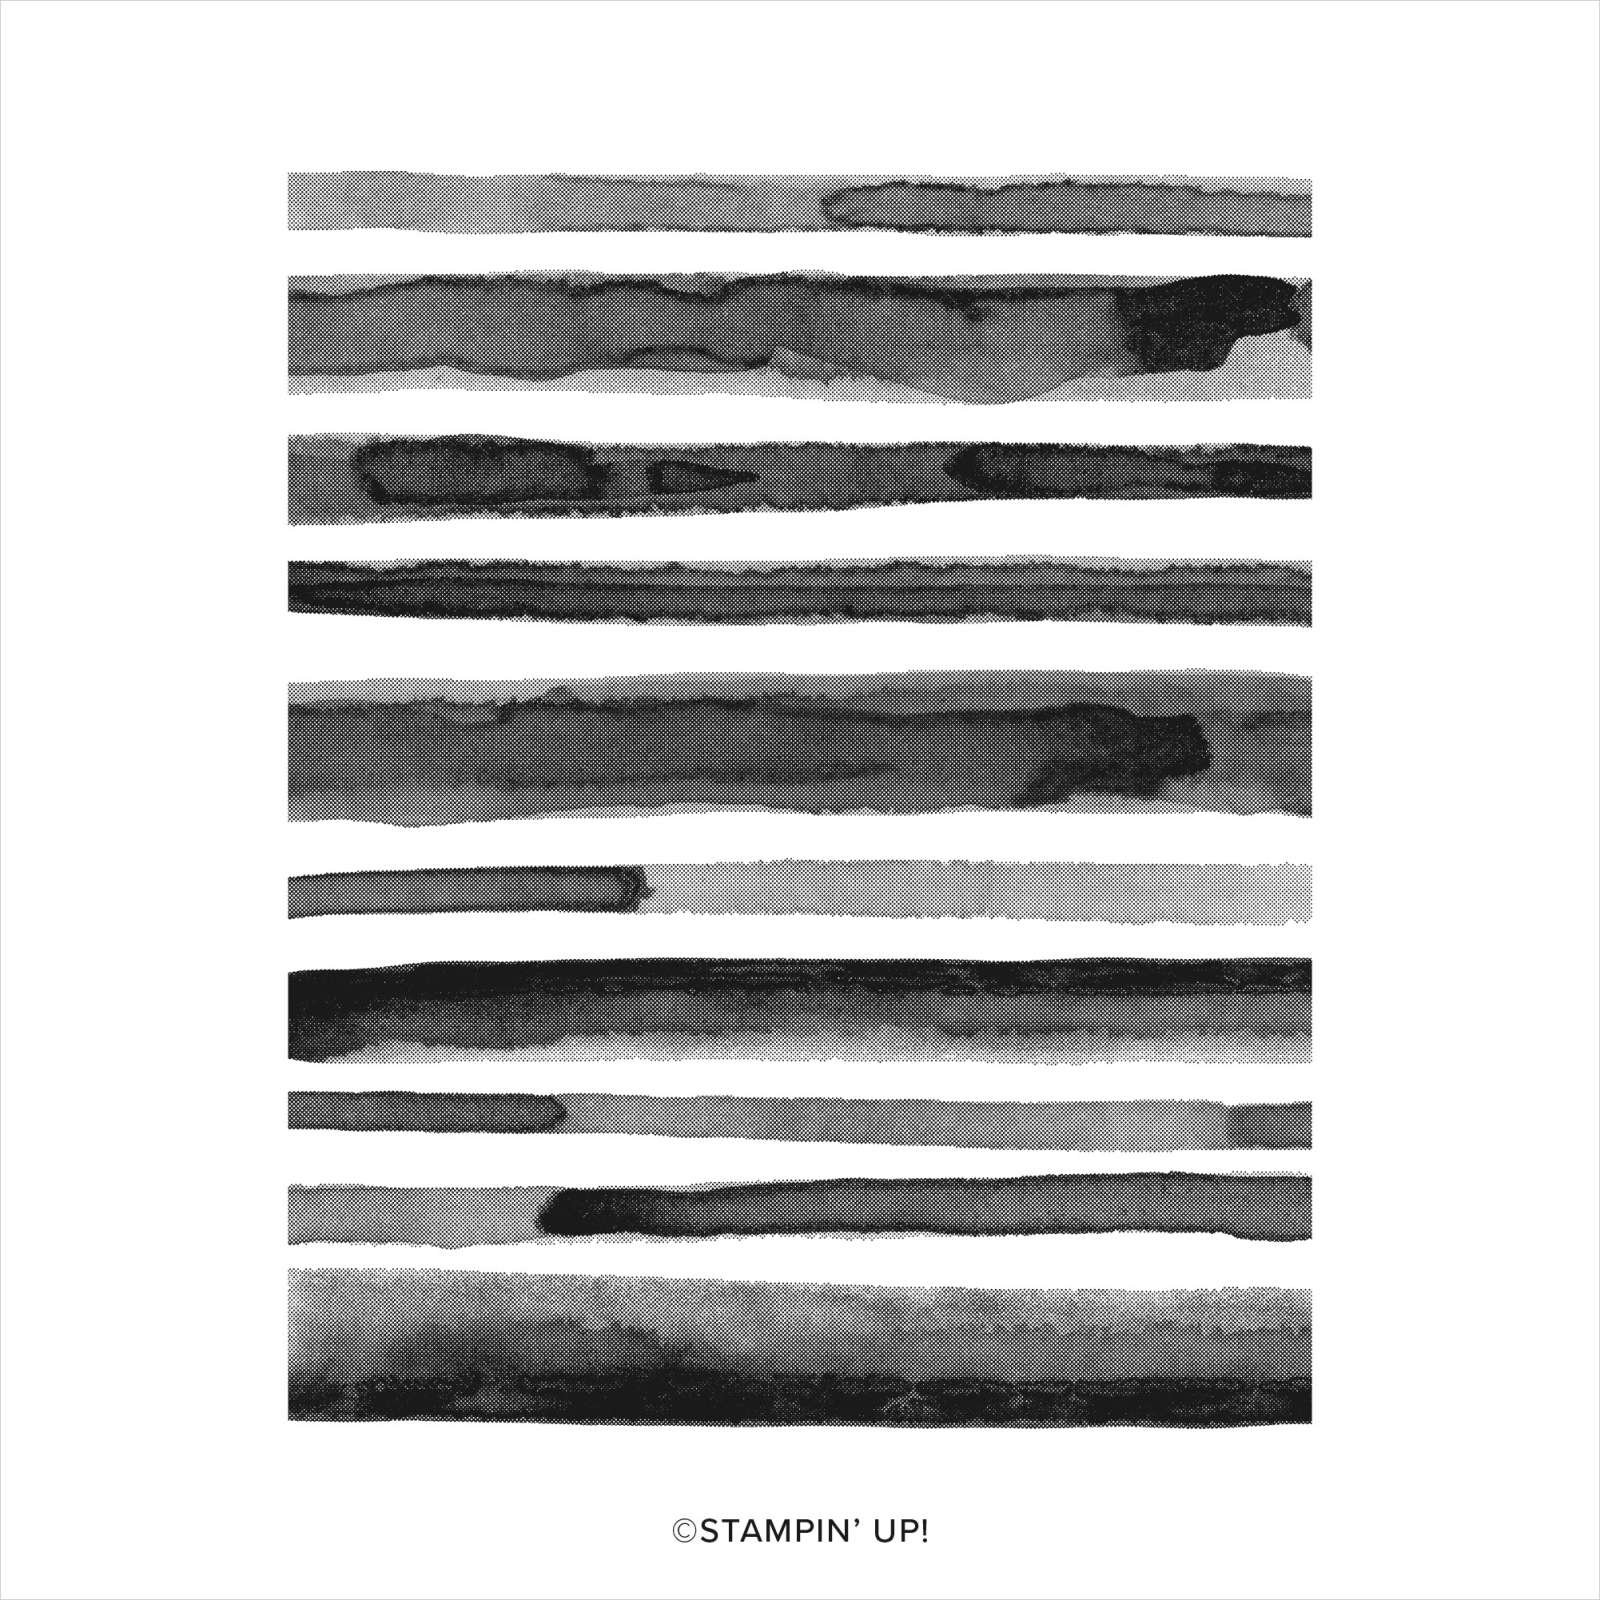
To show it’s versatility, I’m using this background to create THREE different patterns behind the dinosaurs on this birthday card any dino-obsessed kid would appreciate!

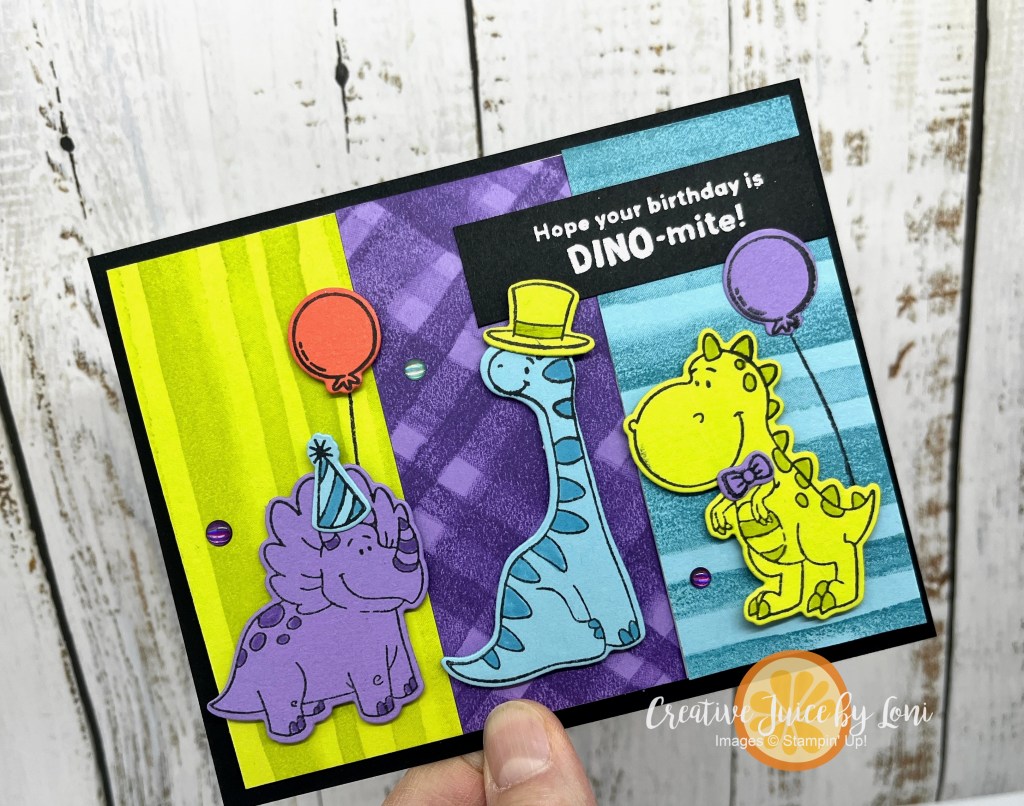
Painted Stripes can be used for vertical lines, horizontal stripes or stamped both directions to create a playful plaid pattern. I love that they are imperfect lines with variegated textures, because you can’t stamp it incorrectly! You can also use this large background stamp on the envelope to make it match (I masked off the address area with a post-it note, which you remove after stamping over it):

The Darling Dinos live up to their name, and are just as cute when stamped on colored card stock, for minimal effort in coloring. And hats on dinos? Cuteness factor x 1000!

I’ll list the supplies used below the roll-call, and am happy to serve you if you don’t have a U.S. demonstrator. Find MORE beautiful background ideas for your card creations at each of these places:

March 2025 New at SU! Hop: Beautiful Backgrounds

Previous BlogNext Blog
1.Creative Juice by Loni (US): Dino-Mite Backgrounds!
2.The Joy of Stampin’ with Rachael (US)-Beautiful Backgrounds with Hear
3.Furry Cat Designs (UK) – Textured Notes Dies for a background
4.Stamping Flair (AU) – Mini Corrugated Embossing Folder
5.Stampinxime by Ximena Morales (DE) – Emboss-Resist-Hintergrund mit Sc
6.De Kijkkast (NL) – Smooched Background with You are Remarkable
7.247 Inkspiration (US) – Beautiful Backgrounds
8.scraphexe (DE) – Beautiful Backgrounds

Powered by blogcarousel.com

Product List

If you have time to leave a comment (link at the top of the post on the left by the date), I’m always grateful for your thoughts!

Joseph’s Coat Technique (with Embossing Folders)

Revisiting a classic stamping technique- this time with 3-D Embossing Folders!

The Joseph’s Coat technique has been done with heat embossing in the past, but Stampin’ Up!’s beautifully detailed and deep image embossing folders really make it easier than ever to create colors that seem to POP from a dark background.

This was the second card I created in the how-to video today using the Layered Florals embossing folder, and it shows the vibrancy of the colors you can achieve with this trick. I also made these cards into a Z-Fold style that stand up to display.

In a nutshell, the way to make this stunning background is to emboss a white or vanilla piece of card stock, then color in the RECESSED images using sponge daubers + Classic Ink Pads -OR- Stampin’ Write Markers. Once you’ve colored all the images, drag a dark ink across the top of the background. I used Night of Navy ink over my Petunia Pop water lilies on this version.

Watch to learn how:

Peek at the details from the Changing Leaves Hybrid Folder Joseph’s Coat card…amazing, eh?

For best results, make sure your dark ink pads are inked up well to achieve the dark “background” in one swipe of your pad.

Here are the supplies I used – order them today, then give this technique a try!

Product List

Just a few days left to earn BONUS DAYS coupons in July! Redemption for the codes you’ve earned this month will begin August 1st!

Leaf Collection Thinking of You Card

Made for Mexico

It’s *FINALLY TIME* and hopefully I’m sitting on the beach as you read this! One of the last things I did to prepare for the Stampin’ Up! Incentive Trip was to create swaps, and thought you might like to see my card:

I used the Leaf Collection stamp we received as an all-attendee giveaway at OnStage last month to emboss a Shaded Spruce and Pretty Peacock background onto Shy Shamrock card stock. The stamp arrives on WEDNESDAY, May 1st in my Stampin’ Store! The ink stayed wet just long enough to cover it in clear embossing powder:

See that new color on the card base? It’s called “Basic Beige”

I added the sentiment in the Hexagon punch and a few leaves and sprigs using the Bough Punch and a sweet bow (if I made it, it probably has ribbon on it).

Looking forward to sharing more about our Mex-capade…when I have the time! And because I’m supposed to say this about earning the Incentive trip: “Results are not typical. Fewer than 1% of Demonstrators world-wide achieve this reward”

THANK YOU for your support and orders from my Stampin’ Store. I hope the value, teaching, and service offered to my friends & customers is equal to my deepest heart-felt appreciation!

New at SU! Sending Smiles with Very Vanilla & Crumb Cake

Very Vanilla is a warm option for basic stamping that is often overlooked, and our International design team is showing you how lovely it is paired with Crumb Cake (another neutral) to create timeless hand-stamped cards:

My “Sending Smiles Across the Miles” card begins with the Watercolor World background stamped with Crumb Cake on a 3-1/2″ x 4-3/4″ Very Vanilla card stock, then I embossed it with the Timeworn Type embossing folder. Add a bit of Crumb Cake ink with a blending brush lightly around the edges and layer it over a crumpled/distressed 3-3/4″ x 5″ crumb cake card stock.

💡 TIP: Spray the card stock you want to distress lightly with water in a Stampin’ Spritzer to make it easier to crumple in your hand, then lay it out flat to dry.

Wanting to keep the two colors as the main palette, I just added a subtle touch of Petal Pink and Soft Sea Foam on the flower/stem and ribbon.

Wouldn’t this be perfect to mail an international Pen Pal? Have you ever had a pen pal in another country? Let me know in the comments!

The card supplies are listed below the other hop participant’s links (visit them all and SAVE your favorites), and I’m delighted to serve you if you don’t have a preferred U.S. demonstrator!

Previous BlogNext Blog
1.Creative Juice by LonI (US) – Sending Smiles with Very Vanilla &
2.Playing with Papercrafting (CA) – Merriest Trees for New at SU
3.Stamping Flair (AU) – Gorgeously Made
4.Tricia’s Stamping Creations (US) – Notes of Nature Bundle
5.iHeartCards2 (US) – Christmas Classics & More Wishes with Very Va
6.Nature’s INKspirations (US) – Handcrafted Elements
7.scraphexe (DE) – Nature’s Sweetness | Liebliche Natur
8.Carterie Plus (CA) – Planted Paradise
9.De Kijkkkast (NL) – Cottage Wreath in timeless vintage
10.24-7 Inkspiration (US) – Warmest Heart

Powered by blogcarousel.com

Product List

Crosshatch Embossed Background

Welcome back to day 2 of my embossing folder series! Today we are looking closer at the Crosshatch 3-D Basic embossing folder (one of a trio in my online store).

For a textured background like this, stamp your images first, then run it through the embossing folder. I used the texture OUTDENTED (it’s a real word) on my floral background, but you can also turn your paper over to get an INDENTED texture like this as an alternative:

If you missed the video teaching TIPS & TECHNIQUES for embossing folders, you can watch it here!

This texture is extremely versatile and you’ll be reaching for it often. I’ve listed the supplies for my “You Inspire Me” card below, and please visit tomorrow for the third 3-D Basics embossed card!

Product List

A “recipe” of the correct way to layer the 3-D Basics Crosshatch embossing folder into your Cut & Emboss “Sandwich”:

Shoebox Swap – Cards, Not Shoes!

At the Sprinkled Ink Retreat last weekend, we participated in a Shoebox Swap, but that doesn’t mean we exchanged empty shoeboxes 😜

Each demonstrator brought a #simplestamping card (some were not so simple!) and had all the pieces cut and prepared for everyone else to make, in a box (about the size of a shoebox, hence the name). We passed boxes around the table and you would make one as it came to you. It was a **flurry** of activity for a few hours…

Who knew crafting could feel like a workout? We were exhausted – but happy stampers! – by the time we finished 15 cards.

For my card, I used the Berry Harvest Background stamp and a sentiment from the Apple Harvest stamp set.

Want to make this card? Here’s how simple it is:

  1. Place background stamp face up and ink it with Soft Seafoam ink. Then dip a sponge dauber into Highland Heather ink and daub it onto the stamp where the berries are.
  2. Lay a 3″ x 4″ piece of Soft Seafoam card stock on top of the stamp, cover it with scrap paper and rub to transfer the image.
  3. Cut the stamped card into 1″ pieces on a paper trimmer and adhere in same order to front of Basic White 8.5″ x 5.5″ card using dimensionals, leaving a small space between each panel.
  4. Stamp sentiment on white scrap in Highland Heather ink and adhere to right panel(s).
  5. Add small bow of white twine on a glue dot.

Here’s a quick look at all the cards we created that night! WOW!

Just a reminder- ANY DAY is a great day to join my Sprinkled Ink Family and start your own Stampin’ Up! journey, but TODAY (June 30, 2023) is the LAST DAY of the Starter Kit+ Promotion. There is no risk to give it a try…and I am here to help you get the most from your experience! Click the image to get going:

Circling Round to Monochromatic Colors (Plus 3 for FREE)

It’s been fun to teach color theory in May and I really hope you’ve learned some skills to help you choose palettes for your paper crafting and rubber stamping projects! Today, I “circled around” to MONOCHROMATIC schemes, which isn’t limited to only one color, but can include 2 or 3 variations of the same HUE. Here are a few examples:

Stampin’ Up! yellows are a exquisite example of how 3 different tints, tones or shades can harmonize well: Crushed Curry (card base), Daffodil Delight (sentiment and banner) and NEW Lemon Lolly (focal point) are different depths of the same sunny color and coordinate together!

We have a variety of purples, and not all of them start in the same corner of the color wheel, so this is where you need to learn to “see” harmonizing colors. The three I used for this card were Gorgeous Grape (card base), Highland Heather (larger banner and cupcake frosting) and Fresh Freesia (background and cupcake liner).

The tutorial for this card style includes further explanation:

I chose to use the Circle Sayings Bundle for our lesson on monochromatic color ideas because I have an exclusive opportunity through June 15th for you: Purchase the bundle from my Stampin’ Store and you’ll receive 3 never-seen project tutorials PLUS the consumable supplies to create all three projects! You’ll get the tutorials via email and the supplies in the mail by June 30th.

Let me share a few additional Stampin’ Up! color trios that work well as monochromatic combinations. These are NOT all the possible pairings, only a few I came up with to get your juices flowing:

Now it’s your turn to give a “monochromatic” card a try!

Product List

Inside the cards:

Beautifully Happy Watercolor Background

After a decade of drought, Southern Utah is enjoying an unbelievable amount of rain, so on this wet day, it just feels like I should be creating with WATERcolor!

In my Live crafting video, I demonstrated how to make a unique background in two ways for the Beautifully Happy Sale-a-Bration stamp set, and it’s easier than you may think:

I’m not a professional…it just amazes me what can be made with paper, ink and a bit of water! Which one appeals most to you, left or right?

Product List

Remember to check your ink refills and card stock supply when you place an order, and you could choose the Beautifully Happy set FREE during Sale-a-Bration!

June 3 for Free: Dragonfly Garden

Punches make creating cards simple by offering an element that adds that “punch” of pizzazz! This month, my 3 for Free kit will be mailed out to those who order the Dragonfly Garden bundle, which features the Dragonfly punch and you’ll be flying to the craft room to put them together.

While I will send you all the consumable supplies (card stock, paper, ribbon, etc), there are a few ink pads and supplies you may want to add to your order (if you don’t already have them) to help you complete your projects:

  • Balmy Blue Classic Ink Pad
  • Bumble Bee Classic Ink Pad
  • Blackberry Bliss Classic Ink Pad
  • Just Jade Classic Ink Pad
  • Versamark Ink Pad
  • Sponge Daubers
  • Gold, Copper OR Silver Embossing Powder
  • Heat Tool (for embossing)

To get you inspired by this bundle (and to teach you how to make some stunning watercolor backgrounds), I demonstrated these two cards during my Facebook Live yesterday (not part of my 3 for Free kit):

The technique (Stampin’ Blends on Vellum with Alcohol) is really quite magical, and so enjoyable to watch:

As I mention in the video, if you don’t want to do this technique yourself -OR- you just want MORE of it, you can also subscribe by June 10th for the Paper Pumpkin Kit “Expressions In Color” which will get you making 9 gorgeous watercolor themed cards in moments with everything you need in one kit arriving in your mailbox:

Birthday Chick All Wired Up

I miss my chickens.

Consoling myself with stamped chickens is (only) slightly less messy and time consuming, but there aren’t any delicious eggs to look forward to. It’s all good though, because these hens from the Birthday Chick stamp set make me laugh as much as the live versions did!

This greeting card started with the TGIF Challenge on Friday to use our background stamps: The All Wired Up background had been on my mind since the chicks arrived!

By using the new Blending Brushes to add a little extra Granny Apple Green ink at the bottom of the background, it added on Ombre element that helps Chunky Clucky really pop off as the focal point!

You may be asking…where did the picket fence come from? Did you fussy cut Chunky Clucky? Well, my friends, I have good news for you: On February 2nd, customers will be able to order coordinating dies (and that’s not all, so stay tuned)!

Product List