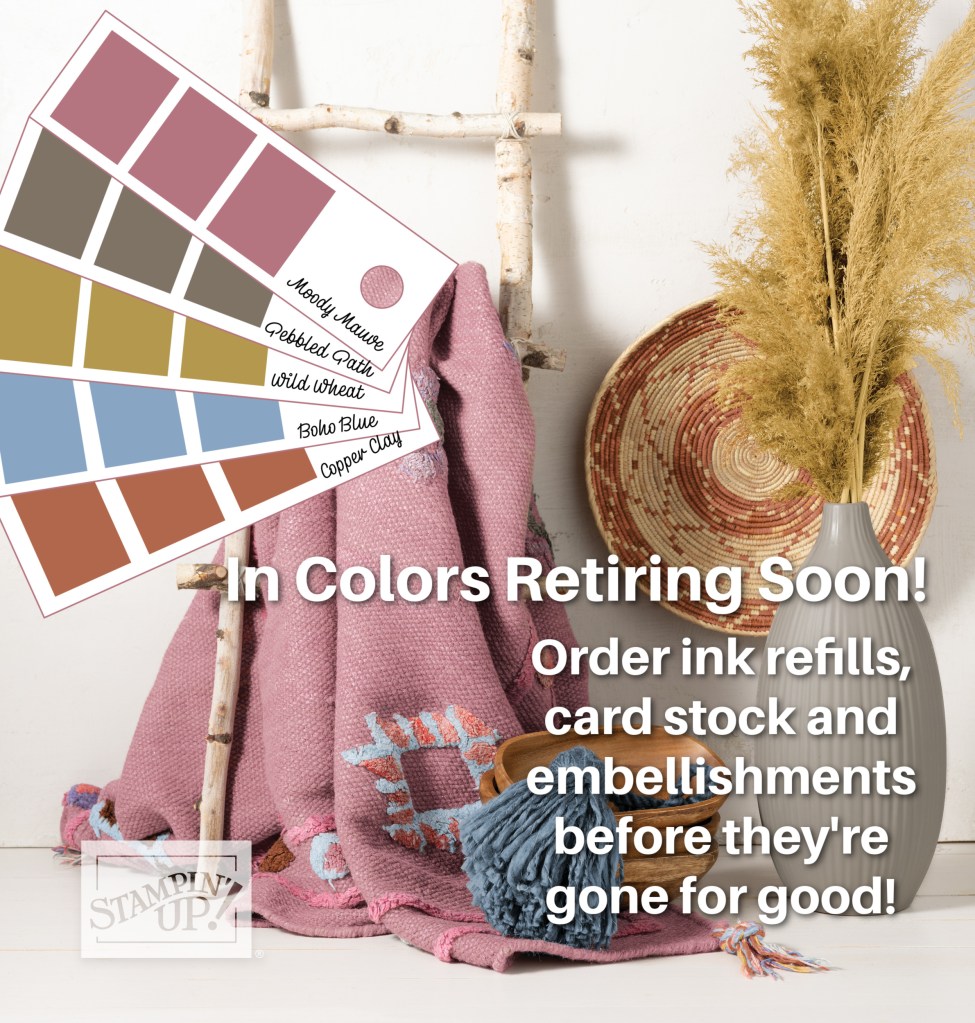
Sending my gratitude to all who attended the Stampin’ Soiree Open House & BOGO sale last week! If you couldn’t make it, or are looking for some sensational stampin’ STEALS, peruse the updated Retired Items for Sale page. From Stampin’ Up! stamp sets to embossing folders and dies, there are plenty of beloved crafting tools to collect.
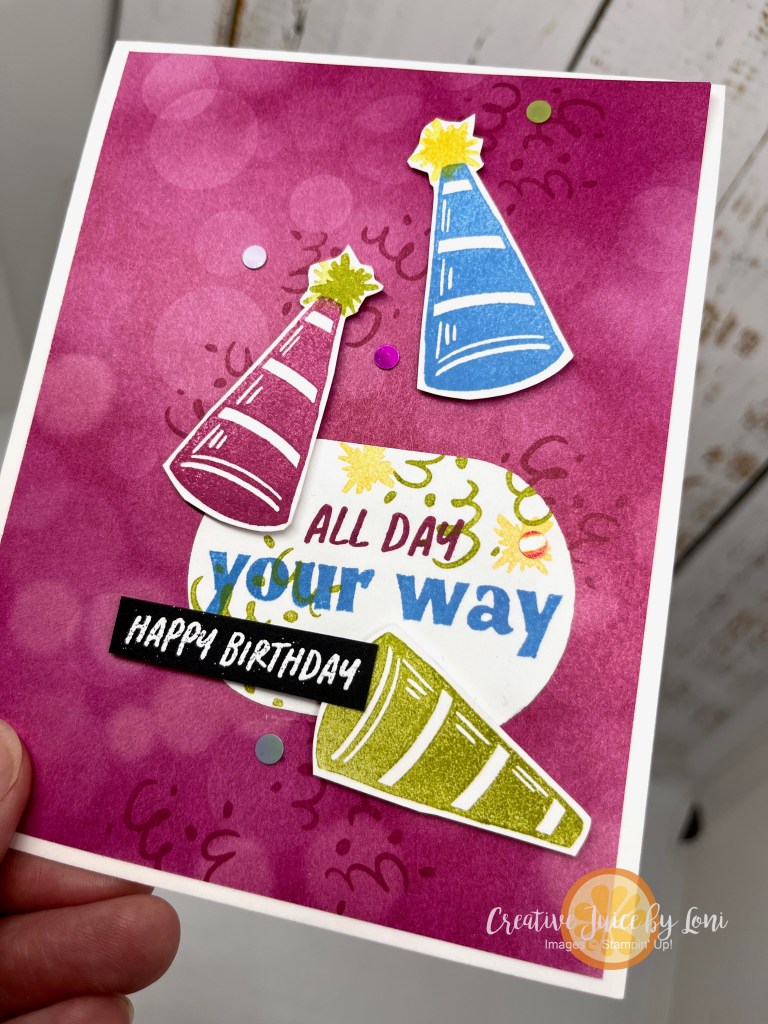
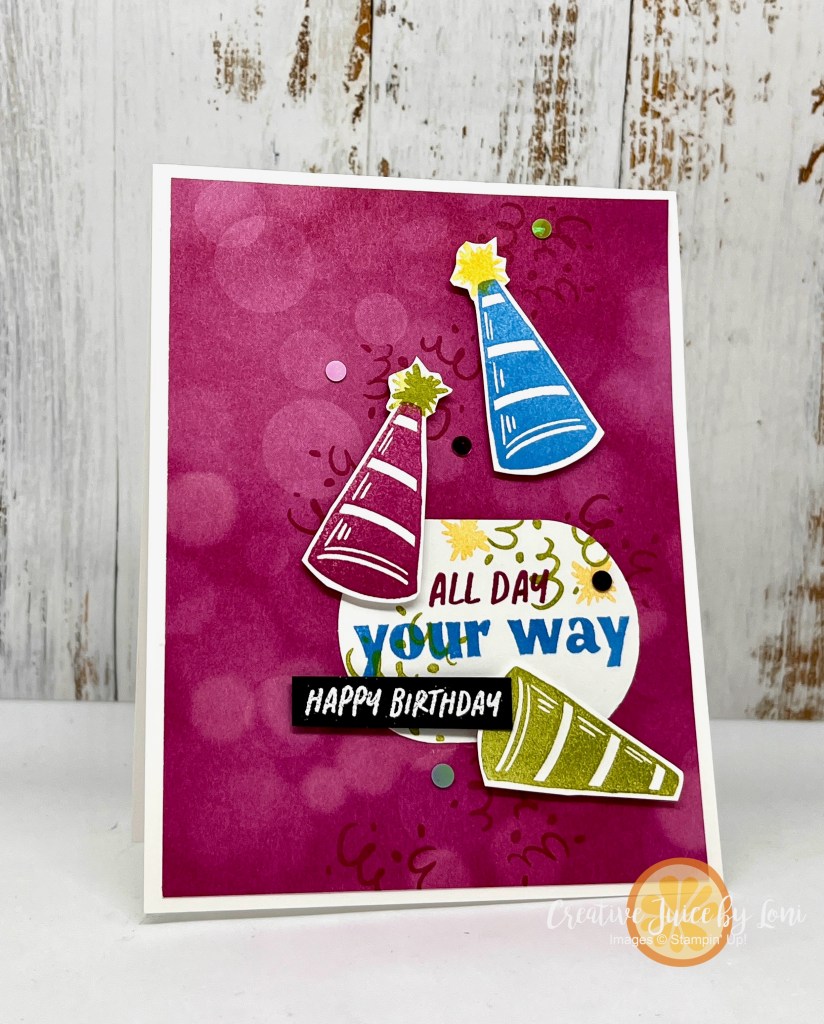
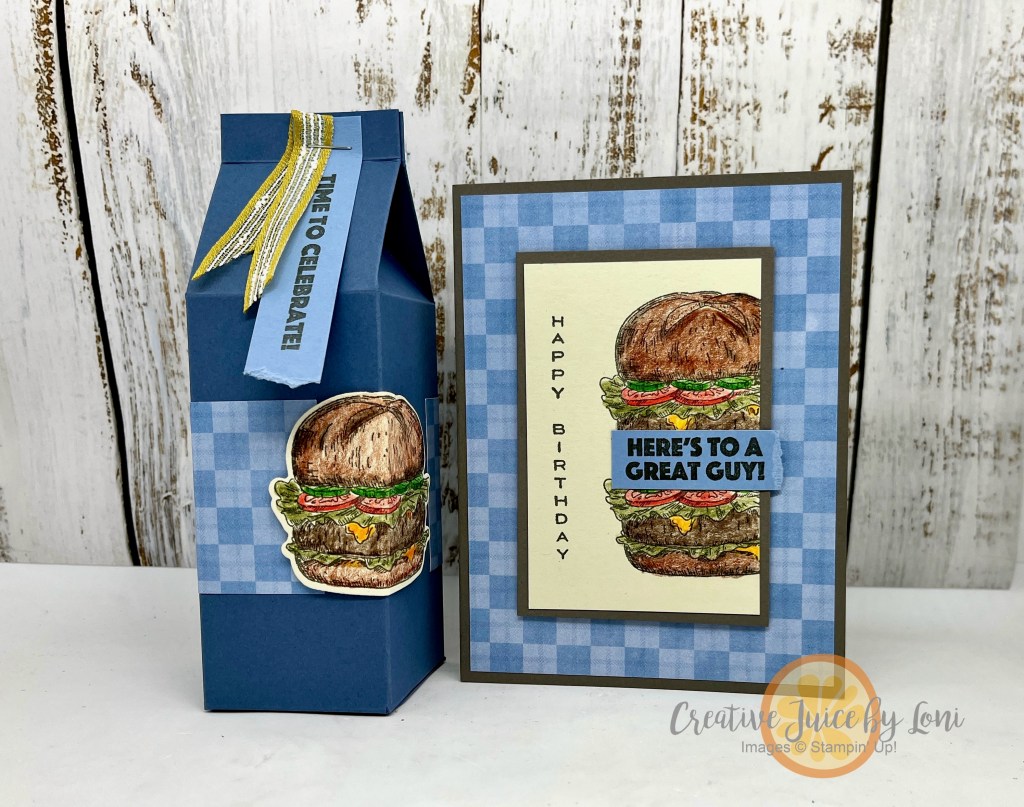
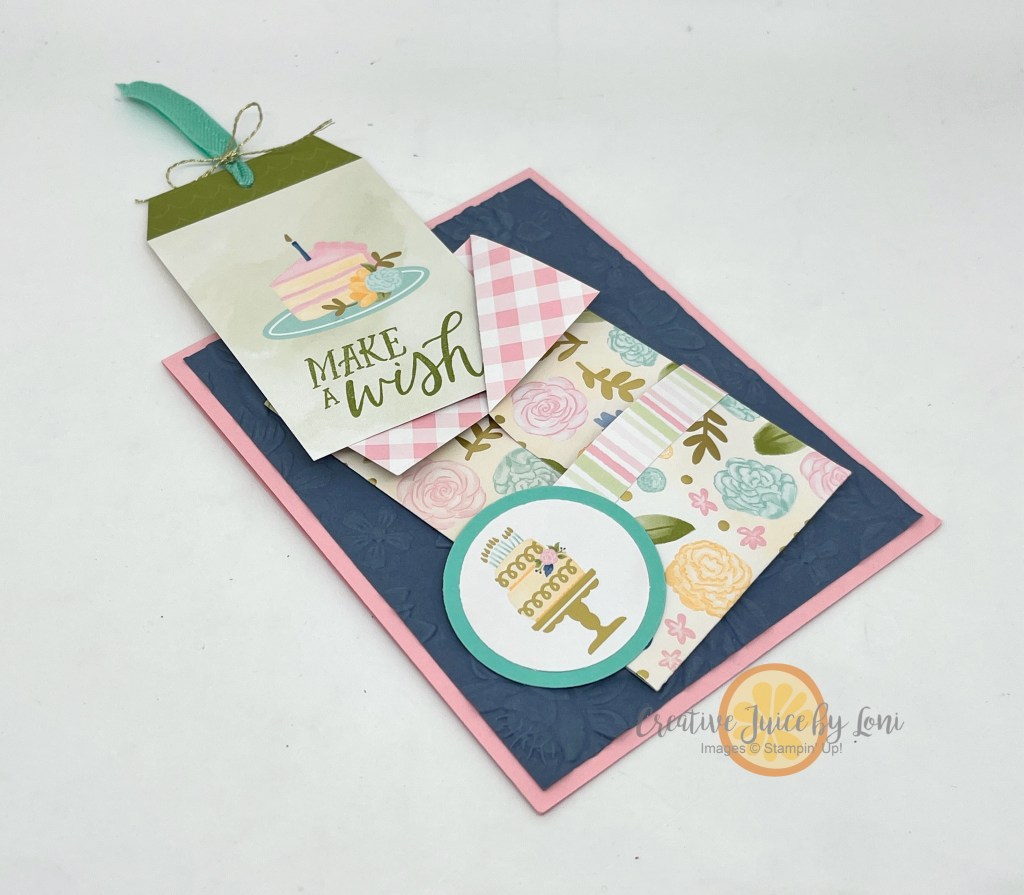
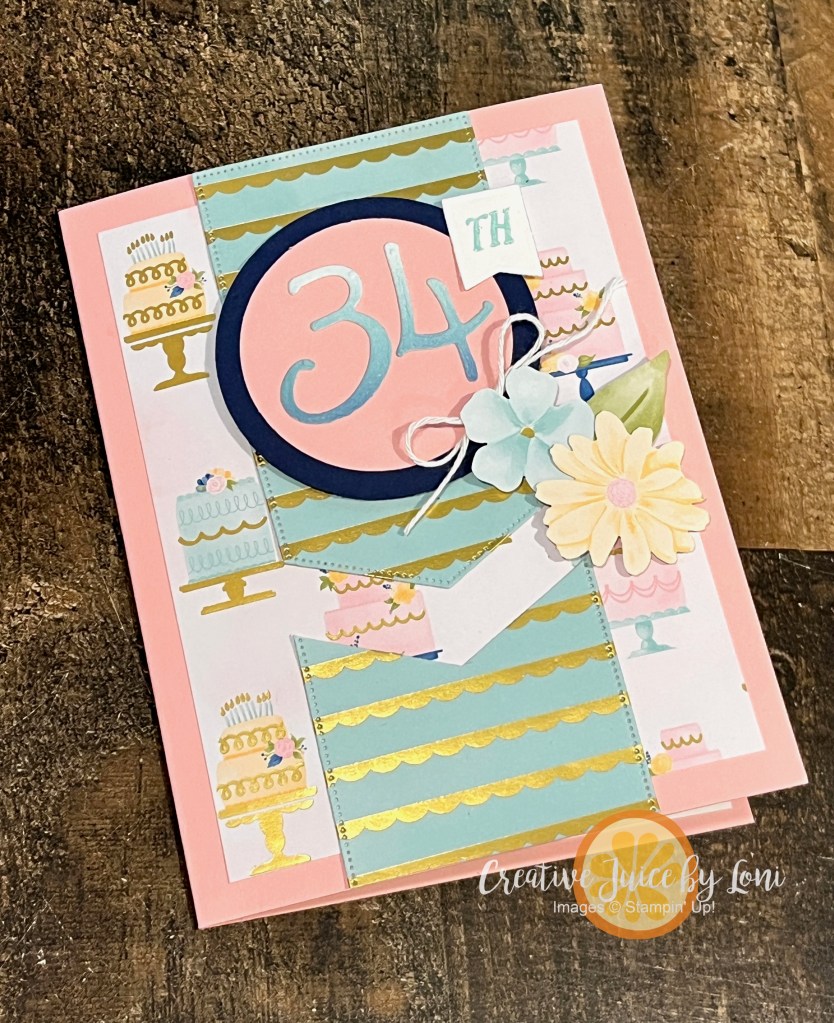
I participated in a new catalog/new online product swap with my demonstrator friends, and this was my design for a birthday card using the Online Exclusive Sweet Jar bundle:
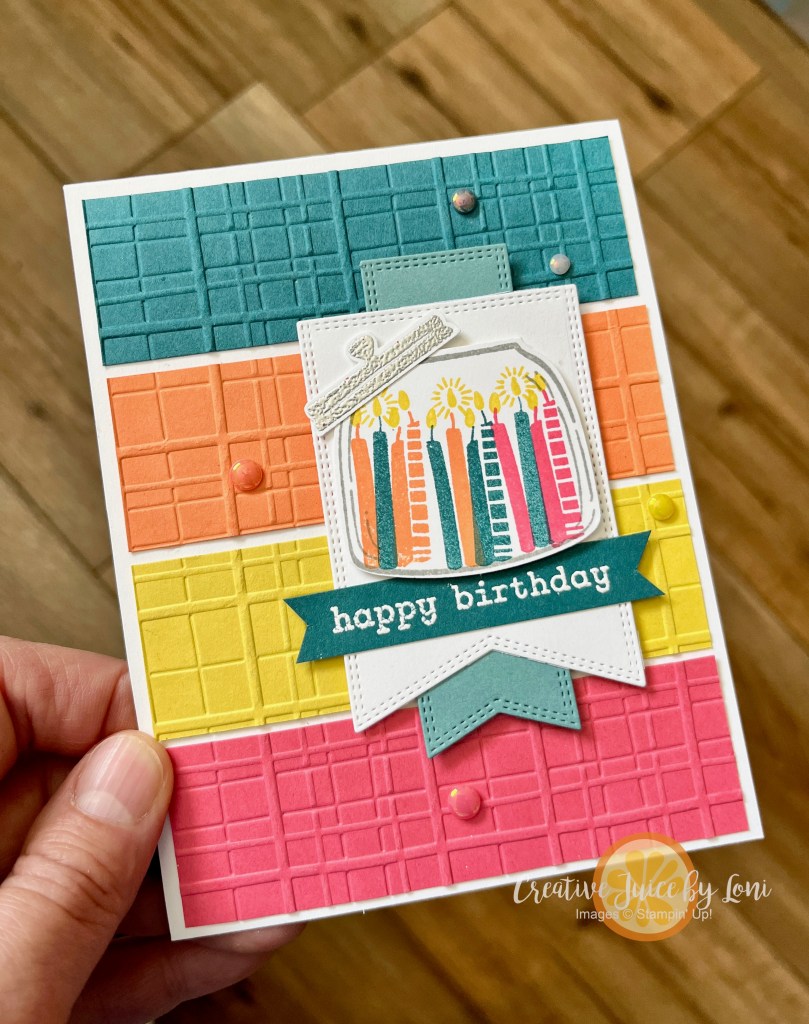
I was so sad to say goodbye to the Sketched Plaid background (which someone might snag from my retired items on sale), but gratefully, I can still use the Forever Plaid 3D Embossing Folder.
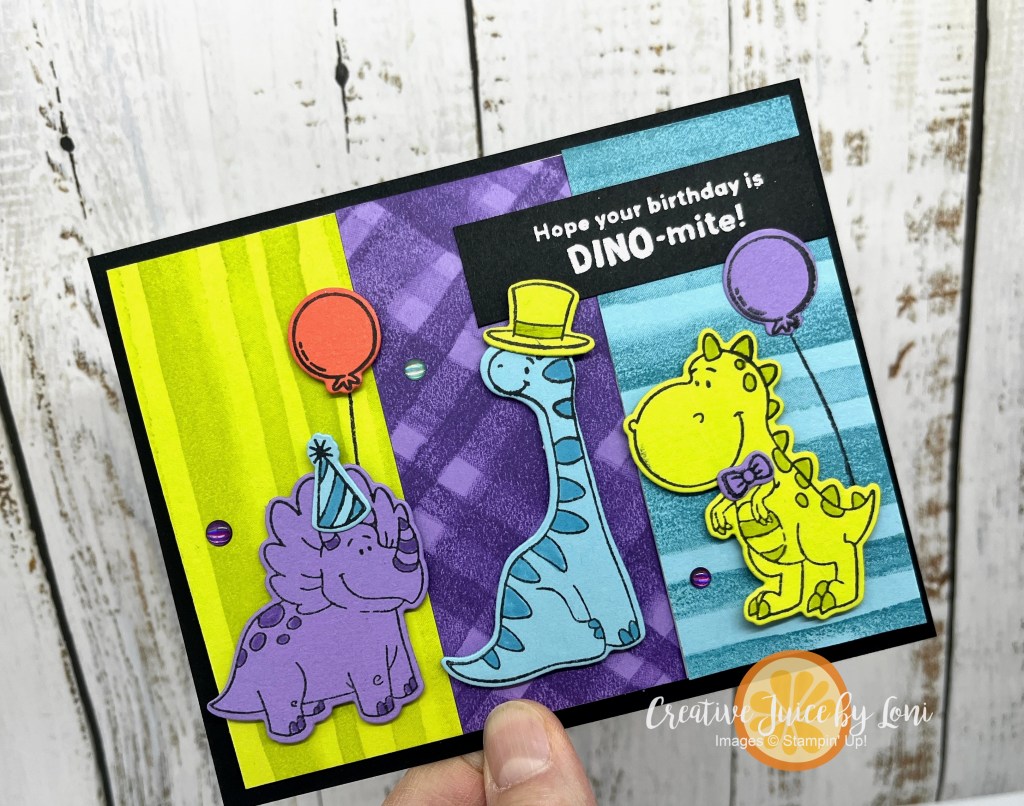
The colors are: Pretty Peacock, Timid Tiger, Darling Duckling, Strawberry Slush and Lost Lagoon. Embossing the jar lid in silver makes it feel fancy, while the banners from the Nested Essentials Dies brings the party vibe:

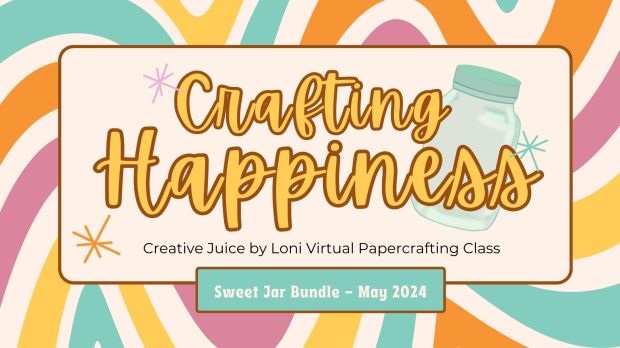
If you are planning to participate in the Virtual Crafting Happiness class on May 28th, order the Sweet Jar bundle from my store by the 20th (or alternatively, the Humble Home bundle will work, too) ~ then I can email you a discount code for $5 off the class fee!
Keep your creative juices flowing! 🍊- Loni Spendlove


![Tune In Photopolymer Stamp Set (English) [ 163633 ]](https://assets1.tamsnetwork.com/images/EC042017NF/163633s.jpg "Tune In Photopolymer Stamp Set (English) [ 163633 ]")
![Tune In Dies [ 163636 ]](https://assets1.tamsnetwork.com/images/EC042017NF/163636s.jpg "Tune In Dies [ 163636 ]")
![Basic White 8 1/2" X 11" Cardstock [ 166780 ]](https://assets1.tamsnetwork.com/images/EC042017NF/166780s.jpg "Basic White 8 1/2\" X 11\" Cardstock [ 166780 ]")
![Flirty Flamingo 8-1/2" X 11" Cardstock [ 141416 ]](https://assets1.tamsnetwork.com/images/EC042017NF/141416s.jpg "Flirty Flamingo 8-1/2\" X 11\" Cardstock [ 141416 ]")
![Pool Party 8-1/2" X 11" Cardstock [ 122924 ]](https://assets1.tamsnetwork.com/images/EC042017NF/122924s.jpg "Pool Party 8-1/2\" X 11\" Cardstock [ 122924 ]")
![Lemon Lolly 8 1/2" X 11" Cardstock [ 161720 ]](https://assets1.tamsnetwork.com/images/EC042017NF/161720s.jpg "Lemon Lolly 8 1/2\" X 11\" Cardstock [ 161720 ]")
![Basic Black 8-1/2" X 11" Cardstock [ 121045 ]](https://assets1.tamsnetwork.com/images/EC042017NF/121045s.jpg "Basic Black 8-1/2\" X 11\" Cardstock [ 121045 ]")
![Tuxedo Black Memento Ink Pad [ 132708 ]](https://assets1.tamsnetwork.com/images/EC042017NF/132708s.jpg "Tuxedo Black Memento Ink Pad [ 132708 ]")
![Flirty Flamingo Classic Stampin' Pad [ 147052 ]](https://assets1.tamsnetwork.com/images/EC042017NF/147052s.jpg "Flirty Flamingo Classic Stampin' Pad [ 147052 ]")
![Lemon Lolly Classic Stampin' Pad [ 161666 ]](https://assets1.tamsnetwork.com/images/EC042017NF/161666s.jpg "Lemon Lolly Classic Stampin' Pad [ 161666 ]")
![Pool Party Classic Stampin' Pad [ 147107 ]](https://assets1.tamsnetwork.com/images/EC042017NF/147107s.jpg "Pool Party Classic Stampin' Pad [ 147107 ]")
![Low Profile Dots [ 164658 ]](https://assets1.tamsnetwork.com/images/EC042017NF/164658s.jpg "Low Profile Dots [ 164658 ]")
![Mini Stampin' Cut & Emboss Machine [ 150673 ]](https://assets1.tamsnetwork.com/images/EC042017NF/150673s.jpg "Mini Stampin' Cut & Emboss Machine [ 150673 ]")
![Basics Wow! Embossing Powder [ 165679 ]](https://assets1.tamsnetwork.com/images/EC042017NF/165679s.jpg "Basics Wow! Embossing Powder [ 165679 ]")
![Uninked Stampin’ Craft Pad & Whisper White Refill [ 147277 ]](https://assets1.tamsnetwork.com/images/EC042017NF/147277s.jpg "Uninked Stampin’ Craft Pad & Whisper White Refill [ 147277 ]")
![Heat Tool (Us And Canada) [ 129053 ]](https://assets1.tamsnetwork.com/images/EC042017NF/129053s.jpg "Heat Tool (Us And Canada) [ 129053 ]")


![Painted Stripes Cling Stamp Set [ 165437 ]](https://assets1.tamsnetwork.com/images/EC042017NF/165437s.jpg "Painted Stripes Cling Stamp Set [ 165437 ]")
![Darling Dinos Bundle (English) [ 164735 ]](https://assets1.tamsnetwork.com/images/EC042017NF/164735s.jpg "Darling Dinos Bundle (English) [ 164735 ]")
![Basic White 8 1/2" X 11" Cardstock [ 159276 ]](https://assets1.tamsnetwork.com/images/EC042017NF/159276s.jpg "Basic White 8 1/2\" X 11\" Cardstock [ 159276 ]")
![Highland Heather 8-1/2" X 11" Cardstock [ 146986 ]](https://assets1.tamsnetwork.com/images/EC042017NF/146986s.jpg "Highland Heather 8-1/2\" X 11\" Cardstock [ 146986 ]")
![Balmy Blue 8-1/2" X 11" Cardstock [ 146982 ]](https://assets1.tamsnetwork.com/images/EC042017NF/146982s.jpg "Balmy Blue 8-1/2\" X 11\" Cardstock [ 146982 ]")
![Lemon Lime Twist 8-1/2" X 11" Cardstock [ 144245 ]](https://assets1.tamsnetwork.com/images/EC042017NF/144245s.jpg "Lemon Lime Twist 8-1/2\" X 11\" Cardstock [ 144245 ]")
![Calypso Coral 8-1/2" X 11" Cardstock [ 122925 ]](https://assets1.tamsnetwork.com/images/EC042017NF/122925s.jpg "Calypso Coral 8-1/2\" X 11\" Cardstock [ 122925 ]")
![Highland Heather Classic Stampin' Pad [ 147103 ]](https://assets1.tamsnetwork.com/images/EC042017NF/147103s.jpg "Highland Heather Classic Stampin' Pad [ 147103 ]")
![Balmy Blue Classic Stampin' Pad [ 147105 ]](https://assets1.tamsnetwork.com/images/EC042017NF/147105s.jpg "Balmy Blue Classic Stampin' Pad [ 147105 ]")
![Lemon Lime Twist Classic Stampin' Pad [ 147145 ]](https://assets1.tamsnetwork.com/images/EC042017NF/147145s.jpg "Lemon Lime Twist Classic Stampin' Pad [ 147145 ]")
![Highland Heather Stampin' Blends Combo Pack [ 154887 ]](https://assets1.tamsnetwork.com/images/EC042017NF/154887s.jpg "Highland Heather Stampin' Blends Combo Pack [ 154887 ]")
![Balmy Blue Stampin' Blends Combo Pack [ 154830 ]](https://assets1.tamsnetwork.com/images/EC042017NF/154830s.jpg "Balmy Blue Stampin' Blends Combo Pack [ 154830 ]")
![Lemon Lime Twist Stampin’ Blends Combo Pack [ 161682 ]](https://assets1.tamsnetwork.com/images/EC042017NF/161682s.jpg "Lemon Lime Twist Stampin’ Blends Combo Pack [ 161682 ]")
![Paper Trimmer [ 152392 ]](https://assets1.tamsnetwork.com/images/EC042017NF/152392s.jpg "Paper Trimmer [ 152392 ]")
![Glossy Dots Assortment [ 158827 ]](https://assets1.tamsnetwork.com/images/EC042017NF/158827s.jpg "Glossy Dots Assortment [ 158827 ]")
![Stampin' Dimensionals [ 104430 ]](https://assets1.tamsnetwork.com/images/EC042017NF/104430s.jpg "Stampin' Dimensionals [ 104430 ]")


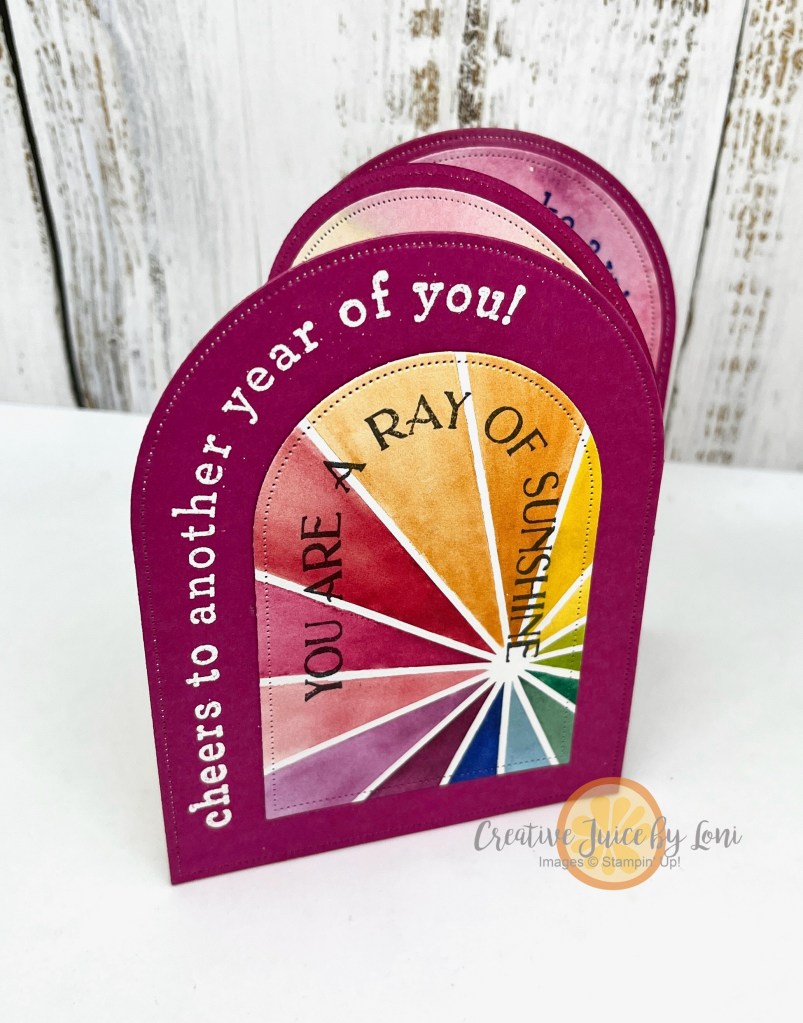
![Arched Wishes Cling Stamp Set (English) [ 165428 ]](https://assets1.tamsnetwork.com/images/EC042017NF/165428s.jpg "Arched Wishes Cling Stamp Set (English) [ 165428 ]")
![Everyday Arches Dies [ 164629 ]](https://assets1.tamsnetwork.com/images/EC042017NF/164629s.jpg "Everyday Arches Dies [ 164629 ]")
![Summer Splash 8 1/2" X 11 Cardstock [ 163797 ]](https://assets1.tamsnetwork.com/images/EC042017NF/163797s.jpg "Summer Splash 8 1/2\" X 11 Cardstock [ 163797 ]")
![Summer Splash Classic Stampin Pad [ 163809 ]](https://assets1.tamsnetwork.com/images/EC042017NF/163809s.jpg "Summer Splash Classic Stampin Pad [ 163809 ]")
![Granny Apple Green Stampin' Pad [ 147095 ]](https://assets1.tamsnetwork.com/images/EC042017NF/147095s.jpg "Granny Apple Green Stampin' Pad [ 147095 ]")
![Fresh Freesia Classic Stampin' Pad [ 155611 ]](https://assets1.tamsnetwork.com/images/EC042017NF/155611s.jpg "Fresh Freesia Classic Stampin' Pad [ 155611 ]")
![Blending Brushes [ 153611 ]](https://assets1.tamsnetwork.com/images/EC042017NF/153611s.jpg "Blending Brushes [ 153611 ]")
![Embossing Additions Tool Kit [ 159971 ]](https://assets1.tamsnetwork.com/images/EC042017NF/159971s.jpg "Embossing Additions Tool Kit [ 159971 ]")
![Stampin' Cut & Emboss Machine [ 149653 ]](https://assets1.tamsnetwork.com/images/EC042017NF/149653s.jpg "Stampin' Cut & Emboss Machine [ 149653 ]")
![Mini Corrugated 3 D Embossing Folder [ 165559 ]](https://assets1.tamsnetwork.com/images/EC042017NF/165559s.jpg "Mini Corrugated 3 D Embossing Folder [ 165559 ]")
![Summer Splash Stampin’ Blends Combo Pack [ 163826 ]](https://assets1.tamsnetwork.com/images/EC042017NF/163826s.jpg "Summer Splash Stampin’ Blends Combo Pack [ 163826 ]")
![Granny Apple Green Stampin' Blends Combo Pack [ 154885 ]](https://assets1.tamsnetwork.com/images/EC042017NF/154885s.jpg "Granny Apple Green Stampin' Blends Combo Pack [ 154885 ]")
![Fresh Freesia Stampin' Blends Combo Pack [ 155518 ]](https://assets1.tamsnetwork.com/images/EC042017NF/155518s.jpg "Fresh Freesia Stampin' Blends Combo Pack [ 155518 ]")
![Clear Wink Of Stella Glitter Brush [ 141897 ]](https://assets1.tamsnetwork.com/images/EC042017NF/141897s.jpg "Clear Wink Of Stella Glitter Brush [ 141897 ]")
![Iridescent Adhesive Backed Discs [ 161954 ]](https://assets1.tamsnetwork.com/images/EC042017NF/161954s.jpg "Iridescent Adhesive Backed Discs [ 161954 ]")
![Multipurpose Liquid Glue [ 110755 ]](https://assets1.tamsnetwork.com/images/EC042017NF/110755s.jpg "Multipurpose Liquid Glue [ 110755 ]")


![Wildflower Birthday 12" X 12" (30.5 X 30.5 Cm) Specialty Designer Series Paper [ 164591 ]](https://assets1.tamsnetwork.com/images/EC042017NF/164591s.jpg "Wildflower Birthday 12\" X 12\" (30.5 X 30.5 Cm) Specialty Designer Series Paper [ 164591 ]")
![Birthday Celebration Photopolymer Stamp Set (English) [ 164592 ]](https://assets1.tamsnetwork.com/images/EC042017NF/164592s.jpg "Birthday Celebration Photopolymer Stamp Set (English) [ 164592 ]")
![Pretty In Pink 8 1/2" X 11" Cardstock [ 163793 ]](https://assets1.tamsnetwork.com/images/EC042017NF/163793s.jpg "Pretty In Pink 8 1/2\" X 11\" Cardstock [ 163793 ]")
![Misty Moonlight 8-1/2" X 11" Cardstock [ 153081 ]](https://assets1.tamsnetwork.com/images/EC042017NF/153081s.jpg "Misty Moonlight 8-1/2\" X 11\" Cardstock [ 153081 ]")
![Coastal Cabana 8-1/2" X 11" Cardstock [ 131297 ]](https://assets1.tamsnetwork.com/images/EC042017NF/131297s.jpg "Coastal Cabana 8-1/2\" X 11\" Cardstock [ 131297 ]")
![Misty Moonlight Classic Stampin' Pad [ 153118 ]](https://assets1.tamsnetwork.com/images/EC042017NF/153118s.jpg "Misty Moonlight Classic Stampin' Pad [ 153118 ]")
![Pretty In Pink 3/8" (1 Cm) Bordered Ribbon [ 163784 ]](https://assets1.tamsnetwork.com/images/EC042017NF/163784s.jpg "Pretty In Pink 3/8\" (1 Cm) Bordered Ribbon [ 163784 ]")
![Gold Twisted Thread [ 164603 ]](https://assets1.tamsnetwork.com/images/EC042017NF/164603s.jpg "Gold Twisted Thread [ 164603 ]")
![1-3/4" (4.4 Cm) Circle Punch [ 119850 ]](https://assets1.tamsnetwork.com/images/EC042017NF/119850s.jpg "1-3/4\" (4.4 Cm) Circle Punch [ 119850 ]")
![Layered Florals 3 D Embossing Folder [ 162935 ]](https://assets1.tamsnetwork.com/images/EC042017NF/162935s.jpg "Layered Florals 3 D Embossing Folder [ 162935 ]")
![Stampin' Seal [ 152813 ]](https://assets1.tamsnetwork.com/images/EC042017NF/152813s.jpg "Stampin' Seal [ 152813 ]")
![Mini Glue Dots [ 103683 ]](https://assets1.tamsnetwork.com/images/EC042017NF/103683s.jpg "Mini Glue Dots [ 103683 ]")
![Basic White Medium Envelopes [ 159236 ]](https://assets1.tamsnetwork.com/images/EC042017NF/159236s.jpg "Basic White Medium Envelopes [ 159236 ]")


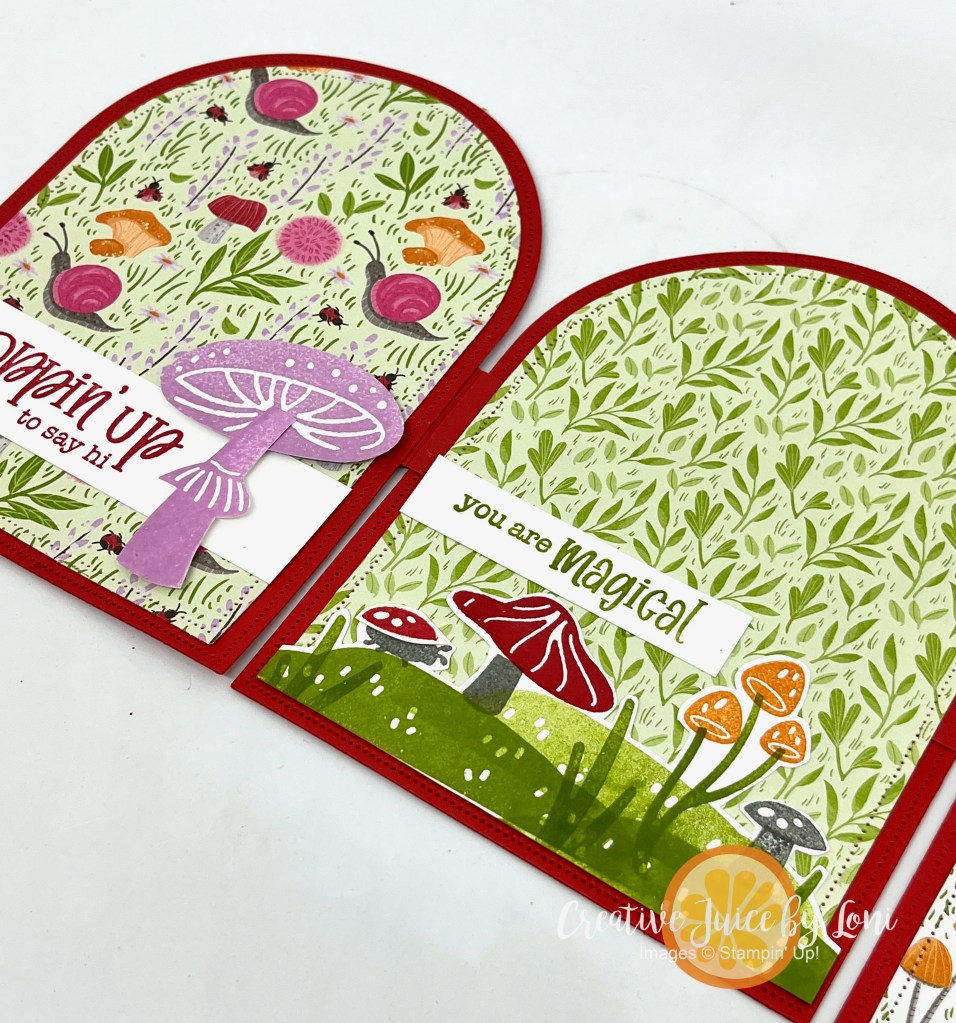
![Everyday Arches Bundle (English) [ 164630 ]](https://assets1.tamsnetwork.com/images/EC042017NF/164630s.jpg "Everyday Arches Bundle (English) [ 164630 ]")
![Storybook Moments 12" X 12" (30.5 X 30.5 Cm) Specialty Designer Series Paper [ 164662 ]](https://assets1.tamsnetwork.com/images/EC042017NF/164662s.jpg "Storybook Moments 12\" X 12\" (30.5 X 30.5 Cm) Specialty Designer Series Paper [ 164662 ]")
![Boho Blue 8 1/2" X 11" Cardstock [ 161724 ]](https://assets1.tamsnetwork.com/images/EC042017NF/161724s.jpg "Boho Blue 8 1/2\" X 11\" Cardstock [ 161724 ]")
![Copper Clay 8 1/2" X 11" Cardstock [ 161721 ]](https://assets1.tamsnetwork.com/images/EC042017NF/161721s.jpg "Copper Clay 8 1/2\" X 11\" Cardstock [ 161721 ]")
![Basic Beige 8 1/2" X 11" Cardstock [ 164511 ]](https://assets1.tamsnetwork.com/images/EC042017NF/164511s.jpg "Basic Beige 8 1/2\" X 11\" Cardstock [ 164511 ]")
![Wild Wheat 8 1/2" X 11" Cardstock [ 161725 ]](https://assets1.tamsnetwork.com/images/EC042017NF/161725s.jpg "Wild Wheat 8 1/2\" X 11\" Cardstock [ 161725 ]")
![2024–2026 In Color™ Glimmer 12" X 12" (30.5 X 30.5 Cm) Specialty Paper [ 163771 ]](https://assets1.tamsnetwork.com/images/EC042017NF/163771s.jpg "2024–2026 In Color™ Glimmer 12\" X 12\" (30.5 X 30.5 Cm) Specialty Paper [ 163771 ]")
![2022–2024 In Color Baker's Twine Pack [ 159195 ]](https://assets1.tamsnetwork.com/images/EC042017NF/159195s.jpg "2022–2024 In Color Baker's Twine Pack [ 159195 ]")
![Boho Blue Classic Stampin' Pad [ 161650 ]](https://assets1.tamsnetwork.com/images/EC042017NF/161650s.jpg "Boho Blue Classic Stampin' Pad [ 161650 ]")
![Copper Clay Classic Stampin' Pad [ 161647 ]](https://assets1.tamsnetwork.com/images/EC042017NF/161647s.jpg "Copper Clay Classic Stampin' Pad [ 161647 ]")
![Bee Builder Punch [ 162553 ]](https://assets1.tamsnetwork.com/images/EC042017NF/162553s.jpg "Bee Builder Punch [ 162553 ]")
![Stampin' Seal+ [ 149699 ]](https://assets1.tamsnetwork.com/images/EC042017NF/149699s.jpg "Stampin' Seal+ [ 149699 ]")
![Brushed Brass Butterflies [ 158136 ]](https://assets1.tamsnetwork.com/images/EC042017NF/158136s.jpg "Brushed Brass Butterflies [ 158136 ]")


![Wildflower Birthday Suite Collection (English) [ 164604 ]](https://assets1.tamsnetwork.com/images/EC042017NF/164604s.jpg "Wildflower Birthday Suite Collection (English) [ 164604 ]")
![Night Of Navy 8-1/2" X 11" Cardstock [ 100867 ]](https://assets1.tamsnetwork.com/images/EC042017NF/100867s.jpg "Night Of Navy 8-1/2\" X 11\" Cardstock [ 100867 ]")
![Soft Sea Foam 8-1/2" X 11" Cardstock [ 146988 ]](https://assets1.tamsnetwork.com/images/EC042017NF/146988s.jpg "Soft Sea Foam 8-1/2\" X 11\" Cardstock [ 146988 ]")
![Night Of Navy Classic Stampin' Pad [ 147110 ]](https://assets1.tamsnetwork.com/images/EC042017NF/147110s.jpg "Night Of Navy Classic Stampin' Pad [ 147110 ]")
![Small Blending Brushes [ 160518 ]](https://assets1.tamsnetwork.com/images/EC042017NF/160518s.jpg "Small Blending Brushes [ 160518 ]")
![2" (5.1 Cm) Circle Punch [ 133782 ]](https://assets1.tamsnetwork.com/images/EC042017NF/133782s.jpg "2\" (5.1 Cm) Circle Punch [ 133782 ]")
![2 3/8" (6 Cm) Circle Punch [ 161354 ]](https://assets1.tamsnetwork.com/images/EC042017NF/161354s.jpg "2 3/8\" (6 Cm) Circle Punch [ 161354 ]")
![Adhesive Sheets [ 152334 ]](https://assets1.tamsnetwork.com/images/EC042017NF/152334s.jpg "Adhesive Sheets [ 152334 ]")
![Baker's Twine Essentials Pack [ 155475 ]](https://assets1.tamsnetwork.com/images/EC042017NF/155475s.jpg "Baker's Twine Essentials Pack [ 155475 ]")