When we take the grandkids for Ice Cream, COLOR is always the biggest factor in choosing which flavor to get! According to their thinking, the brighter the color, the better it tastes?
For a hand-stamped birthday card today, the colors were chosen by the weekly TGIF Challenge, #tgifc484
I’m a big fan of images that pop out of the frame, and that concept works well here.
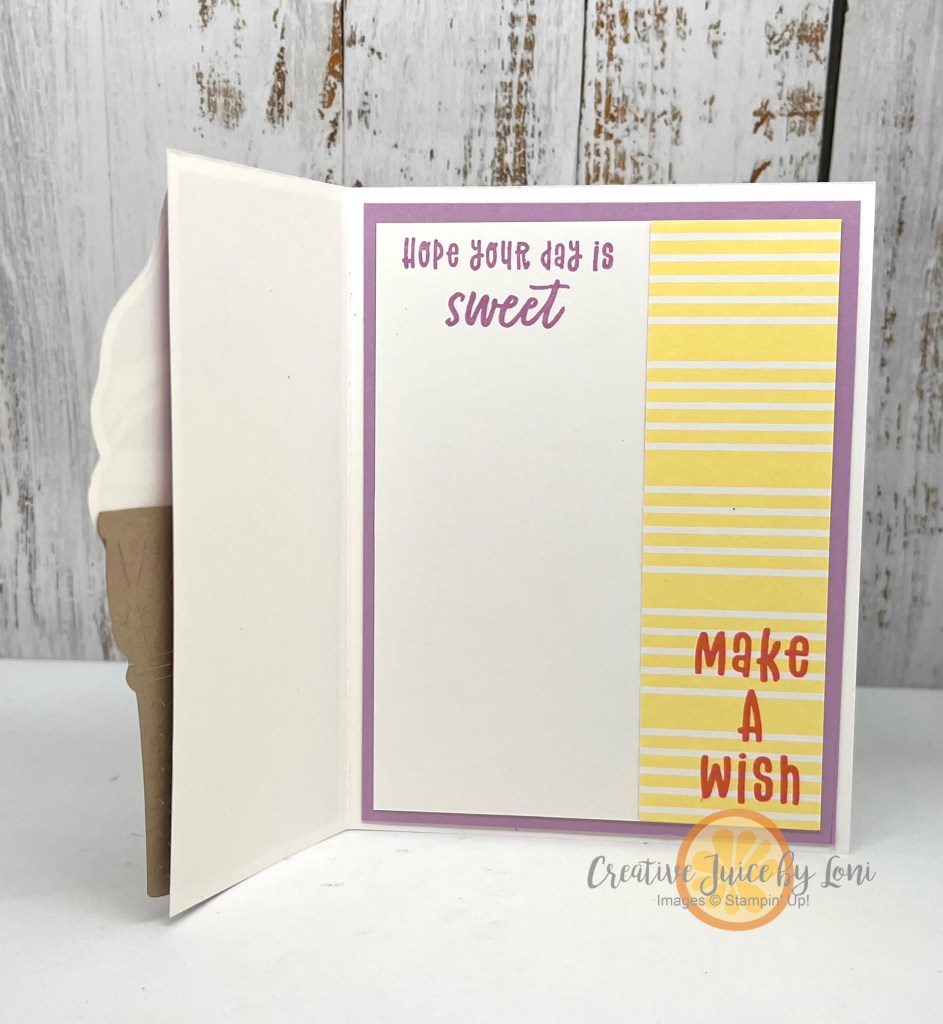
A quick swipe of the White Craft ink pad over the eyelet-embossed Daffodil Delight background allowed me to emboss it with white embossing powder – if double scoops of ice cream are better, so is double embossing!
Top if off with some sprinkles (Iridescent discs sparkle and catch the light, and they are flat for mailing as an added bonus) and you’ve served up a cute birthday cone!
Today on the Creative Juice Crafting Channel, an interactive birthday card featuring a hidden message that appears “on screen”… and NEWS FLASH, it’s a gift card holder, too!
When you pull out the “Stay Tuned” screen, the birthday greeting appears:
What’s on the inside of the card? A pocket ready for a gift card, gift certificate, cash or a note.
The TUNE IN stamp & die bundle has a “retro” feel and has been unique to play with, so I will feature it in my July Crafting Happiness Virtual Class! Another option that will work well with the virtual class is the ATTENTION SHOPPERS bundle. Both bundles are an EXTRA 10% off during June, so whichever you prefer, NOW is the time to order them and register for the class.
*** When you order either bundle from my Stampin’ Store, you’ll get an email with a discount code for $5 off the class registration fee.
The Crafting Happiness class will be privately streamed to YouTube on Wednesday, July 17th at 4 pm MT, and registered crafters can watch LIVE or at their leisure anytime after the live stream.
The class is designed so you can stamp along and it’s up to you to use the suggested stamp sets OR use a set of stamps + dies you already own. There will be 5 projects and this is what is included:
Class packet includes:
Gold & Silver 1/8″ Trim Combo Pack (Item #16133)
Neutrals Adhesive-Backed Sequins (Item #161627)
Card Stock, Designer Series Paper and accessories cut for projects
One sheet of Stampin’ Dimensionals
Envelopes and packaging
Sweet surprises!
Also needed (not included in class fee):
Tune In bundle OR Attention Shoppers bundle OR use one of your own,
Stampin’ Cut & Emboss Machine (or Mini Machine) or similar die cutting machine for coordinating dies (MACHINES are also 10% off in June!!)
Ink Pads: Tuxedo Black Memento Ink Pad (#132708), Balmy Blue (#147105), Basic Beige (#163806), Cajun Craze (#147085), Versamark (#102283)
Watercolor Pencils Assortment #1 (Item #161700)- IF USING ATTENTION SHOPPERS BUNDLE or your own stamps that are line-art type sets.
Before I share the supply list (thanks in advance for supporting my business- I look forward to sending you a thank you card!), here is the video tutorial showing how to create this delightful “hidden message TV” card…craft along and pause as needed:
Ephemera: “things that exist or are used or enjoyed for only a short time”
Some of my friends are “junk journalists” while others are scrapbookers, and most of us make greeting cards often. One thing we all have in common is our enjoyment of embellishing our projects with pretty pieces of ribbon, jewels, and paper, or EPHEMERA.
In the 2024-2025 Stampin’ Up! catalog, there are 4 packages of ephemera to mix & match on projects of your choice- from scrapbooks to journals, from tags to cards. In this video, a special guest demonstrates how these bits & pieces ignite the imagination:
Here are a few other cards I created after all the “help” on the video:
TIP: When starting with a printed card base, create a background for your focal point with a plain contrasting color, such as a frame or tag, then “build” images on and around the background.
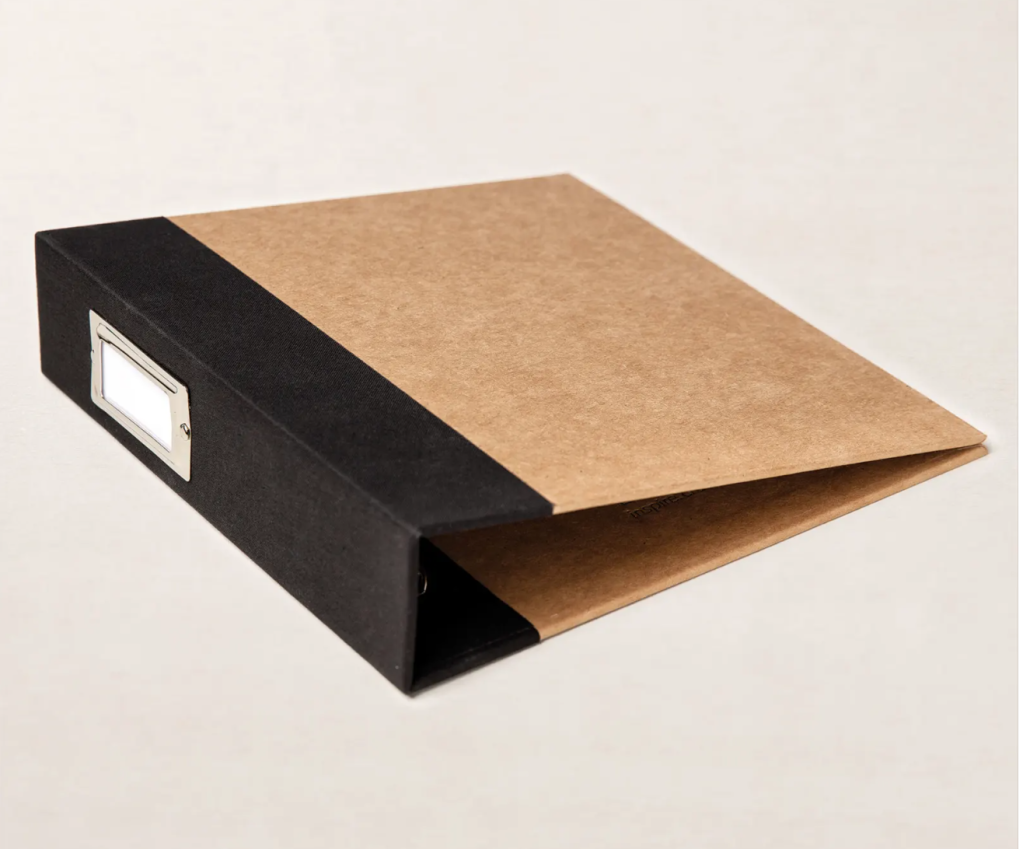
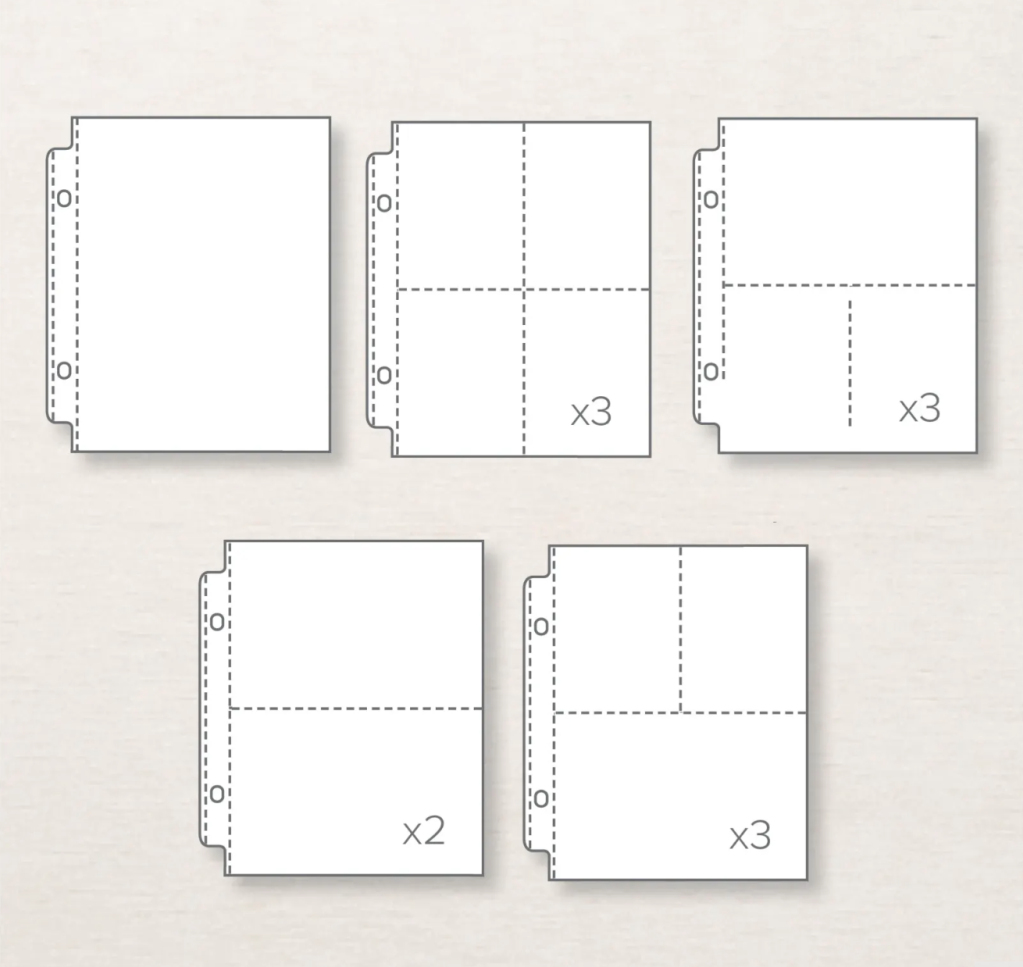
After creating with the die cut images, I realized the best way to store Epemera pieces would be in an album with the 6″ x 8″ pocket pages so you could punch out the pieces (which kind of want to fall out as you handle the sheets), sort, organize and view them easily in a binder! I’m not at home, or I’d snap a pic to show you, but here is the album and pages in a variety pack. You can click the images to add the products to your cart.
Here are the products we “played” with for our Mix & Match Cards. What will you use them for?
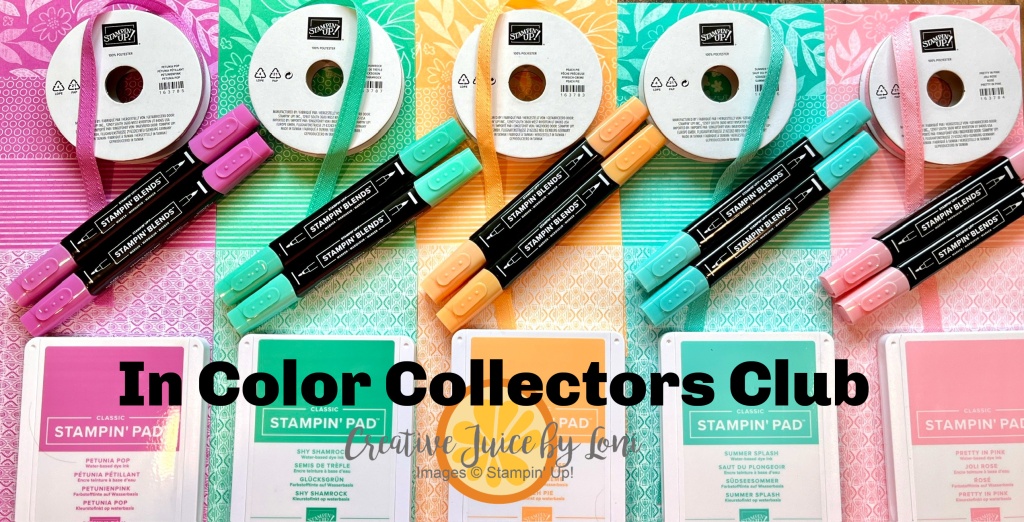
Throughout the month of May 2024, there is a fabulous Starter Kit Special: You’ll get to choose $125 worth of your favorite products for just $99, then Stampin’ Up! will add FOUR 2024-2026 In Color products added to your kit FREE!
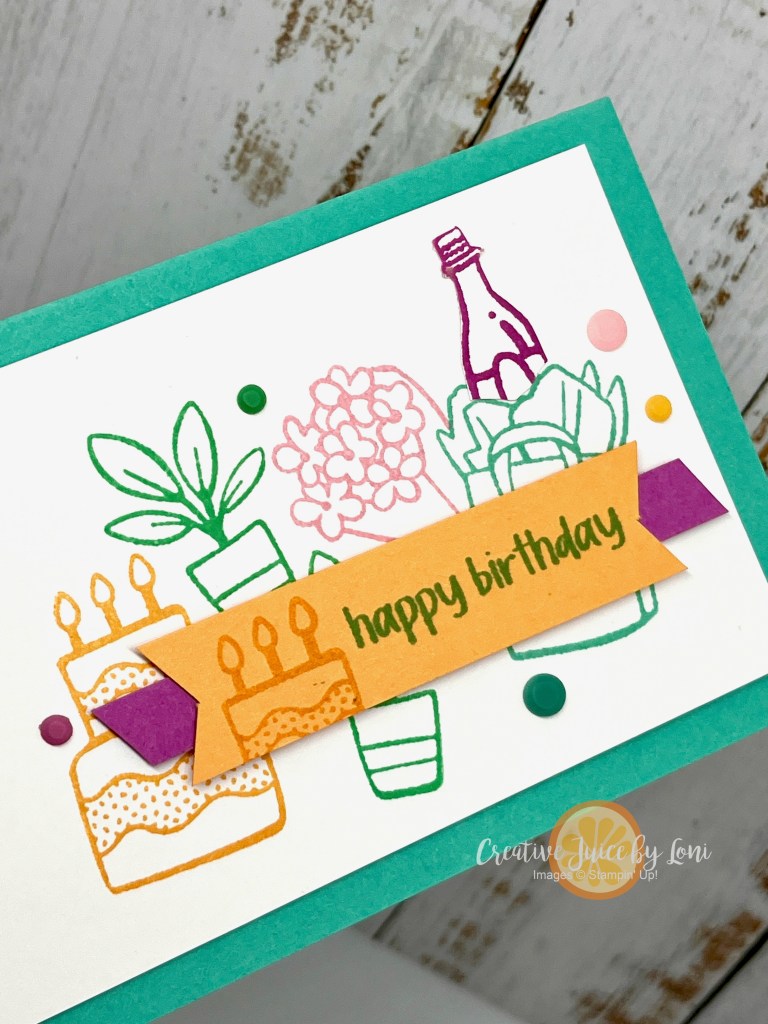
I wanted to show something you could make with these colors and potential items in your kit, so I demonstrated a simple stamping project on my Facebook page, inspired by a layout from the new annual catalog:
I failed to mention that this card is the ideal size to include a gift of ca$h, and here’s what I would stamp on the inside:
Basic masking and fussy cutting techniques are shared in the video you can watch here:
Did you know…
…there are no hidden requirements to buy the starter kit? You can purchase the kit and give the demonstrator life a try, and if you like sharing your love of paper with others, you’ll learn how to personalize your business or support your hobby as a demonstrator. But if you just want to take advantage of this great opportunity to add some color to your life, you can just coast along and enjoy the demonstrator discount until you no longer meet the quarterly sales minimum.
While that’s the smartest way to collect the colors quickly, you could also opt to add them one-at-a-time to your toolbox over the next 5 months by joining my In Color Collectors Club, including getting the new Basic Beige color collection FREE!
If you are in southern Utah, don’t miss my Catalog Carnival Open House this Saturday from 1-4 pm in Hurricane where you can craft a card, snag a snack, capture a new catalog, AND shop from my ONCE-A-YEAR-BOGO SALE!!
Attention Shoppers: I’m always delighted when you choose me to serve your creative needs – thanks for ordering your genuine Stampin’ Up! supplies from my Stampin’ Store by adding the products you love below to your cart, and watch for your thank you card in the mail when you allow me to inspire you!
When you have the right tools, any project becomes easier.
Adhesive sheets are a type of double-sided adhesive that make any piece of paper into a sticker, and they are indispensable for a project like PAPER PIECING. The Ice Cream Swirl dies are a perfect example of how you can create sweet cards to drool over, using adhesive sheets:
Start with a 5.5″ x 6.75″ card base (scored at 4.25″) and “build” layers with Designer Series Paper. The Lighter Than Air designs have creamy colors that I used to cut 3 swirls from, then built up my lemon-raspberry ice cream swirl. This is a card you’ll want to make triplets of at one time, just to use up all the pieces:
Today (April 9th) is the last day to register for my Crafting Happiness class on Friday, April 19th, where I’ll be featuring the Ice Cream Swirl Bundle (and you get a discount on the class if you purchase the bundle from my store)- OR you can use one of the stamp & die bundles you may already have.
I appreciate your order of genuine Stampin’ Up! products from my store! Your support give me the opportunity to continue sharing creativity with you. I’m always tickled to mail a hand-stamped card as a thank you for online orders!
Our family loves to play games together- from board games to video games! A few of our favorites are:
Killer Uno (card game)
Perpetual Commotion (some call it Nertz)
Splendor (strategy)
Anything Mario (video)
Overcooked (video)
Seeing the “Level Complete” stamp set on my shelf reminded me that my son (an avid gamer) is adding an extra (year to his) life this month, so that’s where my imagination went when I saw today’s #tgifc463 Sketch Challenge.
I turned the sketch sideways and used the game controllers as the focal point:
A black card is striking with Daffodil Delight and Tahitian Tide, just remember to add a white layer on the inside to write on.
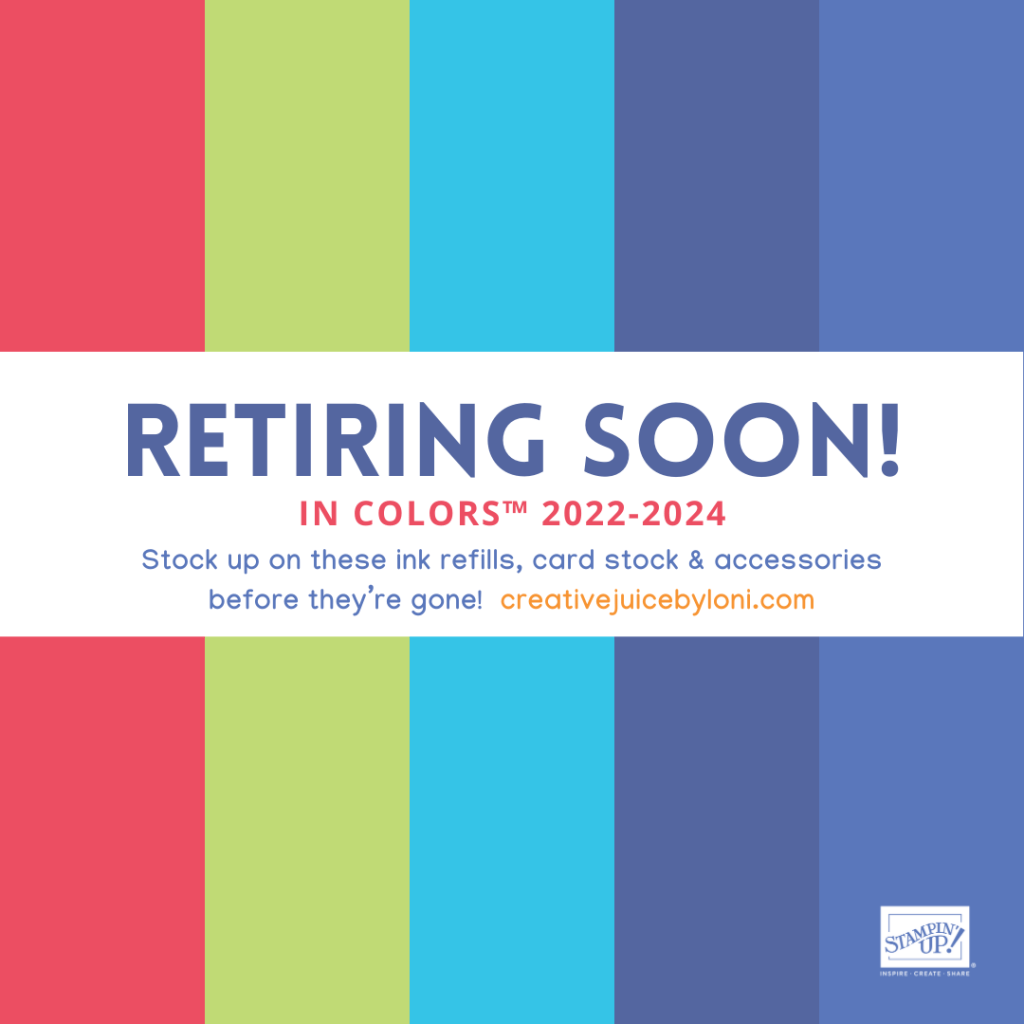
While we are the subject of Tahitian Tide (a 2022-2024 In Color), remember that it’s one of these bright hues retiring at the end of April, 2024, and we don’t really have any bright turquoise to replace it right now, so order an ink refill for your ink pads and card stock of the same color for coordination!
Does your family have a favorite game to play together? Tell me!
To re-create this card, you can click on the supplies listed and order from my Stampin’ Store- that helps me so I can continue to bring you great ideas you are welcome to copy. or spark your own imagination!
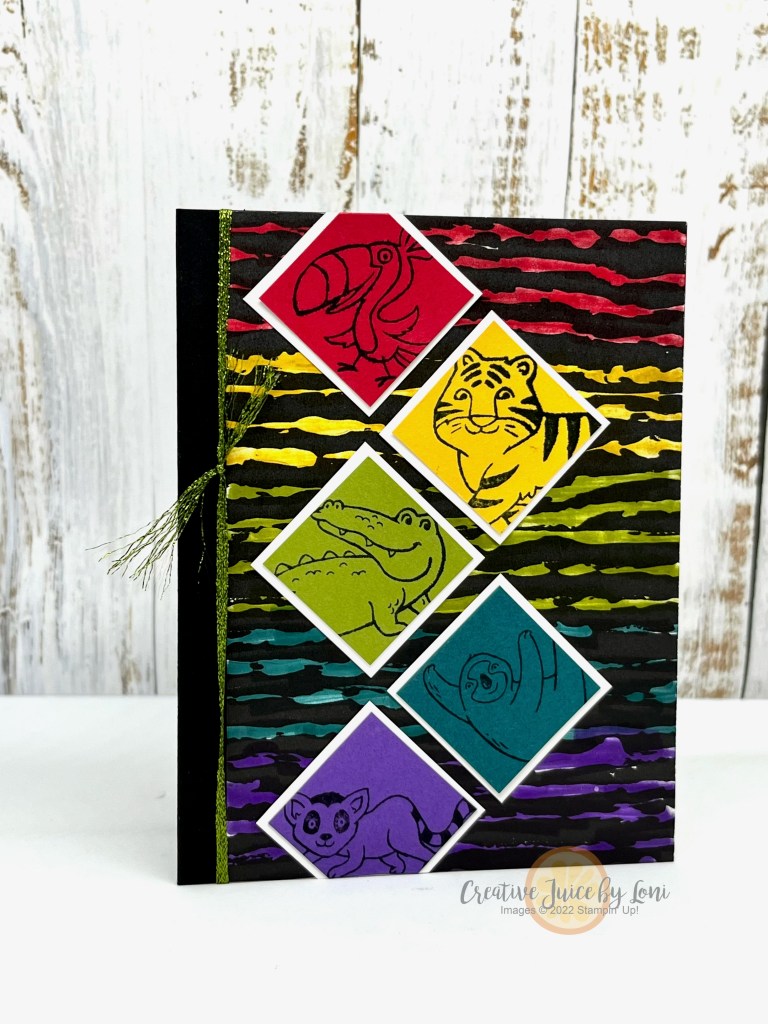
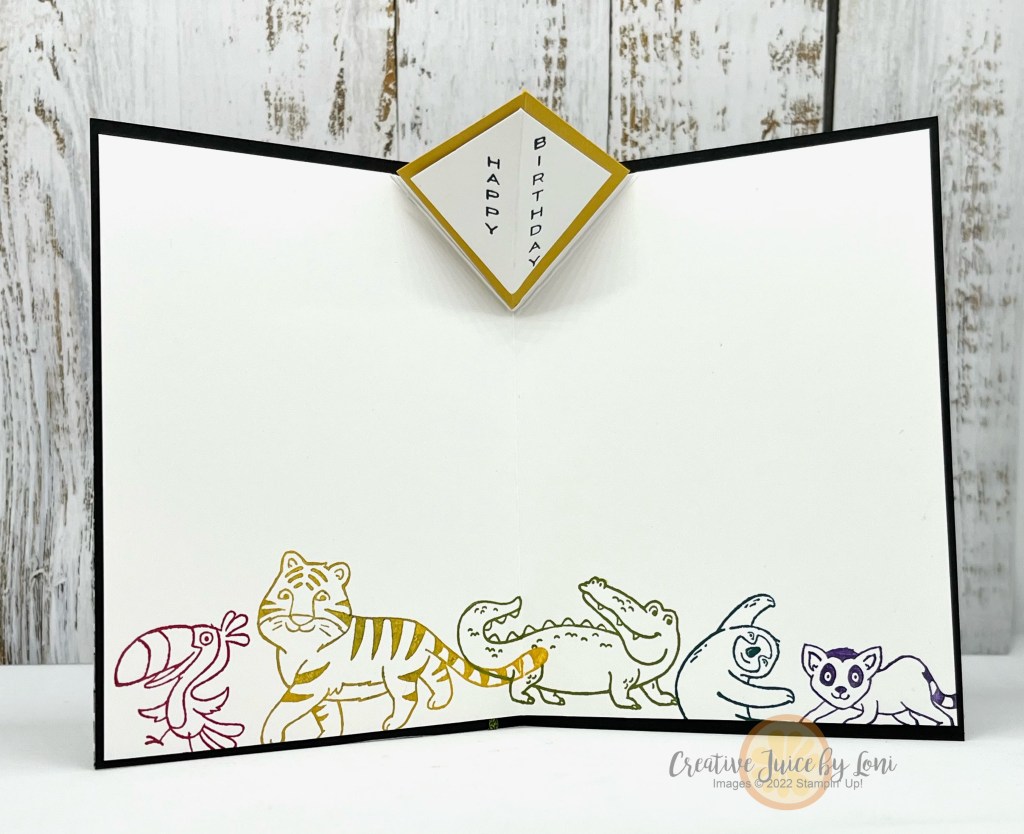
10 days left in Stampin’ Up!’s Sale-a-Bration 2024, with your window to choose free gifts narrowing quickly…so today we are taking a look at one of the options I haven’t shown before: The Jungle Pals stamp set.
As one of your options to choose with $50 order (until 2/29/24), I wanted to show an easy way to use just the stamp set (there is an additional coordinating die set you could select with another $100 purchase).
Start with a 5-1/2″ x 4-1/4″ black card stock base. I added a piece of the Rock & Roll Designer Series Paper colored with Stampin’ Write markers to the top right side, and simply stamped the animals on 1-1/4″ square colored card stock pieces. Frame each animal in 1-3/8″ white card stock and tile onto the front of the card.
For the inside, you’ll need a 5-1/4″ x 8-1/4″ white card stock. Refer to video tutorial for instructions for easy pop-up mechanism instructions.
Here’s the how to:
This style of card can be created with many different products, and choosing products through my Stampin’ Store helps me to keep bringing you this type of training and teaching. When you support a Stampin’ Up! demonstrator, you are guaranteed quality products, unmatched service and hours of happy creativity!
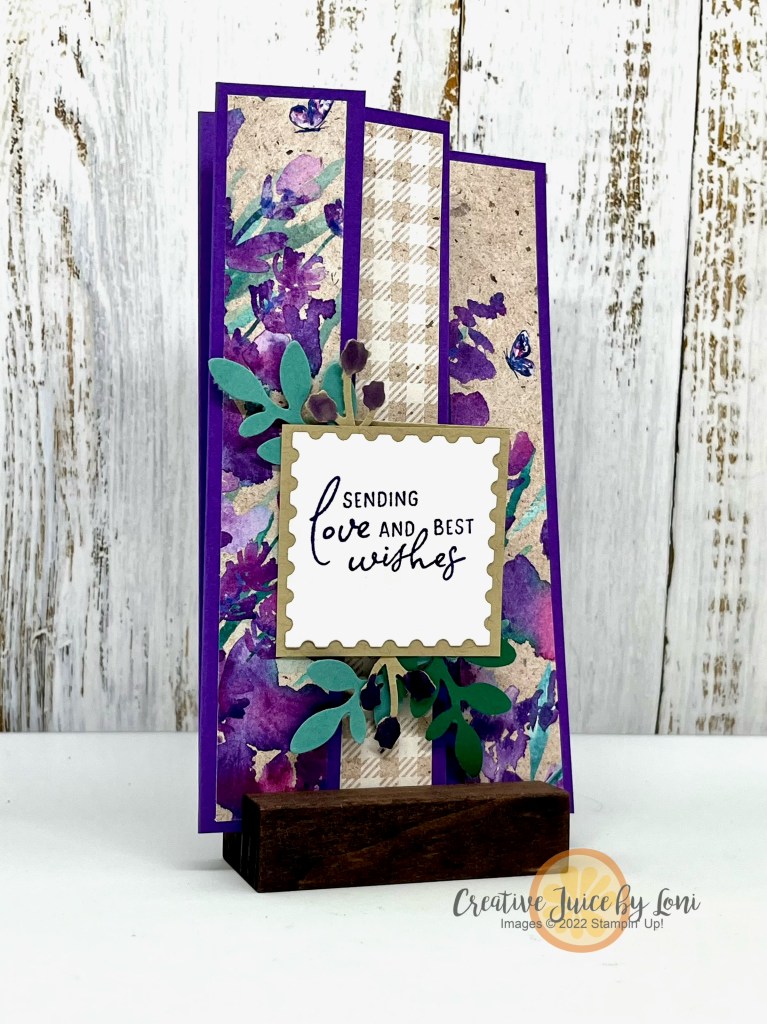
Some patterned paper comes as 12″ x 12″ and a few of our fancy designs are 6″ x 6″, so today (and to help you use up your Paper Share!), I’ve got a fun fold slimline card which uses a 6″ x 6″ piece of Perennial Lavender Designer Series Paper:
On the left is the card closed flat, and on the right, it’s open to see all the panels.
Cut two 2″ wide and two 1″ wide pieces from one 6″ x 6″ piece of pretty paper to fit into each section. You’ll also need a 1″ x 6″ and 2″ x 6″ panel of card stock to fit where you will write a message. The finished size is 3.5″ x 6.25″ when folded flat.
Here’s a different version with a piece of the Lighter Than Air Designer Series Paper, which already comes as 6″ x 6″-
I created a belly band for this one to keep it closed, then when you slide it off, it opens to wish you a Happy Birthday:
If you didn’t snag a stack of patterned paper in my Designer Series Paper Share, I have a few left!Get one piece of EVERY paper in the 2024 Jan-April Mini catalog for $18 (if you pick up from me in Hurricane, UT) or $22 shipped to you, while supplies last. Both pieces used on these cards ARE INCLUDED IN THE SHARE.
The Perennial Lavender Designer Series Paper (and Perennial Lavender suite) coordinates with the January Paper Pumpkin craft kit! Subscribe by January 10th to receive the Lovely Lavender kit:
Make love-themed cards for special occasions, Valentine’s Day, anniversaries, and more with this all-inclusive kit that arrives in your mailbox in January. The kit includes a unique photopolymer stamp set and ink spot and…
• Makes 8 cards: 4 each of 2 designs with 8 coordinating envelopes
Rooty-Tooty Fresh & Fruity! Tomorrow- Thursday, January 4th- the January-April Mini Catalog goes live AND 2024 Sale-a-Bration begins!
I admired the “Blueberry Bunches” stamp set (item #162692) the moment I saw it: It feels like a floral, but it’s a fruit, and that’s kinda my “jam” (see what I did there?).
I’ve paired the stamps with the Perennial Postage bundle (Item #162608) for the sentiment and postage stamp die (in various sizes).
This is the second largest die and after I cut a piece of basic white, I stamped the blueberries in the center, then used Masking Paper around the edges so I could blend Pool Party ink from the outside into the image- a technique called “Reverse Masking”. As you carefully peel off the masking paper, the background appears as a frame!
Once I colored the image with Stampin’ Blends alcohol markers, I “cancelled” the postage stamp with the cutest little detail of the cancellation mark, which I dipped into Memento Tuxedo black ink before running through the Stampin’ Cut & Emboss machine on top of my colored postage stamp.
Seemed fitting to share it with the #tgifc453 postal theme this week.
I’ll update the supply list once the catalog goes live, and hope you’ll try this technique and mail bunches of happy mail.
Need a Mini Catalog and Sale-a-Bration brochure? Shoot me a message and I’ll send it out to you.
Don’t want to miss a publication in the future? I mail mini catalogs to my customers who order $50 or more in the previous 6 months!
The temperature fell almost 30 degrees overnight on Thursday night, with the arrival of a beautiful thunder/lightning show and rivers of rain! When you live in the desert, you don’t complain about water, and the cooler temperature is also welcome.
I’ve also been traveling a LOT, so I needed some time in my Stamp Studio and the Global Design Project #gdp409 challenge was the excuse I needed to bring a rainbow to a rainy day:
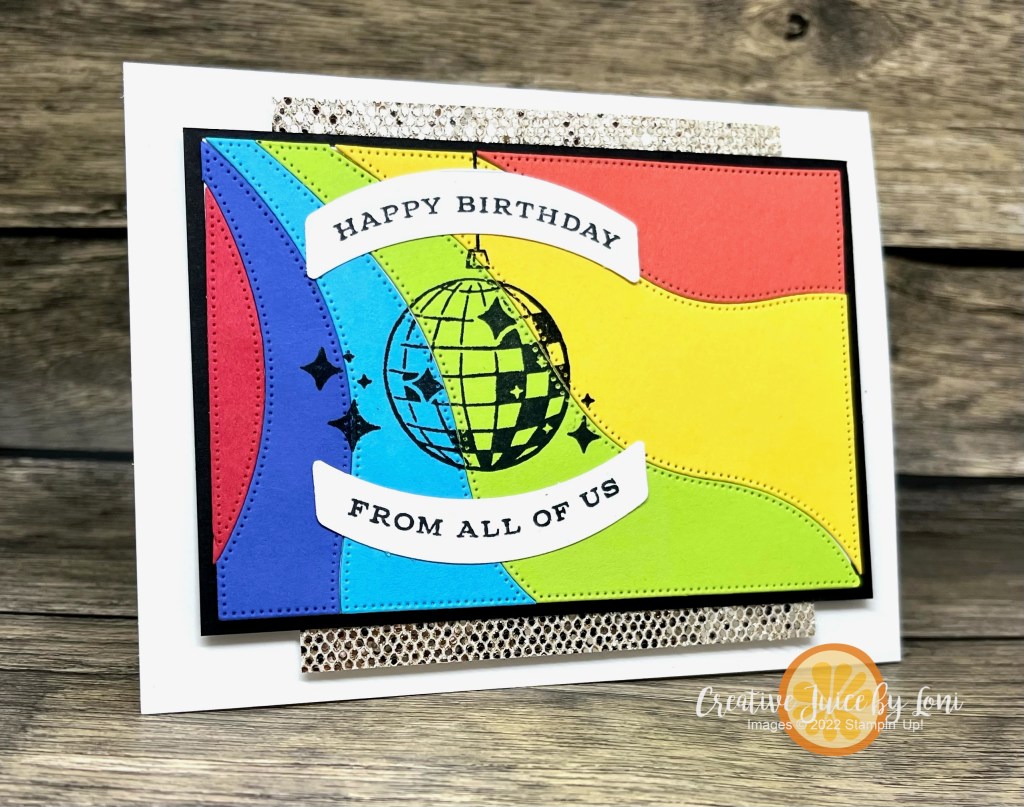
Roy G. Biv is the name to remember when you are putting colors in rainbow order (Red, Orange, Yellow, Green, Blue, Indigo, Violet) but they can circle back around on a card (not so much on a rainbow in the sky)…feel free to start ANYWHERE in the lineup!
My colors were (in ROYGBIV order, not the order on the first card) Sweet Sorbet, Calypso Coral, Daffodil Delight, Parakeet Party, Tahitian Tide and Orchid Oasis (allowing Orchid Oasis to be both Indigo and Violet).
The disco ball is from a new bundle coming September 6th called Curved Occasions in black. OF COURSE, it needed bling! The champagne More Dazzle specialty paper is JUST like a disco ball, and a little strip on the top and bottom catches the light and gets the party started.
I cut the wave pattern using the Patchwork Pieces dies from all the colors and laid them out to line them up on 6 backgrounds:
SHHH…Don’t tell anyone, but I was so excited with the first one I tried, I ended up going in a backward order, and then got a bit befuddled on a few that didn’t survive…a complete paper crafter predicament. That’s the way the card crumples.
There is also a roller skate in the set, so I stamped it on the second card, just to see if I liked it.
What do you think? With – or without – the skate?
Seems fitting to post this card today to remember my brother, Mike (1977-2022) on his birthday (September 2), with such iconic images from the 1970s. Speaking of a spectrum of colors, this photo is of my siblings in 2004 and you can see how genetics can produce light and dark skin! Mike is second from the right, and I’m on the other end. Grateful to know I will see him again after this life and was blessed to have a short time with him here. Be intentional and loving in your time with your family!


")


")


")
 Designer Series Paper")


")


")


")


")

 Designer Series Paper")


")
 Designer Series Paper")


 Metallic Woven Ribbon")


 Designer Series Paper")
")


")