Stack, Cut, Shuffle, STAMP

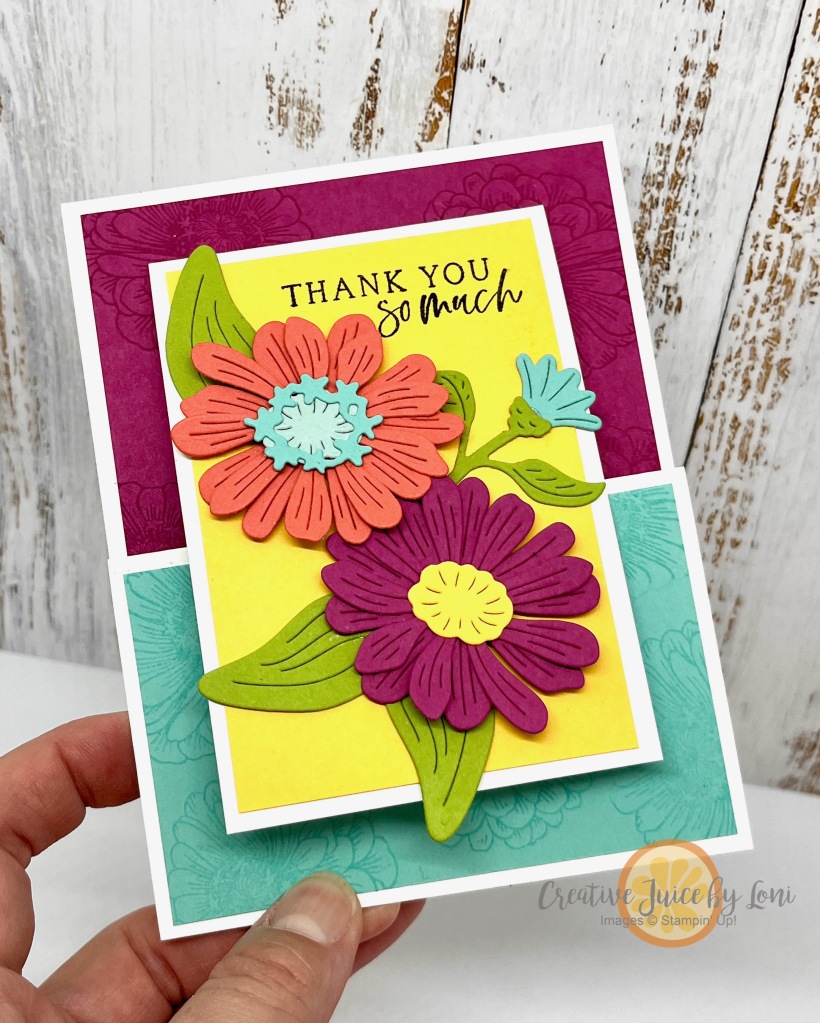
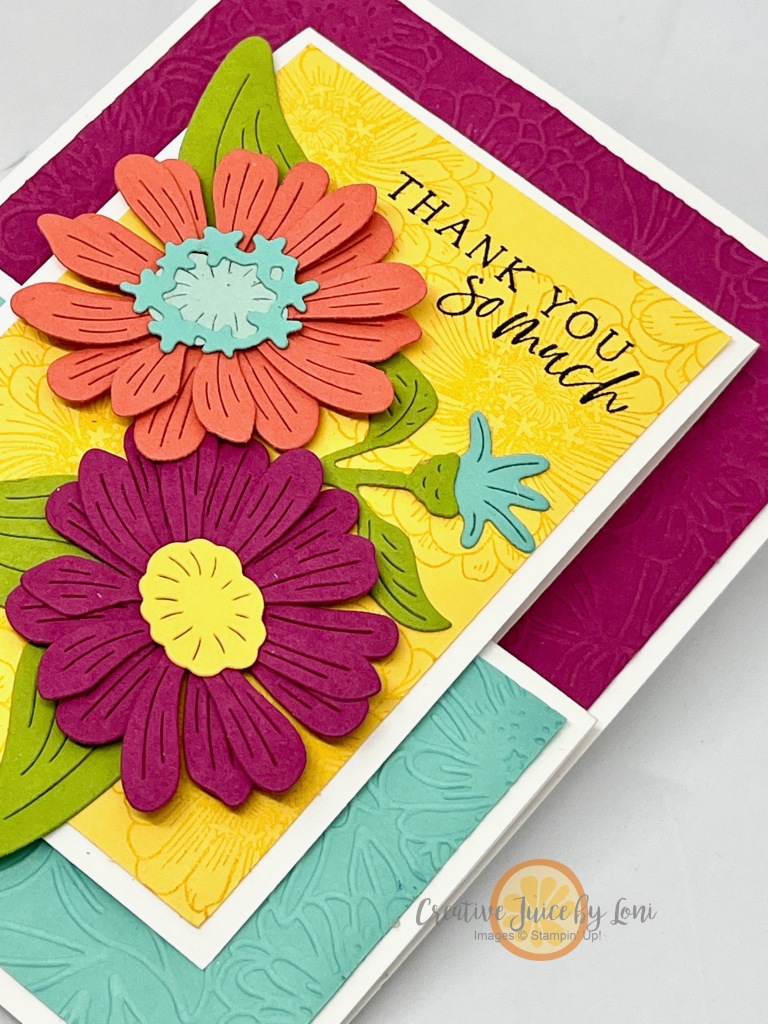
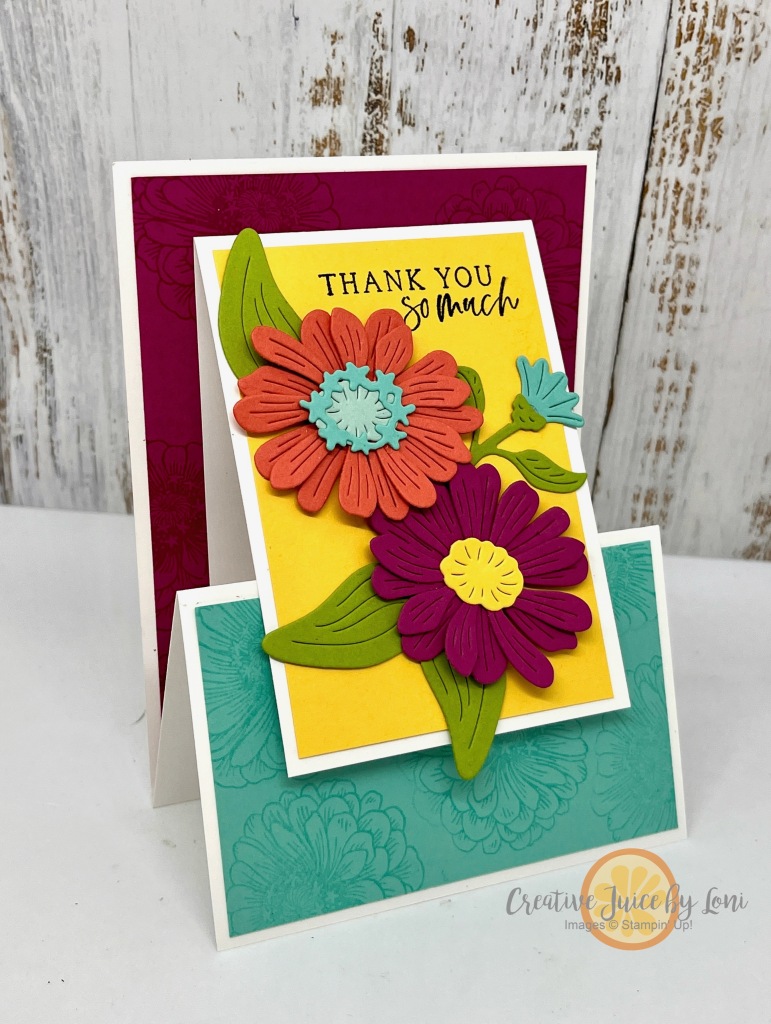
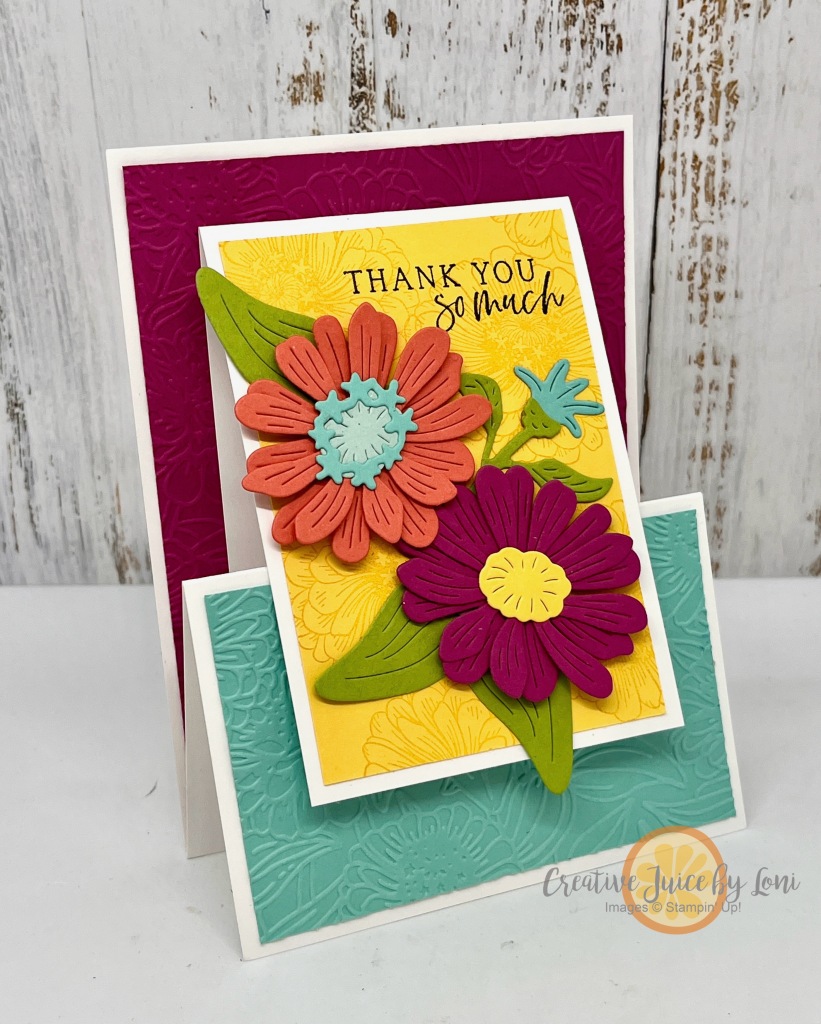
So many marvelous Designer Series Papers, so little time? This technique for cutting a stack of patterned paper will have you making multiple cards at ONE TIME!

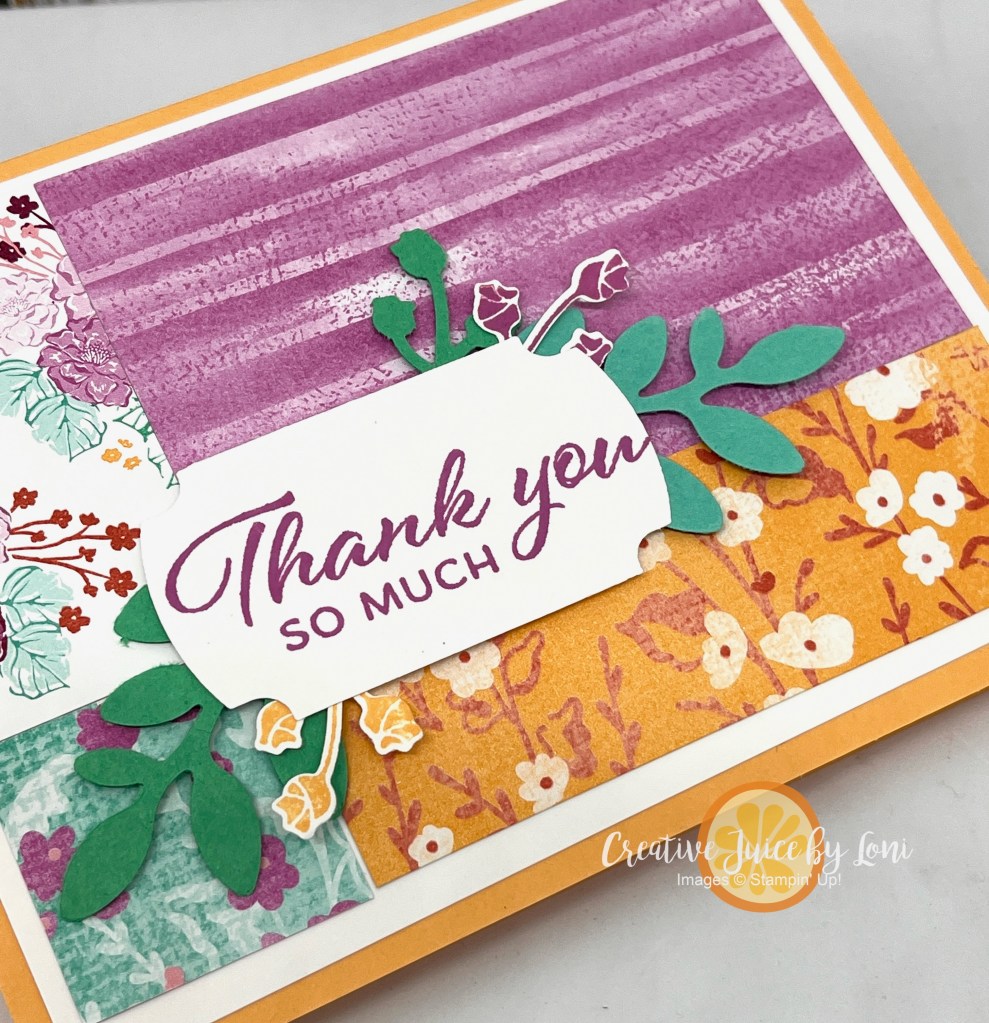
Begin by selecting 4 patterns of Designer Series Paper- I suggest using a maximum of two busy or bold patterns and add a subtle design and a tiny or monochromatic print, in 4 different colors (or different shades of the same hue). This will give you the CONTRAST you need when piecing them back together.

You can adhere the shuffled pieces edge-to-edge (as on the card, left) or leave a small space between them, giving a window-pane look (card on right). You may find that a design on the BACK of your paper works well, so go ahead and flip it over, if needed.

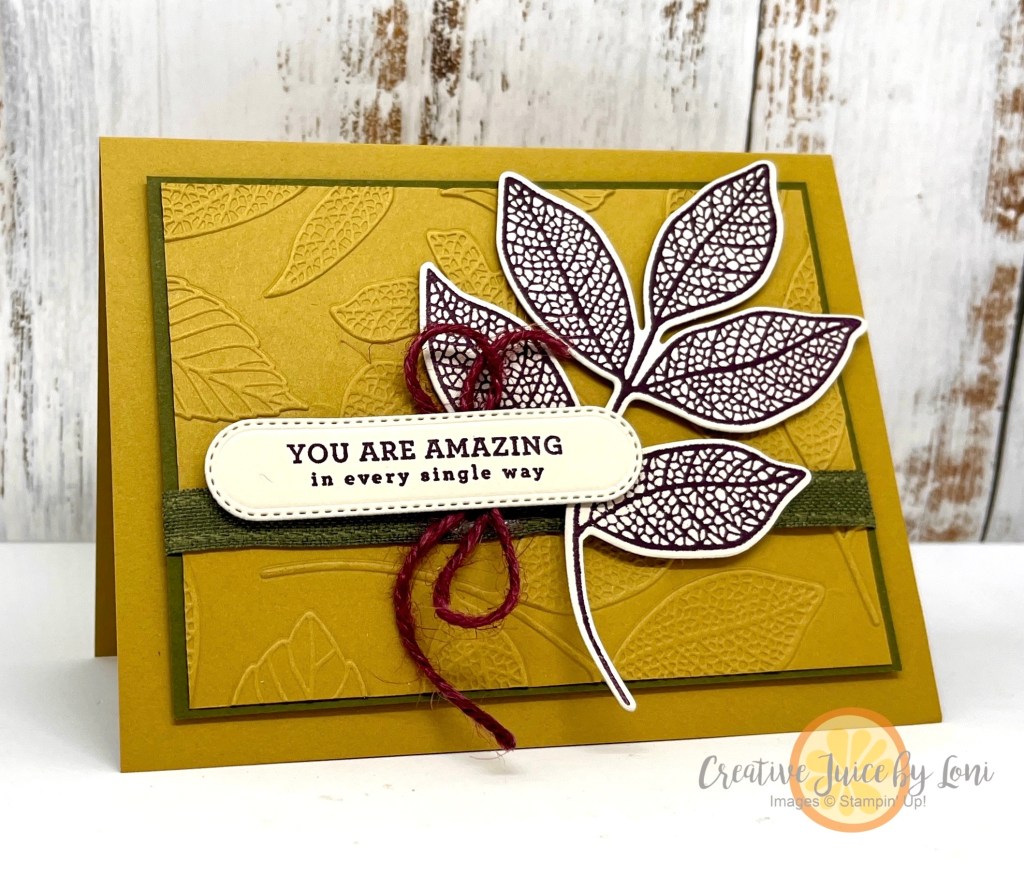
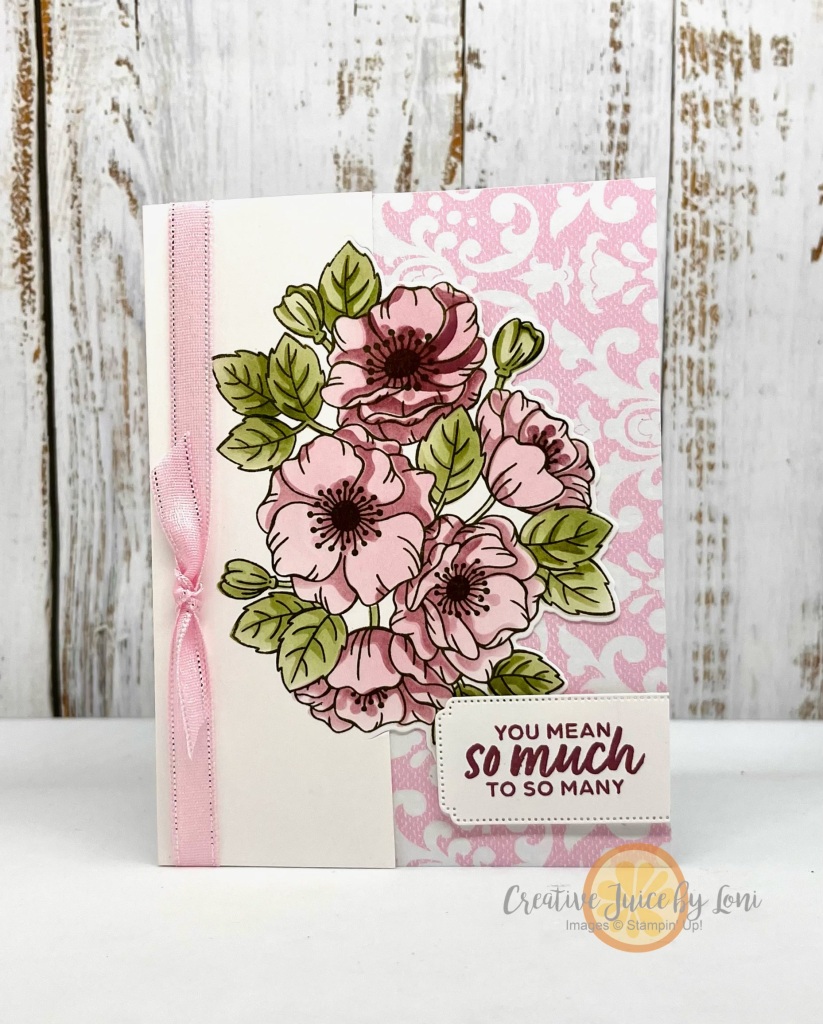
I used the Unbounded Beauty 12″ x 12″ pack- it’s part of the Designer Series Paper SALE this month, August 2024 and showcases the 2024-2026 In Colors, which are lovely together. With the few scraps left over, I added a piece to the inside layer and to the flap of my envelope.

Grab your patterned paper and follow along with me here, as you practice your cardmaking:

If you paper is directional, you’ll need to decide if you are creating PORTRAIT cards (tall) or LANDSCAPE cards (wide) **before** you cut your paper, and make sure it’s oriented the correct way.

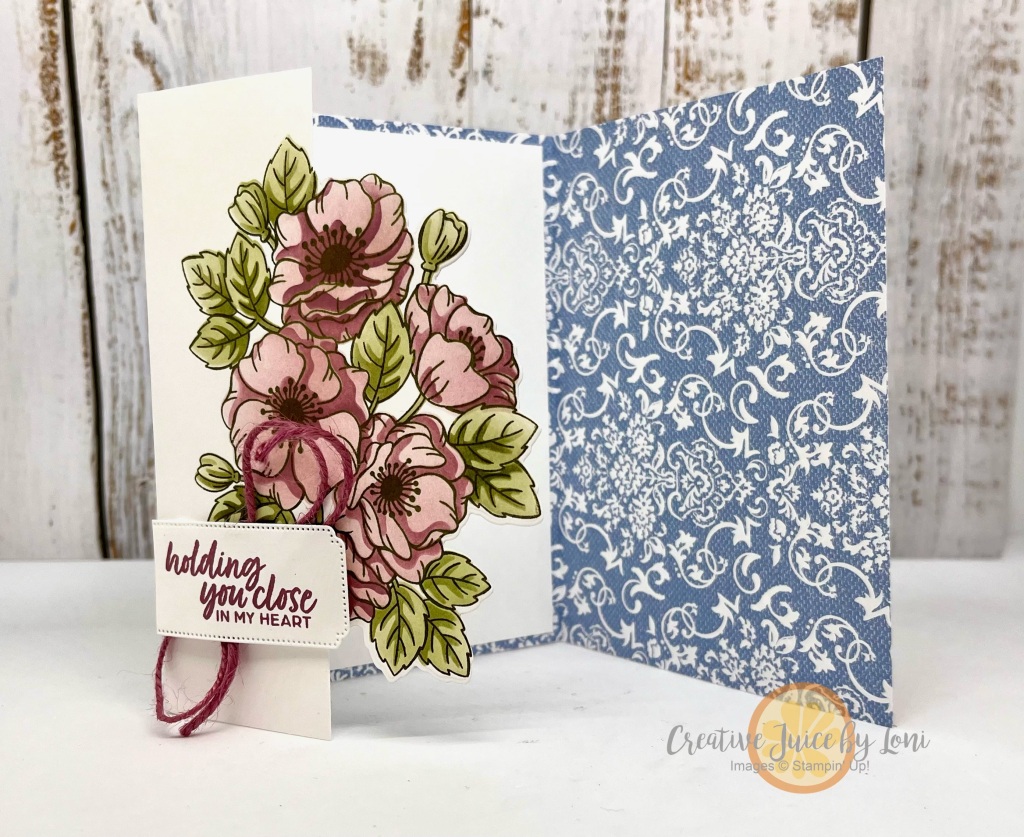
The Unbounded Beauty cards were landscape, but I also needed some sympathy cards, and the blues in the Countryside Inn Designer Series Paper (also 15% off in August) seemed fitting. These are portrait versions of the Stack, Cut, Shuffle technique:
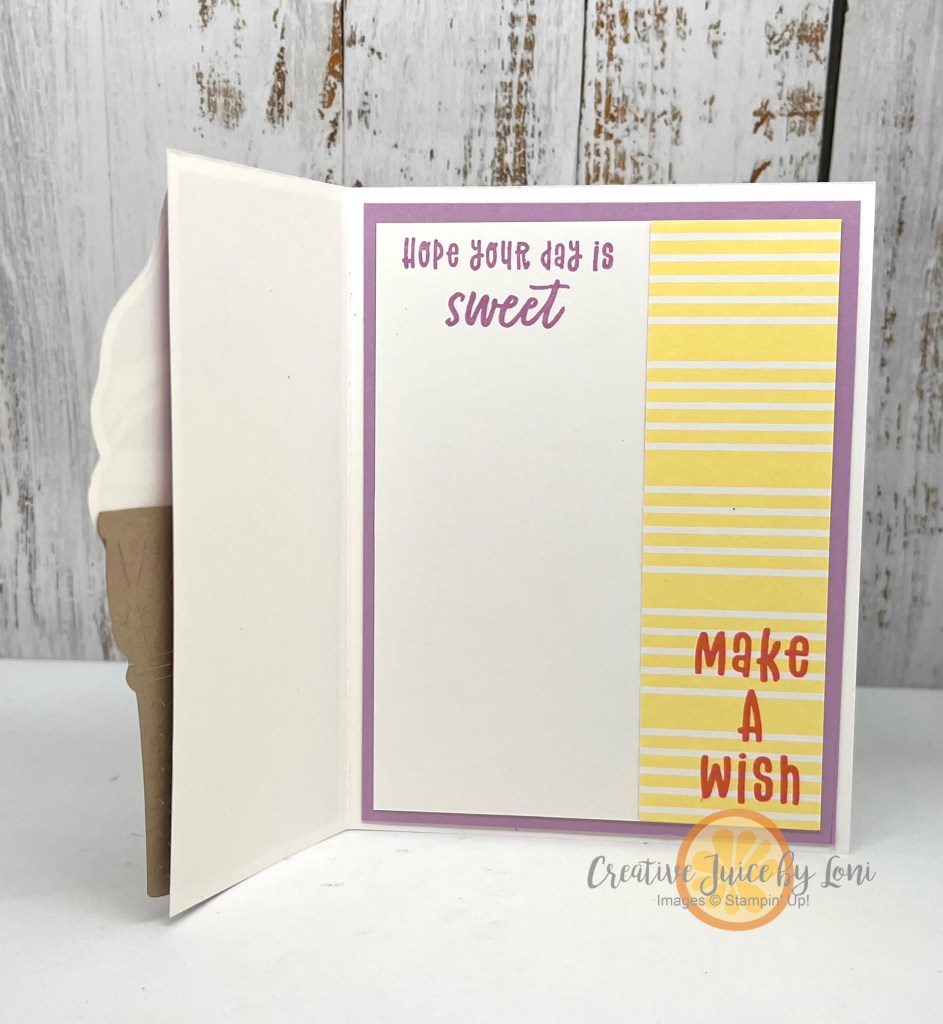
Inside the cards:

I’ll list supplies for both versions, starting with the Unbounded Beauty demonstrated in the how-to video:

Product List

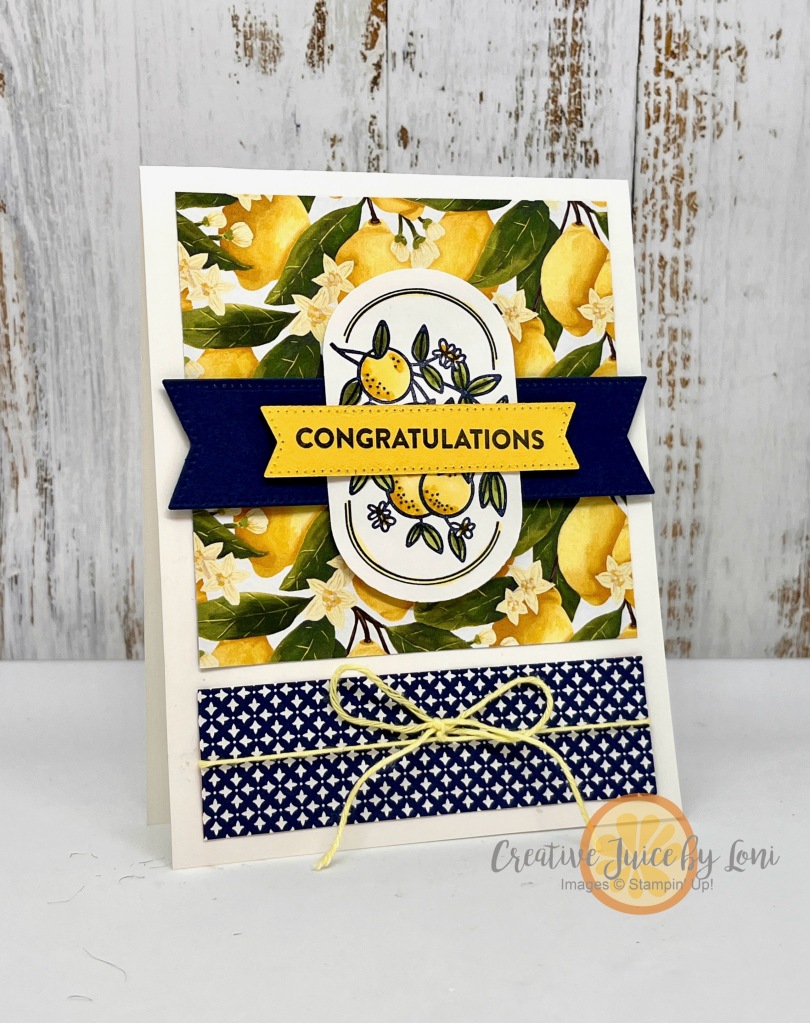
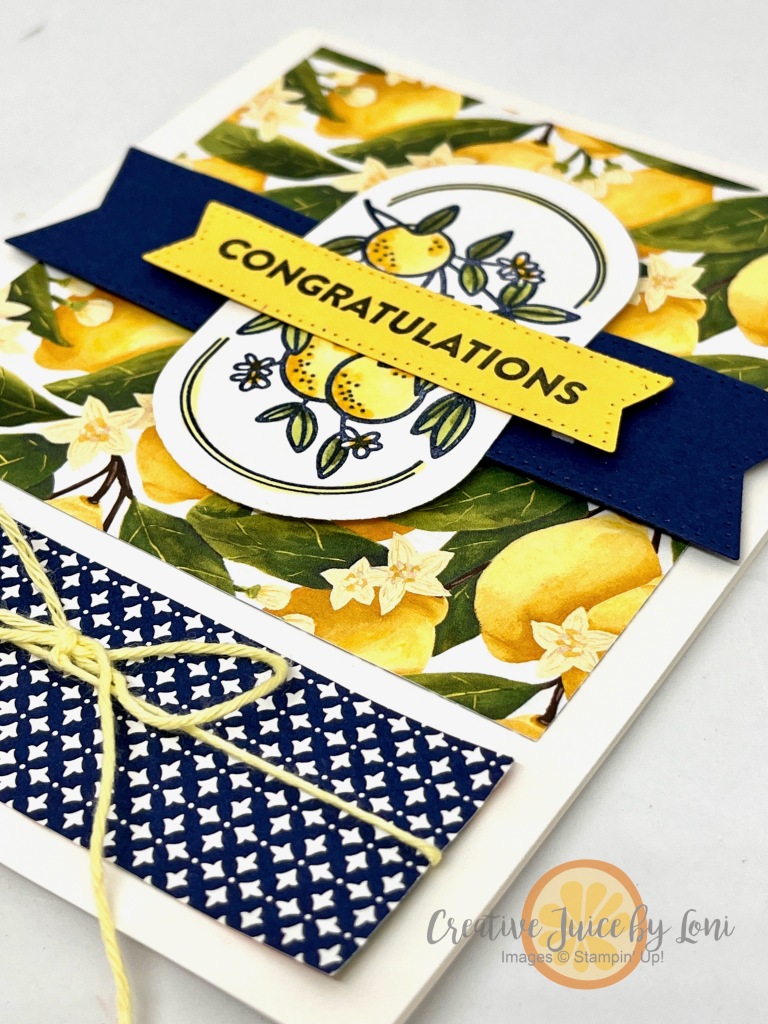
Supplies for the Countryside Inn Comfort card are below.

Product List

Hybrid Embossing Folder How-To

Curious about how a “Hybrid Embossing Folder” works? Allow me to demonstrate how-to using the new Online Exclusive Changing Leaves bundle.

The embossing folder creates amazingly detailed leaves which are beautiful both embossed (raised) and debossed (recessed). Here is a “raised” example in Granny Apple Green using the embossed design for a background on a card:

Flip the embossed paper over and paint into the recessed images using water painters and ink refills -OR- water painters with Metallic Enamel Effects for shine:

Simply stamping the images and die cutting them to use on your projects is also an option. Watch for the tip to lining up all three leaf images in the correct spot, making them easier to die cut at the beginning of this video, in which I also demonstrate all the techniques I’m sharing:

I used my stamped/die cut leaves on a floating frame card:

Finally – and this is the HYBRID VERSION – the dies snap into the embossing folder! All you have to do is add your paper, run it through the Stampin’ Cut & Emboss Machine, and out come die-cut, embossed accents! This is a bonus project that shows the detail:

I borrowed the sentiment from another Online Exclusive stamp set called Comforting Thoughts for an occasion when there are just no words to express what you are feeling for someone’s heartache.

Try dragging your ink pad across the top of an embossed/cut leaf to bring out the details (or use a brayer rolled in ink), like the Pretty Peacock leaf on the card:

The Changing Leaves bundle is $54 (US) so it qualifies for a $5 BONUS DAYS coupon when you purchase it during July 2024. Collect coupons July 3-31st, then redeem them during August!

Color Block Zinnia Stand up Card

Simply Zinnia, Simple Fun-Fold Thanks Card

Bright colored flowers shout “I LOVE YOU” as well as “THANK YOU” and “YOU’RE THE BEST!” Zinnias lead the garden in bold flower-power during the summer, so a color-blocked card that stands to display seemed like the one to craft today:

The Simply Zinnia stamp & die bundle is an Online Exclusive that you can NOT miss! For my demonstration, I used Versamark ink to stamp the zinnia image on both the Berry Burst and Coastal Cabana card stock pieces that fit on the card base.

However, the Zinnia bundle IS part of a larger Flowering Zinnia SUITE of products, which includes the Zinnia 3-D Embossing folder…so I also did a version of this card using it to make a “touchable” raised background.

This is how they stand:

There is a HELPFUL TIP for layering the petal dies in today’s video tutorial, which will save you time in assembly. Remember, you can click on the gear in the bottom right of the video and change the speed to make any tutorial play faster, if you are an impatient crafter like me!

Just a few more days to collect the Stamp + Die bundles you love, or the Cut & Emboss machines, for an ADDITIONAL 10% off.

Product List

New at SU! A Lemony Sketch

You’re here to see how Stampin’ Up! card sketches from the 2024-2025 catalog (pg 22) can improve your cardmaking skills, and our International #NewAtSU design team is taking the assignment seriously!

This is the sketch I chose:

Here is how it inspired me:

You’ll notice that I didn’t use 3 panels, but allowed my banner to visually divide the lemon Designer Series Paper. That’s the thing about a sketch = it’s there to give you a place to start, then run in whichever direction your heart takes you!

Try mixing up products, too! I thought the Mediterannean Blooms lemon paper would make a fabulous backdrop for the image from the Filled with Happiness set, and it did. That Navy & Yellow combination is summery and sweet.

I cut both the navy banner and the lemon oval in half to stretch across the card and give room for the Congratulations sentiment. This would be a unique baby congrats card, or a wedding celebration! It’s just generic enough to fit any occasion.

Once you’ve left me a comment and have filled your cup with creative juice (and your cart with supplies), move along to see how all the other stampers used these wonderful sketches, then TRY ONE YOURSELF.

June 2024 New at SU! Blog Hop: Catalog Sketch Inspiration – Visit them all!

1.Merrick Makings (AUS) – Secret Sketches of SU!
2.Creative Juice by Loni (US) – A Lemony Sketch, Congrats
3.I Heart Cards 2 (US)- Catalog Sketch with Country Woods Collection
4.Stamping Flair (AU) – Flower Cart Stamp Set
5.Furry Cat Designs (UK) – Sketched Butterflies Sketch
6.Nature’s INKspirations (US) – A Sketch Inspired Thoughtful Journey
7.scraphexe (DE) – Sketch Layers of beauty | Liebenswerte Lagen
8.Stampinxime (DE) – Tune In – Geburtstagskarte nach S
9.Tricia’s Stamping Creations (USA) – Latte Love
10.247 Inkspiration (US) – Happy Little Things
11.De Kijkkast (NL) – Veggies and a sketch!
12.Joni in the Spotlight Stamping (USA)-New at SU-Catalog Sketch with La

Powered by blogcarousel.com

Product List

Did you know the Boho Blue Mini Cut & Emboss Machine is less expensive than the white mini machine, with the same performance? AND all the machines are 10% off through June 30th – don’t miss it!

Anticipating Autumn

By nature, I enjoy the season I’m currently living in. However, I can affirmatively claim that FALL is my favorite!

The new “Changing Leaves” bundle was sitting on my craft desk (freshly upacked from a pre-order for new Online Exclusives coming July 2nd) when I saw the TGIF Sketch Challenge – so here we are:

The simplicity of this sketch allows the details of the stamped image and the hybrid embossing folder to take center stage:

These are the colors I chose for my card:

Clever crafters may be asking, “Does Stampin’ Up! have Mossy Meadow ribbon? Or Blackberry Bliss jute twine?” and the answer is NO! But you CAN color the Basic Beige ribbon with the dark Mossy Meadow Stampin’ Blend Marker and the Moody Mauve jute trim with the Blackberry Bliss Stampin’ Blend Marker! Because the blends markers are alcohol-based, it doesn’t take long for the trims to dry before adding them to your paper creations.

Being able to order new products EARLY is one of the perks of being a demonstrator! Don’t suffer from FOMO…you can join my Sprinkled Ink team of demonstrators whenever you are ready.

POST UPDATED JULY 3, 2024: Changing Leaves Bundle NOW AVAILABLE!

Product List

Pop-Out Book-Binding Card

Remember the SQUASH CARD we made last week? We’re using the SAME fold, just starting smaller, and putting it inside a book-binding card for a POP-ular fun-fold for your favorite POP this Father’s Day (or ANY OCCASION)!

At first glance, this looks like a normal book-binding card. But wait until you open it up!

Watch this tutorial and give this a try, and you’ll be chopping all your Designer Series Paper to 6″ square to make more!

The silver foil pop top and bottom really make it look like an aluminum can:

The Simply Sparkling stamp set and dies are just a taste of many incredible products only found in my online store, so while you are adding them to your cart, check out the other Online Exclusives.

Product List

Squash Fun-Fold Card

Usually, I’m a bit more timely in posting my finished project from my Monday Lunchtime Live crafting videos, but we were focused on tending the grandkids. I’m just now getting settled back at home and sharing this (late Saturday night)…better late than never!

This fun-fold card is called a “squash card” and begins with an 8.5″ square piece of card stock. Once finished, the card squashes (or smashes) flat to fit into a standard Stampin’ Up! envelope.

Measurements for the pieces:

  • 8.5″ square card stock, scored at 4.25″ horizontally and vertically AND once diagonally.
  • Designer Series Paper: One 3.75″ square and two 3.5″ square
  • Basic White card stock: Two 3.75″ squares, plus a piece to stamp a greeting and/or images to embellish with.

I die cut images from the Designer Series Paper for the front of my cards, but you could just as easily stamp what you’d like for the top of your cards.

Now peek inside:

TIP: The same design can be used on a 12″ x 12″ piece of card stock to create a mailable scrapbook page! Place photos where any of the paper or card stock layers are, and save a spot to journal about the memories, then fold it up to send to a friend to remember a happy day together.

Watch for instructions:

Thanks for ordering the supplies from my Stampin’ Store so I may continue to bring you ideas to try!

Product List

Good news! Starting June 5th, both the standard and mini Cut & Emboss Machines will be 10% off (they have NEVER been on sale before!) PLUS stamp + die bundles- which are already 10% off – will be available for an ADDITIONAL 10% discount through June 30, 2024.

Ice Cream, Adhesive Sheets and Last Chance Sale

When you have the right tools, any project becomes easier.

Adhesive sheets are a type of double-sided adhesive that make any piece of paper into a sticker, and they are indispensable for a project like PAPER PIECING. The Ice Cream Swirl dies are a perfect example of how you can create sweet cards to drool over, using adhesive sheets:

Start with a 5.5″ x 6.75″ card base (scored at 4.25″) and “build” layers with Designer Series Paper. The Lighter Than Air designs have creamy colors that I used to cut 3 swirls from, then built up my lemon-raspberry ice cream swirl. This is a card you’ll want to make triplets of at one time, just to use up all the pieces:

Today (April 9th) is the last day to register for my Crafting Happiness class on Friday, April 19th, where I’ll be featuring the Ice Cream Swirl Bundle (and you get a discount on the class if you purchase the bundle from my store)- OR you can use one of the stamp & die bundles you may already have.

A tutorial to teach how to use Adhesive Sheets:

Inside the card:

Today also begins the Stampin’ Up! Last Chance Sale– click image to shop!

I appreciate your order of genuine Stampin’ Up! products from my store! Your support give me the opportunity to continue sharing creativity with you. I’m always tickled to mail a hand-stamped card as a thank you for online orders!

Product List

Farewell Friday: Good Feelings & Rays of Light

As we near the end of a Stampin’ Up! catalog year, it’s time to spotlight some of my favorite retiring products. These products are available while supplies last or until April 30, 2024 (download full retiring product list at end of this post).

Since the TGIF Bonus Challenge #tgifc466 was to create a “simple gift set” of cards, it gave me the opportunity to stretch outside my comfort zone of bright colors, and use some of the black & white designs from the Delightfully Eclectic Designer Series Paper. But you can’t take ALL the color out of my life, so I added Calypso Coral, which also shows up on some of the paper designs.

These cards use the paper, PLUS the Good Feelings stamp set and Rays of Light background stamp, all of which will NOT be returning to the new catalog premiering in May. The Rays of Light background is the one I will grieve over losing the most!

This simple fun-fold card style is strategically planned to make the most of your patterned paper! If you score a full 8.5″ x 11″ sheet of card stock along the long edge at 4.25″ and 9.75″…THEN cut it in half at 4.25″, you’ll have two 11″ x 4.25″ cards ready to fold, meeting on the front of the card,

Use a 4″ x 4″ piece of DSP on one side and a 4″ x 1″ piece on the smaller fold. This pattern can be used in landscape or portrait orientation.

Now, HOW should we “gift” all these simple co-ordinating cards?

A quick folio made from a 12″ tall x 10″ wide piece of the Designer Series Paper is just the thing, and can hold all the cards plus envelopes!

Score it at 4.75″ and 5.25″ to give a center binding back, then add a ribbon to tie closed:

What else is retiring? Click banners to download the lists of items from the ’23-’24 Annual Catalog AND the January-April Mini Catalog which will be retiring.

>>> NOTE THAT THE LAST CHANCE SALE STARTS APRIL 9th <<<

These are the supplies I used for my simple set of cards and the folio to gift them in. I appreciate your orders so much and will mail you a thank you card! THANK YOU.

Product List

Coloring with Masks (Enduring Beauty)

Masks (the fancy Stampin’ Up! term for stencils) make coloring stamped images speedy and simple!

I was truly WOWed with how quickly I was able to color the floral spray image from the Enduring Beauty bundle with the coordinating masks, blending brushes and ink pads. This is a technique you may embrace if you don’t love to color, OR if you are just getting started, you can stamp and color this image with just two ink pads! Watch & learn how:

Did you catch how to die cut just half the image so you can add a layer of Designer Series Paper as the background? For the video, I added a second fold that opens on the right:

But you can just add a 4 1/4″ x 5 1/2″ layer of Designer Series Paper behind the flowers to make it a regular card. I really like the look of the Poetic Expressions designs with the flowers, and used the colors of that paper for coloring the flowers, as well.

Turn the design sideways and try different colors, too.

It’s a beautiful stamp set to use for so many projects, and if you haven’t seen my two previous posts using this set this week, check out the Notebook Cover project HERE and the color challenge card HERE.

THANK YOU for shopping in my Stampin’ Store for GENUINE Stampin’ Up! products!!! It enables me to continue bringing you creative ideas and you are guaranteed high quality products with service from someone who cares about you.

Product List