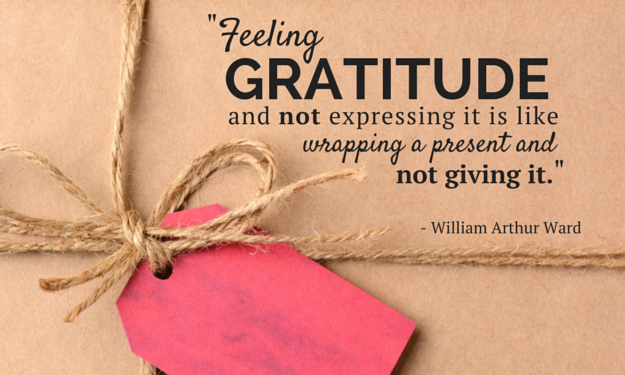
When was the last time you sent a thank you card for a gift you received? (Full transparency: This is something I need to do more of) Since it’s less than a week from Christmas, this is OUR chance to be gracious and grateful.
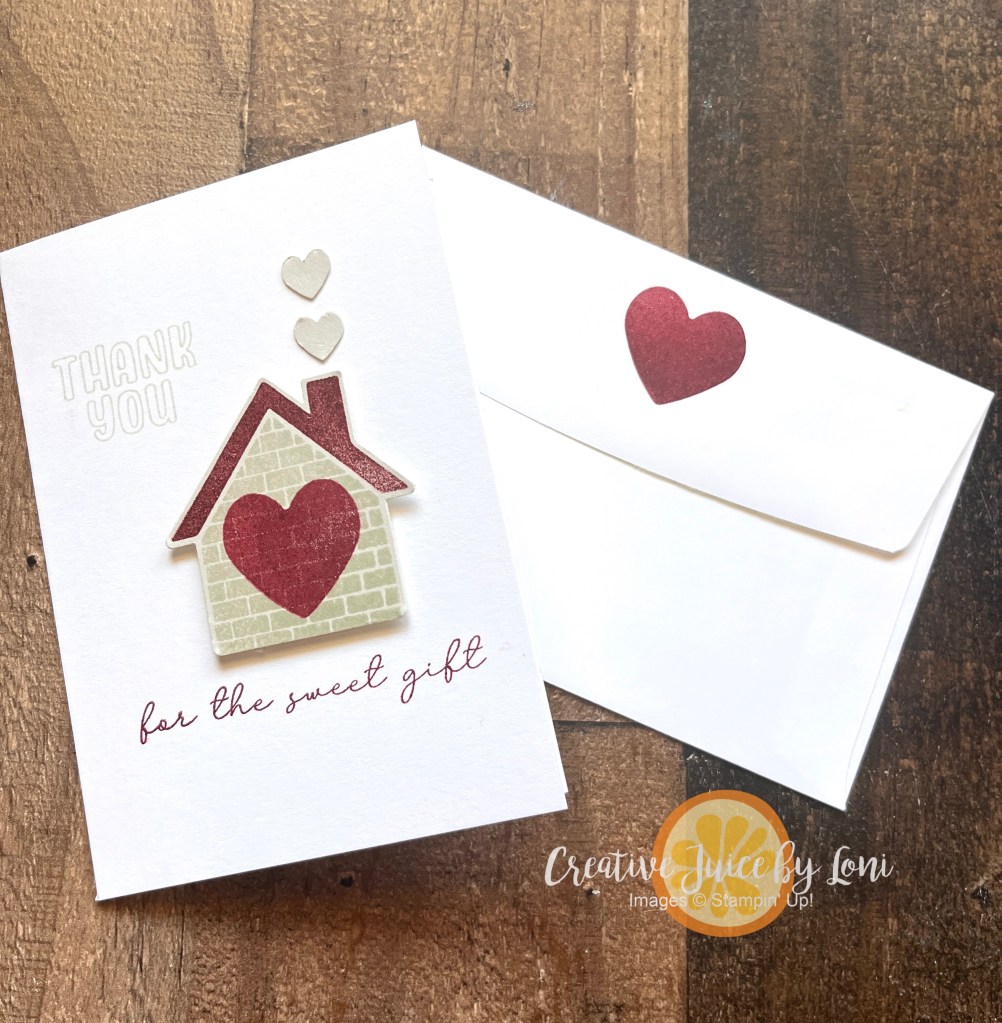
This Thank You card was designed to be speedy and simple to stamp, plus I’m using Stampin’ Up! Notecards & Envelopes, so they are pre-cut and scored. No excuses here!
The Humble Home bundle includes all the stamps you need, plus the Home Builder Punch. You can literally create a stack of these in just minutes.
To make it easy for you, too, print off the tutorial, then add the supplies you need to your cart below.
It’s Ribbon Week here on the Creative Juice Blog, and the New at SU! design team theme for December is “Tied Up with Bows” ~ so I went BIG with the bow on this slimline card, featuring the Happy Hibiscus, a NEW Online Exclusive bundle:
Wrapping a ribbon around a layer on your card gives it a nice finish, and you don’t see the ribbon from the inside of the card.
Before I tied the ribbon, I cut a length of the Silver & White Sheer ribbon in half down the center and laid two loops on my knot, then tied them inside the bow, giving it extra “fluff”:
The Happy Hibiscus bundle includes a 3-D Hybrid embossing folder (which cuts and embosses flowers at the same time, should you so desire), and I just pulled my Whisper White ink pad across the embossed Smoky Slate card stock to bring the embossing out.
I chose to HEAT EMBOSS the large flower, then watercolored it using Pretty In Pink ink and a Water Painter, before die cutting it out. The blossoms and leaves are also watercolored.
I will use this card for my next team member who promotes to Silver, though it would also be a lovely wedding card! Plus: a matching envelope. Finished size: 6″ x 3.5″
Before you move on to the next ribbon/bow project, what is your current favorite Stampin’ Up! ribbon? Tell me in a comment section (at the top of this post, by the date)!
Visit our international inspiration at each stop below, and PIN or save your favorite ideas:
Are you in a rut of tying a ribbon around a card in the SAME WAY all the time? With so many unique ways to use ribbon on your hand-stamped creations, let’s explore just a few ideas! VIDEO TUTORIAL BELOW
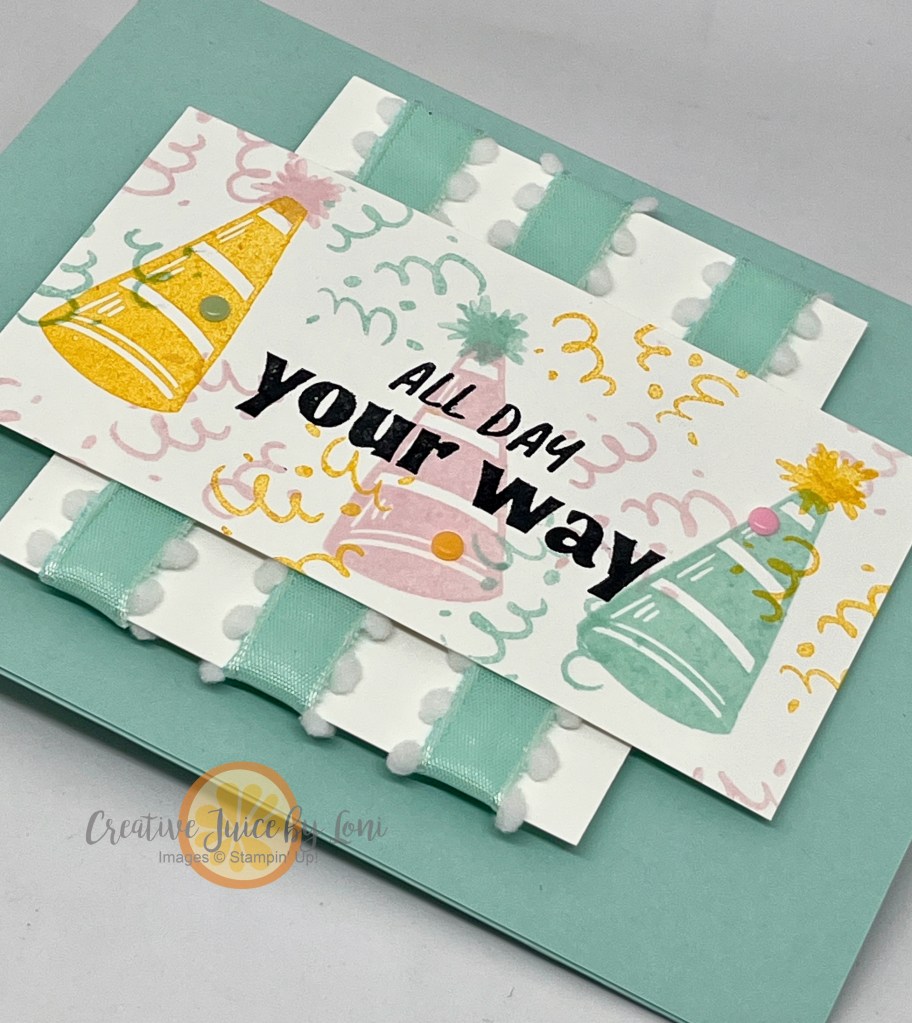
First, try using your ribbon as a background: This Pool Party pompom ribbon is in the “Last Chance” section of my Stampin’ Store, and I’ve paired it with a Sale-a-Bration 2025 stamp set “Day to Celebrate” for this celebratory card. Consider planning ahead, because you’ll want some of this ribbon on hand once you can select this stamp set free (with a $60 order) in January!
Next, there are plenty of crafters who despise having to tie a bow! Weird, but true. So this one is a FAUX BOW and so easy to do (see video). NO BOW TYING REQUIRED. This non-traditional valentine is a second peek at a bundle coming in the January-April 2025 mini catalog called “Hugs for Love” and comes with the To The Point Label punch. The Cherry Cobbler & Gold ribbon looks lovely on Wild Wheat card stock, and gives it a use beyond Christmas:
Next up, not only is it pretty to have two different ribbon types, when you use twine to tie the second bow, it is less bumpy to mail! However, this project may get a little bumpy when you add a package of flower seeds to the pocket:
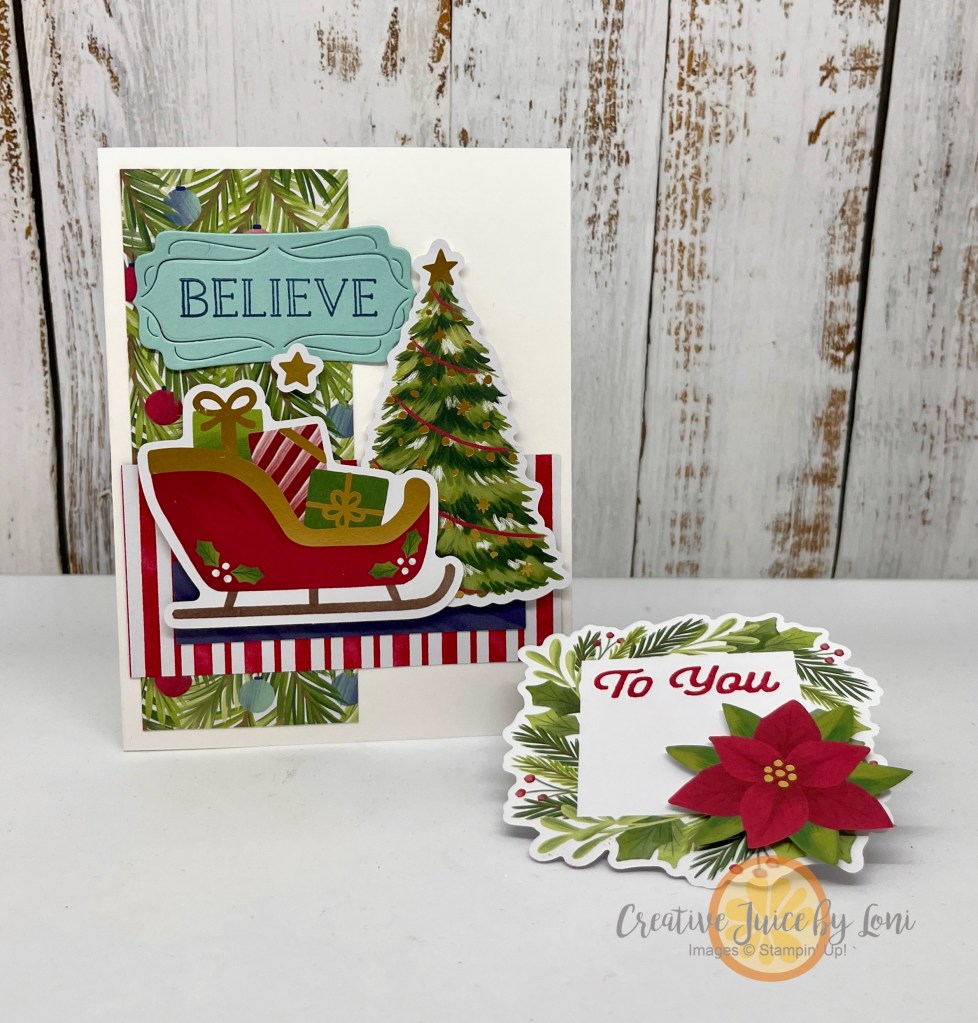
Another preview of some products coming soon…and the good news is that the Storybook Moments Specialty Designer Series Paper, Timeless Plaid Designer Series Paper AND the Petal Pink 3/8″ Scalloped Ribbon are all part of my Designer Series Paper & Ribbon Share
You’ll receive SIXTY-ONE 6″ x 6″ pieces of every Designer Series Paper in the Jan-Apr Mini Catalog AND January Online Exclusive products (not all paper is shown, just a sample). BONUS: Add a sampler of the 4 new ribbons (2.5 yards each), and you’ll have plenty of coordinating products to play with.
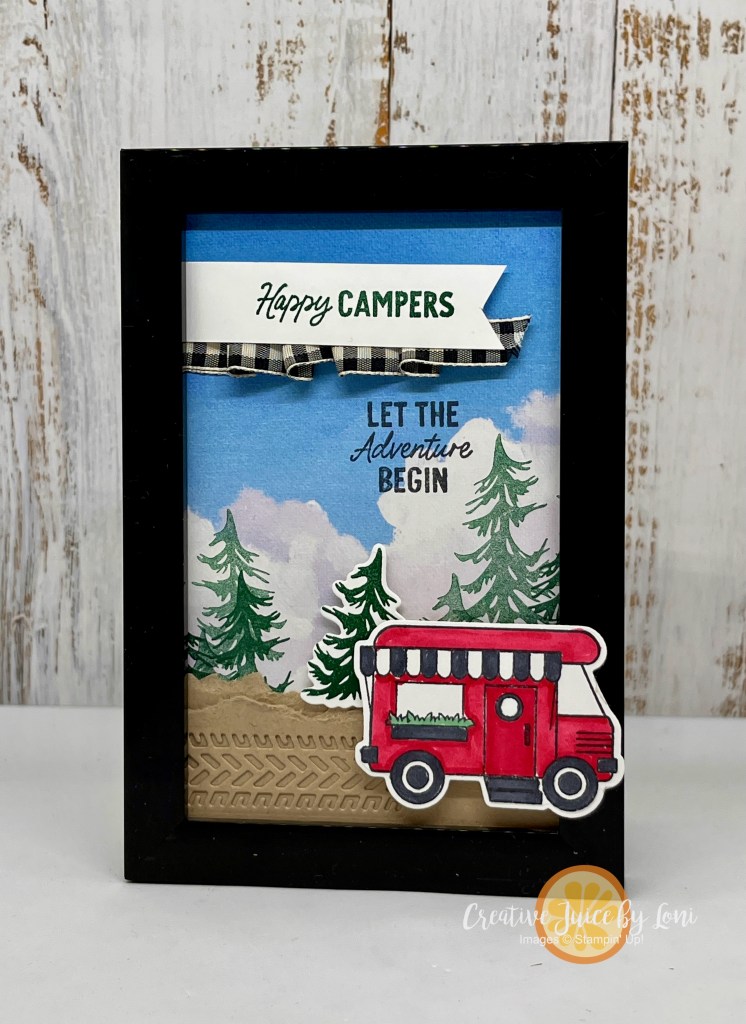
Have you ever created a gathered edge with a ribbon? Let it peek out from below a sentiment like this Black & Vanilla Large Check RIbbon ruffle on a piece of home-sweet-camper framed decor:
Yep- that’s another “first look” at the Adventure Together bundle (a January Online Exclusive) AND the Everyday Skies Designer Series Paper (included in the Paper Share).
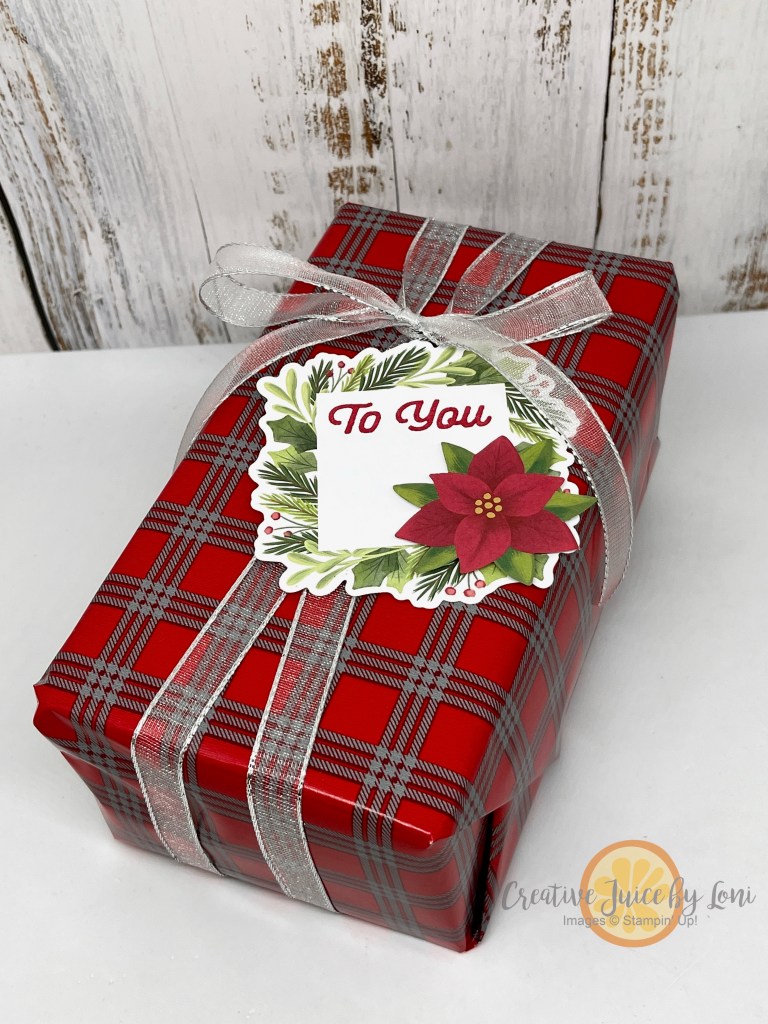
And finally (or at first in the demonstration video), a unique way to tie a bow on a gift box- FAST. Just wait until you see how the bow keeps the ribbon in place! I used the Silver & White Sheer Ribbon:
AT LAST! Here’s the tutorial to watch:
Really looking forward to hearing what you think of these ideas of ways to use Stampin’ Up! ribbon on handmade greeting cards, gifts and more.
While Christmas is just around the corner, Sale-a-Bration is right on it’s heels!
Stampin’ Up! Sale-a-Bration is the best time of the year because when you SHOP or JOIN, there are extra products to choose as a bonus. Let’s take a first look at one of the stamp sets you could choose free with a qualifying purchase: Friendly Seagulls
Rather than coloring the seagulls, I colored AROUND them with Stampin’ Blends markers, creating a seaside sunrise (or sunset?) background. I fussy-cut around two of the birds to set them in front.
The set comes with a few different sentiments than what I used here. For this card, I added words from the “Saying Hey” stamp set from the annual catalog.
If you have ordered from me in the last year, you should receive a January-April mini catalog AND Sale-a-Bration brochure in the mail this month! If you don’t yet have a demonstrator serving you in the U.S., I’d be happy to send you both, simply shoot me a message!
Like this card? It makes me happy to hear if it makes you smile~ scroll back to the top of the post and leave me a comment!
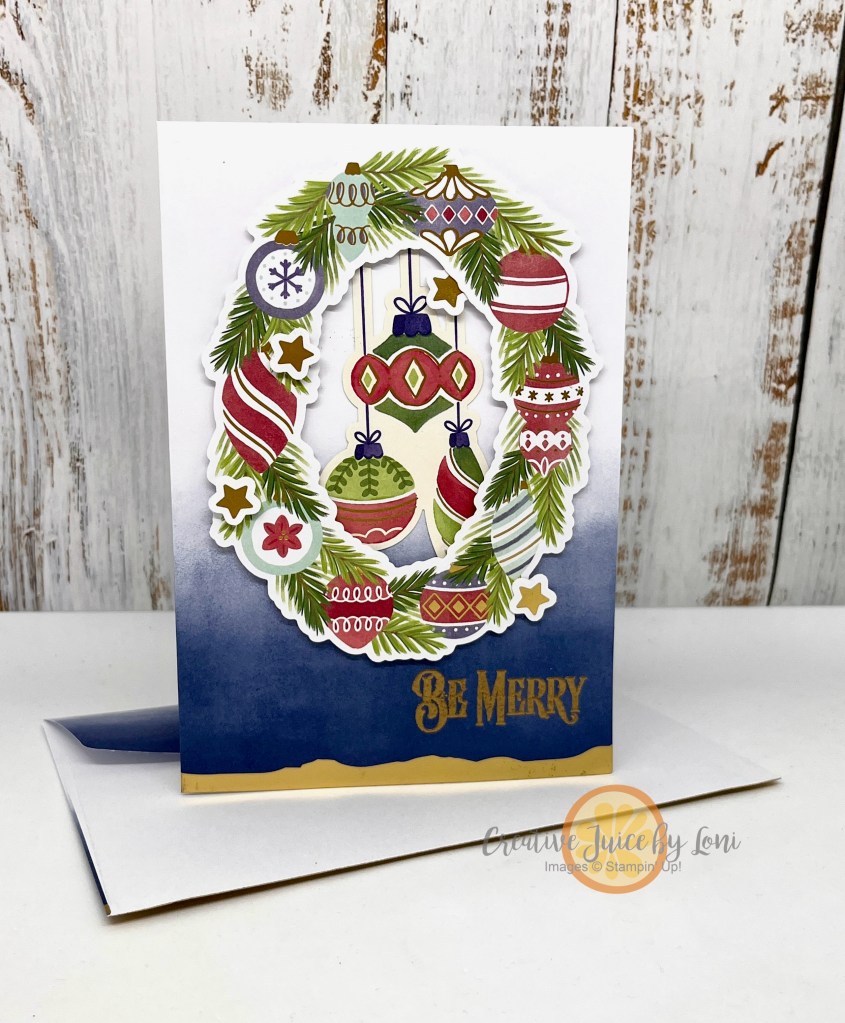
The holidays should be festive and fun, NOT stressful! These fast last-minute projects meet both requirements because the thoughtfully patterned paper AND ready-to-use elements are simply delightful to mix and match:
A Little Bit Festive Designer Series Paper pack is in the LAST CHANCE list and some folks claim to have created up to 30 Christmas cards from the pack, just by added card stock bases, as shown above. They will all be unique, as there are no duplicate images.
Step up your card creations with the Gold-Dipped Cards & Envelope pack: All you have to do is fold them in half and add your focal points! Heat embossing a greeting is one way to add more shine, and many of the Little Bit Festive ephemera pieces also have gold foil details:
Easier to see the shine in the demonstration video:
Two more projects I created with this pack were:
An 8.5″ x 11″ scrapbook page layout. This was still very simple to make, and I could write a whole journal about my hot cocoa obsession…just need to take a few photos and add them!
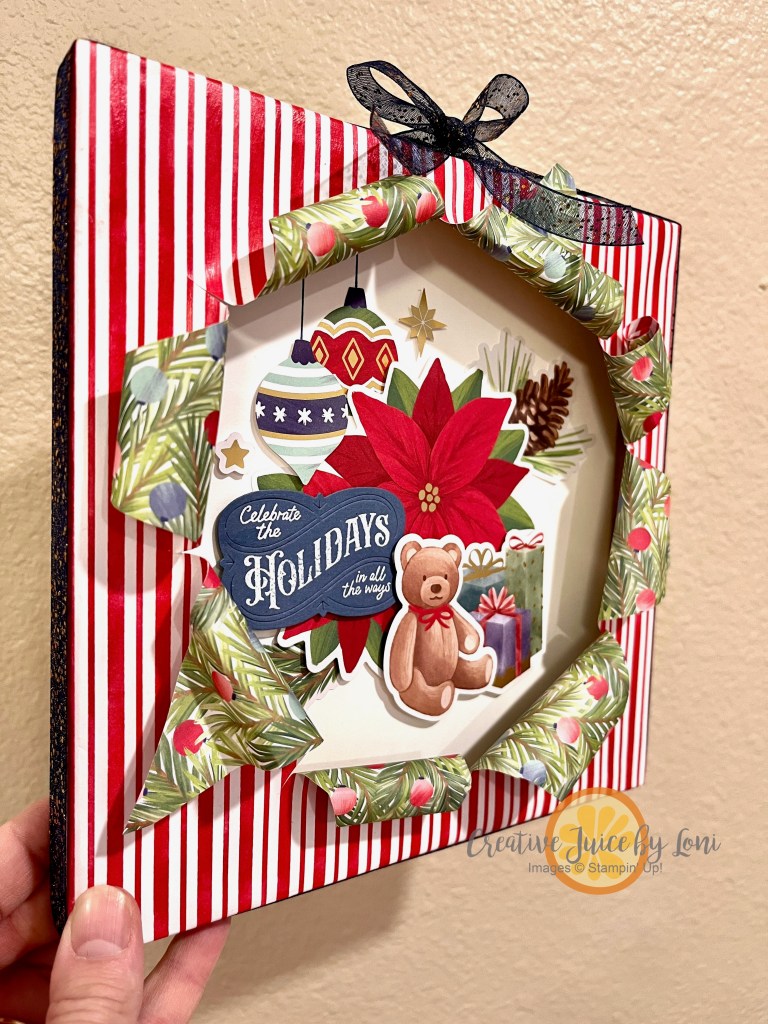
And finally, this true “Busted Canvas” home decor piece! While not quite as quick as the other projects, it really didn’t take much longer to create, once the Mod Podge was dried on the front.
Grouping a bunch of the die cuts together makes an adorable vignette of all things Christmas!
Celebrating the 500th TGIF Challenge with a birthday card I made for a dear friend, and my longest team member. Ann, if you see this, just act surprised when you open your mail!
Tearing – or ripping – paper was one of the first techniques I remember being taught at an EARLY crafting convention I attended. It’s so simple, and adds terrific texture, and while many things have changed in paper crafting styles, this technique has just grown more sophisticated.
To be honest, there were a few times I almost threw out this card to begin again, but I persevered, and surprisingly, I think the end result is “tres shabby chic”!
With a whopping 6 (or more) layers of card stock, Designer Series Paper, ribbon, and the birds (also die cut from the patterned paper, so I didn’t have to color them), this was much more detailed than I usually do, but the card needed all the fussy stuff, and Ann deserves a very special card.
Luckily, most of the elements came from the Nests of Winter Suite, so all I had to add was the pretty pompom ribbon. These items can also be ordered individually, which I will include in the supply list below.
Added a few more torn patterns to the inside of the card and the envelope!
Next time you are crafting, give Torn Paper a try. #tgifc500
Using this reverse masking concept with blending & stamping to give your hand-crafted projects the look of layers without the bulk of extra paper! While I’m sharing projects used mostly with the November “Filled with Joy” Paper Pumpkin kit, I know you’ll find ways to try it with what you have.
Watch the video tutorial, then see the finished projects below.
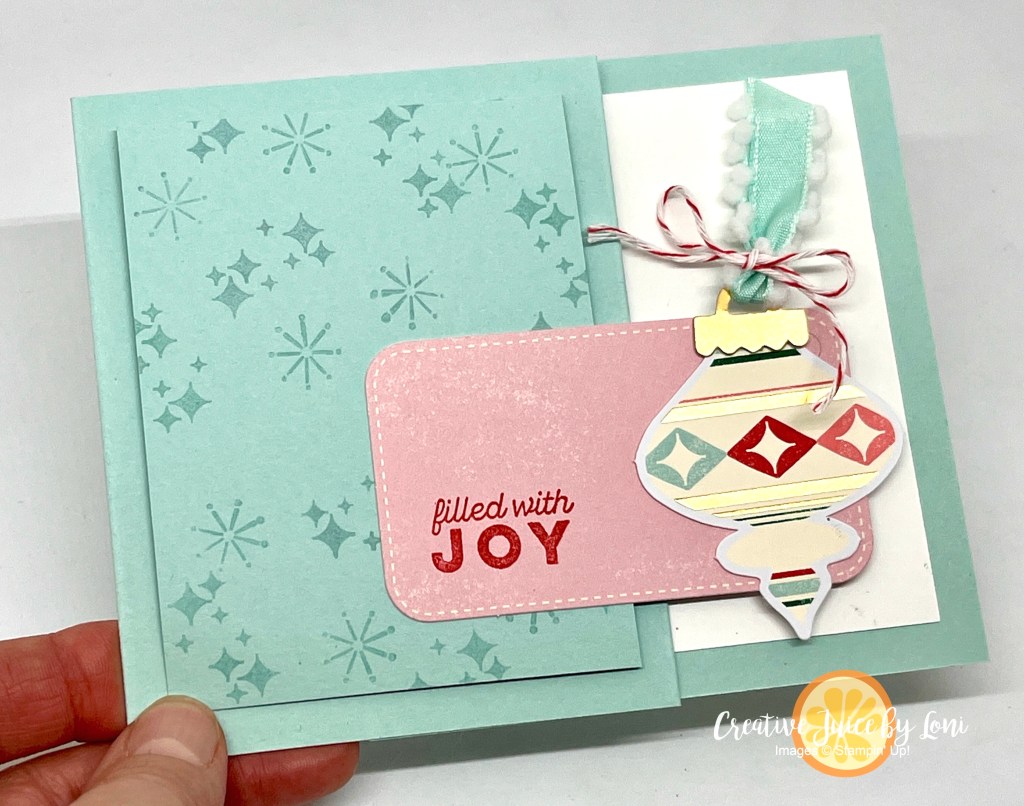
A good paper crafter looks for new ways to use every piece of a kit, such as the piece that we popped the ornaments from in the kit – I used it as a stencil for blending ink onto this tag (from the coordinating Merry Tags & More dies), then stamped through the stencil before removing it:
Voila! A new ornament! Same technique on a card:
These stockings were included in the “Filled with Joy” kit – there were still some refills available to Paper Pumpkin subscribers at the time of this post – and DID YOU KNOW you could add texture to fabric by running it through an embossing folder?! The Eyelet 3D folder was adorable on these and the tag was another alternative idea that wasn’t shown in the video:
I’ll stuff these with some goodies for my primary class at church and for the sisters I minister to. That’s 8 gifts wrapped, thanks to a kit!
You can “think outside the box” and use the supplies from a kit for different projects, like this quick gift card holder (demonstrated in the video):
If you missed subscribing for the November Paper Pumpkin kit, don’t worry…you could make the same gift card holder idea with the Festive Tags kit, which is available a la carte in the Kit Collection!
While you can order from the Kit Collection ANYTIME (new kits are added monthly!), you may not want to miss a month of our premium craft kit subscription…the December kit is called “Notes from the Heart” and here’s a sneak peek:
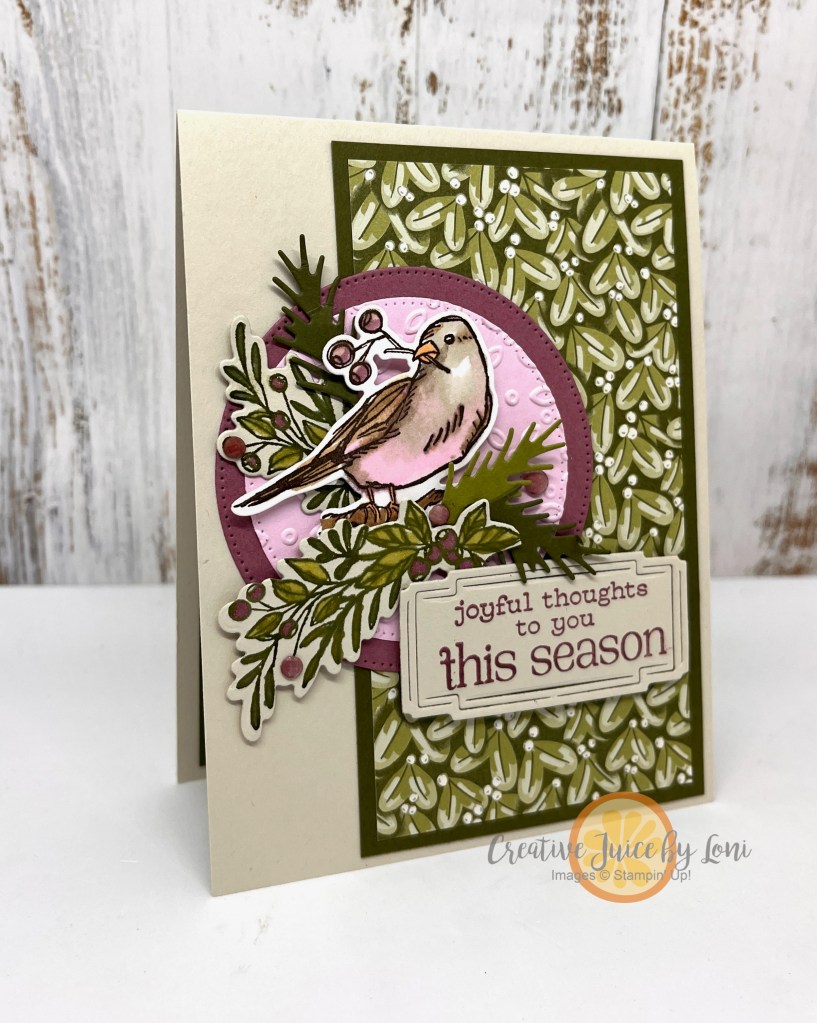
Stepping away from the familiar reds & greens of Christmas with my international Stampin’ Up! demonstrator friends in the New at SU! Design Team, we are using this unique palette that mixes a pinch of pink with deep greens:
The coordinating Paper Pumpkin stamp set from October – “Nests of Christmas” – provided sentiments for both front and inside of the card, in a font that matched the bundle from the Sept-Dec catalog.
Tip: Use the same Moody Mauve Stampin’ Blends markers you color the images with to “dye” the beige Earth Tones Shimmer Gems for sparkling “berries”. I also touched the other berries with the tip of the Wink of Stella pen for added shimmer, which is gorgeous in person, but doesn’t photograph well.
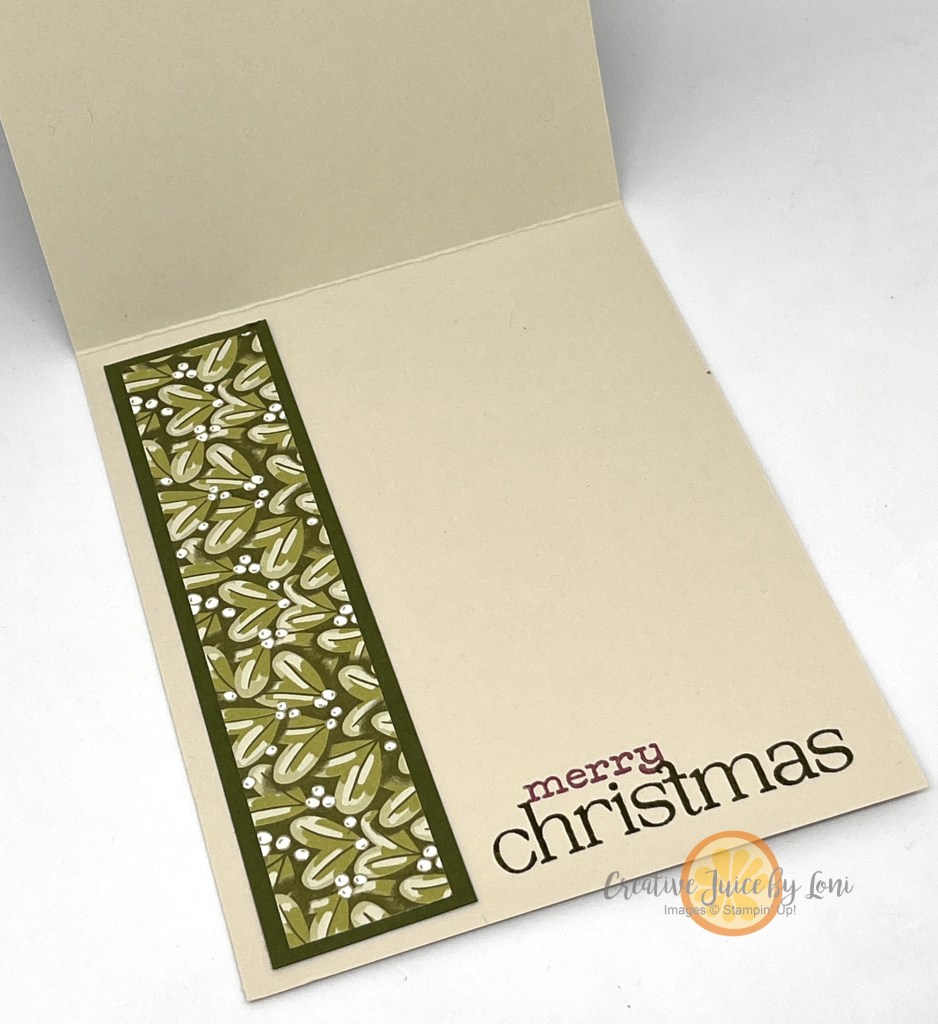
There are always strips of Designer Series Paper left over, so carry the theme to the inside of the card:
Remember! #nonakedenvelopes
Basic Beige is a neutral that is lovely to color on AND makes a card base you can write on, as well.
Is this a color combination you are ready to try? Share a creation using this palette on FB or IG and tag me @creativejuicebyloni ~ I also love your thoughts on my projects…scroll to top of this post to leave a comment on the left!
Off you pop to the next project by Diane, and more fun with unexpected colors! Make sure to see all~
November New at SU! Blog Hop: One Color Combination, Many Ways
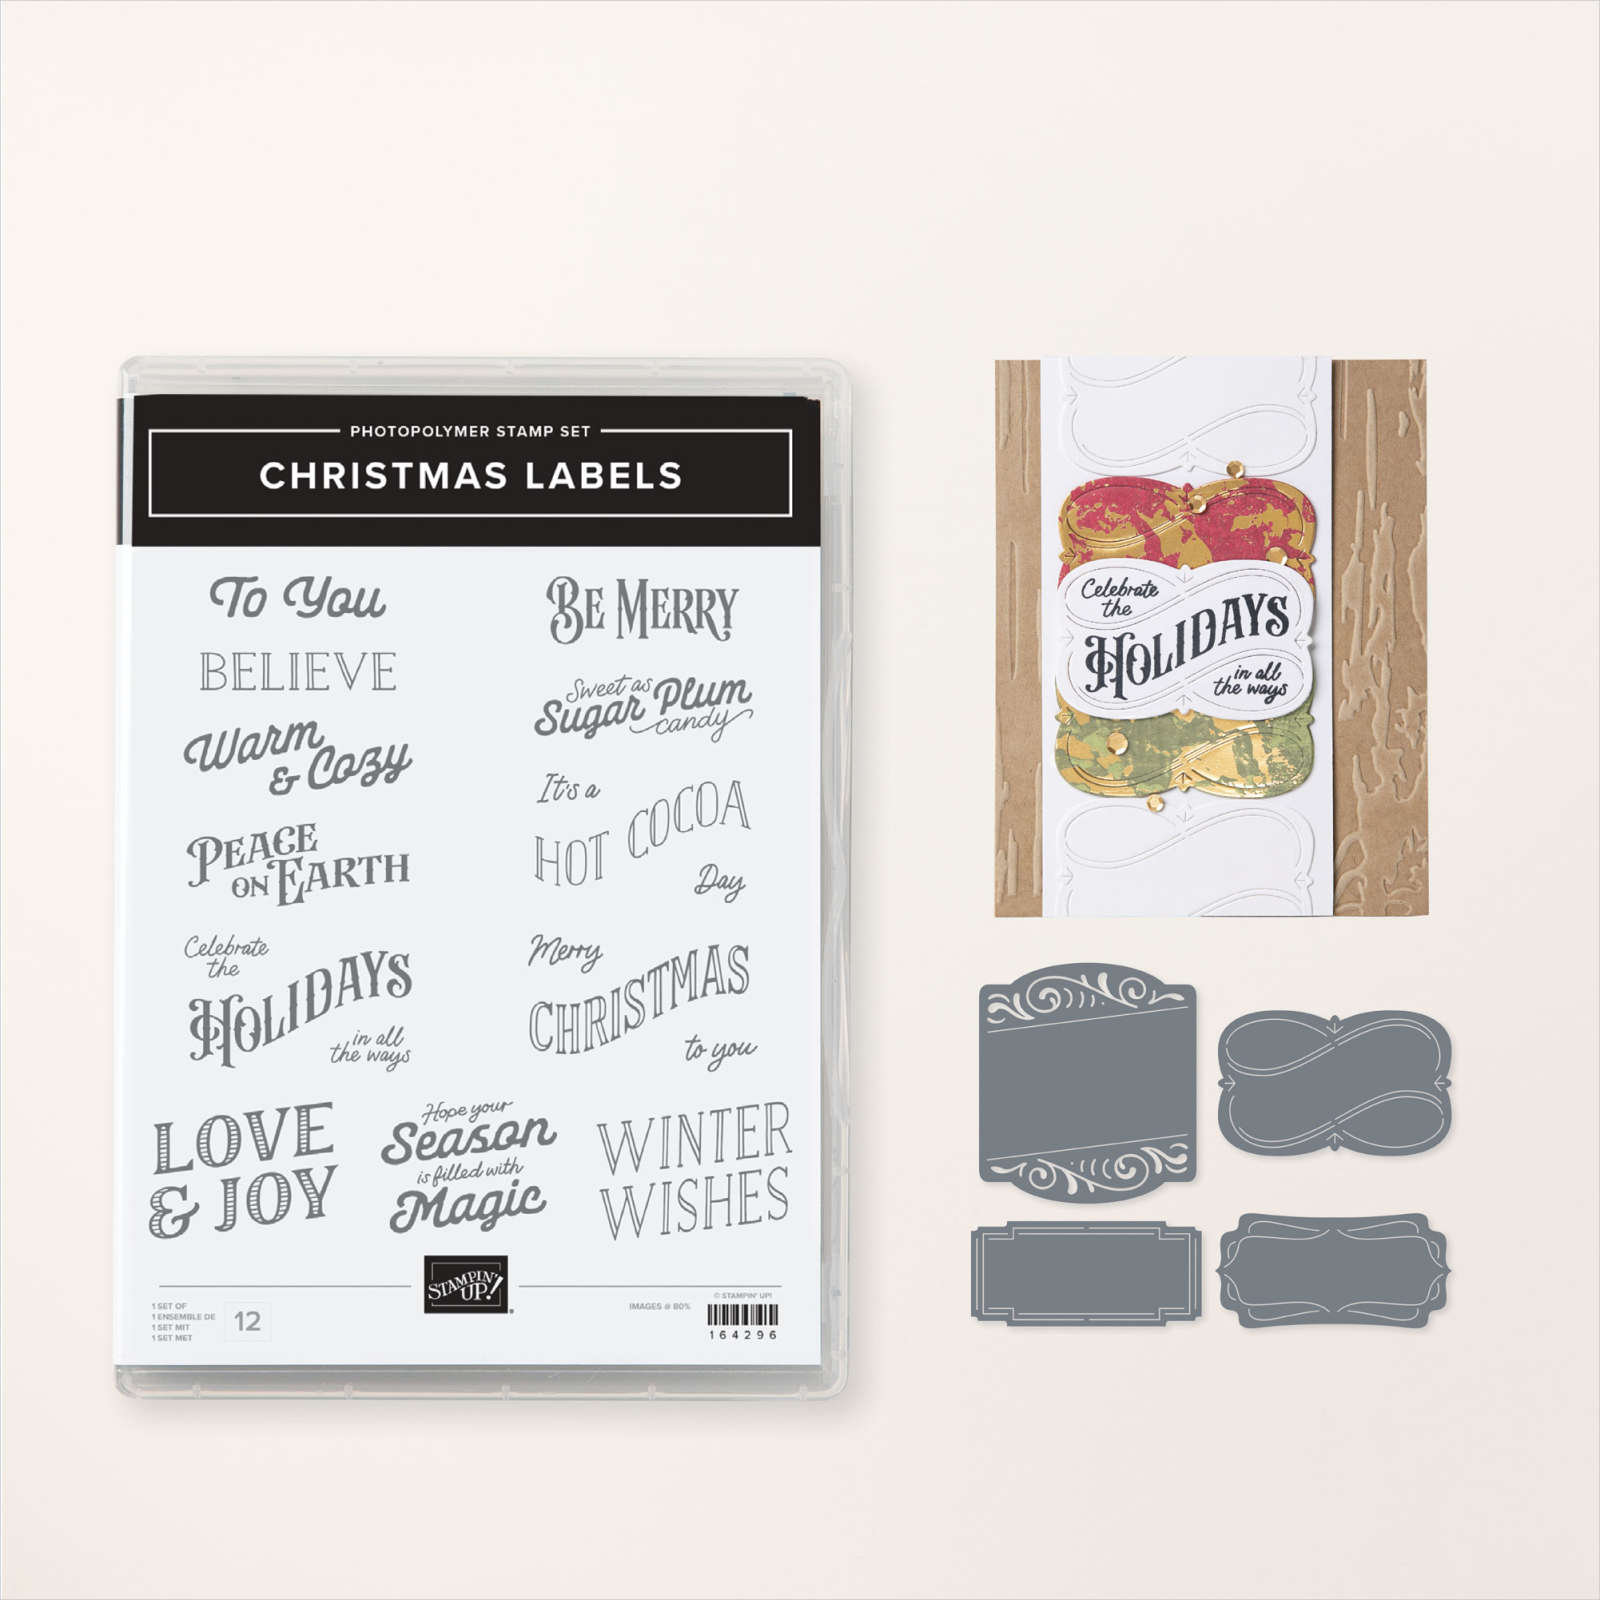
Perhaps it’s the reader in me, but I am a typophile (someone who appreciates a pretty FONT). Stampin’ Up! combined lovely label dies with the gorgeous typography in the Christmas Labels stamp set, and it was a must-have BUNDLE for me.
The way a label can elevate a simple card or gift is what I wanted to demonstrate in a video tutorial:
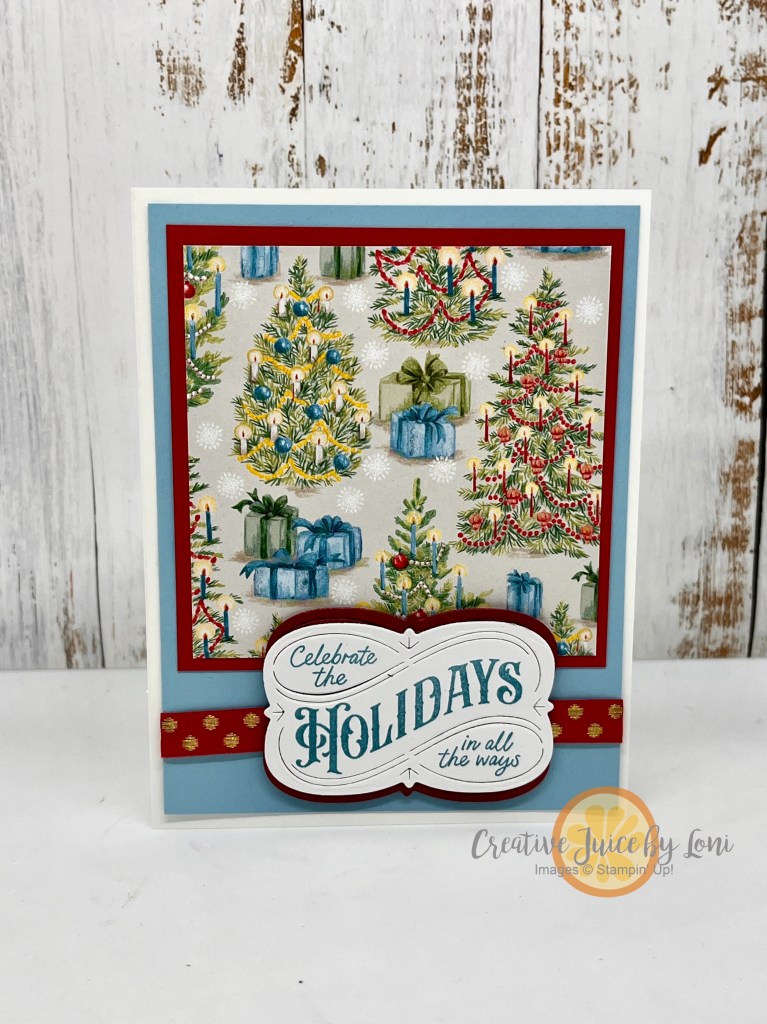
These were the projects made during the video. The first card features the Season of Green & Gold Specialty Designer Series Paper, and the shiny gold accents aren’t as visible in the picture, but can be seen in the video:
Next is another simple card layout spotlighting a piece of the Sentimental Christmas Designer Series Paper, and showed how to create a contrasting matte behind the label by cutting a second label in half:
I’m sharing easy cards to encourage you to keep your holiday crafting attainable! No need to overthink it, or add stress.
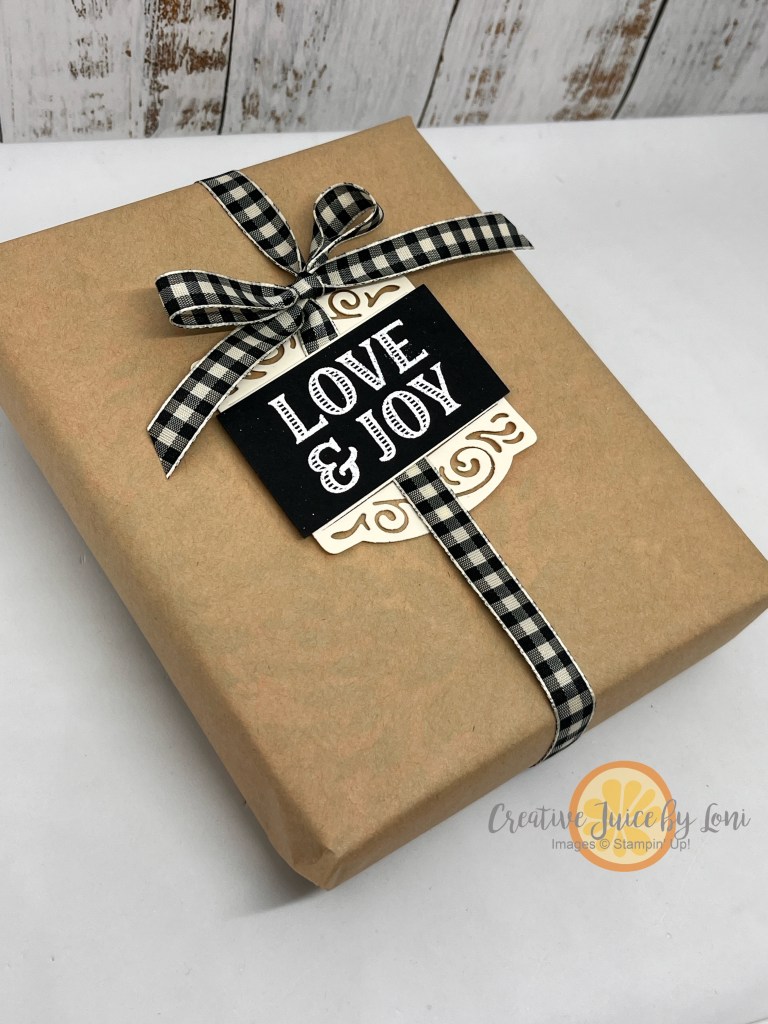
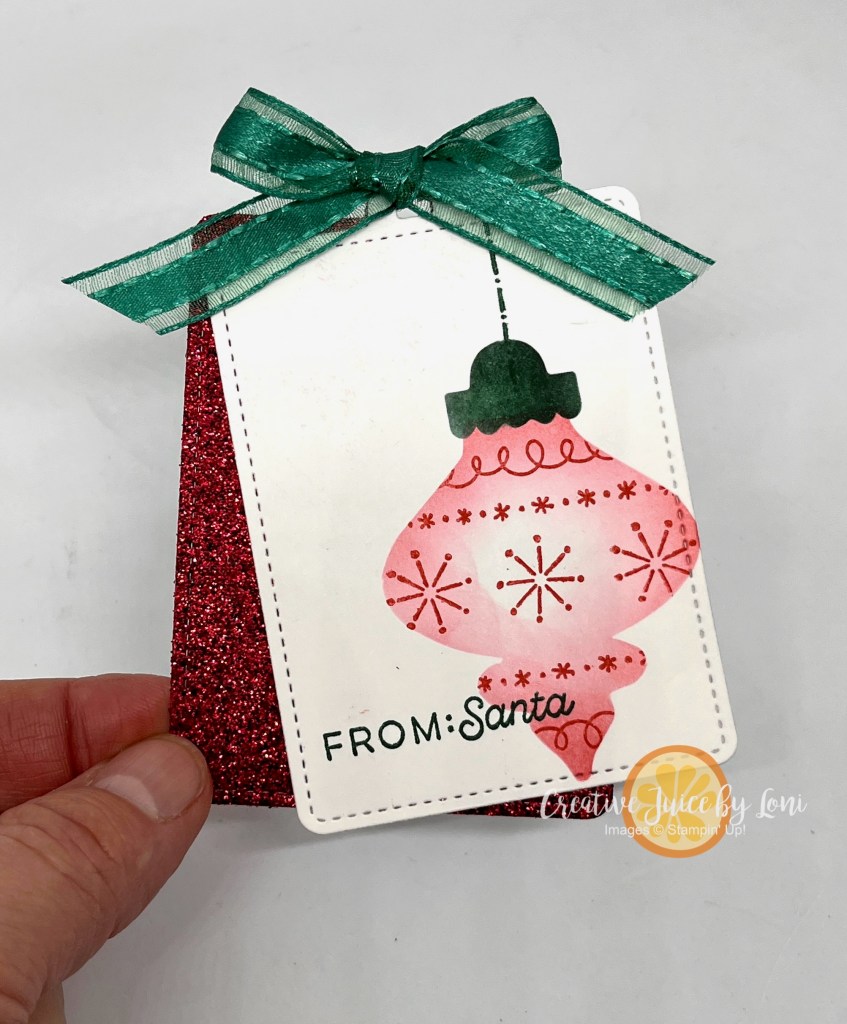
Layer a color over the center of the larger label for a striking contrast, add a coordinating ribbon and the tag makes a basic box beautiful:
When bundles (stamps + dies -OR- stamps + punches) are introduced to my Stampin’ Store, they are 10% off the price of purchasing each product individually.CLARIFICATION: In the video, we thought the Christmas Label bundle and Christmas DSP would be in Seasonal Sale that begins tomorrow (11/13/24), however we learned that only bundles and patterned paper in the Annual catalog are includedin the Seasonal sale, along with most ink and card stock:
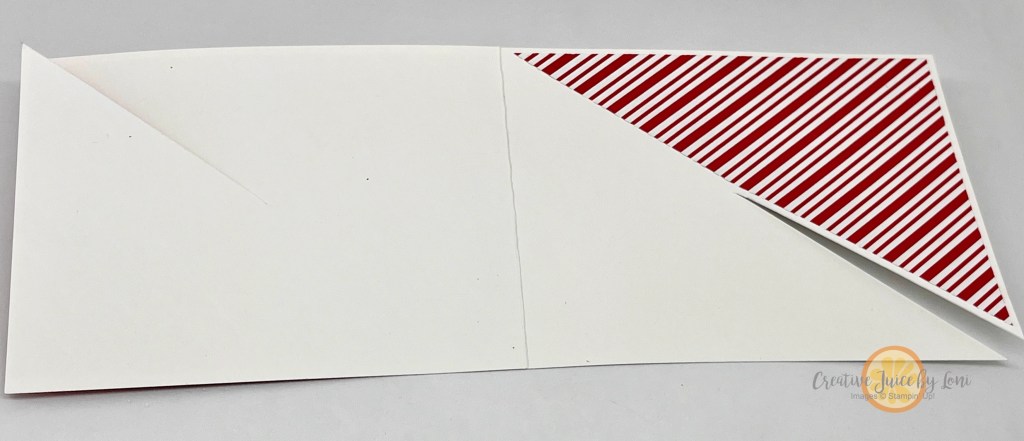
Fans of fun-fold cards, you’ll love the simplicity of this idea, which I call a Diagonal-Lock card, because of the way the front of the card locks into the back of the card. Don’t miss the video tutorial in this post!
For this first version, I paired a muted piece of the Sweet Days of Autumn Designer Series Paper pattern that I could write a message on for the INSIDE of the card, while using the fun forest friends on the front of the card. The leaves and sentiment adorning the front are from the Changing Leaves bundle.
The recipient will “unlock” the card to open and this is what the inside looks like:
Basic card instructions:
Start with an 11″ x 4.25″ card, scored in half at 5.5″.
Adhere a 5.5″ x 4.25″ piece of Designer Series Paper to the front AND inside of the card.
Make a small mark in the center of the front and BACK of the card (at 3.5″ for this A2 card size).
Cut diagonally from opposite corners of the open card in to the mark.
The next version for any holiday celebration (this would be a sweet December birthday card) has a 5.25″ x 4″ Designer Series Paper layer for the front, and a diagonally cut HALF piece for the inside, which leaves a mat around the card which frames it nicely. This time I used my beloved More Than Autumn bundle with the Take A Bow patterned paper:
By using half a sheet on the inside, there is still room to write, even when the pattern is bold. PLUS, you can use the other half for a second card:
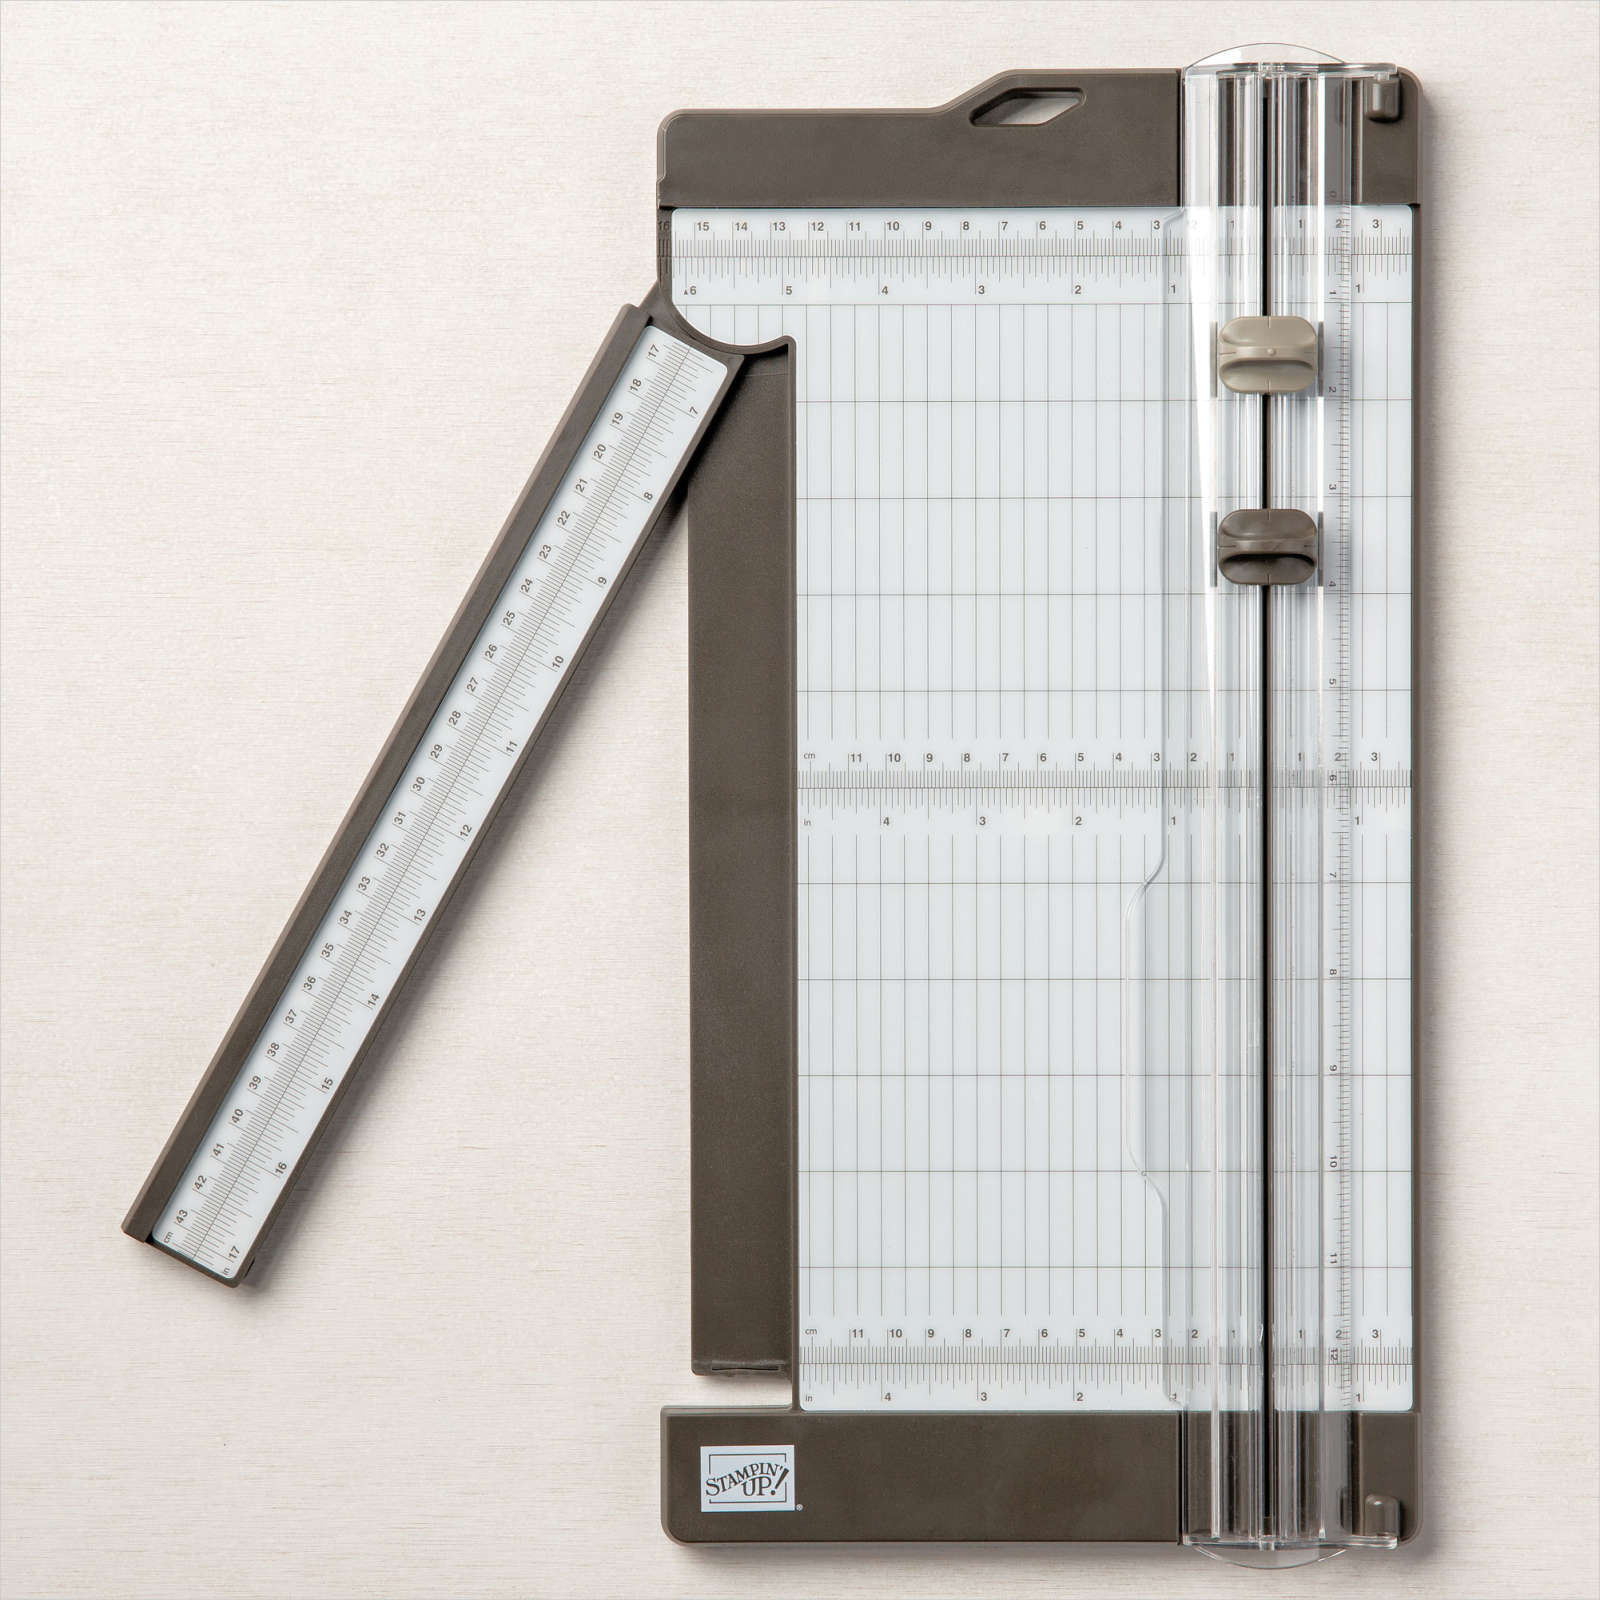
Grab a sheet of card stock and paper trimmer to craft along with this video tutorial to make a template for this card to keep in your “fun-fold” file:
Finally, since the Nests of Winter paper was sitting on my table, I used the Winterly Tree Top Dies to die cut the bird duo and fussy cut the small bird to craft this version:
Click any link to order supplies and create cards of your own!
I love hearing from you~ scroll to top to leave me a comment.
Don’t forget a Paper Trimmer, which also makes a wonderful gift for a teacher, a budding crafter or a student:


")


![Happy Hibiscus Bundle (English) [ 164880 ]](https://assets1.tamsnetwork.com/images/EC042017NF/164880s.jpg "Happy Hibiscus Bundle (English) [ 164880 ]")
![Basic White 12 X12 (30.5 X 30.5 Cm) Cardstock [ 159231 ]](https://assets1.tamsnetwork.com/images/EC042017NF/159231s.jpg "Basic White 12 X12 (30.5 X 30.5 Cm) Cardstock [ 159231 ]")
![Smoky Slate 8-1/2" X 11" Cardstock [ 131202 ]](https://assets1.tamsnetwork.com/images/EC042017NF/131202s.jpg "Smoky Slate 8-1/2\" X 11\" Cardstock [ 131202 ]")
![Silver & White 1/2" (1.3 Cm) Sheer Ribbon [ 162149 ]](https://assets1.tamsnetwork.com/images/EC042017NF/162149s.jpg "Silver & White 1/2\" (1.3 Cm) Sheer Ribbon [ 162149 ]")
![Uninked Stampin’ Craft Pad & Whisper White Refill [ 147277 ]](https://assets1.tamsnetwork.com/images/EC042017NF/147277s.jpg "Uninked Stampin’ Craft Pad & Whisper White Refill [ 147277 ]")
![Metallics Wow! Embossing Powder [ 165678 ]](https://assets1.tamsnetwork.com/images/EC042017NF/165678s.jpg "Metallics Wow! Embossing Powder [ 165678 ]")
![Basics Wow! Embossing Powder [ 165679 ]](https://assets1.tamsnetwork.com/images/EC042017NF/165679s.jpg "Basics Wow! Embossing Powder [ 165679 ]")
![Heat Tool (Us And Canada) [ 129053 ]](https://assets1.tamsnetwork.com/images/EC042017NF/129053s.jpg "Heat Tool (Us And Canada) [ 129053 ]")
![Water Painters [ 151298 ]](https://assets1.tamsnetwork.com/images/EC042017NF/151298s.jpg "Water Painters [ 151298 ]")
![Pretty In Pink Classic Stampin Pad [ 163807 ]](https://assets1.tamsnetwork.com/images/EC042017NF/163807s.jpg "Pretty In Pink Classic Stampin Pad [ 163807 ]")
![Granny Apple Green Stampin' Pad [ 147095 ]](https://assets1.tamsnetwork.com/images/EC042017NF/147095s.jpg "Granny Apple Green Stampin' Pad [ 147095 ]")
![Stampin' Cut & Emboss Machine [ 149653 ]](https://assets1.tamsnetwork.com/images/EC042017NF/149653s.jpg "Stampin' Cut & Emboss Machine [ 149653 ]")
![Rhinestone Basic Jewels [ 144220 ]](https://assets1.tamsnetwork.com/images/EC042017NF/144220s.jpg "Rhinestone Basic Jewels [ 144220 ]")
![Stampin' Seal [ 152813 ]](https://assets1.tamsnetwork.com/images/EC042017NF/152813s.jpg "Stampin' Seal [ 152813 ]")


![A Little Bit Festive 12" X 12" (30.5 X 30.5 Cm) Mix & Match Specialty Designer Series Paper [ 164107 ]](https://assets1.tamsnetwork.com/images/EC042017NF/164107s.jpg "A Little Bit Festive 12\" X 12\" (30.5 X 30.5 Cm) Mix & Match Specialty Designer Series Paper [ 164107 ]")
![Real Red 8-1/2" X 11" Cardstock [ 102482 ]](https://assets1.tamsnetwork.com/images/EC042017NF/102482s.jpg "Real Red 8-1/2\" X 11\" Cardstock [ 102482 ]")
![Basic White 8 1/2" X 11" Thick Cardstock [ 159229 ]](https://assets1.tamsnetwork.com/images/EC042017NF/159229s.jpg "Basic White 8 1/2\" X 11\" Thick Cardstock [ 159229 ]")
![Real Red Classic Stampin' Pad [ 147084 ]](https://assets1.tamsnetwork.com/images/EC042017NF/147084s.jpg "Real Red Classic Stampin' Pad [ 147084 ]")
![Gold Dipped Mix & Match Specialty Cards & Envelopes [ 164108 ]](https://assets1.tamsnetwork.com/images/EC042017NF/164108s.jpg "Gold Dipped Mix & Match Specialty Cards & Envelopes [ 164108 ]")
![Christmas Labels Bundle (English) [ 164101 ]](https://assets1.tamsnetwork.com/images/EC042017NF/164101s.jpg "Christmas Labels Bundle (English) [ 164101 ]")
![Versamark Pad [ 102283 ]](https://assets1.tamsnetwork.com/images/EC042017NF/102283s.jpg "Versamark Pad [ 102283 ]")
![Night Of Navy & Gold 1/2" (1.3 Cm) Glittered Ribbon [ 162011 ]](https://assets1.tamsnetwork.com/images/EC042017NF/162011s.jpg "Night Of Navy & Gold 1/2\" (1.3 Cm) Glittered Ribbon [ 162011 ]")


![Winterly Tree Tops Bundle (English) [ 164066 ]](https://assets1.tamsnetwork.com/images/EC042017NF/164066s.jpg "Winterly Tree Tops Bundle (English) [ 164066 ]")
![Nests Of Winter 12" X 12" (30.5 X 30.5 Cm) Designer Series Paper [ 164183 ]](https://assets1.tamsnetwork.com/images/EC042017NF/164183s.jpg "Nests Of Winter 12\" X 12\" (30.5 X 30.5 Cm) Designer Series Paper [ 164183 ]")
![Gray Granite 8-1/2" X 11" Cardstock [ 146983 ]](https://assets1.tamsnetwork.com/images/EC042017NF/146983s.jpg "Gray Granite 8-1/2\" X 11\" Cardstock [ 146983 ]")
![Garden Green 8-1/2" X 11" Cardstock [ 102584 ]](https://assets1.tamsnetwork.com/images/EC042017NF/102584s.jpg "Garden Green 8-1/2\" X 11\" Cardstock [ 102584 ]")
![Pool Party 8-1/2" X 11" Cardstock [ 122924 ]](https://assets1.tamsnetwork.com/images/EC042017NF/122924s.jpg "Pool Party 8-1/2\" X 11\" Cardstock [ 122924 ]")
![Garden Green Classic Stampin' Pad [ 147089 ]](https://assets1.tamsnetwork.com/images/EC042017NF/147089s.jpg "Garden Green Classic Stampin' Pad [ 147089 ]")
![Pool Party 5/8" (1.6 Cm) Pompom Ribbon [ 164129 ]](https://assets1.tamsnetwork.com/images/EC042017NF/164129s.jpg "Pool Party 5/8\" (1.6 Cm) Pompom Ribbon [ 164129 ]")
![Earth Tones Shimmer Gems [ 164070 ]](https://assets1.tamsnetwork.com/images/EC042017NF/164070s.jpg "Earth Tones Shimmer Gems [ 164070 ]")
![Multipurpose Liquid Glue [ 110755 ]](https://assets1.tamsnetwork.com/images/EC042017NF/110755s.jpg "Multipurpose Liquid Glue [ 110755 ]")


![Festive Tags Kit [ 162485 ]](https://assets1.tamsnetwork.com/images/EC042017NF/162485s.jpg "Festive Tags Kit [ 162485 ]")
![Festive 12" X 12" (30.5 X 30.5 Cm) Glimmer Paper [ 164106 ]](https://assets1.tamsnetwork.com/images/EC042017NF/164106s.jpg "Festive 12\" X 12\" (30.5 X 30.5 Cm) Glimmer Paper [ 164106 ]")
![Basic White 8 1/2" X 11" Cardstock [ 159276 ]](https://assets1.tamsnetwork.com/images/EC042017NF/159276s.jpg "Basic White 8 1/2\" X 11\" Cardstock [ 159276 ]")
![Small Blending Brushes [ 160518 ]](https://assets1.tamsnetwork.com/images/EC042017NF/160518s.jpg "Small Blending Brushes [ 160518 ]")
![Poppy Parade Classic Stampin' Pad [ 147050 ]](https://assets1.tamsnetwork.com/images/EC042017NF/147050s.jpg "Poppy Parade Classic Stampin' Pad [ 147050 ]")
![Shaded Spruce Classic Stampin' Pad [ 147088 ]](https://assets1.tamsnetwork.com/images/EC042017NF/147088s.jpg "Shaded Spruce Classic Stampin' Pad [ 147088 ]")
![Pool Party Classic Stampin' Pad [ 147107 ]](https://assets1.tamsnetwork.com/images/EC042017NF/147107s.jpg "Pool Party Classic Stampin' Pad [ 147107 ]")
![Shaded Spruce 1/2" (1.3 Cm) Satin & Sheer Ribbon [ 164224 ]](https://assets1.tamsnetwork.com/images/EC042017NF/164224s.jpg "Shaded Spruce 1/2\" (1.3 Cm) Satin & Sheer Ribbon [ 164224 ]")
![Poppy Parade 8-1/2" X 11" Cardstock [ 119793 ]](https://assets1.tamsnetwork.com/images/EC042017NF/119793s.jpg "Poppy Parade 8-1/2\" X 11\" Cardstock [ 119793 ]")
![Pretty In Pink 8 1/2" X 11" Cardstock [ 163793 ]](https://assets1.tamsnetwork.com/images/EC042017NF/163793s.jpg "Pretty In Pink 8 1/2\" X 11\" Cardstock [ 163793 ]")
![Lost Lagoon 8-1/2" X 11" Cardstock [ 133679 ]](https://assets1.tamsnetwork.com/images/EC042017NF/133679s.jpg "Lost Lagoon 8-1/2\" X 11\" Cardstock [ 133679 ]")
![Bubble Bath 8 1/2" X 11" Cardstock [ 161718 ]](https://assets1.tamsnetwork.com/images/EC042017NF/161718s.jpg "Bubble Bath 8 1/2\" X 11\" Cardstock [ 161718 ]")
![Snowflake Sky 3 D Embossing Folder [ 162026 ]](https://assets1.tamsnetwork.com/images/EC042017NF/162026s.jpg "Snowflake Sky 3 D Embossing Folder [ 162026 ]")
![Everyday Details Dies [ 162864 ]](https://assets1.tamsnetwork.com/images/EC042017NF/162864s.jpg "Everyday Details Dies [ 162864 ]")


![Mossy Meadow 8-1/2" X 11" Cardstock [ 133676 ]](https://assets1.tamsnetwork.com/images/EC042017NF/133676s.jpg "Mossy Meadow 8-1/2\" X 11\" Cardstock [ 133676 ]")
![Moody Mauve 8 1/2" X 11" Cardstock [ 161723 ]](https://assets1.tamsnetwork.com/images/EC042017NF/161723s.jpg "Moody Mauve 8 1/2\" X 11\" Cardstock [ 161723 ]")
![Old Olive 8-1/2" X 11" Cardstock [ 100702 ]](https://assets1.tamsnetwork.com/images/EC042017NF/100702s.jpg "Old Olive 8-1/2\" X 11\" Cardstock [ 100702 ]")
![Season Of Green & Gold 12" X 12" (30.5 X 30.5 Cm) Specialty Designer Series Paper [ 164324 ]](https://assets1.tamsnetwork.com/images/EC042017NF/164324s.jpg "Season Of Green & Gold 12\" X 12\" (30.5 X 30.5 Cm) Specialty Designer Series Paper [ 164324 ]")
![Eyelet 3 D Embossing Folder [ 163414 ]](https://assets1.tamsnetwork.com/images/EC042017NF/163414s.jpg "Eyelet 3 D Embossing Folder [ 163414 ]")
![Stylish Shapes Dies [ 159183 ]](https://assets1.tamsnetwork.com/images/EC042017NF/159183s.jpg "Stylish Shapes Dies [ 159183 ]")
![Christmas Labels Dies [ 164100 ]](https://assets1.tamsnetwork.com/images/EC042017NF/164100s.jpg "Christmas Labels Dies [ 164100 ]")
![Mossy Meadow Classic Stampin' Pad [ 147111 ]](https://assets1.tamsnetwork.com/images/EC042017NF/147111s.jpg "Mossy Meadow Classic Stampin' Pad [ 147111 ]")
![Moody Mauve Classic Stampin' Pad [ 161649 ]](https://assets1.tamsnetwork.com/images/EC042017NF/161649s.jpg "Moody Mauve Classic Stampin' Pad [ 161649 ]")
![Early Espresso Classic Stampin' Pad [ 147114 ]](https://assets1.tamsnetwork.com/images/EC042017NF/147114s.jpg "Early Espresso Classic Stampin' Pad [ 147114 ]")
![Pecan Pie Stampin’ Blends Combo Pack [ 161674 ]](https://assets1.tamsnetwork.com/images/EC042017NF/161674s.jpg "Pecan Pie Stampin’ Blends Combo Pack [ 161674 ]")
![Crumb Cake Stampin' Blends Combo Pack [ 154882 ]](https://assets1.tamsnetwork.com/images/EC042017NF/154882s.jpg "Crumb Cake Stampin' Blends Combo Pack [ 154882 ]")
![Moody Mauve Stampin’ Blends Combo Pack [ 161660 ]](https://assets1.tamsnetwork.com/images/EC042017NF/161660s.jpg "Moody Mauve Stampin’ Blends Combo Pack [ 161660 ]")
![Bubble Bath Stampin’ Blends Combo Pack [ 161675 ]](https://assets1.tamsnetwork.com/images/EC042017NF/161675s.jpg "Bubble Bath Stampin’ Blends Combo Pack [ 161675 ]")
![Basic White Medium Envelopes [ 159236 ]](https://assets1.tamsnetwork.com/images/EC042017NF/159236s.jpg "Basic White Medium Envelopes [ 159236 ]")
![Clear Wink Of Stella Glitter Brush [ 141897 ]](https://assets1.tamsnetwork.com/images/EC042017NF/141897s.jpg "Clear Wink Of Stella Glitter Brush [ 141897 ]")