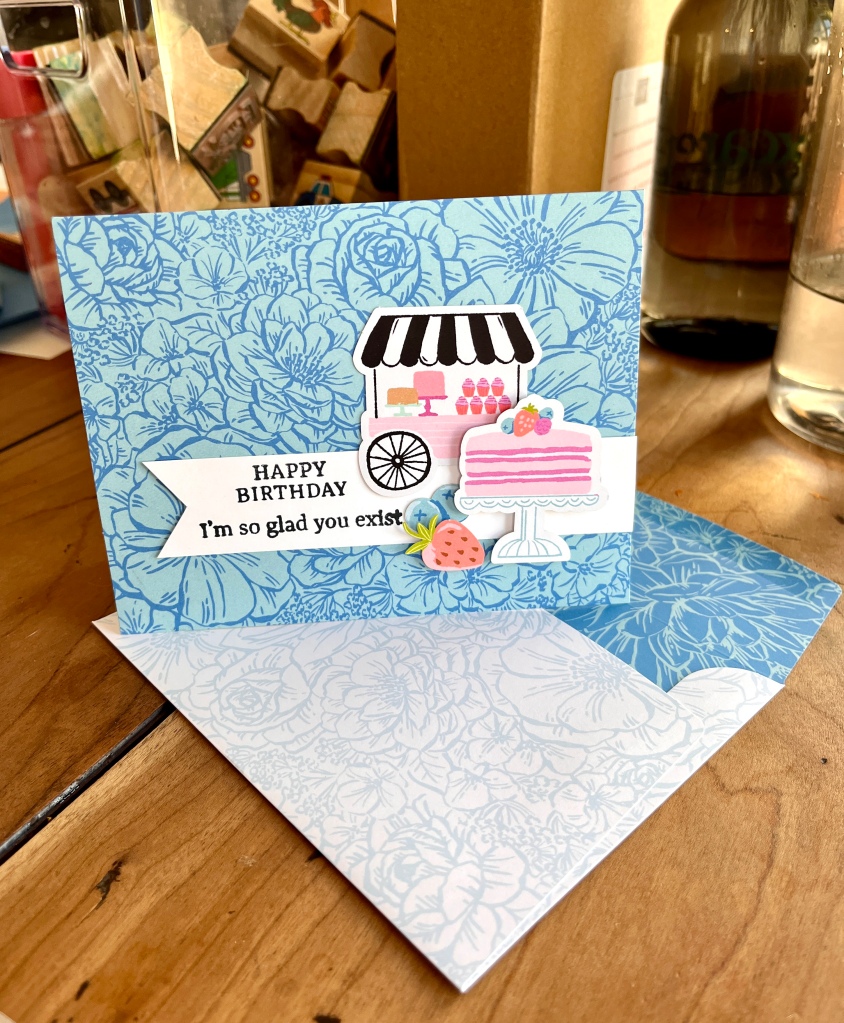
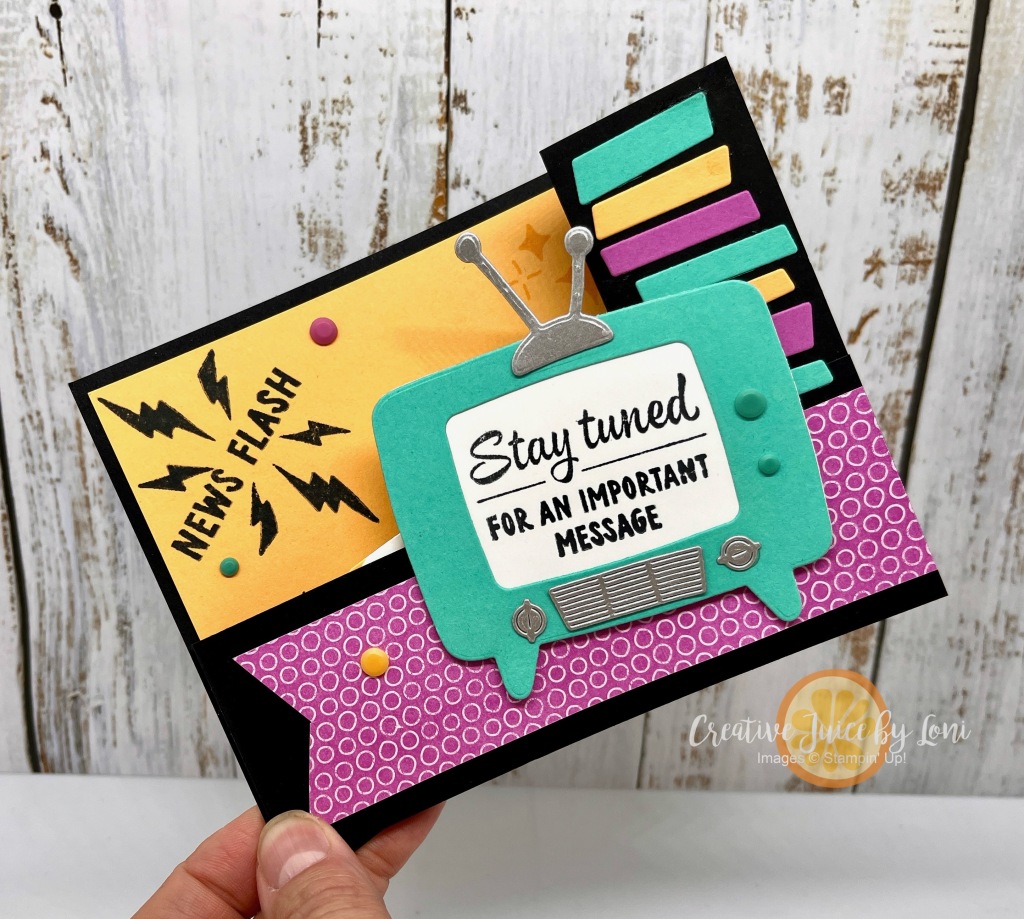
Today on the Creative Juice Crafting Channel, an interactive birthday card featuring a hidden message that appears “on screen”… and NEWS FLASH, it’s a gift card holder, too!

When you pull out the “Stay Tuned” screen, the birthday greeting appears:

What’s on the inside of the card? A pocket ready for a gift card, gift certificate, cash or a note.

The TUNE IN stamp & die bundle has a “retro” feel and has been unique to play with, so I will feature it in my July Crafting Happiness Virtual Class! Another option that will work well with the virtual class is the ATTENTION SHOPPERS bundle. Both bundles are an EXTRA 10% off during June, so whichever you prefer, NOW is the time to order them and register for the class.
*** When you order either bundle from my Stampin’ Store, you’ll get an email with a discount code for $5 off the class registration fee.
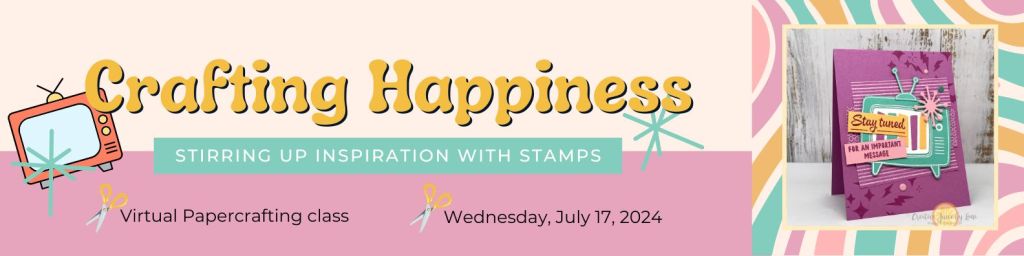
The Crafting Happiness class will be privately streamed to YouTube on Wednesday, July 17th at 4 pm MT, and registered crafters can watch LIVE or at their leisure anytime after the live stream.
The class is designed so you can stamp along and it’s up to you to use the suggested stamp sets OR use a set of stamps + dies you already own. There will be 5 projects and this is what is included:
Class packet includes:
- Gold & Silver 1/8″ Trim Combo Pack (Item #16133)
- Neutrals Adhesive-Backed Sequins (Item #161627)
- Card Stock, Designer Series Paper and accessories cut for projects
- One sheet of Stampin’ Dimensionals
- Envelopes and packaging
- Sweet surprises!
Also needed (not included in class fee):
- Tune In bundle OR Attention Shoppers bundle OR use one of your own,
- Stampin’ Cut & Emboss Machine (or Mini Machine) or similar die cutting machine for coordinating dies (MACHINES are also 10% off in June!!)
- Ink Pads: Tuxedo Black Memento Ink Pad (#132708), Balmy Blue (#147105), Basic Beige (#163806), Cajun Craze (#147085), Versamark (#102283)
- Watercolor Pencils Assortment #1 (Item #161700)- IF USING ATTENTION SHOPPERS BUNDLE or your own stamps that are line-art type sets.
Before I share the supply list (thanks in advance for supporting my business- I look forward to sending you a thank you card!), here is the video tutorial showing how to create this delightful “hidden message TV” card…craft along and pause as needed:
")
 Designer Series Paper")


")


")


 Bordered Ribbon")


")


")
 Designer Series Paper")


")


")


 Designer Series Paper")


 Album")


")