Have you taken the time to explore the new Online Exclusives in my Stampin’ Up! Store? Some things have been so popular, they are already backordered and we are waiting for more!
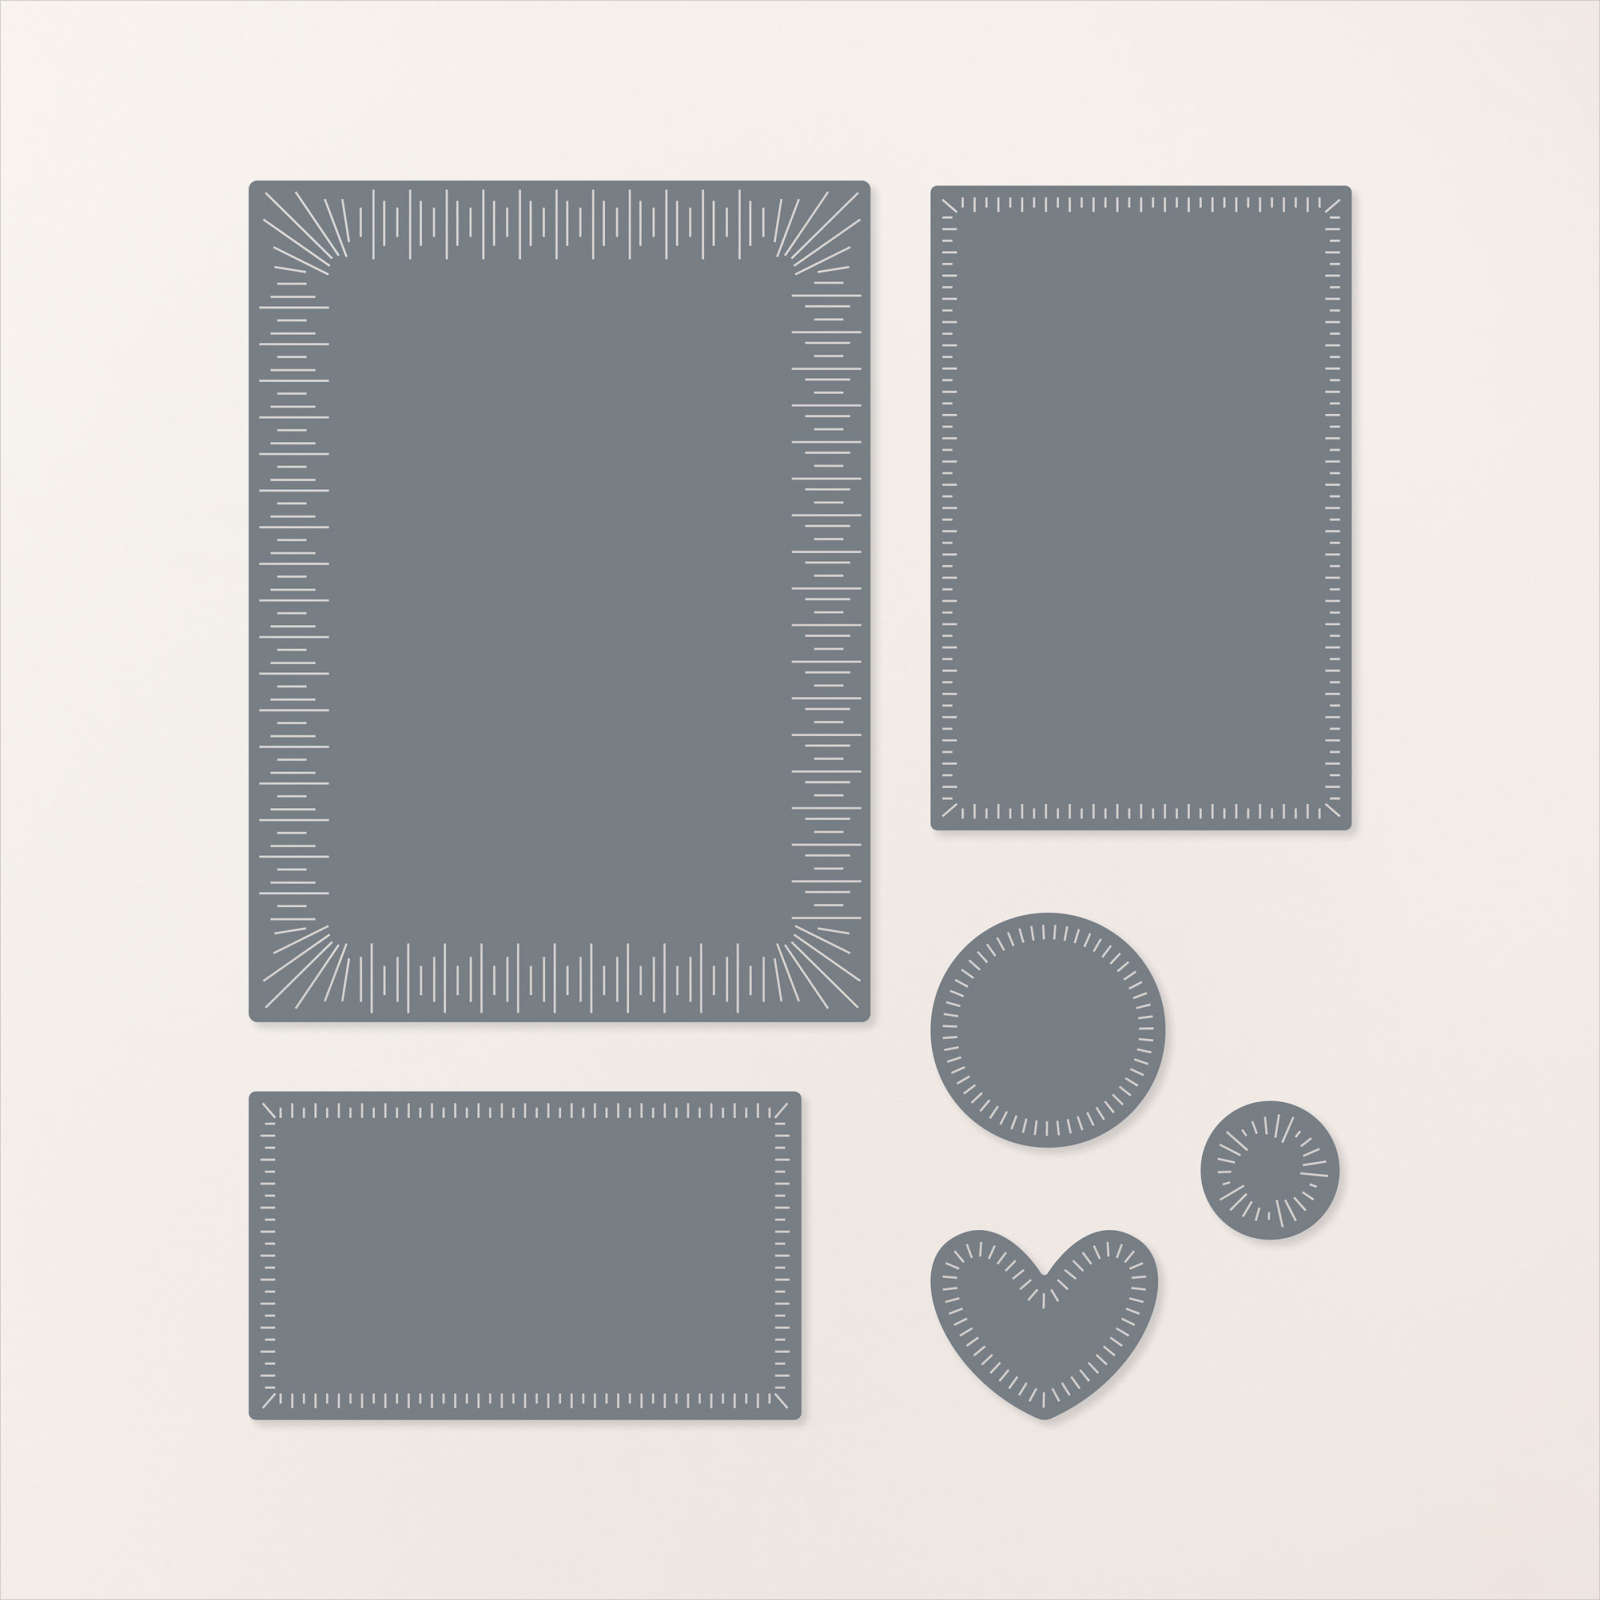
One new item I wanted to share with you is the Radiating Stitches Dies…these cutting tools will take ANY stamps you already have and give them a pretty frame or add a bit of whimsy with a layer of “stitching” around the edges of your layers:
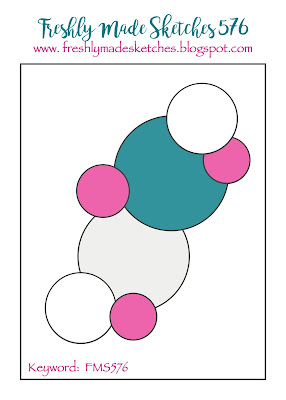
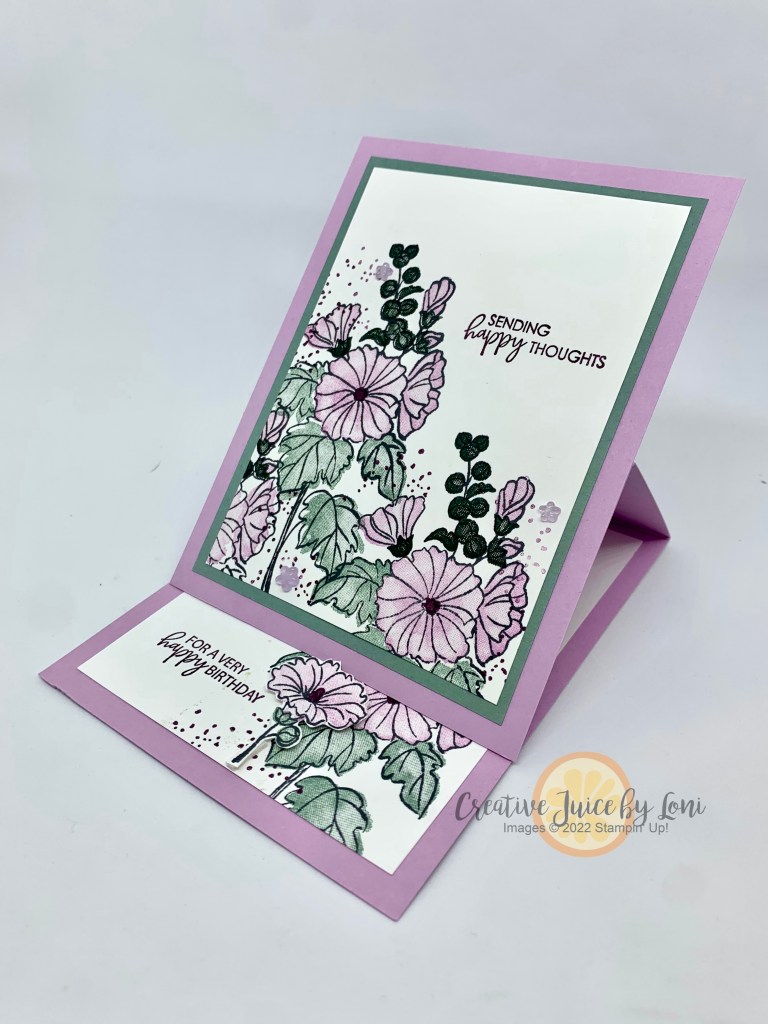
I chose to follow the Freshly Made Sketch #576 during my Live Crafting today and used two In Color Combinations to demonstrate the versatility of starting with a sketch, and the ease of using a combination of colors curated in a color “family”.
It happens that from today through Mid-April, I have 10 family birthdays (and about 15 friend and team birthdays) to celebrate, so this was an opportunity to get prepared!
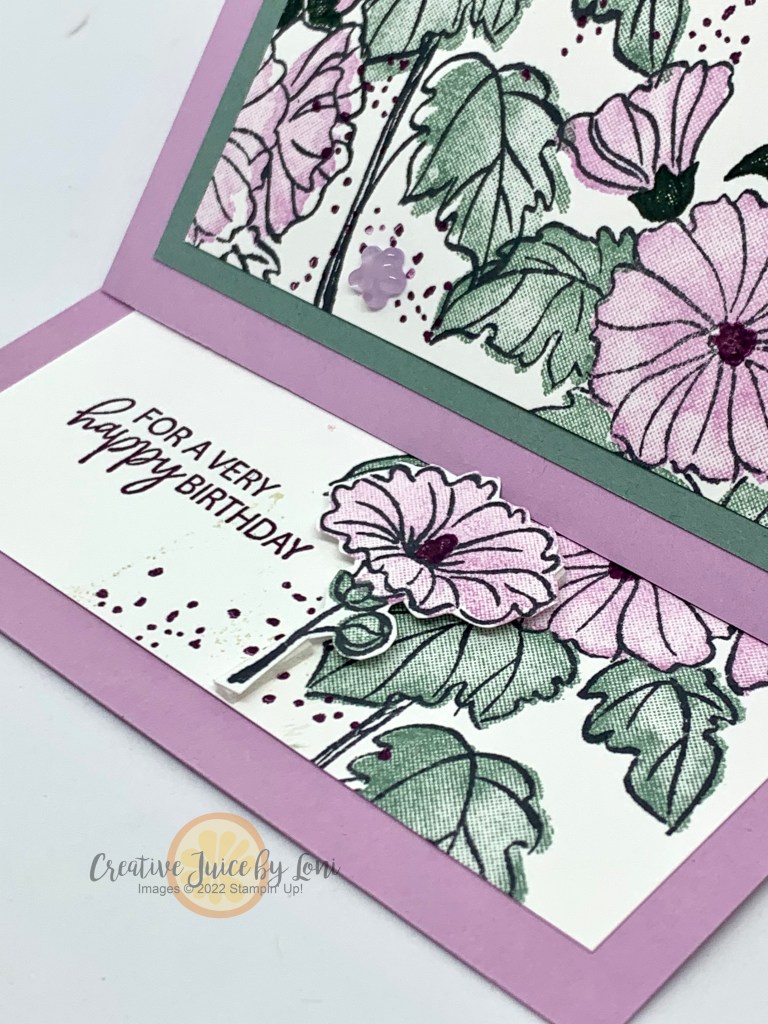
This version I turned sideways and used the 2022-2024 In Colors as my palette. A sketch can be turned any which-way!
And this card followed the portrait layout of the original sketch, plus I used a base of Very Vanilla with my colors from the (retiring) 2021-2023 In Colors. All supplies listed below to make it easy to add to your cart!
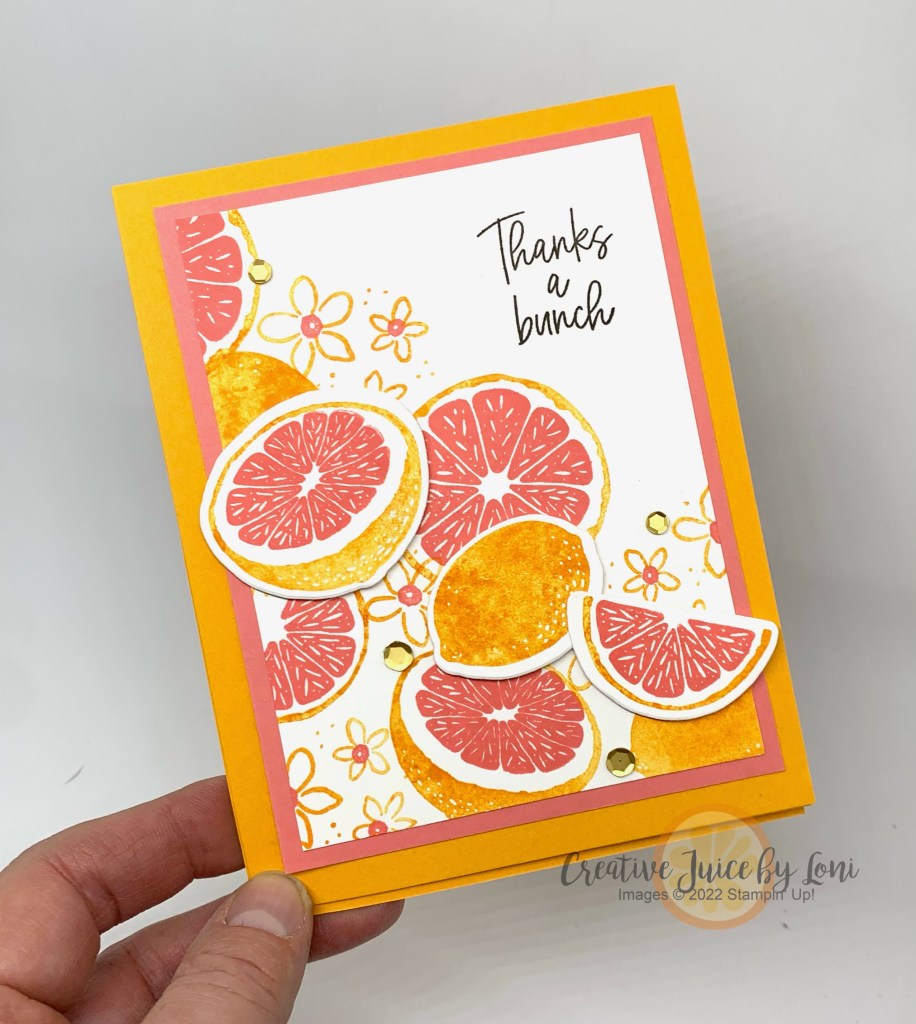
When you are so grateful for someone you could just SQUEEZE them tight, here’s your card!
The Sweet Citrus stamps can become anything (oranges, lemons, limes and even coconuts!) so this time I used Mango Melody and Flirty Flamingo to turn them into GRAPEFRUIT.
But the best thing about this card is that it’s an EASEL card when you open it and stand the front up against the slice inside:
It’s a simple fancy fold: The card base is an 11″ x 4-1/4″ piece of Mango Melody card stock scored at 2-3/4″ and 5-1/2″, plus you’ll need another 4-1/4″ x 5-1/2″ piece of Mango Melody to adhere to the bottom half of the front of the card ONLY (below where it bends) to create the part that stands up. Then just decorate the front panel as desired.
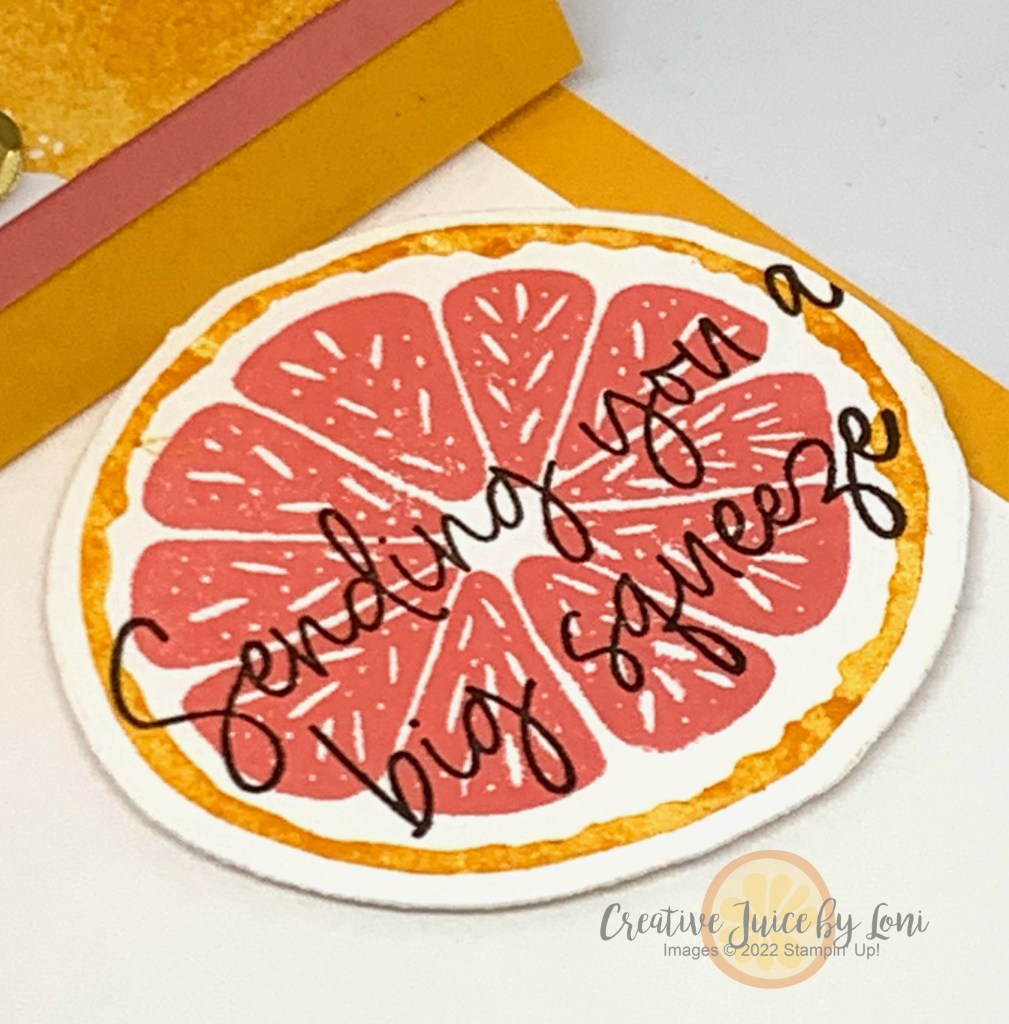
Inside, you’ll need a piece of fruit to create a “stop” for the easel front to rest against. I used a slice of grapefruit popped up on a few dimensionals:
It’s a very easy card to make and yet it packs a (grapefruit) PUNCH!
Thanks for visiting my website and choosing me to serve your creative needs. Your support means so much to me!
Here’s a bonus for reading to the end: I also made this card with the Beautifully Happy set from Sale-a-Bration (last month), just to show how versatile this style of card is.
Black & White is a classic, elegant color combination, but when you add a POP of color, a card becomes stunning!
In my LIVE broadcast today, I teach you how to stack the individual pieces from the Daffodil Dies to craft a bundle of flowers on top of a black & white polka-dot background. While I chose Melon Mambo as my “POP” of color, you could use yellow, purple or bright blue!
Having a few shades of the pink really helped these flowers feel real (lightest to darkest: Blushing Bride, Polished Pink, Melon Mambo).
It certainly brightened my day to make these fabulous cards!
Every crafter loves the feeling of using up *every*scrap* of pretty paper. It’s a magical feat of unparalleled proportions! That’s how I feel today, after successfully finishing off a whole pack of Favored Flowers Designer Series Paper from Sale-a-Bration.
After using up a bunch of this pretty paper for cards to swap at StampFest, I had just a few long strips and edges left that seemed a shame to waste, so I came up with the Peek-a-Boo Pocket card:
Starting with a Basic White Envelope, I cut off one end to create a pocket, then punched a shape for my greeting to peek out of. To finish it off, I embellished with pieces fussy cut from the Designer Series Paper. I demonstrated this for my Monday Lunchtime Live project today:
With only 8 more days of our ONLY Sale-a-Bration of 2023, and with the sun shining today, I chose to show you a project fit for SPRING!
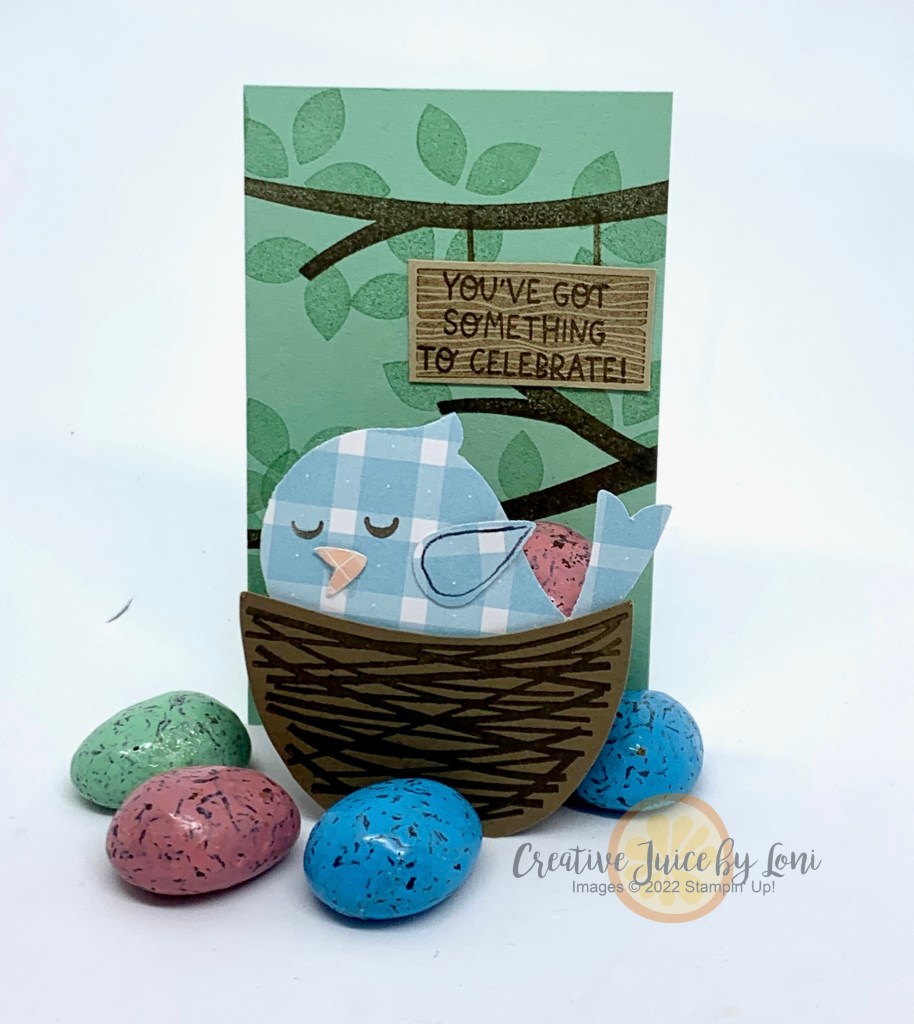
This Sweet Songbird next was inspired by some that I had seen previously, and was reminded of when I discovered the Junior Mint Eggs at Dollar Tree! The green is a perfect Mint Macaron color and I wanted to put a next into a Mint Macaron tree.
Because Stampin’ Up! added a few catalog products to the choices for Sale-a-Bration, the Songbird Builder Punch is on the list you could choose free with your $50 US order before February 28, 2023, and while you don’t need the stamp set to create cute birds with the Country Gingham Designer Series Paper, the Sweet Songbirds stamp set does give you options for sentiments, nests and branches.
This would be a sweet favor at Easter dinner or, with the “Welcome” sentiment, at a baby shower, or Spring craft day with friends!
Measurements for the papers:
Mint Macaron: 2-1/4″ x 3-1/2″
Soft Suede: 3″ x 1-1/2″, scored at 1/4″ along the long sides, and at 1″ and 2″ from end to end to create the “nest”
Soft Suede scrap to stamp a nest on and cut out.
Scrap of Crumb Cake for sign
Country Gingham DSP: 2-1/4″ x 2-1/4″ to punch out bird
Here’s a how-to video (from my Lunchtime LIVE crafting video on YouTube & Facebook 2/20/23):
I had to use up the scraps of gingham paper on my desk, so I also made a slimline card…not a very “little” note of thanks when the finished card is 8-1/2″ x 3-1/2″!
IF YOU CHOOSE THE SONGBIRD BUILDER PUNCH AS A FREE GIFT before the end of February 2023, use item #164422 and order the Sweet Songbird stamp set #158721 as part of your $50 order to qualify for the free punch!
As Stampin’ Up!’s biggest sale of the year winds down, things start to sell out… yesterday the Dainty Flowers Designer Series Paper Sale-a-Bration exclusive product was the first to go. Have YOU picked your freebie yet? Don’t forget that you get to choose a product with each $50 purchase through the end of the month!
Thanks GOODNESS it’s Friday! The #tgifc408 challenge was to use a Sale-a-Bration product, but it’s too difficult to choose just one, so I chose TWO: the Thanks a Bunch stamp set (free choice with $50) and the Dandy Designs Designer Series Paper (a mega-pack that you could choose with a $100 order). TIP: When you order $150, you can choose both PLUS earn $15 Stampin’ Rewards! It’s a good time to stock up on adhesive, envelopes, card stock and don’t forget to check the clearance rack.
The Tailor-Made Tag was a terrific piece for my garden of carrots! Makes me want to pick one.
Have you noticed that long carrots are sweeter and tastier than baby carrots? You can argue, but it’s true.
Since I loved the layout of this card, I had to try it with a different piece of the Dandy Designs paper and another favorite new set… Sweet Citrus:
Two of the colors I used (Pale Papaya on the carrot card base and Fresh Freesia on the grapefruit card layer) are RETIRING in April. These popular In Colors are known to sell out quickly once the retiring list is released in March (if not before), so remember to add an ink refill for your ink pads and stock up on card stock or coordinating accessories now, while you can take advantage of free products during Sale-a-Bration, and before they are sold out, too.
While some of our Sale-a-Bration products are dwindling, there are additional items to choose from the annual catalog:
We took the challenge to show you our favorite bundles from the newest January-April Mini catalog…without using Basic White card stock!
Thanks for pausing along the path of our February New at SU! hop- I’m so glad you’re visiting and hope all the ideas you save or PIN will give you inspiration for your next stamping project.
Basic white is a wonderfully smooth paper to stamp on, but did you know it has a lovely cousin, VERY VANILLA? I’m rarely without a full backup package of either of these stamping staple card stocks, but Vanilla is often overlooked, so I think you’ll see a lot of her today:
The Legendary Ride bundle is part elegant, a bit retro and all high adventure! The glossy black “Ready to Ride” Designer Series Paper that coordinates with the bundle captures it all.
For this card, I embossed the shorter (top) side of a Vanilla card (5-1/4″ x 7-3/4″, scored at 4″) with the Thanks embossing folder, then scored a 5-1/4″ x 4-1/2″ piece of the checkered Designer Series Paper at 1/2″ on the bottom of the directional side (so the images face up when you open it). Next, cut the top with a die from the Basic Borders and adhere it behind the Vanilla card before mounting it to the basic black card stock mat.
Before I cut my letters out, I adhered an adhesive sheet behind a piece of 4″ x 1-3/4″ Very Vanilla card stock and lined up my letters as close as I could. TIP:Hold them in place with a strip of washi tape. Adding the letters to my motorcycle card was easy: Just peel off the adhesive backing and they stick like STICKERS!
BONUS PROJECT:
Then I was left with the negative, which I adhered to a piece of the Sale-a-Bration Favored Flowers Designer Series Paper (a choice free with $50 order before 2/28/23) and cut with the same Basic Borders Die. I added a piece of Gorgeous Grape ribbon (currently in the Clearance Rack in my Stampin’ Store) before attaching it to a Very Vanilla card base:
Die cut once and get two cards!
Now on to more stamping adventures with our design team around the world…click on each one and save your favorites:
February 2023 New at SU! Blog Hop: J-A Mini Catalog Bundles, Without Basic White Cardstock
If you are in the U.S. and don’t have a demonstrator currently serving you, I’m happy to act as your craft supplier and have listed the items needed for the Legendary Ride card here:
An opportunity such as this won’t happen again for 12 more years- the next time Valentine’s day is on a Taco Tuesday isn’t until 2034!
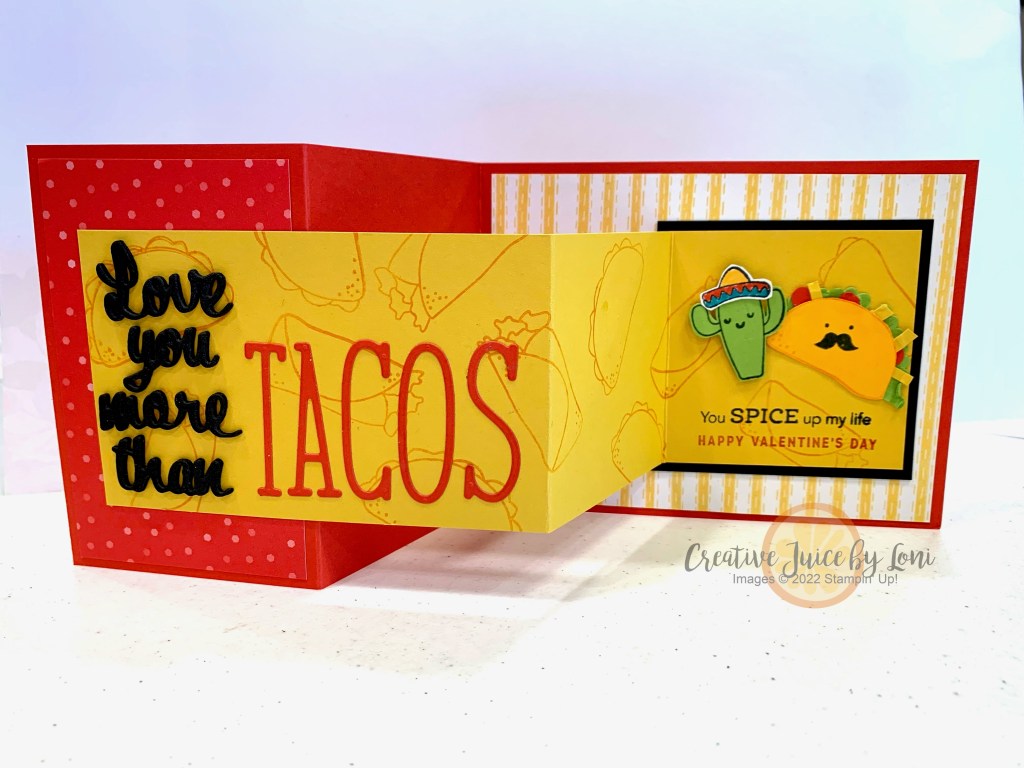
Our family has a classic comfort meal…and yes, it’s TACOS. We’ve eaten tacos for Thanksgiving and Christmas Eve. It’s time to bring them to the day of LOVE & affection. Luckily, my husband shares our obsession, because this card will be for him:
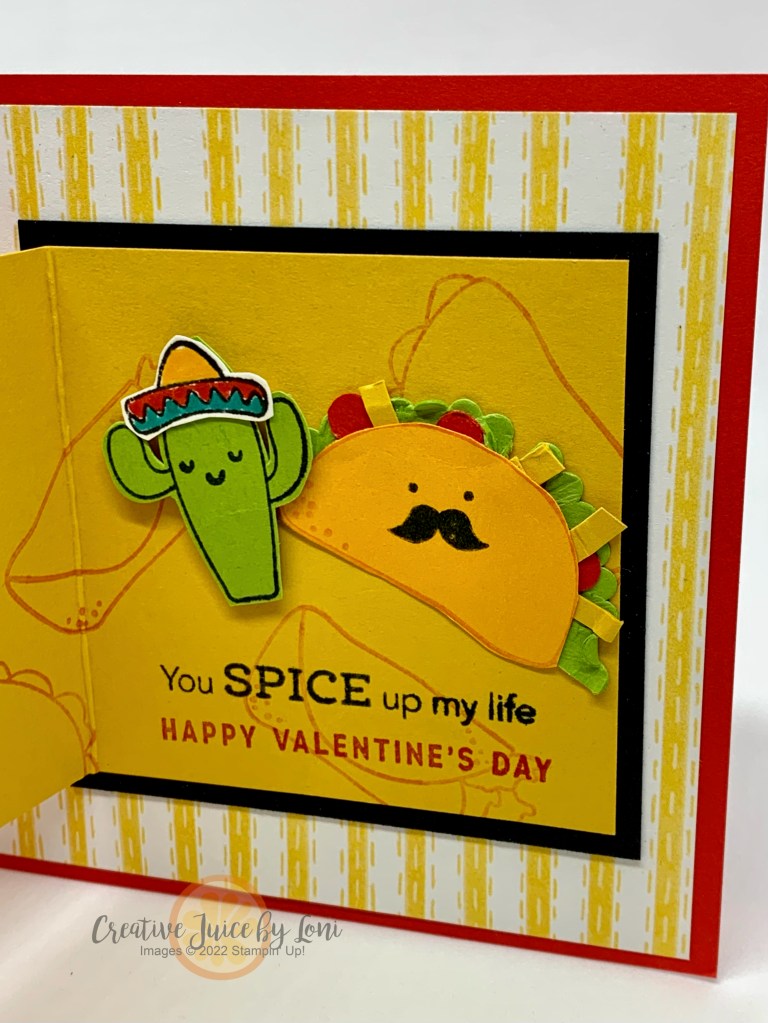
This Double-Z fold card was fun to make at Stamp Club last night, too! The crafters didn’t even complain about fussy cutting or “stuffing” the taco with lettuce, cheese and tomatoes:
A scalloped circle die, a standard hole punch and a few scraps of paper make it easy to create the taco toppings: Scrunch up a few scalloped wedges of Granny Apple Green card stock and glue it behind the taco, then stuff in the other pieces with a dot of liquid glue.
A sheet of craft foam with an adhesive sheet adhered to the back can be cut out on the Cut & Emboss Machine and adhered to the front to give it a chunky texture!
If you haven’t made this type of card before, here are the measurements for this one:
Card base: 4-1/4″ x 11″, scored at 2-3/4″ and 5-1/2″
Smaller Z-Fold: 2-3/4′ x 10″, scored at 4-1/2″ and 7-1/4″
Designer Series Paper: 4″ x 2-1/2″ and 4″ x 5-1/4″
I added a piece of 3″ x 3″ Basic Black card stock
Want to create your own version? Here are the supplies I used for my Spec-Taco-Lar Valentine:
Faux (pronounced FO) means “an imitation” and in my own way of thinking, it also means “a better idea than the original”. This is certainly true of this unique card fold, because this “fake” version is so much easier than the one with a lot of tricky cuts and scores!
While I used the Rain or Shine suite for my card, I look forward to seeing how YOU use this easy tutorial:
Did you catch that the February Paper Pumpkin craft-kit-in-the-mail “Sunshine & Smiles” coordinates with the “Rain or Shine” Suite that is full of the cutest critters? Make sure you are subscribed by February 10th for this kit that will create 9 radiant cards with a peek-through component!
PLUS, there is a coordinating add-on die duo you can pre-order for the February Paper Pumpkin kit…while supplies last:
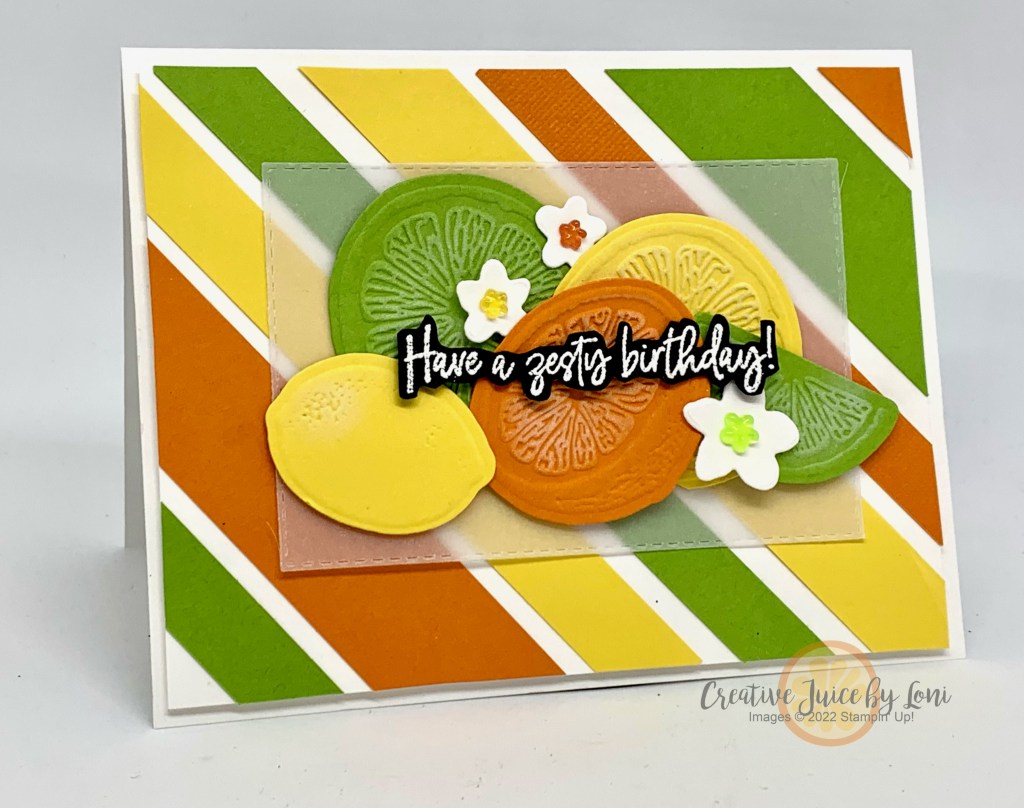
Put on your sunnies for this amaZING birthday card, with a lot of ZEST!
Why not have ALL the citrus? I’m squeezing the most out of this Sweet Citrus bundle from the mini catalog…it’s been so much fun to play with!
I’m going through my strips of card stock now, looking for more ways to incorporate bold stripes on my projects, because this one turned out just so cheery! Make your own by printing out the tutorial below.


")


")


")


 Designer Series Paper")
")

 Gingham Ribbon")


")
 Designer Series Paper")


")
 Designer Series Paper")


 Open Weave Ribbon")
 Open Weave Ribbon")


")
 Specialty Designer Series Paper")


")
")


 Designer Series Paper")
 Designer Series Paper")


")


")


