Busted Canvas Card Technique

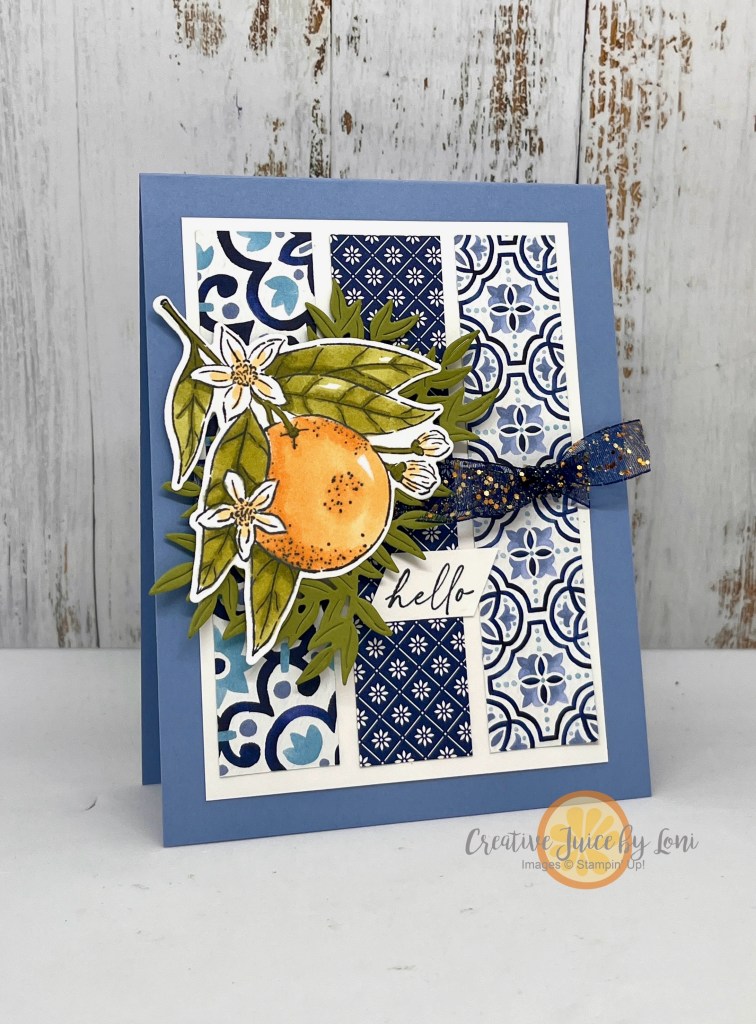
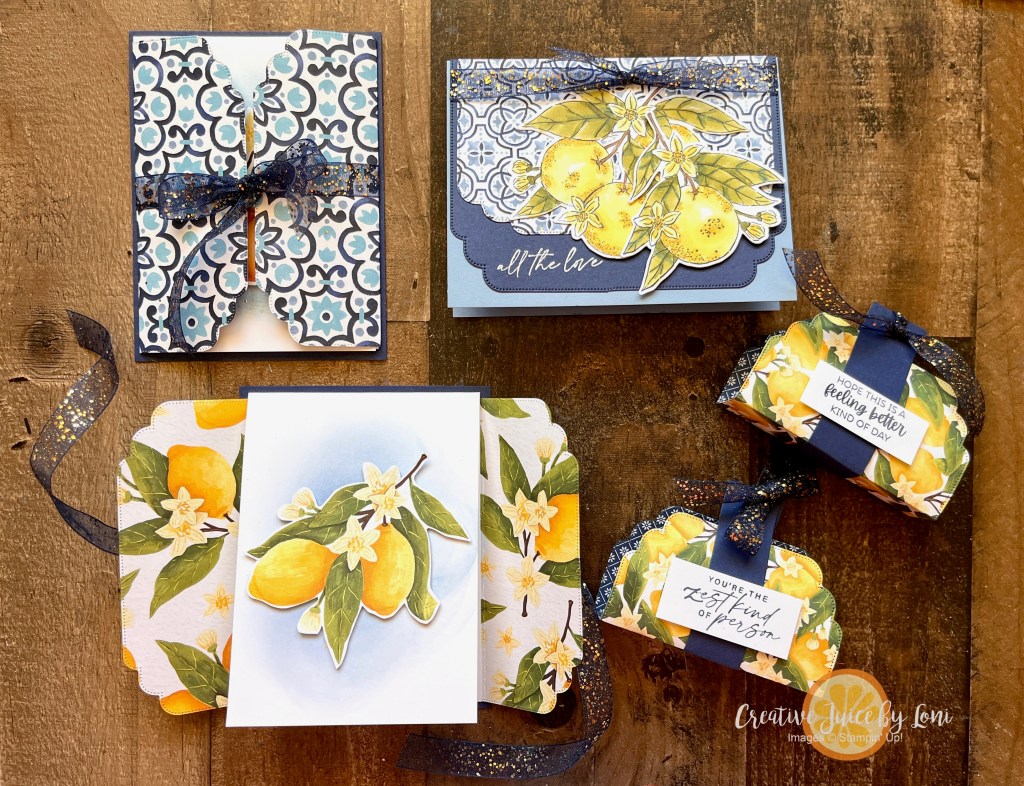
TREND ALERT! This technique was popping up in my social media, so I wanted to bring it to card-making: The Busted Canvas looks like the card is being unwrapped to reveal an image and sentiment, so while it’s not going to fit in a traditional envelope, it will look fabulous hanging out of a gift bag or handed to a friend personally.

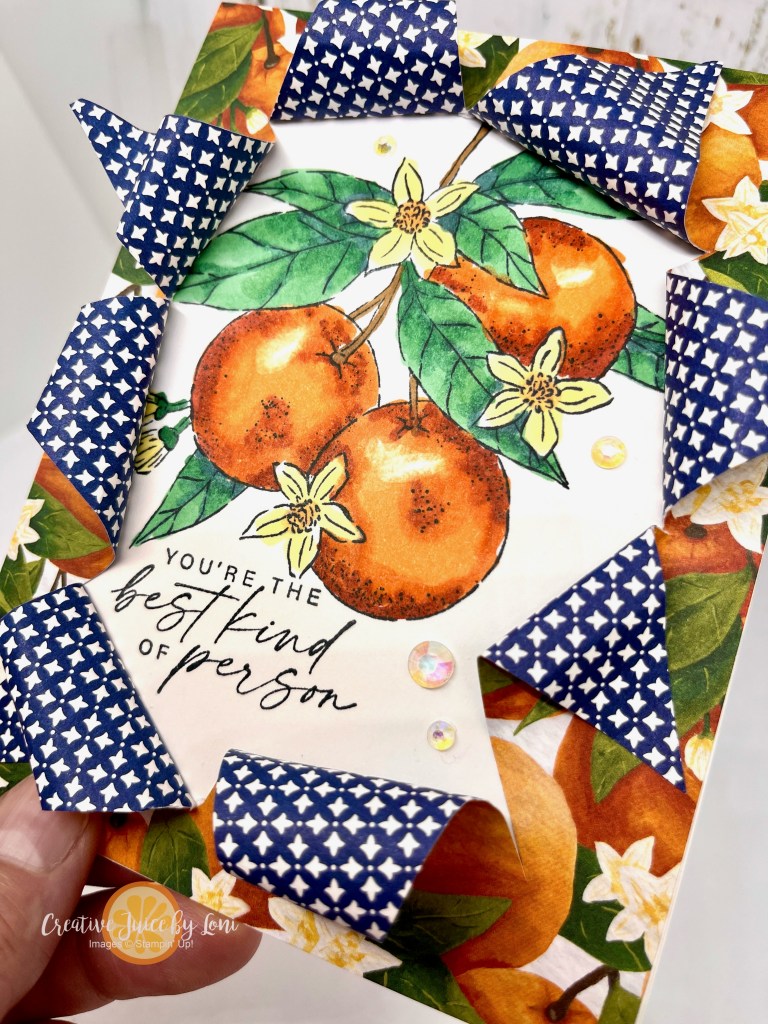
The happy surprise behind the paper has an excited “feel”… like you were too thrilled to open the package to carefully undo the wrapping!

In the video tutorial, I share some tips and tricks, and one thing to note is that when you roll the Designer Series Paper out as tightly as you can, it doesn’t really *need* to be glued down, but if you choose to adhere it to the front, you’ll probably want to use hot glue. The pointed edges do adhere well flat using Tear & Tape, but the rolled pieces tend to pull away unless you use a glue gun.

While I stamped and colored in both my images with Stampin’ Blends, you could use a pre-printed image or more Designer Series Paper on the inside.

Before I share the video, here’s the second example using the Nests of Winter products coming in the September-December mini catalog:

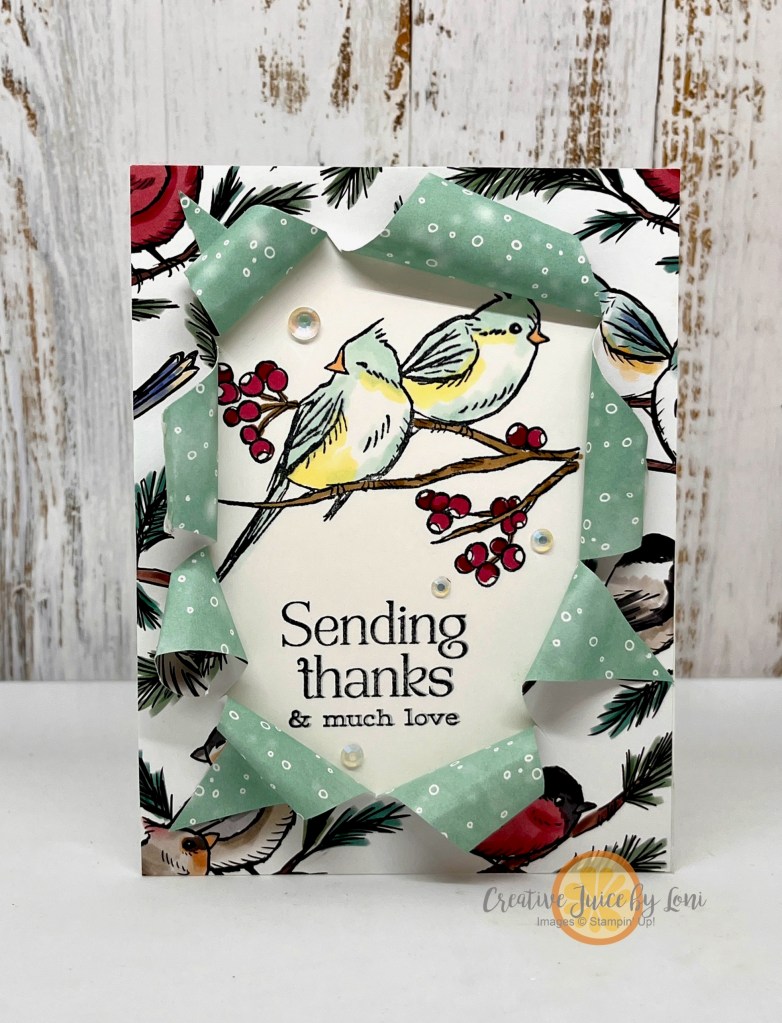
The technique is too much fun to stop with one!

Okay, okay, here’s the tutorial! You’ll need an 11″ x 4-1/4″ card base, a 5-1/2″ x 4-1/4″ piece of white card stock and a 5-1/2″ x 4-1/4″ piece of Designer Series Paper, plus your stamps, ink and coloring tools to craft along:

It’s a timely technique for the Stampin’ Up! Designer Series Paper Sale during August 2024
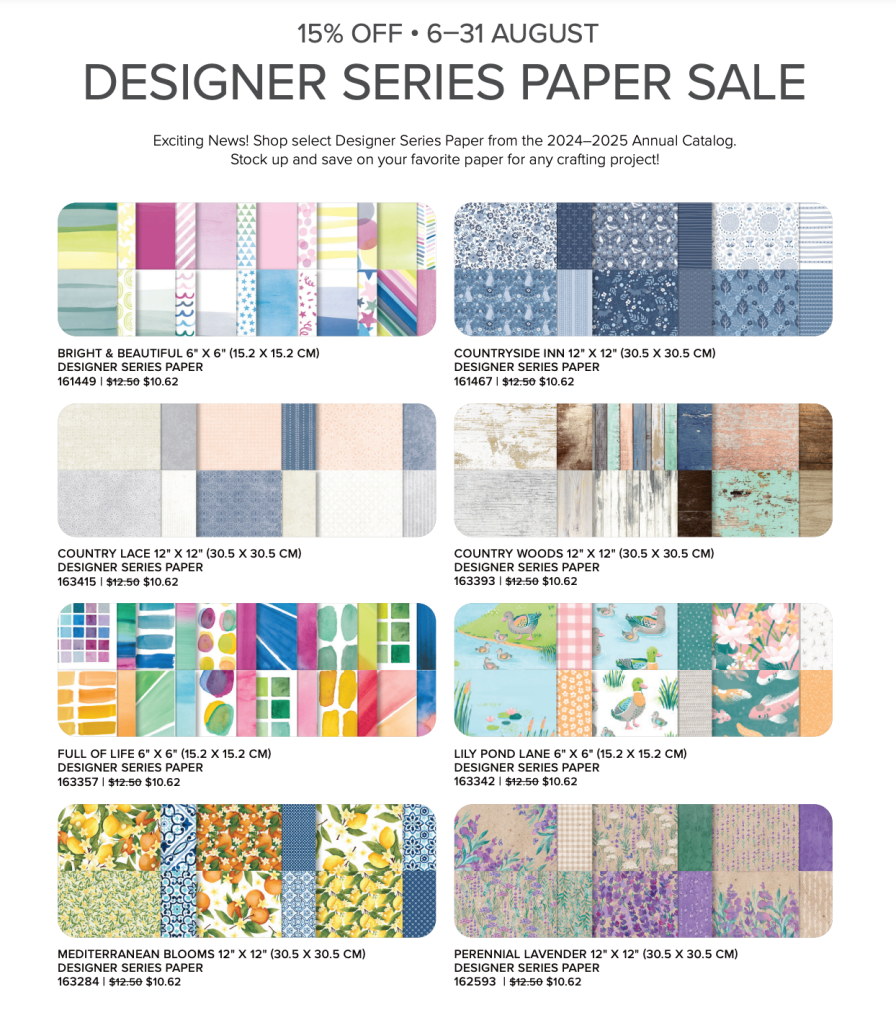
Product List

Paper Crafts with ZEST!

The frame die from the Citrus Blooms bundle offers such versatility when you are considering summery cards or gifts, and in my Live Crafting broadcast today, I couldn’t stop with just one project.

The first card I demonstrated was the elegant “gate-fold” card, which opens to reveal a simple branch of mouth-watering fruit. For once in my career, I DIDN’T add a sentiment to this card! It seems like it could be used for any reason, so I left the options open.

The measurements for this gatefold card are:

  • Night of Navy Mat: 5.5″ x 4.25″
  • Basic White card stock: 4″ x 10.5″, scored at 5.25″
  • Designer Series Paper for gate flaps: 5.5″ x 5″, folded in half at 2.5″
  • A piece of Designer Series Paper to die- or fussy-cut your preferred citrus from
  • 22″ Navy & Gold Glimmer ribbon

While I didn’t demonstrate the second card, I’ll show you how to cut the larger navy layer from the frame using a 4.25″ x 5.5″ piece of card stock in the short video below.

Finally, when I found the Lemon Crisp Kit Kat candies, I knew I needed to make a favor (before I ate them all and regretted my life choices).

Measurements for this project:

  • Cut the frame from a 4″ x 5.5″ piece of Designer Series Paper, then score it at 2-1/8″ and 3″ in the center.
  • Night of Navy card stock 2-7/8″ x 4.5″, scored on all four sides at 1″ to create the “box” that holds two candies inside.
  • Navy 1″ x 8.5″ for the band around the outside (you’ll cut off the excess on the top after wrapping it)
  • Ribbon- as long as you want (tie a knot or a bow)

Now you have all the pieces prepared (right?), watch HOW to make each of these projects:

JULY is the month to earn BONUS DAYS COUPONS!

Add these items to your cart to earn your first coupon(s) AND make the projects shown here!

Product List

You are the reason I am able to bring inspiration to you once a week without charging a fee. Thank you for your orders, comments, and shares. It means so much to me, I hope you know!

Squash Fun-Fold Card

Usually, I’m a bit more timely in posting my finished project from my Monday Lunchtime Live crafting videos, but we were focused on tending the grandkids. I’m just now getting settled back at home and sharing this (late Saturday night)…better late than never!

This fun-fold card is called a “squash card” and begins with an 8.5″ square piece of card stock. Once finished, the card squashes (or smashes) flat to fit into a standard Stampin’ Up! envelope.

Measurements for the pieces:

  • 8.5″ square card stock, scored at 4.25″ horizontally and vertically AND once diagonally.
  • Designer Series Paper: One 3.75″ square and two 3.5″ square
  • Basic White card stock: Two 3.75″ squares, plus a piece to stamp a greeting and/or images to embellish with.

I die cut images from the Designer Series Paper for the front of my cards, but you could just as easily stamp what you’d like for the top of your cards.

Now peek inside:

TIP: The same design can be used on a 12″ x 12″ piece of card stock to create a mailable scrapbook page! Place photos where any of the paper or card stock layers are, and save a spot to journal about the memories, then fold it up to send to a friend to remember a happy day together.

Watch for instructions:

Thanks for ordering the supplies from my Stampin’ Store so I may continue to bring you ideas to try!

Product List

Good news! Starting June 5th, both the standard and mini Cut & Emboss Machines will be 10% off (they have NEVER been on sale before!) PLUS stamp + die bundles- which are already 10% off – will be available for an ADDITIONAL 10% discount through June 30, 2024.

Citrus Blooms Mediterranean Tile Card

Capri is Calling

It’s CATALOG PREMIER DAY and I am doing the happy dance! Do you have a favorite suite of products? Or pretty paper you can’t resist?

My top pick will be no surprise: The Mediterranean Blooms Suite reminds me of the island of Capri, Italy and that’s where my inspiration came from for this card…plus, I have a tutorial for you!

Lemons are plentiful in Capri, and while I chose to use Peach Pie Stampin’ Blends to color my citrus fruit, it still feels like the island, with the blue & white tiles that reflect the ocean.

I’m still enjoying the sun in another beautiful part of the planet, so I’ll update links when I return, but you can start shopping today at my Stampin’ Store!

Meanwhile, print out this tutorial and be prepared to answer the call of Capri- by mailing a little sunshine this summer:

Ready to see more? Watch this!

Thanks for ordering from my Stampin’ Store!