If you can’t find fresh watermelon during February, watermelon sour bites may satisfy your cravings:
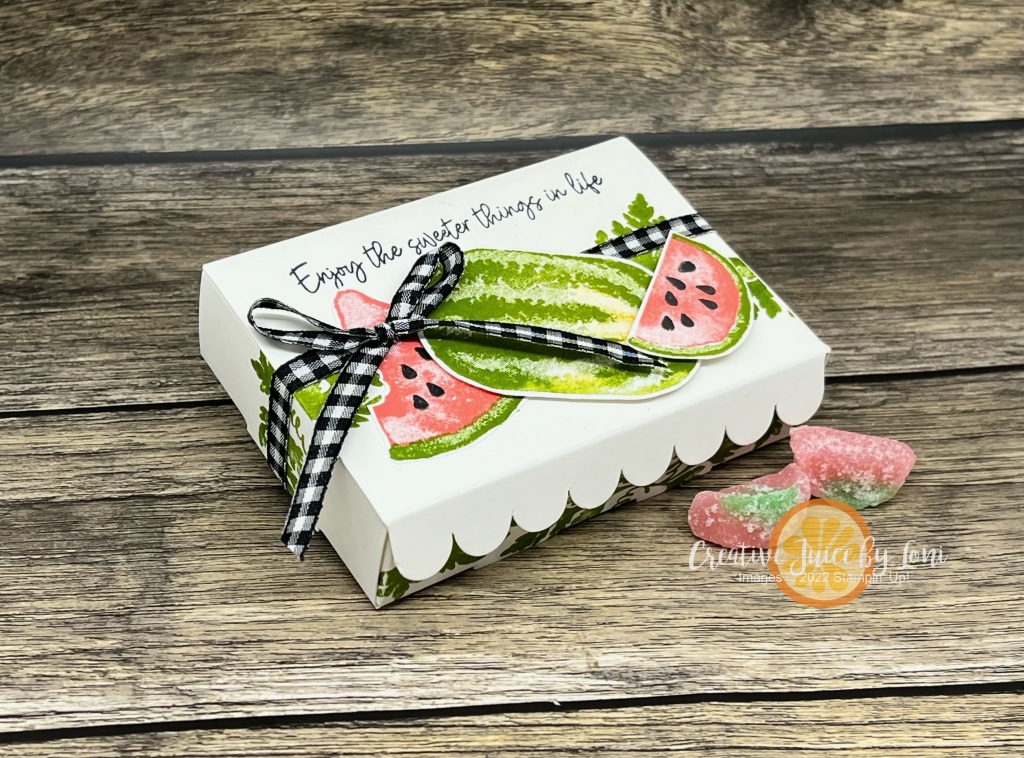
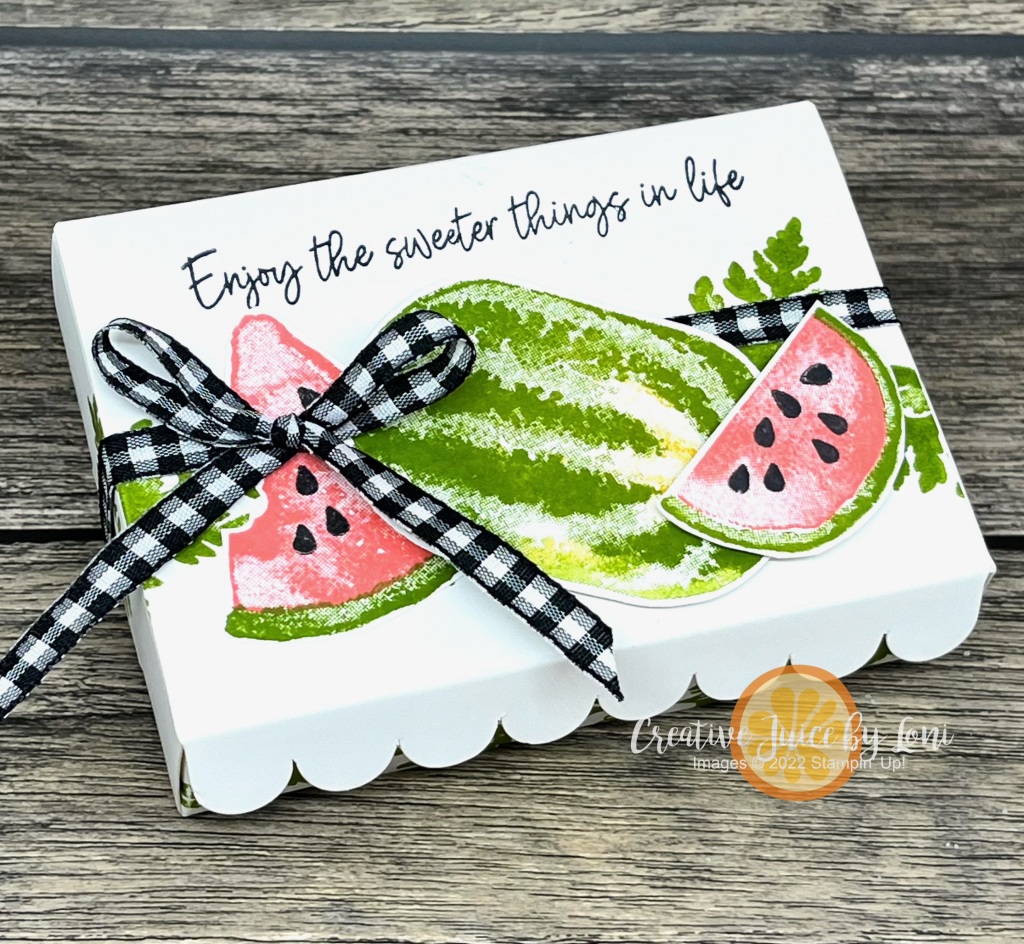
The Scalloped Gift Card box can also hold things aside from gift cards, so I designed this one for a treat box with the Watercolor Melon set (a free option with $50 order from my store through February).
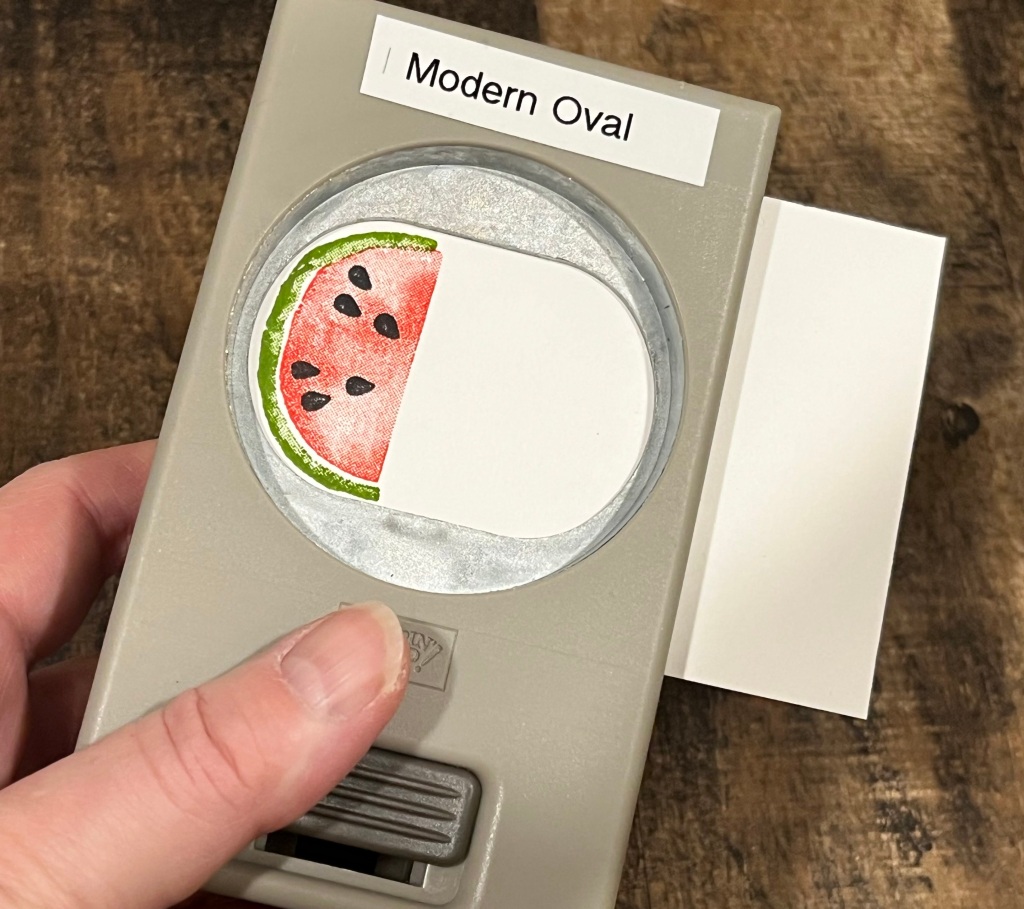
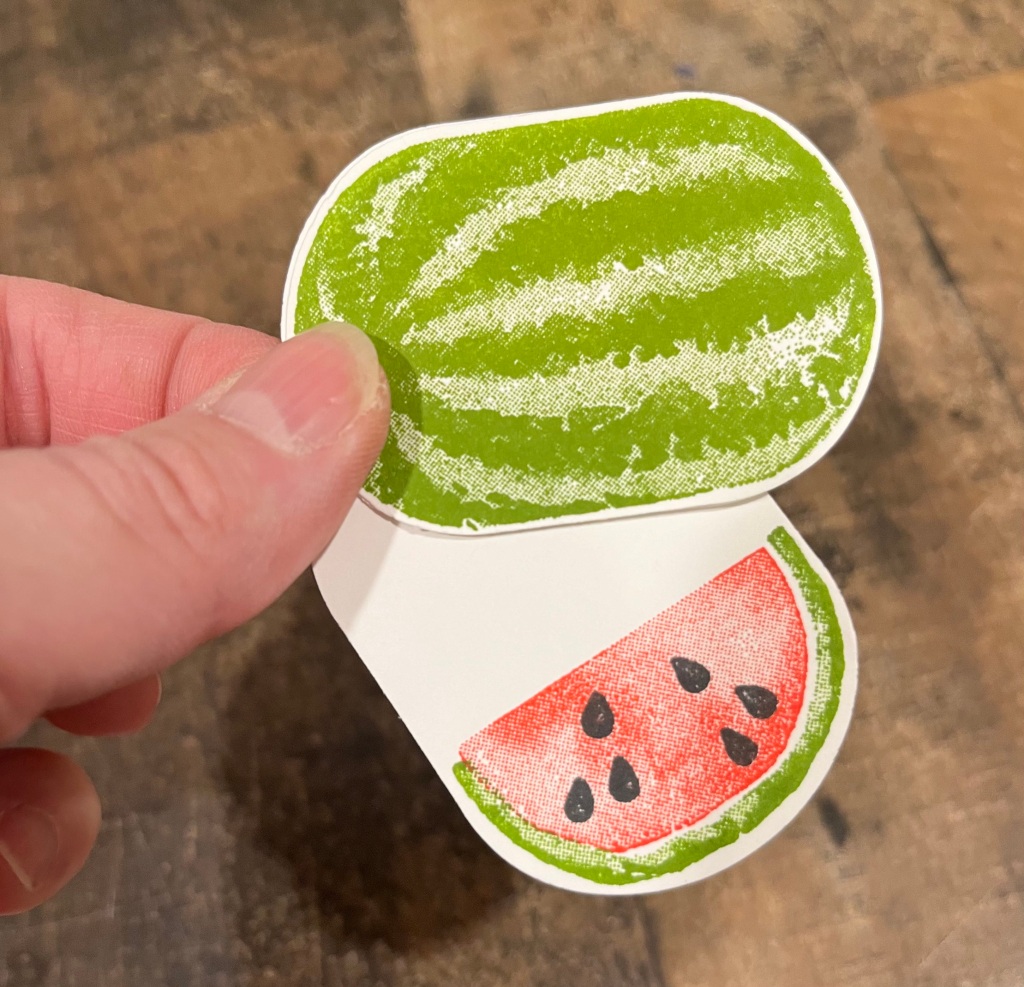
You stamp on the box while it’s flat, then assemble and fill it. Since there are no words in the set, feel free to find the one that fits from your collection! I added the sentiment from the Sweet Citrus stamp set, or anything “sweet” will work! I just learned that you can punch out the WHOLE watermelon *AND* the slice from the Modern Oval punch:
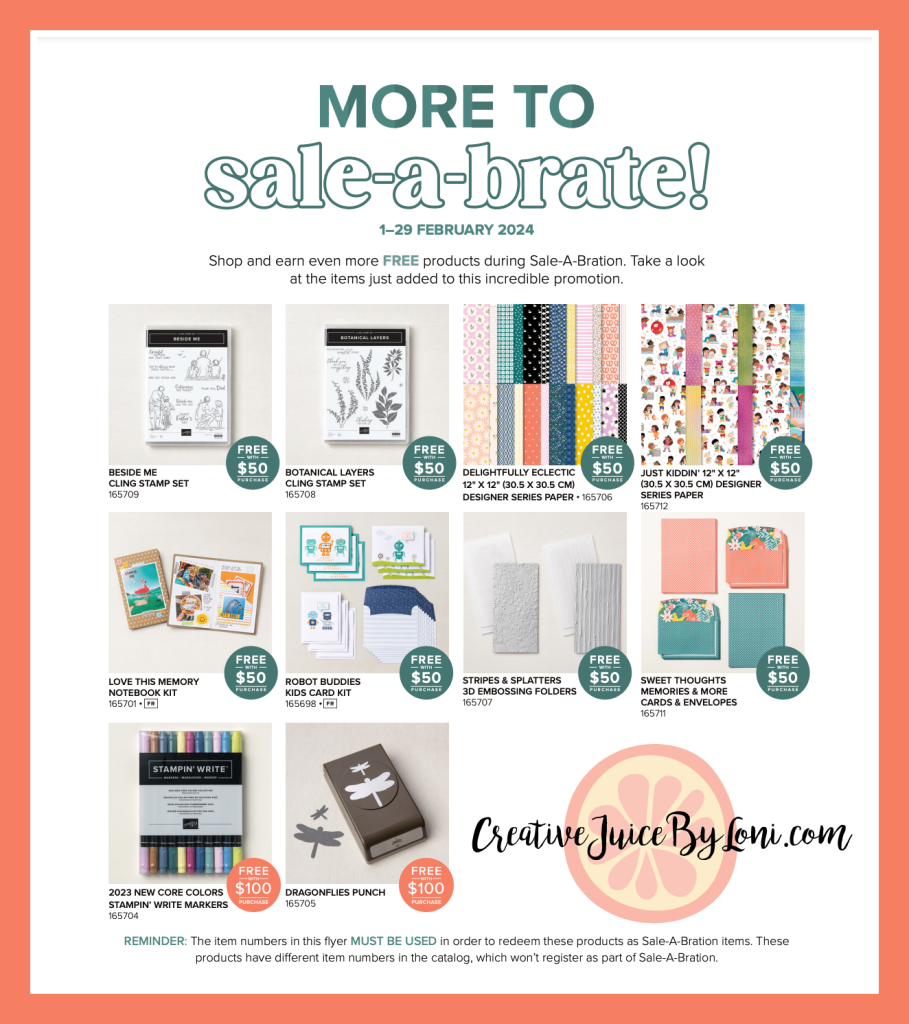
It’s the midway point of Sale-a-Bration – Stampin’ Up!’s biggest party of the year – and they have added NEW options to choose at the $50 and $100 spend threshold. Remember you can mix up your options to equal the total of your order:
Ready to make a box of watermelon bites? Here’s a tutorial to print and you can shop the supply list at the link below.
As we approach the half-way point of Sale-a-Bration (or SAB- the biggest party of the year for Stampin’ Up!), it’s time to show a little love for the Designer Series Paper (DSP) you could choose free with a qualifying order…and stick around for a late-January-ONLY offer!
Giving your creativity a few parameters makes it EASIER to use your imagination, and a SKETCH helps to narrow down your options.
Measurements for this sketch (you can adjust sizes to work for you):
Card Base: 8-1/2″ x 5-1/2″ scored at 4-1/4″
Layer One: 4″ x 5-1/4″
Layer Two: 2-3/4″ square on a 3″ square mat
Layer Three: 2″ x 3″ on a 2-1/8″ x 3-1/8″ mat
Layer Four: 3-1/2″ x 3/4″
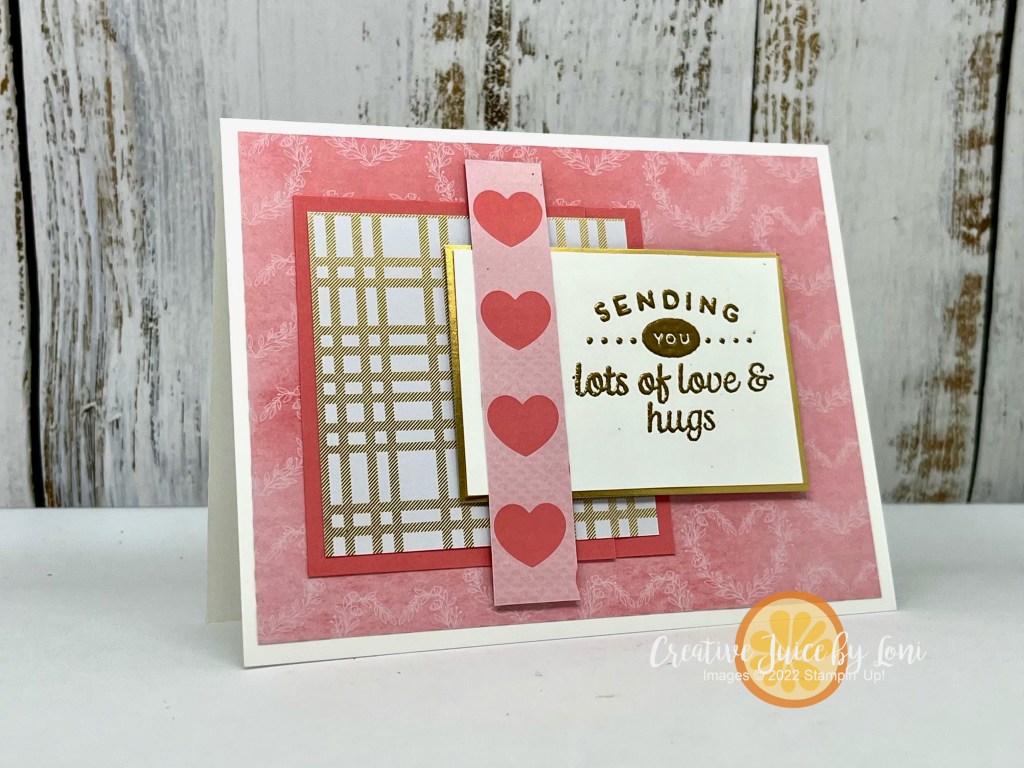
Once you’ve found a fun template for a card, just plug in the pieces, and nothing could be easier than patterned paper!
A version for mom using the Softly Stippled DSP. Substitute the strip on top with a length of lovely ribbon. The Brushed Brass Butterflies pull the gold thread from the bow to help catch mom’s eye.
Be BRAVE: Turn the sketch sideways or flip-flop it and it looks completely different! Flight & Airy DSP is delicate and delightful, the fluffy birds being my favorite! The sayings for the previous 3 cards all came from the Heartfelt Hellos stamp set, which is also a Sale-a-Bration option.
Next, the Sunny Days Designer Series Paper was delightful to pair with the “Playing in the Rain” bundle for a card to uplift and bring sunshine!
Finally, the Most Adored Specialty Designer Series Paper has Red & Pink patterns on one side, with gold foiled designs on the opposite sides: Use them for Valentines or Weddings! I embossed sentiments from the Heartfelt Hexagon stamp set on both cards.
I walked through making most of these cards with tips to help you choose patterns and layer nicely in this video tutorial:
SO WHAT’S THE SPECIAL OFFER??
While all of these papers are available through the end of February (while supplies last), for the next 3 days – through January 31, 2024 –place a $50+ order from my Stampin’ Store and you’ll receive a 4″ x 6″ piece of EVERY Sale-a-Bration Designer Series Paper as a thank you from me! That’s 30 pieces total.
Thanks for visiting and learning all about using a card sketch. Now get off the computer and get your fingers inky!
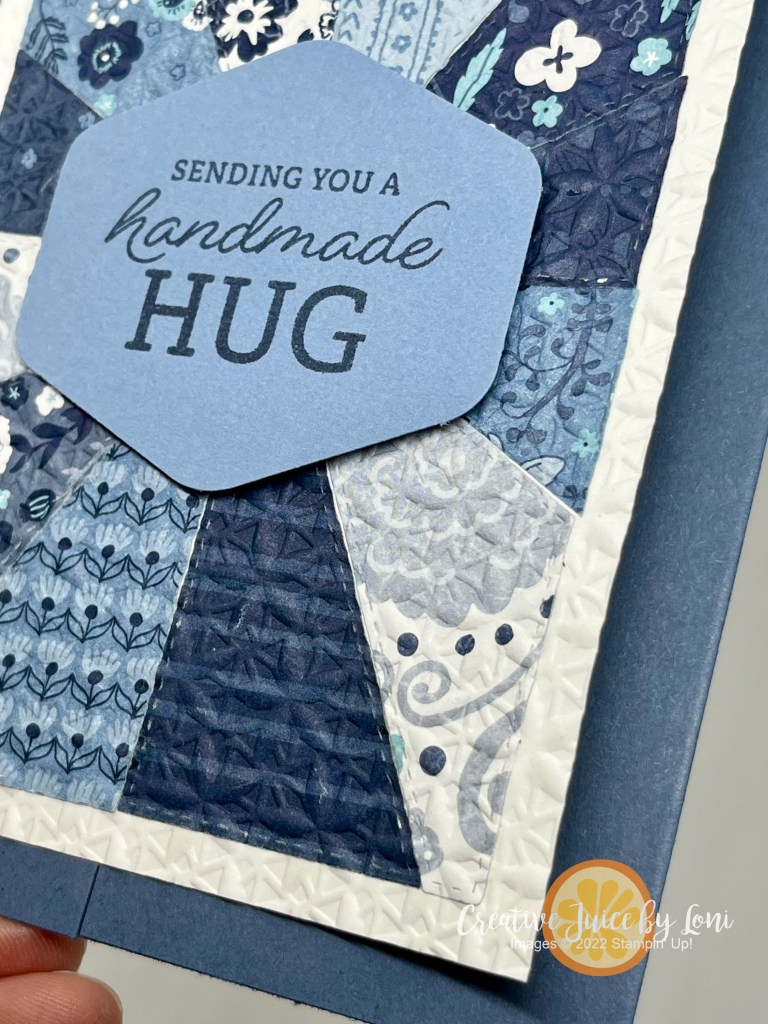
Greeting card crafters know how similar their art is to quilting: Matching patterns, colors and textures of little pieces of paper gives us a quicker satisfaction on a smaller scale than a quilt!
This card not only patchworks paper together, it ALSO HAS A QUILTED TEXTURE!
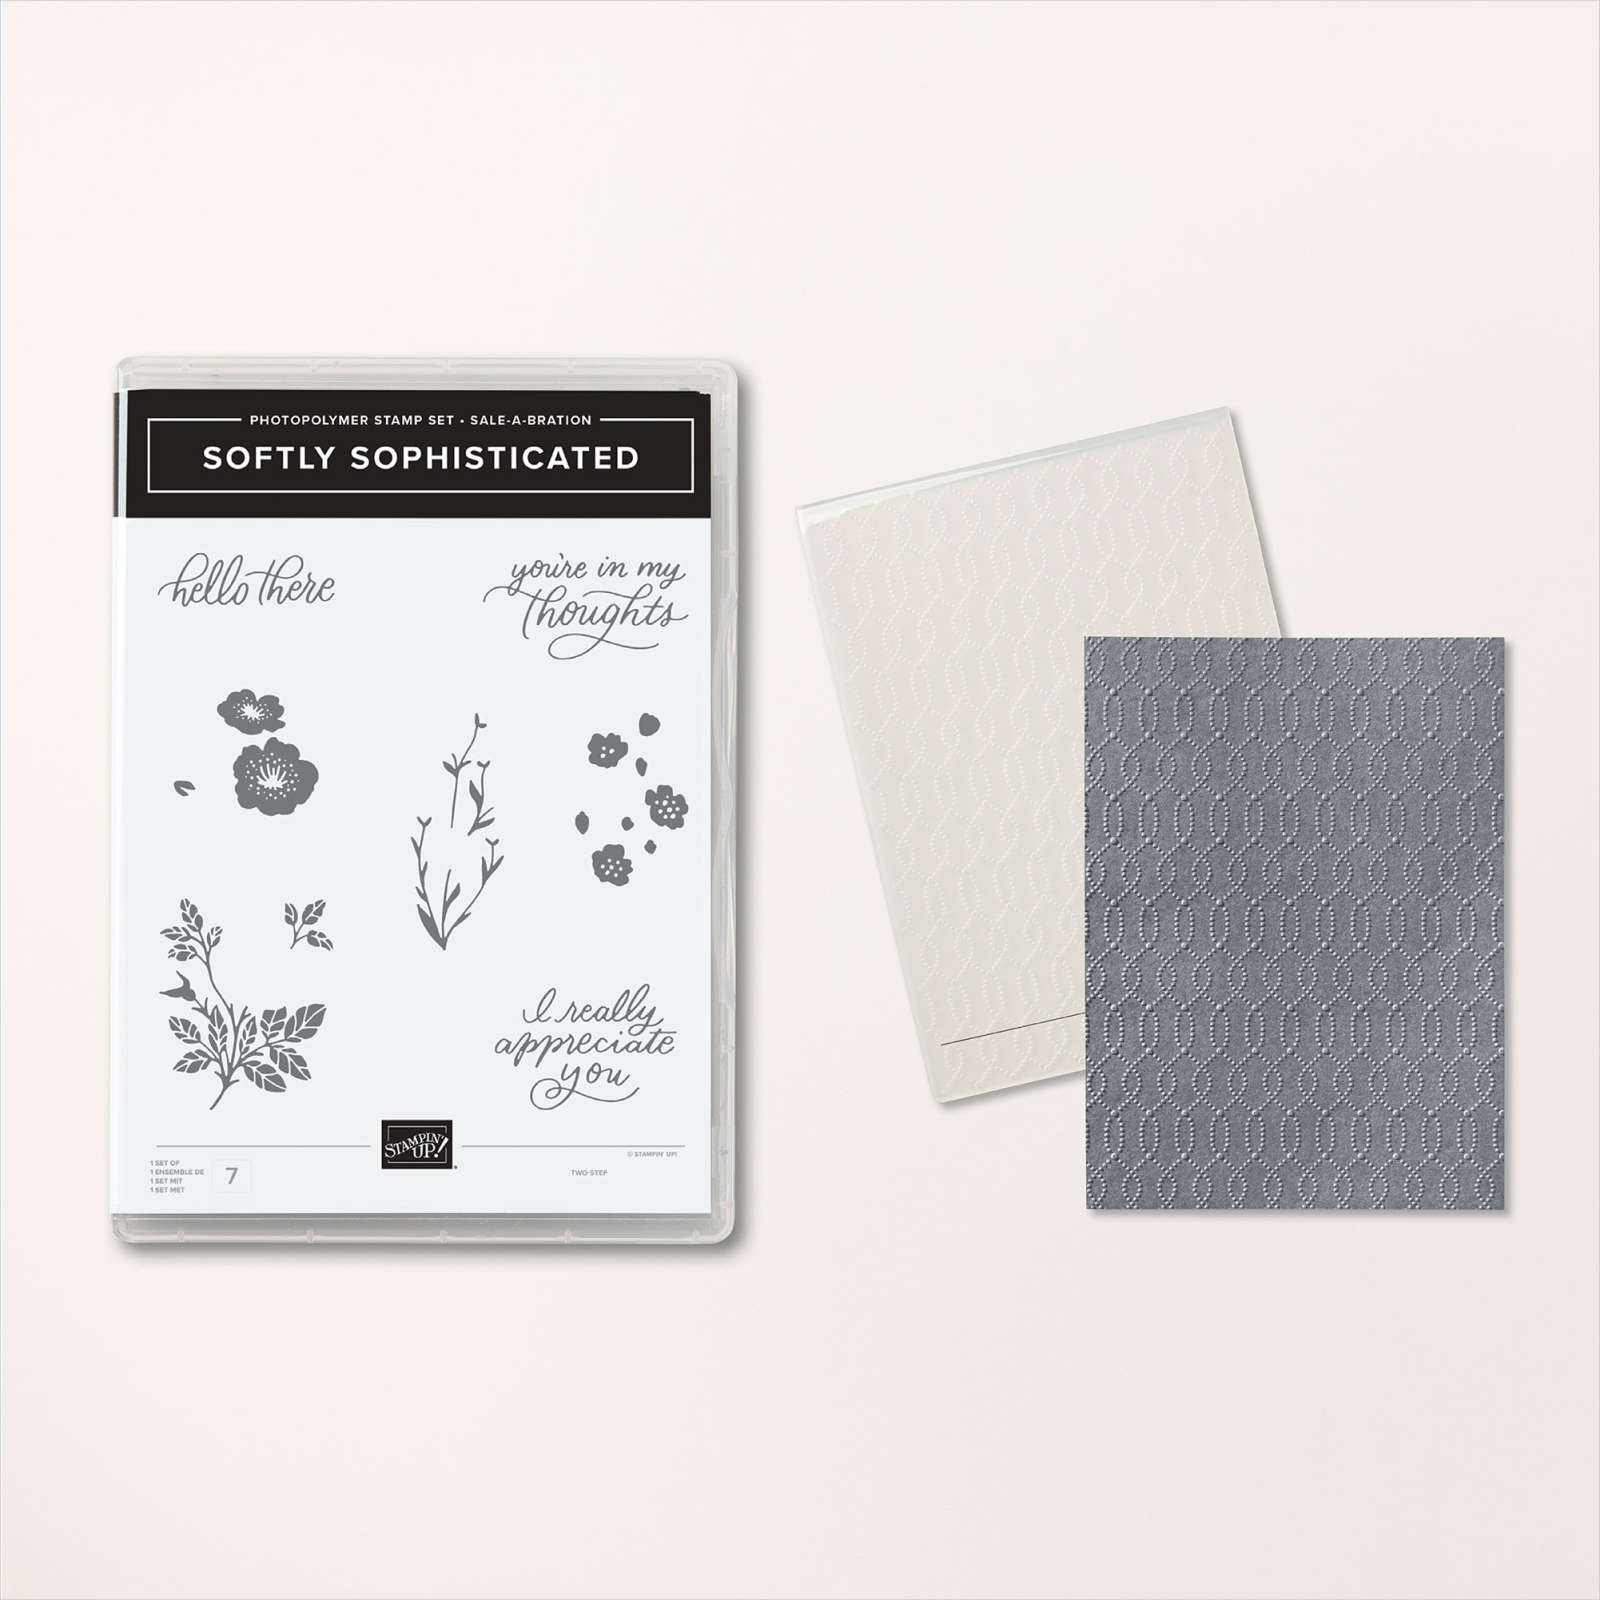
I paired the Softly Sophisticated Sale-a-Bration bundle with the Softly Stippled Sale-a-Bration Designer Series Paper for this card.
INSTRUCTIONS & MEASUREMENTS: Stamp images & sentiment on the Wild Wheat textile patterned paper (2″ x 3-1/4″) then adhere it to the center of a 5-1/4″ x 4″ piece of Wild Wheat card stock, with two 3/4″ x 3-7/8″ pieces of Designer Series Paper on the top and bottom and two 3/4″ x 4-1/8″ pieces of Designer Series Paper on the sides (adjusted measurement from the video). Emboss all the layers with the Softly Sophisticated 3-D Embossing folder before mounting it to the card base.
Follow along and craft with me- you can pause as you stamp & assemble:
The Softly Sophisticated Bundle is a set of stamps & embossing folder you can choose FREE with a $100 order before 2/29/24 for Sale-a-Bration!
I didn’t stop with the first card, but pulled out some supplies from the Annual Catalog to make a few handmade hugs (gatefold cards):
TIPS FOR THIS CARD: Cut a 3-1/4″ x 4-3/4″ piece of each pattern in the Countryside Inn Designer Series Paper. You can cut two sheets at a time with the Sunburst die, but you may want to go forward and back through the Cut & Emboss machine. You can flip pieces over, since the top and bottom of the design are the same size/shape and get ALL 12 designs in the starburst!
This card also used the Softly Sophisticated 3-D Embossing Folder, then I tried a few other textures:
3-D Embossing folders used left to right: Softly Sophisticated, Layered Florals, Basics Floral
These are the supplies I used for the blue sunburst hug cards:
I’ll be sharing some of these cards with new team members during Sale-a-Bration – if you would like to start a crafty adventure with Stampin’ Up! I’m here to help. There are two bonus options if you choose to give it a try before the end of February, and the Glass Mat Studio is one of them!
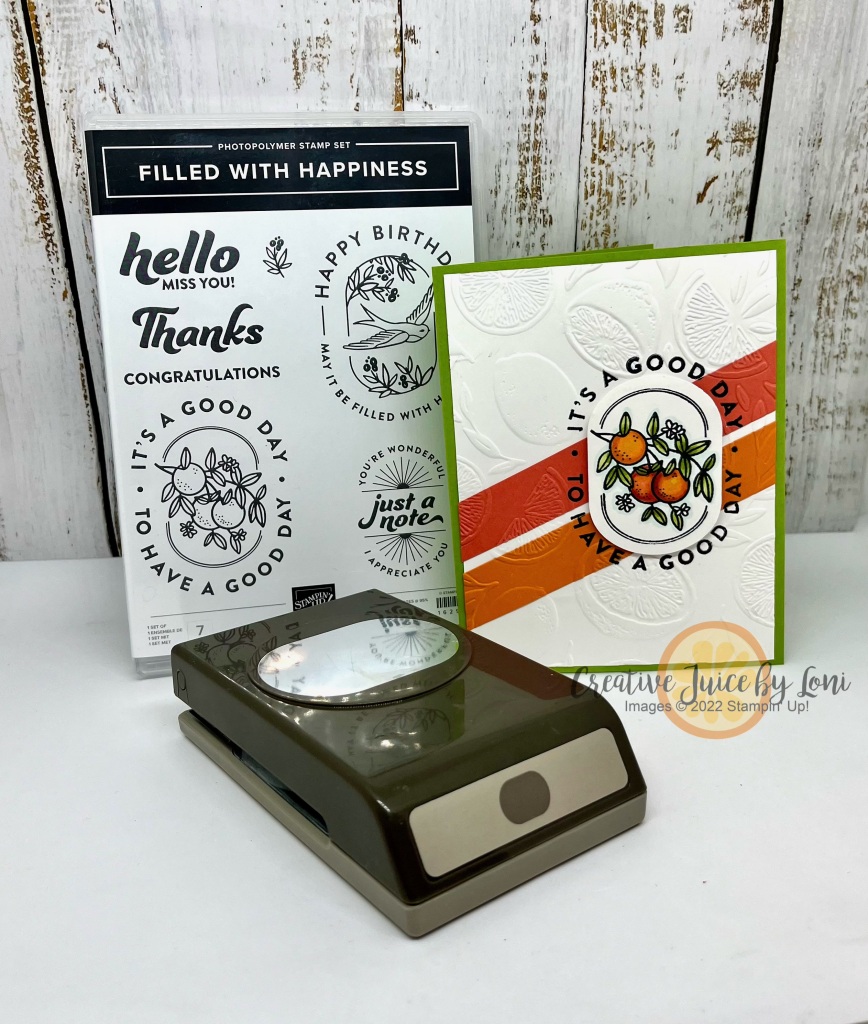
Many of our 2024 Sale-a-Bration freebies coordinate with a new product in the January-April mini catalog, so today I’m showing you how the Watercolor Melon SAB stamp set (an option you can choose free with a $50 order) coordinates with the Modern Oval punch, and that punch *also* matches the Filled with Happiness stamp set!
Let’s say you purchased the Modern Oval punch and Filled with Happiness stamp set and a set of Stampin’ Blends markers, NOW you qualify for a free Sale-a-Bration product…like the Watercolor Melon stamp set!
Hey look! They work interchangeably!
Let’s get a close-up look at these two similar-but-different cards:
Lay down your card stock strips and stamp the “It’s a Good Day” stamp on the white layer BEFORE you emboss it with the Sweet Citrus Hybrid 3-D Embossing Folder.
Stamp the same image again, color in with Stampin’ Blends and punch out the center with the Modern Oval punch to lift up in the center with dimensionals!
Moving on with a similar idea…
Use the slices and wedges of watermelon as your background, then turn your card stock stripes vertically. Use the full watermelon (punched with the Modern Oval) as the place to put your sentiment, which came from the Filled with Happiness set! Isn’t it nice how they all coordinate for bright and beautiful card making?
I guess you could call this one a “Thanks-a-Melon” card! Remember the inside- stamping a little slice of melon with seeds carries the theme through the card.
What are you waiting for? Choosing something free NOW with your qualifying order gives you time to order AGAIN before Sale-a-Bration ends on February 29th, and everyone loves a gift-with-purchase!
There is an art to being grateful, and expressing heartfelt appreciation is the first step to living in abundant gratitude. This simple card will help:
It’s a breeze to create quickly (watch below), and the combination of Vanilla, Lost Lagoon & Pretty Peacock are the sophisticated part.
Add a few Brushed Brass Butterflies and it’s a luxe & lovely thank you card, wouldn’t you agree?
I appreciate the opportunity to serve YOUR creative needs, as well as your recommendation to other paper crafters. THANK YOU.
This stamp set (plus coordinating embossing folder, see previous post) is a FREE BUNDLE you could choose when you purchase $100 from my Stampin’ Store before February 29, 2024. Here are the supplies needed for this card, and adding them all to your cart would get you the Softly Sophisticated bundle as a complimentary gift (if you choose it during checkout) PLUS another free Sale-a-Bration product!
Happy to see you hopping through here! Our New at SU! global group of demonstrators have ALL the Sale-a-Brationproducts here for you this month, and trust me: You want them ALL. Whether you are ending here, or just starting, don’t miss a single post!
I get to showcase the Softly Sophisticated bundle that you could choose free through February 29th with a qualifying order in your country (in the US, it’s free with a $100 order) and it comes with a stamp set AND an embossing folder:
It feels so elegant in Very Vanilla and I used the Perennial Postage dies for this first card to show how a simple layout can be “next level” when you add a little embossed texture.
Only one little problem: The small die with the postage cancellation wasn’t long enough! So here’s HOW TO STRETCH a die!
Leave me a comment and tell me what you think of this project, or which SAB item is next on your wish list, then visit these posts to help you celebrate creativity during Stampin’ Up! Sale-a-Bration – remember to save or PIN your favorites!
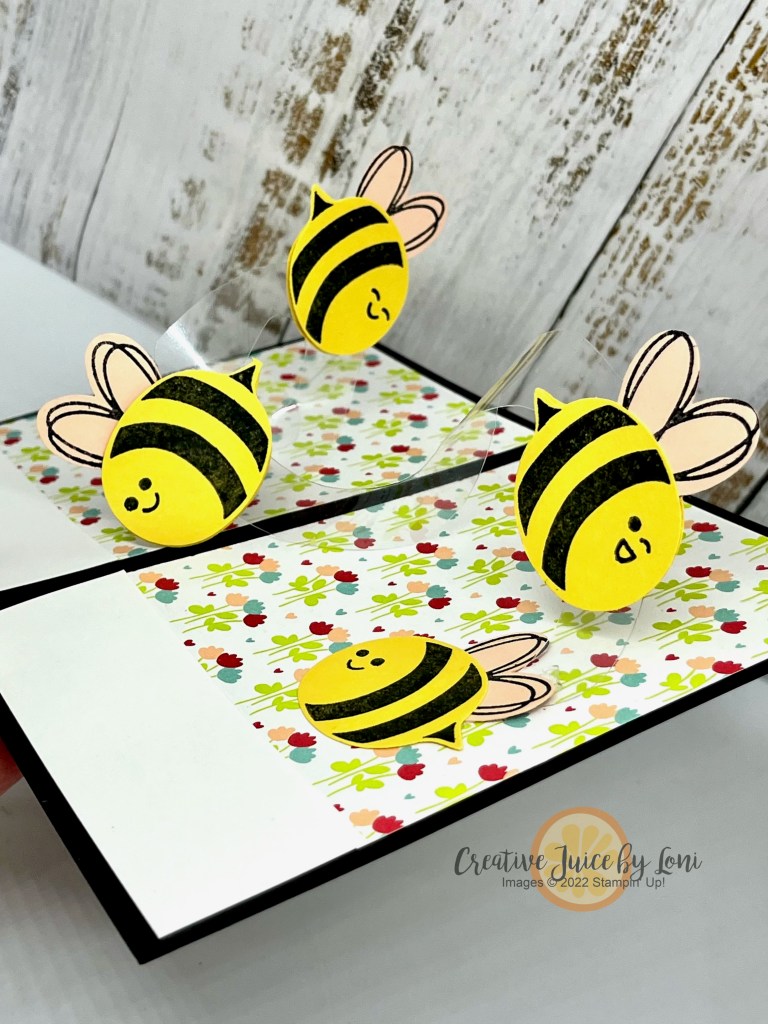
Crafter problems: Losing sleep over a project that you’ve dreamed up! That was the situation last night because I was too excited about making this idea come to life:
But I’m getting ahead of myself…
This simple pop-up card uses WINDOW sheets (spiralized) to make the bees buzz with a message of love on Valentine’s Day! The front of the card:
I actually made TWO versions with the Bee My Valentine suite AND a Sale-a-Bration specialty paper (which I’ll show you after the video). They are very easy to create and will be buzz-worthy when my grandkids open them!
Here’s the tutorial video:
It’s your last chance to sign up for myJanuary VIRTUAL Class, featuring the Bee My Valentine bundle
-OR- stamps and punches you may already have! Click the image for more info:
Stampin’ Up! Sale-a-Bration is in full swing, and you could choose the Most Adored Specialty Designer Series Paper as a free product with $50 order before it ends on 2/29/24 (or the paper is sold out), in which case, you could ALSO make this version of the Spiral Pop-Up Card:
One side of the paper is Flirty Flamingo and Real Red and the other side is white and GOLD FOIL, which will be perfect to have on hand for wedding season and anniversaries.
When you checkout from my Stampin’ Store, you’ll be prompted to choose Sale-a-Bration product(s) you qualify for! Here’s a cart I’ve started for you (add or take out, as you wish):
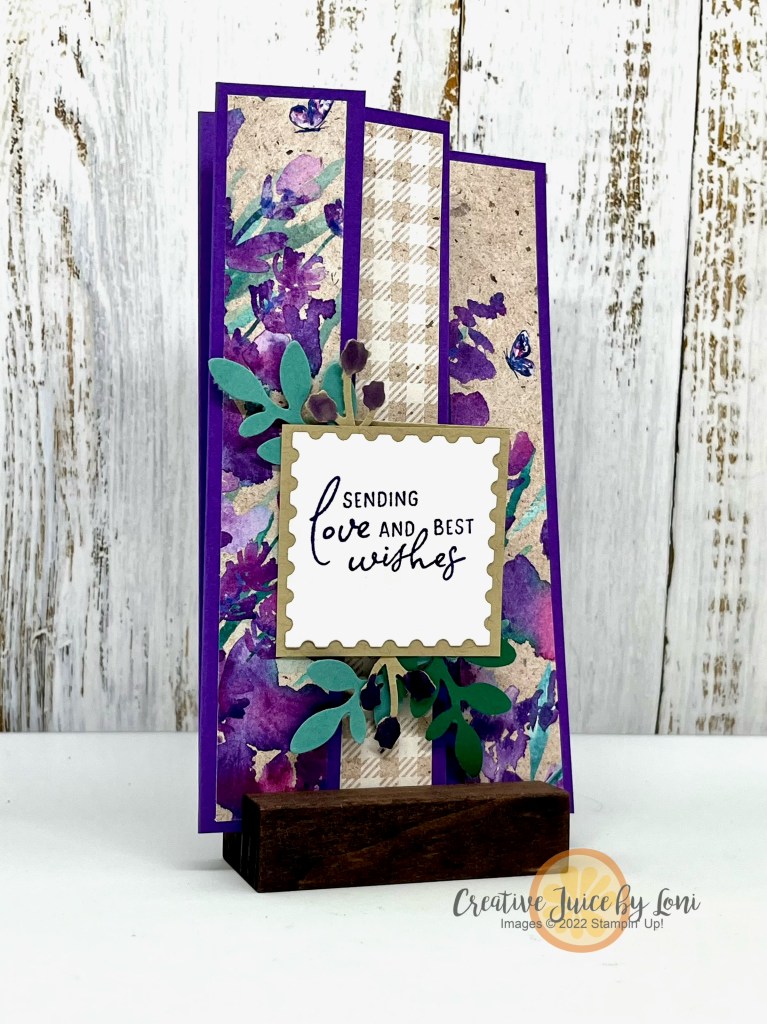
Some patterned paper comes as 12″ x 12″ and a few of our fancy designs are 6″ x 6″, so today (and to help you use up your Paper Share!), I’ve got a fun fold slimline card which uses a 6″ x 6″ piece of Perennial Lavender Designer Series Paper:
On the left is the card closed flat, and on the right, it’s open to see all the panels.
Cut two 2″ wide and two 1″ wide pieces from one 6″ x 6″ piece of pretty paper to fit into each section. You’ll also need a 1″ x 6″ and 2″ x 6″ panel of card stock to fit where you will write a message. The finished size is 3.5″ x 6.25″ when folded flat.
Here’s a different version with a piece of the Lighter Than Air Designer Series Paper, which already comes as 6″ x 6″-
I created a belly band for this one to keep it closed, then when you slide it off, it opens to wish you a Happy Birthday:
If you didn’t snag a stack of patterned paper in my Designer Series Paper Share, I have a few left!Get one piece of EVERY paper in the 2024 Jan-April Mini catalog for $18 (if you pick up from me in Hurricane, UT) or $22 shipped to you, while supplies last. Both pieces used on these cards ARE INCLUDED IN THE SHARE.
The Perennial Lavender Designer Series Paper (and Perennial Lavender suite) coordinates with the January Paper Pumpkin craft kit! Subscribe by January 10th to receive the Lovely Lavender kit:
Make love-themed cards for special occasions, Valentine’s Day, anniversaries, and more with this all-inclusive kit that arrives in your mailbox in January. The kit includes a unique photopolymer stamp set and ink spot and…
• Makes 8 cards: 4 each of 2 designs with 8 coordinating envelopes
Love is in the air as Stampin’ Up!’s yearly party starts today and you could choose the “Most Adored” SPECIALTY Designer Series Paper as a free product (with $50 purchase) to complete some elegant Valentines in Real Red and Shiny Gold:
Paired with the Sale-a-Bration “Heartfelt Hellos” stamp set, the gold-foiled stars shimmer!
This sketch would work with any Designer Series Paper and there are many designs you could select as your complimentary product(s) with each qualifying purchase through February 29th – while supplies last!
Join the PARTY: Shop and Earn free products during Sale-a-Bration!
Rooty-Tooty Fresh & Fruity! Tomorrow- Thursday, January 4th- the January-April Mini Catalog goes live AND 2024 Sale-a-Bration begins!
I admired the “Blueberry Bunches” stamp set (item #162692) the moment I saw it: It feels like a floral, but it’s a fruit, and that’s kinda my “jam” (see what I did there?).
I’ve paired the stamps with the Perennial Postage bundle (Item #162608) for the sentiment and postage stamp die (in various sizes).
This is the second largest die and after I cut a piece of basic white, I stamped the blueberries in the center, then used Masking Paper around the edges so I could blend Pool Party ink from the outside into the image- a technique called “Reverse Masking”. As you carefully peel off the masking paper, the background appears as a frame!
Once I colored the image with Stampin’ Blends alcohol markers, I “cancelled” the postage stamp with the cutest little detail of the cancellation mark, which I dipped into Memento Tuxedo black ink before running through the Stampin’ Cut & Emboss machine on top of my colored postage stamp.
Seemed fitting to share it with the #tgifc453 postal theme this week.
I’ll update the supply list once the catalog goes live, and hope you’ll try this technique and mail bunches of happy mail.
Need a Mini Catalog and Sale-a-Bration brochure? Shoot me a message and I’ll send it out to you.
Don’t want to miss a publication in the future? I mail mini catalogs to my customers who order $50 or more in the previous 6 months!


 Designer Series Paper")


")
")


")


 Designer Series Paper")


 Designer Series Paper")
")


 Specialty Designer Series Paper")
")


 Specialty Paper")


")


