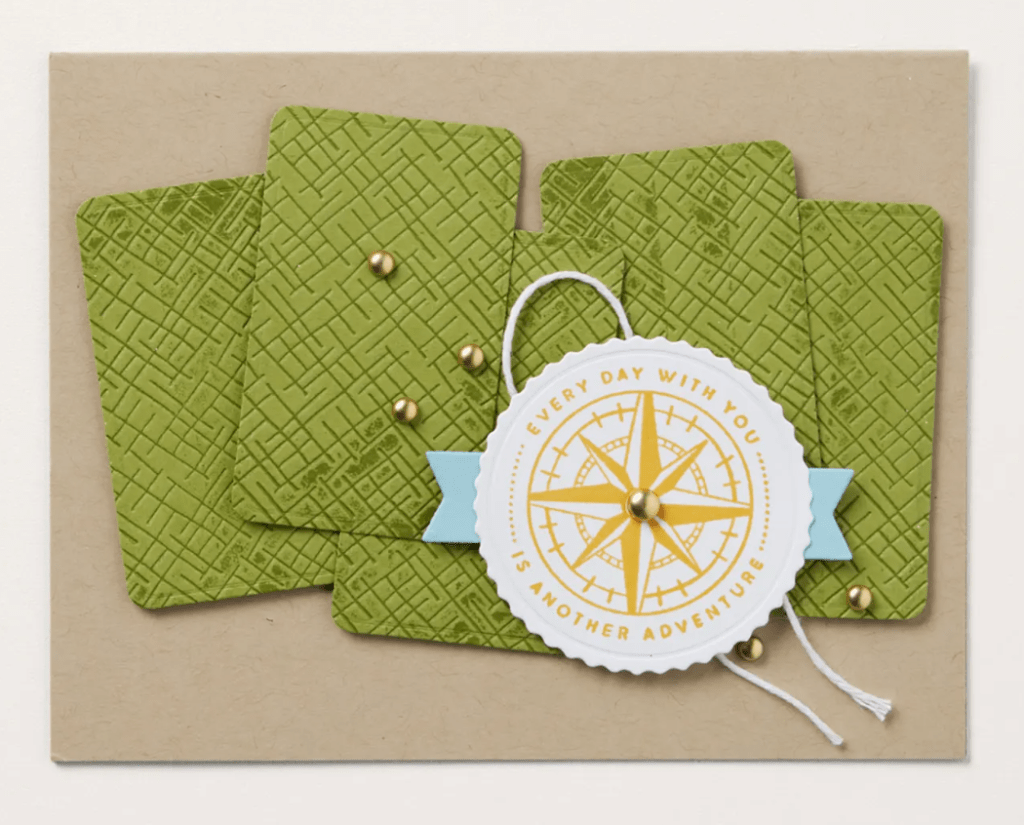
Welcome back to day 2 of my embossing folder series! Today we are looking closer at the Crosshatch 3-D Basic embossing folder (one of a trio in my online store).
For a textured background like this, stamp your images first, then run it through the embossing folder. I used the texture OUTDENTED (it’s a real word) on my floral background, but you can also turn your paper over to get an INDENTED texture like this as an alternative:
If you missed the video teaching TIPS & TECHNIQUES for embossing folders, you can watch it here!
This texture is extremely versatile and you’ll be reaching for it often. I’ve listed the supplies for my “You Inspire Me” card below, and please visit tomorrow for the third 3-D Basics embossed card!
You may not have a preference for how your sandwiches are cut, but there is a CORRECT way to layer the “sandwich” for using embossing folders on your Stampin’ Cut & Emboss machine 🥪
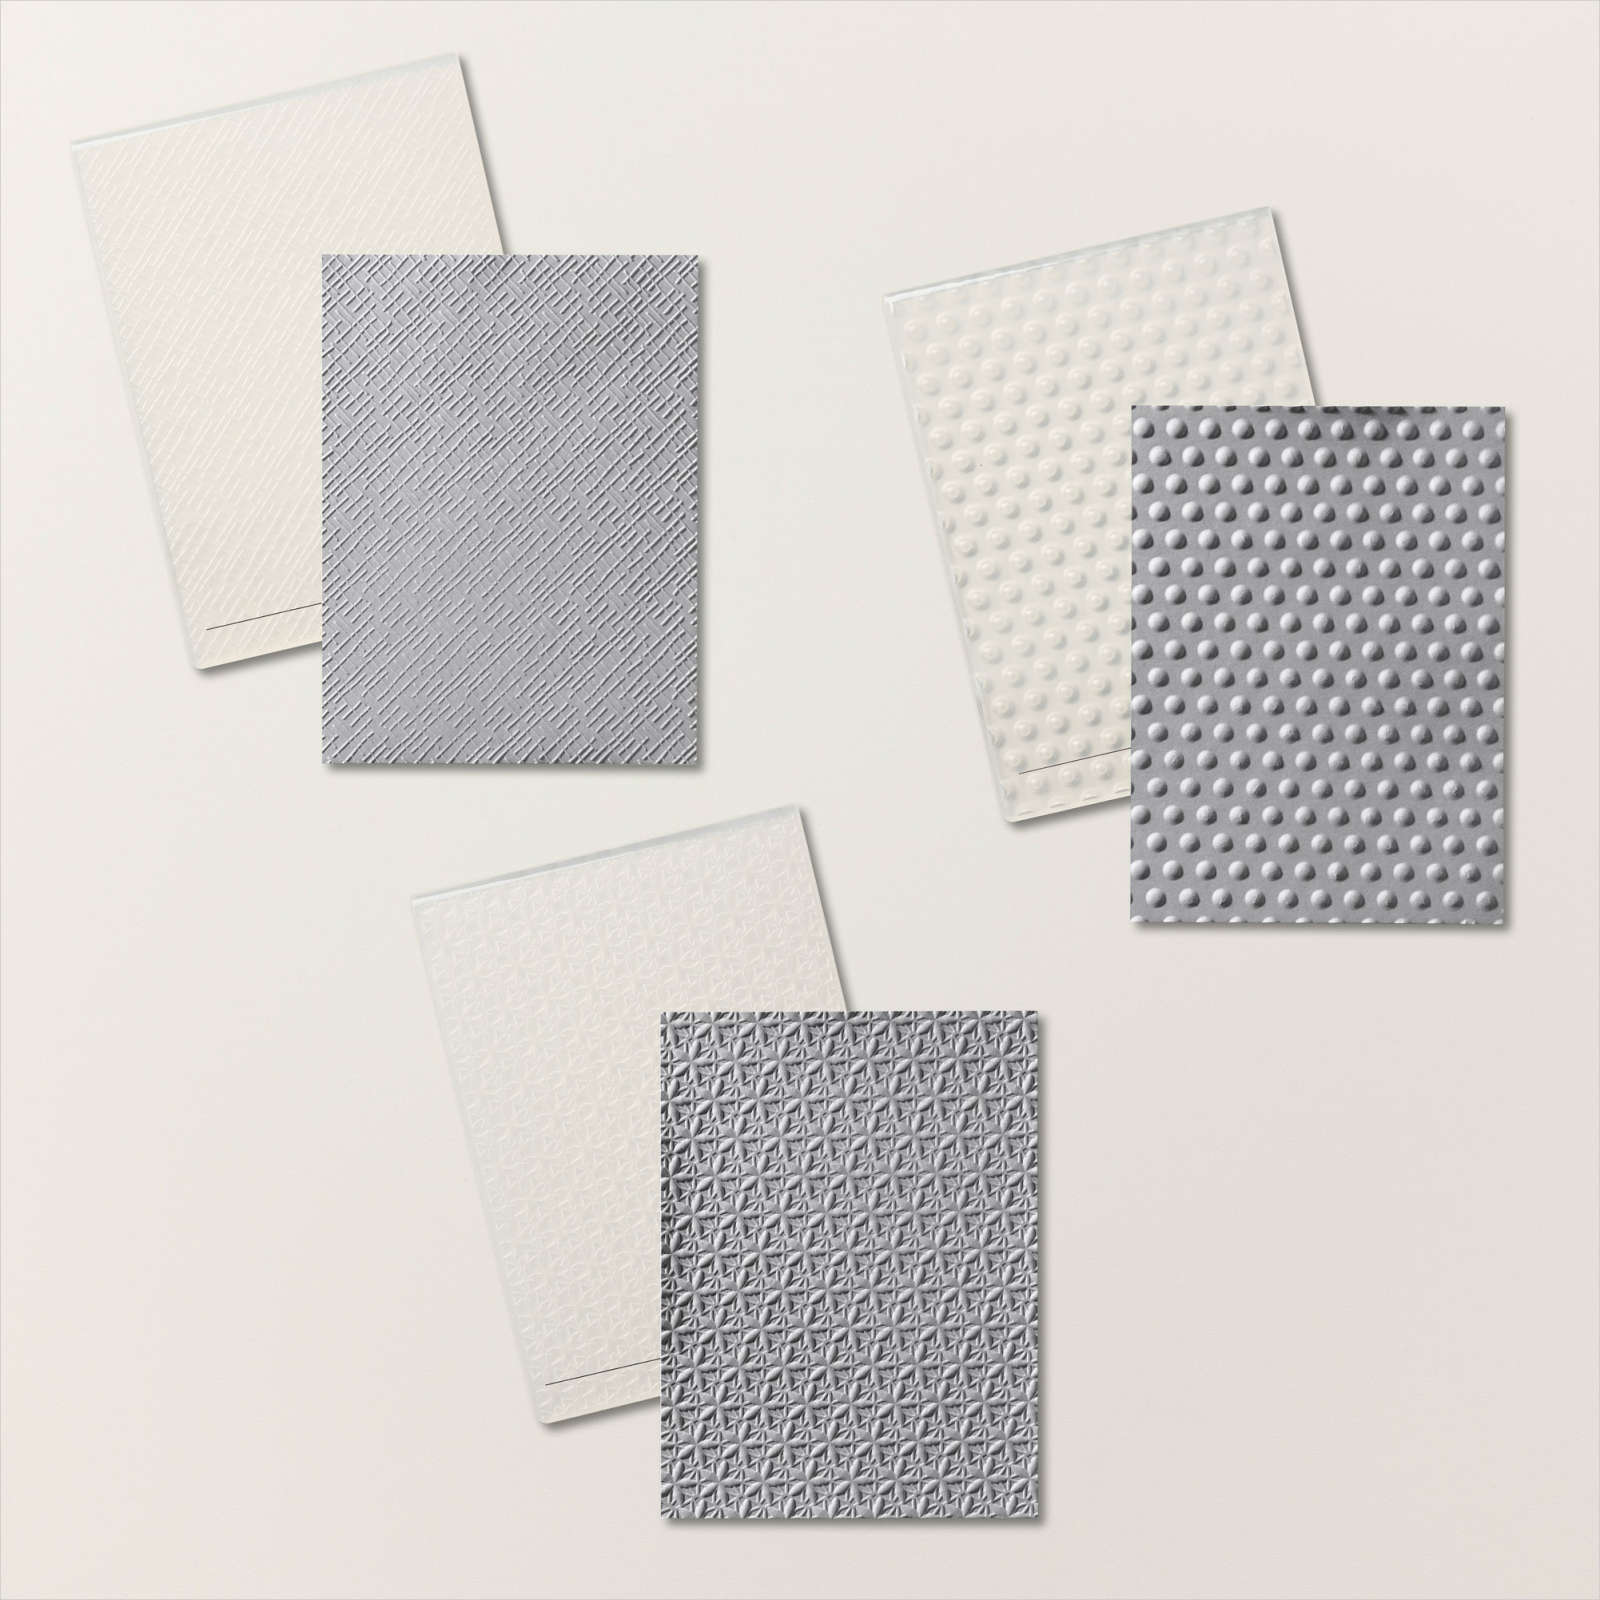
Stampin’ Up! has three styles of embossing folders: Standard (approx. 1/16″ wide), 3D (approx. 1/8″ wide) and Hybrid (similar to 3D and will have a coordinating die to insert as desired). Each type of folder has a “Recipe” for successful texturizing, and if you forget, it’s PRINTED on the base plate/platform #1
Today’s LIVE video teaches the tips and tricks to remember for successful embossing:
Because there are NEW items in the Online Exclusive section of my Stampin’ Store (some are being restocked as quickly as possible!), I am showcasing the 3-D Basics trio of embossing folders, starting with the 3-D Floral:
I lightly pulled/tapped my Petal Pink ink pad across the embossed layer to help the flowers POP and the other supplies are listed below. The Radiating Stitches Dies (which is what I used for the frame) are also part of the Online Exclusives!
Come back over the next few days to see all the cards, and remember it’s BONUS DAYS in July, so for each $50 spent before 7/31, you earn a $5 coupon to redeem in August!
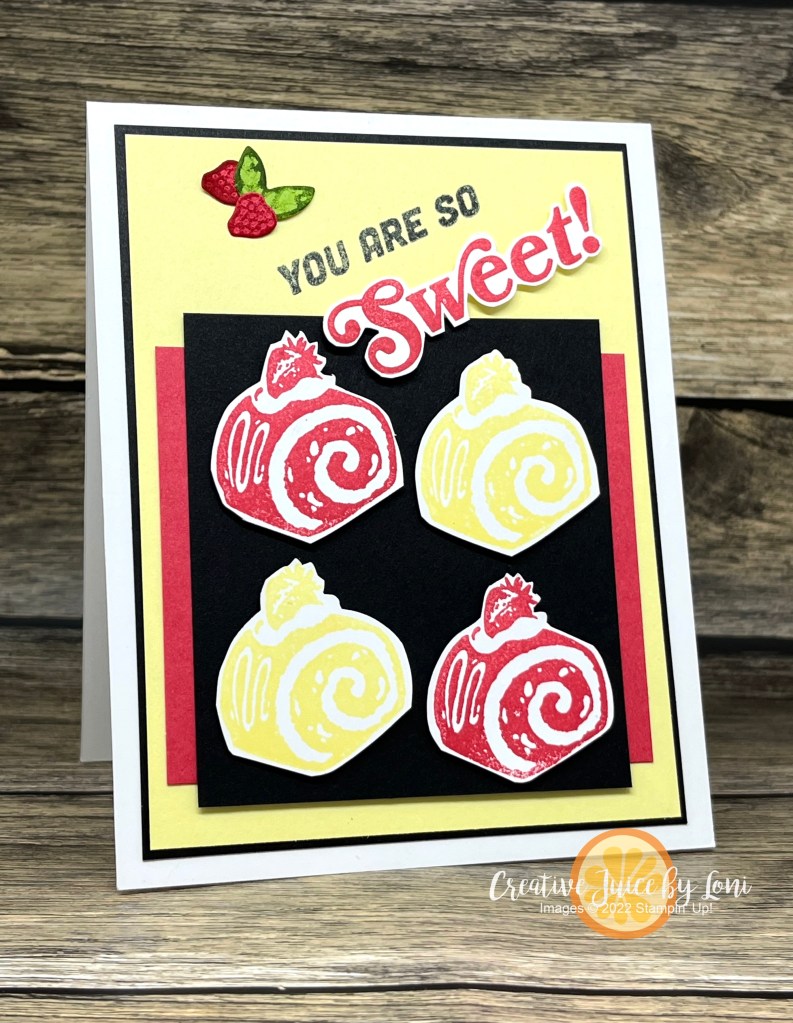
Friday is a good day for stretching those creative muscles, so I jumped into this unique TGIF Color Challenge!
Once I saw the colors, I went to my stamp collection to choose a stamp set. I hadn’t inked up the new SUPER COOL stamps yet, and the cake roll image reminded me of a red velvet cake:
It needed just a little something after I stamped (and fussy cut) the greeting, so I pulled out the teensy strawberry die from the So Refreshing dies to mimic the fruit on top of the cakes. Just “dip” them into an ink pad to really show off the texture from the dies…
It’s BONUS DAYS at Stampin’ Up!
Hope you make time to ink up a new stamp this weekend, too!
I’d reckon you didn’t see thePaper Florist dies that are new to the Stampin’ Up! catalog, did you?
You’ll have them on your radar now~ they’ll make you into a flower arranger extraordinaire!
This project started with a wood cut-out from Dollar Tree and layered Designer Series Paper, spelled out m motto and adorned it with these gorgeous card stock blooms.
Enjoy a how-to video with a few helpful hints:
July is my birthday month! It always feels like a party, and I am content with all that I’ve been blessed with, so it’s an opportunity to glorify God by sharing my bounty. That’s why I’m supporting my personal charitable passion, Operation Underground Railroad by donating 10% of my sales in July (plus 10% to another organization chosen by YOU).
With more than 40 million victims of human trafficking worldwide (25% reported to be children), my heart hurts for every child who doesn’t have the freedom to be innocent. And it’s happening here.
You are welcome to add to my #riseupforfreedom fundraiser. Family and friends- in lieu of birthday gifts, please consider a donation!
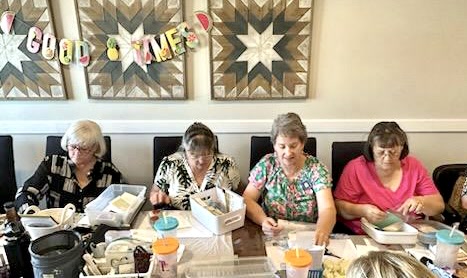
At the Sprinkled Ink Retreat last weekend, we participated in a Shoebox Swap, but that doesn’t mean we exchanged empty shoeboxes 😜
Each demonstrator brought a #simplestamping card (some were not so simple!) and had all the pieces cut and prepared for everyone else to make, in a box (about the size of a shoebox, hence the name). We passed boxes around the table and you would make one as it came to you. It was a **flurry** of activity for a few hours…
Who knew crafting could feel like a workout? We were exhausted – but happy stampers! – by the time we finished 15 cards.
Place background stamp face up and ink it with Soft Seafoam ink. Then dip a sponge dauber into Highland Heather ink and daub it onto the stamp where the berries are.
Lay a 3″ x 4″ piece of Soft Seafoam card stock on top of the stamp, cover it with scrap paper and rub to transfer the image.
Cut the stamped card into 1″ pieces on a paper trimmer and adhere in same order to front of Basic White 8.5″ x 5.5″ card using dimensionals, leaving a small space between each panel.
Stamp sentiment on white scrap in Highland Heather ink and adhere to right panel(s).
Add small bow of white twine on a glue dot.
Here’s a quick look at all the cards we created that night! WOW!
Just a reminder- ANY DAY is a great day to join my Sprinkled Ink Family and start your own Stampin’ Up! journey, but TODAY (June 30, 2023) is the LAST DAY of the Starter Kit+ Promotion. There is no risk to give it a try…and I am here to help you get the most from your experience! Click the image to get going:
Sometimes I obsess over WHICH SIDE of my pretty Designer Series Paper I should use, and if this dilemma sounds familiar, you will like today’s card design because it allows you to show BOTH sides of the paper!
You’ll be seeing more of these flowers next Monday, but I also wanted to point out the incredible detail of the photographic style of the Masterfully Made DSP~ I did NOT tear any of the Lemon Lime Twist paper, that is just a flat layer, but it LOOKS 3-D!!
When you watch the replay of my live demonstration, you’ll learn how this MEGAPACK of paper patterns gives expanded options for some of the newer products in our catalog, and offers versatile designs to enhance any project.
Final reminder that most of our Designer Series Papers are 15% off through the end of June, 2023! Don’t miss a chance to stock up with paper that has new colors and textures to keep you crafting through the summer…
Looking for the supply list?Simply click on the orange buttons!
Zelda is a big deal for my granddaughter, so when the June “New at SU!” blog hop theme was Kid’s Cards, I thought maybe someone else has kids playing video games this summer. The newLEVEL COMPLETE stamp set is great for the young, and young-at-heart!
I wanted this to be an interactive card, as gamers love to “play” and fidget, and this one flips open when the tab is pulled on the right:
I saw Aubrey (of the Stampin’ Jill team) create a Pull-Tab Flip Card last week, I wanted to put my own spin on it!
To make it easy to assemble, here are the measurements (supply list at bottom of post), then you can watch either or both videos to put it together (my pieces are different sizes than Aubrey’s, as my card pulls from the right and hers from the bottom) :
Card base: 4-1/2″ x 5-1/2″
First layer: 3-3/4″ x 5″, cut the smallest banner from the Stylish Shapes dies about 1/3 in from the left side for the mechanism to slide through before attaching to card base with dimensionals in each corner.
Mechanism: 1-1/2″ x 7″, scored at 4-7/8″ and 5-1/4″
Flip Layer:2-3/4″ x 4-1/2″. Adhere this to the 3/8″ piece only, under the left edge of the layer.
Inside layers (2):2-1/4″ x 3-1/2″
TIP: Use strong adhesive, such as Stampin’ Seal+ or Tear & Tape because this card will be tugged and pulled over and over again!
Give this card a try- it comes together quickly when you have all the pieces cut and ready! If you can’t make it today, PIN it/save it for later and I’d love to see your version.
Off you pop to one of the other kid-friendly card ideas around the world:
BREAKING NEWS: FREE SHIPPING day just announced! Set an alarm for Wednesday, June 21st and earn free shipping on your orders over $75 that day only!
Paper crafters pride themselves on using scraps, so when we find a way to NOT WASTE A PIECE of pretty paper, we must give it a try!
I appreciated this idea from fellow demonstrator Rachel Tessman, and with the Glorious Gingham Designer Series Paper ON SALE through June, knew it was time to share it with you! It’s a fabulous way to get 4 angled corner backgrounds from one 6″ x 6″ piece of Designer Series Paper, and you’ll love how simple it is.
Lay a ruler down and mark 1-1/2″ on each bottom right corner as you rotate the paper 90-degrees four times. Mark it on the BACK SIDE of the paper you want to use, then you don’t have to worry about erasing lines! Then connect the marks across from each other like this:
Use your Paper Trimmer to cut along each of your lines and you’ll have 4 angled pieces to put in the corners of your card fronts:
My card base is Thick Basic White Card stock: 5-1/2″ x 8-1/2″, scored in half at 4-1/4″
Pretty Peacock card stock: 5-1/8″ x 3-7/8″
Basic White card stock: 5″ x 3-3/4″
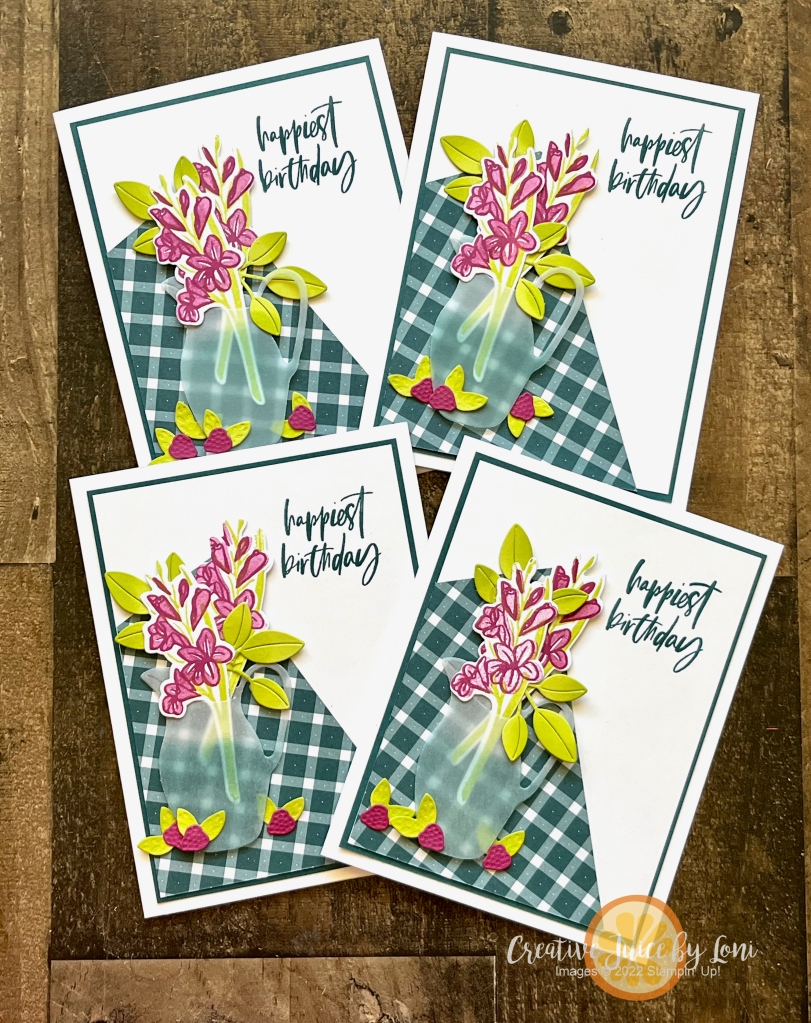
I used the So Refreshing Bundle to complete my cards, and here’s a video to watch & learn how to:
Filled my pitcher with “water” and stuck in the flowers:
Let me know if you try it, or share your version in my Creative Corner Facebook Group for my V.I.C.’s (Very Important Crafters). Now turn up the alarm to remind you to order on Free Shipping Day and add these supplies to your cart:
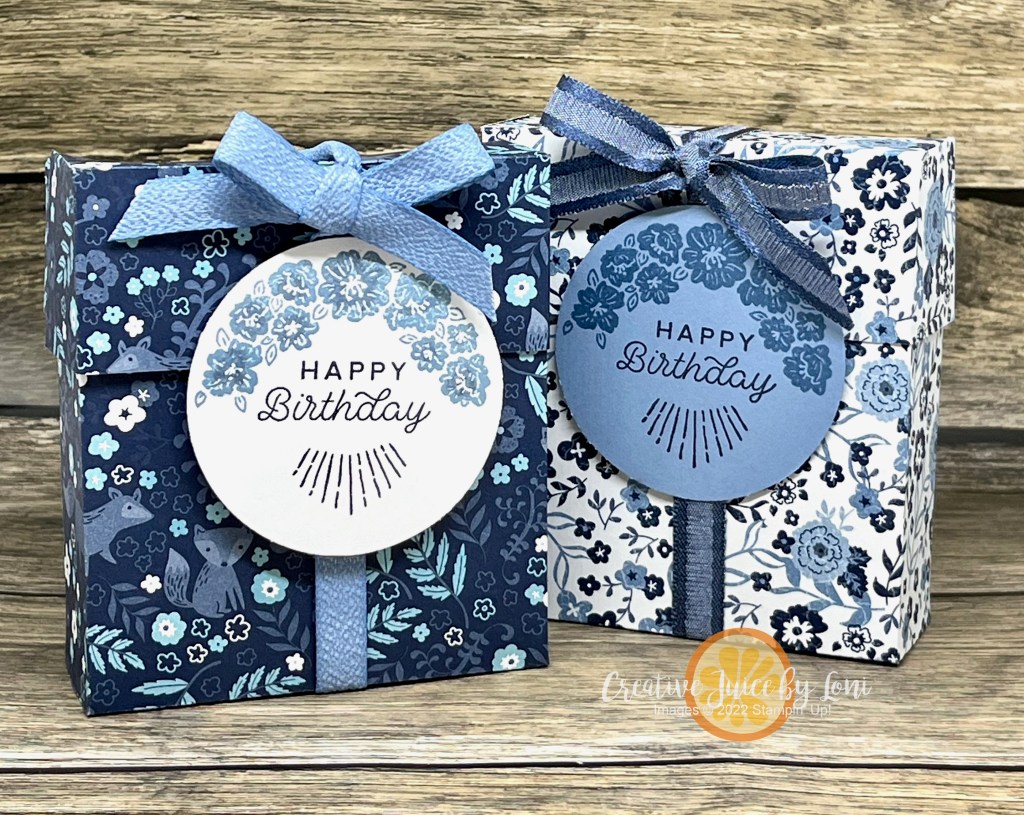
Today’s project encourages you to USE THAT PRETTY PAPER- Don’t hoard it! This hinge-lidded gift box (3.5″ x 4″ x 1-1/4″ finished size) is speedy to make, and begins with a 6″ x 12″ piece of Designer Series Paper.
Score along each long size at 1-1/4″ in (or if you are using a Simply Scored board, put the short end at the top and score at 1-1/4″ and 4-3/4″)
Turn the 12″ side of the paper along the top of your trimmer or Simply Scored, then score at 4″, 5-1/4″, 9-1/4″ and 10-1/2″. You’ll trim at each of these score lines from the long edges just into the intersecting 1-1/4″ score line.
**If your paper is DIRECTIONAL (meaning there is a top and bottom to the pattern), watch the video to see instructions- or make sure that the top of your design is at the left when you make the first 4″ score along the long side.
This box is ideal for 2 bolts of Stampin’ Up! ribbon (or one large bolt, like the Boho Blue one I showed in the video), and it’s tight, but will work for 2 classic ink pads, or a myriad of other small gifts!
Three things to note if you are reading this in June 2023:
Most of the Designer Series Paper in the Stampin’ Up! Annual Catalog is 15% off during June only!
You CAN add discounted paper to the Starter Kit+ Special Offer in June! It’s the best VALUE for anyone with a long wishlist or who wants to try a new adventure- no obligation to try it out.
The Circle Sayings 3-for-Free offer ends June 15th!
When you purchase the Circle Sayings bundle from my Stampin’ Store by 6/15/23, I’ll email you a tutorial for 3 exclusive cards you won’t find anywhere else PLUS I send you the supplies (card stock, ribbon, paper, etc) to make those three cards with your new stamp set and coordinating punch! This is the bundle I used on my box today:
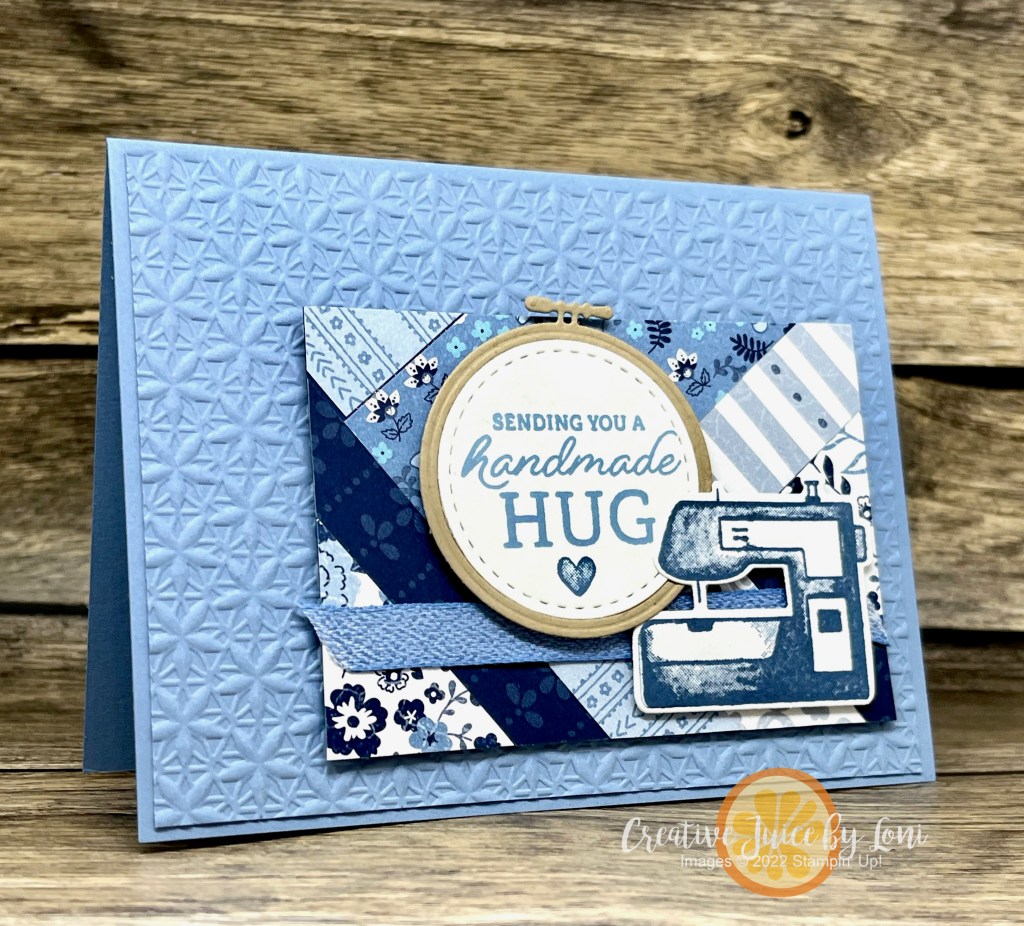
And because I couldn’t decide which I liked best, I made TWO versions, one for “paper-piecers” and the other for “fabric-piecers”!
Which version do you like best? I really want to know!
I can see a quilter including the second card with a comforter they would gift to a loved one!
My scraps were pieces of the Countryside Inn Designer Series Paper (15% off during June!) and I paired my paper quilts with the Basics Floral 3D Embossing Folder…have you seen this bundle of *indispensible* textures? Only available in my online store, they are the ones I reach for the most because one of them will go with [almost] anything I’m creating!
And can we take a minute to admire the Boho Blue Limited Edition Mini Cut & Emboss Machine I stamped on my card and the actual one in my Stampin’ Store? I really did stamp it in Boho Blue for my card, but the lighting at night doesn’t look quite right. I love the mini machine for quick cutting and it’s the one that sits on my desk, but remember; the regular size embossing folders only fit in the regular Cut & Emboss Machine.
Use up your Designer Series Paper scraps with this technique: Glue pieces next to each other on a piece of card stock (in line or randomly), then cut to desired size and use it like you would a regular piece of patterned paper!

")


 Bordered Ribbon")


")


 Designer Series Paper")


")


 Designer Series Paper")


 Designer Series Paper")


")


 Bordered Ribbon")


 Textured Ribbon")
