
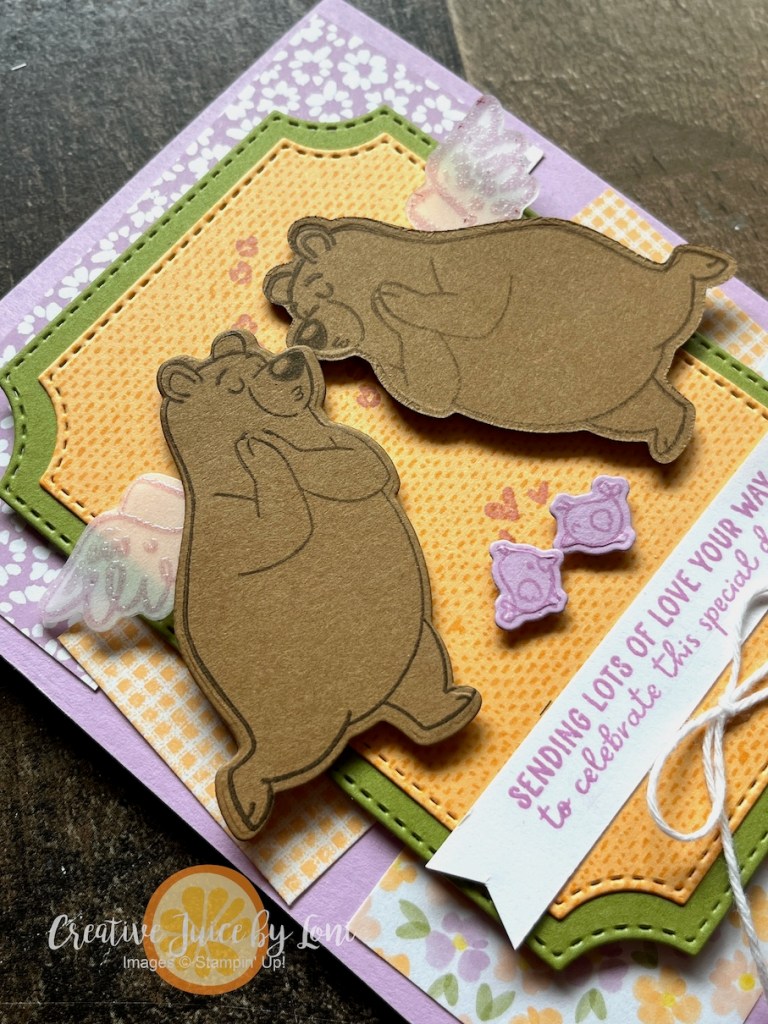
I’ve been sharing Sunshine & Smiles with the Beach Boardwalk Suite for a few days here AND on my social media (FB & IG) ~ today’s projects include a card, a scrapbook layout and announcements for upcoming EVENTS where I hope to see your face!
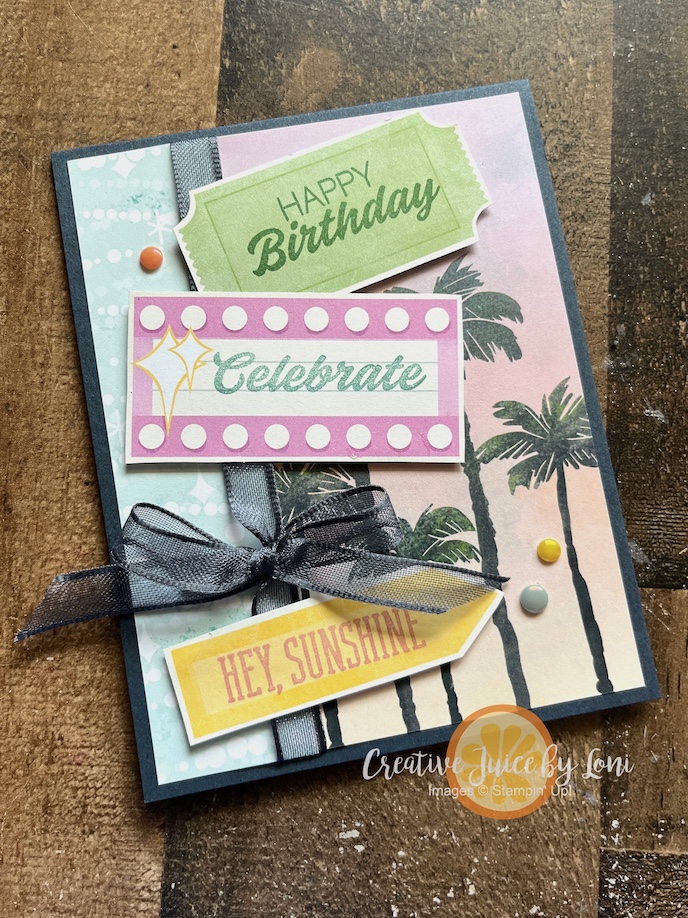
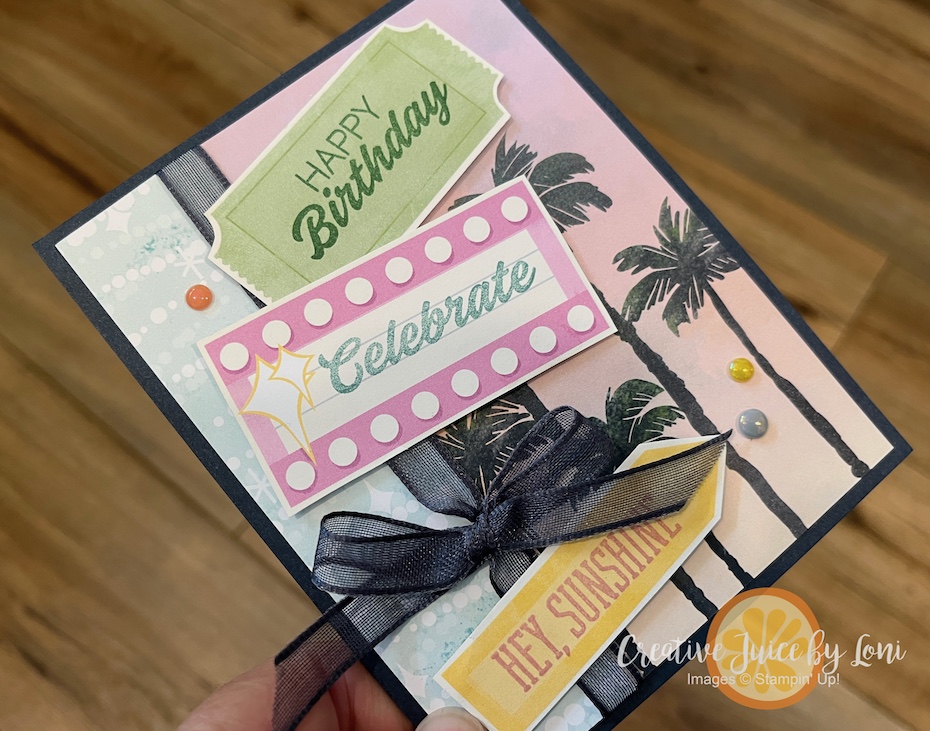
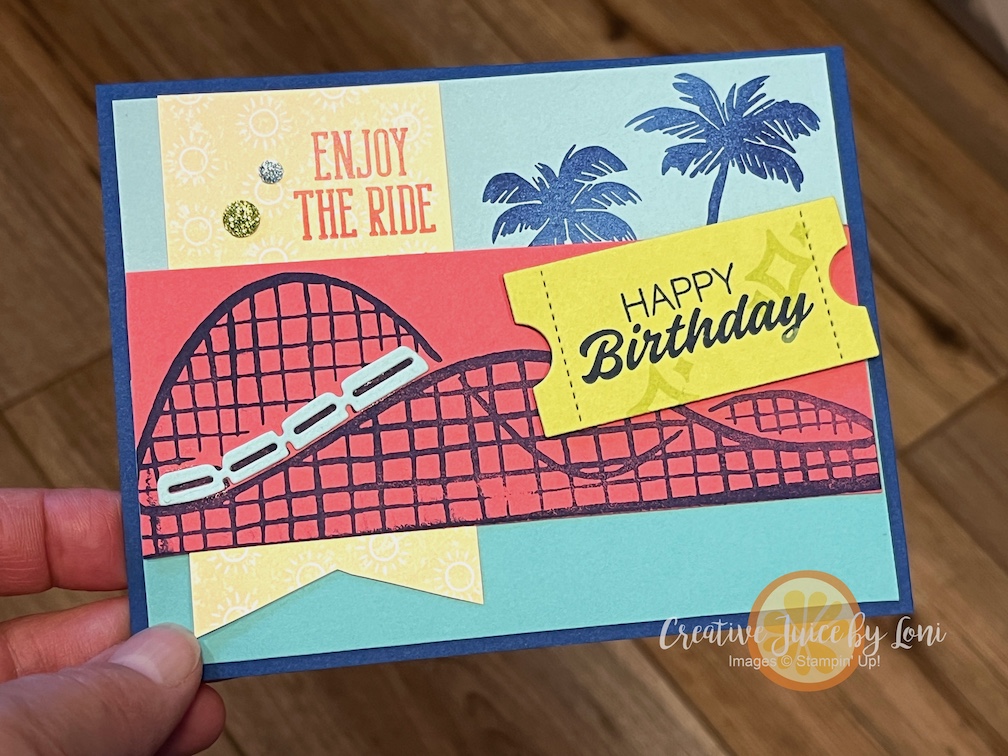
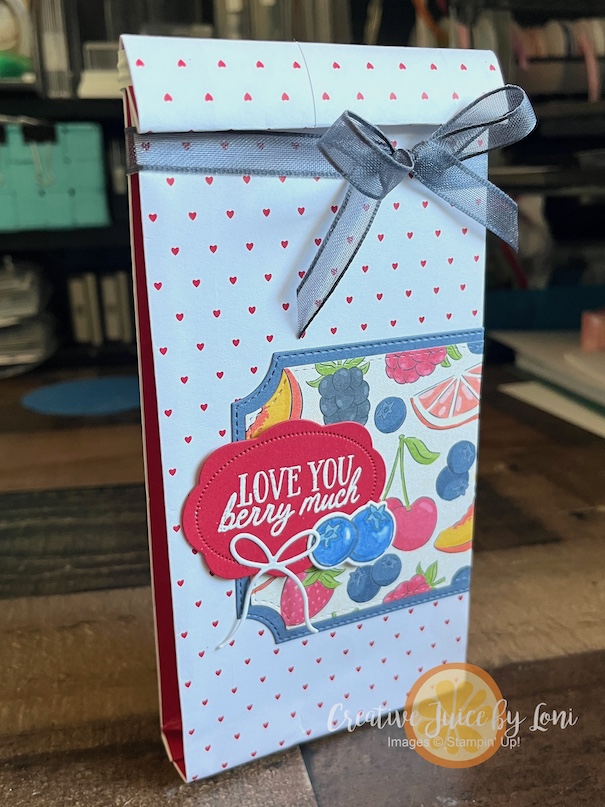
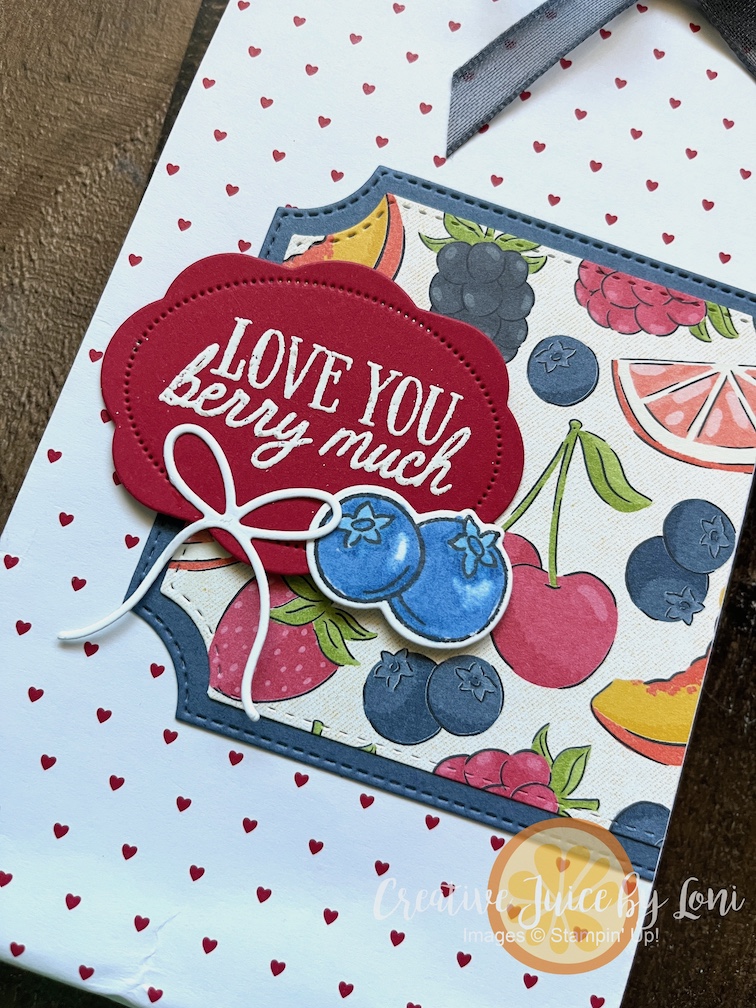
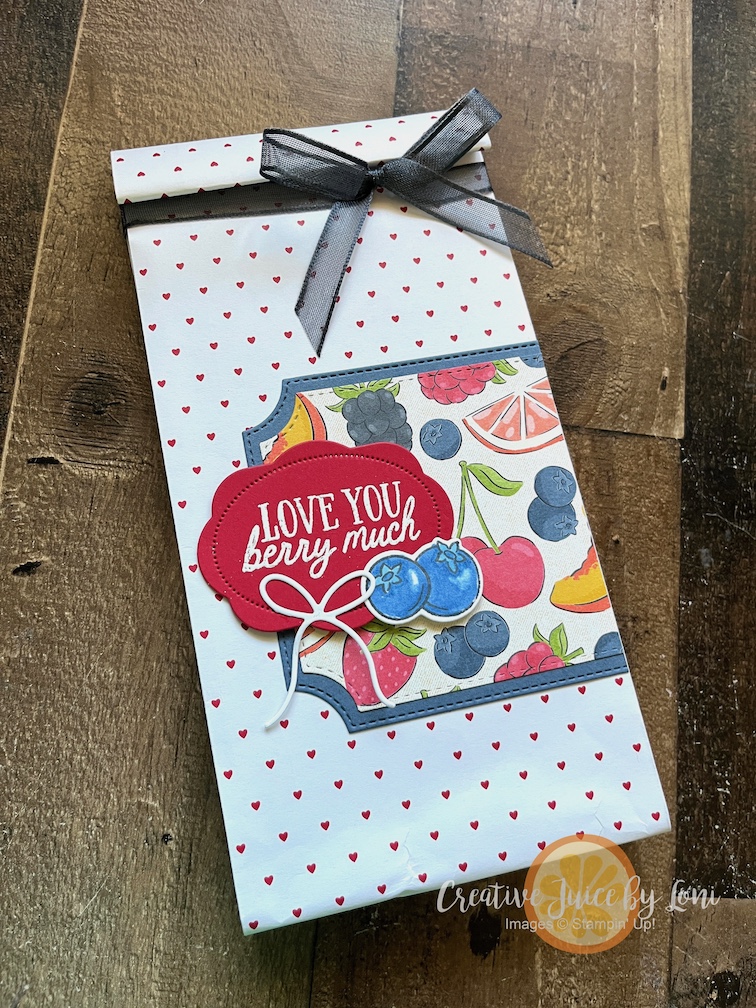
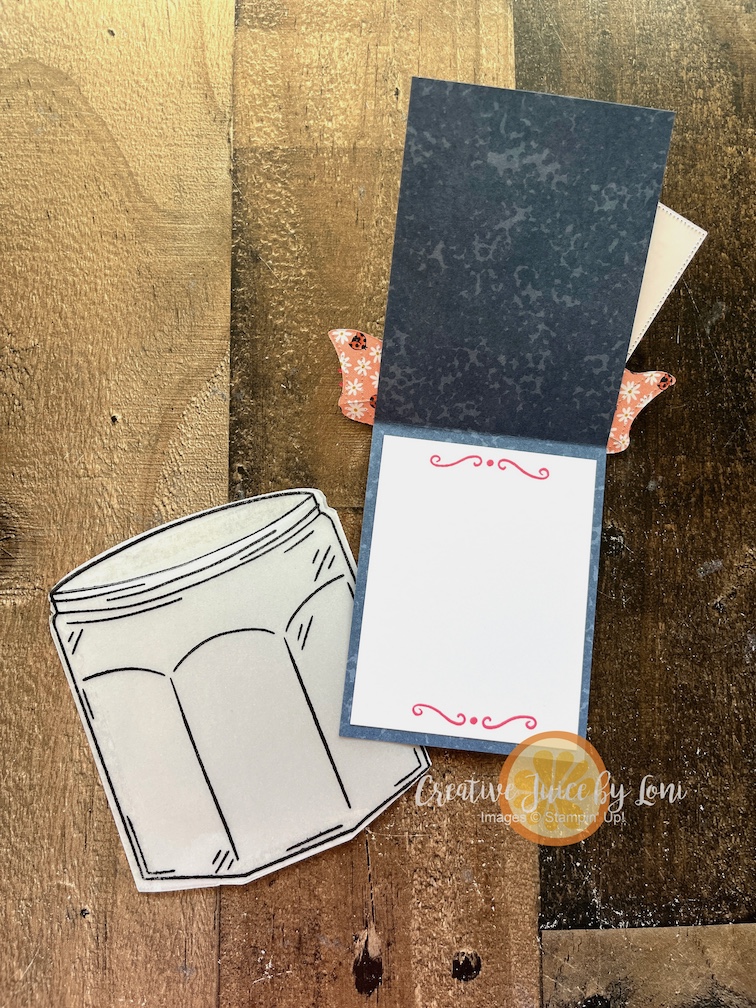
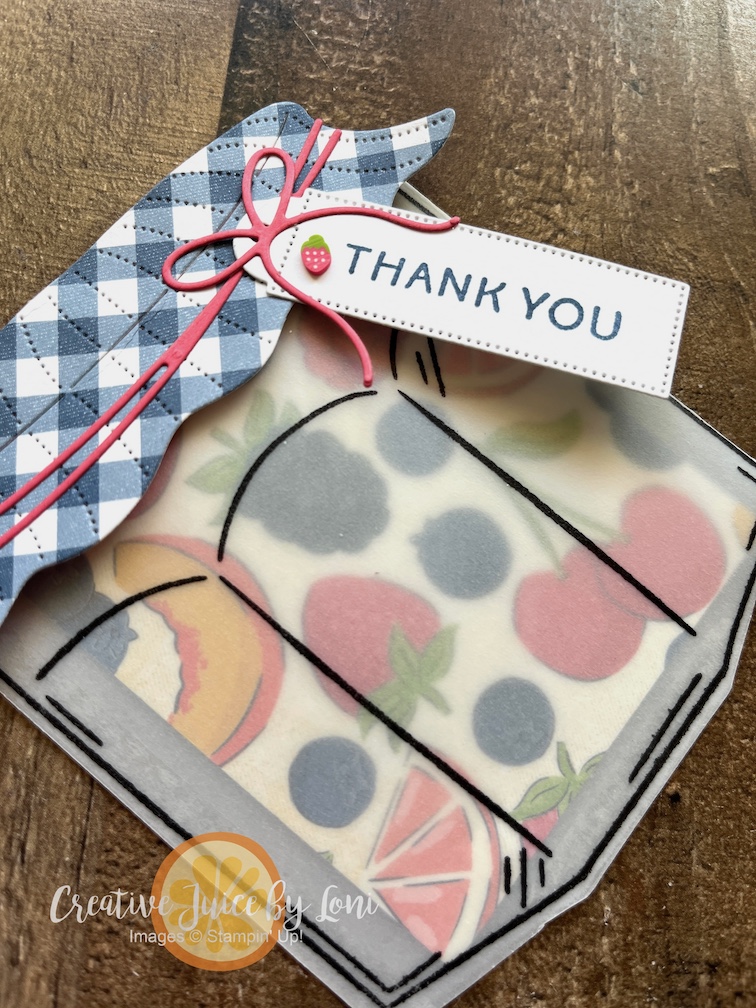
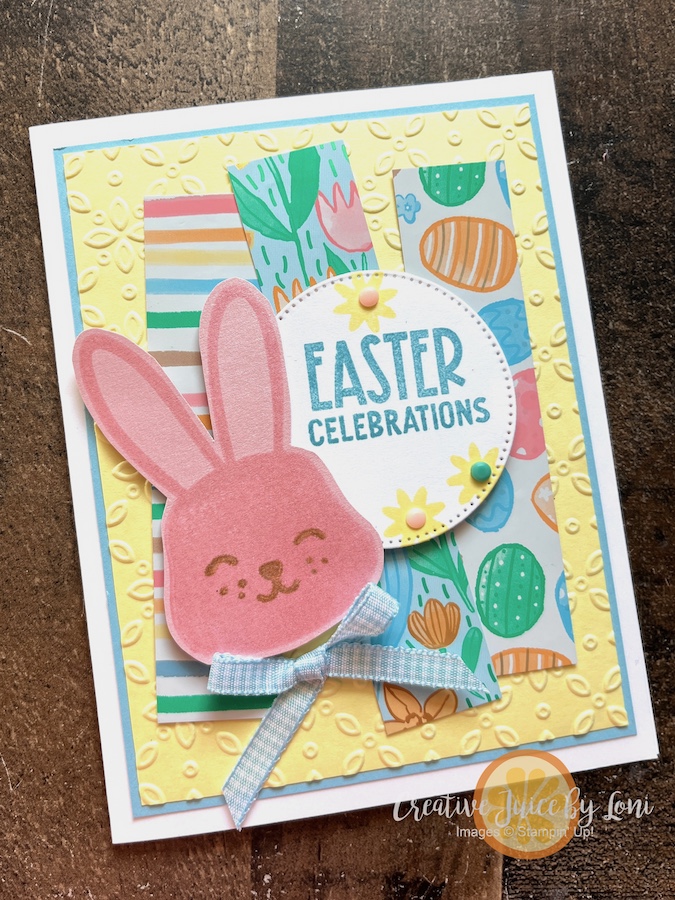
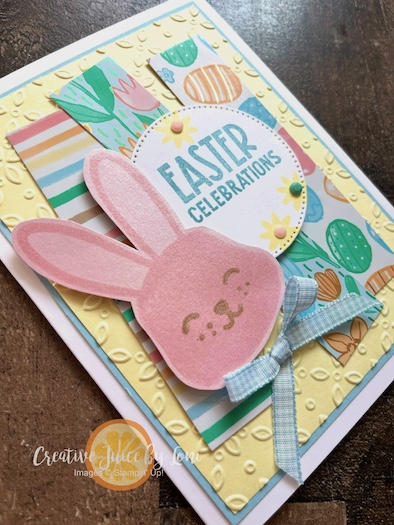
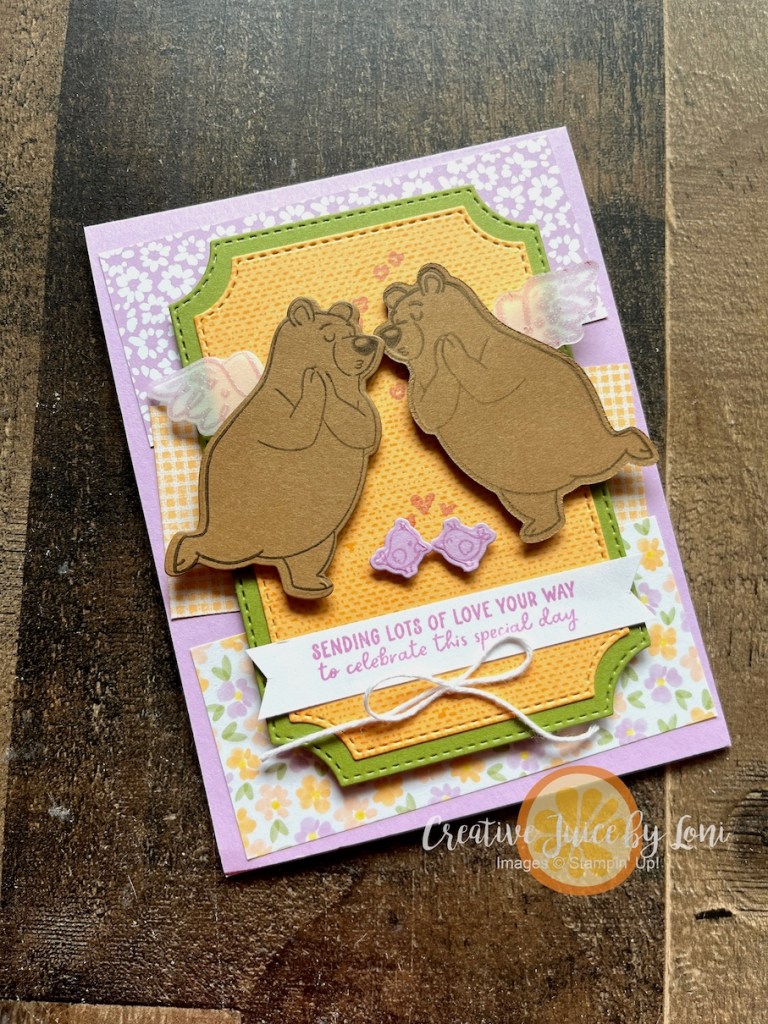
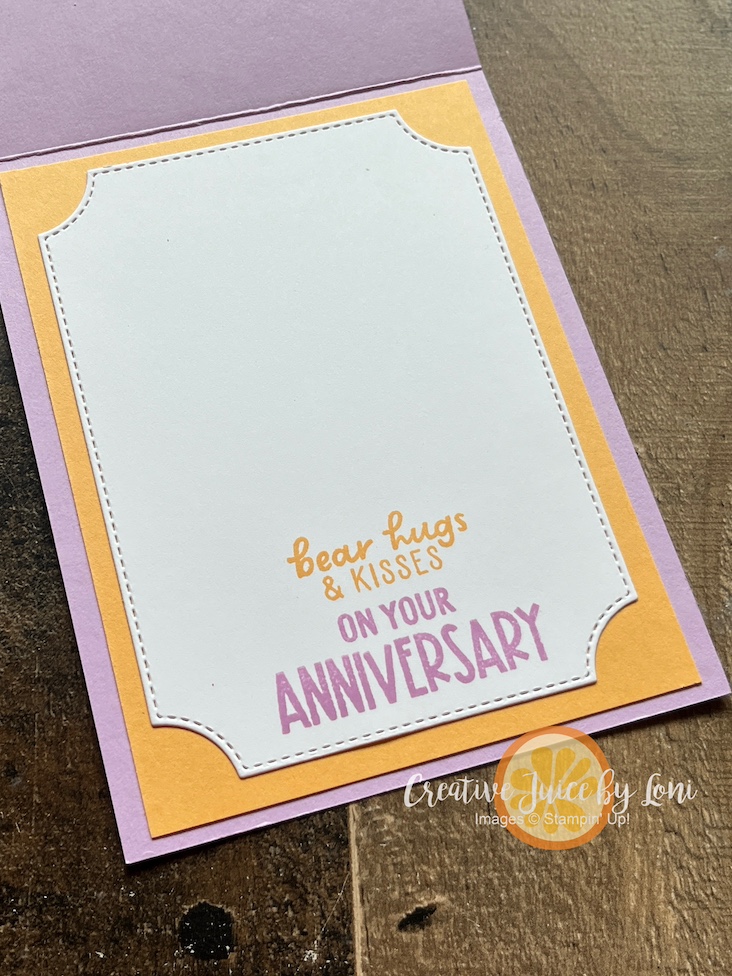
I love the sheet of tickets and tags included in the Beach Boardwalk Designer Series Paper because they can be stamped to evoke a “winning” feeling for any celebration, like you won a drawing 🎟️ or a stuffed animal in a boardwalk game! On the inside of this card, I added one more ticket to remind the recipient that life is quite the adventure:

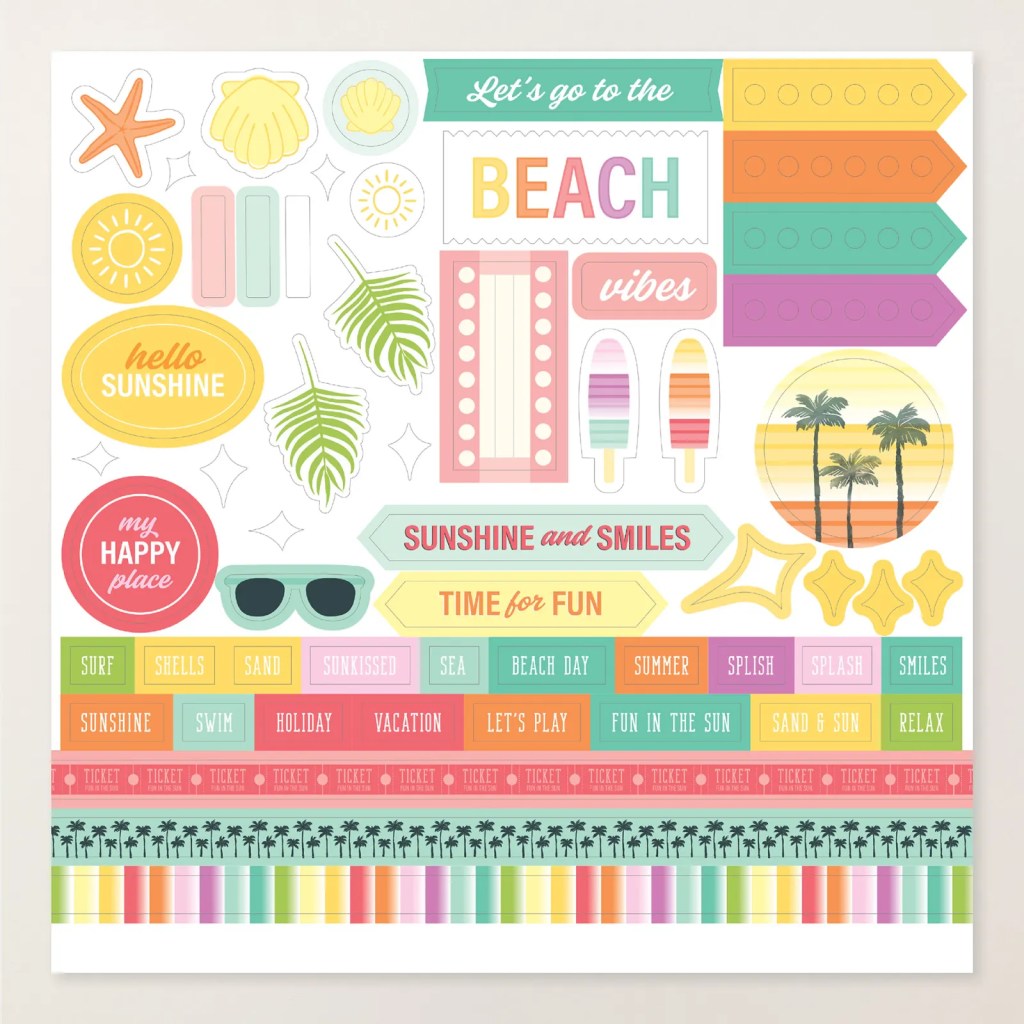
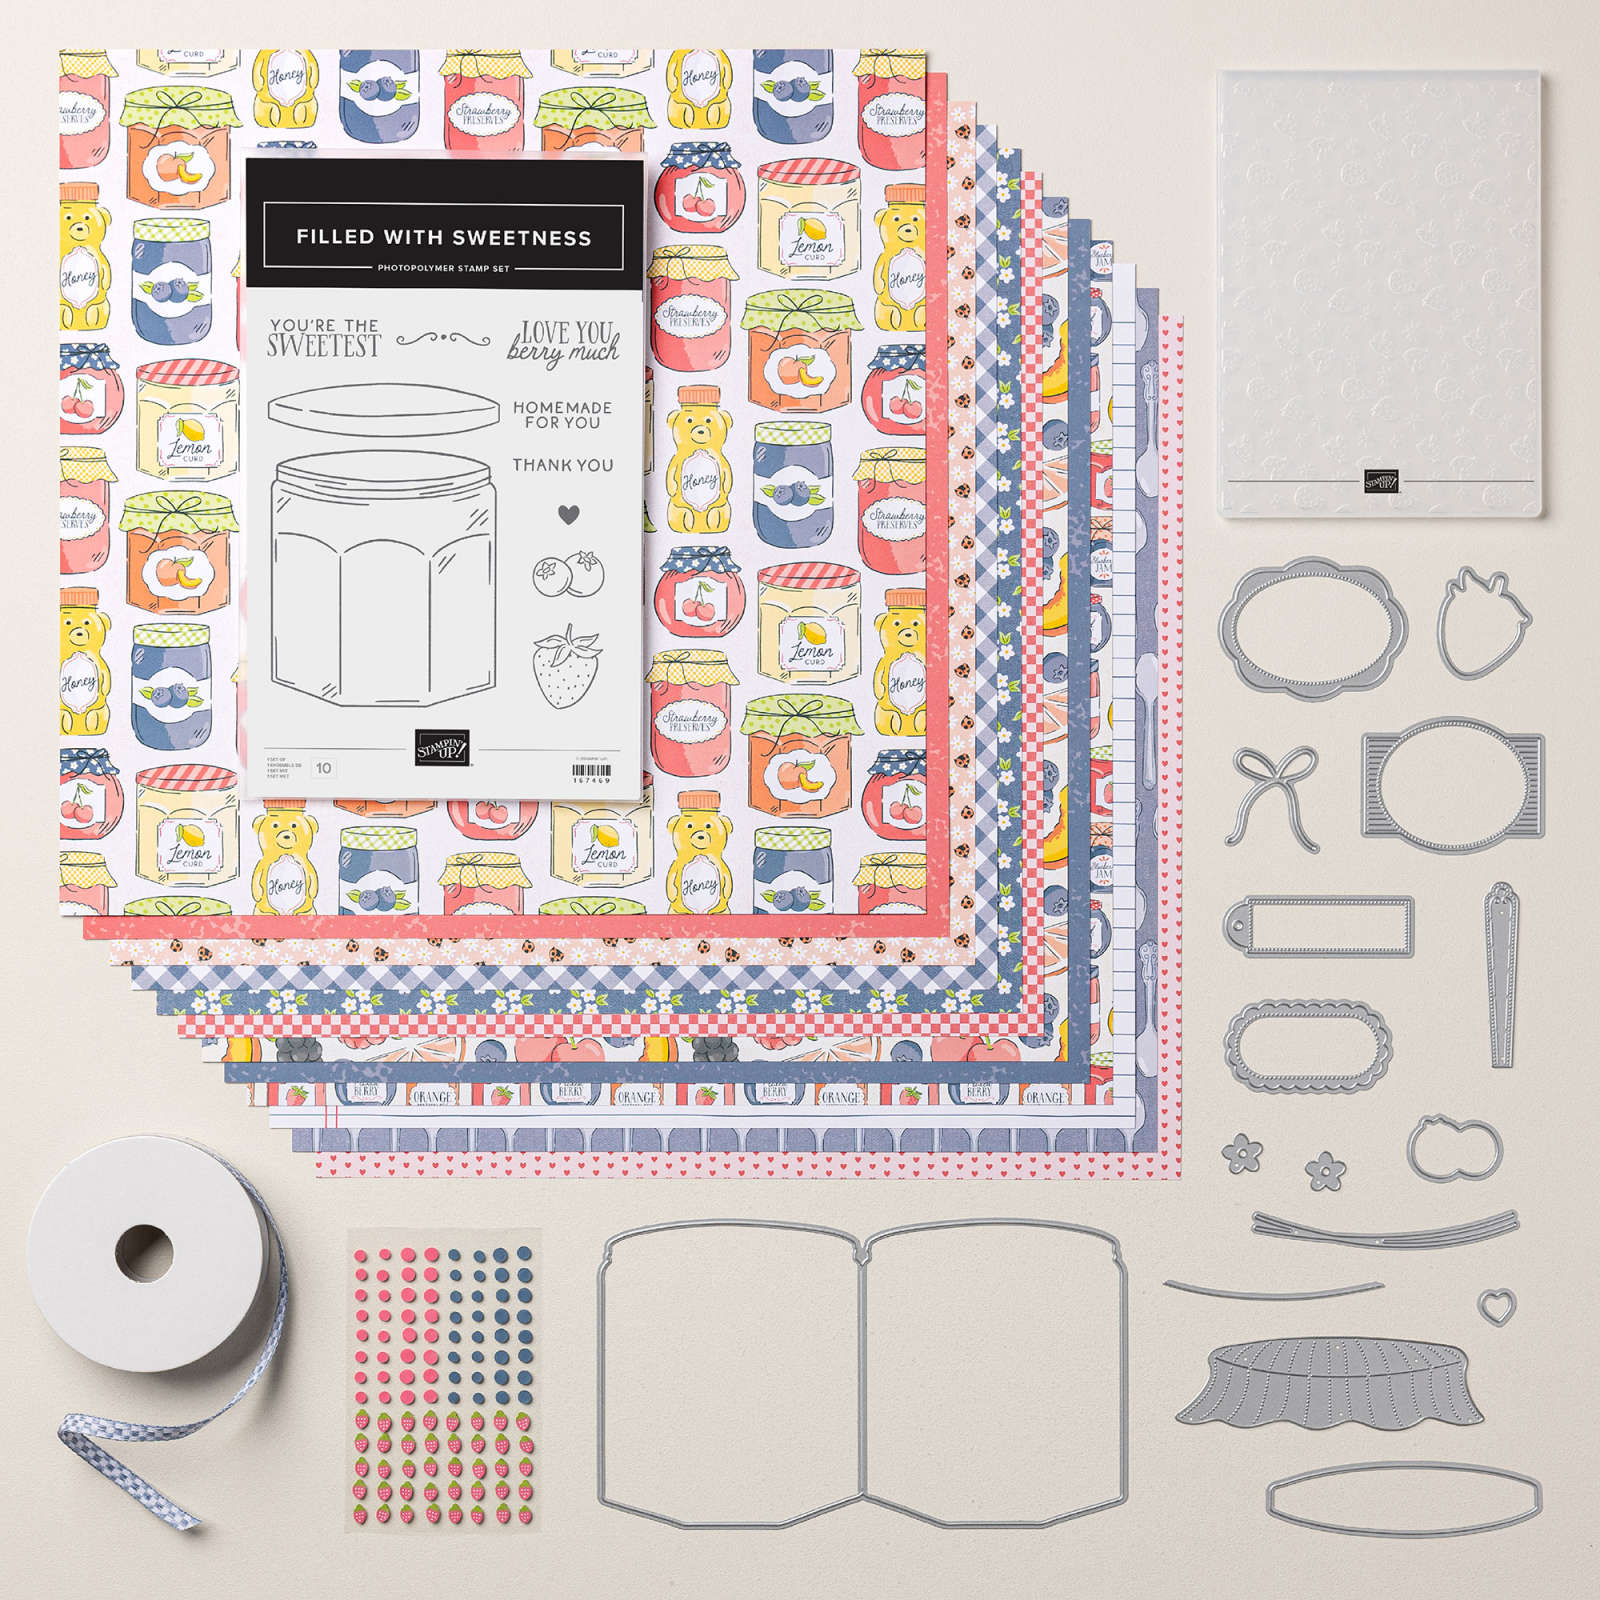
IN CASE YOU DIDN’T KNOW, this Beach Boardwalk paper also comes in a different package with a sticker sheet, all ready to preserve the memories of a day at the park, carnival, beach or fair on a scrapbook page or complete album:

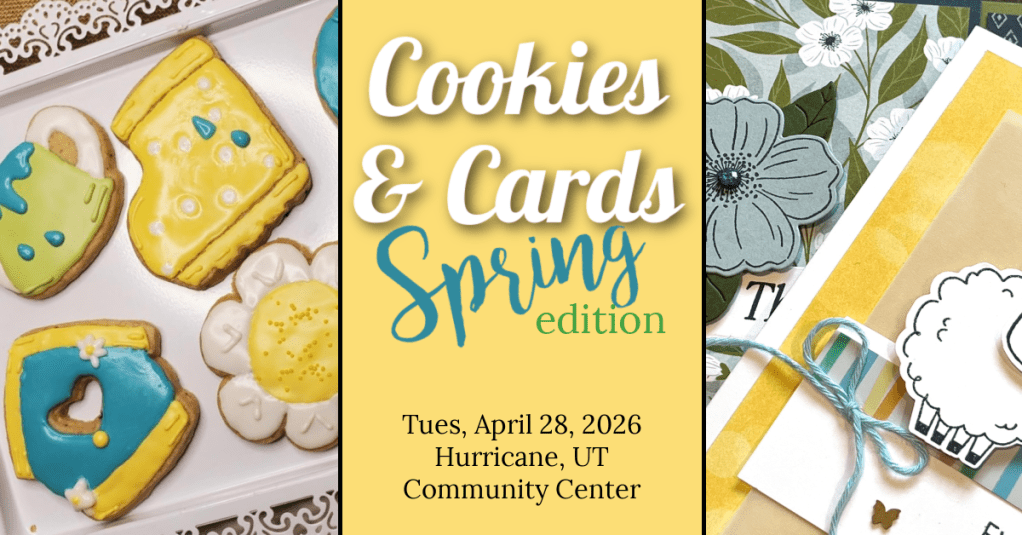
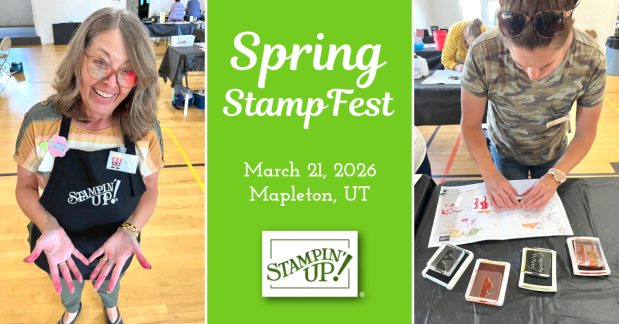
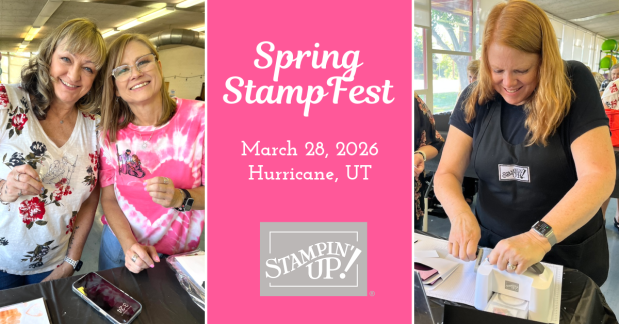
If you have a tropical vacation planned, a summer party or camp, pick up these products soon! And if you crave crafting adventures in southern Utah, here are the next few events I’m hosting ~ click on the images to learn more on the Facebook Events, or click the button to register!
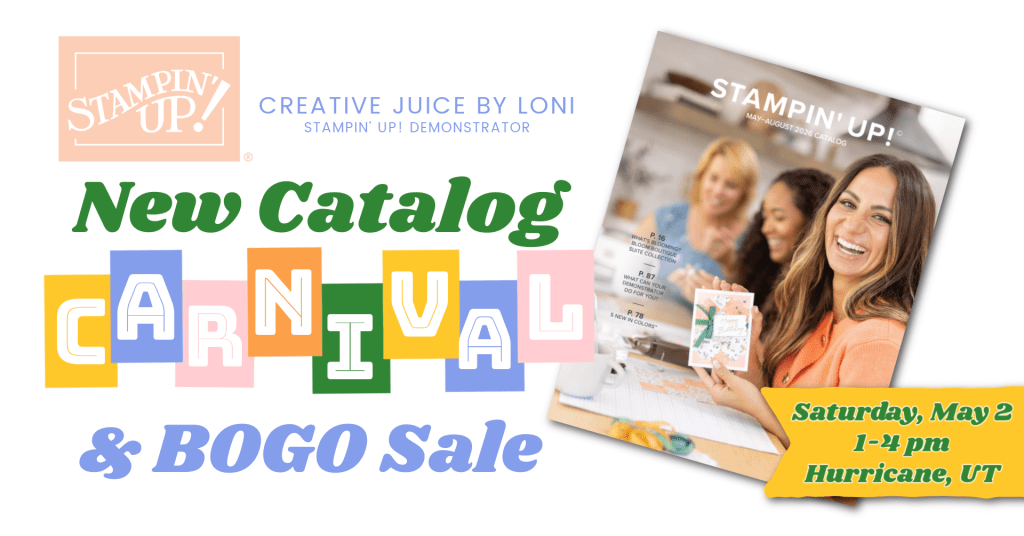
The Catalog Carnival & BOGO SALE is Open House style, so just bring a friend and drop in for all sorts of fun freebies and snacks at 350 S 400 W ~ it’s a ticket to create!
VIEW UPCOMING EVENTS ANYTIME: CLICK THE “CLASSES & EVENTS” LINK IN PINK BAR ACROSS THE TOP
![Boardwalk Fun Photopolymer Stamp Set (English) [ 166822 ]](https://assets1.tamsnetwork.com/images/EC042017NF/166822s.jpg "Boardwalk Fun Photopolymer Stamp Set (English) [ 166822 ]")
![Beach Boardwalk 12" X 12" (30.5 X 30.5 Cm) Designer Series Paper [ 166820 ]](https://assets1.tamsnetwork.com/images/EC042017NF/166820s.jpg "Beach Boardwalk 12\" X 12\" (30.5 X 30.5 Cm) Designer Series Paper [ 166820 ]")
![Secret Sea 8 1/2" X 11" Cardstock [ 165624 ]](https://assets1.tamsnetwork.com/images/EC042017NF/165624s.jpg "Secret Sea 8 1/2\" X 11\" Cardstock [ 165624 ]")
![2024 2026 In Color™ Flat Pearls [ 165266 ]](https://assets1.tamsnetwork.com/images/EC042017NF/165266s.jpg "2024 2026 In Color™ Flat Pearls [ 165266 ]")
![Secret Sea 3/8" (1 Cm) Bordered Open Weave Ribbon [ 166932 ]](https://assets1.tamsnetwork.com/images/EC042017NF/166932s.jpg "Secret Sea 3/8\" (1 Cm) Bordered Open Weave Ribbon [ 166932 ]")
![Garden Green Classic Stampin' Pad [ 147089 ]](https://assets1.tamsnetwork.com/images/EC042017NF/147089s.jpg "Garden Green Classic Stampin' Pad [ 147089 ]")
![Fresh Freesia Classic Stampin' Pad [ 155611 ]](https://assets1.tamsnetwork.com/images/EC042017NF/155611s.jpg "Fresh Freesia Classic Stampin' Pad [ 155611 ]")
![Lost Lagoon Classic Stampin' Pad [ 161678 ]](https://assets1.tamsnetwork.com/images/EC042017NF/161678s.jpg "Lost Lagoon Classic Stampin' Pad [ 161678 ]")
![Pretty Peacock Classic Stampin’ Pad [ 150083 ]](https://assets1.tamsnetwork.com/images/EC042017NF/150083s.jpg "Pretty Peacock Classic Stampin’ Pad [ 150083 ]")
![Stampin' Seal [ 152813 ]](https://assets1.tamsnetwork.com/images/EC042017NF/152813s.jpg "Stampin' Seal [ 152813 ]")
![Stampin' Dimensionals [ 104430 ]](https://assets1.tamsnetwork.com/images/EC042017NF/104430s.jpg "Stampin' Dimensionals [ 104430 ]")
Keep your creative juices flowing! 🍊🧡– Loni Spendlove


![Boardwalk Fun Bundle (English) [ 166829 ]](https://assets1.tamsnetwork.com/images/EC042017NF/166829s.jpg "Boardwalk Fun Bundle (English) [ 166829 ]")
![Blueberry Bushel 8-1/2" X 11" Cardstock [ 146968 ]](https://assets1.tamsnetwork.com/images/EC042017NF/146968s.jpg "Blueberry Bushel 8-1/2\" X 11\" Cardstock [ 146968 ]")
![Pool Party 8-1/2" X 11" Cardstock [ 122924 ]](https://assets1.tamsnetwork.com/images/EC042017NF/122924s.jpg "Pool Party 8-1/2\" X 11\" Cardstock [ 122924 ]")
![Coastal Cabana 8-1/2" X 11" Cardstock [ 131297 ]](https://assets1.tamsnetwork.com/images/EC042017NF/131297s.jpg "Coastal Cabana 8-1/2\" X 11\" Cardstock [ 131297 ]")
![Strawberry Slush 8-1/2" X 11" Card Stock [ 131295 ] (Retired)](https://assets1.tamsnetwork.com/images/EC042017NF/131295s.jpg "Strawberry Slush 8-1/2\" X 11\" Card Stock [ 131295 ] (Retired)")
![Lemon Lime Twist 8-1/2" X 11" Cardstock [ 144245 ]](https://assets1.tamsnetwork.com/images/EC042017NF/144245s.jpg "Lemon Lime Twist 8-1/2\" X 11\" Cardstock [ 144245 ]")
![Blueberry Bushel Classic Stampin' Pad [ 147138 ]](https://assets1.tamsnetwork.com/images/EC042017NF/147138s.jpg "Blueberry Bushel Classic Stampin' Pad [ 147138 ]")
![Strawberry Slush Classic Stampin' Pad [ 165286 ]](https://assets1.tamsnetwork.com/images/EC042017NF/165286s.jpg "Strawberry Slush Classic Stampin' Pad [ 165286 ]")
![Lemon Lime Twist Classic Stampin' Pad [ 147145 ]](https://assets1.tamsnetwork.com/images/EC042017NF/147145s.jpg "Lemon Lime Twist Classic Stampin' Pad [ 147145 ]")
![Basic Black 8-1/2" X 11" Cardstock [ 121045 ]](https://assets1.tamsnetwork.com/images/EC042017NF/121045s.jpg "Basic Black 8-1/2\" X 11\" Cardstock [ 121045 ]")
![2024–2026 In Color™ 8 1/2" X 11" Cardstock [ 163803 ]](https://assets1.tamsnetwork.com/images/EC042017NF/163803s.jpg "2024–2026 In Color™ 8 1/2\" X 11\" Cardstock [ 163803 ]")
![Lemon Lolly 8 1/2" X 11" Cardstock [ 161720 ]](https://assets1.tamsnetwork.com/images/EC042017NF/161720s.jpg "Lemon Lolly 8 1/2\" X 11\" Cardstock [ 161720 ]")
![Tuxedo Black Memento Ink Pad [ 132708 ]](https://assets1.tamsnetwork.com/images/EC042017NF/132708s.jpg "Tuxedo Black Memento Ink Pad [ 132708 ]")
![Stampin' Cut & Emboss Machine [ 149653 ]](https://assets1.tamsnetwork.com/images/EC042017NF/149653s.jpg "Stampin' Cut & Emboss Machine [ 149653 ]")
![Multipurpose Liquid Glue [ 110755 ]](https://assets1.tamsnetwork.com/images/EC042017NF/110755s.jpg "Multipurpose Liquid Glue [ 110755 ]")
![Black Stampin' Dimensionals Combo Pack [ 150893 ]](https://assets1.tamsnetwork.com/images/EC042017NF/150893s.jpg "Black Stampin' Dimensionals Combo Pack [ 150893 ]")
![Take Your Pick [ 144107 ]](https://assets1.tamsnetwork.com/images/EC042017NF/144107s.jpg "Take Your Pick [ 144107 ]")


![Filled With Sweetness Bundle (English) [ 167475 ]](https://assets1.tamsnetwork.com/images/EC042017NF/167475s.jpg "Filled With Sweetness Bundle (English) [ 167475 ]")
![Homemade Sweetness 12" X 12" (30.5 X 30.5 Cm) Designer Series Paper [ 167467 ]](https://assets1.tamsnetwork.com/images/EC042017NF/167467s.jpg "Homemade Sweetness 12\" X 12\" (30.5 X 30.5 Cm) Designer Series Paper [ 167467 ]")
![Misty Moonlight 8-1/2" X 11" Cardstock [ 153081 ]](https://assets1.tamsnetwork.com/images/EC042017NF/153081s.jpg "Misty Moonlight 8-1/2\" X 11\" Cardstock [ 153081 ]")
![Real Red 8-1/2" X 11" Cardstock [ 102482 ]](https://assets1.tamsnetwork.com/images/EC042017NF/102482s.jpg "Real Red 8-1/2\" X 11\" Cardstock [ 102482 ]")
![Basic White 8 1/2" X 11" Cardstock [ 166780 ]](https://assets1.tamsnetwork.com/images/EC042017NF/166780s.jpg "Basic White 8 1/2\" X 11\" Cardstock [ 166780 ]")
![Branching Out Dies [ 165775 ]](https://assets1.tamsnetwork.com/images/EC042017NF/165775s.jpg "Branching Out Dies [ 165775 ]")
![Blueberry Bushel Stampin’ Blends Combo Pack [ 161679 ]](https://assets1.tamsnetwork.com/images/EC042017NF/161679s.jpg "Blueberry Bushel Stampin’ Blends Combo Pack [ 161679 ]")
![Uninked Stampin’ Craft Pad & Whisper White Refill [ 147277 ]](https://assets1.tamsnetwork.com/images/EC042017NF/147277s.jpg "Uninked Stampin’ Craft Pad & Whisper White Refill [ 147277 ]")
![Basics Wow! Embossing Powder [ 165679 ]](https://assets1.tamsnetwork.com/images/EC042017NF/165679s.jpg "Basics Wow! Embossing Powder [ 165679 ]")
![Heat Tool (Us And Canada) [ 129053 ]](https://assets1.tamsnetwork.com/images/EC042017NF/129053s.jpg "Heat Tool (Us And Canada) [ 129053 ]")


![Basic White 12" X 12" (30.5 X 30.5 Cm) Thick Cardstock [ 166782 ]](https://assets1.tamsnetwork.com/images/EC042017NF/166782s.jpg "Basic White 12\" X 12\" (30.5 X 30.5 Cm) Thick Cardstock [ 166782 ]")
![Strawberry Slush 8 1/2" X 11" Cardstock [ 165625 ]](https://assets1.tamsnetwork.com/images/EC042017NF/165625s.jpg "Strawberry Slush 8 1/2\" X 11\" Cardstock [ 165625 ]")
![Cloud Cover 8 1/2" X 11" Cardstock [ 165621 ]](https://assets1.tamsnetwork.com/images/EC042017NF/165621s.jpg "Cloud Cover 8 1/2\" X 11\" Cardstock [ 165621 ]")
![Vellum 12" X 12" (30.5 X 30.5 Cm) Specialty Paper [ 167099 ]](https://assets1.tamsnetwork.com/images/EC042017NF/167099s.jpg "Vellum 12\" X 12\" (30.5 X 30.5 Cm) Specialty Paper [ 167099 ]")
![Silver Foil 12" X 12" (30.5 X 30.5 Cm) Specialty Pack [ 163096 ]](https://assets1.tamsnetwork.com/images/EC042017NF/163096s.jpg "Silver Foil 12\" X 12\" (30.5 X 30.5 Cm) Specialty Pack [ 163096 ]")
![Jet Black Stāzon Ink Pad [ 101406 ]](https://assets1.tamsnetwork.com/images/EC042017NF/101406s.jpg "Jet Black Stāzon Ink Pad [ 101406 ]")
![Misty Moonlight Stampin' Blends Combo Pack [ 153108 ]](https://assets1.tamsnetwork.com/images/EC042017NF/153108s.jpg "Misty Moonlight Stampin' Blends Combo Pack [ 153108 ]")
![Strawberry Slush 3/8" (1 Cm) Faux Linen Ribbon [ 165274 ]](https://assets1.tamsnetwork.com/images/EC042017NF/165274s.jpg "Strawberry Slush 3/8\" (1 Cm) Faux Linen Ribbon [ 165274 ]")


![Adhesive Sheets [ 152334 ]](https://assets1.tamsnetwork.com/images/EC042017NF/152334s.jpg "Adhesive Sheets [ 152334 ]")
![Tear & Tape Adhesive [ 154031 ]](https://assets1.tamsnetwork.com/images/EC042017NF/154031s.jpg "Tear & Tape Adhesive [ 154031 ]")
![Strawberries & Dots [ 167479 ]](https://assets1.tamsnetwork.com/images/EC042017NF/167479s.jpg "Strawberries & Dots [ 167479 ]")

![Reason To Celebrate Photopolymer Stamp Set (English) [ 166905 ]](https://assets1.tamsnetwork.com/images/EC042017NF/166905s.jpg "Reason To Celebrate Photopolymer Stamp Set (English) [ 166905 ]")
![Seasonal Celebrations Photopolymer Stamp Set [ 167225 ]](https://assets1.tamsnetwork.com/images/EC042017NF/167225s.jpg "Seasonal Celebrations Photopolymer Stamp Set [ 167225 ]")
![Easter Joy 12" X 12" (30.5 X 30.5 Cm) Specialty Designer Series Paper [ 166939 ]](https://assets1.tamsnetwork.com/images/EC042017NF/166939s.jpg "Easter Joy 12\" X 12\" (30.5 X 30.5 Cm) Specialty Designer Series Paper [ 166939 ]")
![Pastels Shimmer 12" X 12" (30.5 X 30.5 Cm) Specialty Paper [ 167198 ]](https://assets1.tamsnetwork.com/images/EC042017NF/167198s.jpg "Pastels Shimmer 12\" X 12\" (30.5 X 30.5 Cm) Specialty Paper [ 167198 ]")
![Basic White 8 1/2" X 11" Thick Cardstock [ 159229 ]](https://assets1.tamsnetwork.com/images/EC042017NF/159229s.jpg "Basic White 8 1/2\" X 11\" Thick Cardstock [ 159229 ]")
![Balmy Blue 8-1/2" X 11" Cardstock [ 146982 ]](https://assets1.tamsnetwork.com/images/EC042017NF/146982s.jpg "Balmy Blue 8-1/2\" X 11\" Cardstock [ 146982 ]")
![Balmy Blue Classic Stampin' Pad [ 147105 ]](https://assets1.tamsnetwork.com/images/EC042017NF/147105s.jpg "Balmy Blue Classic Stampin' Pad [ 147105 ]")
![Lemon Lolly Classic Stampin' Pad [ 161666 ]](https://assets1.tamsnetwork.com/images/EC042017NF/161666s.jpg "Lemon Lolly Classic Stampin' Pad [ 161666 ]")
![Pretty In Pink Classic Stampin Pad [ 163807 ]](https://assets1.tamsnetwork.com/images/EC042017NF/163807s.jpg "Pretty In Pink Classic Stampin Pad [ 163807 ]")
![Eyelet 3D Embossing Folder [ 163414 ]](https://assets1.tamsnetwork.com/images/EC042017NF/163414s.jpg "Eyelet 3D Embossing Folder [ 163414 ]")
![Stylish Shapes Dies [ 159183 ]](https://assets1.tamsnetwork.com/images/EC042017NF/159183s.jpg "Stylish Shapes Dies [ 159183 ]")
![Paper Trimmer [ 152392 ]](https://assets1.tamsnetwork.com/images/EC042017NF/152392s.jpg "Paper Trimmer [ 152392 ]")
![Balmy Blue 1/4" (6.4 Mm) Gingham Ribbon [ 166952 ]](https://assets1.tamsnetwork.com/images/EC042017NF/166952s.jpg "Balmy Blue 1/4\" (6.4 Mm) Gingham Ribbon [ 166952 ]")


![Hobby Haven Suite Collection (English) [ 167214 ]](https://assets1.tamsnetwork.com/images/EC042017NF/167214s.jpg "Hobby Haven Suite Collection (English) [ 167214 ]")
![Cajun Craze 8-1/2" X 11" Cardstock [ 119684 ]](https://assets1.tamsnetwork.com/images/EC042017NF/119684s.jpg "Cajun Craze 8-1/2\" X 11\" Cardstock [ 119684 ]")
![Lost Lagoon 8-1/2" X 11" Cardstock [ 133679 ]](https://assets1.tamsnetwork.com/images/EC042017NF/133679s.jpg "Lost Lagoon 8-1/2\" X 11\" Cardstock [ 133679 ]")
![Forever Plaid 3 D Embossing Folder [ 164049 ]](https://assets1.tamsnetwork.com/images/EC042017NF/164049s.jpg "Forever Plaid 3 D Embossing Folder [ 164049 ]")
![Versamark Pad [ 102283 ]](https://assets1.tamsnetwork.com/images/EC042017NF/102283s.jpg "Versamark Pad [ 102283 ]")
![Metallics Wow! Embossing Powder [ 165678 ]](https://assets1.tamsnetwork.com/images/EC042017NF/165678s.jpg "Metallics Wow! Embossing Powder [ 165678 ]")
![Basic Beige 3/8" (1 Cm) Bordered Ribbon [ 163788 ]](https://assets1.tamsnetwork.com/images/EC042017NF/163788s.jpg "Basic Beige 3/8\" (1 Cm) Bordered Ribbon [ 163788 ]")

![Valentine Kisses Bundle (English) [ 167310 ]](https://assets1.tamsnetwork.com/images/EC042017NF/167310s.jpg "Valentine Kisses Bundle (English) [ 167310 ]")
![Lasting Linen Photopolymer Stamp Set [ 167107 ]](https://assets1.tamsnetwork.com/images/EC042017NF/167107s.jpg "Lasting Linen Photopolymer Stamp Set [ 167107 ]")
![Silicone Craft Sheet [ 127853 ]](https://assets1.tamsnetwork.com/images/EC042017NF/127853s.jpg "Silicone Craft Sheet [ 127853 ]")
![Lovely & Beautiful 12" X 12" (30.5 X 30.5 Cm) Specialty Designer Series Paper [ 166957 ]](https://assets1.tamsnetwork.com/images/EC042017NF/166957s.jpg "Lovely & Beautiful 12\" X 12\" (30.5 X 30.5 Cm) Specialty Designer Series Paper [ 166957 ]")
![Fresh Freesia 8 1/2" X 11" Cardstock [ 155613 ]](https://assets1.tamsnetwork.com/images/EC042017NF/155613s.jpg "Fresh Freesia 8 1/2\" X 11\" Cardstock [ 155613 ]")
![Old Olive 8-1/2" X 11" Cardstock [ 100702 ]](https://assets1.tamsnetwork.com/images/EC042017NF/100702s.jpg "Old Olive 8-1/2\" X 11\" Cardstock [ 100702 ]")
![Peach Pie 8 1/2" X 11" Cardstock [ 163799 ]](https://assets1.tamsnetwork.com/images/EC042017NF/163799s.jpg "Peach Pie 8 1/2\" X 11\" Cardstock [ 163799 ]")
![Pecan Pie 8 1/2" X 11" Cardstock [ 161717 ]](https://assets1.tamsnetwork.com/images/EC042017NF/161717s.jpg "Pecan Pie 8 1/2\" X 11\" Cardstock [ 161717 ]")
![Peach Pie Classic Stampin Pad [ 163810 ]](https://assets1.tamsnetwork.com/images/EC042017NF/163810s.jpg "Peach Pie Classic Stampin Pad [ 163810 ]")
![Pecan Pie Classic Stampin' Pad [ 161665 ]](https://assets1.tamsnetwork.com/images/EC042017NF/161665s.jpg "Pecan Pie Classic Stampin' Pad [ 161665 ]")
![Baker's Twine Essentials Pack [ 155475 ]](https://assets1.tamsnetwork.com/images/EC042017NF/155475s.jpg "Baker's Twine Essentials Pack [ 155475 ]")
![Mini Glue Dots [ 103683 ]](https://assets1.tamsnetwork.com/images/EC042017NF/103683s.jpg "Mini Glue Dots [ 103683 ]")


![Hobby Haven 12" X 12" (30.5 X 30.5 Cm) Specialty Designer Series Paper [ 167201 ]](https://assets1.tamsnetwork.com/images/EC042017NF/167201s.jpg "Hobby Haven 12\" X 12\" (30.5 X 30.5 Cm) Specialty Designer Series Paper [ 167201 ]")
![Crumb Cake 8-1/2" X 11" Cardstock [ 120953 ]](https://assets1.tamsnetwork.com/images/EC042017NF/120953s.jpg "Crumb Cake 8-1/2\" X 11\" Cardstock [ 120953 ]")
![Calypso Coral 8-1/2" X 11" Cardstock [ 122925 ]](https://assets1.tamsnetwork.com/images/EC042017NF/122925s.jpg "Calypso Coral 8-1/2\" X 11\" Cardstock [ 122925 ]")
![Petal Pink 8-1/2" X 11" Cardstock [ 146985 ]](https://assets1.tamsnetwork.com/images/EC042017NF/146985s.jpg "Petal Pink 8-1/2\" X 11\" Cardstock [ 146985 ]")
![Calypso Coral Classic Stampin' Pad [ 147101 ]](https://assets1.tamsnetwork.com/images/EC042017NF/147101s.jpg "Calypso Coral Classic Stampin' Pad [ 147101 ]")
![Mini Stampin' Cut & Emboss Machine [ 150673 ]](https://assets1.tamsnetwork.com/images/EC042017NF/150673s.jpg "Mini Stampin' Cut & Emboss Machine [ 150673 ]")


![Made With Love 12" X 12" (30.5 X 30.5 Cm) Designer Series Paper [ 167054 ]](https://assets1.tamsnetwork.com/images/EC042017NF/167054s.jpg "Made With Love 12\" X 12\" (30.5 X 30.5 Cm) Designer Series Paper [ 167054 ]")
![Party Alphabet Dies [ 165263 ]](https://assets1.tamsnetwork.com/images/EC042017NF/165263s.jpg "Party Alphabet Dies [ 165263 ]")
![Flirty Flamingo 8-1/2" X 11" Cardstock [ 141416 ]](https://assets1.tamsnetwork.com/images/EC042017NF/141416s.jpg "Flirty Flamingo 8-1/2\" X 11\" Cardstock [ 141416 ]")
![Valentine Kisses Dies [ 167029 ]](https://assets1.tamsnetwork.com/images/EC042017NF/167029s.jpg "Valentine Kisses Dies [ 167029 ]")
