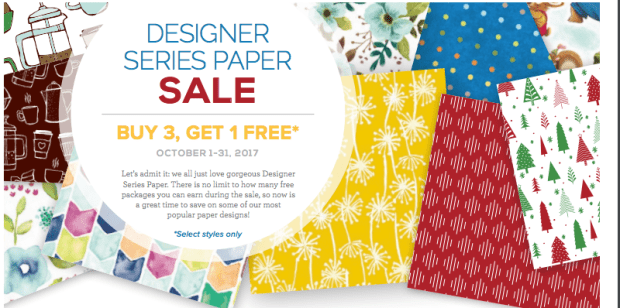
Greetings, friends: I’m glad you are here for our “summertime stamping” themed blog hop! The What’s New at SU! group is comprised of demonstrators from around the world who are excited to share the latest Stampin’ Up! ideas with you, and I know you’ll find inspiration to create your own versions (or borrow one of ours).
I love thinking of ways to use my paper crafting supplies for projects that are unusual, and when I think of summer, I think of barbecues and picnics with family and friends! So why not a little tabletop decor?
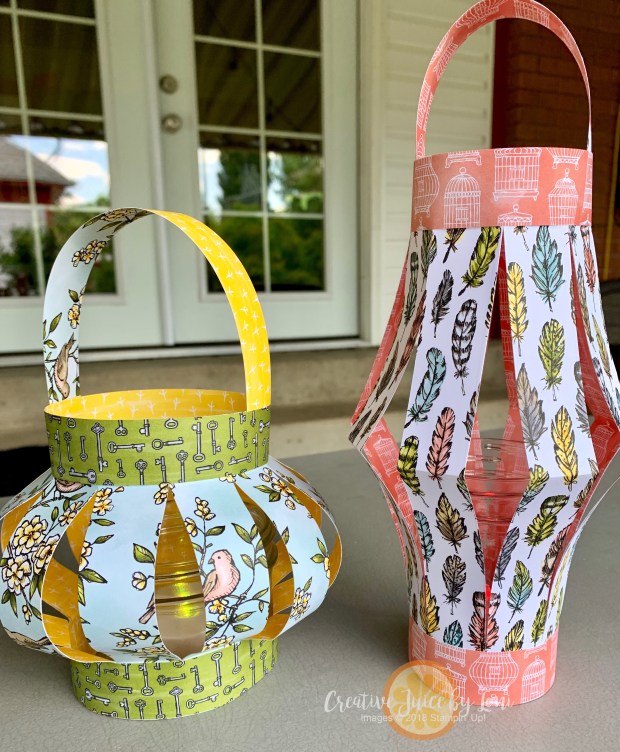
The beautiful new Bird Ballad Designer Series Paper (DSP) was a fine choice for these paper lanterns and they were super simple to make!

For the small round lantern, you’ll need a piece of 6″ x 12″ DSP. Score it at 1″ along the top and bottom, then cut vertical lines at every inch between the two score lines. Cut two strips of contrasting DSP 1″ x 12″ to reinforce the top and bottom edges, if desired, and a 1″ x 10″ strip for the handle. Wrap the paper around and attach the sides together at the back. I inserted the handle between the lantern and outside reinforcement strip using Tear & Tape adhesive. I also curled the paper with my bone folder a bit to keep the round shape. Then I set it over a small jar with a battery-operated candle!
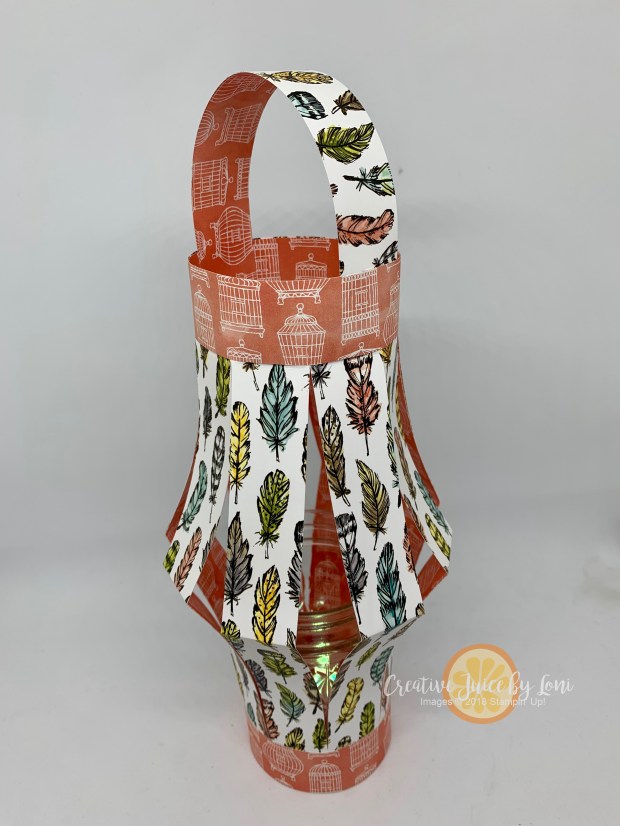
This tall lantern is easier (if possible)! It’s a piece of 9″ x 9″ DSP and you score it at 1″, 4.5″ and 8″, then fold at the 4.5″ line and cut at 1″ from the fold just to the edge of the score lines:
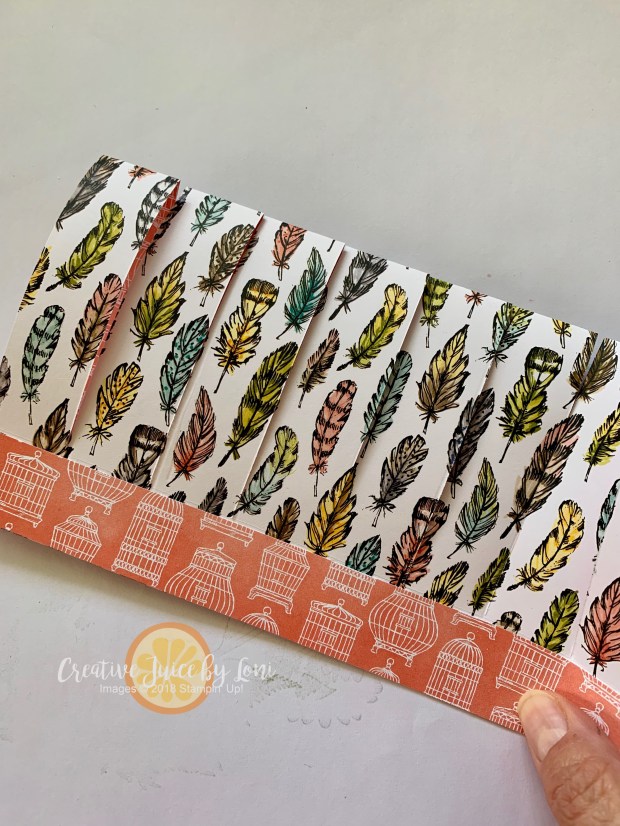
When you unfold the paper, it looks like this:

Follow the same instructions for finishing this lantern. You could make them any size: I simply suggest measuring the jars you are going to wrap them around and cut the width to 1″ longer.
Now you are ready to party on to the next blog which is Terry’s (or back to Margriet’s blog)!


Your comments are welcome and appreciated! You can order the supplies to make your own lanterns from your demonstrator, or if you don’t have a demonstrator, please shop from my Stampin’ Store!


")
")

")
")