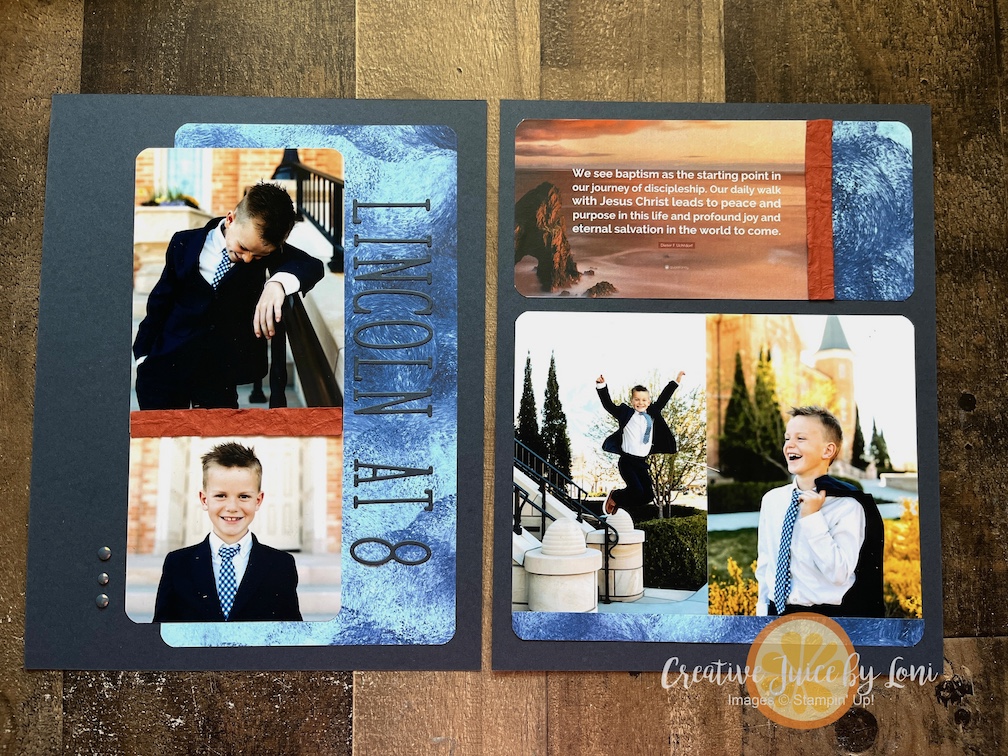
This handsome dude is my oldest Grandson, and he was recently baptized! It’s rare we can get him to cooperate for photos (age typical), so these pictures are to be TREASURED 😆
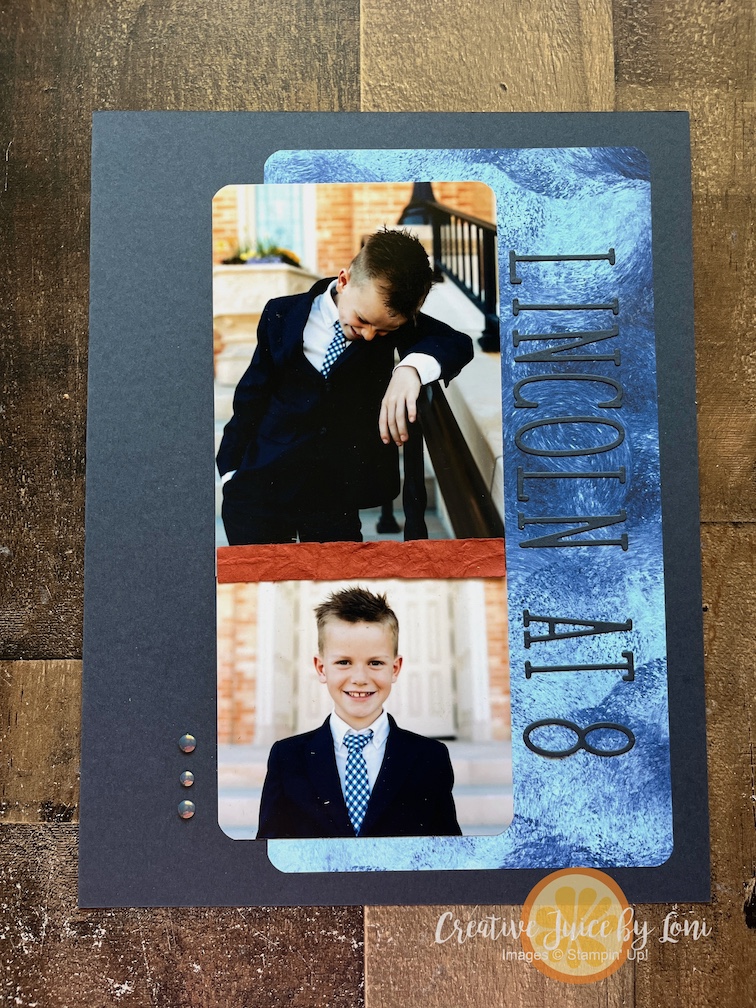
When I saw the Freshly Made Sketches #734, I realized that it would make a terrific map for one half of a scrapbook page layout, so I started with the #FMS734, using Lincoln’s dapper face as the focal point:
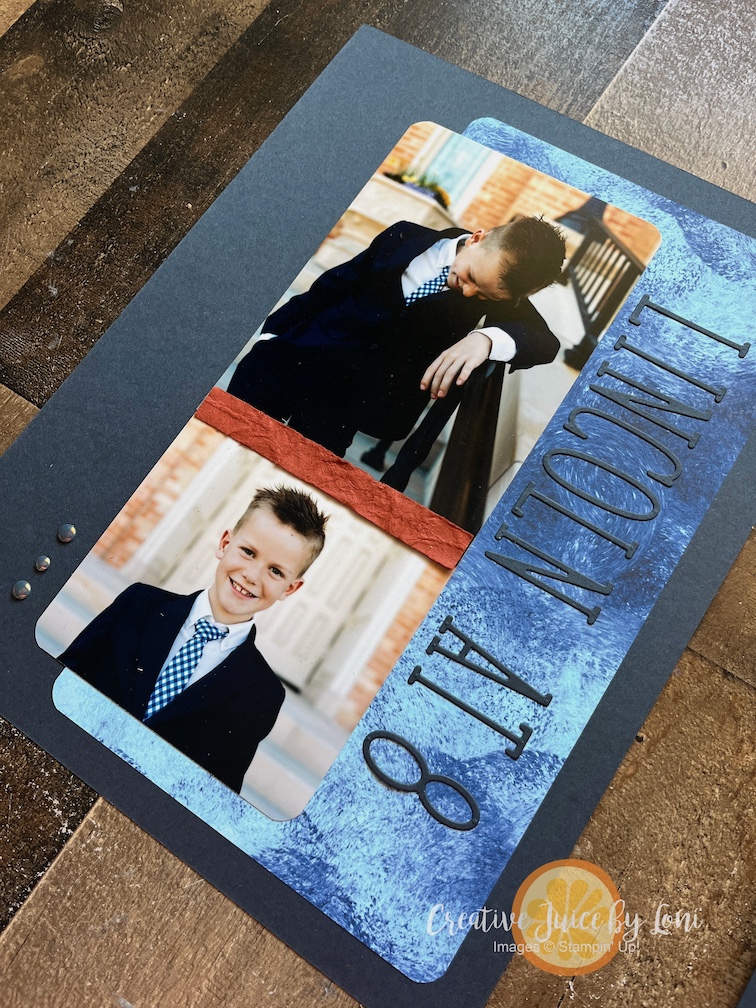
Secret Sea card stock is a blue/dark gray essential Stampin’ Up!®️ color that is softer than harsh black, and paired with a piece of Nature Walk Designer Series Paper, it let the photos shine. A small crumpled strip of Cajun Craze card stock separates the pictures and gives more earthy texture.
I’m not ready to let the Alphabet a la Mode dies go, even though they are retiring…if you don’t have them yet, GRAB THEM TODAY before they sell out, because they are scrapbooking MUST HAVES!! Make sure you line the card stock with Adhesive sheets before cutting to make the letters/numbers into stickers for your pages!
Do you have a standing appointment on your calendar for creativity? Not a someday, not a “when-I-have-time”, but a regular, reliable pause where ink meets paper and you focus on the divine act of making something from scratch.
One of the things I love most about Paper Pumpkin by Stampin’ Up!®️ is that each month, a fully coordinated, all-inclusive kit arrives at your door like a little box of possibility. No supply hunting. No decision fatigue. Just open the box and begin your date with creativity!
Here’s the part that might surprise you… the creativity doesn’t end when the kit is finished.
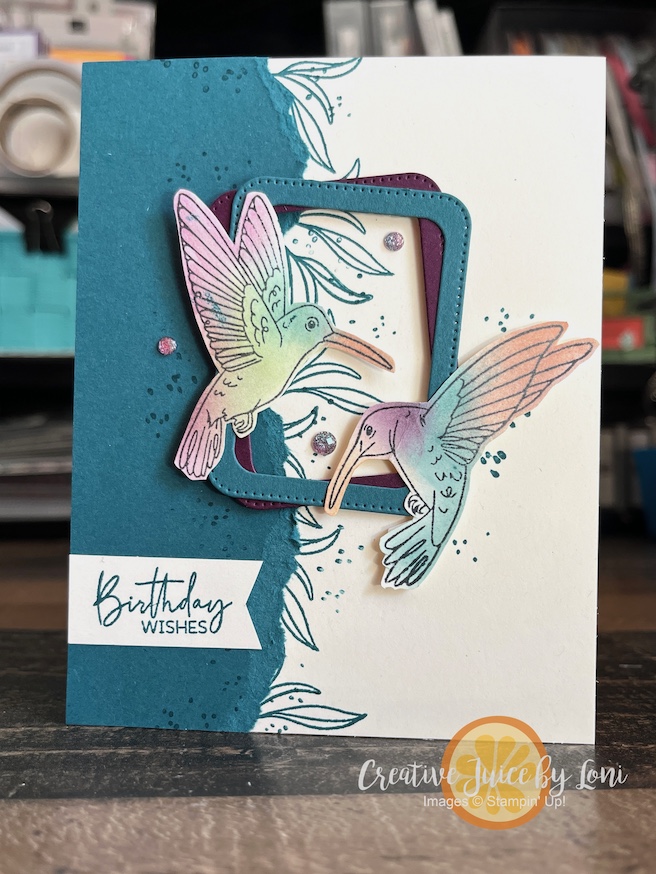
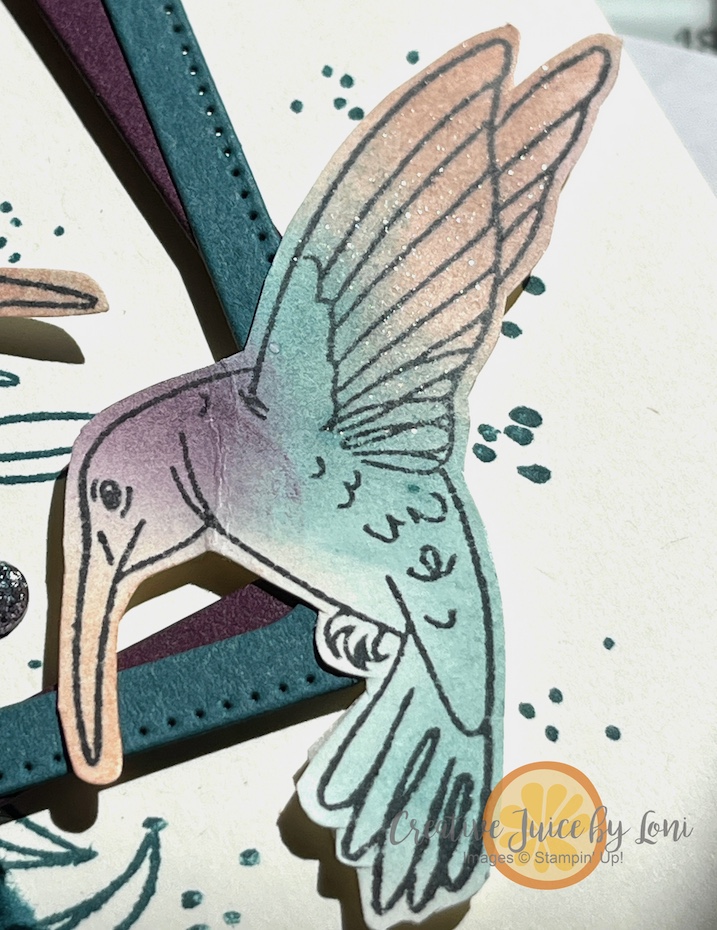
For this card, I used the stamp sets from the March 2026 “Fluttering Garden” Paper Pumpkin kit to create something entirely new for the Freshly Made Sketch challenge #FMS730. I wanted to see how far I could stretch those detailed stamps, and it turns out—they fly beautifully.
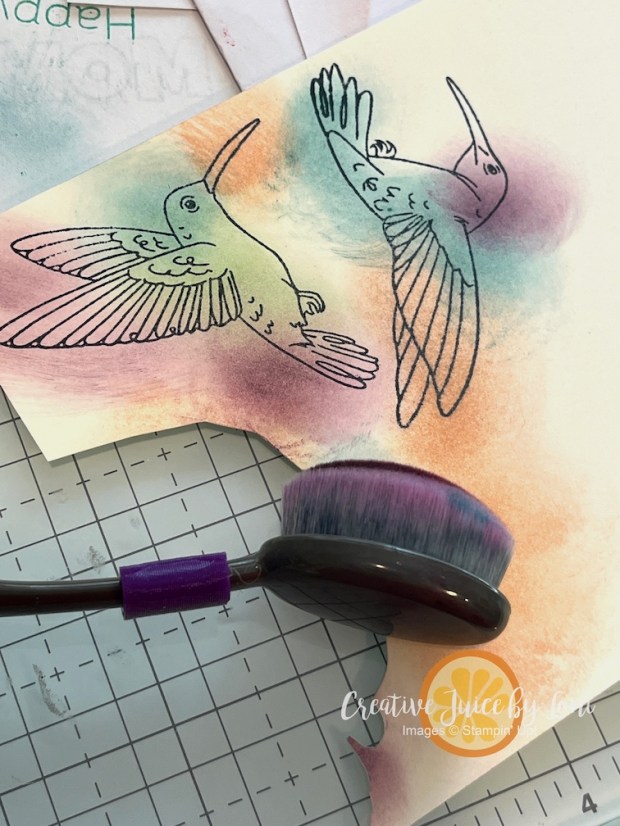
I discovered that my favorite way to color the hummingbirds is with blending brushes and ink pads. No need to be particular… JUST START BLENDING! The soft gradients give them a delicate, natural look and once you fussy cut them out, they look lovely.
The real gift of a monthly kit like Paper Pumpkin is that it builds your confidence while quietly expanding your skills. First, you follow the included designs. Then, you start to experiment with a new layout or color palette… until one day you realize you’re not just assembling—you’re creating.
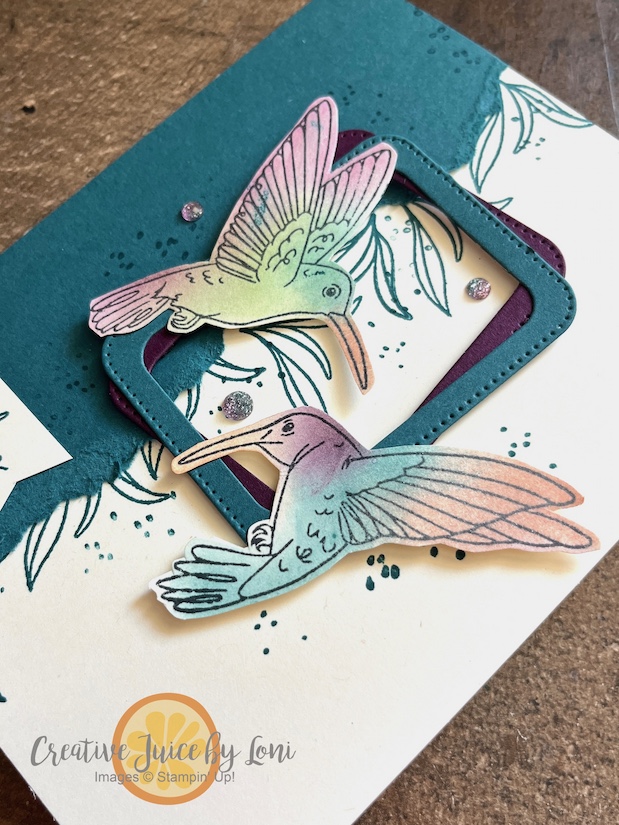
I used two of the Nesting Essentials dies to create dual frames for this card, and the card colors are Very Vanilla, Pretty Peacock, Blackberry Bliss, Old Olive and Crisp Canteloupe (a returning In Color).
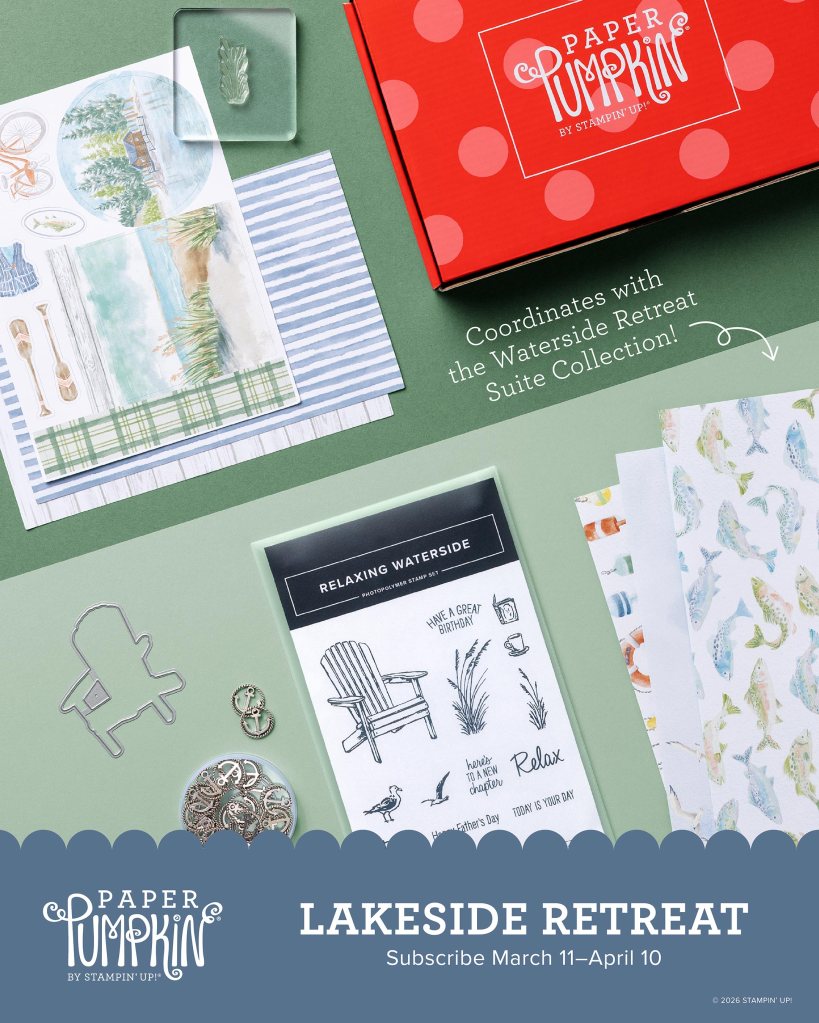
Having a monthly crafting ritual is grounding is grounding and you’ll find a Paper Pumpkin subscription is the mail you anticipate the MOST! The April kit, “Lakeside Retreat,” is available to subscribe to through April 10th. It includes a Peaceful Pine ink spot (an early release of a NEW IN Color!) and coordinates with the Waterside Retreat Suite which will be available in the May-August catalog:
It’s a flexible subscription, with the ability to skip a month or cancel at any time (but why would you?).
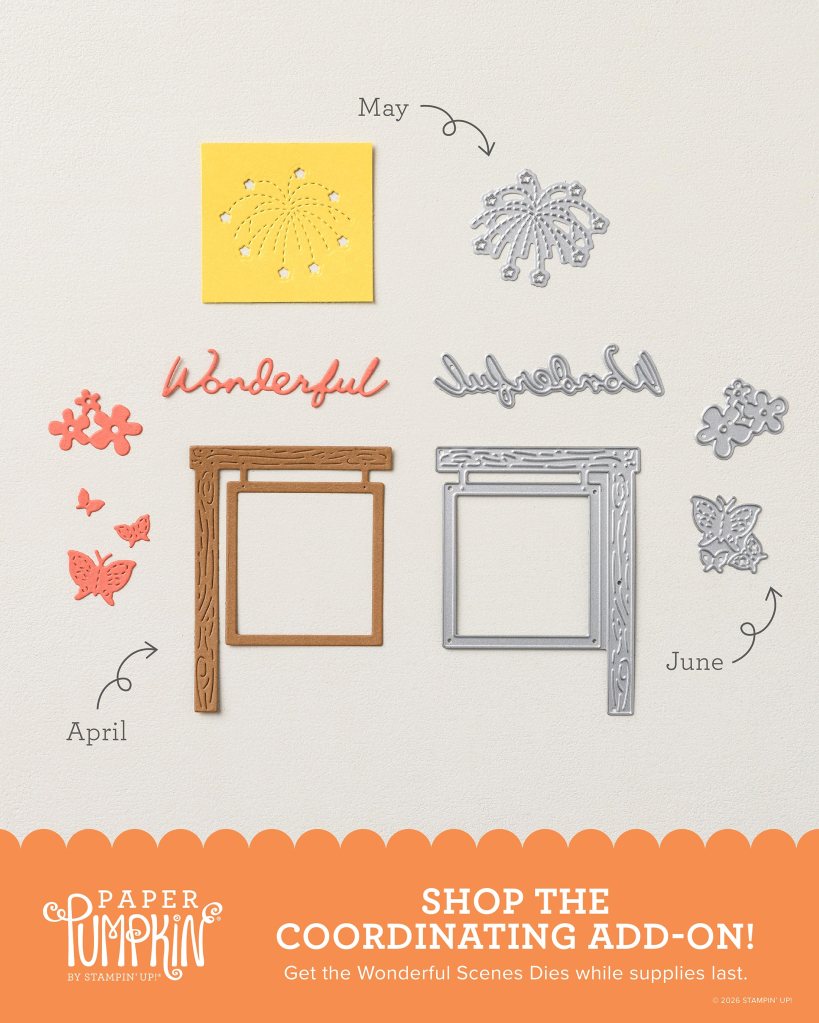
Stay tuned for some sneak peeks of this suite and the optional “Wonderful Scenes” Add On dies that coordinate with the April, May and June Paper Pumpkin Kits!
One more detail to point out on my hummingbird card: Add a wash of WINK OF STELLA GLITTER BRUSH over the wings for gorgeous shimmer & shine!
The best way to keep creating… is simply to begin.
Some punny jokes begin with “What do you get when you mix a ____ with a ____?” but in paper crafting, MAGIC happens when you are given two different starting points, like a color palette and a sketch!
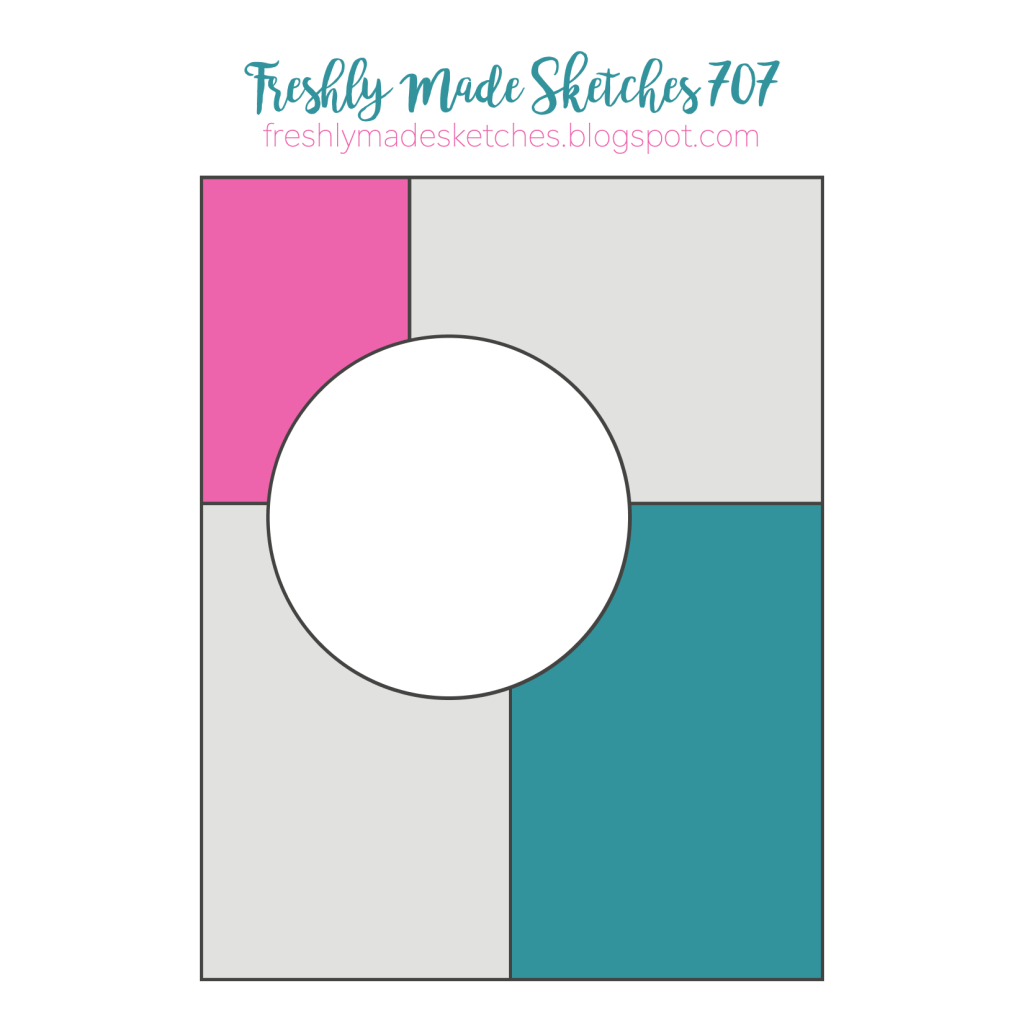
This card was born by marrying the Global Design Project Color Challenge #gdp517 with the Freshly Made Sketch Challenge #FMS707 …AND combining the Abundant Joy Paper Pumpkin Add-On dies with with the Traditions of Christmas Specialty Designer Series Paper! No stamping required for this project 😉
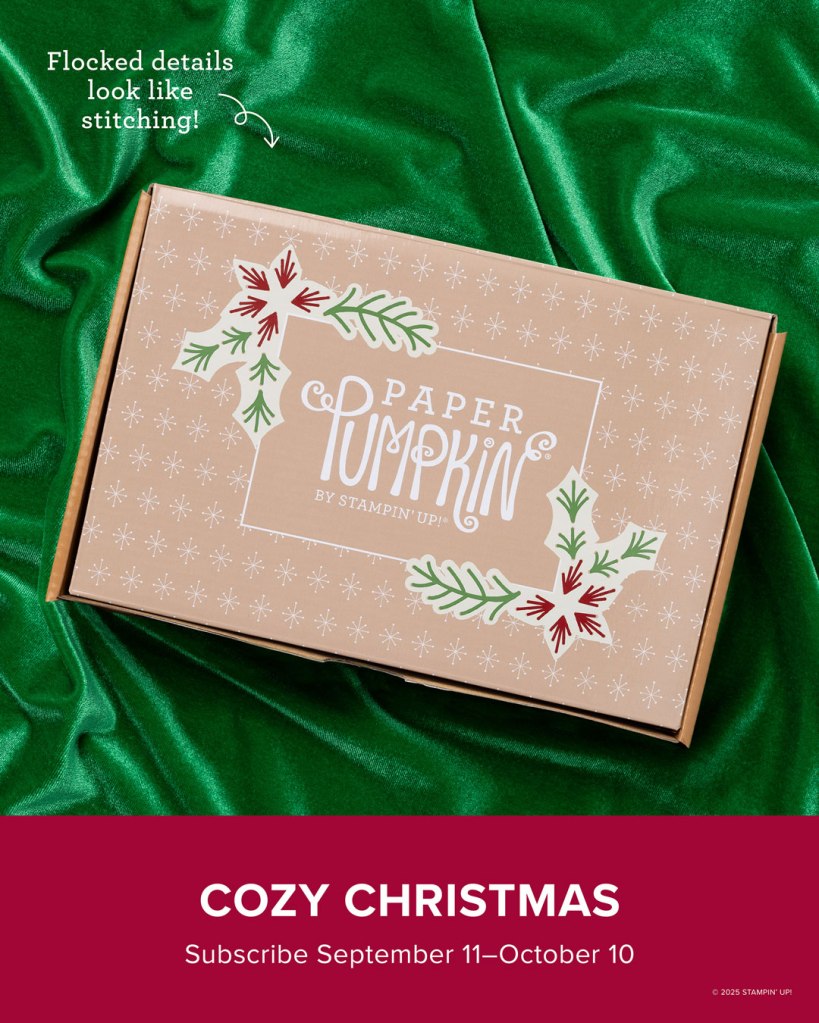
October 10th is the last day to subscribe for the Cozy Christmas card kit, and the dies are darling on their own, with just a bit of pretty paper, and using a bit of glimmer paper for the JOY makes the season sparkle:
Next time you are needing some creative inspiration to strike, pick a color palette and card sketch and make your own mash-up!
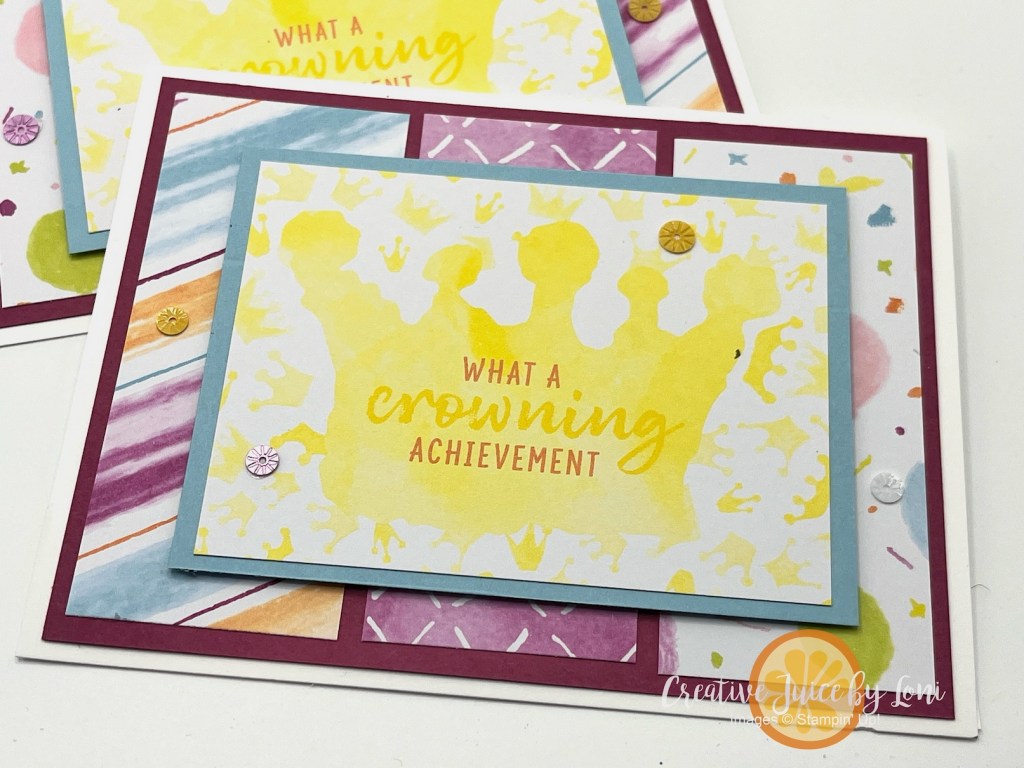
Today’s creation is proof that you don’t need a craft room full of supplies (or a time machine to the Cretaceous period) to make something “dino-mite.” This cheerful congratulations card came together in minutes using the Celebrations Expressions Memories & More card pack from Stampin’ Up! and the adorable Darling Dinos stamp & die bundle.
If you’ve been around my blog for a while, you know I love a good sketch challenge to get the creative juices flowing. This design was inspired by Freshly Made Sketches #698. When you’ve got a great sketch, half the work is already done for you!
The Recipe for Easy Cardmaking
Card Base: Balmy Blue cardstock, because the white background of the cards need a contrasting color to stand out.
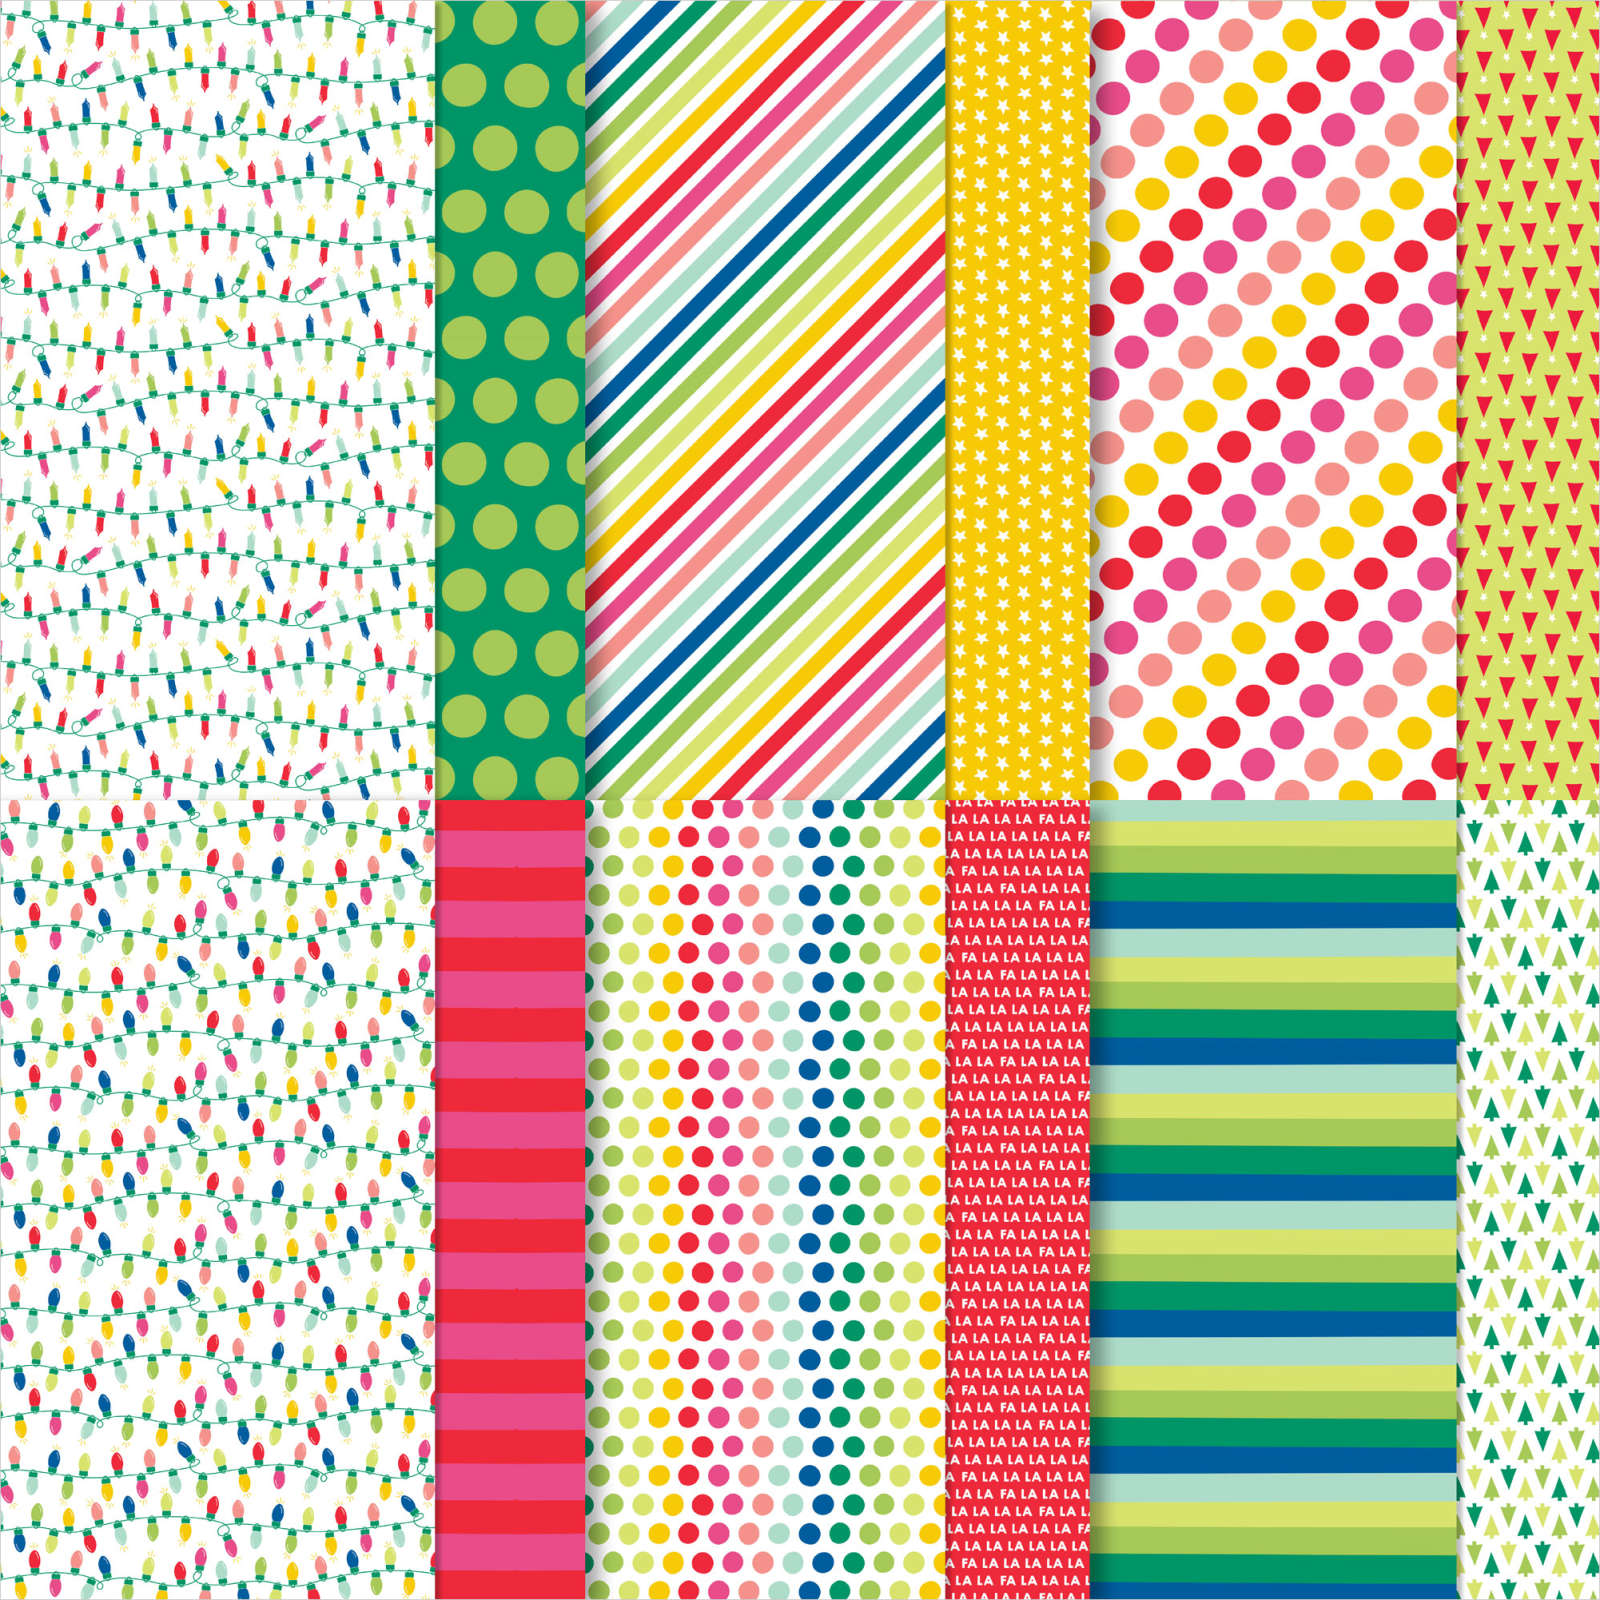
Panels: I cut down three different cards from the Celebrations Expressions pack to fit the sketch—two with fun, hand-painted patterns and one with bright, festive banners. Pre-printed designs are the secret sauce for fast crafting: no stamping, coloring, or choosing a color palette required – it’s done for you!
Focal Point: That sweet brontosaurus is stamped in Memento Tuxedo Black ink directly onto Balmy Blue card stock and simply colored with Stampin’ Blends.
Finishing Touches: A few Starburst Sequins add sparkle, and a simple “CONGRATULATIONS” sentiment was trimmed from the card pack itself. Easy-peasy.
Leftover 1″ squares of the pre-printed cards pull the party all the way to the inside of the card:
Why Memories & More Packs Are a Game-Changer
If you’ve never crafted with Memories & More cards, think of them as your personal cardmaking shortcut. They’re designed for pocket scrapbooking, but their patterns, colors, and ready-to-use sentiments make them perfect for quick cards, too. In this project, I didn’t have to stamp the sentiment or create background layers from scratch—they were already there, waiting to be trimmed and glued in place.
Because I also have team members whose promotions I want to recognize, I created a second set of cards from the same card pack:
No stamping on this one! Just the Memories & More cards and coordinating card stock paired together so the celebration can get started quickly.
Give yourself the tools to create happy mail whenever the occasion pops up—because a handmade card always makes the celebration a little brighter.
I got all my paperwork caught up, so I’m rewarding myself with some stamping time and the Freshly Made Sketch 602 tempted me to give it a try:
Before I show you my card, let me ask a question: Do you look for a sketch to match the stamps you want to use -OR- do you find stamps to put into a sketch you found?
I’ve done both, but today it was sketch first, stamps next.
Wouldn’t this be a fun invitation for a New Year’s Eve Party? You can see how Amy O’Neill used the same sketch & stamps to make a birthday version here!
Bold stamps always appeal to me (no coloring required) and I thought the way you could “build” different party blowouts with the Year to Celebrate stamp set (NEW in the Sept-Dec mini catalog) was super cool:
I also love that the back side of many of the holiday Designer Series Papers are NON-HOLIDAY patterns, so they can be used all year long. The patterned paper I used on my card is the BACK SIDE of the Merry, Bold & Bright DSP that I GUARANTEE you are going to see a LOT of in the next few months!
Using a sponge dauber and my Whisper White Craft ink pad, I made the embossed background stand out a bit by rubbing the ink over the shells and seaweed, then pulled colors from the Designer Series Paper (Balmy Blue, Crumb Cake, Night of Navy and Soft Sea Foam) to use as my color palette.
If I had a “spirit shape” it would be a circle (I don’t like corners), so the Circle Saying stamp set – which coordinates with a new 2-3/8″ circle punch – was part of my first demonstrator pre-order from the new catalog, which you will be able to shop from starting May 2nd. HOWEVER, if you want to combine them with the embossing folder or pretty paper, you’ll need to snag them now in the LAST CHANCE SALE:
The Circle Sayings Bundle (photopolymer stamp set + 2-3/8″ circle punch) will be available on May 2nd, and here are the other supplies to collect NOW for this card:
Have you taken the time to explore the new Online Exclusives in my Stampin’ Up! Store? Some things have been so popular, they are already backordered and we are waiting for more!
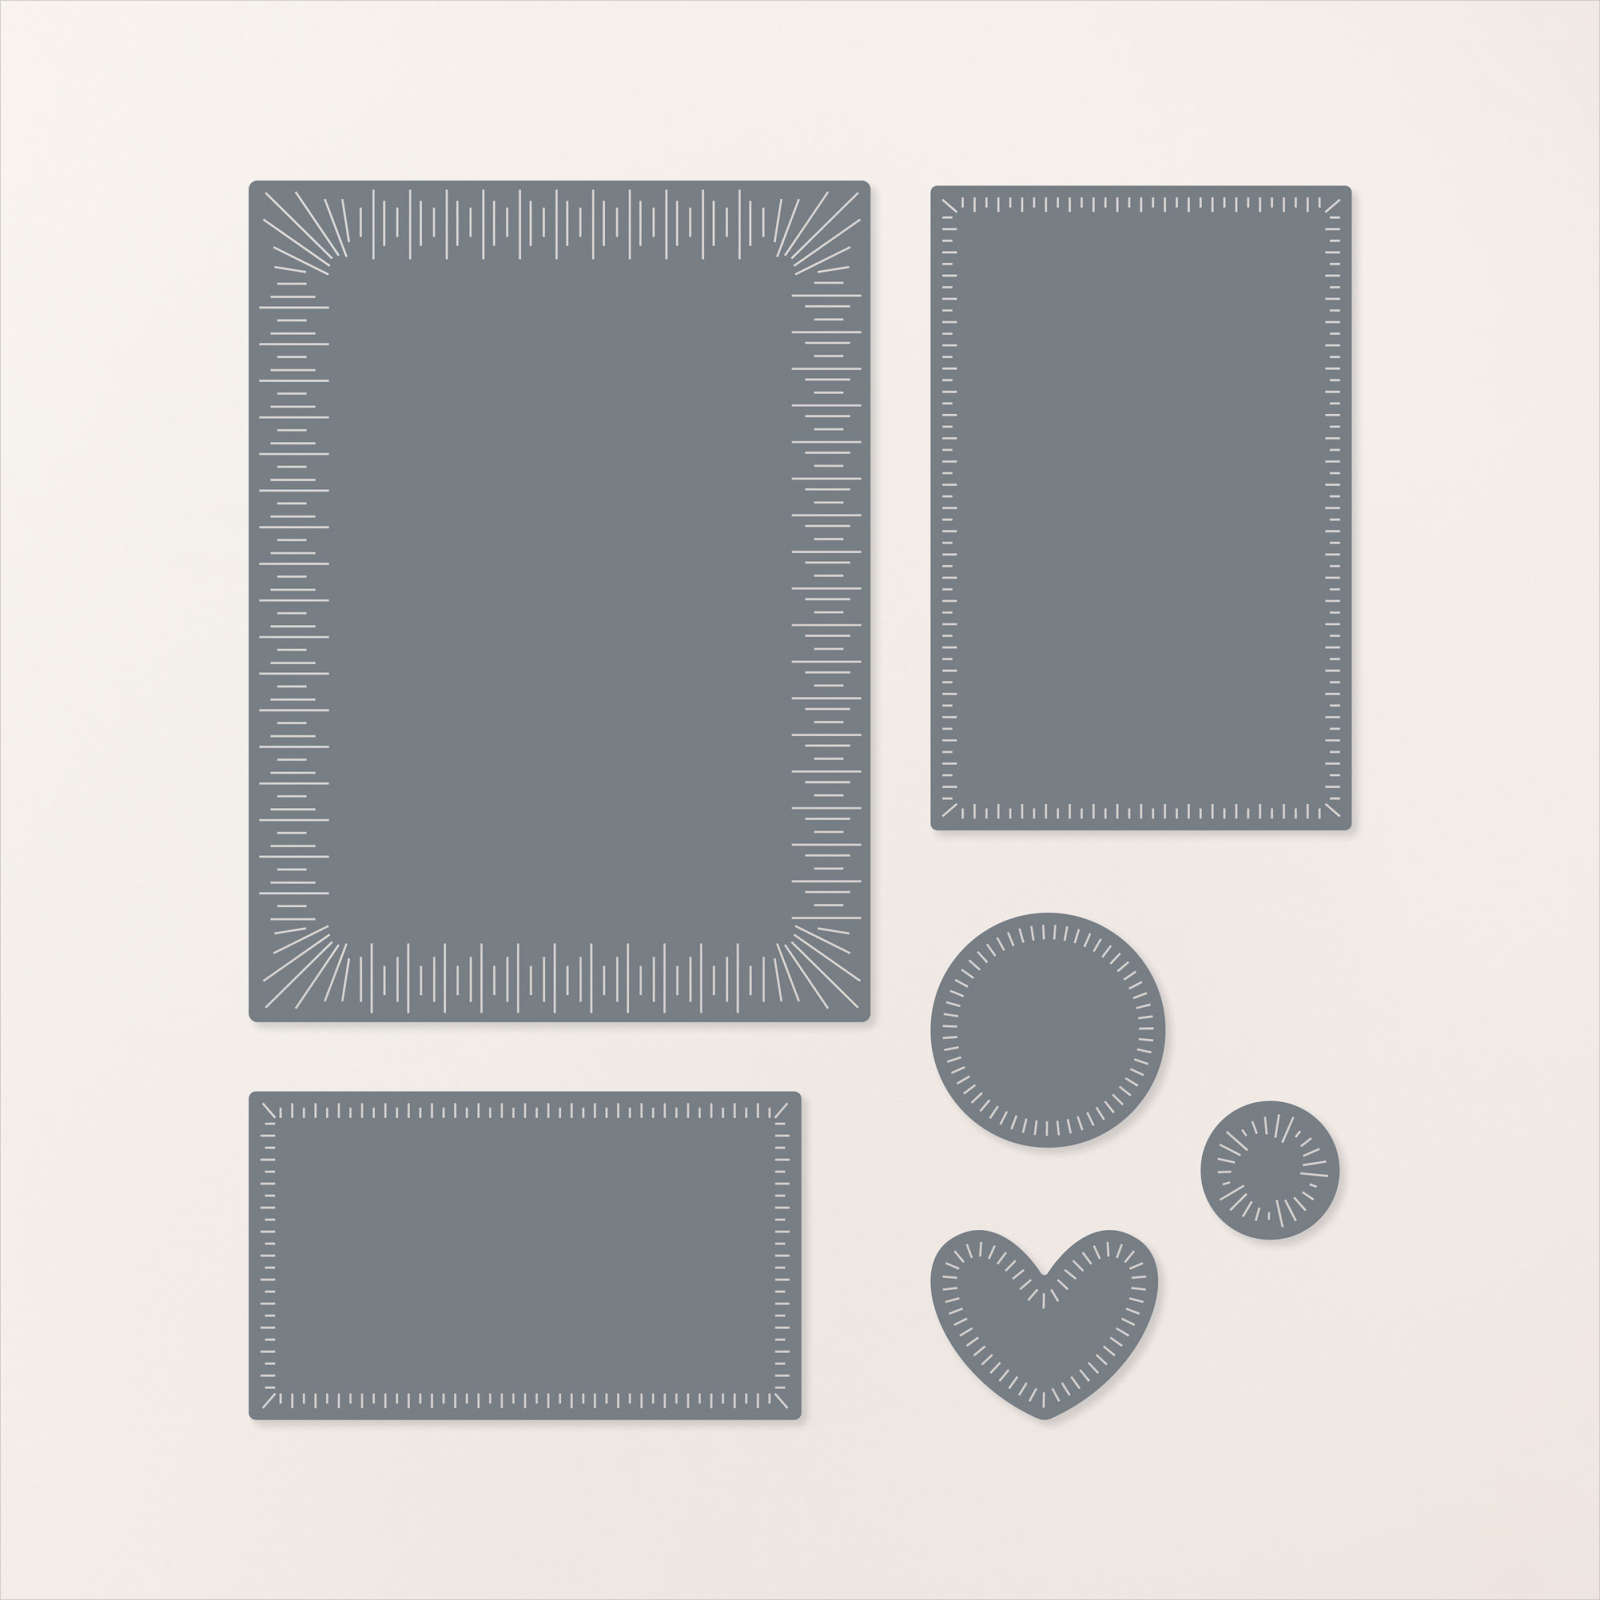
One new item I wanted to share with you is the Radiating Stitches Dies…these cutting tools will take ANY stamps you already have and give them a pretty frame or add a bit of whimsy with a layer of “stitching” around the edges of your layers:
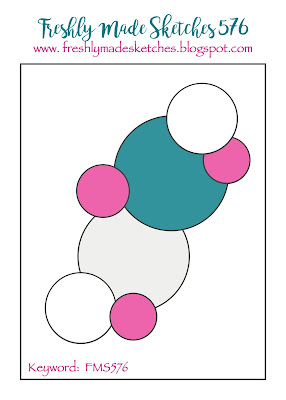
I chose to follow the Freshly Made Sketch #576 during my Live Crafting today and used two In Color Combinations to demonstrate the versatility of starting with a sketch, and the ease of using a combination of colors curated in a color “family”.
It happens that from today through Mid-April, I have 10 family birthdays (and about 15 friend and team birthdays) to celebrate, so this was an opportunity to get prepared!
This version I turned sideways and used the 2022-2024 In Colors as my palette. A sketch can be turned any which-way!
And this card followed the portrait layout of the original sketch, plus I used a base of Very Vanilla with my colors from the (retiring) 2021-2023 In Colors. All supplies listed below to make it easy to add to your cart!
At convention Stampin’ Up! announced that the 2017 Grand Vacation demonstrators can earn will be to Phuket, Thailand! Now I have a goal 🙂
Did you know that according to Thai tradition, each day of the week is assigned a color and the color for the day you were born is supposed to be your lucky color?! Find out your lucky Stampin’ Up! color by finding out which day of the week you were born on and then click here for your SU! Birthdate Hue.
In honor of the birthday I recently celebrated, I created this monochromatic card in MY color (Melon Mambo) and used this week’s Freshly Made Sketch:
What is your birth date color? Leave a comment below!
A sure sign of fall isn’t the falling leaves or cooler temperatures…it’s the CANDY! Remember when you could ONLY get candy corn in Autumn and Peeps at Easter? That was before they started making pastel corn for Easter and Peeps ghosts for Halloween…ah, the good old days…
I’ve been thinking about tags lately, so this popped into my head when I saw the Friday Mashup challenge (mashing up a fall food theme and paper piercing, FM128) and the Freshly Made Sketch (FMS104) this week:
The paper piercing was inspired by Patty B (but on a smaller version of hers). Here’s how I made the candy corn:
So there’s a sweet treat double whammy (or is it a triple?) for you today!
Project Recipe (all supplies from Stampin’ Up! unless noted):
Stamps:Sweets for the Sweet stamp set
Ink: Chocolate Chip, Pumpkin Pie, Crushed Curry
Paper: Sweater Weather Designer Series Paper (132184), card stock: Pumpkin Pie, Crushed Curry, Very Vanilla, Whisper White
Accessories: Stampin’ Sponge, Crushed Curry 3/4″ Chevron Ribbon (130019), Early Espresso Baker’s Twine (123124), 4×6 Cellophane bag (102757). Punches: 1/2″ circle (119869), 1″ circle (119868), 1-3/8″ circle (119860), Artisan Label (130920). OTHER: CANDY CORN
Update 9/30/13: My project was voted as ROCKSTAR at the Friday Mashup! Wahoo!
This trio of bunnies are too adorable for words and I’ve been looking for an excuse to use them, so I combined sketch #78 from the Freshly Made Sketches blog and the color inspiration on my Creative Juice by Loni Facebook page…and it turned out so sweet! Of course, I had to add the bunny tails, so it’s really NOT JUST all ears…


![Nature Walk 12" X 12" (30.5 X 30.5 Cm) Designer Series Paper [ 166912 ]](https://assets1.tamsnetwork.com/images/EC042017NF/166912s.jpg "Nature Walk 12\" X 12\" (30.5 X 30.5 Cm) Designer Series Paper [ 166912 ]")
![Secret Sea 8 1/2" X 11" Cardstock [ 165624 ]](https://assets1.tamsnetwork.com/images/EC042017NF/165624s.jpg "Secret Sea 8 1/2\" X 11\" Cardstock [ 165624 ]")
![Cajun Craze 8-1/2" X 11" Cardstock [ 119684 ]](https://assets1.tamsnetwork.com/images/EC042017NF/119684s.jpg "Cajun Craze 8-1/2\" X 11\" Cardstock [ 119684 ]")
![Adhesive Sheets [ 152334 ]](https://assets1.tamsnetwork.com/images/EC042017NF/152334s.jpg "Adhesive Sheets [ 152334 ]")
![Alphabet à La Mode Dies [ 160750 ]](https://assets1.tamsnetwork.com/images/EC042017NF/160750s.jpg "Alphabet à La Mode Dies [ 160750 ]")
![Mini Stampin' Cut & Emboss Machine [ 150673 ]](https://assets1.tamsnetwork.com/images/EC042017NF/150673s.jpg "Mini Stampin' Cut & Emboss Machine [ 150673 ]")
![2025–2027 In Color™ Flat Pearls [ 165192 ]](https://assets1.tamsnetwork.com/images/EC042017NF/165192s.jpg "2025–2027 In Color™ Flat Pearls [ 165192 ]")


![Abundant Joy Dies [ 167855 ]](https://assets1.tamsnetwork.com/images/EC042017NF/167855s.jpg "Abundant Joy Dies [ 167855 ]")
![Traditions Of Christmas 12" X 12" (30.5 X 30.5 Cm) Specialty Designer Series Paper [ 165853 ]](https://assets1.tamsnetwork.com/images/EC042017NF/165853s.jpg "Traditions Of Christmas 12\" X 12\" (30.5 X 30.5 Cm) Specialty Designer Series Paper [ 165853 ]")
![Peaceful Garden 12" X 12" (30.5 X 30.5 Cm) Glimmer Paper [ 165929 ]](https://assets1.tamsnetwork.com/images/EC042017NF/165929s.jpg "Peaceful Garden 12\" X 12\" (30.5 X 30.5 Cm) Glimmer Paper [ 165929 ]")
![Basic White 8 1/2" X 11" Thick Cardstock [ 159229 ]](https://assets1.tamsnetwork.com/images/EC042017NF/159229s.jpg "Basic White 8 1/2\" X 11\" Thick Cardstock [ 159229 ]")
![Crumb Cake 8-1/2" X 11" Cardstock [ 120953 ]](https://assets1.tamsnetwork.com/images/EC042017NF/120953s.jpg "Crumb Cake 8-1/2\" X 11\" Cardstock [ 120953 ]")
![Old Olive 8-1/2" X 11" Cardstock [ 100702 ]](https://assets1.tamsnetwork.com/images/EC042017NF/100702s.jpg "Old Olive 8-1/2\" X 11\" Cardstock [ 100702 ]")
![Cherry Cobbler 8-1/2" X 11" Cardstock [ 119685 ]](https://assets1.tamsnetwork.com/images/EC042017NF/119685s.jpg "Cherry Cobbler 8-1/2\" X 11\" Cardstock [ 119685 ]")
![Real Red & White Baker's Twine [ 164051 ]](https://assets1.tamsnetwork.com/images/EC042017NF/164051s.jpg "Real Red & White Baker's Twine [ 164051 ]")
![Mini Stampin' Dimensionals [ 144108 ]](https://assets1.tamsnetwork.com/images/EC042017NF/144108s.jpg "Mini Stampin' Dimensionals [ 144108 ]")


![Celebration Expressions Memories & More Card Pack [ 165307 ]](https://assets1.tamsnetwork.com/images/EC042017NF/165307s.jpg "Celebration Expressions Memories & More Card Pack [ 165307 ]")
![Darling Dinos Bundle (English) [ 164735 ]](https://assets1.tamsnetwork.com/images/EC042017NF/164735s.jpg "Darling Dinos Bundle (English) [ 164735 ]")
![Balmy Blue 8-1/2" X 11" Cardstock [ 146982 ]](https://assets1.tamsnetwork.com/images/EC042017NF/146982s.jpg "Balmy Blue 8-1/2\" X 11\" Cardstock [ 146982 ]")
![Timid Tiger 8 1/2" X 11" Cardstock [ 165626 ]](https://assets1.tamsnetwork.com/images/EC042017NF/165626s.jpg "Timid Tiger 8 1/2\" X 11\" Cardstock [ 165626 ]")
![Berry Burst 8-1/2" X 11" Cardstock [ 144243 ]](https://assets1.tamsnetwork.com/images/EC042017NF/144243s.jpg "Berry Burst 8-1/2\" X 11\" Cardstock [ 144243 ]")
![Basic White 8 1/2" X 11" Cardstock [ 166780 ]](https://assets1.tamsnetwork.com/images/EC042017NF/166780s.jpg "Basic White 8 1/2\" X 11\" Cardstock [ 166780 ]")
![Tuxedo Black Memento Ink Pad [ 132708 ]](https://assets1.tamsnetwork.com/images/EC042017NF/132708s.jpg "Tuxedo Black Memento Ink Pad [ 132708 ]")
![Balmy Blue Stampin' Blends Combo Pack [ 148544 ] (Retired)](https://assets1.tamsnetwork.com/images/EC042017NF/148544s.jpg "Balmy Blue Stampin' Blends Combo Pack [ 148544 ] (Retired)")
![Starburst Sequins [ 165539 ]](https://assets1.tamsnetwork.com/images/EC042017NF/165539s.jpg "Starburst Sequins [ 165539 ]")
![Stampin' Seal [ 152813 ]](https://assets1.tamsnetwork.com/images/EC042017NF/152813s.jpg "Stampin' Seal [ 152813 ]")


")
 Designer Series Paper")


 Metallic Woven Ribbon")


 Specialty Designer Series Paper")


")


