January Virtual Stamping Class: Bee My Valentine

Since my crafty friends are spread across the continent, I wanted to try something new in 2024: Once a quarter, I’ll be offering a virtual stamping class which will feature a new product. Each class could also be stamped with products you already have!

When you sign up for the class, you’ll be sent a package with all the consumable supplies (card stock, envelopes, Designer Series Paper, etc) needed for 6 projects PLUS two full sized accessories (embellishments and ribbon) and a color copy of the completed projects.

The class will be privately streamed to *YouTube and you’ll receive a link to watch and craft along with me, or watch at your convenience anytime!

* You may need a free YouTube account to log in and access the video tutorial.

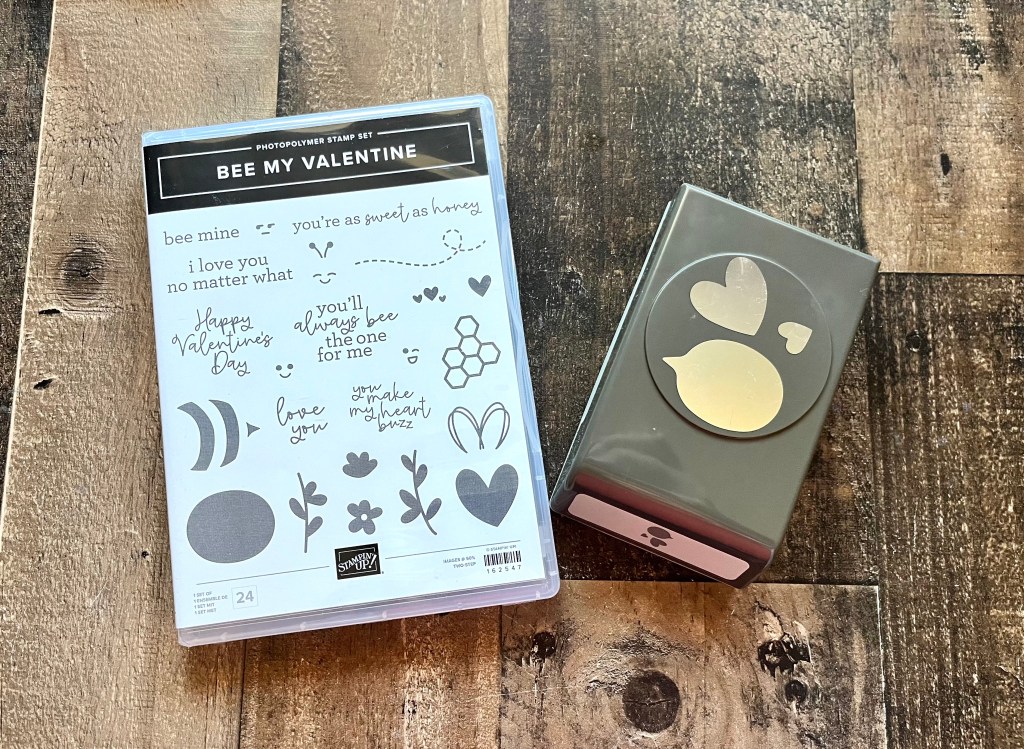
The first Creative Juice Virtual Class of 2024 will be streamed Friday, January 26th at 4 pm MT (or watched with private link later) and features the BEE MY VALENTINE bundle (shown above) from the January-April Mini catalog. This bundle is OPTIONAL for you to purchase from my Stampin’ Store starting on January 4, 2024, and it’s going to be a HOT seller, so buzz over early to get it in time for the class!

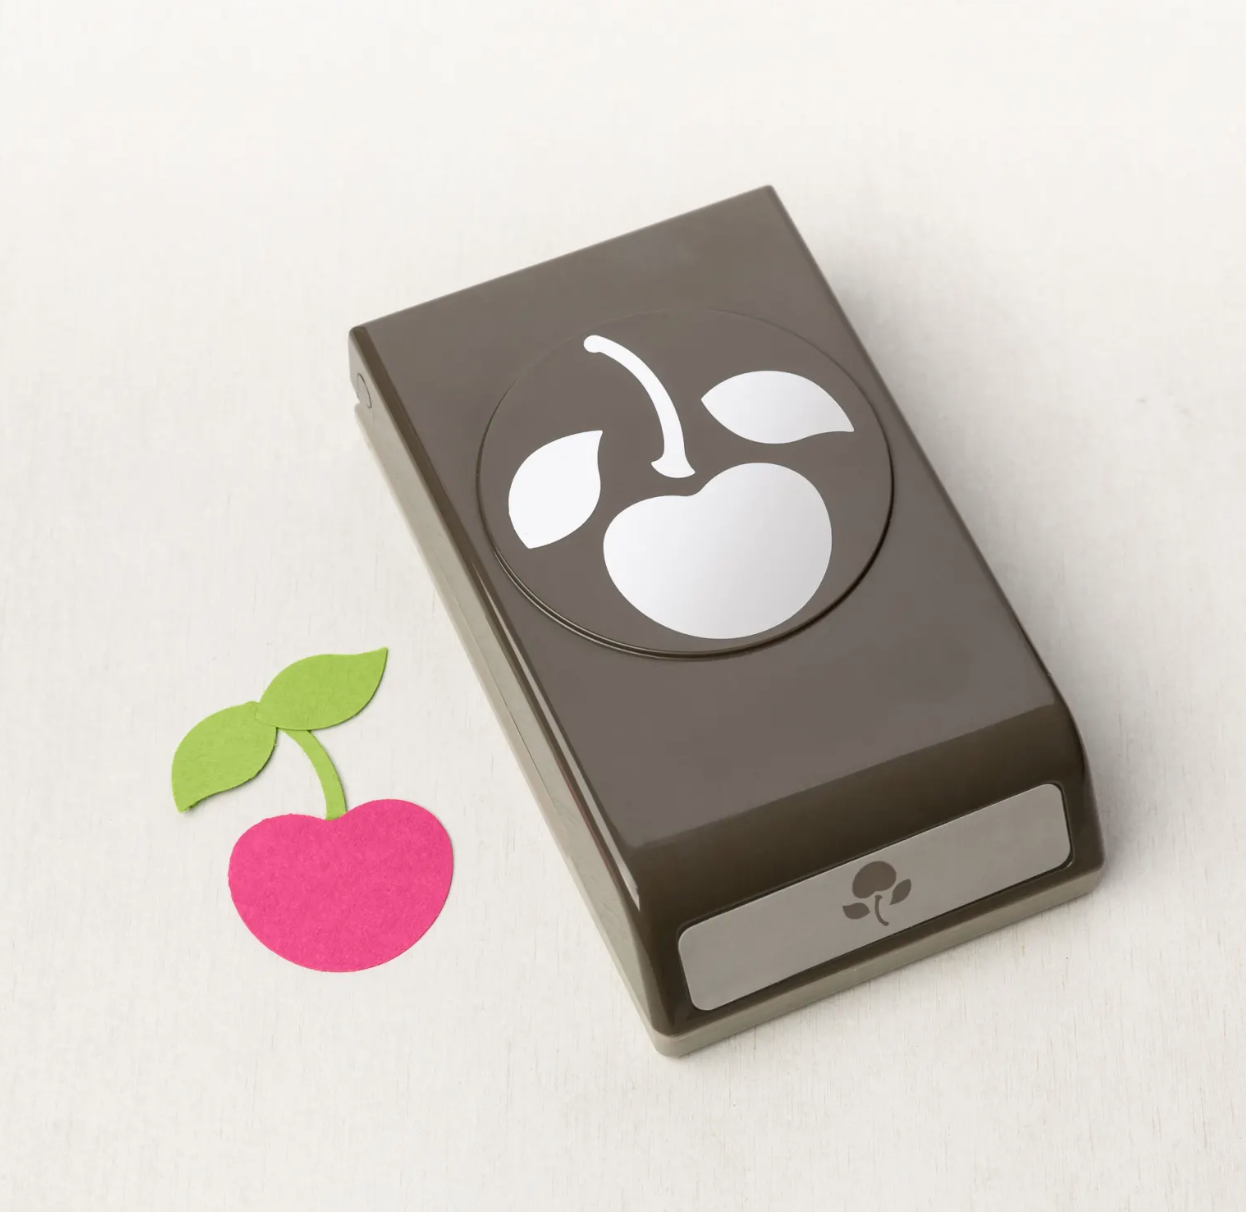
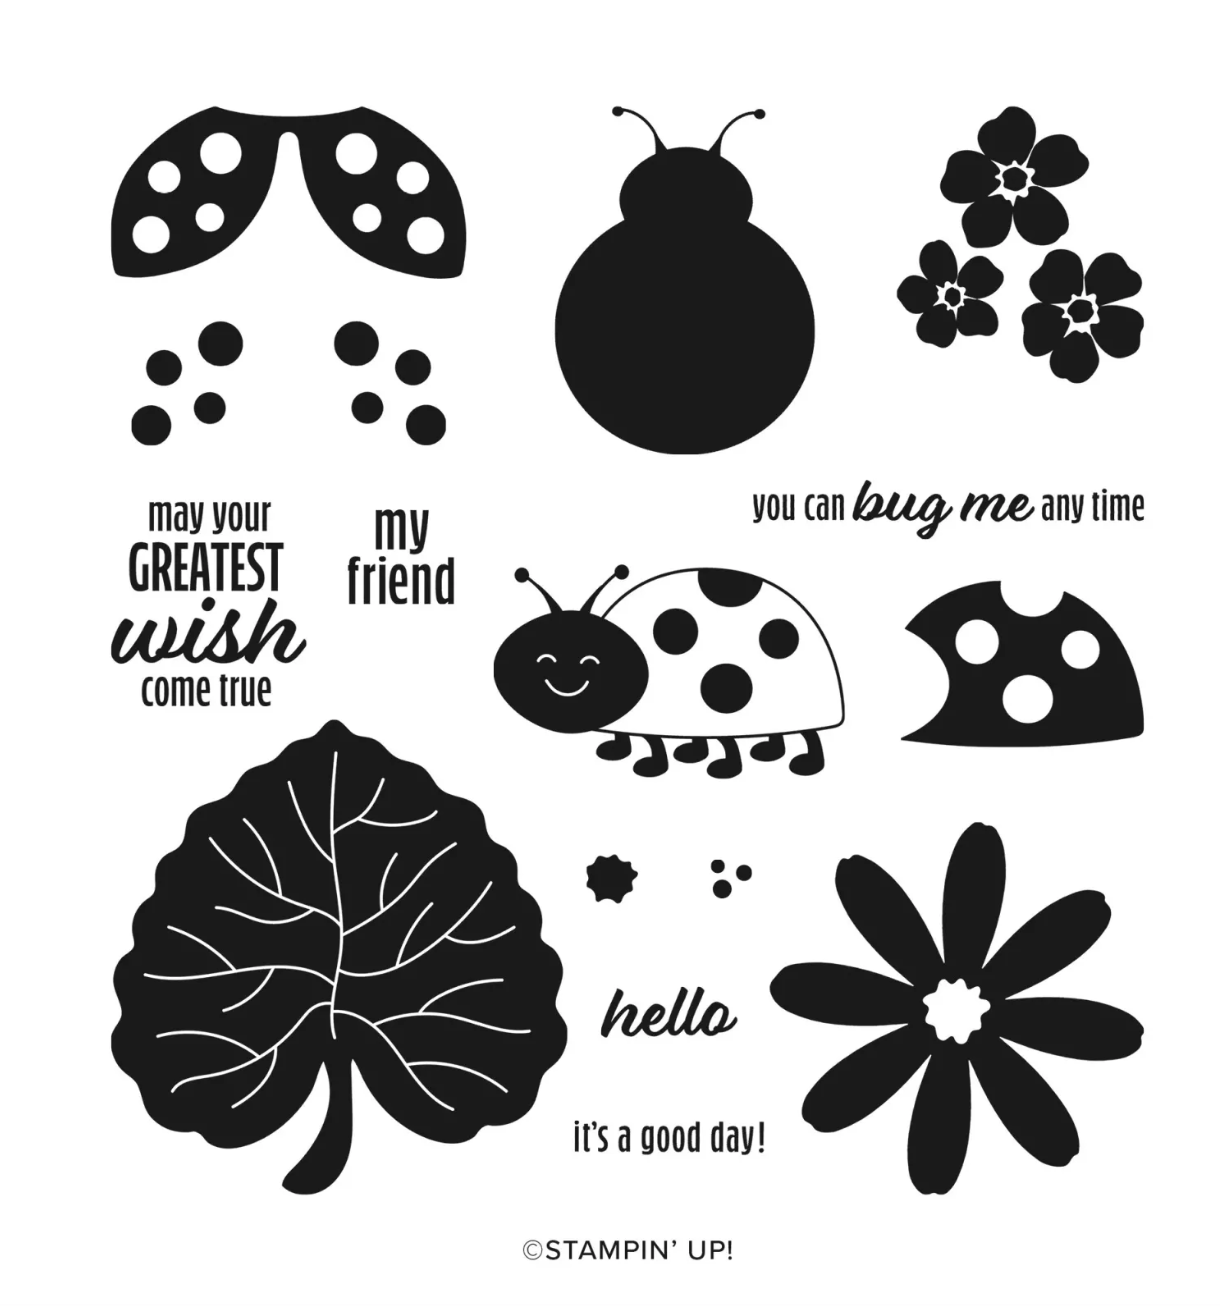
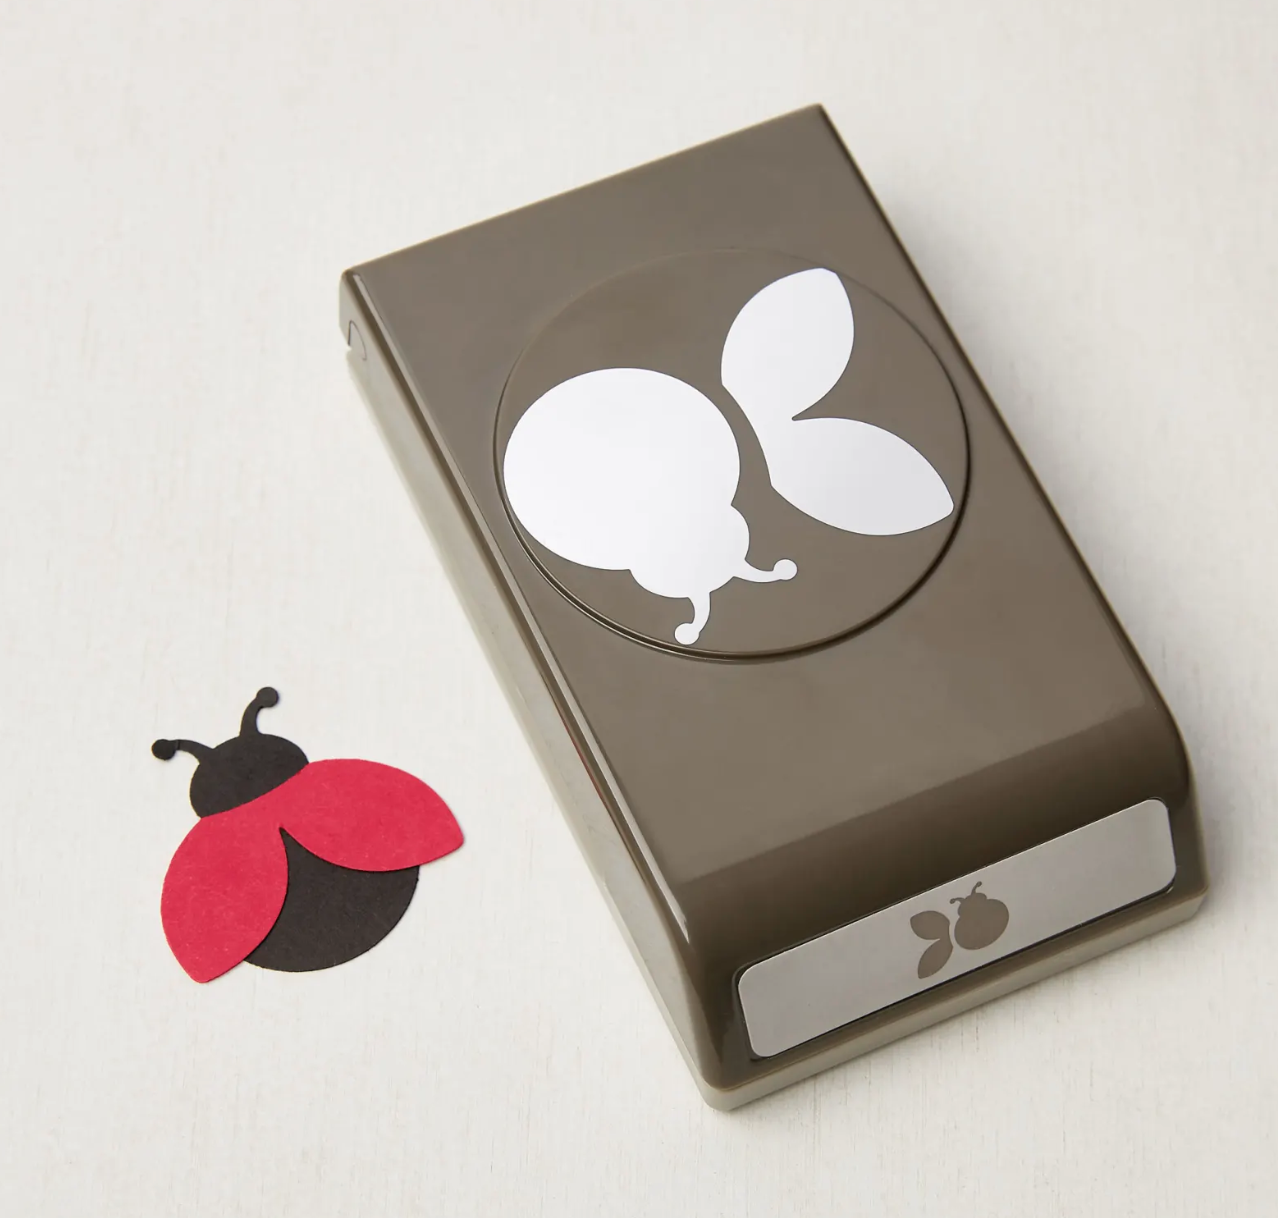
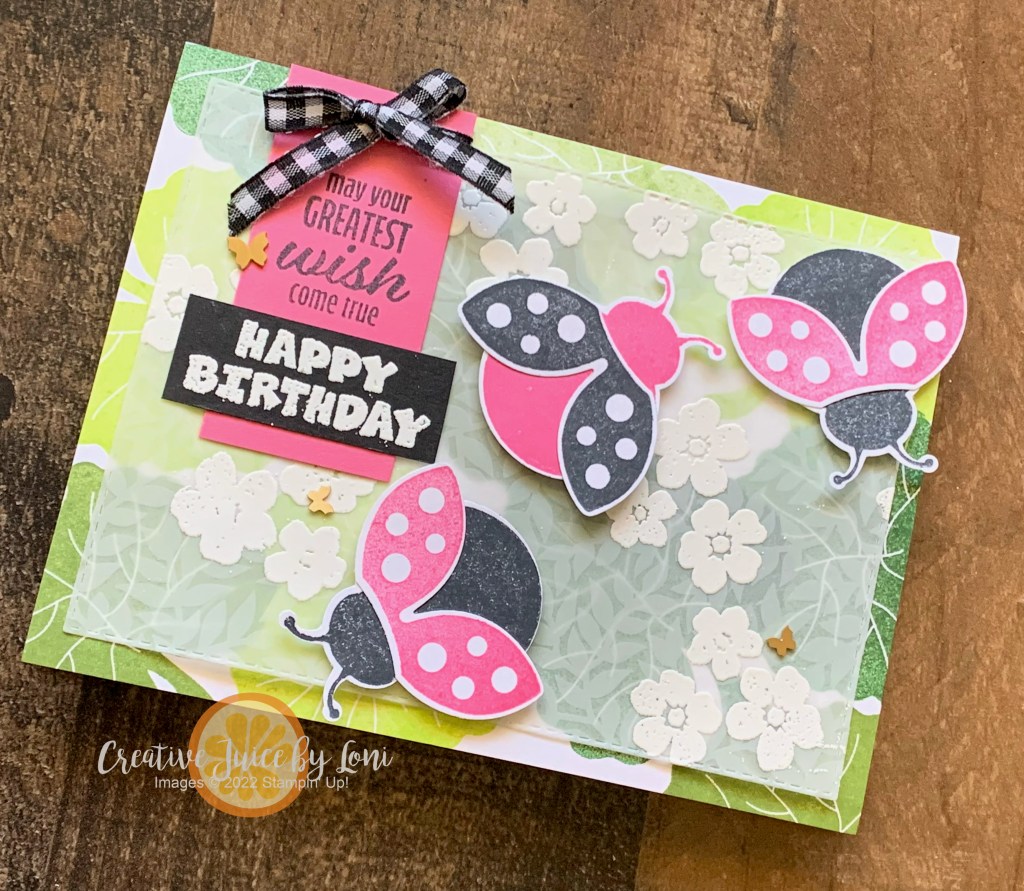
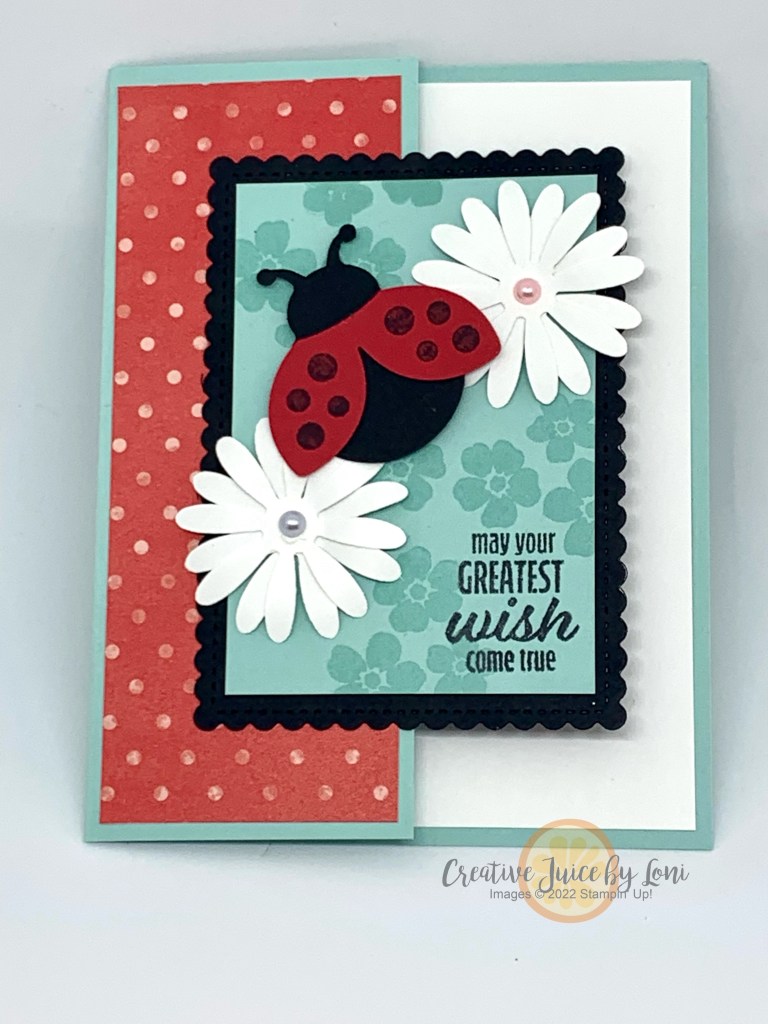
Alternatively, you will be able to complete the cards with the SWEETEST CHERRIES –or– HELLO LADYBUG stamp sets and coordinating punches (click image to view in store or add to cart):

For the class, you will also need these supplies:

Included in the class kit will be:

  • Full Sweet Sorbet 1/4″ Bordered Ribbon (10 yards)
  • Full Adhesive-Backed Hearts & Flowers embellishements
  • Card Stock, Designer Series Paper, Vellum and twine cut for projects
  • One sheet of Stampin’ Dimensionals
  • Envelopes and packaging
  • Buzz-worthy surprises!

Class fee (includes tax and shipping to you!): $35.

U.S. Customers Only. Purchase class through January 15th, while supplies last. Must purchase class kit to participate in the class.

This card is NOT one of the projects from the class. It was designed by my demonstrator friend Beth Olsen and shows how adorable this bundle is going to be! Hope you’ll join me at class- sign up ASAP!

Vellum Overlay Ladybug Birthday Card

I challenged my Sprinkled Ink team to use Vellum this month, and what kind of leader would I be if I didn’t do what I asked them to do? So it was delightful when Friday’s TGIF challenge went right along with it! Plus, I got to pull out my Ladybug builder punch to create Polished Pink bugs for a birthday card, so who wouldn’t have fun with that?

Have you played with the Vellum Basics Specialty Designer Series Paper? With SIX 12″x12″ pieces of printed vellum – 2 each of stripes, polka dots, and this pretty leafy vine that I used – it’s gives a soft layer of texture, which I enhanced by heat-embossing the blossoms on top of:

While I stamped and punched out the ladybugs for the Polished Pink version of the card, you can also just use the Ladybug Builder punch to punch the pieces out and stamp the polka-dots on the wings, as in the Real Red version-

You’ll have such an enjoyable time putting together these cards, and remember to order some Brushed Brass Butterfly embellishments to include inside your card as the birthday gift!

Here’s a step-by-step video to make it easy for you – simply pause the video and collect the pieces you need to create along with me.

Click the links to add the supplies you’ll need to your cart (Stitched Rectangle dies and Cut & Emboss machine are optional):

Product List

THE BEST DEAL is always the Starter Kit!! Add $125 of the products you want to your Starter Kit and only pay $99…PLUS, save every time you shop, and be a part of my fabulous Sprinkled Ink team of Stampin’ Up! demonstrators. It’s a WIN/WIN opportuntiy!

Ladybug Wish Come True

I don’t enjoy bugs crawling on me, but there is a soft spot in my heart (and on my fingers) for ladybugs. They are just the friendliest little creatures, so I don’t mind walking them to the door (if they’ve found their way inside) and giving them a lift to the nearest plant outside. I may even talk to them and tell them how pretty they are.

This little ladybug is adorable on a card:

Here’s a tutorial to get started, and of course, all the supplies can be found in my Stampin’ store!

So Loved, Ladybug

Crafting can be so simple: Stamps, ink, card stock…and a punch!

This card took me less than 15 minutes to make, from start to finish.

Paper pieces you’ll need:

  • Magenta Madness card stock base 4-1/4′ x 8-1/4″ scored at 5-1/2″, plus a 4″ x 2-1/2″ for top
  • Basic Black card stock 2-3/4″ x 8-1/2″ scored at 4-1/4″
  • 2 pieces of Basic White card stock 3-3/4″ x 2-1/4″ to stamp on, plus 5-1/4″ x 4″ for inside card, plus a scrap to stamp the ladybug on.
  • Pattern Party Designer Series Paper (polka dot) 2-1/2″ x 4″

HOT TIP: Magenta Madness is retiring, so order extra card stock and ink pad refill TODAY!!

Inspired by the #tgifc360 #simplestamping challenge:

Product List
Hello Ladybug Bundle (English)
$32.25
A Grand Kid Cling Stamp Set (English)
$21.00
Magenta Madness 8-1/2" X 11" Cardstock
$8.75
Basic Black 8-1/2" X 11" Cardstock
$8.75
Basic White 8 1/2" X 11" Cardstock
$9.75
Pattern Party 12" X 12" (30.5 X 30.5 Cm) Host Designer Series Paper
$18.00
Magenta Madness Classic Stampin' Pad
$7.50
Granny Apple Green Stampin' Pad
$7.50
Tuxedo Black Memento Ink Pad
$6.00