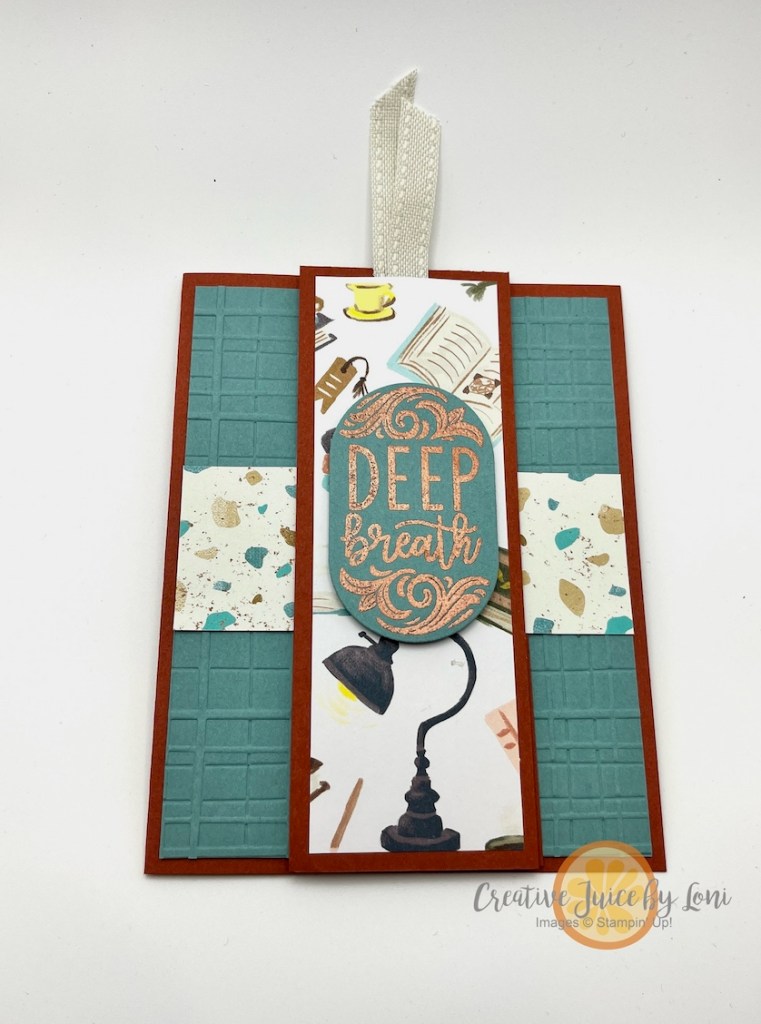
Reading is my favorite sport. It’s a shame there isn’t a competition for it, because I’d be on the medal stand, for certain!
My most recent reading obsession has been “The Unselected Journals of Emma M. Lion” by Beth Brower. I started the first volume on December 27th and finished volume 8 less than a month later! Now, in the appropriate mourning period between what I’ve consumed of Emma’s own words and the release of her next journal installment (there are rumored to be close to 25 books when done), I’ve done what any self-respecting reading-crafter would do, and made a card that is also a bookmark gift:
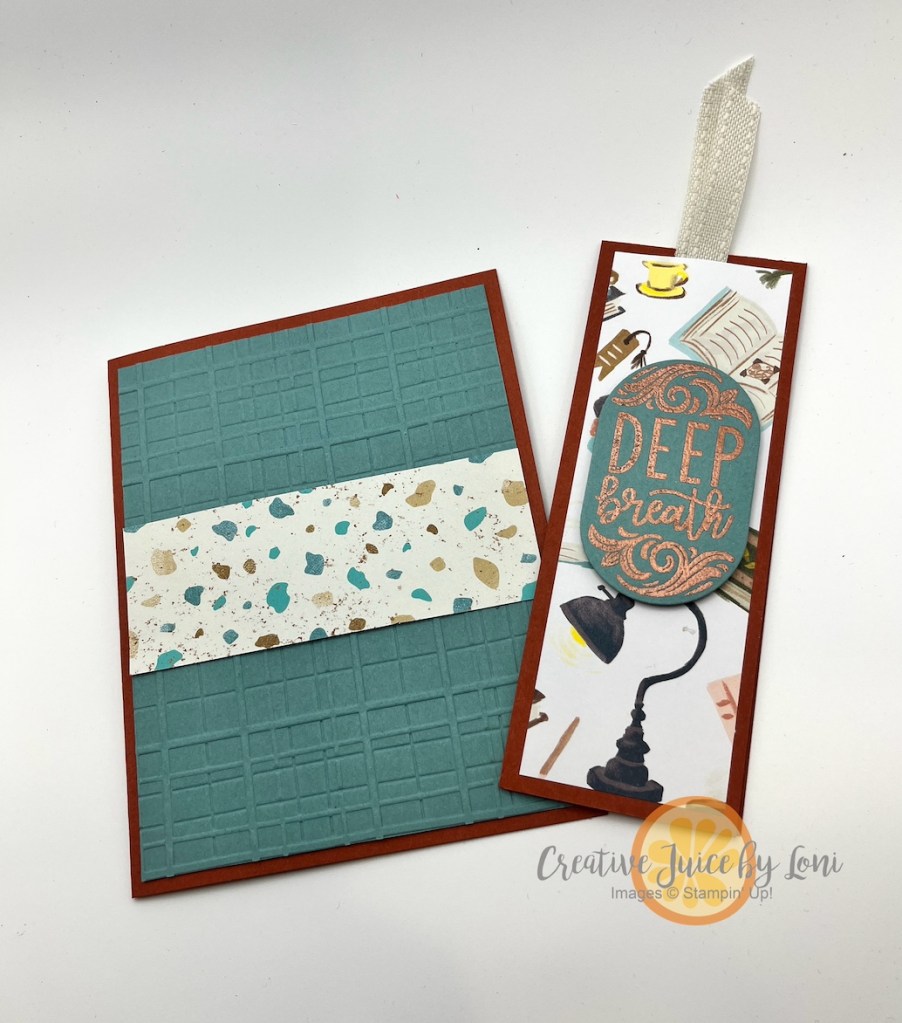
The Stampin’ Up!®️ Hobby Haven suite had the patterned paper appropriate for book lovers, and the bookmark cleverly clasps onto the page you are reading (and the front of the card) with strips of self-adhesive magnet sheets:
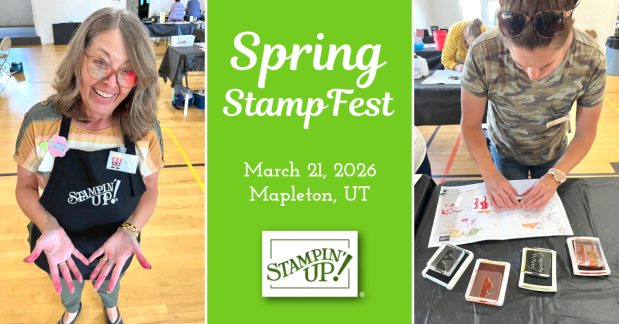
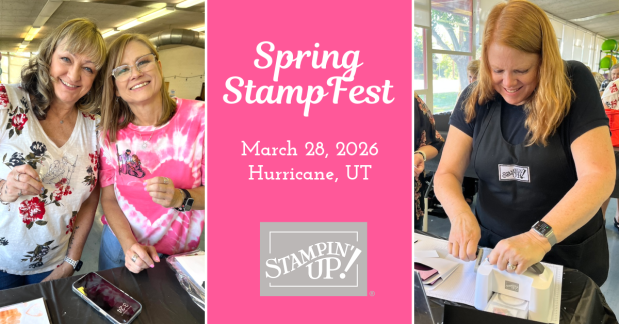
Now put down your book and come to stamp and craft with us at our Spring StampFest events in Utah County on March 21 or Southern Utah on March 28th! Click on the links to register, or on the pictures to see the events on Facebook:
Keep your creative juices flowing! 🍊🧡– Loni Spendlove
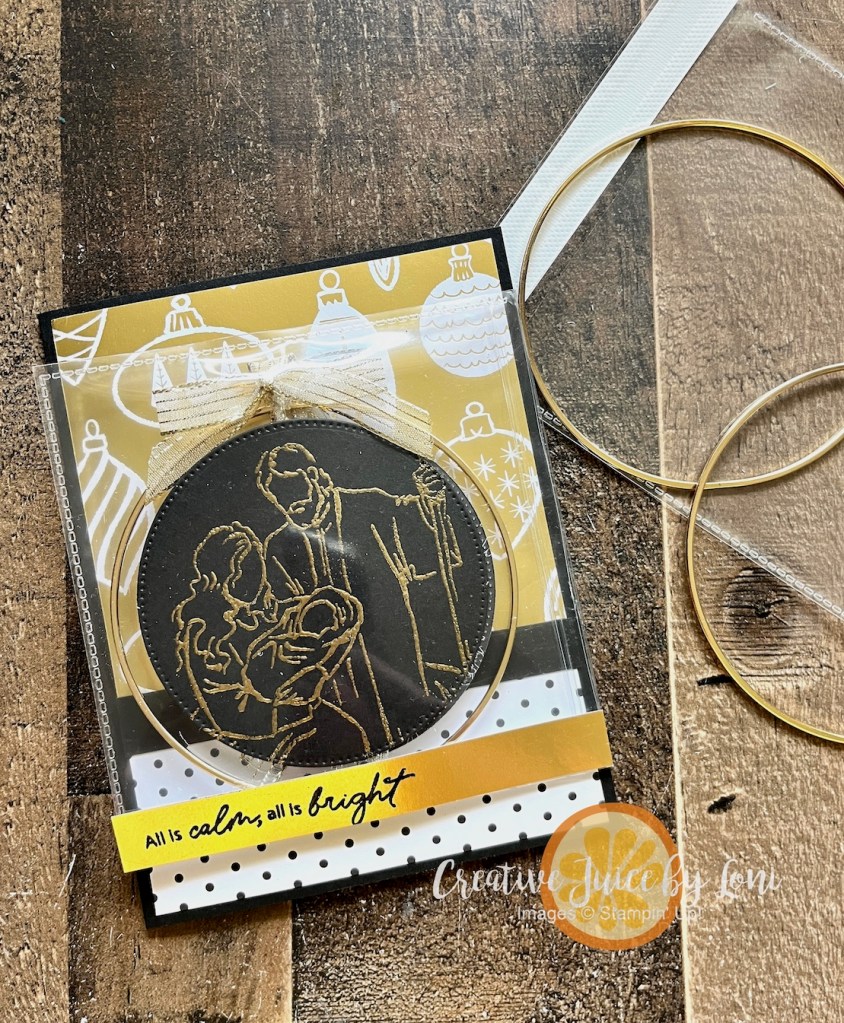
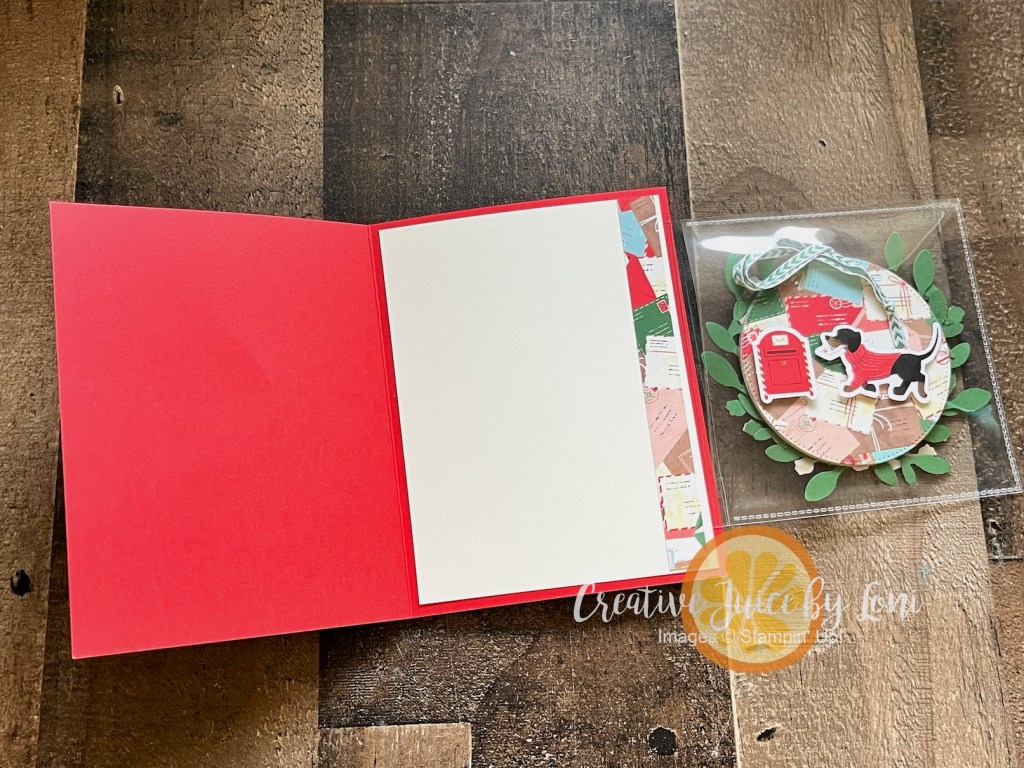
There have been a lot of MAILABLE GIFT IDEAS shared on my website this year, thus, it’s fitting that we add an ornament featuring the large Gold Hoops (also from my store) that could be hung on a Christmas tree. Awesomely, Stampin’ Up!’s new 4″ x 4″ FLIP-FLAPS allow the ornament to double as the decoration for the front of the card, and I have a video tutorial to help you learn how to make one!
By folding the Flip Flap pocket over the front of the card, you can slide the ornament inside and lift the flap to open and get it out. NOTE: In my tutorial, I adhered the flip flap to the inside layer, but you’ll want to adhere it to the back panel inside the card instead, so the ornament doesn’t fall out until you open the flap!
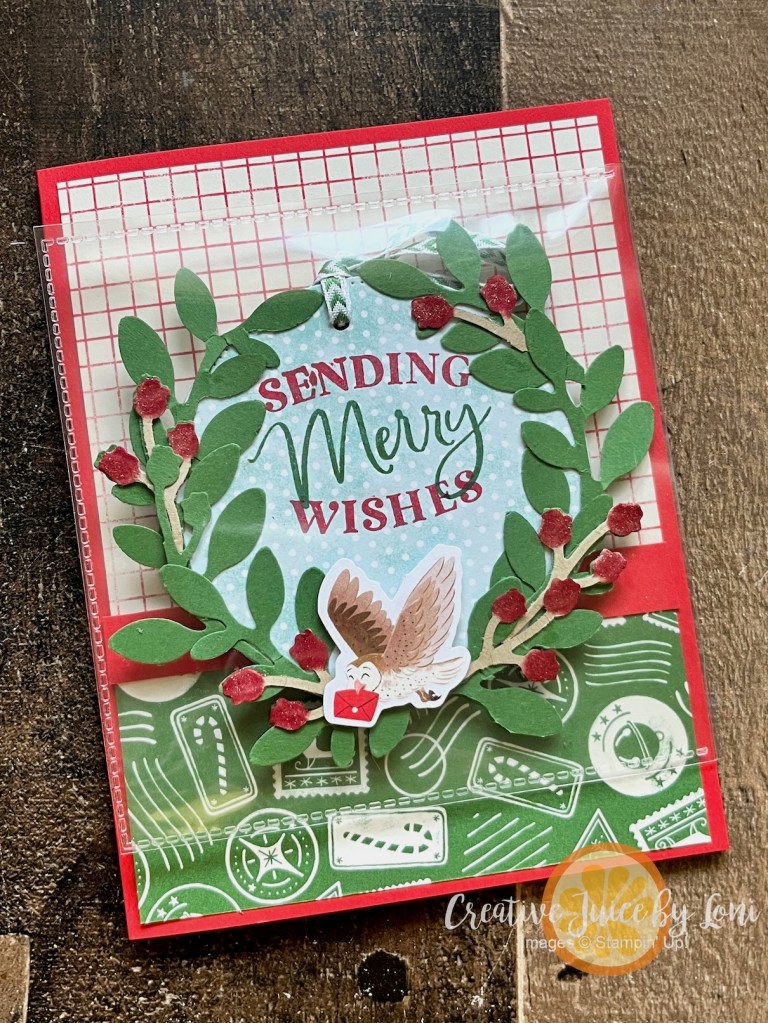
This next version was inspired by an ornament my teammate Angaleen taught us in our November team virtual Stamp & Chat meeting, and uses the North Pole Delivery Specialty Designer Series Paper, which includes printed die cuts:
Here’s how it looks when you open it up, and the back side of the ornament:
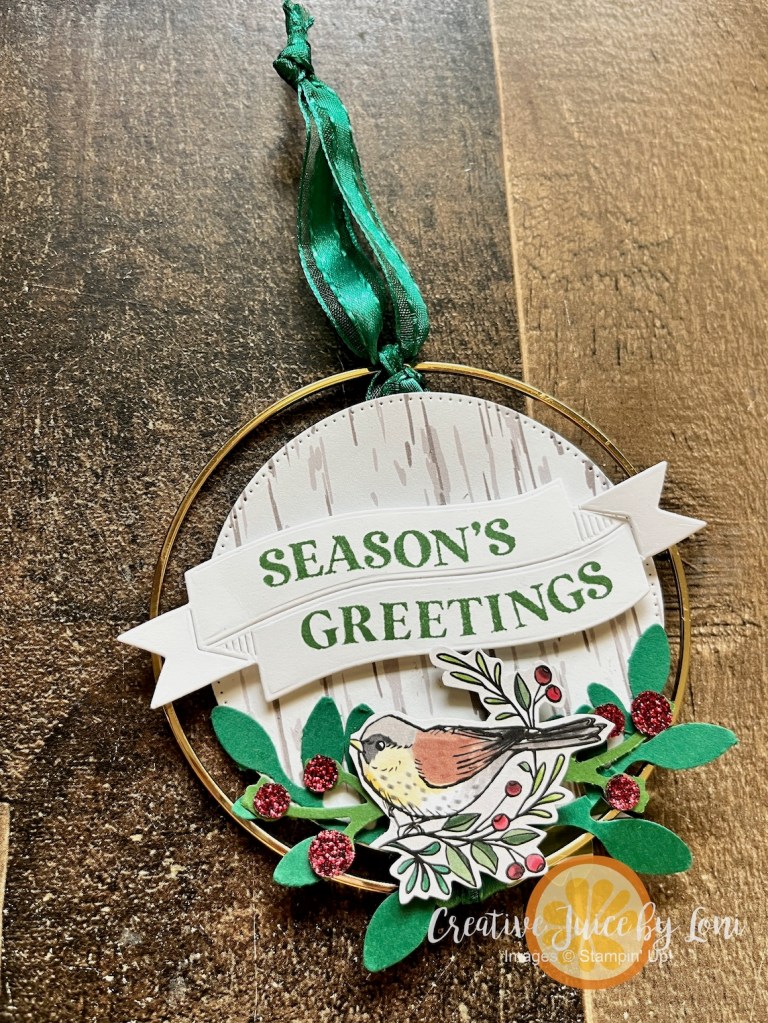
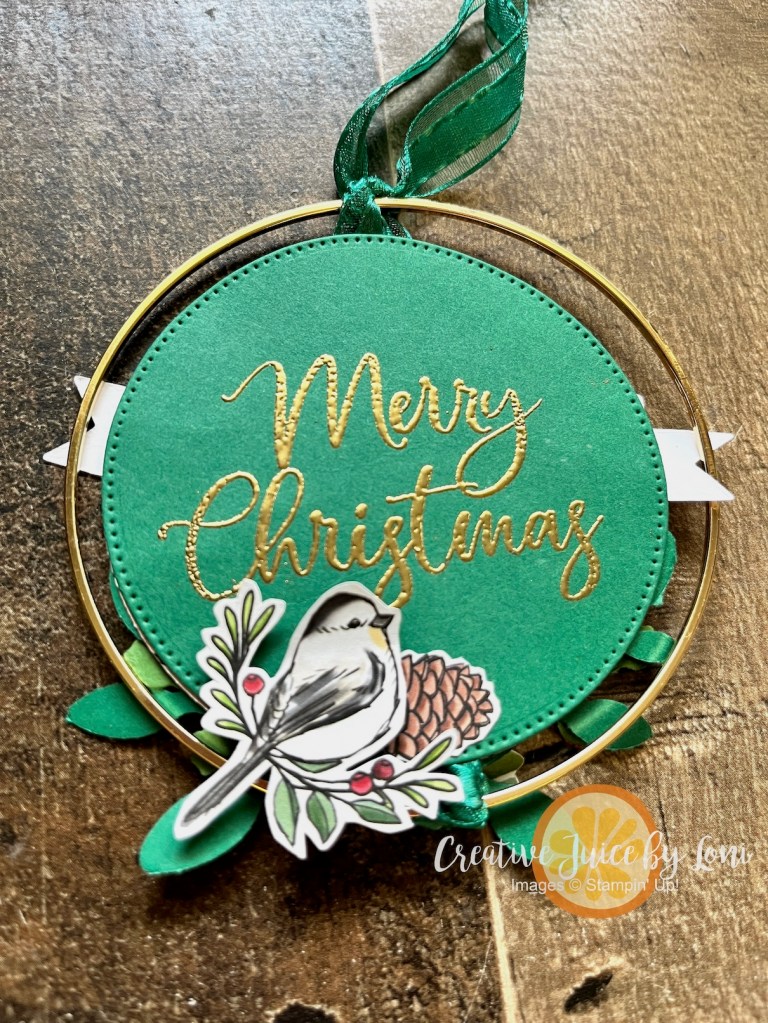
I didn’t use the Gold Hoop on this version, but will on the last one. Use any punch or die for your leaves. The recently retired “Bough Punch” was on my desk, so that’s what I grabbed for both the North Pole card and the next one, featuring my favorite Designer Series Paper from last year (and still available online), Nests of Winter.
The birds were fussy cut from the patterned paper and the sentiments came from the Traditional Labels bundle. I added some Cherry Cobbler delicate details from the Branching Out dies along the top and bottom of the Flip-Flap for this card (TIP: Add a piece of adhesive sheet to the card stock BEFORE you die cut them out, to make the berry branch stick without mess!)
Here is the card opened:
Ready to craft along with me? Watch the video (and rest assured, I usually don’t have such a beastly time with Stampin’ Seal + !!!). THANKS IN ADVANCE for choosing to shop with me! It allows me to have the time and resources to share more ideas with you without charging for the tutorials.
If you find these instructions useful, please shop by clicking any of the links to the products listed above! Another way to show your support: Scroll back to the comment section at the top of the post near the date and leave a COMMENT!
FINAL TIP for this card idea: Score your 4″ x 4″ Flip Flap at 4-1/4″ (the score will be close to the side with adhesive) before you attach it to the inside back panel of your card, so it folds over the front and lays flat.
Keep your creative juices flowing! 🍊🧡– Loni Spendlove
Adding to the growing “Mailable Gifts” list (you’ll want to PIN or bookmark that link) ~ this time it’s one a guy would appreciate!
Since it’s Father’s Day, I like to remember my sons and sons-in-love (I do the same for the girls on Mother’s Day). A gift card for a CAR WASH doesn’t break the bank (when you have many gifts to mail), and when I was at Quick Quack Car Wash purchasing gift cards, I saw that they also had AIR FRESHENERS for just $1!!
Of course, I had to come back to make a slimline card that would fit both the Duck Scent and the gift card! The Stampin’ Up!®️ Party Alphabet dies are large enough to show off the contrasting pattern on the front, and this is the inside of the card style:
I did have to cut off just a bit of the bottom of the “Duck Scents” to fit into a small envelope (as shown) – it’s a 6 3/4″ security envelope, like you can buy a box of at Dollar Tree. The card size is 3.5″ x 6.25″ when folded, and I’ll give you material measurements in just a moment.
One thing you will have to do is manipulate the sentiment on your clear block, so it will curve around the first letter, and fit on the Designer Series Paper. That’s easy to do with Stampin’ Up!®️ photopolymer stamps, like the Everyday Arches set I used for this card. Make sure to stamp this sentiment close to the left side of the patterned paper so you have room for the letters!
I’m here to make all the mistakes so you don’t have to- I had to make this card style 3 times before I got it right! Once I got it down, I made multiple versions. Here are the measurements:
11″ x 3.5″ cardstock for card base, scored at 6.25″ and 9.75″ (fold the smallest flap over and secure edges with Tear & Tape adhesive to create a pocket for a gift card).
Designer Series Paper for front layer: 6″ x 3.25″
Cardstock for inside of card: 5-7/8″ x 3-1/8″
Designer Series Paper AND card stock for 3 letters (and the shadow behind them): 2.5″ x 5″
Stamp any designs you want on your letters (like the birds) BEFORE you offset the card stock behind them for a shadow effect, then pop them up on the front of your card with dimensionals.
These cards turned out terrific with a combination of papers from the Everyday Skies 6″ x 6″ Designer Series Paper pack! Supplies listed below, and the SON card uses Cajun Craze, Blueberry Bushel and Cloud Cover (inside) card stock; the DAD card uses Azure Afternoon, Blackberry Bliss and Basic White (inside) card stock.
Would you give this card style a try? Leave me a comment (at top of post, next to the posting date) to let me know how you like it.
In today’s live demonstration on the Creative Juice Facebook Page and YouTube channel, I showed how to create two sizes of scrapbook pages (8.5″ x 11″ and 12″ x 12″) you can mail memories with~ .
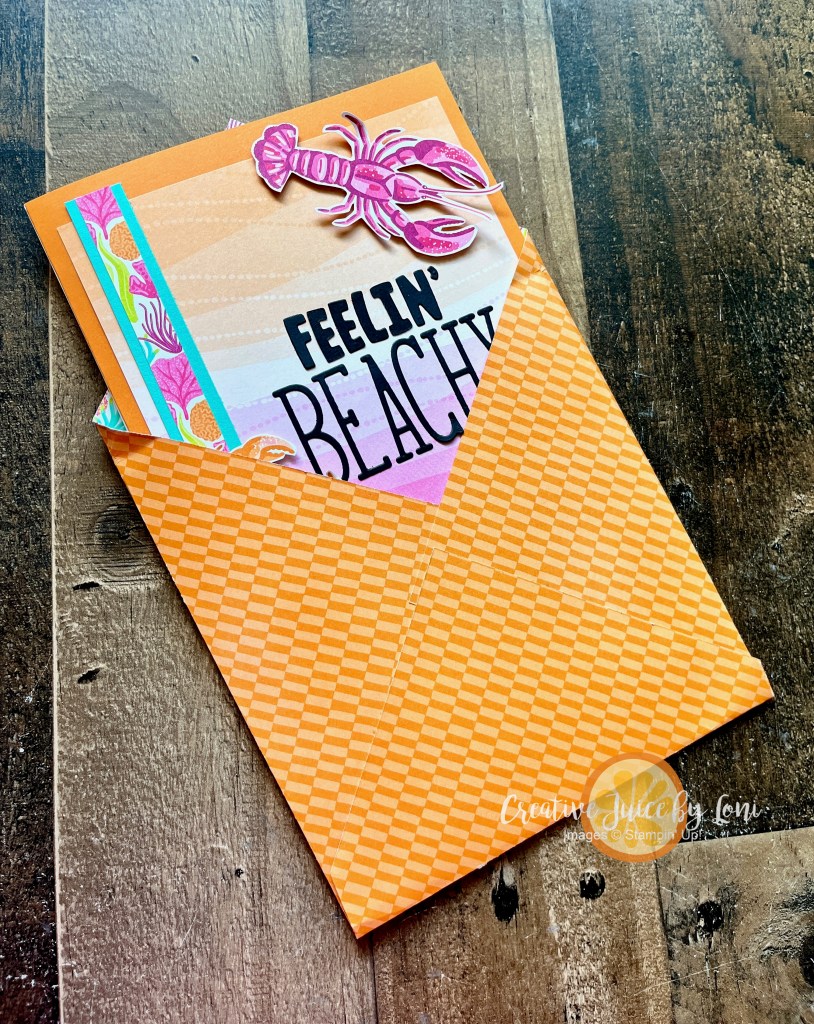
You’ll need a page layout that has quadrants, so you can fold it for mailing. This sketch features a long panel on the right and a cluster of photos on the left. Once you fold it up, it fits in a large envelope. I created the envelope from a 10″ x 10″ piece of the same Friends of the Ocean Designer Series Paper by Stampin’ Up! :
These beloved funny faces were the inspiration for this project:
INSTRUCTIONS: Start by taking the card stock for your page and scoring it in half one direction, then in half the other way. You’ll cut along one of the score lines in to the middle – on my “Funny Faces” page, I cut it along the lower center score line, but if I were to do it again, I’d cut along the horizontal line on right or left, as I did for the “Feeling Beachy” 12×12 page.
Once folded, the 8.5″ x 11″ page fits into a Basic White Medium Envelope:
TIP for mailing in 2025: If it weighs more than 1 oz. you’ll need a two ounce postage stamp, or one regular stamp and an additional ounce postage stamp. For the 12×12 page, you’ll need a Non-Machinable 1 ounce stamp ($1.19) PLUS an additional ounce stamp ($.28) for a total of $1.47.
Use the faces from the Meant to Bee and/or Bee My Valentine on Daffodil Delight card stock and punch them out with a 1/2″ circle punch to create the emoji buttons!
I’ll add this to the list of Mailable Gifts we’ve been building- bookmark that list HERE, then watch the video for more information on how to #mailamemory :
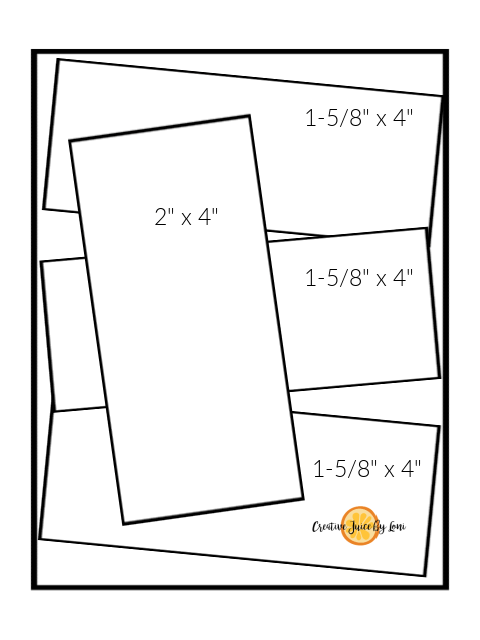
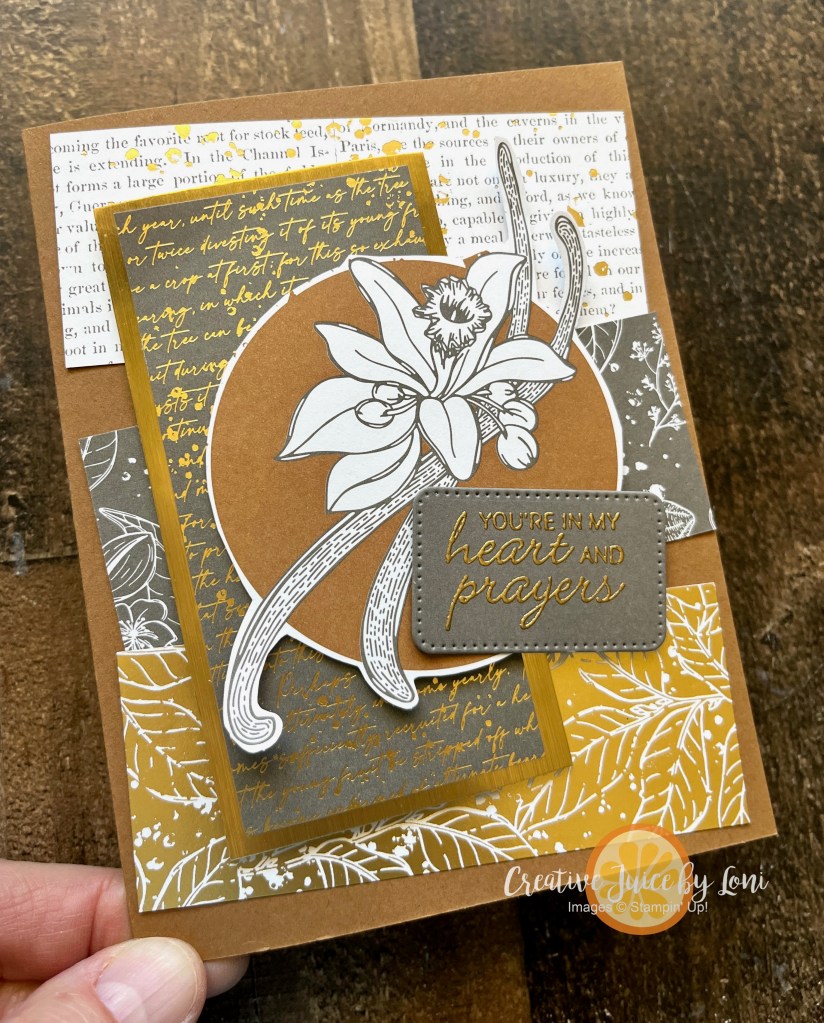
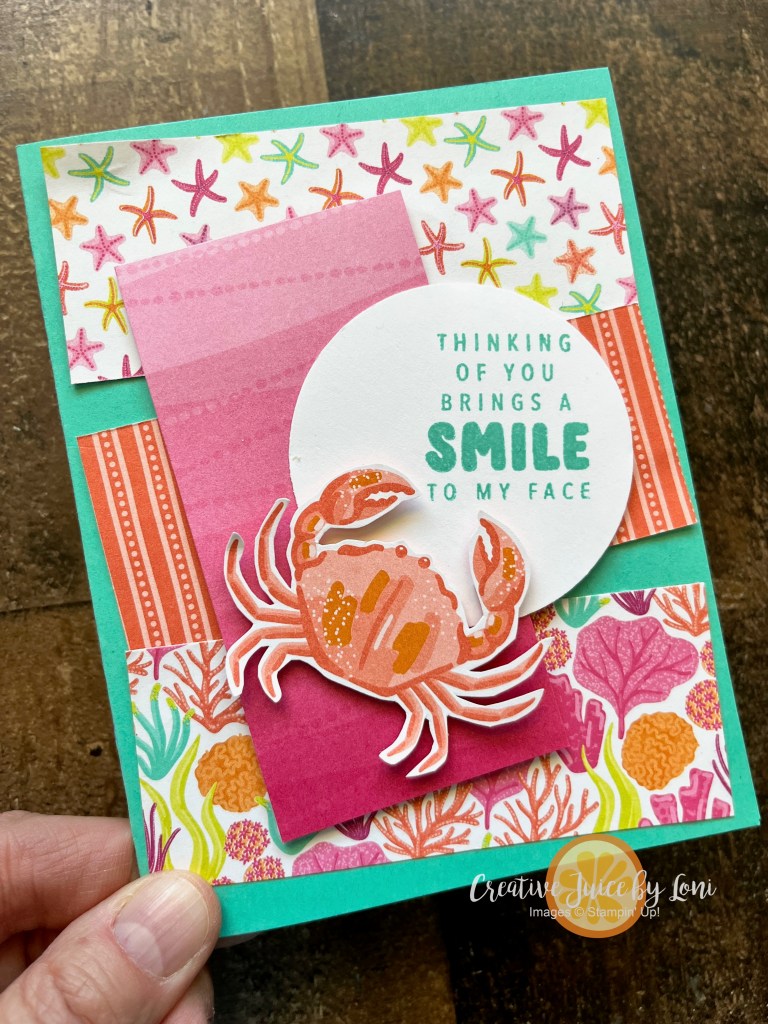
A sketch is a springboard for creativity, and today I dove into creating cards from my stash of Designer Series Paper using this sketch:
Card #1 was a sympathy card using some gilded botanical patterns that have been around Stampin’ Up! a long time, and I wanted to show it off! The Nature’s Sweetness Specialty Designer Series Paper only needed an embossed sentiment added to make this greeting card perfect:
You’ll notice that circle shapes draw the eye when used with rectangles!
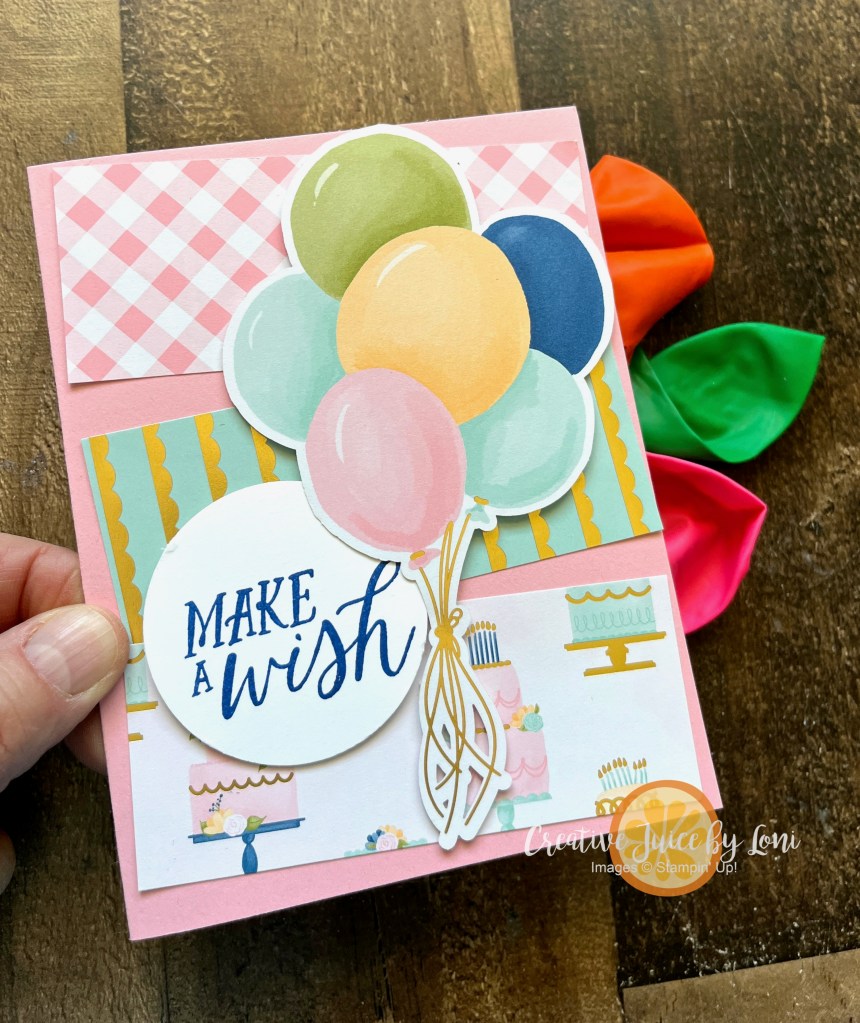
Card #3 brings us to another “mailable item” idea: BALLOONS!
In my demonstration video, I suggested blowing up a balloon and writing a message on it, then deflating it again to include inside the card. It’s double fun to have to blow it up to read the greeting! You could also “reveal” what experience you have planned to celebrate with (“I’ll pick you up for birthday lunch on me this Friday at noon!”) by writing it on the balloon.
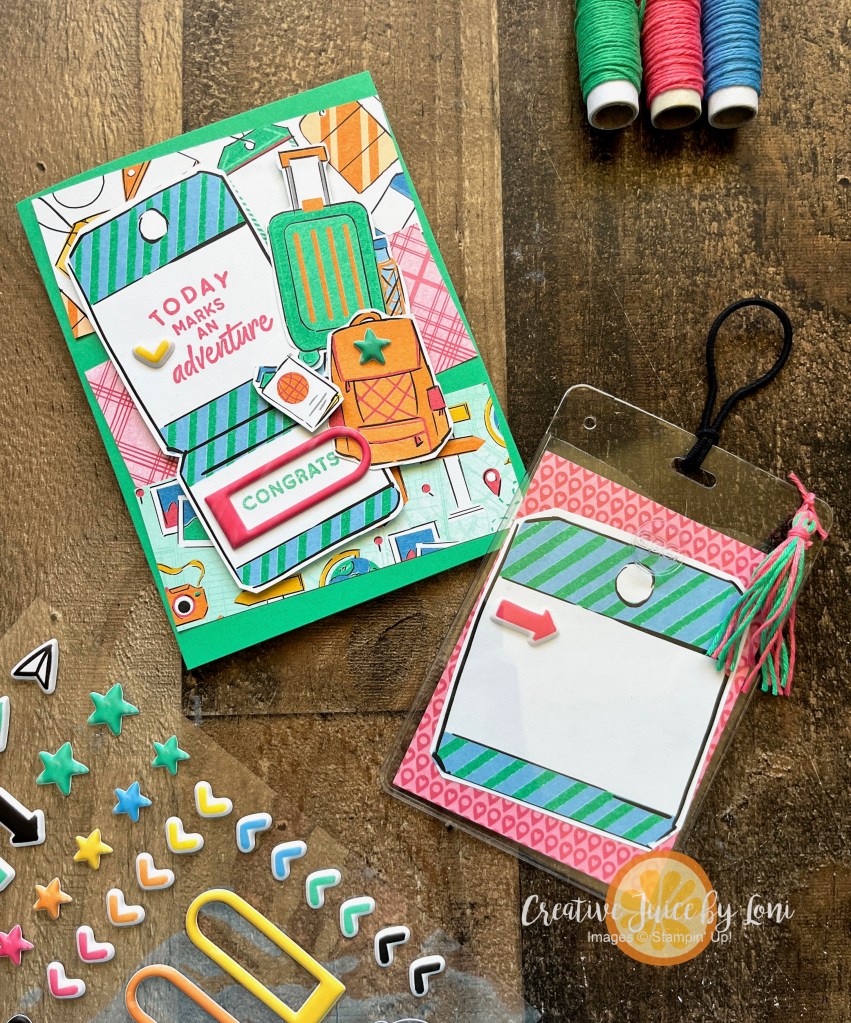
And finally, since Graduation season is imminent, Card #4 was created with the On the Go Suite Collection and includes a LUGGAGE TAG:
This will be for my niece who is graduating from High School this month and off on a grand European adventure to celebrate (remember when we were just happy to have cake & ice cream to mark a milestone like graduation 👩🎓 😂?)
I added the tassel after the demonstration in the video, and think the detail is adorable.
Missed the LONG LIST (and growing) OF MAILABLE GIFT ITEMS? Check it out HERE!
If you enjoy learning “how-to”, here’s today’s sketchy tutorial:
Thank you for choosing to shop with me. Most of the products used were linked throughout this post – just click on a product to add it to your cart…and watch for an exclusive tutorial bundle from me when you spend more than $50 in one month!
Connecting with you is a joy ~ Check out my upcoming events (in person AND online):
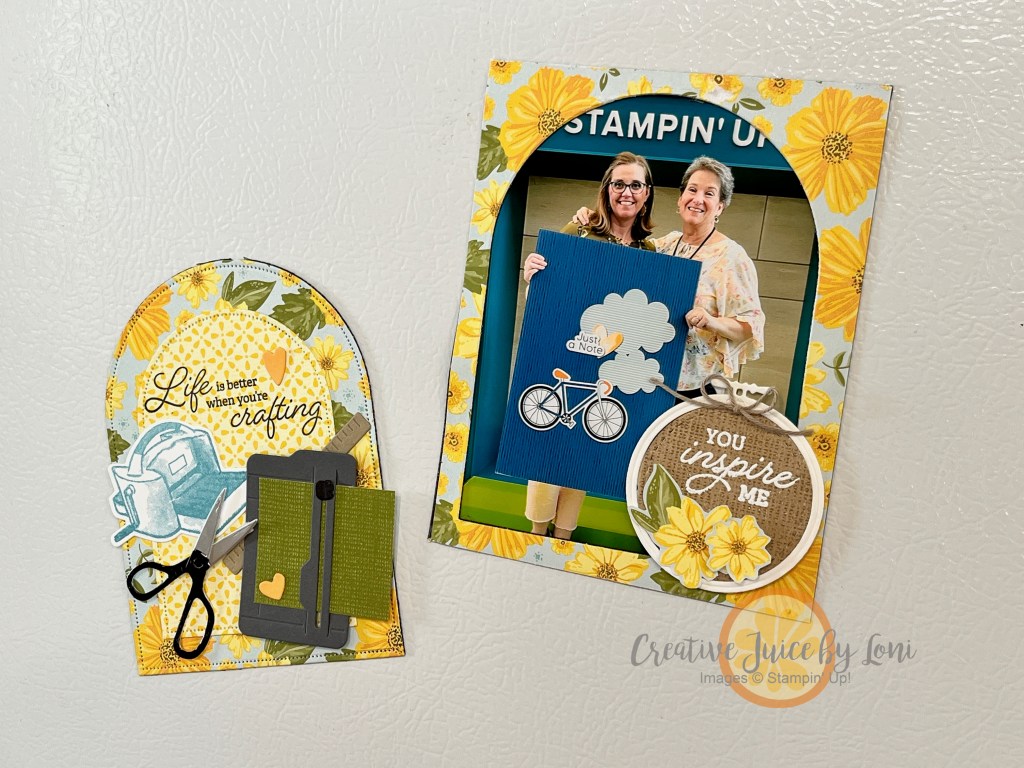
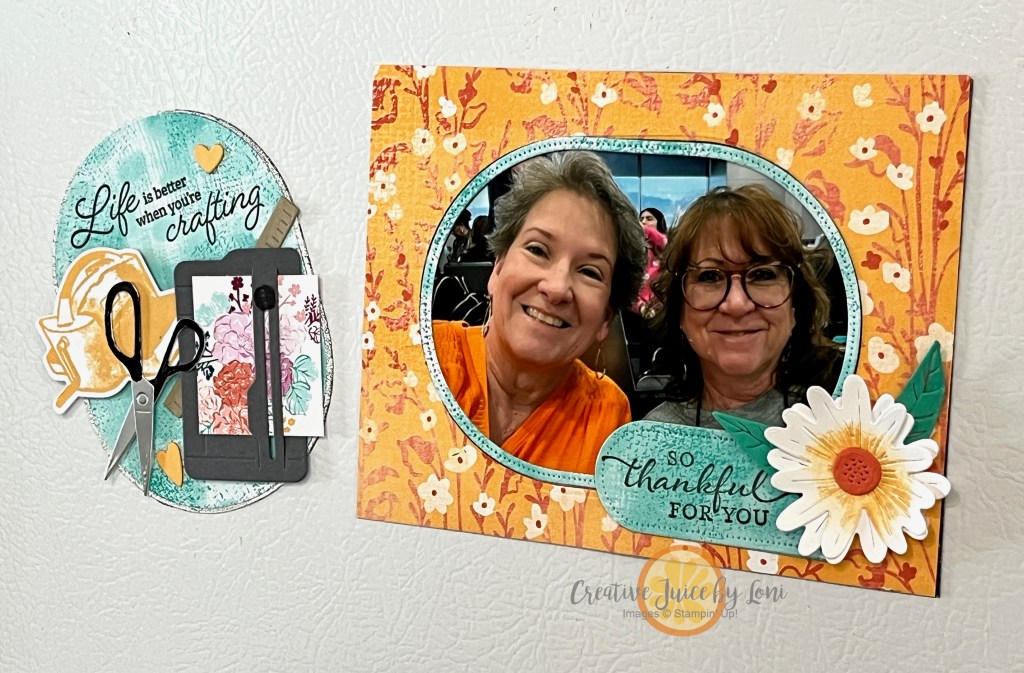
Back with another gift that fits inside an envelope for mailing (if you missed the previous ideas, bookmark that post HERE)! This magnet frame is a TWO-FER since you get two magnets from one project, and can include both the photo frame and extra magnet as a bonus gift.
These are actually on my fridge! I wanted to show that they do stick with the magnet sheetsused today (click link to shop on Amazon). You can use ANY Stampin’ Up! products (Designer Series Paper, stamps, dies, etc.) but I will link the ones I used for this version below – THANKS FOR SHOPPING WITH ME!
Let’s get right to the video tutorial, which will answer most of your questions:
The Everyday Arches dies worked well for this frame: Roll it through the Cut & Emboss machine TWICE to cut through the layers of paper and magnet sheet.
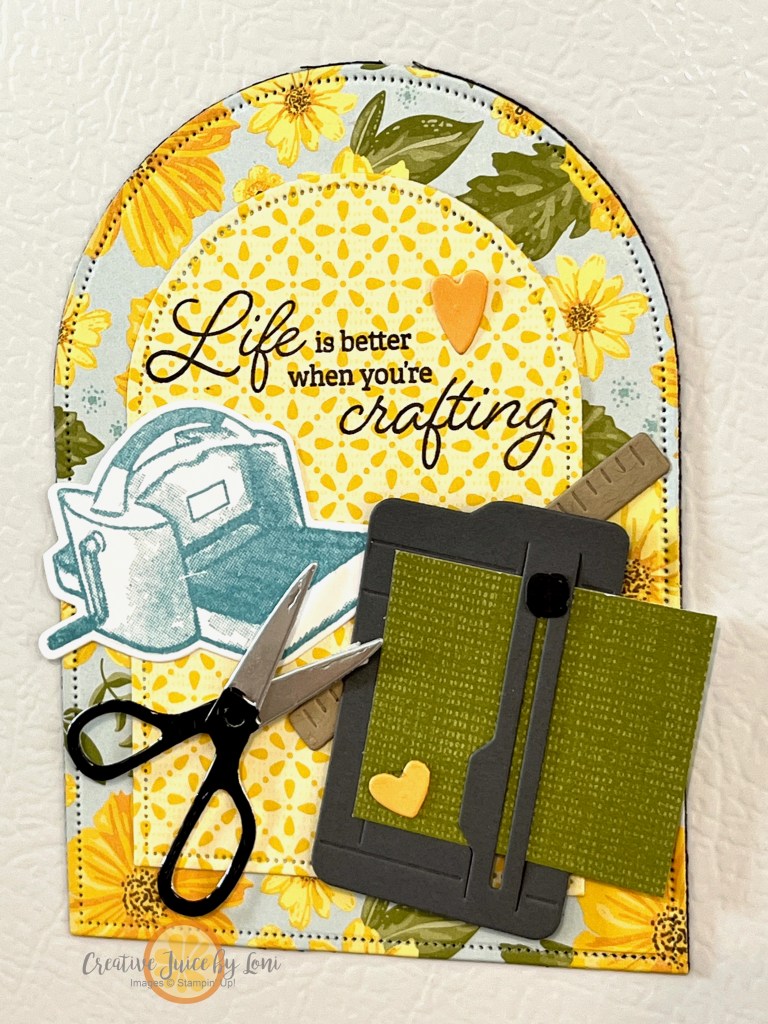
Then use the inside arch for a second magnet. Think of it as a blank palette and “build” a scene just as you would a card front. I used the Crafting For You stamp set and dies, and just learned that the stamp set is already sold out/discontinued from the 2024-25 Catalog! Guess that’s a good reminder not to let something you love pass you by… at least the dies are still available, and many don’t need the stamps.
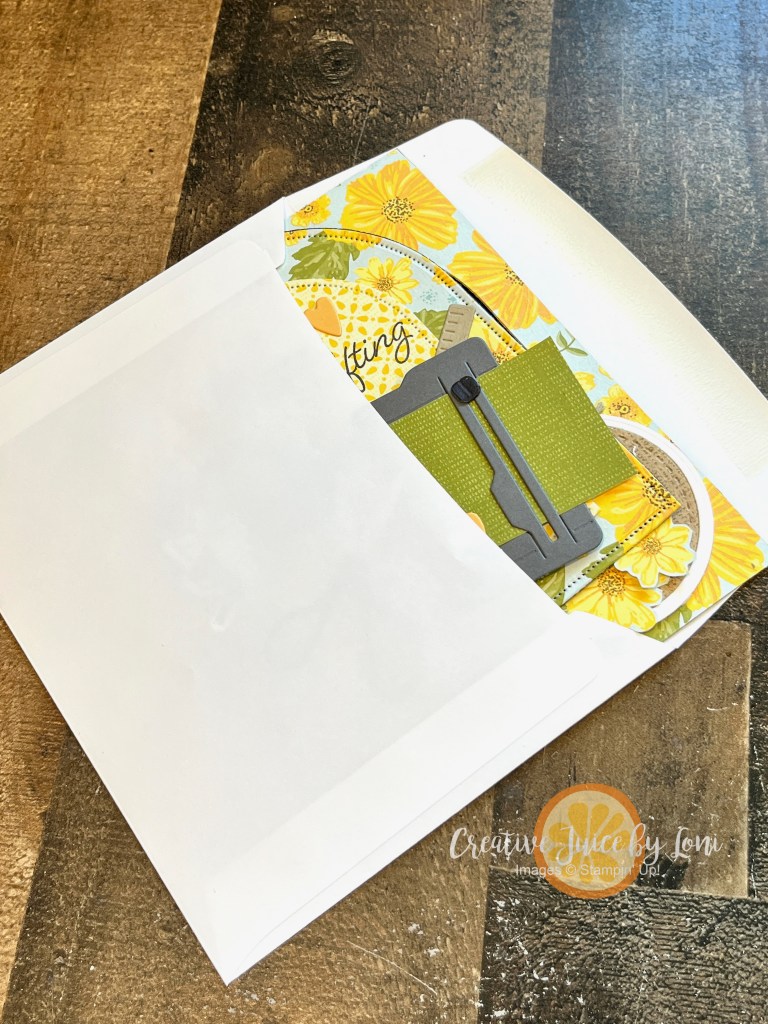
They can both be mailed in the same envelope. I made the magnet 4.25″ x 5.5″ to fit in the Basic White A2 envelopes, but you could certainly make a larger size if you have a larger envelope:
This version features an upcoming product (stamps & dies) called “Impressions Abloom” that will be released in the Online Exclusive section of my Stampin’ Store on May 6th. I paired it with the Unbounded Beauty Designer Series Paper. If you want to use the back side of the paper for the inside piece, remember to cut the shape from the paper BEFORE putting it on the magnet’s adhesive side, then run through the machine a second time to cut out the center piece.
Let me know if you’ll make one (blog comments at top of post by date) – or show me your version in my customer VIP Facebook Group, if you are a part of the Creative Juice Crafter’s Corner!
As we are brain-storming mailable gifts/items this month, here’s an adorable little project to make with your Stampin’ Up! line-art stamps: This mini coloring book is just 2.75″ x 4.25″ finished and all you need is an 8.5″ x 11″ sheet of copy paper, a black ink pad and your favorite stamp images.
If you can fold paper, you can make this! Let’s start with the how-to video, featuring a few unexpected (but very cute) guests:
While it’s very easy to stamp your own book, there are also folks who have created printable versions. This Spring version by Jennifer A. Bell was was one of my favorites, and is appropriate for all ages (adult artists included!)
Here’s a different visual tutorial (borrowed from the interwebs):
Enjoy the novelty of this simple project and tell me if you’ve tried it!
It’s easy to fall into the rut of sending gift cards as the only flat thing to include in a handmade card for a present, but I’ve been making a list (and collecting) a whole stack of mailable items to share as ideas!
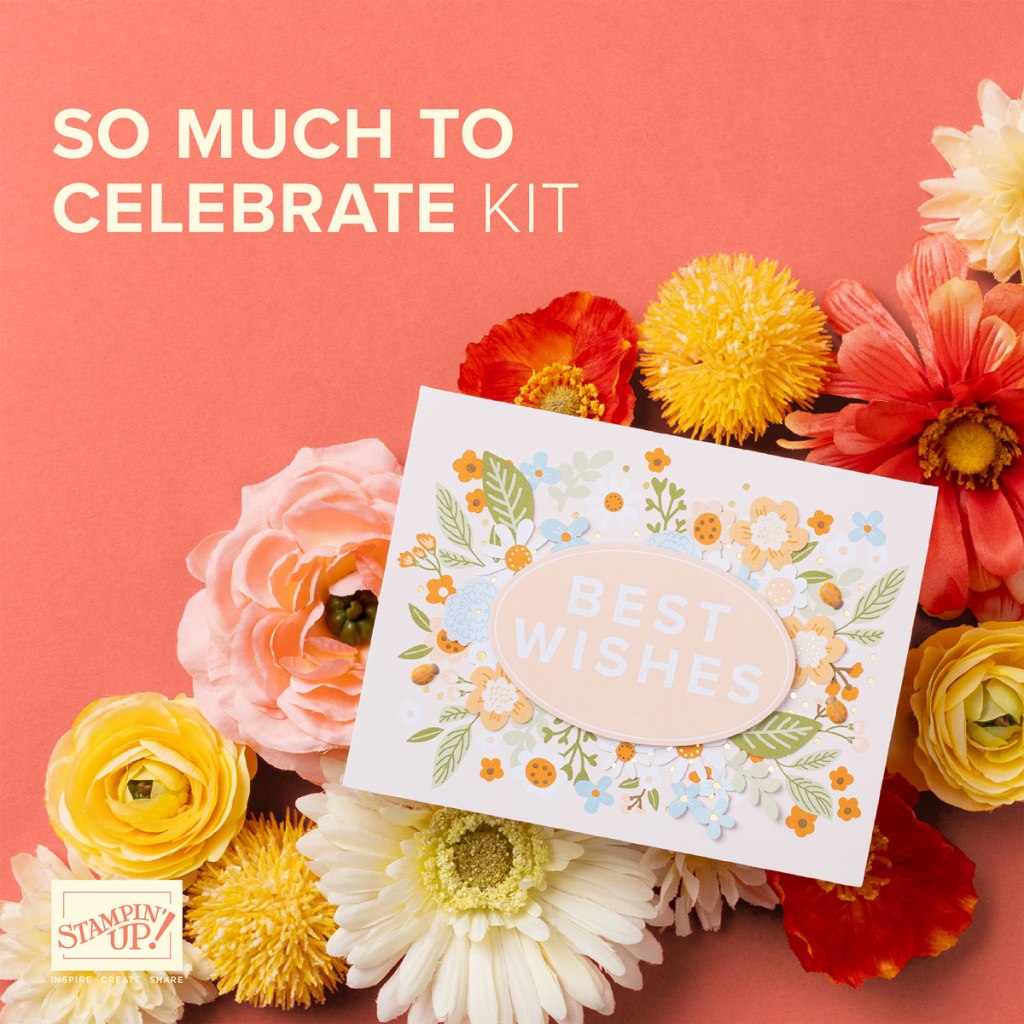
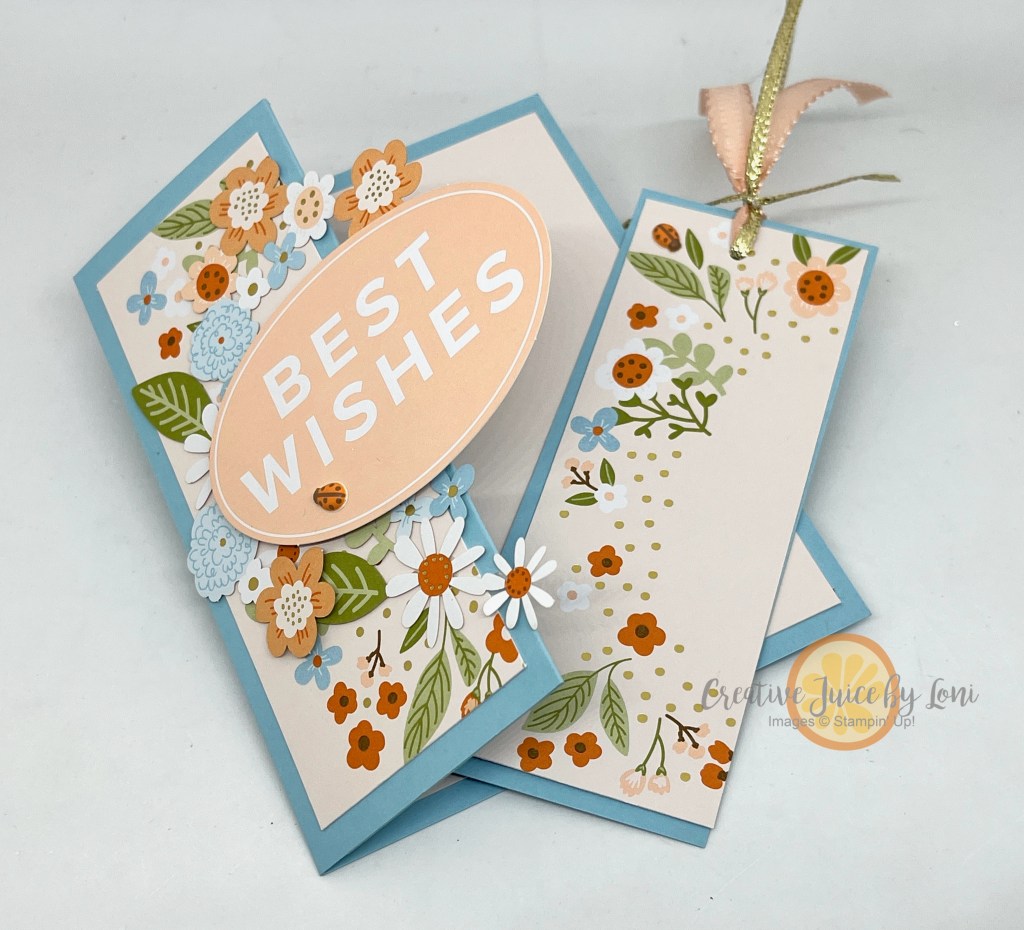
Let’s start with a gift you can make yourself: A bookmark tucked into the pocket of a card! Let’s allow the Stampin’ Up! “So Much to Celebrate” kit give us a place to begin.
This kit makes 9 cards, with all the supplies needed included in the box and no stamping required! However, you can always step-up a kit with coordinating card stock and ribbon, so I made it into this:
Watch how to quickly make this card and bookmark, then see all the mailable giftable ideas that I’ve linked below!
Now it’s time to think BEYOND a gift card as the first thing to send as a gift! Some items may have affiliate links, which means I would earn a small commission if you purchase.


![Hobby Haven Suite Collection (English) [ 167214 ]](https://assets1.tamsnetwork.com/images/EC042017NF/167214s.jpg "Hobby Haven Suite Collection (English) [ 167214 ]")
![Cajun Craze 8-1/2" X 11" Cardstock [ 119684 ]](https://assets1.tamsnetwork.com/images/EC042017NF/119684s.jpg "Cajun Craze 8-1/2\" X 11\" Cardstock [ 119684 ]")
![Lost Lagoon 8-1/2" X 11" Cardstock [ 133679 ]](https://assets1.tamsnetwork.com/images/EC042017NF/133679s.jpg "Lost Lagoon 8-1/2\" X 11\" Cardstock [ 133679 ]")
![Forever Plaid 3 D Embossing Folder [ 164049 ]](https://assets1.tamsnetwork.com/images/EC042017NF/164049s.jpg "Forever Plaid 3 D Embossing Folder [ 164049 ]")
![Versamark Pad [ 102283 ]](https://assets1.tamsnetwork.com/images/EC042017NF/102283s.jpg "Versamark Pad [ 102283 ]")
![Metallics Wow! Embossing Powder [ 165678 ]](https://assets1.tamsnetwork.com/images/EC042017NF/165678s.jpg "Metallics Wow! Embossing Powder [ 165678 ]")
![Heat Tool (Us And Canada) [ 129053 ]](https://assets1.tamsnetwork.com/images/EC042017NF/129053s.jpg "Heat Tool (Us And Canada) [ 129053 ]")
![Stampin' Cut & Emboss Machine [ 149653 ]](https://assets1.tamsnetwork.com/images/EC042017NF/149653s.jpg "Stampin' Cut & Emboss Machine [ 149653 ]")
![Basic Beige 3/8" (1 Cm) Bordered Ribbon [ 163788 ]](https://assets1.tamsnetwork.com/images/EC042017NF/163788s.jpg "Basic Beige 3/8\" (1 Cm) Bordered Ribbon [ 163788 ]")
![Multipurpose Liquid Glue [ 110755 ]](https://assets1.tamsnetwork.com/images/EC042017NF/110755s.jpg "Multipurpose Liquid Glue [ 110755 ]")
![Stampin' Dimensionals [ 104430 ]](https://assets1.tamsnetwork.com/images/EC042017NF/104430s.jpg "Stampin' Dimensionals [ 104430 ]")


![Party Alphabet Dies [ 165263 ]](https://assets1.tamsnetwork.com/images/EC042017NF/165263s.jpg "Party Alphabet Dies [ 165263 ]")
![Everyday Arches Photopolymer Stamp Set (English) [ 164623 ]](https://assets1.tamsnetwork.com/images/EC042017NF/164623s.jpg "Everyday Arches Photopolymer Stamp Set (English) [ 164623 ]")
![Everyday Skies 6" X 6" (15.2 X 15.2 Cm) Designer Series Paper [ 164622 ]](https://assets1.tamsnetwork.com/images/EC042017NF/164622s.jpg "Everyday Skies 6\" X 6\" (15.2 X 15.2 Cm) Designer Series Paper [ 164622 ]")
![Azure Afternoon 8 1/2" X 11" Cardstock [ 161719 ]](https://assets1.tamsnetwork.com/images/EC042017NF/161719s.jpg "Azure Afternoon 8 1/2\" X 11\" Cardstock [ 161719 ]")
![Blackberry Bliss 8-1/2" X 11" Cardstock [ 133675 ]](https://assets1.tamsnetwork.com/images/EC042017NF/133675s.jpg "Blackberry Bliss 8-1/2\" X 11\" Cardstock [ 133675 ]")
![Blueberry Bushel 8-1/2" X 11" Cardstock [ 146968 ]](https://assets1.tamsnetwork.com/images/EC042017NF/146968s.jpg "Blueberry Bushel 8-1/2\" X 11\" Cardstock [ 146968 ]")
![Cloud Cover 8 1/2" X 11" Cardstock [ 165621 ]](https://assets1.tamsnetwork.com/images/EC042017NF/165621s.jpg "Cloud Cover 8 1/2\" X 11\" Cardstock [ 165621 ]")
![Basic White 8 1/2" X 11" Cardstock [ 166780 ]](https://assets1.tamsnetwork.com/images/EC042017NF/166780s.jpg "Basic White 8 1/2\" X 11\" Cardstock [ 166780 ]")
![Blueberry Bushel Classic Stampin' Pad [ 147138 ]](https://assets1.tamsnetwork.com/images/EC042017NF/147138s.jpg "Blueberry Bushel Classic Stampin' Pad [ 147138 ]")
![Azure Afternoon Classic Stampin' Pad [ 161663 ]](https://assets1.tamsnetwork.com/images/EC042017NF/161663s.jpg "Azure Afternoon Classic Stampin' Pad [ 161663 ]")
![Mini Stampin' Cut & Emboss Machine [ 150673 ]](https://assets1.tamsnetwork.com/images/EC042017NF/150673s.jpg "Mini Stampin' Cut & Emboss Machine [ 150673 ]")
![Stampin' Seal [ 152813 ]](https://assets1.tamsnetwork.com/images/EC042017NF/152813s.jpg "Stampin' Seal [ 152813 ]")
![Tear & Tape Adhesive [ 154031 ]](https://assets1.tamsnetwork.com/images/EC042017NF/154031s.jpg "Tear & Tape Adhesive [ 154031 ]")


![Friends Of The Ocean 12" X 12" (30.5 X 30.5 Cm) Designer Series Paper [ 164684 ]](https://assets1.tamsnetwork.com/images/EC042017NF/164684s.jpg "Friends Of The Ocean 12\" X 12\" (30.5 X 30.5 Cm) Designer Series Paper [ 164684 ]")
![Pumpkin Pie 8-1/2" X 11" Cardstock [ 105117 ]](https://assets1.tamsnetwork.com/images/EC042017NF/105117s.jpg "Pumpkin Pie 8-1/2\" X 11\" Cardstock [ 105117 ]")
![Basic Black 8-1/2" X 11" Cardstock [ 121045 ]](https://assets1.tamsnetwork.com/images/EC042017NF/121045s.jpg "Basic Black 8-1/2\" X 11\" Cardstock [ 121045 ]")
![Daffodil Delight 8-1/2" X 11" Cardstock [ 119683 ]](https://assets1.tamsnetwork.com/images/EC042017NF/119683s.jpg "Daffodil Delight 8-1/2\" X 11\" Cardstock [ 119683 ]")
![Summer Splash 8 1/2" X 11 Cardstock [ 163797 ]](https://assets1.tamsnetwork.com/images/EC042017NF/163797s.jpg "Summer Splash 8 1/2\" X 11 Cardstock [ 163797 ]")
![Adhesive Sheets [ 152334 ]](https://assets1.tamsnetwork.com/images/EC042017NF/152334s.jpg "Adhesive Sheets [ 152334 ]")
![Alphabet à La Mode Dies [ 160750 ]](https://assets1.tamsnetwork.com/images/EC042017NF/160750s.jpg "Alphabet à La Mode Dies [ 160750 ]")
![Mini Alphabet Dies [ 162934 ]](https://assets1.tamsnetwork.com/images/EC042017NF/162934s.jpg "Mini Alphabet Dies [ 162934 ]")
![Tuxedo Black Memento Ink Pad [ 132708 ]](https://assets1.tamsnetwork.com/images/EC042017NF/132708s.jpg "Tuxedo Black Memento Ink Pad [ 132708 ]")
![Meant To Bee Photopolymer Stamp Set (English) [ 166583 ]](https://assets1.tamsnetwork.com/images/EC042017NF/166583s.jpg "Meant To Bee Photopolymer Stamp Set (English) [ 166583 ]")
![Bee My Valentine Photopolymer Stamp Set (English) [ 162547 ]](https://assets1.tamsnetwork.com/images/EC042017NF/162547s.jpg "Bee My Valentine Photopolymer Stamp Set (English) [ 162547 ]")
![Basic White Medium Envelopes [ 159236 ]](https://assets1.tamsnetwork.com/images/EC042017NF/159236s.jpg "Basic White Medium Envelopes [ 159236 ]")
![Paper Trimmer [ 152392 ]](https://assets1.tamsnetwork.com/images/EC042017NF/152392s.jpg "Paper Trimmer [ 152392 ]")
![Mini Glue Dots [ 103683 ]](https://assets1.tamsnetwork.com/images/EC042017NF/103683s.jpg "Mini Glue Dots [ 103683 ]")


![Floral Delight 12" X 12" (30.5 X 30.5 Cm) Designer Series Paper [ 164700 ]](https://assets1.tamsnetwork.com/images/EC042017NF/164700s.jpg "Floral Delight 12\" X 12\" (30.5 X 30.5 Cm) Designer Series Paper [ 164700 ]")
![Everyday Arches Dies [ 164629 ]](https://assets1.tamsnetwork.com/images/EC042017NF/164629s.jpg "Everyday Arches Dies [ 164629 ]")
![Crafting With You Dies [ 161225 ]](https://assets1.tamsnetwork.com/images/EC042017NF/161225s.jpg "Crafting With You Dies [ 161225 ]")
![Silver Foil Sheets [ 132178 ]](https://assets1.tamsnetwork.com/images/EC042017NF/132178s.jpg "Silver Foil Sheets [ 132178 ]")
![Early Espresso Classic Stampin' Pad [ 147114 ]](https://assets1.tamsnetwork.com/images/EC042017NF/147114s.jpg "Early Espresso Classic Stampin' Pad [ 147114 ]")