I was thinking of cake.
This decorating trend is called a “fault line” cake, and after watching a few short videos (activating my sweet tooth), it occurred to me that the concept would translate into card making (minus the calories!).


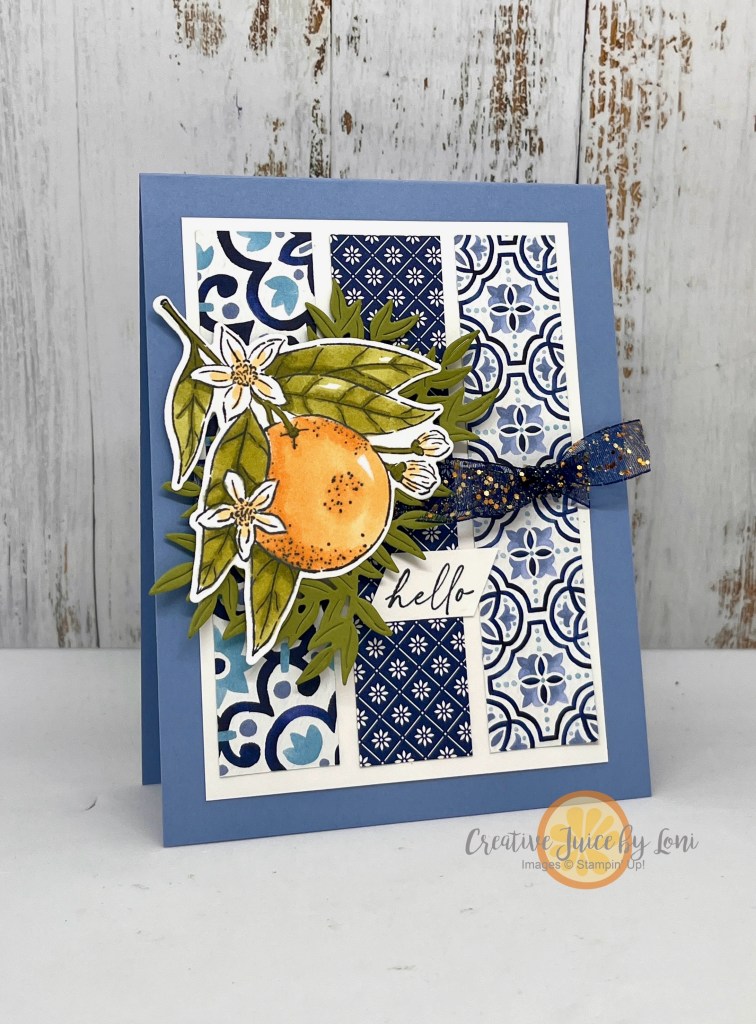
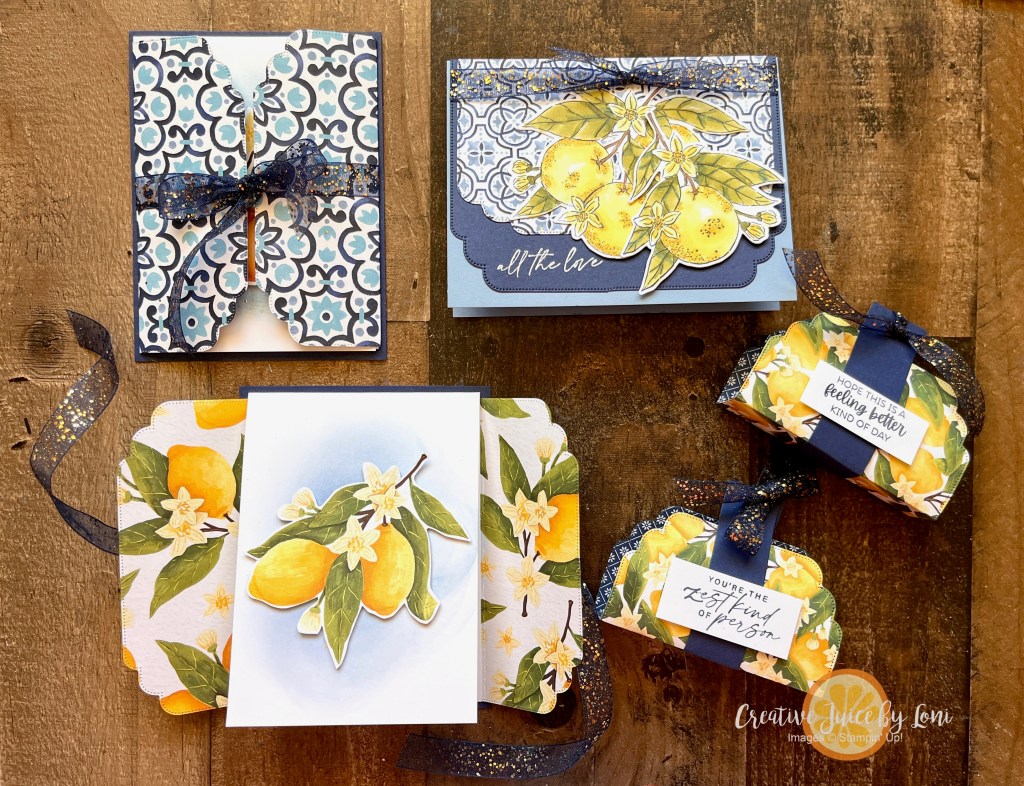
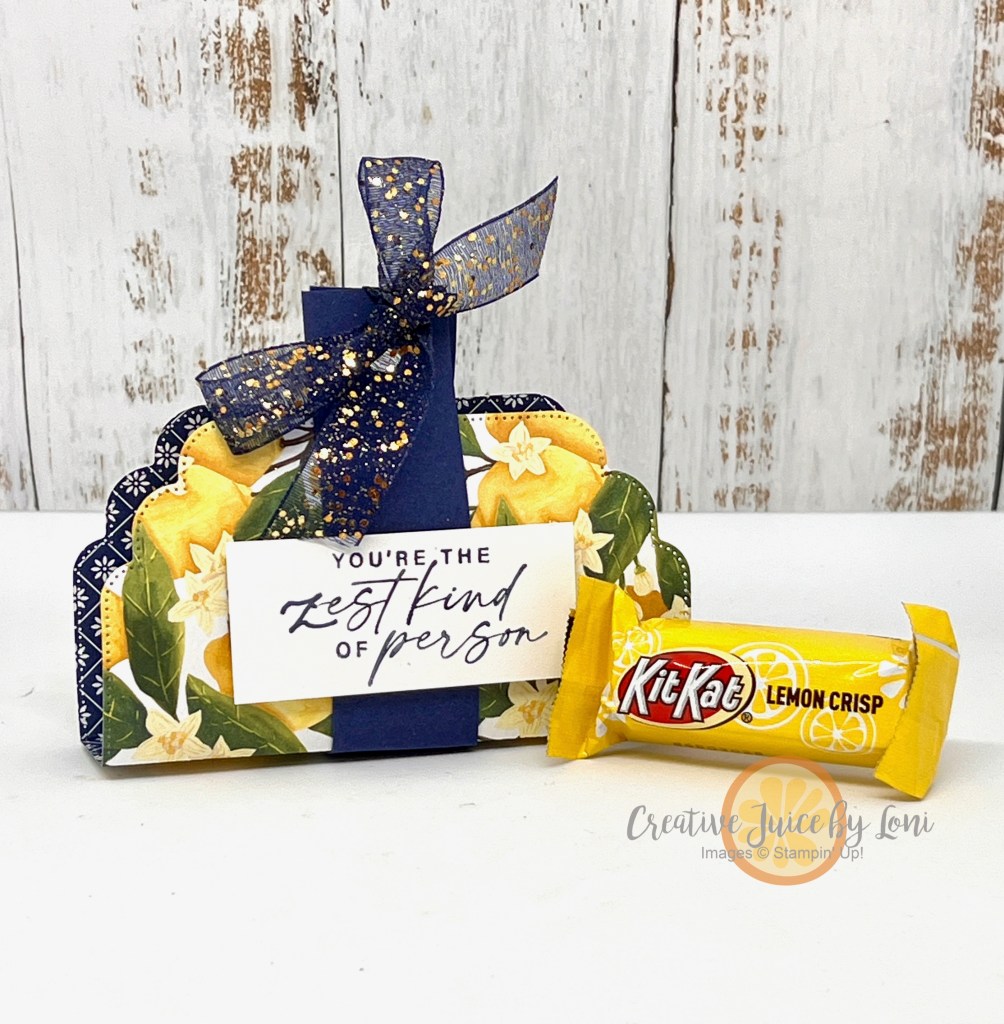
Let’s try it using the December Paper Pumpkin “Notes from the Heart” stamp set from paired with card stock and Designer Series Paper to create these Fault Line greeting cards,starting with a thank you card:

I roughed-up the edges along the “fault line”, reminiscent of my Busted Canvas card, by rolling back the torn edges. It really gives the card character!

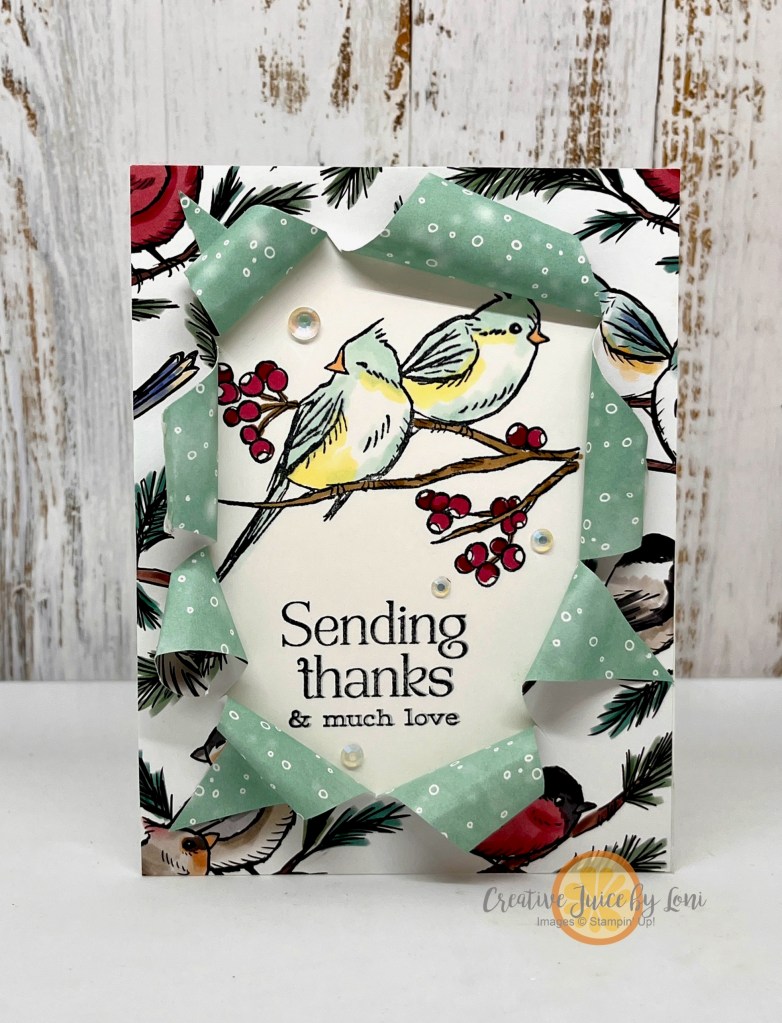
Next, a Basic Beige Birthday Card, with the Timeless Plaid Designer Series Paper (from the Stampin’ Up! 2025 January-April mini catalog) peeking through:

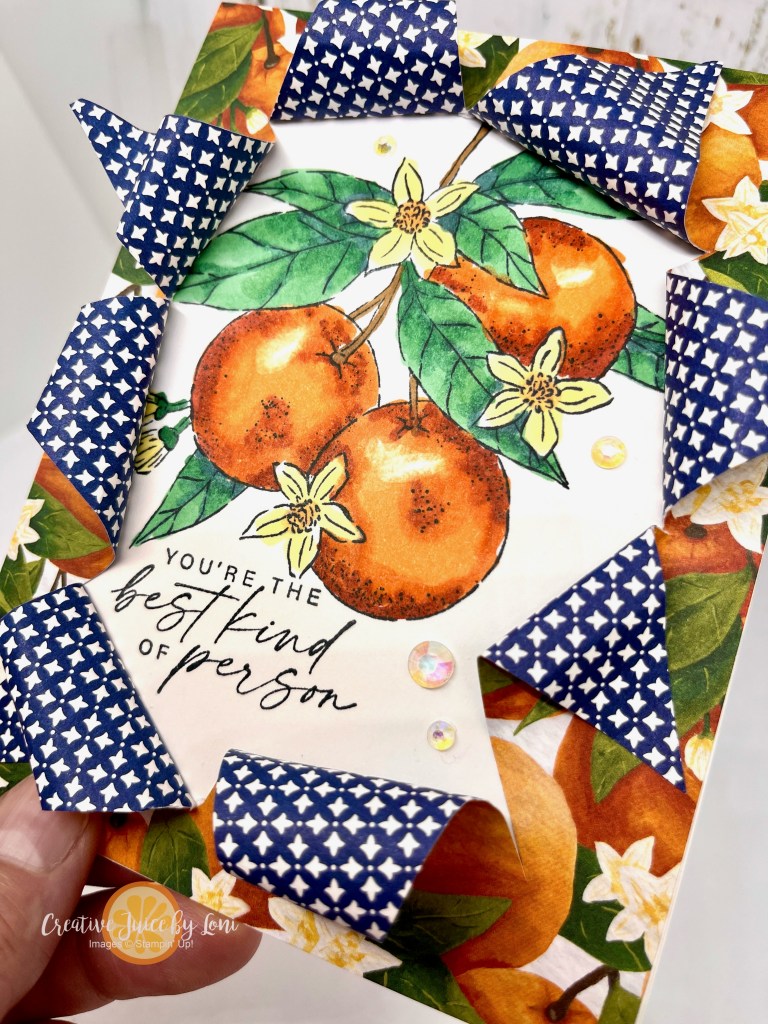
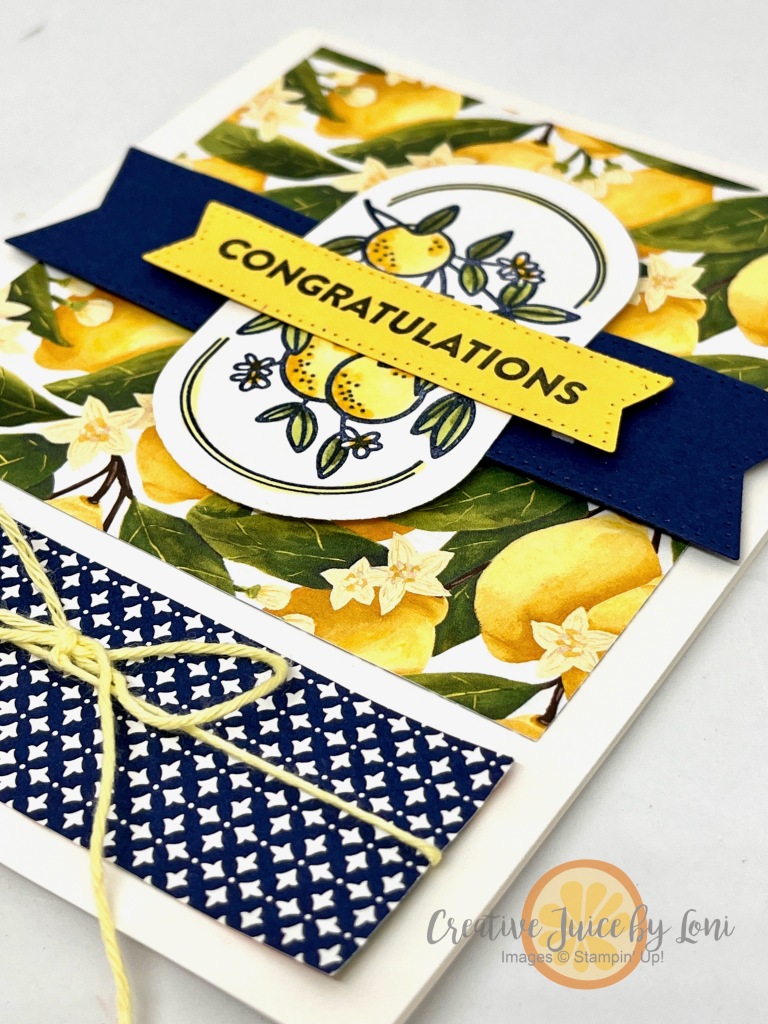
Since I hadn’t opened the Nature’s Sweetness Specialty DSP package, I ended my stamping spree with this shiny Congrats Card. The gold foil and embossing are gorgeous, so I’ll probably make a whole stack of these to have on hand! The Adhesive-Backed Heart Sequins will be available on January 7th:

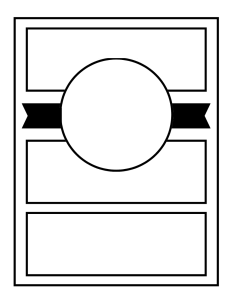
Here are the materials needed for the Fault Line card:
- 4.25″ x 9.5″ card stock base, scored at 5.5″
- 4.25″ x 5.5″ card stock, same color (inside the front of the card to give it stability and cover DSP)
- Designer Series Paper 4.25″ x 4″ -the main image showing through
- Designer Series Paper -OR- card stock 4.25″ x 3″
- Stamps, Ink pad, embellishments (as desired)
Learn how to make this fault line card (with a twist) on Monday 12/30 during Lunchtime Live Crafting on my Facebook Page and YouTube channel at 12:30 MT. The replay will be posted here on my website later that day.
Don’t miss a Paper Pumpkin kit! The January kit Hearts for You will be oh-so-loveable, and I always share exclusive alternate projects using just the stamp set and ink (similar to these) with my subscribers in my Paper Pumpkin Patch email. Subscribe NOW by clicking the image or link above:

![Whisper White 8-1/2" X 11" Cardstock [ 100730 ]](https://assets1.tamsnetwork.com/images/EC042017NF/100730s.jpg "Whisper White 8-1/2\" X 11\" Cardstock [ 100730 ]")
![Basic Beige 8 1/2" X 11" Cardstock [ 164511 ]](https://assets1.tamsnetwork.com/images/EC042017NF/164511s.jpg "Basic Beige 8 1/2\" X 11\" Cardstock [ 164511 ]")
![Cajun Craze 8-1/2" X 11" Cardstock [ 119684 ]](https://assets1.tamsnetwork.com/images/EC042017NF/119684s.jpg "Cajun Craze 8-1/2\" X 11\" Cardstock [ 119684 ]")
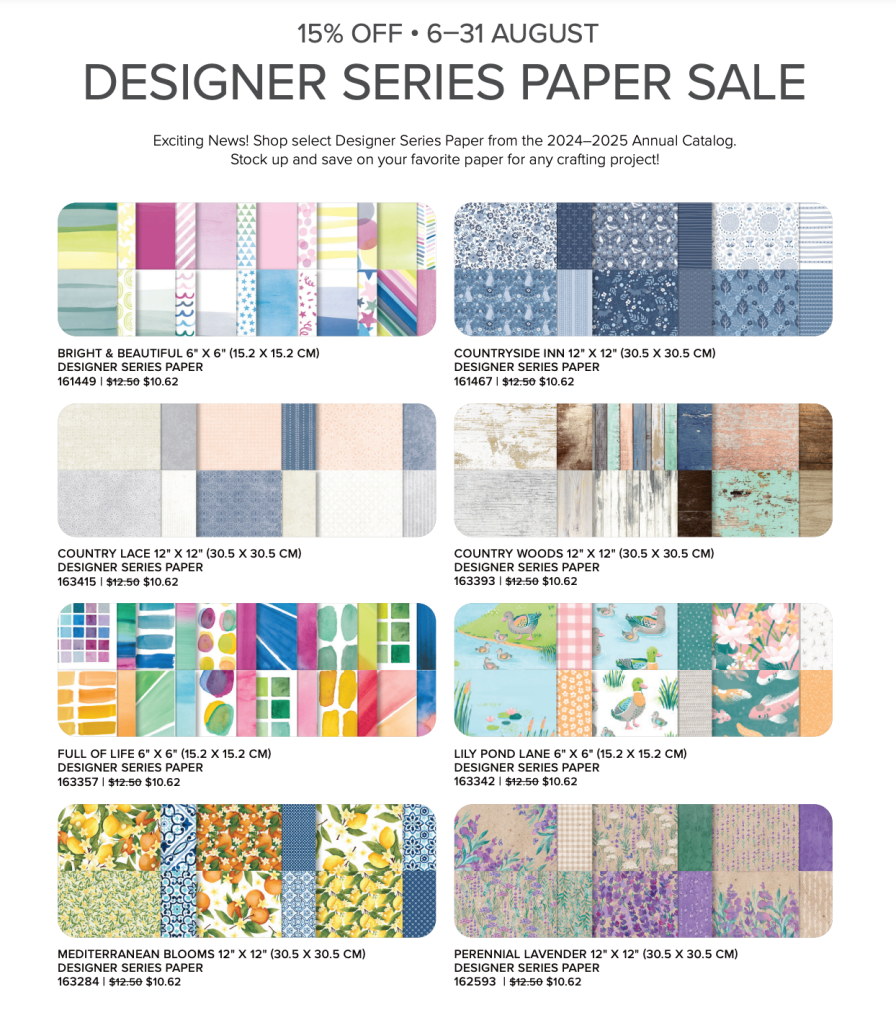
![Mediterranean Blooms 12" X 12" (30.5 X 30.5 Cm) Designer Series Paper [ 163284 ]](https://assets1.tamsnetwork.com/images/EC042017NF/163284s.jpg "Mediterranean Blooms 12\" X 12\" (30.5 X 30.5 Cm) Designer Series Paper [ 163284 ]")
![Nature's Sweetness 12" X 12" (30.5 X 30.5 Cm) Specialty Designer Series Paper [ 162616 ]](https://assets1.tamsnetwork.com/images/EC042017NF/162616s.jpg "Nature's Sweetness 12\" X 12\" (30.5 X 30.5 Cm) Specialty Designer Series Paper [ 162616 ]")
![Night Of Navy Classic Stampin' Pad [ 147110 ]](https://assets1.tamsnetwork.com/images/EC042017NF/147110s.jpg "Night Of Navy Classic Stampin' Pad [ 147110 ]")
![Cajun Craze Classic Stampin' Pad [ 147085 ]](https://assets1.tamsnetwork.com/images/EC042017NF/147085s.jpg "Cajun Craze Classic Stampin' Pad [ 147085 ]")
![Versamark Pad [ 102283 ]](https://assets1.tamsnetwork.com/images/EC042017NF/102283s.jpg "Versamark Pad [ 102283 ]")
![Metallics Wow! Embossing Powder [ 165678 ]](https://assets1.tamsnetwork.com/images/EC042017NF/165678s.jpg "Metallics Wow! Embossing Powder [ 165678 ]")
![Heat Tool (Us And Canada) [ 129053 ]](https://assets1.tamsnetwork.com/images/EC042017NF/129053s.jpg "Heat Tool (Us And Canada) [ 129053 ]")
![Stampin' Seal [ 152813 ]](https://assets1.tamsnetwork.com/images/EC042017NF/152813s.jpg "Stampin' Seal [ 152813 ]")
![Faux Glass Dots [ 164060 ]](https://assets1.tamsnetwork.com/images/EC042017NF/164060s.jpg "Faux Glass Dots [ 164060 ]")


")


")


 Glittered Ribbon")


")
 Designer Series Paper")


")