
Halloween is around the corner, but you don’t need to be limited to the Trick or Treat season when crafting with the Stampin’ Up!®️ Spooky Sweet products, and particularly the Designer Series Paper. This sheet has a flamingo dressed in a tutu that I’m going to use on a birthday card:
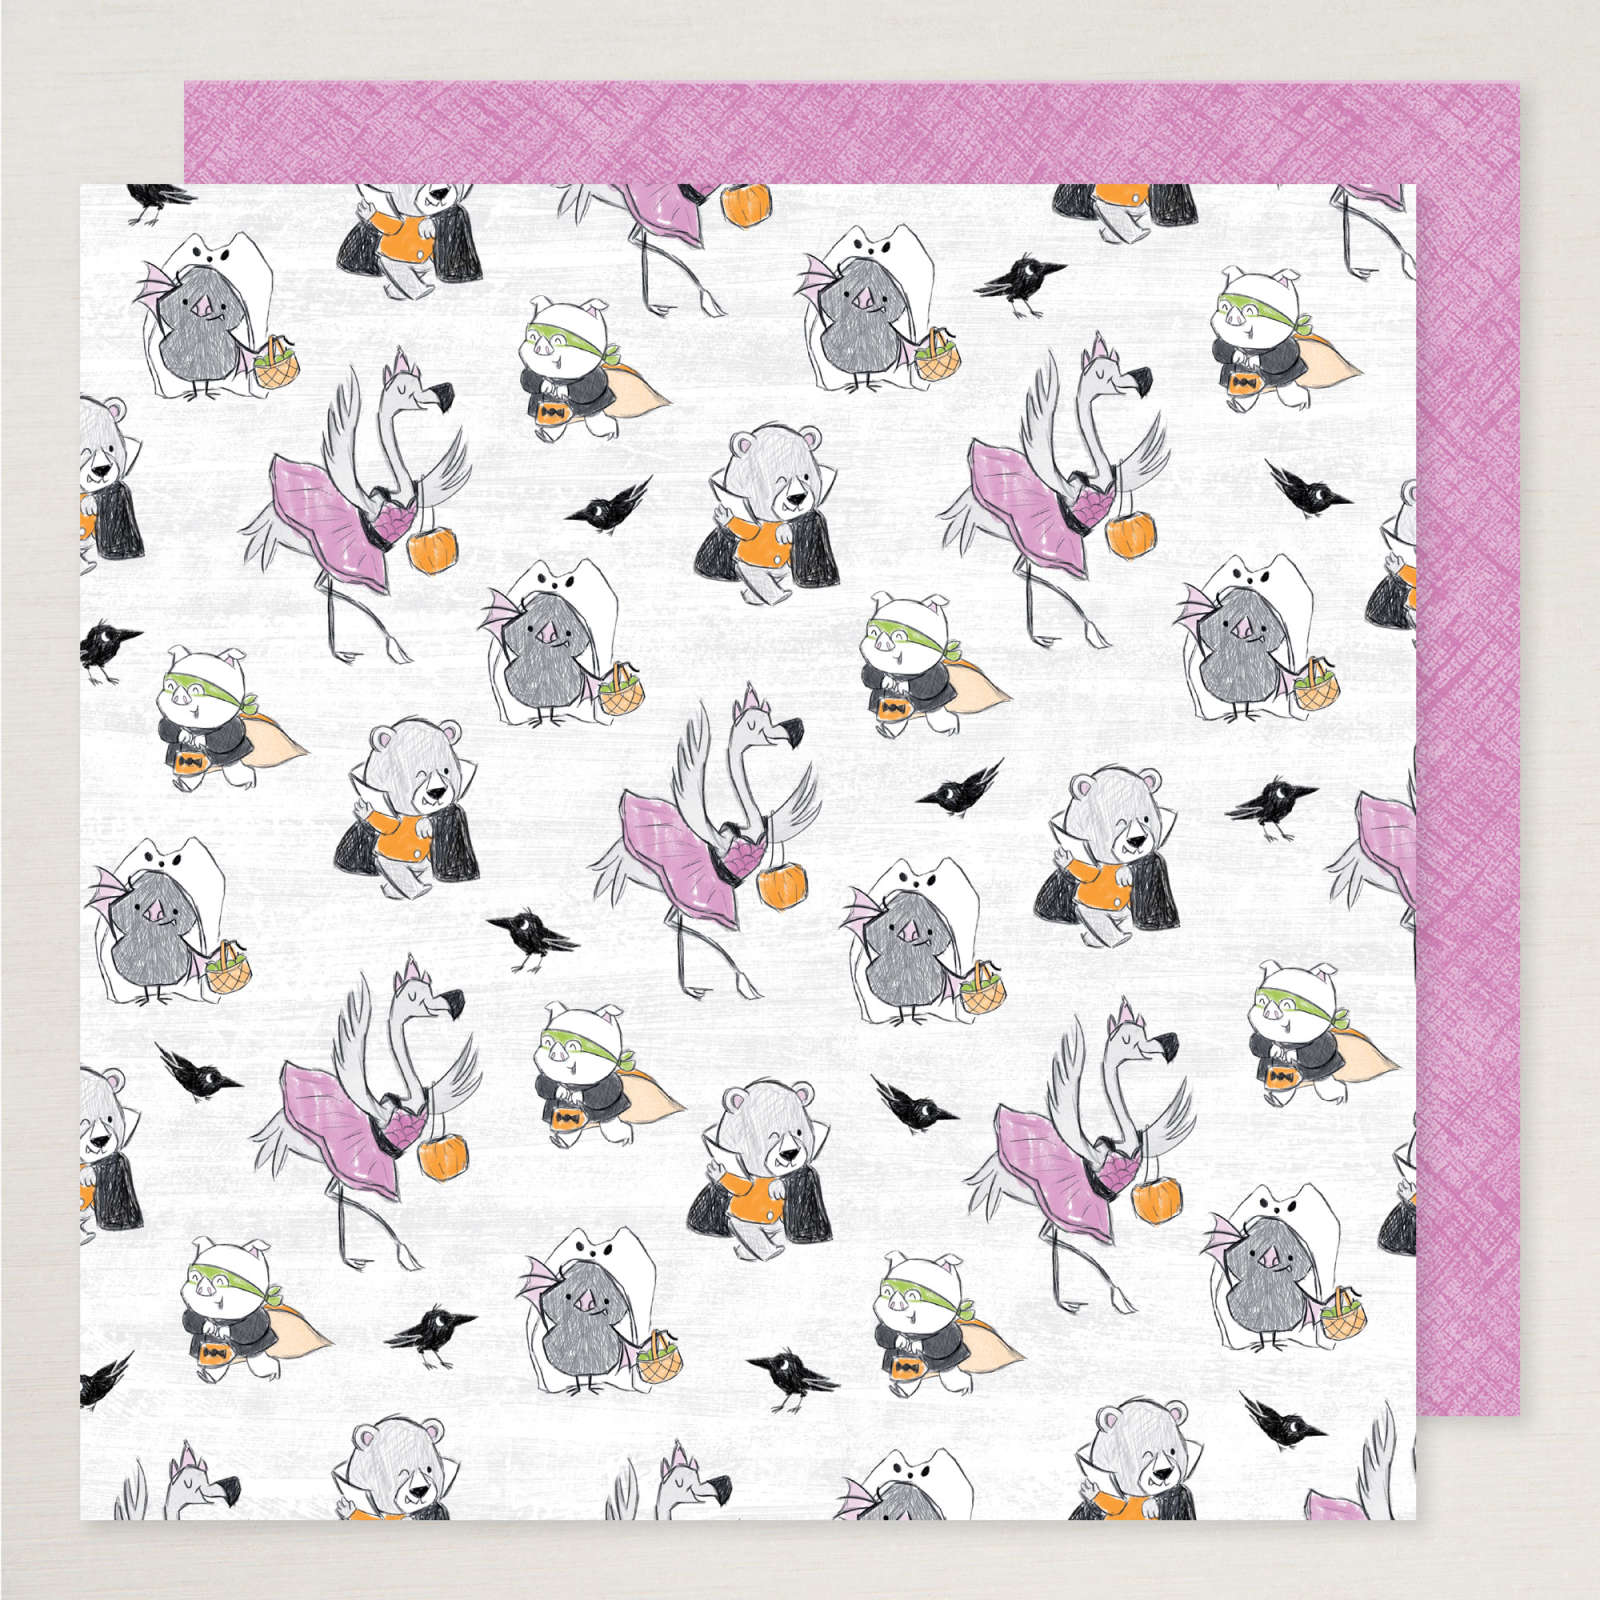
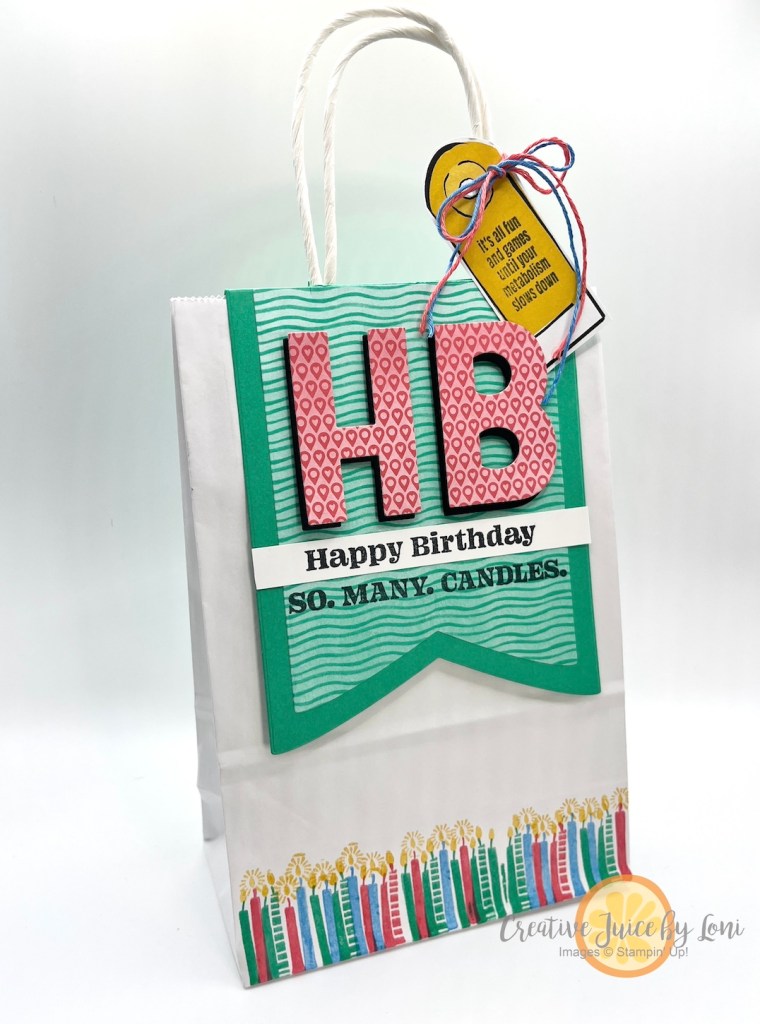
It’s TOO TOO cute when paired with the Not 29 Anymore stamp set for a card you can send to “THAT FRIEND” who is fiesty & fabulous:

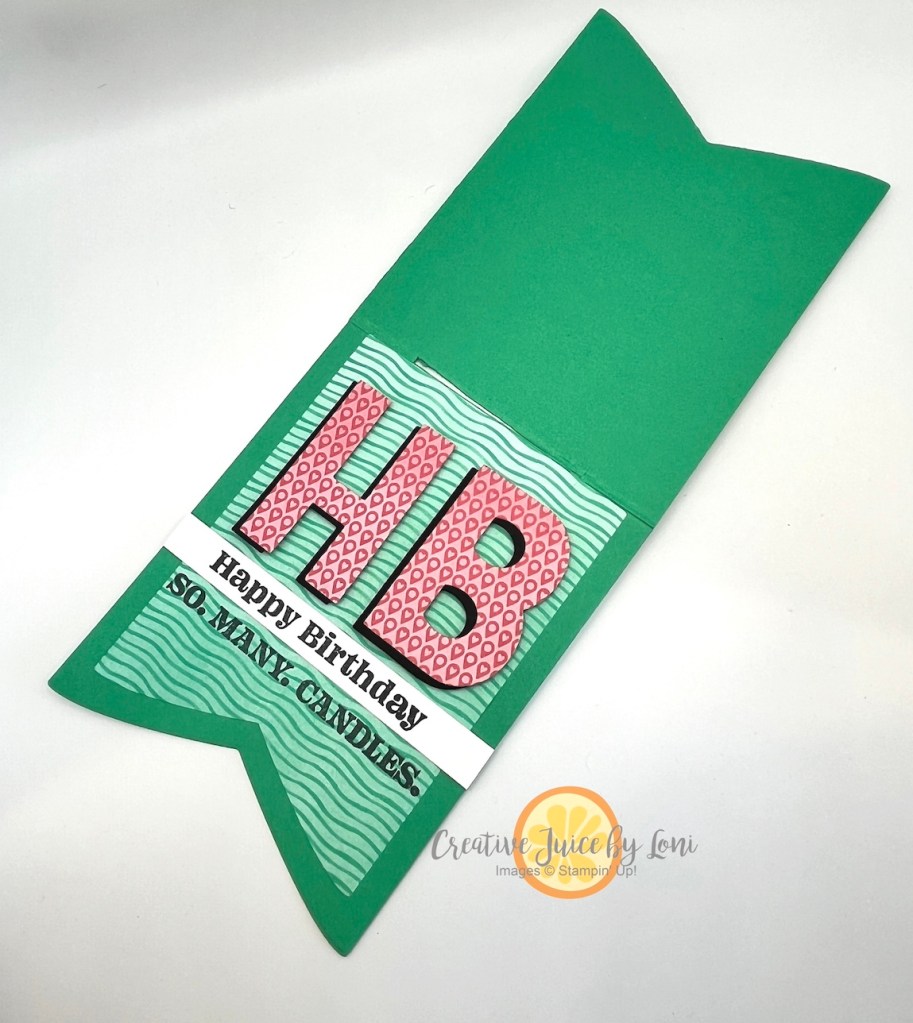
This card is called a “Missing Middle” card, and is easier than it looks: Start with a 4-1/4″ x 8 1/2″ piece of card stock (mine is Granny Apple Green) and score it at 5-1/2″ and cut it at 7″… leaving you a 1-1/2″ x 4-1/4″ piece of card stock for the bottom of the card. (All the supplies I used are listed at the bottom)
Fold the top 1-1/2″ down and add a layer of Designer Series Paper, if desired. Lay the section you cut off at the bottom edge of the card, and attach a 2-1/4″ x 4-1/4″ piece of card stock to the top section and bottom section only. Then it will open like this and you can add a white layer inside to write or stamp on:

My flamingo is layered over a piece of retired Be Dazzling specialty paper, but any of our current Glimmer Paper brings the bling when you need it.


Heading into the Halloween season, there are a few events (online and in-person) you’ll want to know about:
First: The VIRTUAL Spooky Sweet Class happens Thursday, October 2nd, and the last day you can order the suite and be invited to join the class is September 24th! This gives me time to prepare and mail the supplies you’ll need, and for you to have the suite ready to use. Learn more at the event description on Facebook by clicking the image below, or on my event calendar HERE.

Second: Stamping is the best medicine to make you feel good, and you’ll stamp 3 FALL paper crafting projects at our Stamp Therapy sessions in Hurricane, UT on October 9th. Choose to attend the 10 am session or the 6 pm session, but register early, because these seem to fill up quickly. Class fee: $15.

Southern Utah crafters: Here’s another tasty opportunity for more Spooky Sweet crafting at the Cookies, Cards & Cocoa class on Oct. 16th at 6:30 PM at the Strap Tank Restaurant in St. George, UT.

Decorate 4 Halloween sugar cookies and stamp two paper crafting projects, while enjoying a beverage from the restaurant. Class fee: $35 ALL SUPPLIES PROVIDED! Click HERE to register by Oct. 9th
Product List![Spooky Sweet 12" X 12" (30.5 X 30.5 Cm) Specialty Designer Series Paper [ 166191 ]](https://assets1.tamsnetwork.com/images/EC042017NF/166191s.jpg "Spooky Sweet 12\" X 12\" (30.5 X 30.5 Cm) Specialty Designer Series Paper [ 166191 ]")
![Not 29 Anymore Photopolymer Stamp Set (English) [ 166182 ]](https://assets1.tamsnetwork.com/images/EC042017NF/166182s.jpg "Not 29 Anymore Photopolymer Stamp Set (English) [ 166182 ]")
![Granny Apple Green 8-1/2" X 11" Cardstock [ 146990 ]](https://assets1.tamsnetwork.com/images/EC042017NF/146990s.jpg "Granny Apple Green 8-1/2\" X 11\" Cardstock [ 146990 ]")
![Petunia Pop 8 1/2" X 11" Cardstock [ 163801 ]](https://assets1.tamsnetwork.com/images/EC042017NF/163801s.jpg "Petunia Pop 8 1/2\" X 11\" Cardstock [ 163801 ]")
![Basic White 8 1/2" X 11" Cardstock [ 166780 ]](https://assets1.tamsnetwork.com/images/EC042017NF/166780s.jpg "Basic White 8 1/2\" X 11\" Cardstock [ 166780 ]")
![Granny Apple Green Stampin' Pad [ 147095 ]](https://assets1.tamsnetwork.com/images/EC042017NF/147095s.jpg "Granny Apple Green Stampin' Pad [ 147095 ]")
![Petunia Pop Classic Stampin Pad [ 163811 ]](https://assets1.tamsnetwork.com/images/EC042017NF/163811s.jpg "Petunia Pop Classic Stampin Pad [ 163811 ]")
![Tuxedo Black Memento Ink Pad [ 132708 ]](https://assets1.tamsnetwork.com/images/EC042017NF/132708s.jpg "Tuxedo Black Memento Ink Pad [ 132708 ]")
![Paper Trimmer [ 152392 ]](https://assets1.tamsnetwork.com/images/EC042017NF/152392s.jpg "Paper Trimmer [ 152392 ]")
![More Dazzle 6" X 6" (15.2 X 15.2 Cm) Specialty Paper [ 161749 ]](https://assets1.tamsnetwork.com/images/EC042017NF/161749s.jpg "More Dazzle 6\" X 6\" (15.2 X 15.2 Cm) Specialty Paper [ 161749 ]")
![Stampin' Seal+ [ 149699 ]](https://assets1.tamsnetwork.com/images/EC042017NF/149699s.jpg "Stampin' Seal+ [ 149699 ]")


![Sweet Jar Photopolymer Stamp Set (English) [ 165501 ]](https://assets1.tamsnetwork.com/images/EC042017NF/165501s.jpg "Sweet Jar Photopolymer Stamp Set (English) [ 165501 ]")
![Party Dies Bundle [ 165265 ]](https://assets1.tamsnetwork.com/images/EC042017NF/165265s.jpg "Party Dies Bundle [ 165265 ]")
![On The Go 12" X 12" (30.5 X 30.5 Cm) Designer Series Paper [ 165566 ]](https://assets1.tamsnetwork.com/images/EC042017NF/165566s.jpg "On The Go 12\" X 12\" (30.5 X 30.5 Cm) Designer Series Paper [ 165566 ]")
![Pack Your Bags Twine Three Pack [ 165582 ]](https://assets1.tamsnetwork.com/images/EC042017NF/165582s.jpg "Pack Your Bags Twine Three Pack [ 165582 ]")
![Shy Shamrock Classic Stampin Pad [ 163808 ]](https://assets1.tamsnetwork.com/images/EC042017NF/163808s.jpg "Shy Shamrock Classic Stampin Pad [ 163808 ]")
![Azure Afternoon Classic Stampin' Pad [ 161663 ]](https://assets1.tamsnetwork.com/images/EC042017NF/161663s.jpg "Azure Afternoon Classic Stampin' Pad [ 161663 ]")
![Strawberry Slush Classic Stampin' Pad [ 165286 ]](https://assets1.tamsnetwork.com/images/EC042017NF/165286s.jpg "Strawberry Slush Classic Stampin' Pad [ 165286 ]")
![Darling Duckling Classic Stampin' Pad [ 165277 ]](https://assets1.tamsnetwork.com/images/EC042017NF/165277s.jpg "Darling Duckling Classic Stampin' Pad [ 165277 ]")
![Basic Black 8-1/2" X 11" Cardstock [ 121045 ]](https://assets1.tamsnetwork.com/images/EC042017NF/121045s.jpg "Basic Black 8-1/2\" X 11\" Cardstock [ 121045 ]")
![Shy Shamrock 8 1/2" X 11" Cardstock [ 163795 ]](https://assets1.tamsnetwork.com/images/EC042017NF/163795s.jpg "Shy Shamrock 8 1/2\" X 11\" Cardstock [ 163795 ]")
![Stampin' Cut & Emboss Machine [ 149653 ]](https://assets1.tamsnetwork.com/images/EC042017NF/149653s.jpg "Stampin' Cut & Emboss Machine [ 149653 ]")
