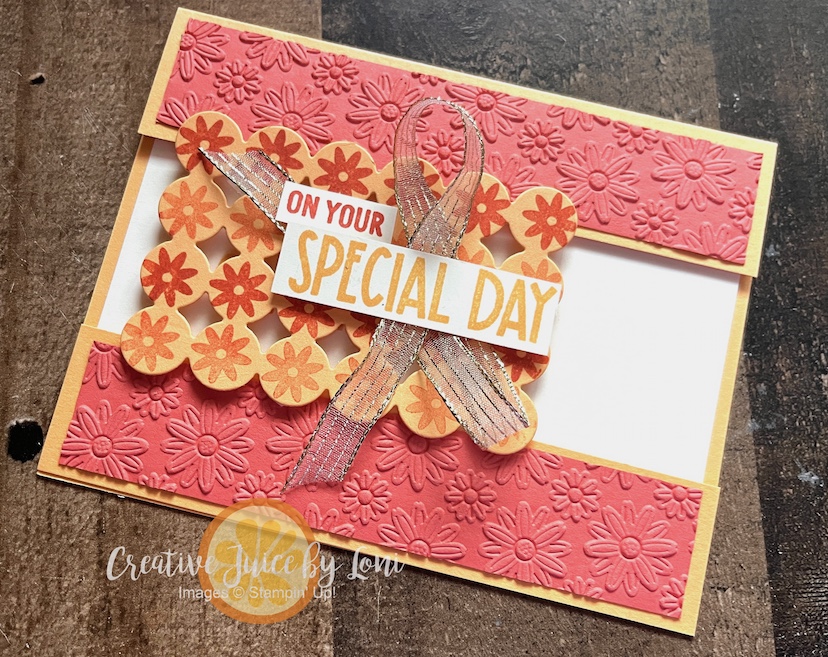
For the second day of pairing the Stampin’ Up!®️ Reason to Celebrate and Seasonal Celebrations stamp sets, here’s a “missing middle” card fitting for a wedding, graduation, anniversary, promotion, or any special event you want to commemorate!
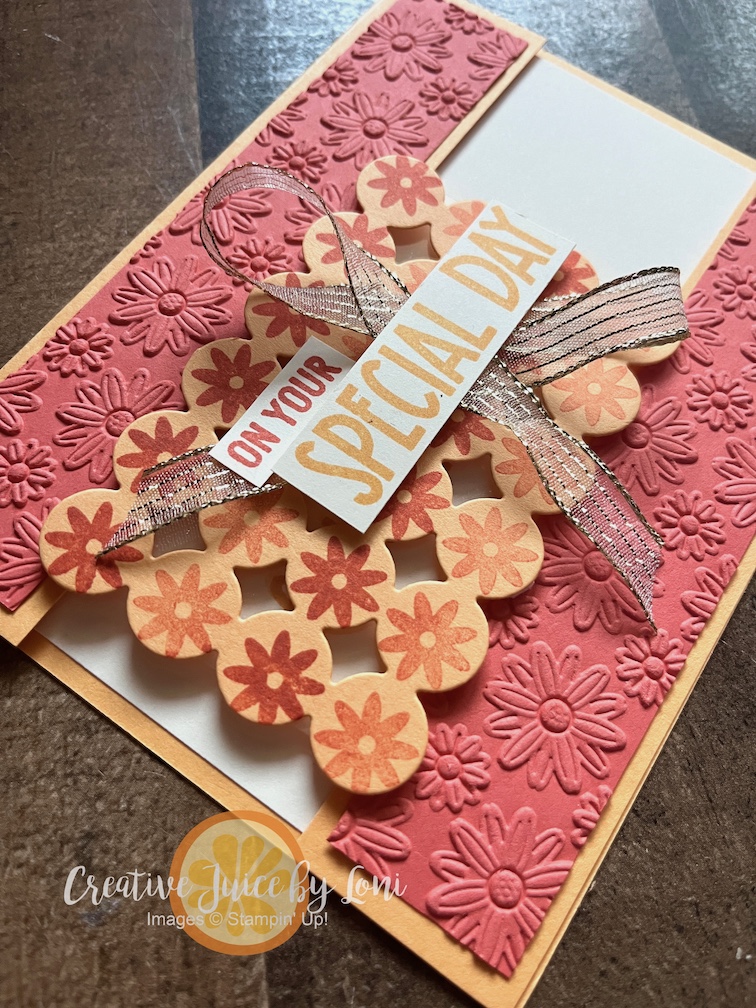
My friend Yvonne discovered that the daisy chain (and the line of hearts!) from the Seasonal Celebrations stamp set fit nicely in the oh-so-essential dot die from the Lovely Arrangement dies, so I paired it with the upcoming Lazy Daisy 3D embossing folder (available March 3rd).
The Peach Pie card base is 5.5″ x 5.5″ and scored at 4.25″, with another 5.5″ x 1.25″ strip for the bottom edge. You can secure a 3.25″ window sheet between the Peach Pie strips and the Calypso Coral embossed pieces to make the bottom section “float” or just use a second piece of the dots to create a sturdy connection between both sections.
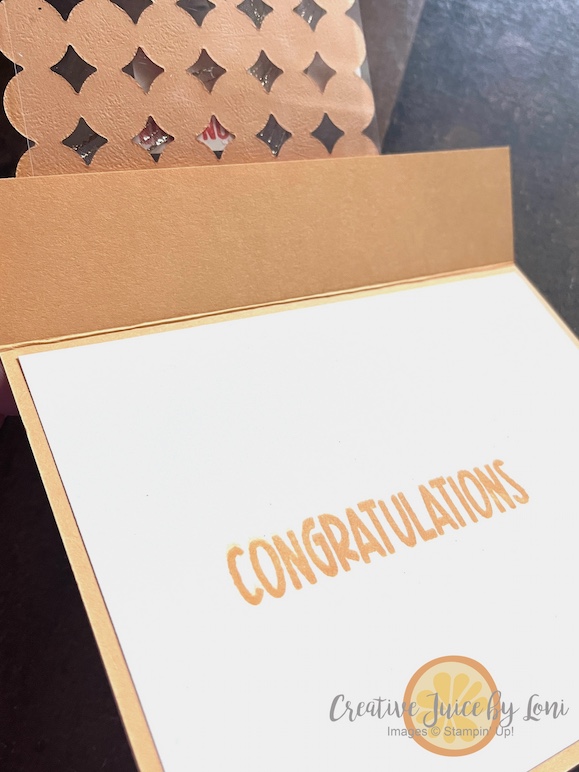
One the inside, a sentiment of Congratulations waits hidden behind the floating piece:
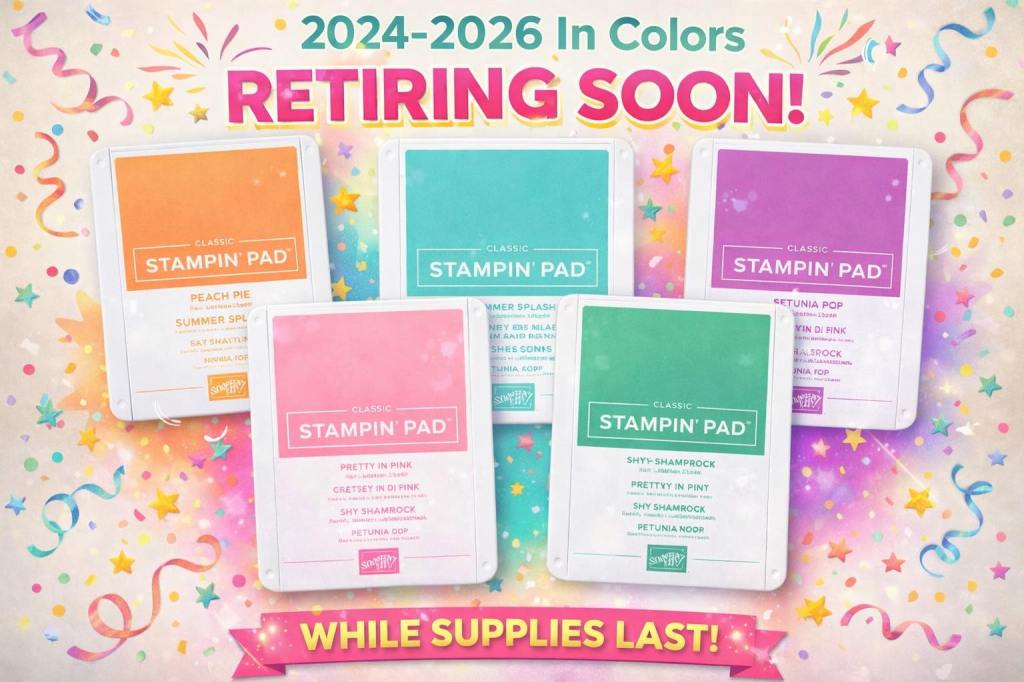
We are coming to the end of the 2024-2026 In Color season, and Peach Pie is one of the soon-to-be-leaving colors. Make sure you have the card stock, ink refill and coordinating supplies you need before they sell out – CLICK IMAGE TO SHOP ALL RETIRING IN COLORS!
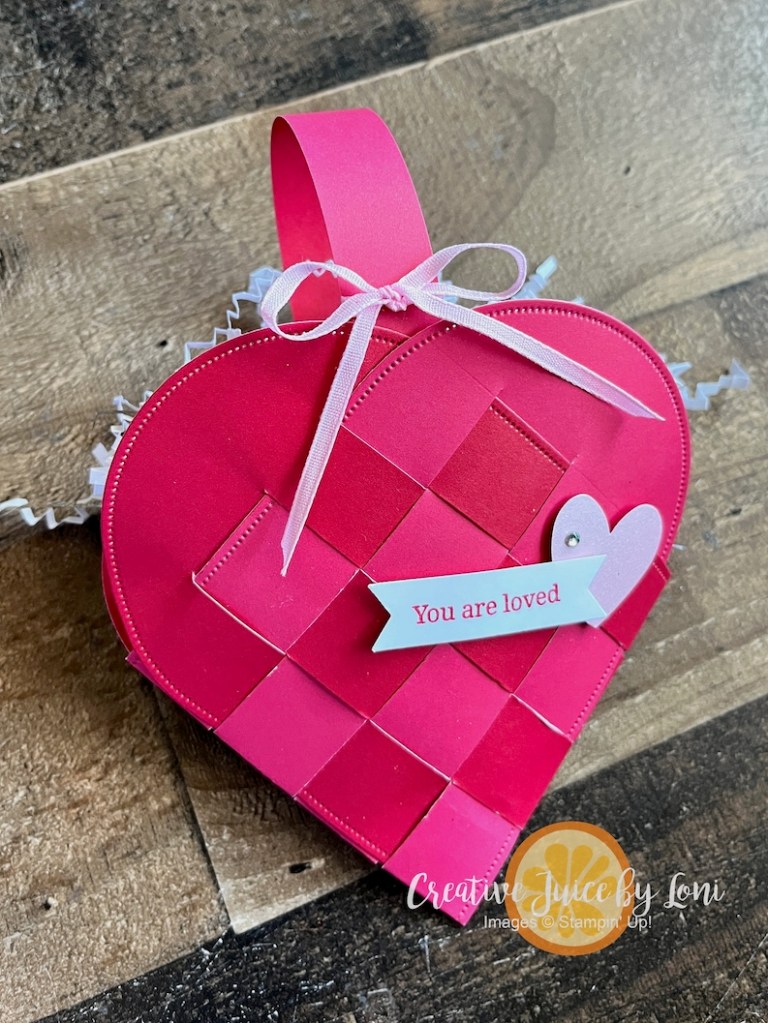
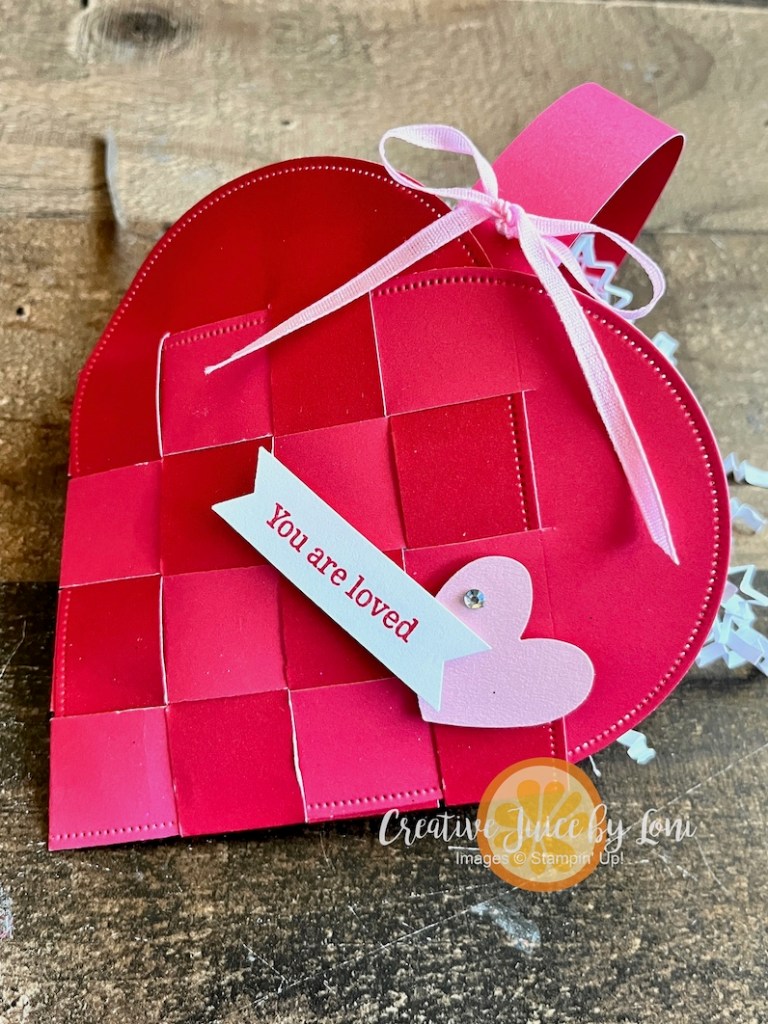
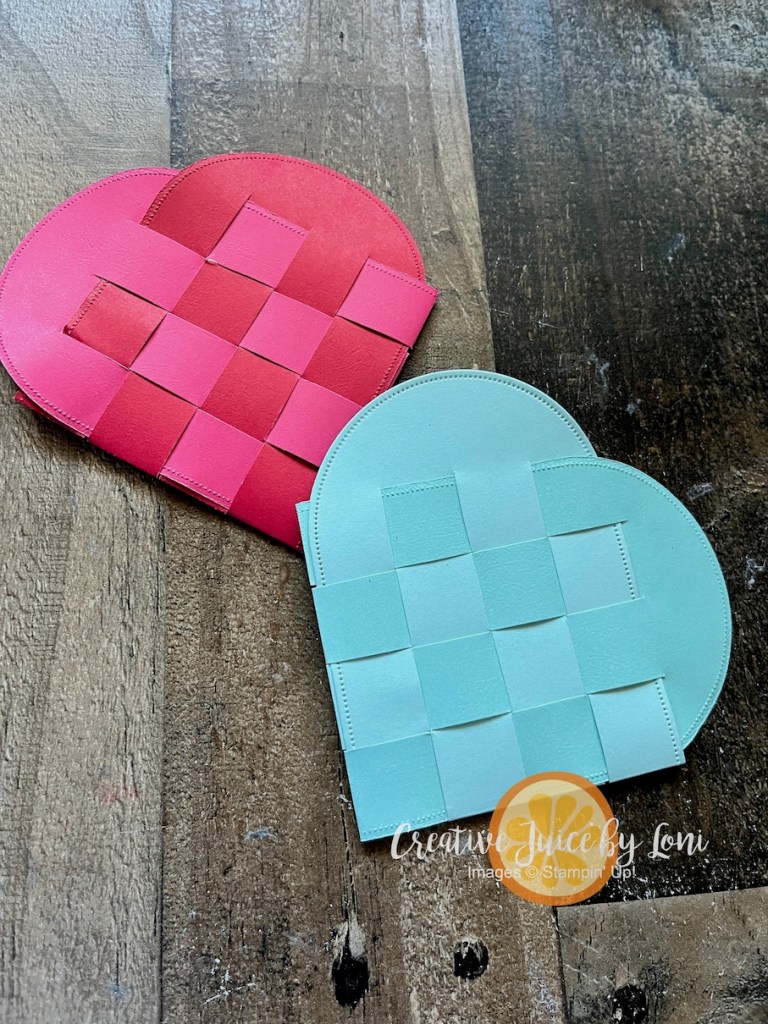
Our worldwide New at SU! design team is back to inspire you with new stamping ideas for 2026 and we’re starting off with the theme of “Handcrafted Hearts” 💕 I’ve been wanting to make these adorable “danish woven heart baskets” with the Everyday Arches dies, so this is the moment:
My mom taught me to make these when I was a young girl, and truthfully, I never really got the hang of them until NOW. To help YOU, I’ve created a short How-To video:
The woven pattern is so lovely with the two-tone card stock that I didn’t want anything covering it, so opted for a small heart punched from the new Pastels Shimmer paper and a mini-banner with the message that matches.
You’ll have all the heart eyes 😍 when you see more works of heart made by the other folks, and remember to PIN or SAVE your favorites:
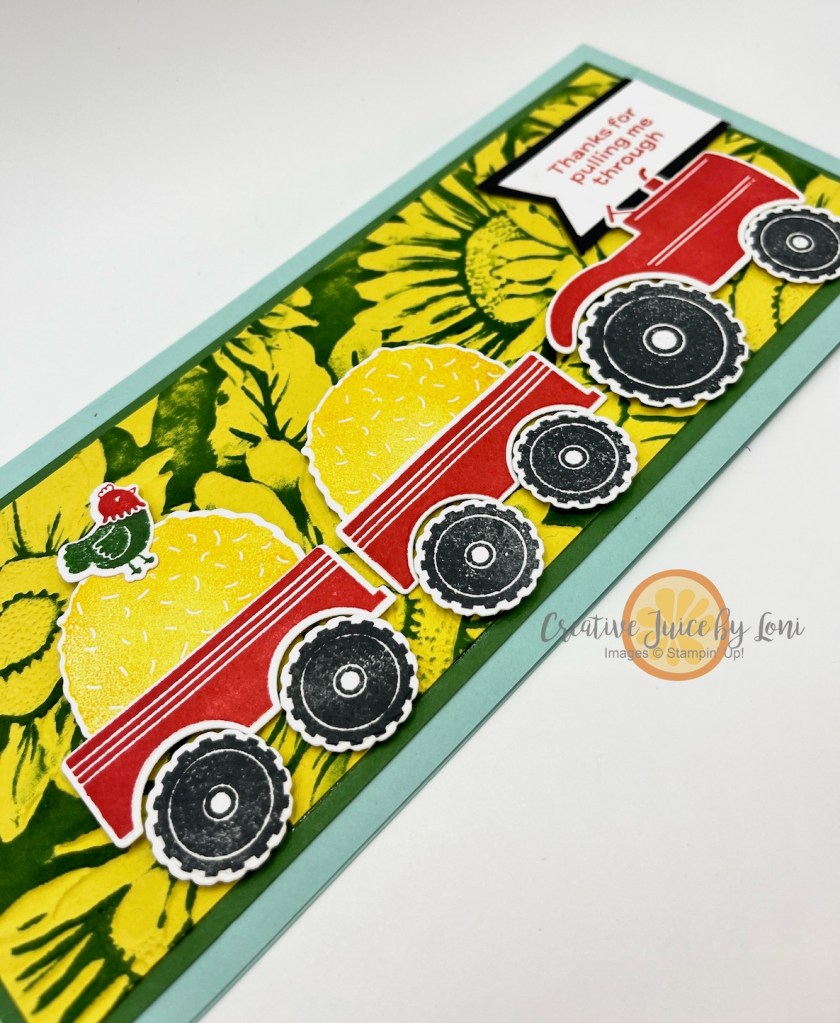
Did you know Stampin’ Up!®️ releases NEW products every other month? July is one of those months, and I wanted to mix two of the new items together for a large slimline card: The Tractor & Co. bundle (photopolymer stamps + dies) and the fabulous Sunflower 3D embossing folder!
To make the sunflowers pop, after you’ve embossed an 8.25″ x 3.25″ of Darling Duckling card stock with this extra-large embossing folder, drag the Garden Green ink pad across the flat side (where the flowers are pushed down, not up).
An 8.5″ x 3.5″ Garden Green Mat behind the sunflowers frames it nicely, and the tractor is popped up with Stampin’ Dimensionals.
The Pool Party card base is 9″ wide and 8″ tall, scored in half at 4″. This fits into a legal sized envelope.
Those are just two of the new products launched yesterday! Also check out the two new KITS for July (click on images to see the kits):
One more thing I’m looking forward to this month is the Sweeter With You Paper Pumpkin kit! In case you aren’t familiar with Paper Pumpkin, it’s a craft kit subscription by mail, and each kit includes an exclusive stamp set, ink spot and all the supplies prepared for you to enjoy a stress-free moment of creativity!
Each quarter, a coordinating set of dies is also offered to Paper Pumpkin subscribers, and they match all the kits released in those three months. The Circle of Seasons die set is only $12 and the strawberry die will also create an acorn (hint at the September kit!):
My Paper Pumpkin subscribers also receive a special email from me on the last week of the month, with ideas to use the stamp set, ink spot and add-on dies AFTER the kit is complete! I know you’d look forward to a kit in your mailbox each month, so give it a try!
Check out all the new products released this month HERE:
Keep your creative juices flowing! 🍊🧡– Loni Spendlove
My 2025 Memorial Day began with the opportunity to sing with the Hurricane Valley Choir at a program at the Hurricane, Utah cemetery honoring those who gave the ultimate sacrifice, as well as those who still serve in the U.S. Military today. That got me thinking about the freedoms I enjoy today because of people who laid down their lives in many ways.
I love the United States of America and what the Founding Fathers intended it to be. I believe it is a land blessed by God, but to have His protection, we must follow Him. There are things I’m concerned about (and have been for many years) and I’m choosing to remember those who fought for freedom – on a battle field or in a home.
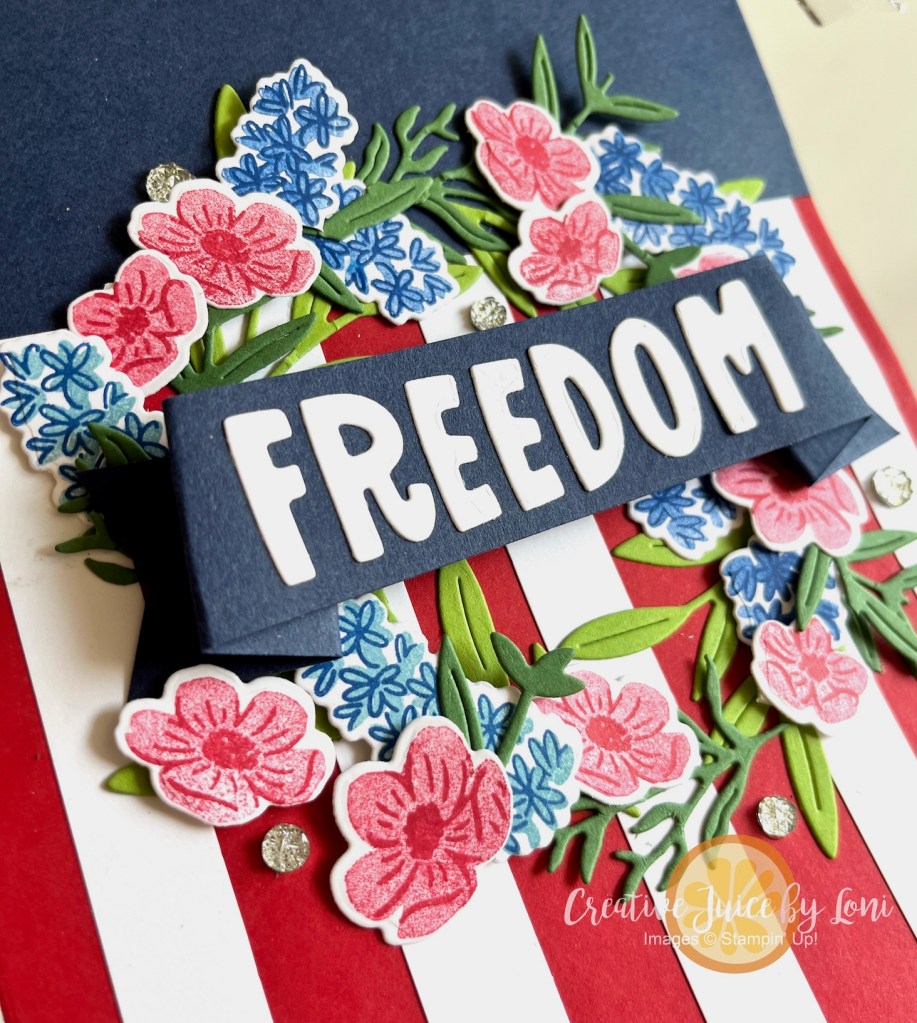
Which brings me to the paper craft I demonstrated in my live video: A banner for freedom! We start with Memorial Day at the end of May, proudly wave our country’s flag on June 14th for Flag Day and celebrate our Independence Day on July 4th…so this craft using the Party Banner Dies, Pretty Florals Bundle and Mini Alphabet dies was created in time for a multi-seasonal decoration.
It now hangs proudly on my front door:
As mentioned in my video, the best shopping deal for stampers ANYTIME is the Starter Kit, which normally includes $125 in product that YOU CAN CHOOSE, plus supplies to run your business (catalogs, etc), a free Paper Pumpkin Kit AND free shipping…all for $99!
Currently we have a special offer – for just a few more days – which allows you to choose and extra $40 in your kit! There are no requirements to this opportunity: Only a chance to see if a creative business (or get a discount on the products you are already using) is something you’d enjoy exploring.
Serendipitously, the Party Dies Bundle is $125 for both the Banners and the large Alphabet – adding them to your starter kit would be a terrific way to save on these incredible crafting tools! Once you join Stampin’ Up!, you’ll also be able to save 20% (or more) on future purchases, and connect with a community of crafters that you didn’t know how much you needed.
If shopping with a demonstrator is more your style, I’m delighted to serve you! Here are the supplies I used for the Patriotic Banner, and you can click on any to add to your order:
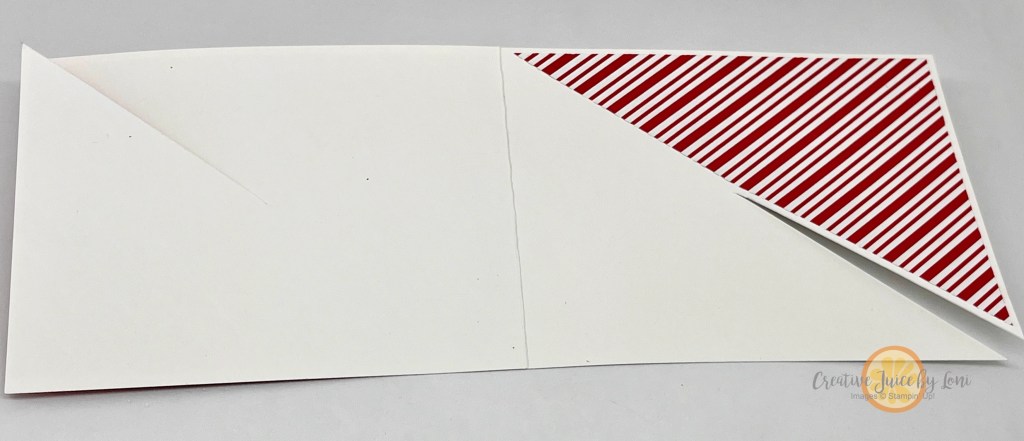
Fans of fun-fold cards, you’ll love the simplicity of this idea, which I call a Diagonal-Lock card, because of the way the front of the card locks into the back of the card. Don’t miss the video tutorial in this post!
For this first version, I paired a muted piece of the Sweet Days of Autumn Designer Series Paper pattern that I could write a message on for the INSIDE of the card, while using the fun forest friends on the front of the card. The leaves and sentiment adorning the front are from the Changing Leaves bundle.
The recipient will “unlock” the card to open and this is what the inside looks like:
Basic card instructions:
Start with an 11″ x 4.25″ card, scored in half at 5.5″.
Adhere a 5.5″ x 4.25″ piece of Designer Series Paper to the front AND inside of the card.
Make a small mark in the center of the front and BACK of the card (at 3.5″ for this A2 card size).
Cut diagonally from opposite corners of the open card in to the mark.
The next version for any holiday celebration (this would be a sweet December birthday card) has a 5.25″ x 4″ Designer Series Paper layer for the front, and a diagonally cut HALF piece for the inside, which leaves a mat around the card which frames it nicely. This time I used my beloved More Than Autumn bundle with the Take A Bow patterned paper:
By using half a sheet on the inside, there is still room to write, even when the pattern is bold. PLUS, you can use the other half for a second card:
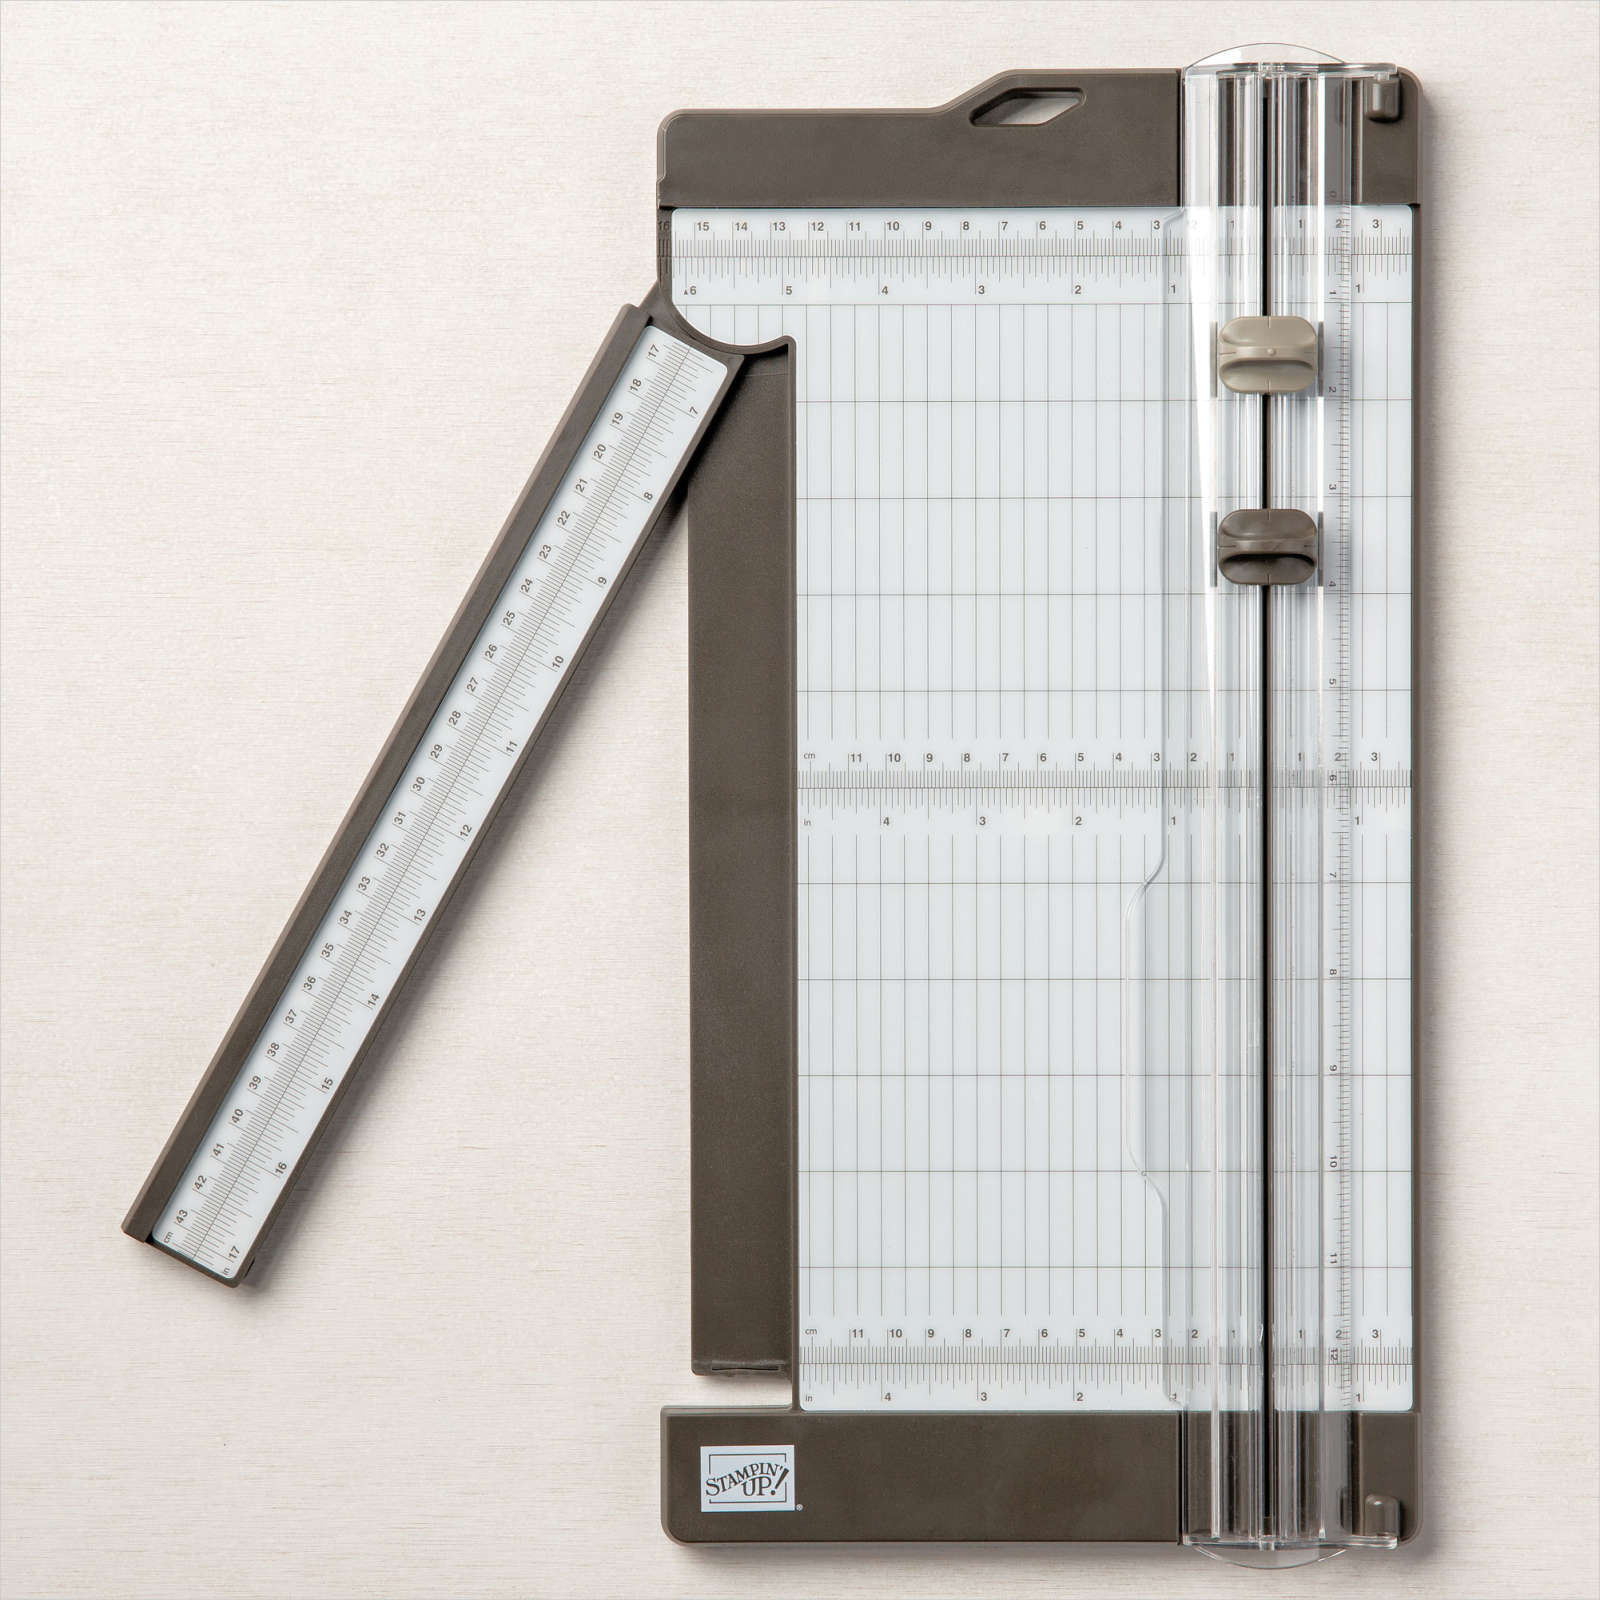
Grab a sheet of card stock and paper trimmer to craft along with this video tutorial to make a template for this card to keep in your “fun-fold” file:
Finally, since the Nests of Winter paper was sitting on my table, I used the Winterly Tree Top Dies to die cut the bird duo and fussy cut the small bird to craft this version:
Click any link to order supplies and create cards of your own!
I love hearing from you~ scroll to top to leave me a comment.
Don’t forget a Paper Trimmer, which also makes a wonderful gift for a teacher, a budding crafter or a student:
Patterned Paper may fade into the background for most paper crafting projects, but here are THREE different ways to make the most of this crafting staple:
2. Heat Emboss Over It: Embossing powder covers patterns beautifully! LIghter paper patterns allow you to color in parts of the embossed image.
These samples use the same Designer Series Paper as the first cards, just different patterns from the same packages:
3. Dry Emboss It: Stamp a sentiment first, then run it through an embossing folder. To bring out the pattern, rub a sanding block (or emery board) over the top of the ridges!
Just 5 days left of the Designer Series Paper Sale (ends August 31, 2024) – featuring ALL OF THE PATTERNS USED TODAY!
LOVE Stampin’ Up! Designer Series Paper?? Don’t miss the chance to reserve a 6″x6″ sample of (almost) every pattern in the upcoming September-December Mini Catalog:
Watch today’s video showing these three techniques to try on Designer Series Paper :
Humans have basic needs: Air, water, food…and NEED connection with other people! This is why I offer an in-person crafting event every month: to help you have social interaction, adult conversation and laughter and healthy relationships with other makers.
So what’s coming up? Here’s the IN-PERSON event schedule, in calendar order – carve out time to create with me:
Twice a year, I work with a few demonstrators to plan a fabulous “crafternoon” experience where you will make multiple paper-crafting projects, snack and visit, swap greeting cards, learn new techniques/ideas, win prizes, and connect with other crafters.
WHEN: Saturday, September 21st beginning at 1:00 PM (Mountain Time) WHERE: Hurricane Community Center, 63 S 100 W (SOUTH SIDE), Hurricane, Utah
Registration: $65 (LOWER PRICE!) **Save $10** if you register by September 7th- $55 for early birds!
While we provide (almost) all the supplies at the event, you’ll need to bring scissors and adhesive (also available to purchase at the event). A Paper Trimmer would also be helpful, but not required. Please label your items with your name.
Optional CARD SWAP: Create 12-16 cards using any current SU! products (no envelopes required) and trade with other crafters.
WHERE: RK Creative Studio, 55 E 100 N, Spanish Fork, UT WHEN: Saturday, September 28th, beginning at 1:00 PM (Mountain Time)
Registration: $65 **Save $10** if you register by September 14th- just $55 for early birds!
Optional CARD SWAP: Create 8-12 cards using any current SU! products (no envelopes required) and trade with other crafters at the beginning of the event!
EVENT CANCELLATION POLICY: You may request a refund if cancellation is received 2 weeks prior to event. Registrations may be transferred to another personal at any time.
We’ll cue the monster mash and stir up a cauldron of spooky treats as we assemble a haunted home using a fabulous kit from Stampin’ Up! – You’ll have the coolest Halloween decor on the block, and have a blast making it with other crafters in Hurricane, UT on October 1st at 7 p.m.
Class fee: $26. All supplies (and snacks) are provided, but we ONLY HAVE have 9 kits available, so don’t hesitate to claim your spot by finalizing your registration (link below) and you can join & share the event with friends on Facebook HERE.
Returning for the 3 year, I’ll be teaching two classes at CraftConUSA in Kanab, UT on October 25-26, 2024! This growing event is a wonderful weekend to work on your own crafts alongside other creators, choose the classes that interest you and enjoy a beautiful part of the world!
Use promo code TEACHERSPET30 to save 30% on event registration
Here are the two classes I’ll be teaching with my teammate Sue-don’t miss them!
1. Christmas Charm: Holiday Packaging Masterclass
A simple gift is transformed by creating a charming package! Create 4 pretty packages ready to make the season bright, AND take home supplies to create many more. Class includes a full package of Stampin’ Up! Designer Series Paper, plus Ephemera tags, packaging and ribbon. CLASS FEE: $37Bring: Scissors and adhesive, Paper Trimmer (optional, but helpful)
2. Take the Scenic Route: Memories that Matter
Remember your summer vacation (or plan ahead for the next one): Complete an entire mini album highlighting where you’ve been, or where you want to go!
Includes: A Travel Journal, pages & pockets for photos & memorabilia, sticky die cuts and alphabets to capture your adventures. BONUS: You’ll also use the kit box to create a gift box (or a place to store more treasures). Bring: 20-40 photos/memorabilia of a vacation to remember. All other supplies will be provided. CLASS FEE: $37
CLASS REGISTRATION OPENS SOON- Meanwhile, register for the event below – Use Promo Code TEACHERSPET30 to save 30% on event registration!
There are TWO Christmas Card class times to choose from: 1 pm or 7 pm on Thursday, November 14th in Hurricane, Utah.
Create 8 fabulous holiday cards (2 each of 4 different designs) to make the season VeRy MeRrY! These cards could be the gift themselves, and tucking a gift card inside would bring magic to a mailbox. Bring: adhesive and scissors (also available to purchase at class). Everything else will be provided for you- including snacks! Class fee: $22
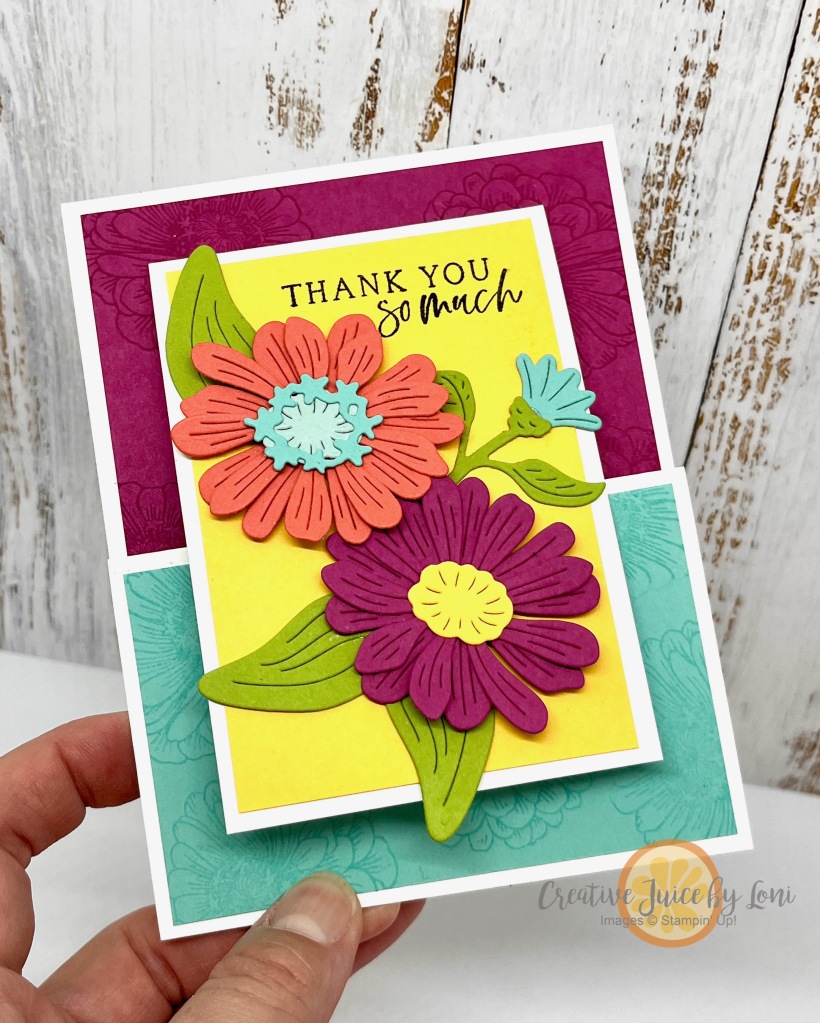
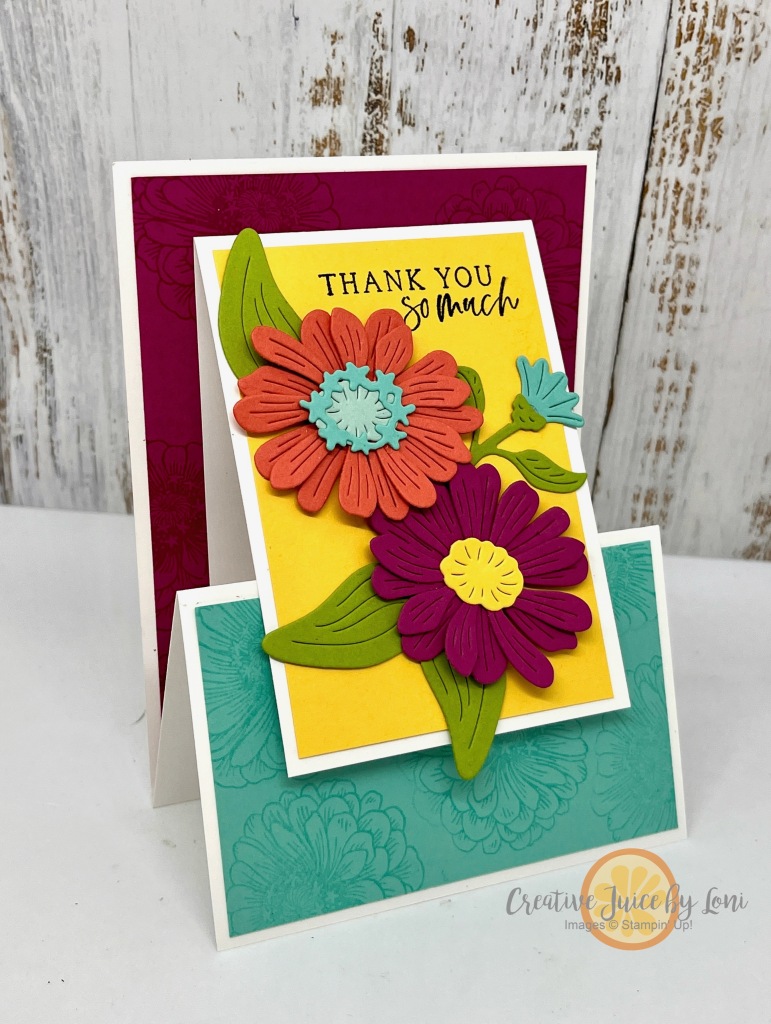
Bright colored flowers shout “I LOVE YOU” as well as “THANK YOU” and “YOU’RE THE BEST!” Zinnias lead the garden in bold flower-power during the summer, so a color-blocked card that stands to display seemed like the one to craft today:
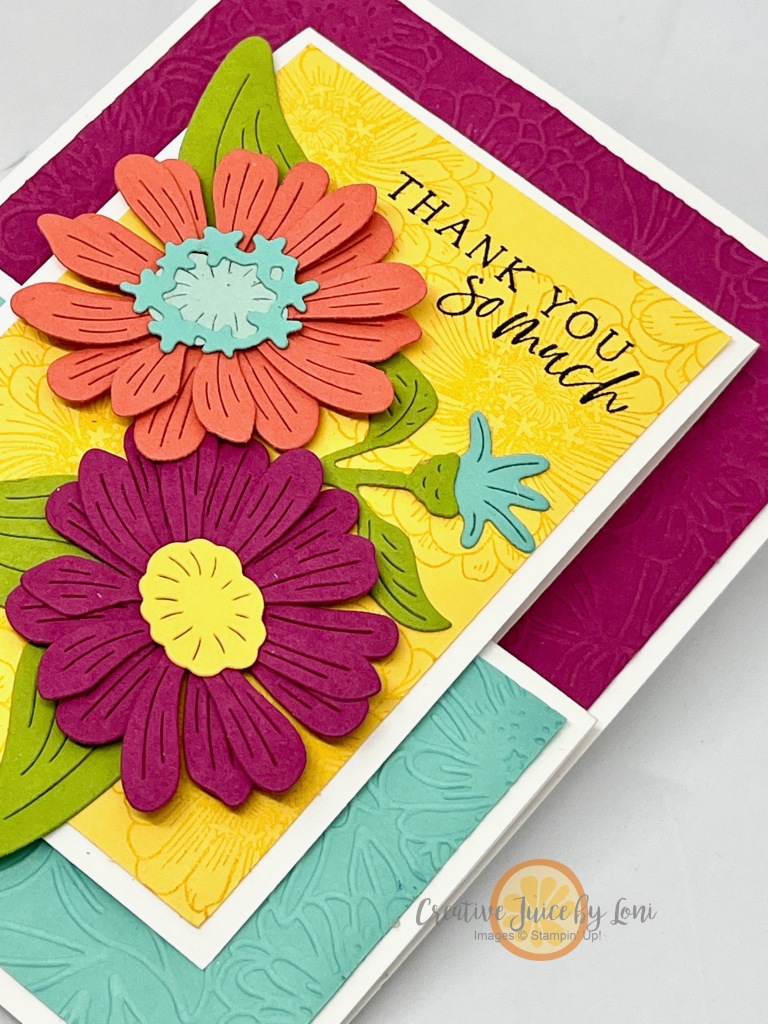
The Simply Zinnia stamp & die bundle is an Online Exclusive that you can NOT miss! For my demonstration, I used Versamark ink to stamp the zinnia image on both the Berry Burst and Coastal Cabana card stock pieces that fit on the card base.
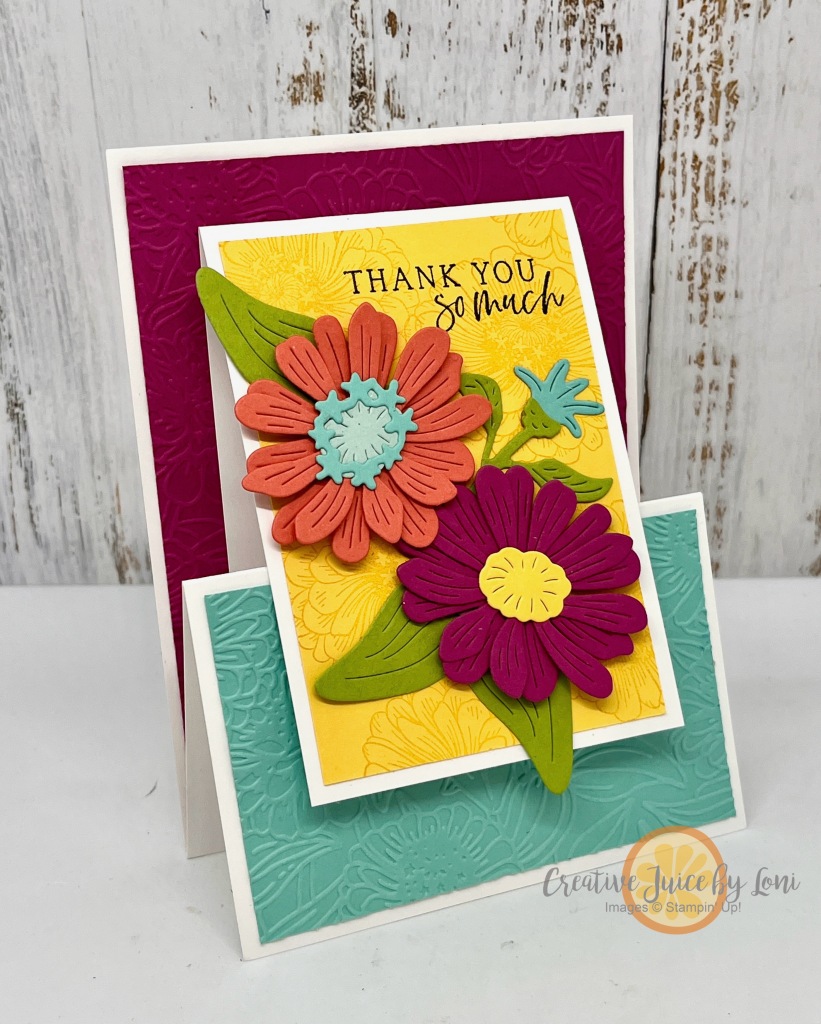
However, the Zinnia bundle IS part of a larger Flowering Zinnia SUITE of products, which includes the Zinnia 3-D Embossing folder…so I also did a version of this card using it to make a “touchable” raised background.
This is how they stand:
There is a HELPFUL TIP for layering the petal dies in today’s video tutorial, which will save you time in assembly. Remember, you can click on the gear in the bottom right of the video and change the speed to make any tutorial play faster, if you are an impatient crafter like me!
Just a few more days to collect the Stamp + Die bundles you love, or the Cut & Emboss machines, for an ADDITIONAL 10% off.
The vibrant In Color combination from the Global Design Project challenge #gdp449 felt like just the ones to use for today’s Live Crafting project
Your stampin’ stash can be used for MORE than cards, and this little purse/shopping tote/beach bag template can be used for gifting things such as gift cards, candy, money, jewelry, etc. The finished size of the box itself is 3.75″ tall, 3.5″ wide and 1″ deep.
The inspiration for the gift bags in the shopping cart came from a swap from my team mate Heather Goins, a.k.a. the Crazy Cardmaker. I love how she stamped onto patterned paper and colored the tissue paper in!
Normally, I wouldn’t pair foil paper AND glimmer paper, but this time it really added all the shimmer needed for a birthday celebration.
This is the month to add the NEW Attention Shoppers bundle to your collection: A stamp set + die bundle is discounted 10% when it is new to a catalog or publication PLUS in June 2024, bundles are an *additional* 10% off!
I had created this pattern for a project that I shared with the Stampin’ Leaders Project Sheet group. The instructions will give you the same measurements for the Attention Shoppers version!
Masks (the fancy Stampin’ Up! term for stencils) make coloring stamped images speedy and simple!
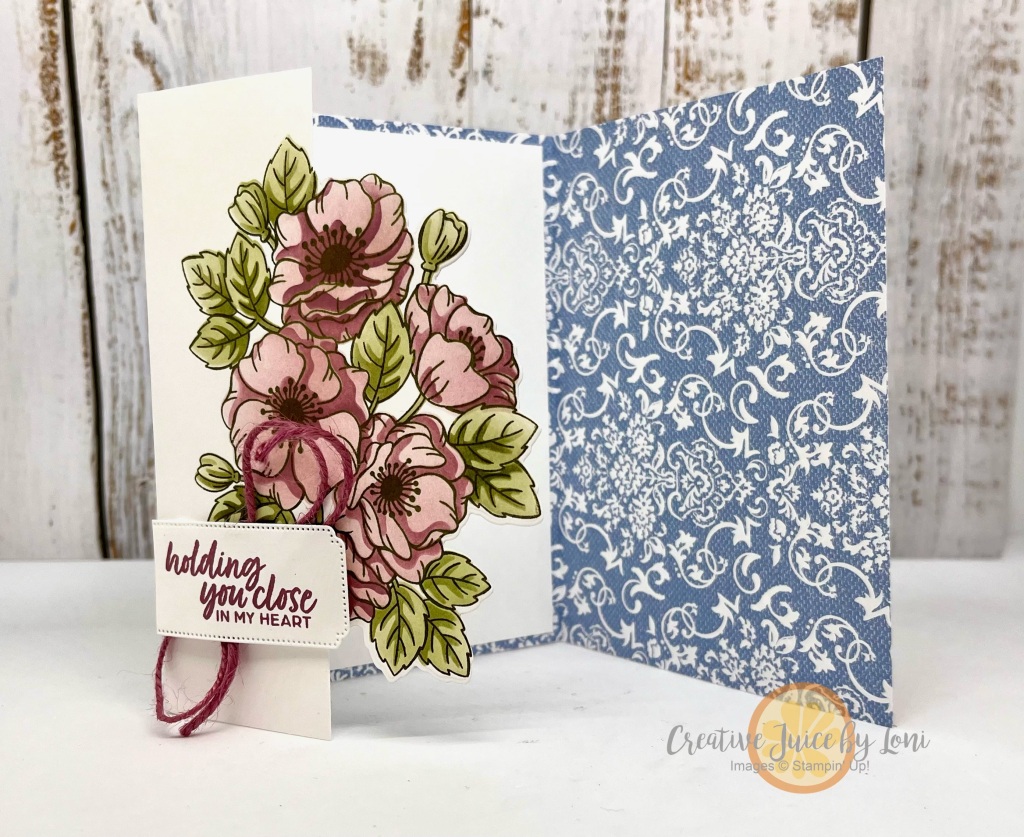
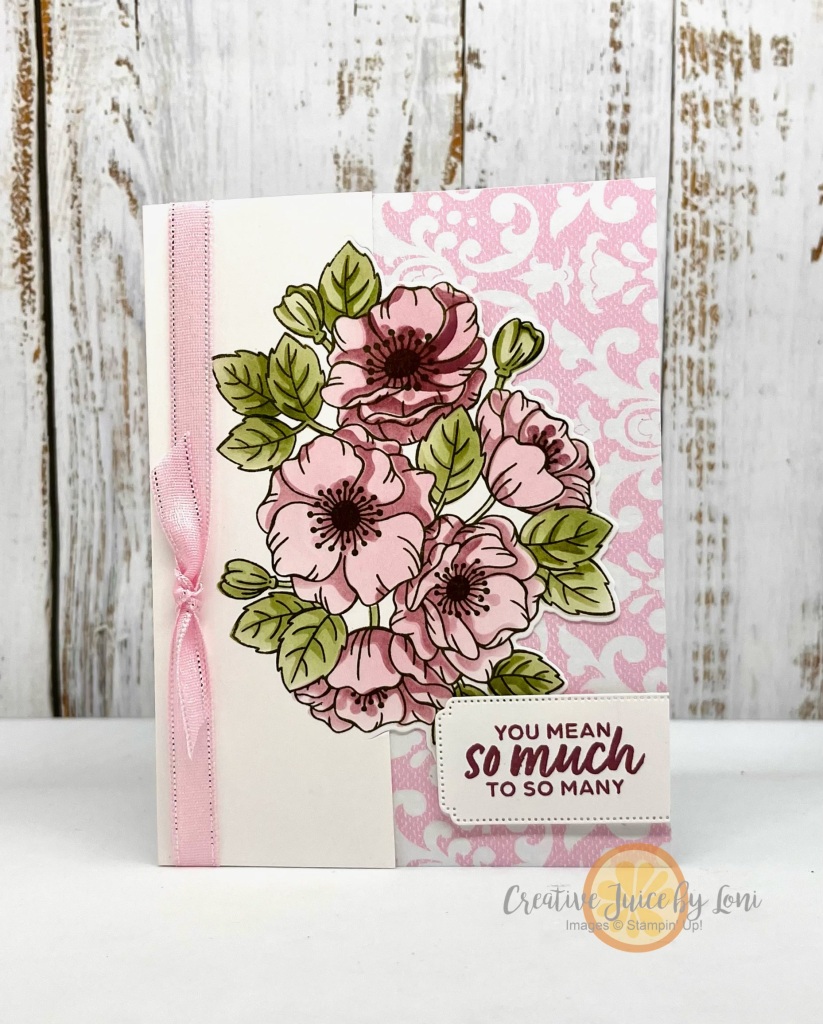
I was truly WOWed with how quickly I was able to color the floral spray image from the Enduring Beauty bundle with the coordinating masks, blending brushes and ink pads. This is a technique you may embrace if you don’t love to color, OR if you are just getting started, you can stamp and color this image with just two ink pads! Watch & learn how:
Did you catch how to die cut just half the image so you can add a layer of Designer Series Paper as the background? For the video, I added a second fold that opens on the right:
But you can just add a 4 1/4″ x 5 1/2″ layer of Designer Series Paper behind the flowers to make it a regular card. I really like the look of the Poetic Expressions designs with the flowers, and used the colors of that paper for coloring the flowers, as well.
Turn the design sideways and try different colors, too.
It’s a beautiful stamp set to use for so many projects, and if you haven’t seen my two previous posts using this set this week, check out the Notebook Cover project HERE and the color challenge card HERE.
THANK YOU for shopping in my Stampin’ Store for GENUINE Stampin’ Up! products!!! It enables me to continue bringing you creative ideas and you are guaranteed high quality products with service from someone who cares about you.

![Reason To Celebrate Photopolymer Stamp Set (English) [ 166905 ]](https://assets1.tamsnetwork.com/images/EC042017NF/166905s.jpg "Reason To Celebrate Photopolymer Stamp Set (English) [ 166905 ]")
![Seasonal Celebrations Photopolymer Stamp Set [ 167225 ]](https://assets1.tamsnetwork.com/images/EC042017NF/167225s.jpg "Seasonal Celebrations Photopolymer Stamp Set [ 167225 ]")
![Lovely Arrangements Dies [ 167175 ]](https://assets1.tamsnetwork.com/images/EC042017NF/167175s.jpg "Lovely Arrangements Dies [ 167175 ]")
![Peach Pie 8 1/2" X 11" Cardstock [ 163799 ]](https://assets1.tamsnetwork.com/images/EC042017NF/163799s.jpg "Peach Pie 8 1/2\" X 11\" Cardstock [ 163799 ]")
![Very Vanilla 8 1/2" X 11" Cardstock [ 166784 ]](https://assets1.tamsnetwork.com/images/EC042017NF/166784s.jpg "Very Vanilla 8 1/2\" X 11\" Cardstock [ 166784 ]")
![Window Sheets [ 142314 ]](https://assets1.tamsnetwork.com/images/EC042017NF/142314s.jpg "Window Sheets [ 142314 ]")
![Calypso Coral 8-1/2" X 11" Cardstock [ 122925 ]](https://assets1.tamsnetwork.com/images/EC042017NF/122925s.jpg "Calypso Coral 8-1/2\" X 11\" Cardstock [ 122925 ]")
![Peach Pie Classic Stampin Pad [ 163810 ]](https://assets1.tamsnetwork.com/images/EC042017NF/163810s.jpg "Peach Pie Classic Stampin Pad [ 163810 ]")
![Calypso Coral Classic Stampin' Pad [ 147101 ]](https://assets1.tamsnetwork.com/images/EC042017NF/147101s.jpg "Calypso Coral Classic Stampin' Pad [ 147101 ]")
![Stampin' Cut & Emboss Machine [ 149653 ]](https://assets1.tamsnetwork.com/images/EC042017NF/149653s.jpg "Stampin' Cut & Emboss Machine [ 149653 ]")
![Stampin' Seal+ [ 149699 ]](https://assets1.tamsnetwork.com/images/EC042017NF/149699s.jpg "Stampin' Seal+ [ 149699 ]")
![Mini Stampin' Dimensionals [ 144108 ]](https://assets1.tamsnetwork.com/images/EC042017NF/144108s.jpg "Mini Stampin' Dimensionals [ 144108 ]")
![Gold Striped 3/8" (1 Cm) Mesh Ribbon [ 165599 ]](https://assets1.tamsnetwork.com/images/EC042017NF/165599s.jpg "Gold Striped 3/8\" (1 Cm) Mesh Ribbon [ 165599 ]")


![Everyday Arches Dies [ 164629 ]](https://assets1.tamsnetwork.com/images/EC042017NF/164629s.jpg "Everyday Arches Dies [ 164629 ]")
![Real Red 12" X 12" (30.5 X 30.5 Cm) Two Tone Cardstock [ 166696 ]](https://assets1.tamsnetwork.com/images/EC042017NF/166696s.jpg "Real Red 12\" X 12\" (30.5 X 30.5 Cm) Two Tone Cardstock [ 166696 ]")
![Banner Sayings Bundle (English) [ 167051 ]](https://assets1.tamsnetwork.com/images/EC042017NF/167051s.jpg "Banner Sayings Bundle (English) [ 167051 ]")
![Pastels Shimmer 12" X 12" (30.5 X 30.5 Cm) Specialty Paper [ 167198 ]](https://assets1.tamsnetwork.com/images/EC042017NF/167198s.jpg "Pastels Shimmer 12\" X 12\" (30.5 X 30.5 Cm) Specialty Paper [ 167198 ]")
![Bee Builder Punch [ 162553 ]](https://assets1.tamsnetwork.com/images/EC042017NF/162553s.jpg "Bee Builder Punch [ 162553 ]")
![Bubble Bath 1/8" (3.2 Mm) Faux Linen Ribbon [ 167075 ]](https://assets1.tamsnetwork.com/images/EC042017NF/167075s.jpg "Bubble Bath 1/8\" (3.2 Mm) Faux Linen Ribbon [ 167075 ]")
![Rhinestone Basic Jewels [ 144220 ]](https://assets1.tamsnetwork.com/images/EC042017NF/144220s.jpg "Rhinestone Basic Jewels [ 144220 ]")
![Stampin' Dimensionals [ 104430 ]](https://assets1.tamsnetwork.com/images/EC042017NF/104430s.jpg "Stampin' Dimensionals [ 104430 ]")
![Multipurpose Liquid Glue [ 110755 ]](https://assets1.tamsnetwork.com/images/EC042017NF/110755s.jpg "Multipurpose Liquid Glue [ 110755 ]")


![Tractor & Co Bundle (English) [ 166116 ]](https://assets1.tamsnetwork.com/images/EC042017NF/166116s.jpg "Tractor & Co Bundle (English) [ 166116 ]")
![Sunflower 3 D Embossing Folder [ 166145 ]](https://assets1.tamsnetwork.com/images/EC042017NF/166145s.jpg "Sunflower 3 D Embossing Folder [ 166145 ]")
![Darling Duckling 8 1/2" X 11" Cardstock [ 165622 ]](https://assets1.tamsnetwork.com/images/EC042017NF/165622s.jpg "Darling Duckling 8 1/2\" X 11\" Cardstock [ 165622 ]")
![Garden Green 8-1/2" X 11" Cardstock [ 102584 ]](https://assets1.tamsnetwork.com/images/EC042017NF/102584s.jpg "Garden Green 8-1/2\" X 11\" Cardstock [ 102584 ]")
![Pool Party 8-1/2" X 11" Cardstock [ 122924 ]](https://assets1.tamsnetwork.com/images/EC042017NF/122924s.jpg "Pool Party 8-1/2\" X 11\" Cardstock [ 122924 ]")
![Basic White 8 1/2" X 11" Cardstock [ 166780 ]](https://assets1.tamsnetwork.com/images/EC042017NF/166780s.jpg "Basic White 8 1/2\" X 11\" Cardstock [ 166780 ]")
![Basic Black 8-1/2" X 11" Cardstock [ 121045 ]](https://assets1.tamsnetwork.com/images/EC042017NF/121045s.jpg "Basic Black 8-1/2\" X 11\" Cardstock [ 121045 ]")
![Garden Green Classic Stampin' Pad [ 147089 ]](https://assets1.tamsnetwork.com/images/EC042017NF/147089s.jpg "Garden Green Classic Stampin' Pad [ 147089 ]")
![Poppy Parade Classic Stampin' Pad [ 119782 ] (Retired)](https://assets1.tamsnetwork.com/images/EC042017NF/119782s.jpg "Poppy Parade Classic Stampin' Pad [ 119782 ] (Retired)")
![Crushed Curry Classic Stampin' Pad [ 147087 ]](https://assets1.tamsnetwork.com/images/EC042017NF/147087s.jpg "Crushed Curry Classic Stampin' Pad [ 147087 ]")
![Tuxedo Black Memento Ink Pad [ 132708 ]](https://assets1.tamsnetwork.com/images/EC042017NF/132708s.jpg "Tuxedo Black Memento Ink Pad [ 132708 ]")


![Party Banners Dies [ 165264 ]](https://assets1.tamsnetwork.com/images/EC042017NF/165264s.jpg "Party Banners Dies [ 165264 ]")
![Mini Alphabet Dies [ 162934 ]](https://assets1.tamsnetwork.com/images/EC042017NF/162934s.jpg "Mini Alphabet Dies [ 162934 ]")
![Pretty Florals Bundle [ 165179 ]](https://assets1.tamsnetwork.com/images/EC042017NF/165179s.jpg "Pretty Florals Bundle [ 165179 ]")
![Real Red 8-1/2" X 11" Cardstock [ 102482 ]](https://assets1.tamsnetwork.com/images/EC042017NF/102482s.jpg "Real Red 8-1/2\" X 11\" Cardstock [ 102482 ]")
![Night Of Navy 8-1/2" X 11" Cardstock [ 100867 ]](https://assets1.tamsnetwork.com/images/EC042017NF/100867s.jpg "Night Of Navy 8-1/2\" X 11\" Cardstock [ 100867 ]")
![Granny Apple Green 8-1/2" X 11" Cardstock [ 146990 ]](https://assets1.tamsnetwork.com/images/EC042017NF/146990s.jpg "Granny Apple Green 8-1/2\" X 11\" Cardstock [ 146990 ]")
![Adhesive Sheets [ 152334 ]](https://assets1.tamsnetwork.com/images/EC042017NF/152334s.jpg "Adhesive Sheets [ 152334 ]")
![Real Red Classic Stampin' Pad [ 147084 ]](https://assets1.tamsnetwork.com/images/EC042017NF/147084s.jpg "Real Red Classic Stampin' Pad [ 147084 ]")
![Night Of Navy Classic Stampin' Pad [ 147110 ]](https://assets1.tamsnetwork.com/images/EC042017NF/147110s.jpg "Night Of Navy Classic Stampin' Pad [ 147110 ]")
![Balmy Blue Classic Stampin' Pad [ 147105 ]](https://assets1.tamsnetwork.com/images/EC042017NF/147105s.jpg "Balmy Blue Classic Stampin' Pad [ 147105 ]")
![Silver & White 1/2" (1.3 Cm) Sheer Ribbon [ 162149 ]](https://assets1.tamsnetwork.com/images/EC042017NF/162149s.jpg "Silver & White 1/2\" (1.3 Cm) Sheer Ribbon [ 162149 ]")
![Drusy Adhesive Backed Embellishments [ 164223 ]](https://assets1.tamsnetwork.com/images/EC042017NF/164223s.jpg "Drusy Adhesive Backed Embellishments [ 164223 ]")
![Stampin' Seal [ 152813 ]](https://assets1.tamsnetwork.com/images/EC042017NF/152813s.jpg "Stampin' Seal [ 152813 ]")


")


")


 Designer Series Paper")
 Glimmer Specialty Paper")


 Circle Punch")
 Circle Punch")


")
 Designer Series Paper")


