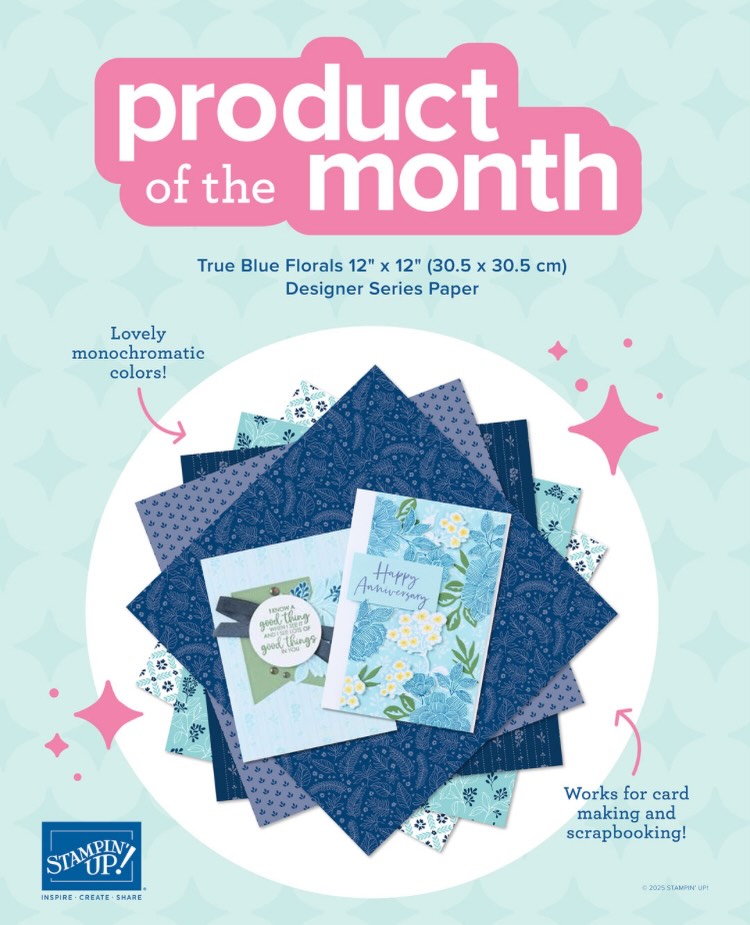
While it is bittersweet to bid adieu to Stampin’ Up! Sale-a-Bration, I am pleased to announce the Stampin’ Up!®️ Product of the Month, which gives you the opportunity to collect an exclusive product you can’t get anywhere else 12 times a year (with a qualifying order), starting with the True Blue Florals 12″ x 12″ Designer Series Paper in December, 2025:
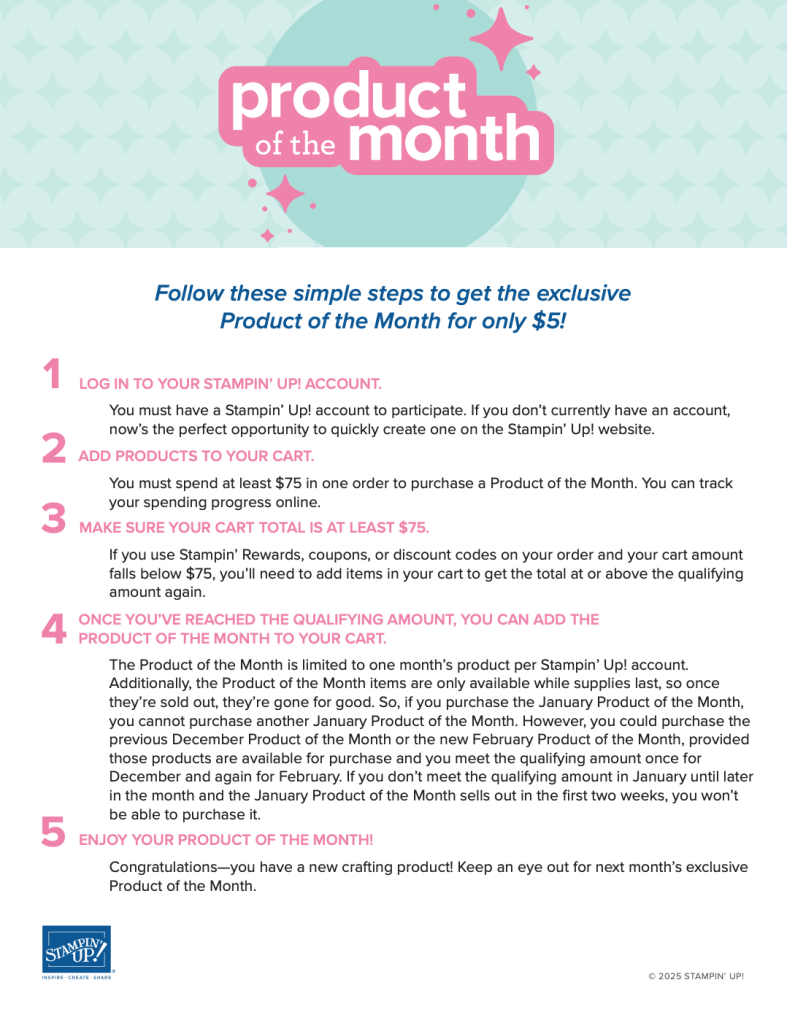
HOW DOES THE PRODUCT OF THE MONTH WORK?
Follow these steps, or watch the video below:
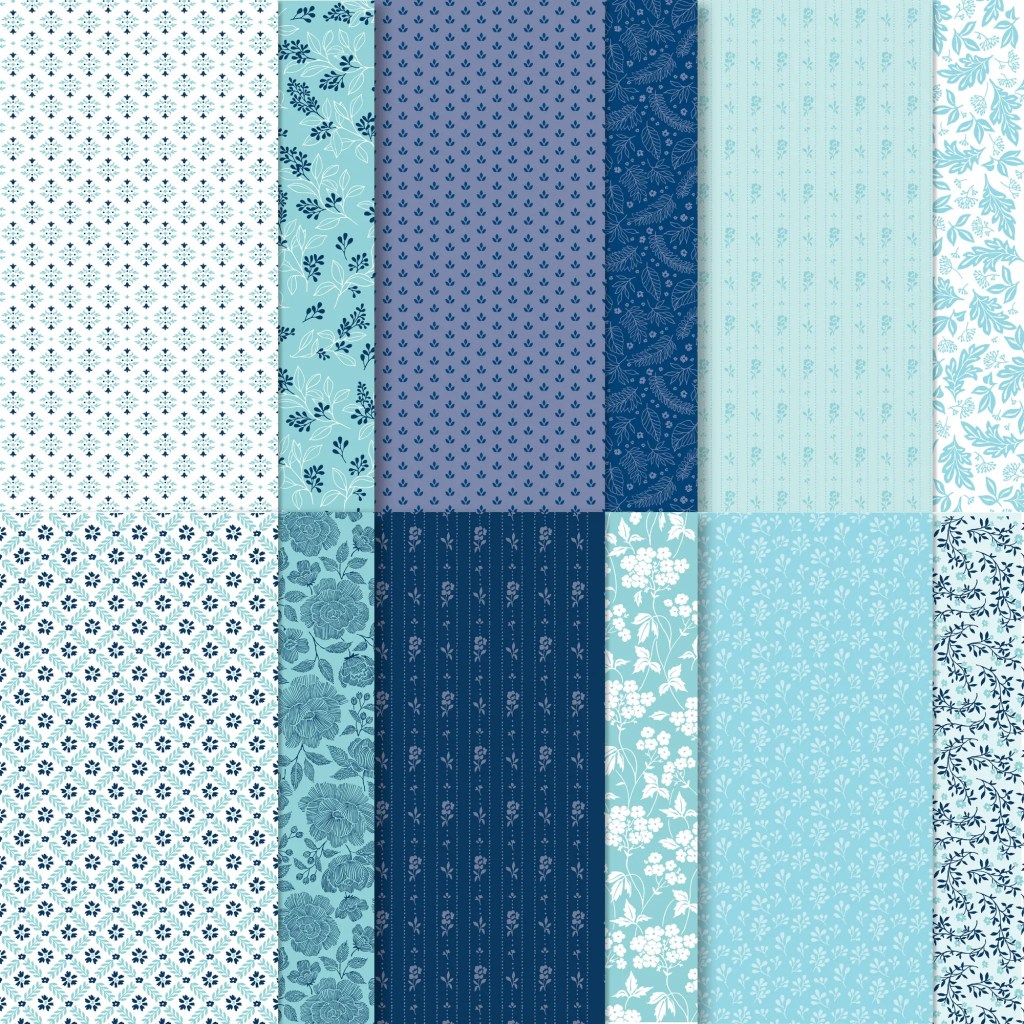
Let’s look at the December POTM and the calm vibe these patterns of paper provide:
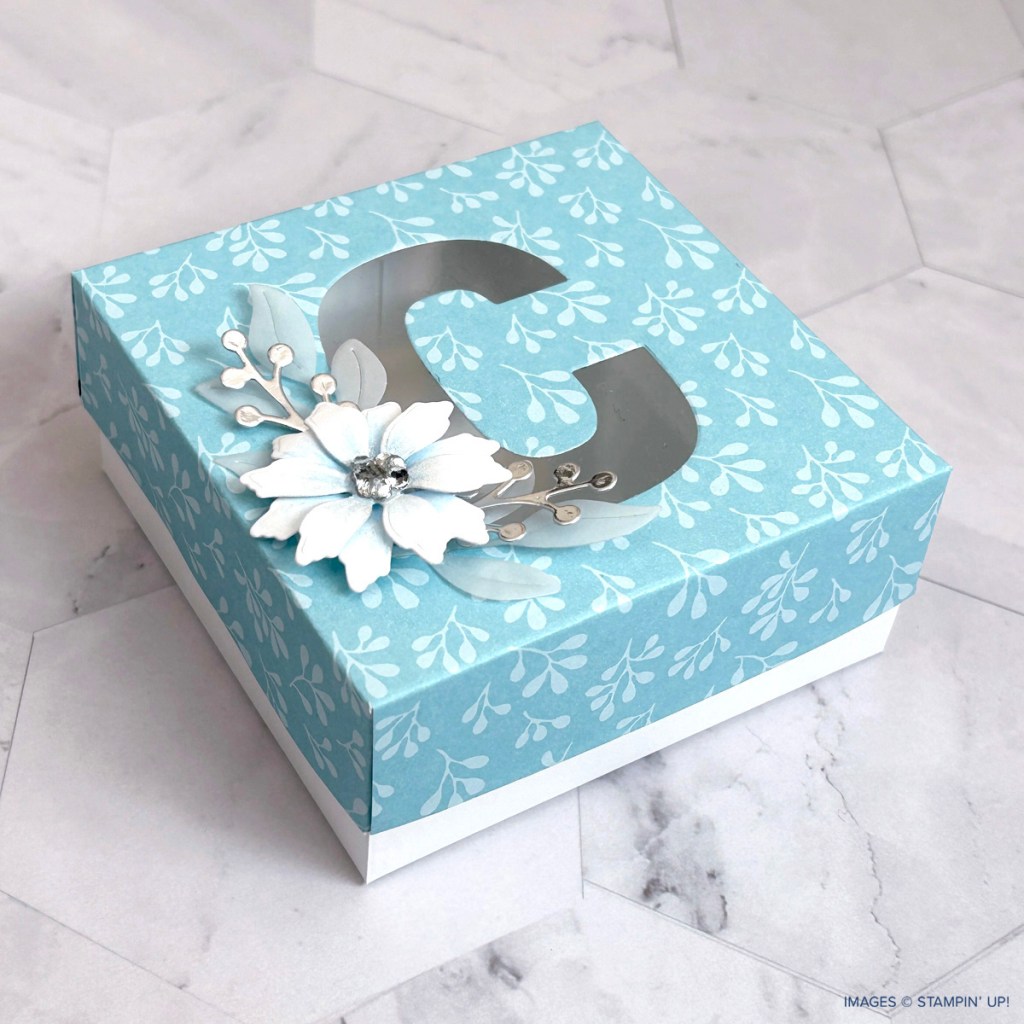
And a few projects you could create with them:
When you see a product you can’t resist, don’t hesitate, because these products are only while supplies last!
To help you reach the minimum order, you will be happy to know that the Last Chance List has been updated, and many holiday items are on sale:
Keep your creative juices flowing! 🍊🧡– Loni Spendlove
When my cousin Valarie asked if I could make a Gift Card Folio like one she had seen on a social media, I watched the video she shared and said ABSOLUTELY!
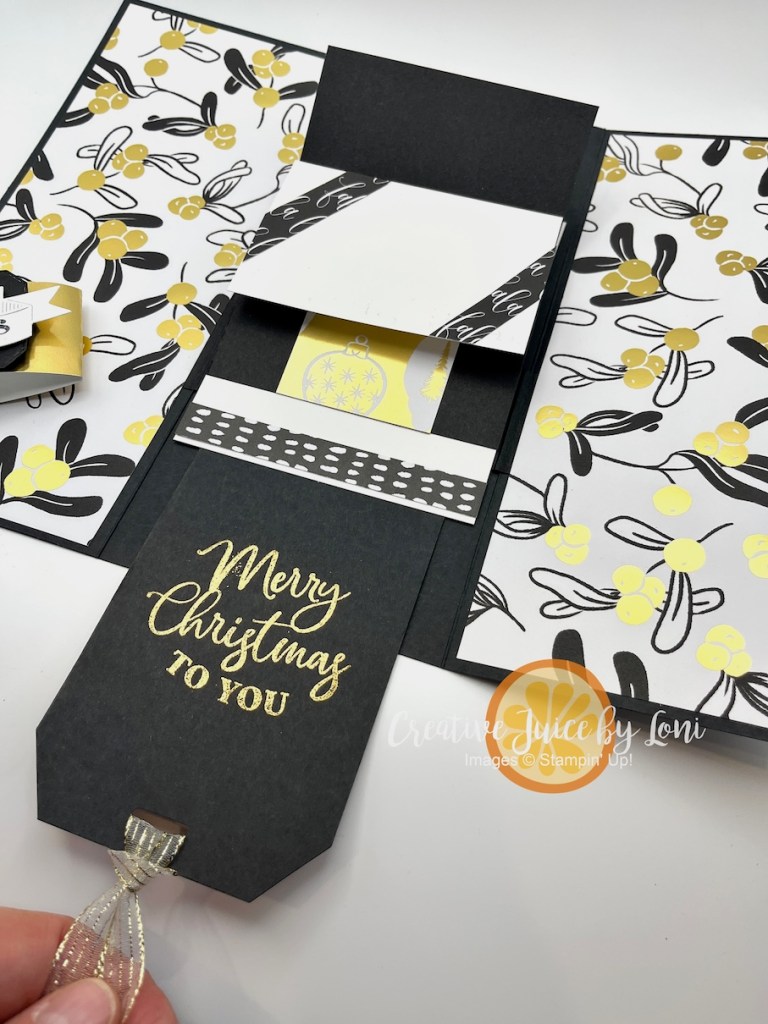
This is a larger version of a classic interactive card design called a “Waterfall Card”, and this one presents FIVE GIFT CARDS (or would be an excellent base for a mini photo album). After a few tries and tweaks, I was satisfied with the result – give this a try! You can follow along with the video instructions below 🖥️
I’ve used the Modern Christmas Designer Series Paper from Stampin’ Up!® to embellish this folio, though I show a few other versions made with the retired “Season of Green & Gold” DSP in the video. The black, white & gold is just so elegant, and of course, you can choose any colors/patterns/paper that fit your occasion.
TIP: Add gift cards to each of the five panels with mini glue dots, or use the panels and both sides of the folder for photos of a event to remember!
When you pull the tab, the “waterfall” begins to cascade, and a “secret message” appears:
Maximizing the use of materials was important to me, so this version uses a full sheet of 12″ x 12″ card stock (and a full sheet of 12″ x 12″ Designer Series Paper, if you cut it wisely), plus a few extra pieces. WATCH the tutorial to see HOW TO CUT the card stock!
Measurements:
11-7/8″ x 9″ Basic Black card stock, scored at 4″ and 8″
12″ x 3″ Basic Black card stock, scored at 1″, 2″, 3″, 4″ and 5″
6″ x 1-1/2″ Basic Black card stock, scored at 1″ and 4-7/8″
5 pieces of card stock 2-1/2″ x 3-3/4″
Designer Series Paper: TWO 8-3/4″ x 3-3/4″ and TWO 8-3/4″ x 3-5/8″
Gold Foil sheet: 1-1/2″ x 9-1/2″ for the belly band
Scraps of card stock for label, scraps of Designer Series Paper for embellishments inside.
Making paper crafting easy for you is my goal. What did you think about this tutorial? Please leave a comment and tell me what you’ll use this idea for (comments are found at the top of the post, next to the posting date).
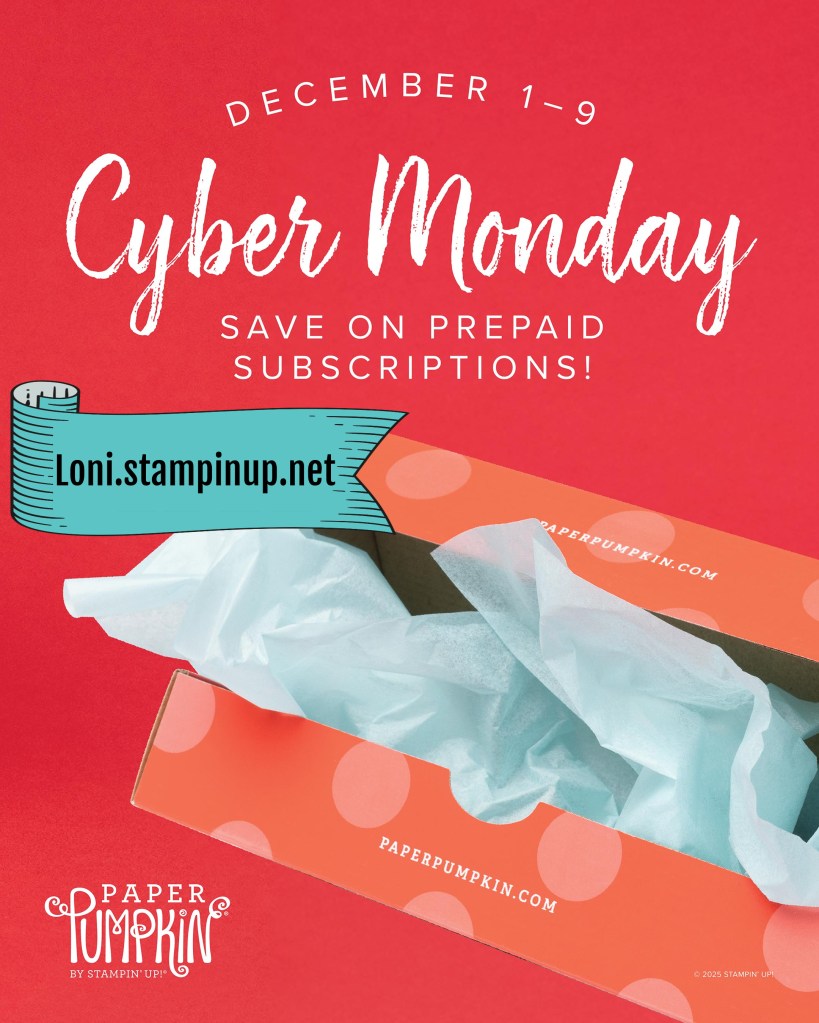
If you’ve been waiting for a good time to subscribe to the BEST MONTHLY CRAFT KIT, OR you need a unique and creative gift for a friend, this is your sign! From December 1-9, pre-paid Paper Pumpkin subscriptions are discounted as follows:
3-month prepaid: $61.00 (regular price $81.00)
6-month prepaid: $122.00 (regular price $162.00)
12-month prepaid: $244.00 (regular price $324.00)
This price includes shipping! Now, here’s the fine print:
* Subscriptions purchased during this promotion start immediately with the December Watercolor in Bloom Kit. This kit cannot be skipped.
* Do not purchase multiple subscriptions for the same recipient. The subscriptions will all start with the Watercolor in Bloom Kit, so the recipient will end up receiving duplicates of the same kit each month.
* If you are already a Paper Pumpkin monthly subscriber, this is a great opportunity to save on your upcoming kits!
* If you ALREADY HAVE a pre-paid subscription and wish to take advantage of the sale, go into your account and PAUSE your currrent December kit, unless you wish to have 2 of the same boxes shipped to you (the other would be a lovely gift to give!).
Bah, humbug to BLACK Friday. The only black piece of clothing I own is a pair of slacks I have to wear for the community choir, and would prefer a color, anytime. Can’t we call it “Happy-Shopping-in-your-slippers Day?” Maybe it doesn’t roll off the tongue…however, Stampin’ Up!’s holiday sale on some of our basic blocks of crafting starts today (and ends on December 1st)…and there is plenty of color to choose from!
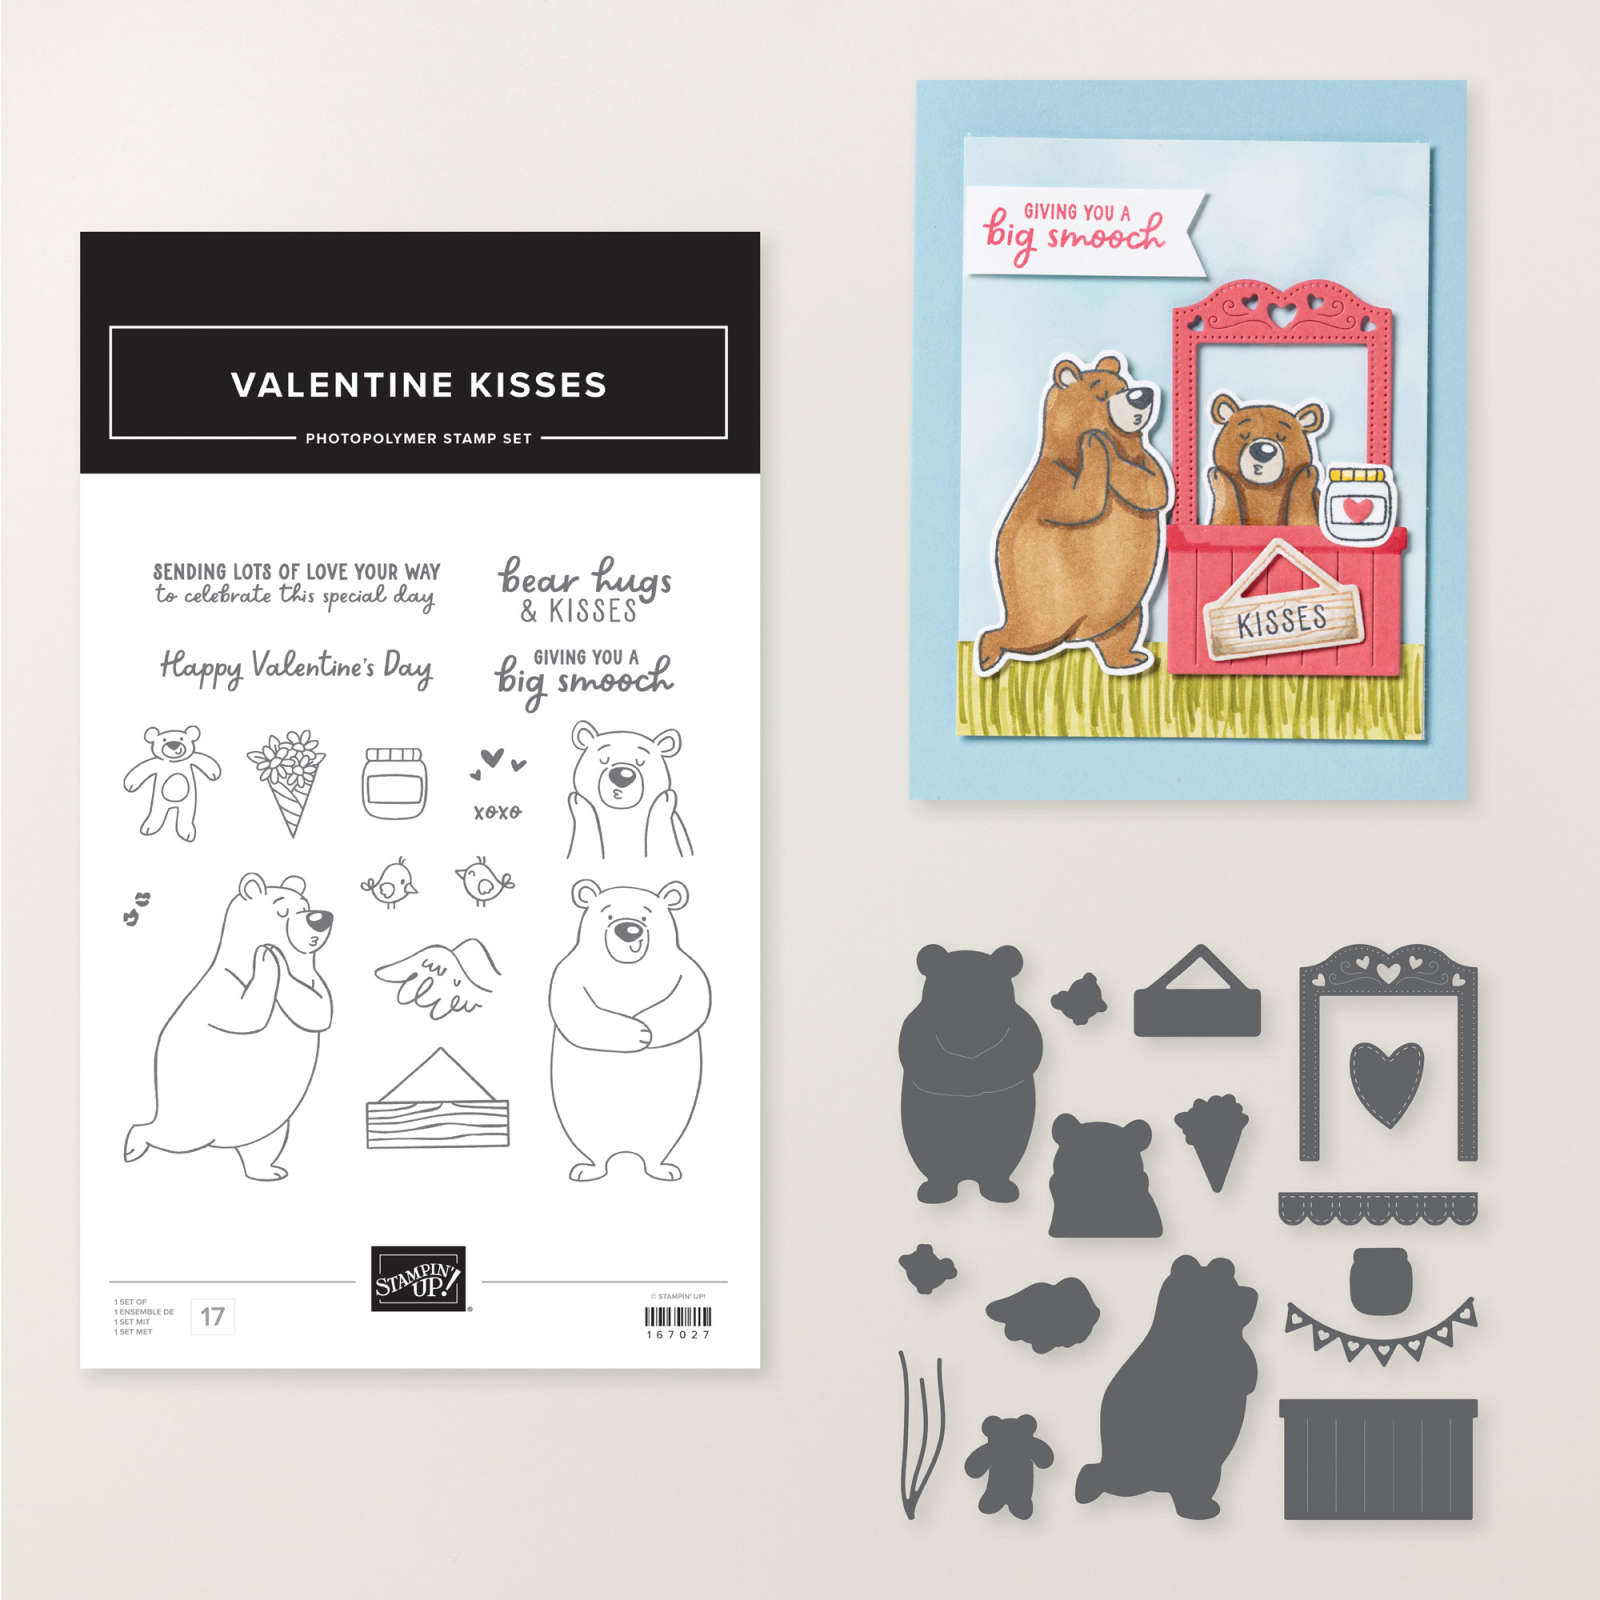
If I had to choose between Basic White and Very Vanilla card stock, I’d pick Vanilla. It’s just a softer, elegant color. Both are very smooth to stamp and color on, and since the Stampin’ Blends Markers are on sale (and so is Vanilla card stock!), I made a card using a new November Online Exclusive bundle called Valentine Kisses that is unBEARably adorable:
The dies for the hugging bear even cut out a slot to tuck in a heart, a teddy bear or a bouquet of flowers!
I’m going to offer a Virtual Class using this bundle in January, and if you order it from my Stampin’ Store, you’ll receive an invitation to join the class!
And these cute bears aren’t stuck as Valentines, this card could be sent to anyone needing an extra squeeze:
Stock up on during the Black Friday sale on some of your basic crafting supplies, like adhesive and basic card stock. And if you have a newlywed couple, a new crafter or a teacher on your shopping list, snag a paper trimmer at 40% off as a gift!
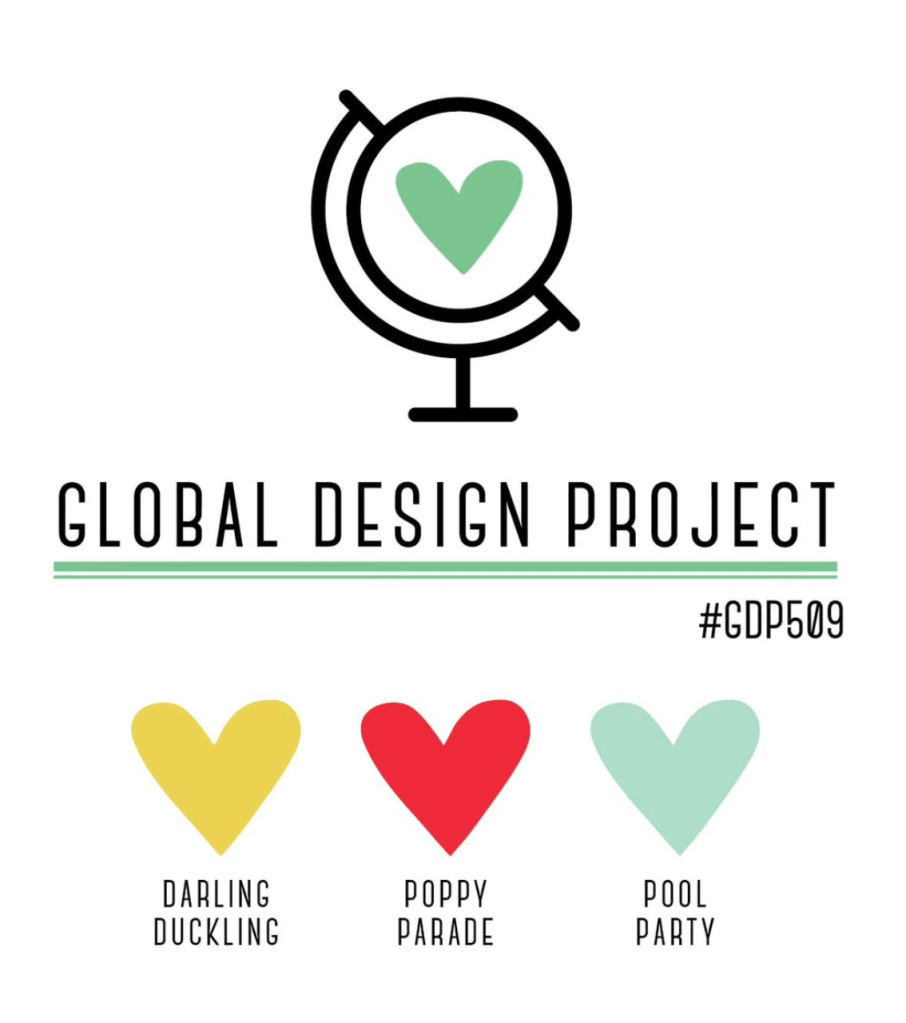
I’ve been making samples for Fall StampFest (spoiler alert!) and while I was doing some “research” on social media, these bright colors – Darling Duckling, Poppy Parade & Pool Party – scrolled by, and then I couldn’t really get any work done until I pulled the colors out and put it onto paper, so-to-speak.
Plaid, cornfields and tractors MUST go together, but I also love a peek of the torn leafy Darling Duckling Designer Series Paper, just beneath the farm vehicle.
But my FAVORITE detail is the blue ribbon! Can you tell what I used to make it?
The ribbon medallion is made with the TIRE DIES!
Pull in a sentiment from the “More than Autumn” stamp set and the card is worthy of grand prize at the county fair, don’t you think?
Another winning opportunity: Darling Duckling is a 2025-2027 IN COLOR, thus the ink, card stock and the patterned paper are all on sale for 15% off during August 2025!
When you are ready to make a tractor card of your own, you can add all the supplies you need to your cart here:
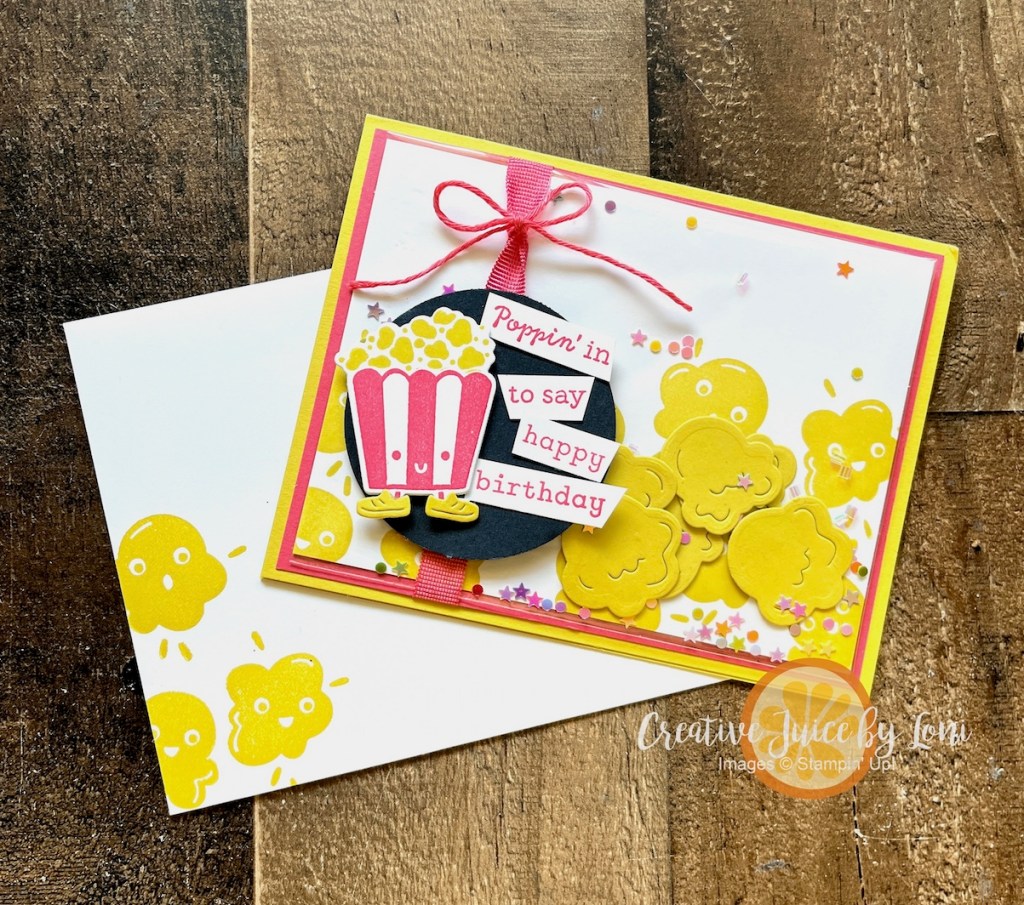
Creative Juice LIVE Crafting (on YouTube & Facebook) IS BACK…with a twist! Going forward, I’ll be going live in my channels at 12:30 p.m. MT ON THE FIRST MONDAY OF EACH MONTH. As I *pop* back into your social feed, I have an a-maize-ing Faux Shaker Card tutorial to share with you in today’s video!
Traditional shaker cards are quite thick, so using a clear envelope to hold the shaker elements makes the card thinner to mail, and easy to make.
Colors used: Darling Duckling, Strawberry Slush and Secret Sea, which are all 2025-2027 In Colors, and an announcement you’ll appreciate is that tomorrow (August 5th) is the beginning of an IN COLOR SALE!
Many In Color products are 15% off through August 31st, and I need to remember to order refills for my ink pads…my shopping list is started.
Without further adieu, here is the VIDEO TUTORIAL for the Faux Shaker Popcorn Birthday card, and you may add the supplies to your cart with the list below the video:
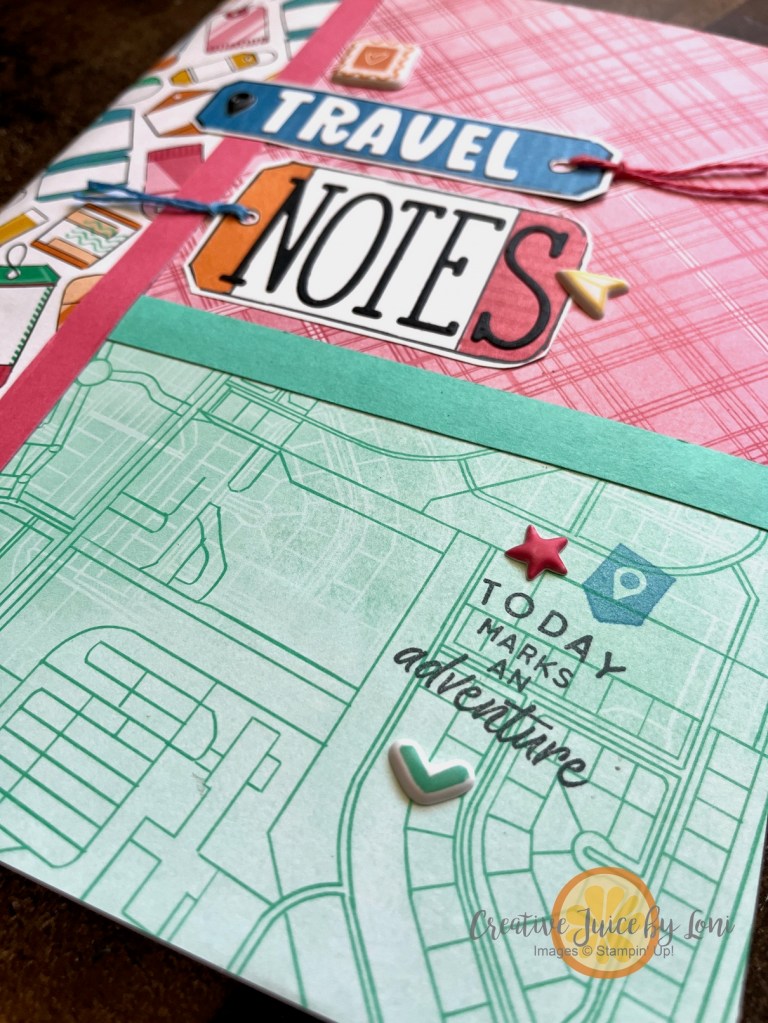
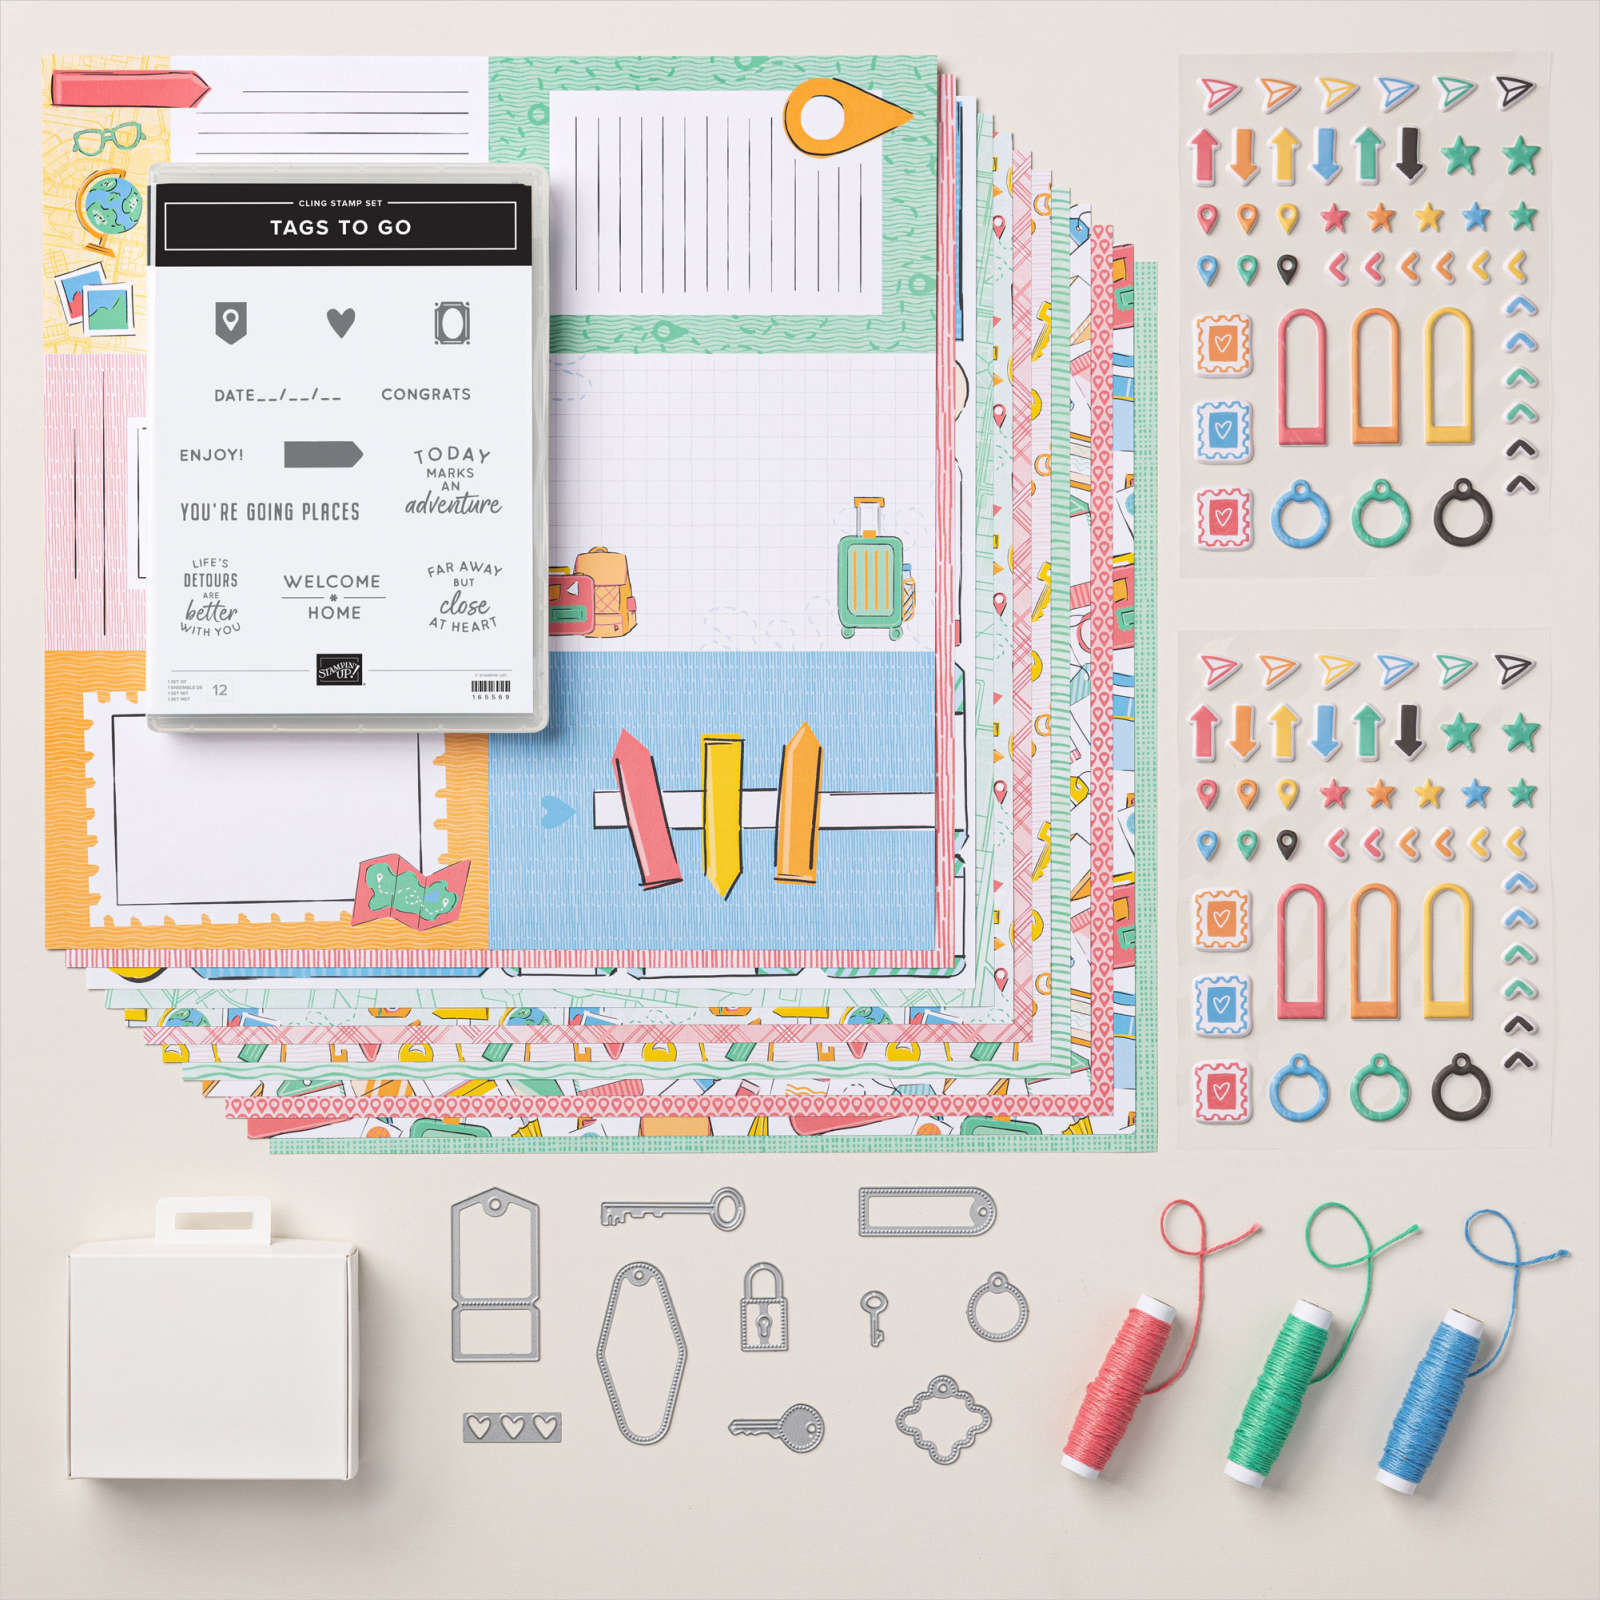
Welcome to another Sweet Suite SIMPLE Summer Stamping project: A D.I.Y. Travel Journal crafted with the Stampin’ Up!®️ On the Go Suite Collection!
This easy-peasy book began with an inexpensive composition notebook that I covered with the travel-themed On the Go Designer Series Paper by Stampin’ Up!®️
Crafting with a suite of products, like the On the Go suite takes the stress out of choosing colors or finding coordinating items, because it’s all done for you…even down to the matching puffy stickers and colored twine for the tags!
The puffy stickers really add a level of whimsy and fun!
Remember to stamp the top of each page with the date stamp, and your journal is ready for adventure:
I’ve got measurements and tips to make this project speedy and fun~ watch the tutorial:
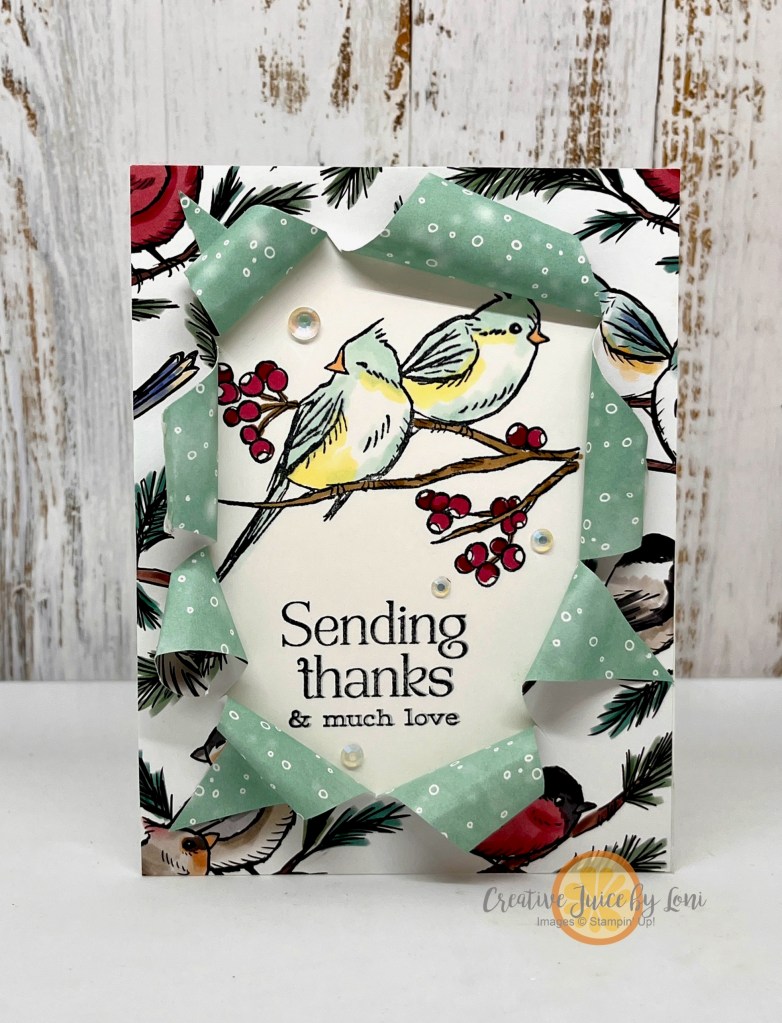
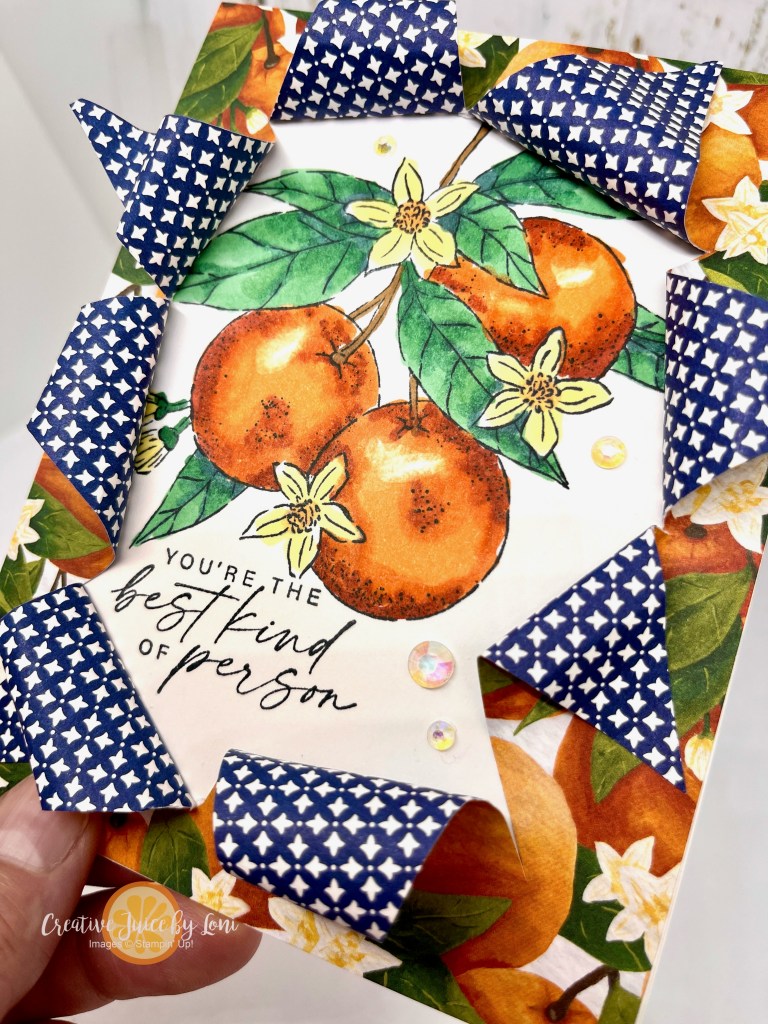
TREND ALERT! This technique was popping up in my social media, so I wanted to bring it to card-making: The Busted Canvas looks like the card is being unwrapped to reveal an image and sentiment, so while it’s not going to fit in a traditional envelope, it will look fabulous hanging out of a gift bag or handed to a friend personally.
The happy surprise behind the paper has an excited “feel”… like you were too thrilled to open the package to carefully undo the wrapping!
In the video tutorial, I share some tips and tricks, and one thing to note is that when you roll the Designer Series Paper out as tightly as you can, it doesn’t really *need* to be glued down, but if you choose to adhere it to the front, you’ll probably want to use hot glue. The pointed edges do adhere well flat using Tear & Tape, but the rolled pieces tend to pull away unless you use a glue gun.
While I stamped and colored in both my images with Stampin’ Blends, you could use a pre-printed image or more Designer Series Paper on the inside.
Before I share the video, here’s the second example using the Nests of Winter products coming in the September-December mini catalog:
The technique is too much fun to stop with one!
Okay, okay, here’s the tutorial! You’ll need an 11″ x 4-1/4″ card base, a 5-1/2″ x 4-1/4″ piece of white card stock and a 5-1/2″ x 4-1/4″ piece of Designer Series Paper, plus your stamps, ink and coloring tools to craft along:
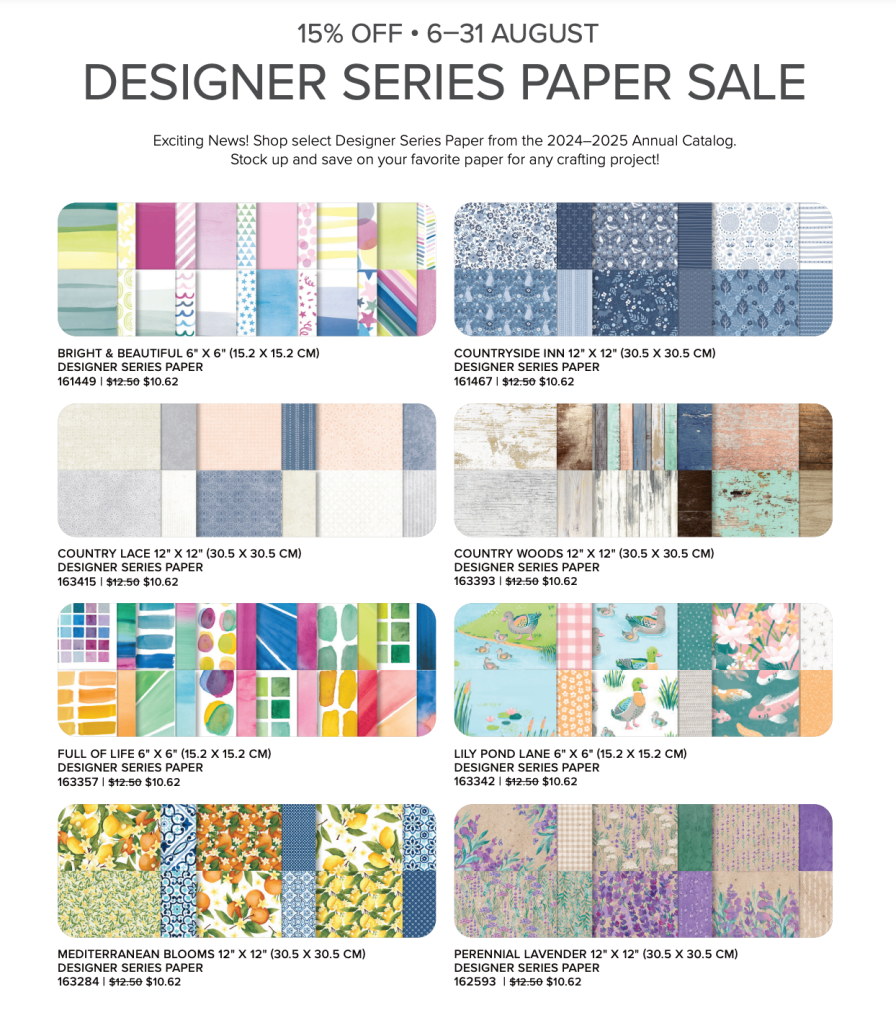
It’s a timely technique for the Stampin’ Up! Designer Series Paper Sale during August 2024
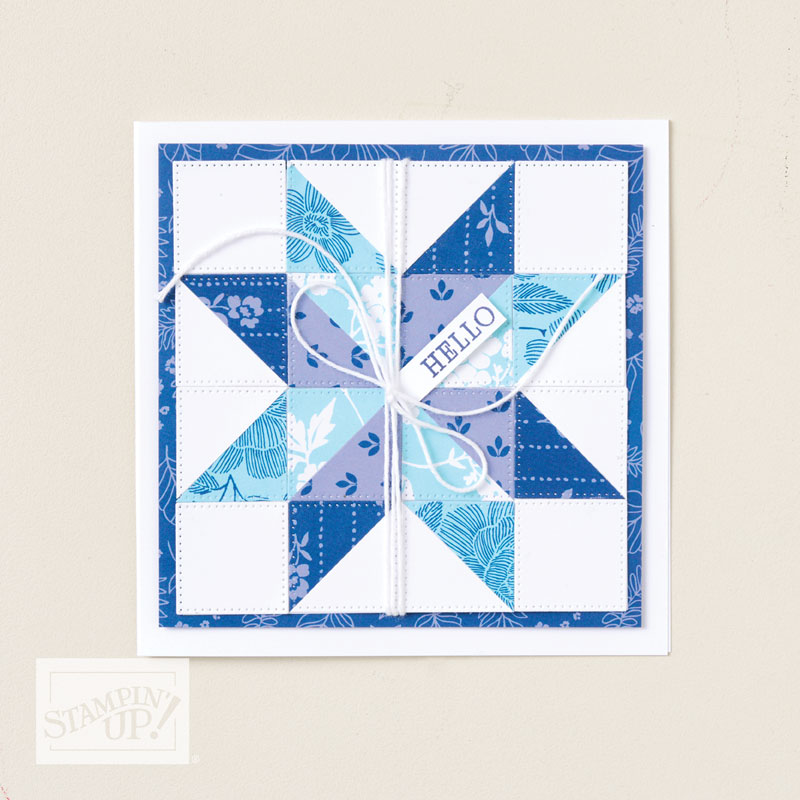
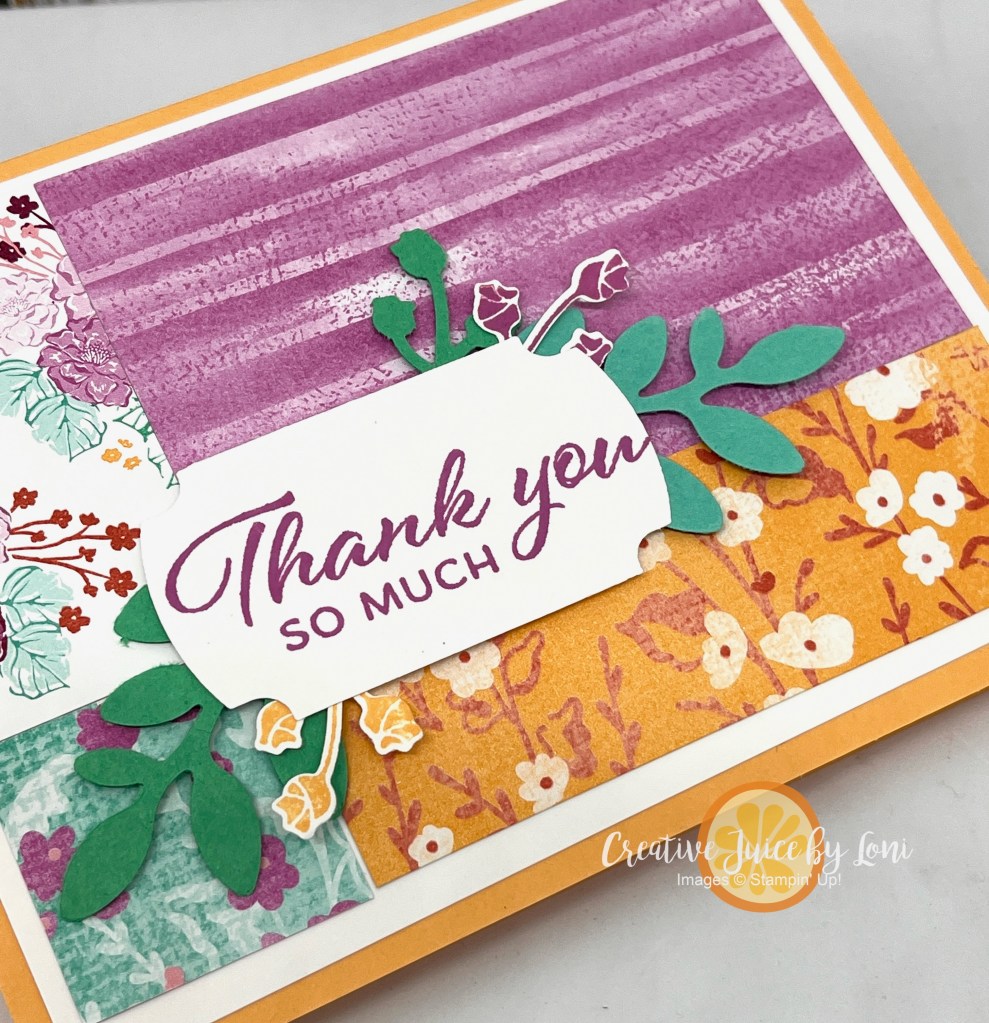
So many marvelous Designer Series Papers, so little time? This technique for cutting a stack of patterned paper will have you making multiple cards at ONE TIME!
Begin by selecting 4 patterns of Designer Series Paper- I suggest using a maximum of two busy or bold patterns and add a subtle design and a tiny or monochromatic print, in 4 different colors (or different shades of the same hue). This will give you the CONTRAST you need when piecing them back together.
You can adhere the shuffled pieces edge-to-edge (as on the card, left) or leave a small space between them, giving a window-pane look (card on right). You may find that a design on the BACK of your paper works well, so go ahead and flip it over, if needed.
I used the Unbounded Beauty 12″ x 12″ pack- it’s part of the Designer Series Paper SALE this month, August 2024 and showcases the 2024-2026 In Colors, which are lovely together. With the few scraps left over, I added a piece to the inside layer and to the flap of my envelope.
Grab your patterned paper and follow along with me here, as you practice your cardmaking:
If you paper is directional, you’ll need to decide if you are creating PORTRAIT cards (tall) or LANDSCAPE cards (wide) **before** you cut your paper, and make sure it’s oriented the correct way.
The Unbounded Beauty cards were landscape, but I also needed some sympathy cards, and the blues in the Countryside Inn Designer Series Paper (also 15% off in August) seemed fitting. These are portrait versions of the Stack, Cut, Shuffle technique:
Inside the cards:
I’ll list supplies for both versions, starting with the Unbounded Beauty demonstrated in the how-to video:
Have you noticed the 22 card sketches on page 22 of the Annual Catalog? You’ll want to turn to these any time you’ve lost your crafting mojo, for they will give you a “map” to follow as you get back into your stamping groove.
If you look closely, you may spy samples throughout the catalog that follow a sketch, as well.
I decided to use the Simply Zinnia bundle to follow this sketch for the #CreativeChallengeSU :
These colors feel like SUMMER and make me want to plant some in my yard.
Did you know there are products online that aren’t in the Stampin’ Up! catalog? The New at SU! Design Team wants to make sure you know how AWESOME our Online Exclusive products are!
Occasionally we get a product that we know will be a runaway hit…and the Trucking Along Bundle was one of those which sold out the first stock in just a few days, then AGAIN just this week you snagged up all the punches we had in the Utah warehouse! The stamp set is still available in the U.S. market, and the TRUCK BUILDER PUNCH has been reordered (though it’s coming from overseas, so it may take up to 90 days…). Thanks for being patient while we restock.
The photopolymer stamp set + coordinating punch covers everything from Summer to Christmas, and really delivers crafting happiness:
For my card, I used an inch and a half of a paper straw glued to the back of the truck and slightly flattened out (which is why it has to be paper, and really a much better use for a paper straw than drinking….) to slide along the linen thread! You may want to use two layers of Thick Basic White card stock to make the truck heavy enough to slide easily, or use a mini glue dot to attach a penny to the back of the truck.
The pickup is packed for a beach adventure and the sun is radiating! You’ll have a load of fun making it slide back and forth along the linen twine. I’d love to hear your thoughts about this card!
While some products will stay a while in the Online Exclusive section of our Stampin’ Store, some may be LIMITED to the supply on hand, and supplies in each market may vary. New Online Exclusive products will be introduced in MARCH, JULY and NOVEMBER. You’ll want to visit all the other posts in the July New at SU! Blog Hop and **SAVE** your favorites to CASE (copy) later!
If you are here on July 19th…don’t miss the 24 hour Stamp Sale! *All stamps in the 2023-2024 Annual Catalog are 15% off TODAY ONLY, PLUS you earn Bonus Days coupons for every $50 you spend in July!
*Except Host Stamps, Online Exclusives are NOT in the Annual Catalog


![Traditional Labels Bundle (English) [ 165865 ]](https://assets1.tamsnetwork.com/images/EC042017NF/165865s.jpg "Traditional Labels Bundle (English) [ 165865 ]")
![Basic Black 12" X 12" (30.5 X 30.5 Cm) Cardstock [ 166786 ]](https://assets1.tamsnetwork.com/images/EC042017NF/166786s.jpg "Basic Black 12\" X 12\" (30.5 X 30.5 Cm) Cardstock [ 166786 ]")
![Modern Christmas 12" X 12" (30.5 X 30.5 Cm) Specialty Designer Series Paper [ 165990 ]](https://assets1.tamsnetwork.com/images/EC042017NF/165990s.jpg "Modern Christmas 12\" X 12\" (30.5 X 30.5 Cm) Specialty Designer Series Paper [ 165990 ]")
![Basic White 8 1/2" X 11" Cardstock [ 166780 ]](https://assets1.tamsnetwork.com/images/EC042017NF/166780s.jpg "Basic White 8 1/2\" X 11\" Cardstock [ 166780 ]")
![Gold Foil Sheets [ 132622 ]](https://assets1.tamsnetwork.com/images/EC042017NF/132622s.jpg "Gold Foil Sheets [ 132622 ]")
![Gold Striped 3/8" (1 Cm) Mesh Ribbon [ 165599 ]](https://assets1.tamsnetwork.com/images/EC042017NF/165599s.jpg "Gold Striped 3/8\" (1 Cm) Mesh Ribbon [ 165599 ]")
![Hole Punch Assortment [ 165409 ]](https://assets1.tamsnetwork.com/images/EC042017NF/165409s.jpg "Hole Punch Assortment [ 165409 ]")
![Paper Trimmer [ 152392 ]](https://assets1.tamsnetwork.com/images/EC042017NF/152392s.jpg "Paper Trimmer [ 152392 ]")
![Tear & Tape Adhesive [ 154031 ]](https://assets1.tamsnetwork.com/images/EC042017NF/154031s.jpg "Tear & Tape Adhesive [ 154031 ]")
![Stampin' Seal [ 152813 ]](https://assets1.tamsnetwork.com/images/EC042017NF/152813s.jpg "Stampin' Seal [ 152813 ]")
![Black Stampin' Dimensionals Combo Pack [ 150893 ]](https://assets1.tamsnetwork.com/images/EC042017NF/150893s.jpg "Black Stampin' Dimensionals Combo Pack [ 150893 ]")


![Valentine Kisses Bundle (English) [ 167310 ]](https://assets1.tamsnetwork.com/images/EC042017NF/167310s.jpg "Valentine Kisses Bundle (English) [ 167310 ]")
![Perennial Postage Dies [ 162607 ]](https://assets1.tamsnetwork.com/images/EC042017NF/162607s.jpg "Perennial Postage Dies [ 162607 ]")
![Very Vanilla 8 1/2" X 11" Cardstock [ 166784 ]](https://assets1.tamsnetwork.com/images/EC042017NF/166784s.jpg "Very Vanilla 8 1/2\" X 11\" Cardstock [ 166784 ]")
![Pretty In Pink 8 1/2" X 11" Cardstock [ 163793 ]](https://assets1.tamsnetwork.com/images/EC042017NF/163793s.jpg "Pretty In Pink 8 1/2\" X 11\" Cardstock [ 163793 ]")
![Soft Sea Foam 8-1/2" X 11" Cardstock [ 146988 ]](https://assets1.tamsnetwork.com/images/EC042017NF/146988s.jpg "Soft Sea Foam 8-1/2\" X 11\" Cardstock [ 146988 ]")
![Pecan Pie 8 1/2" X 11" Cardstock [ 161717 ]](https://assets1.tamsnetwork.com/images/EC042017NF/161717s.jpg "Pecan Pie 8 1/2\" X 11\" Cardstock [ 161717 ]")
![Pecan Pie Classic Stampin' Pad [ 161665 ]](https://assets1.tamsnetwork.com/images/EC042017NF/161665s.jpg "Pecan Pie Classic Stampin' Pad [ 161665 ]")
![Beautiful Pattern 3 D Embossing Folder [ 167097 ]](https://assets1.tamsnetwork.com/images/EC042017NF/167097s.jpg "Beautiful Pattern 3 D Embossing Folder [ 167097 ]")
![Pecan Pie Stampin’ Blends Combo Pack [ 161674 ]](https://assets1.tamsnetwork.com/images/EC042017NF/161674s.jpg "Pecan Pie Stampin’ Blends Combo Pack [ 161674 ]")
![Crumb Cake Stampin' Blends Combo Pack [ 154882 ]](https://assets1.tamsnetwork.com/images/EC042017NF/154882s.jpg "Crumb Cake Stampin' Blends Combo Pack [ 154882 ]")
![Bronze & Ivory Stampin' Blends Combo Pack [ 154922 ]](https://assets1.tamsnetwork.com/images/EC042017NF/154922s.jpg "Bronze & Ivory Stampin' Blends Combo Pack [ 154922 ]")
![Stampin' Cut & Emboss Machine [ 149653 ]](https://assets1.tamsnetwork.com/images/EC042017NF/149653s.jpg "Stampin' Cut & Emboss Machine [ 149653 ]")
![Multipurpose Liquid Glue [ 110755 ]](https://assets1.tamsnetwork.com/images/EC042017NF/110755s.jpg "Multipurpose Liquid Glue [ 110755 ]")
![Stampin' Dimensionals [ 104430 ]](https://assets1.tamsnetwork.com/images/EC042017NF/104430s.jpg "Stampin' Dimensionals [ 104430 ]")


![Tractor & Co Bundle (English) [ 166116 ]](https://assets1.tamsnetwork.com/images/EC042017NF/166116s.jpg "Tractor & Co Bundle (English) [ 166116 ]")
![More Than Autumn Photopolymer Stamp Set (English) [ 164228 ]](https://assets1.tamsnetwork.com/images/EC042017NF/164228s.jpg "More Than Autumn Photopolymer Stamp Set (English) [ 164228 ]")
![Darling Duckling 8 1/2" X 11" Cardstock [ 165622 ]](https://assets1.tamsnetwork.com/images/EC042017NF/165622s.jpg "Darling Duckling 8 1/2\" X 11\" Cardstock [ 165622 ]")
![Poppy Parade 8-1/2" X 11" Cardstock [ 119793 ]](https://assets1.tamsnetwork.com/images/EC042017NF/119793s.jpg "Poppy Parade 8-1/2\" X 11\" Cardstock [ 119793 ]")
![Pool Party 8-1/2" X 11" Cardstock [ 122924 ]](https://assets1.tamsnetwork.com/images/EC042017NF/122924s.jpg "Pool Party 8-1/2\" X 11\" Cardstock [ 122924 ]")
![Basic Black 8-1/2" X 11" Cardstock [ 121045 ]](https://assets1.tamsnetwork.com/images/EC042017NF/121045s.jpg "Basic Black 8-1/2\" X 11\" Cardstock [ 121045 ]")
![2025–2027 In Color™ 6" X 6" (15.2 X 15.2 Cm) Designer Series Paper [ 165300 ]](https://assets1.tamsnetwork.com/images/EC042017NF/165300s.jpg "2025–2027 In Color™ 6\" X 6\" (15.2 X 15.2 Cm) Designer Series Paper [ 165300 ]")
![Silver Foil Sheets [ 132178 ]](https://assets1.tamsnetwork.com/images/EC042017NF/132178s.jpg "Silver Foil Sheets [ 132178 ]")
![Darling Duckling Classic Stampin' Pad [ 165277 ]](https://assets1.tamsnetwork.com/images/EC042017NF/165277s.jpg "Darling Duckling Classic Stampin' Pad [ 165277 ]")
![Old Olive Classic Stampin' Pad [ 147090 ]](https://assets1.tamsnetwork.com/images/EC042017NF/147090s.jpg "Old Olive Classic Stampin' Pad [ 147090 ]")
![Crumb Cake Classic Stampin' Pad [ 147116 ]](https://assets1.tamsnetwork.com/images/EC042017NF/147116s.jpg "Crumb Cake Classic Stampin' Pad [ 147116 ]")
![Tuxedo Black Memento Ink Pad [ 132708 ]](https://assets1.tamsnetwork.com/images/EC042017NF/132708s.jpg "Tuxedo Black Memento Ink Pad [ 132708 ]")
![Forever Plaid 3 D Embossing Folder [ 164049 ]](https://assets1.tamsnetwork.com/images/EC042017NF/164049s.jpg "Forever Plaid 3 D Embossing Folder [ 164049 ]")
![Adhesive Sheets [ 152334 ]](https://assets1.tamsnetwork.com/images/EC042017NF/152334s.jpg "Adhesive Sheets [ 152334 ]")
![Blending Brushes [ 153611 ]](https://assets1.tamsnetwork.com/images/EC042017NF/153611s.jpg "Blending Brushes [ 153611 ]")
![Two Tone Sparkle Gems [ 164633 ]](https://assets1.tamsnetwork.com/images/EC042017NF/164633s.jpg "Two Tone Sparkle Gems [ 164633 ]")


![Poppin' By Bundle (English) [ 165489 ]](https://assets1.tamsnetwork.com/images/EC042017NF/165489s.jpg "Poppin' By Bundle (English) [ 165489 ]")
![Strawberry Slush 8 1/2" X 11" Cardstock [ 165625 ]](https://assets1.tamsnetwork.com/images/EC042017NF/165625s.jpg "Strawberry Slush 8 1/2\" X 11\" Cardstock [ 165625 ]")
![Secret Sea 12" X 12" (30.5 X 30.5 Cm) Two Tone Cardstock [ 166709 ]](https://assets1.tamsnetwork.com/images/EC042017NF/166709s.jpg "Secret Sea 12\" X 12\" (30.5 X 30.5 Cm) Two Tone Cardstock [ 166709 ]")
![Strawberry Slush Classic Stampin' Pad [ 165286 ]](https://assets1.tamsnetwork.com/images/EC042017NF/165286s.jpg "Strawberry Slush Classic Stampin' Pad [ 165286 ]")
![Strawberry Slush 3/8" (1 Cm) Faux Linen Ribbon [ 165274 ]](https://assets1.tamsnetwork.com/images/EC042017NF/165274s.jpg "Strawberry Slush 3/8\" (1 Cm) Faux Linen Ribbon [ 165274 ]")
![Pack Your Bags Twine Three Pack [ 165582 ]](https://assets1.tamsnetwork.com/images/EC042017NF/165582s.jpg "Pack Your Bags Twine Three Pack [ 165582 ]")
![Clear Medium Envelopes [ 102619 ]](https://assets1.tamsnetwork.com/images/EC042017NF/102619s.jpg "Clear Medium Envelopes [ 102619 ]")
![Loose Shaker Elements [ 165268 ]](https://assets1.tamsnetwork.com/images/EC042017NF/165268s.jpg "Loose Shaker Elements [ 165268 ]")
![Mini Stampin' Cut & Emboss Machine [ 150673 ]](https://assets1.tamsnetwork.com/images/EC042017NF/150673s.jpg "Mini Stampin' Cut & Emboss Machine [ 150673 ]")
![Stampin' Seal+ [ 149699 ]](https://assets1.tamsnetwork.com/images/EC042017NF/149699s.jpg "Stampin' Seal+ [ 149699 ]")


![Tags To Go Cling Stamp Set (English) [ 165569 ]](https://assets1.tamsnetwork.com/images/EC042017NF/165569s.jpg "Tags To Go Cling Stamp Set (English) [ 165569 ]")
![On The Go 12" X 12" (30.5 X 30.5 Cm) Designer Series Paper [ 165566 ]](https://assets1.tamsnetwork.com/images/EC042017NF/165566s.jpg "On The Go 12\" X 12\" (30.5 X 30.5 Cm) Designer Series Paper [ 165566 ]")
![On The Go Puffy Stickers [ 165581 ]](https://assets1.tamsnetwork.com/images/EC042017NF/165581s.jpg "On The Go Puffy Stickers [ 165581 ]")
![Azure Afternoon Classic Stampin' Pad [ 161663 ]](https://assets1.tamsnetwork.com/images/EC042017NF/161663s.jpg "Azure Afternoon Classic Stampin' Pad [ 161663 ]")
![Summer Splash 8 1/2" X 11 Cardstock [ 163797 ]](https://assets1.tamsnetwork.com/images/EC042017NF/163797s.jpg "Summer Splash 8 1/2\" X 11 Cardstock [ 163797 ]")
![Mini Alphabet Dies [ 162934 ]](https://assets1.tamsnetwork.com/images/EC042017NF/162934s.jpg "Mini Alphabet Dies [ 162934 ]")
![Alphabet à La Mode Dies [ 160750 ]](https://assets1.tamsnetwork.com/images/EC042017NF/160750s.jpg "Alphabet à La Mode Dies [ 160750 ]")


 Designer Series Paper")
")


 Designer Series Paper")
")


 Circle Punch")


 Designer Series Paper")
")


 Diagonal Trim Combo Pack")


")


