Fanc-ify with Christmas Labels

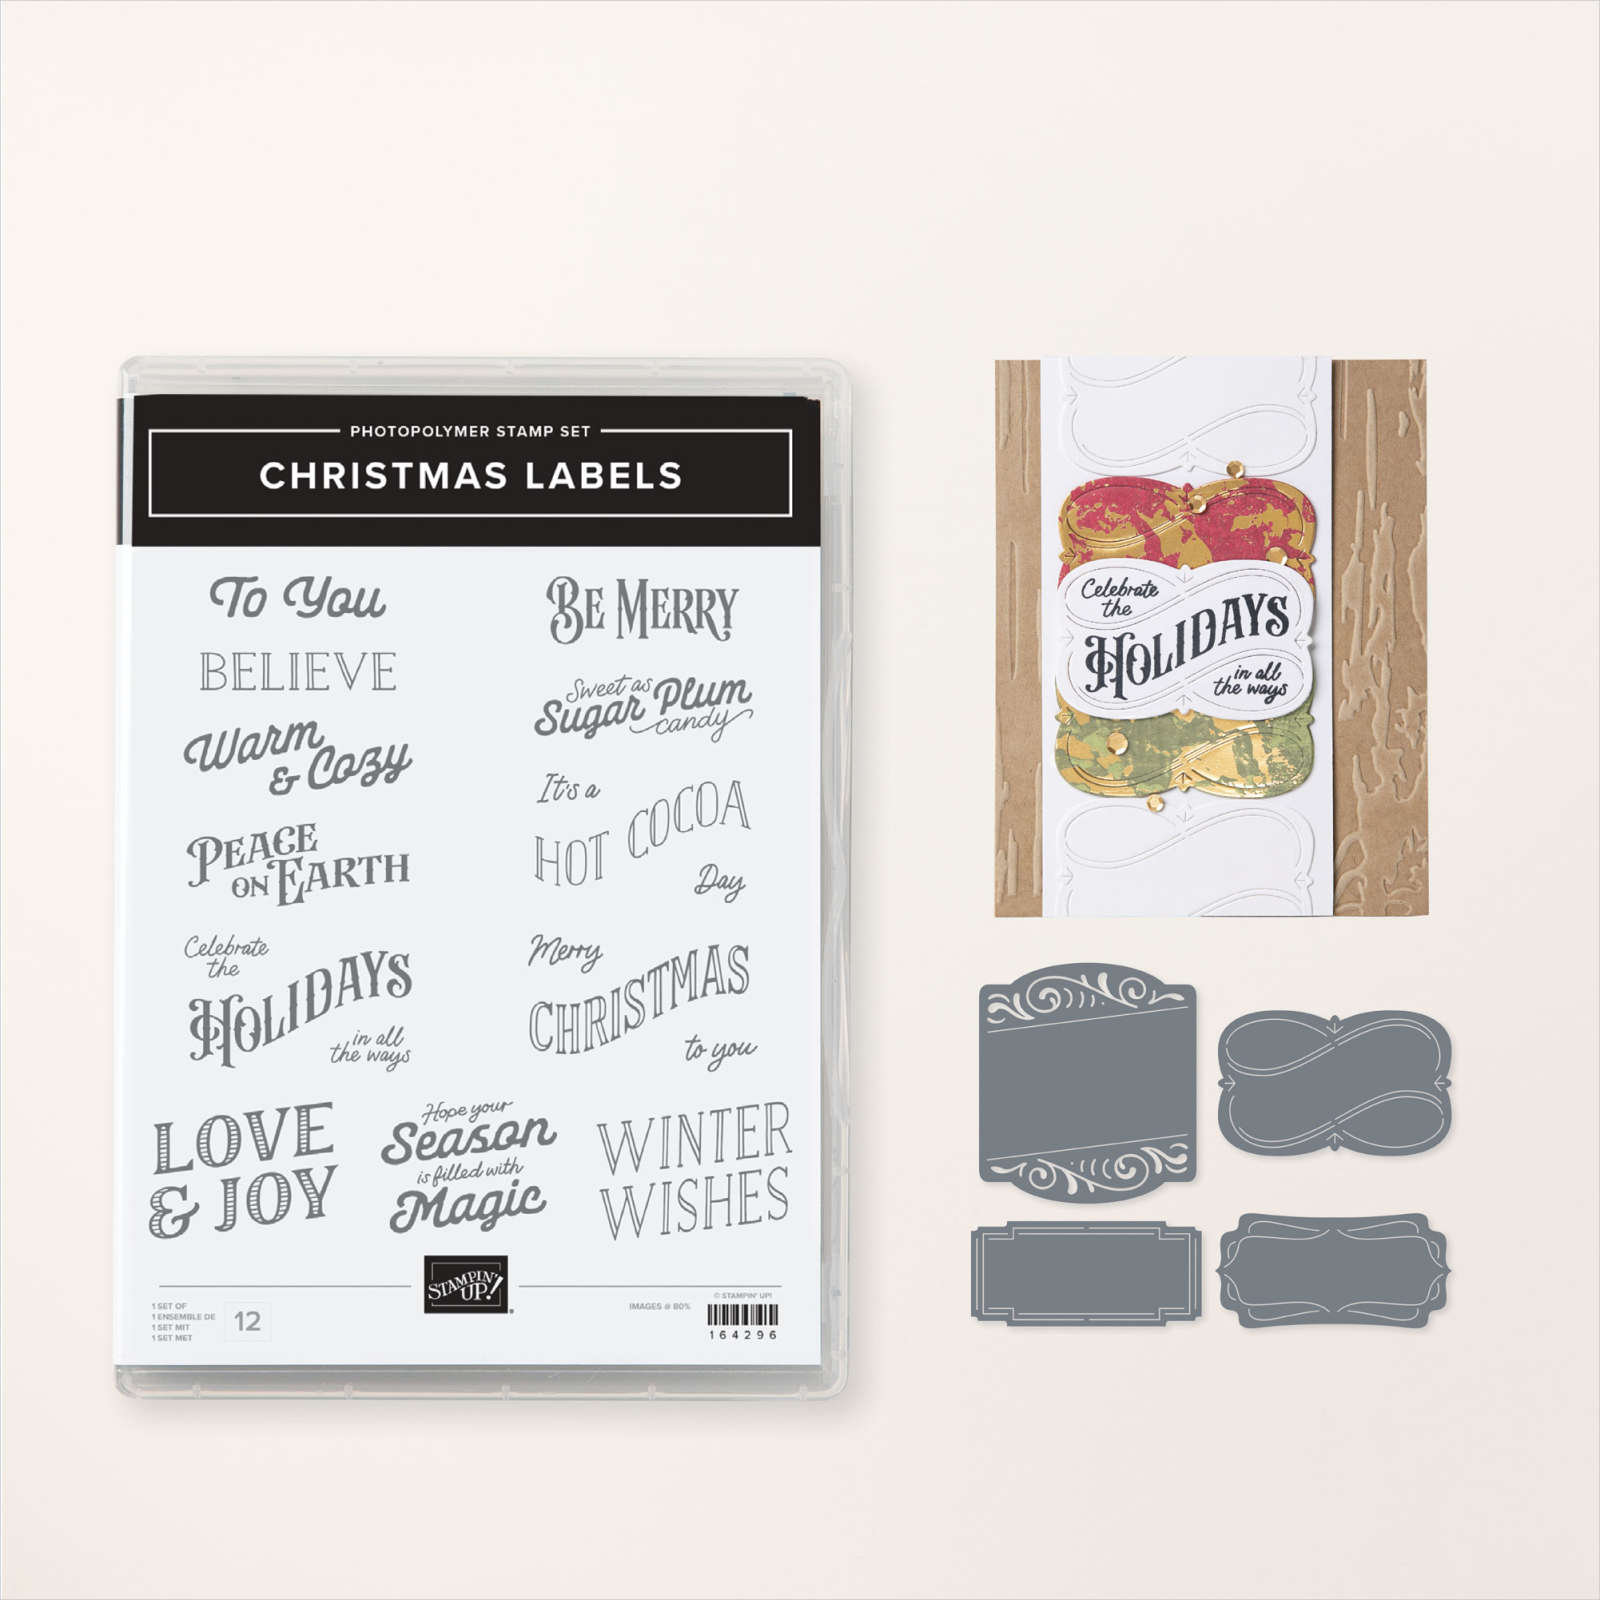
Perhaps it’s the reader in me, but I am a typophile (someone who appreciates a pretty FONT). Stampin’ Up! combined lovely label dies with the gorgeous typography in the Christmas Labels stamp set, and it was a must-have BUNDLE for me.

The way a label can elevate a simple card or gift is what I wanted to demonstrate in a video tutorial:

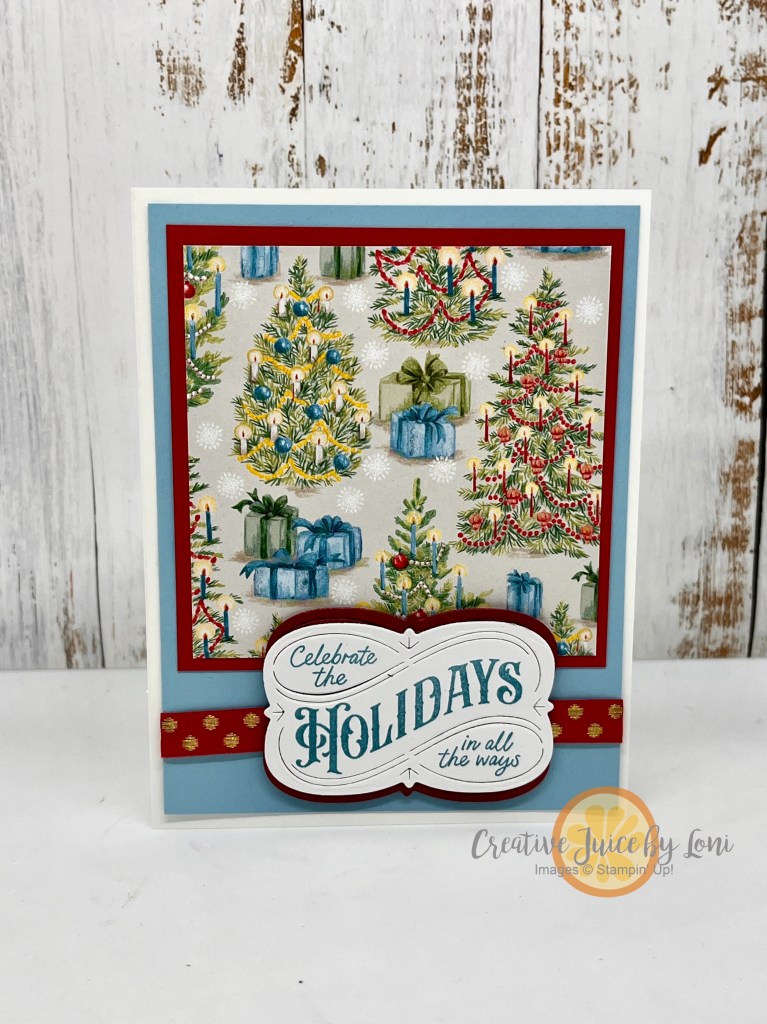
These were the projects made during the video. The first card features the Season of Green & Gold Specialty Designer Series Paper, and the shiny gold accents aren’t as visible in the picture, but can be seen in the video:

Next is another simple card layout spotlighting a piece of the Sentimental Christmas Designer Series Paper, and showed how to create a contrasting matte behind the label by cutting a second label in half:

I’m sharing easy cards to encourage you to keep your holiday crafting attainable! No need to overthink it, or add stress.

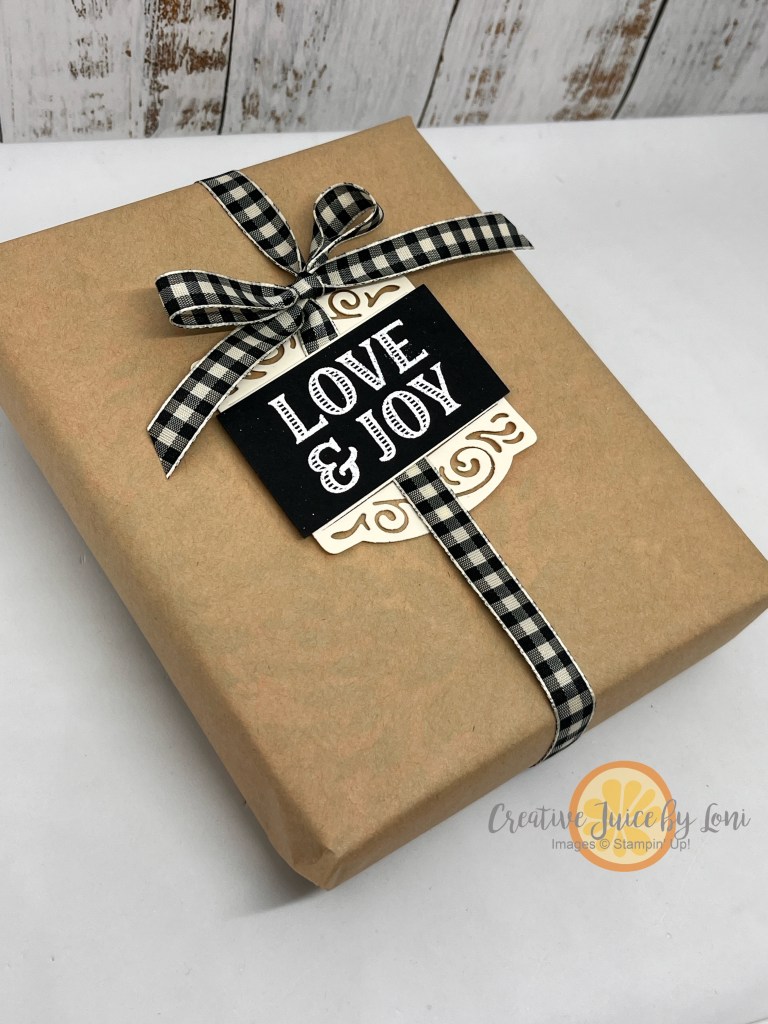
Layer a color over the center of the larger label for a striking contrast, add a coordinating ribbon and the tag makes a basic box beautiful:

When bundles (stamps + dies -OR- stamps + punches) are introduced to my Stampin’ Store, they are 10% off the price of purchasing each product individually. CLARIFICATION: In the video, we thought the Christmas Label bundle and Christmas DSP would be in Seasonal Sale that begins tomorrow (11/13/24), however we learned that only bundles and patterned paper in the Annual catalog are included in the Seasonal sale, along with most ink and card stock:

Christmas Ornament on a Card

Each Monday, I think about what I can create to serve you, my crafting community. It wouldn’t be lying to say sometimes I loose sleep over it! But I count it as a blessing to bring you inspiration, so I took the opportunity to figure out a Christmas Card that would also have an ornament to hang on the tree because I know that things may be tight for some folks right now, and this pretty card + gift is a thoughtful way to share some light this season with friends and neighbors without breaking the bank.

The card is very simple: A 8.5″ x 5.5″ Wild Wheat card base with a 3.5″ x 4.75″ Pool Party stamped layer on top of a 3.75″ x 5″ Real Red layer.

Thick white card stock is needed for the banner at the top, but as I explained in the video tutorial (below), you can also cut out two banners and glue them together for more stability. I only added dimensionals to the left side, so you can slide the ornament off the right side. Remember to slide the card into the envelope fold-first, so when the recipient pulls it out, the ornament comes with it!

Embossing the angel image makes coloring with Stampin’ Blends (or watercolors) really easy to stay inside the lines, because they are raised! Plus, the gold makes it look LUXE! I left the angel’s dress white and just added Wink of Stella for a subtle shimmer.

Watch the video tutorial, then I would appreciate you ordering any of the supplies you need from my Stampin’ Store, if this inspired you to make some!

Good news if you are finding this soon after it’s posted: The Seasonal Sale begins tomorrow, Tuesday, November 14th, 2023 and ends on 11/16/23 at 11:59 PM MST.

The SEASONAL SALE includes:

  • 10% off ribbons and trims.
  • 15% off inks, including pads, refills, markers, and Blends. Bundles are not included.
  • 20% off papers, including cardstock, specialty paper, and Designer Series Paper.

Shop online to see the full selection of discounted products. Discounts are automatically applied when sale items are added to any order, including Starter Kits.

Product List