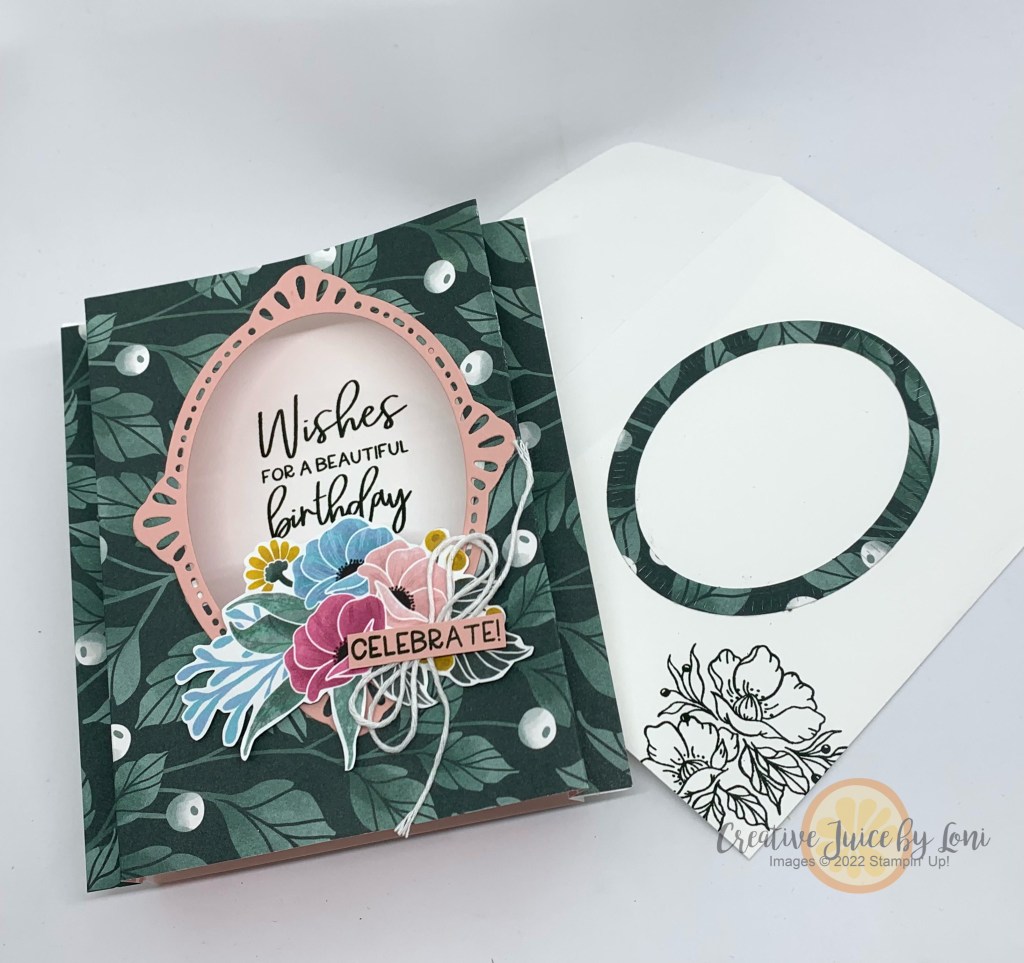
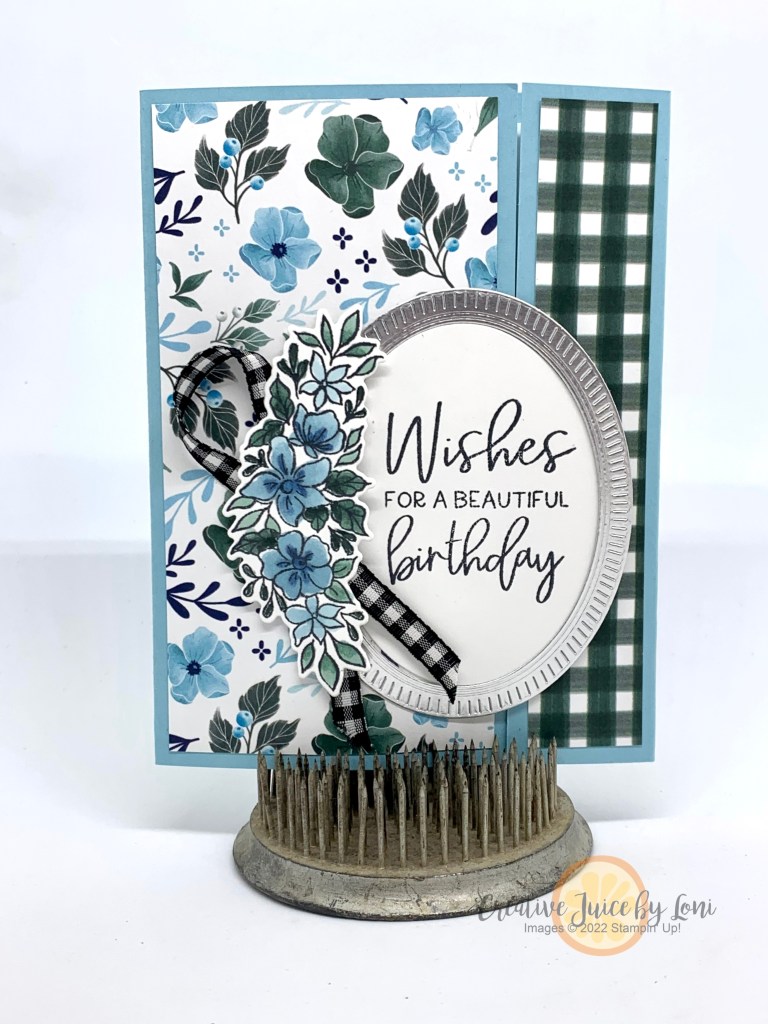
When you want to mail something a bit fancier than a regular birthday card, try this very versatile design: It folds flat to fit into an envelope, but pops open to stand up and the frame makes it feel like a piece of art:
It’s simple to create and I made the video to help you step-by-step:
Just push in the folded sides to slide it into an envelope:
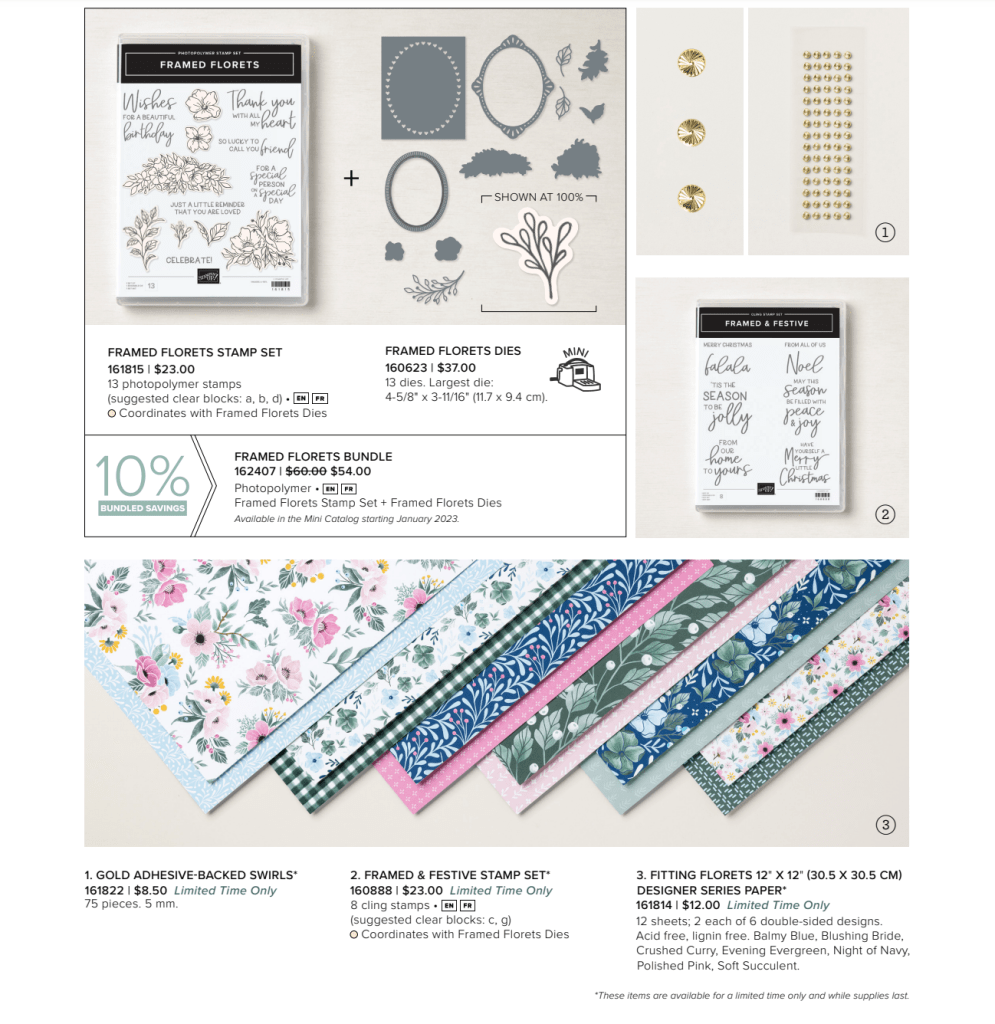
While the Framed Florets bundle (stamps and dies) are also in the Stampin’ Up! 2023 January-April Mini Catalog which goes live for customers on January 5th, THE BEAUTIFUL Designer Series Paper is a preview exclusive only through January 4th, so DON’T MISS IT.
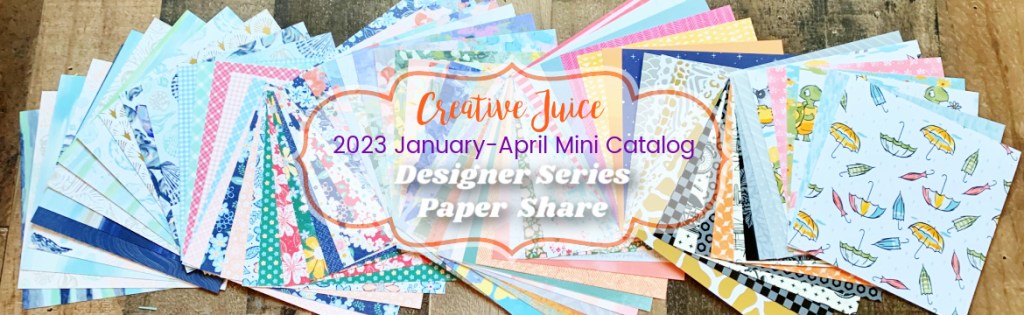
When it’s too difficult to choose only ONE, choose them ALL!
For all my paper-addict friends and customers, I’ve got you covered with a 6″ x 6″ piece of EVERY Designer Series Paper in the Stampin’ Up! 2023 January-April Mini catalog (excluding Host paper and Shimmer Paper): That’s 83 different pieces of pretty patterned paper, including specialty and vellum. You’ll get a piece of every paper from these new paper collections:
By the Bay
Country Floral Lane
Country Gingham
Delicate Desert
Dry Brushed Metallic Specialty
Enjoy the Journey
Fancy Flora
Like an Animal Specialty
Rain or Shine Specialty
Ready to Ride Specialty
Regency Park
Vellum Basics Specialty
ONE SET (or share) is just $30 (if you pick it up from me in Hurricane, UT) or $36 shipped to you!
To reserve your Paper Share, click the button below BEFORE JANUARY 5th and follow through the form to finalize payment:
You’ll have such a marvelous time in your creative space using all the paper, and I look forward to hearing which set is your FAVORITE, Post your paper creations in the Creative Juice Crafters Corner Facebook group so we can see how you used it.
Do you ever get overwhelmed with all the options in your craft room? This quote, which I heard on a podcast recently, really resonated with me, and for crafters, it’s GOOD ADVICE:
“Creativity THRIVES on LIMITATIONS” – Sarah Jane Wright
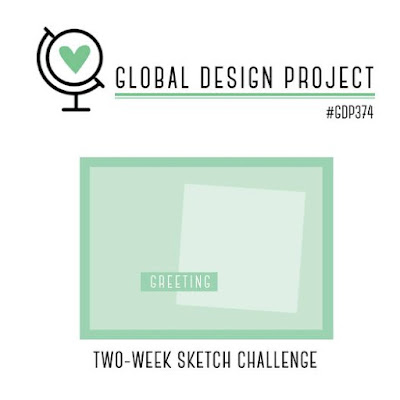
It got me thinking about what helps me to be creative, and she was correct: When I have parameters to work within, I’m always more productive and imaginative! For instance, a card sketch is a limitation:
A sketch constrains you to stay within the prescribed boundaries, with a few options for making it your own, as I did by twisting the background for the Global Design Project sketch #gdp374 a bit for my card:
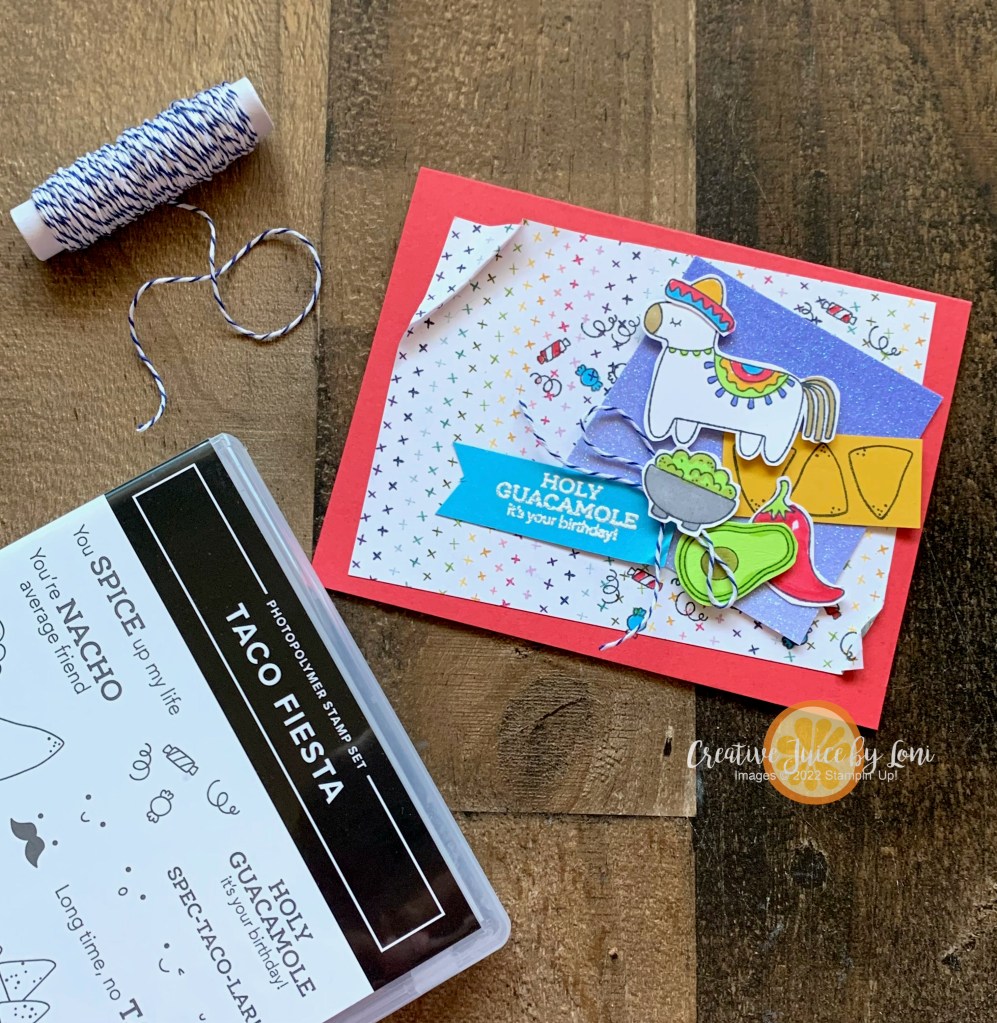
I also “limited” myself to (mostly) the 2022-2024 In Colors as my color palette. It seemed the best choice for a FIESTA!
I “sprinkled” the images from the Taco Fiesta stamp set (item #167032, available 1/5/2023) across the glimmer paper 2-3/4″ square to capture the feeling of a party (with chips & guac). You can watch the creation of the card in my video replay:
Did you miss the opportunity to get the coordinating dies for This Birthday Piggy, Yeti to Party or Apple Harvest stamp set?
Are you a savvy shopper and love stocking up for next year early?
TODAY IS YOUR DAY!
New items have been added to the CLEARANCE RACK **and** the Last Chance list from the July-December catalog is up, with many holiday items on sale up to 60% off. This is not the time to dilly-dally, because when they are gone, they are gone.
I’ll be sharing some projects on social media all day (follow me on FB & Insta), but just for you here, this is a big tag I created a few months ago to go on the dishwasher we replaced for my Mother-in-Love for her birthday & Christmas gift…and if you know Launa, you know she love PIGS and I love having dies to cut out the images from “This Birthday Piggy” stamp set:
I forgot to take a picture of the finished tag on the dishwasher, so all you get is the video!
These coordinating dies will go fast, along with Designer Series Paper and embellishments from the current mini catalog that are deeply discounted, so fill your cart and craft for Christmas.
It’s jolly good fun to wander through the aisles of Dollar Tree and imagine ways to use some of the festive treasures they carry as home decor or gifts! When I saw these cute little packages of 3 Cherry Cordials (which evoke Christmas memories from my childhood), I remembered my Stampin’ Up! Cherry Builder punch and the creative juice started flowing…
It was KISMET that I found the perfect sentiment in the Framed & Festive Limited Edition stamp set, and the idea was taking shape! In fact, I created this simple “dress up” project in my Monday Live video, which you can watch quickly here:
You can alter the design just a bit and put it on a larger box of Cordial Cherries, as well:
PSSST…tomorrow (December 1st) is the beginning of our LAST CHANCE sale on items from the July-December mini catalog (along with NEW things added to the clearance rack) and the Painted Christmas Designer Series Paper that I used on the small cherry boxes will be on sale for 60% off, while supplies last, so set an alarm to shop the sale early!
Giving a gift card makes everyone happy: It’s easy for you to buy, and the recipient gets to choose what they want. But if it seems “impersonal”, the New at SU! design team is here to show you how to make gifting (and getting) a gift card EXCITING!
This Birthday Piggy is scooting in on a gift box that doesn’t even hint at what’s inside:
It’s a charming surprise when you open the box and a gift card pops up:
Don’t worry…it’s a simple box to make and the mechanism is a piece of (birthday) cake! Let me show you how:
This is my fancy project sketch and dimensions (bold lines are where you will cut). It may help as you follow along with the video tutorial (feel free to pause the video as you learn). You can get both pieces from one sheet of 8.5″ x 11″ card stock.
Once your box is assembled and decorated, simply attach your gift card to the front panel of the pop-up piece using a few glue dots!
I’ll list the supplies below and am happy to serve you if you are in the U.S. and don’t have a demonstrator. Now make sure you hop along to see the other clever gift card holders our International creative team are sharing…click a link below:
IF GIFT CARDS ARE YOUR JAM, DON’T MISS SUBSCRIBING FOR THE DECEMBER PAPER PUMPKIN KIT!
Create fun gift card holders to help you celebrate your special occasions all year long! Personalize each gift with these reversible boxes and paper bands for a unique design every time. This kit includes:
Good Things Come in Small Packages Photopolymer Stamp Set
Garden Green Classic Stampin’ Spot
16 gift card holders: 2 each of 8 reversible designs
Precut paper pieces, twine, and belly bands to customize all your crafts.
Enough adhesive for each project!
Finished box size: 3-5/8″ x 2-1/2″ x 1/2″
Coordinating Stampin’ Up! colors for the December Kit: Balmy Blue, Basic Gray, Blushing Bride, Calypso Coral, Crushed Curry, Garden Green, Tahitian Tide
Plus, you can take your crafting even further with a special add-on: Give a gift card box and a personalized card with the Good Things Cards & Envelopes add-on. You get 20 cards (5 each of 4 designs) and 20 coordinating envelopes…while supplies last!
Have you ever wished you had a card on hand to lift the spirits of a friend? If you answered yes, let this one be the one you always have in your box!
These remind me of the “In case of emergency, break glass” cases: Sometimes acting like a grown up is difficult, and we all know CHOCOLATE helps. So you may need to break one of these open at any moment.
The cards are also the SWAPS I made for Stampin’ Up! OnStage Local. I’m headed to Anaheim this weekend for our annual convention (OnStage) and demonstrators always swap cards at events; make multiples of the same card and trade with other demonstrators so you have a wide variety of samples to inspire you when you get home!
Though they are simple, they are certainly SWEET!
Stamp a stack to keep in stock, but don’t eat all the chocolate! Here’s what you’ll need:
Starting TODAY, the Fitting Florets Collection (a pre-release from Stampin’ Up!’s 2023 January-June Mini Catalog) is ready to add to cart – with some of the limited time products only available while supplies last! The BUNDLE will be available through June 2023, but you’ll want to get the whole collection ASAP to use through the holiday season.
To make this fold, you need a piece of 8.5″ x 5.5″ card stock and score at 3″ and 7.25″ along the longer side with the Simple Scored board (or your paper trimmer and scoring blade). Layer on a piece of 5.25″ x 2.75″ Fitting Florets Designer Series Paper (available only while supplies last) on the front left side of card and a 1″ x 5.25″ piece on the front right flap.
The Framed & Festive stamp set could be combined with ANY Christmas paper, stamps and accessories and the font makes is playful and perfect.
One way to play with this new collection will be to attend the Christmas Card Class THIS SATURDAY, November 5th at 3 pm in Hurricane, Utah:
You’ll create 8 gorgeous greeting cards for the holiday (2 each of 4 different designs, including envelopes) for just $20, and one of the cards is designed with the Fitting Florets collection. Remember to bring scissors and adhesive, but if you forget or need more, we’ll have both scissors & adhesive + refills available for purchase at the class.
Reserve your spot by November 2nd by clicking the button below, or send Venmo to Loni-Spendlove
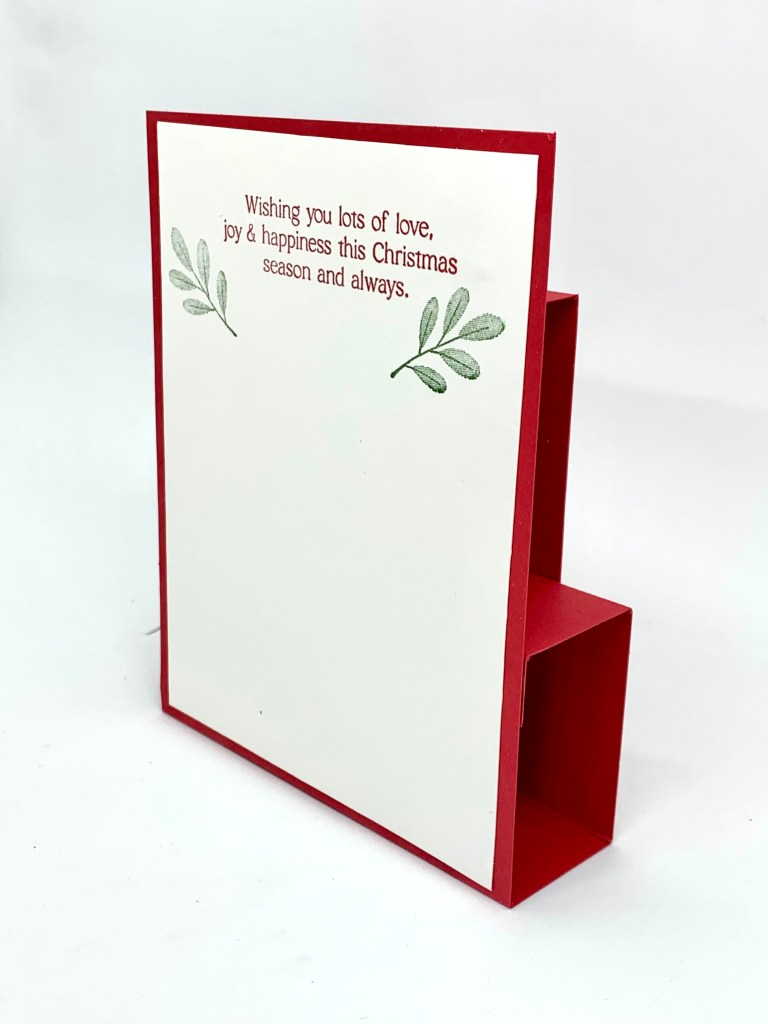
Here’s a taste of Christmas Cheer in greeting-card form, and while it stands up to display, it folds FLAT to mail!
Crafters at the Kane County Crafter’s Convention also made this card using the Sweet Candy Cane suite last weekend. It’s one of my favorite fancy folds, and it’s easier to make than you would imagine! Here’s how:
For the card base, you’ll need:
10.5″ x 4.25″ Real Red card stock, scored at 1/2″, 1.75″, 3.75″ and 5″
5.5″ x 3″ Real Red card stock, scored at 1/2″ and 1.75″
4″ x 5.25″ Pool Party card stock: Die cut stripe background from the center of this piece
4″ x 1.75″ piece of Sweetest Christmas Designer Series Paper
3.5″ x 2.75″ Pool Party card stock (optional: emboss with Wintry 3D embossing folder)
5.5″ x 4.25″ Basic White: Stamp candy canes, leaves and sentiment, cut out with coordinating dies
4″ x 5.25″ Basic White for back of card, where you can write a message when sending
Do you say “I’m sorry” too much? Women are the worst at apologizing, even when we haven’t done anything wrong!
I’m working on replacing “Sorry” with “Thank You” and had the opportunity to practice on Sunday when my husband was waiting for to go to church while I finished handouts for my primary class. When I was done (we weren’t late), I said “Thank You for your patience!” instead of ”Sorry to make you wait” and he was more gracious about the wait.
Of course, an apology when I HAVE done something wrong is appropriate, but when I can use THANK YOU instead, it feels more validating for both parties: “Thank you for listening” rather than “I’m sorry I’ve been talking so much”!
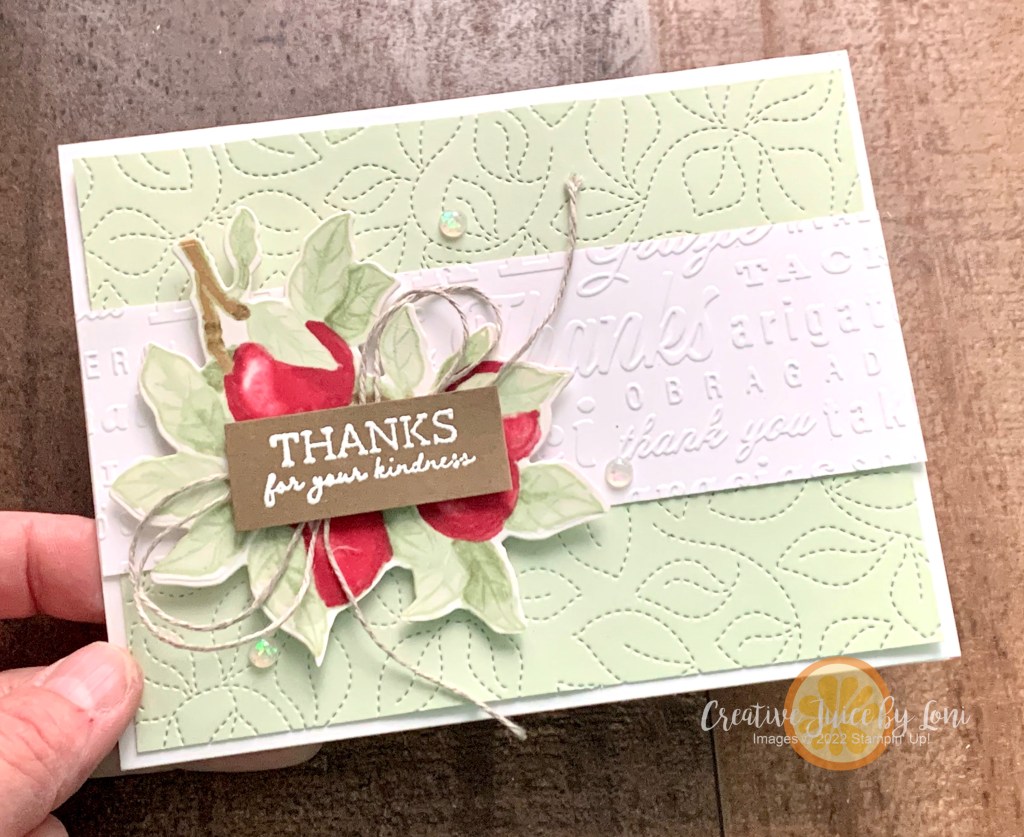
My card today is one I can use when someone has sacrificed their time to help me (and I have a friend in mind)…so instead of saying “Sorry I took your time” I can express my appreciation for their assistance!
It’s also a #multicrafting project: I used the Global Design Project sketch #gdp366 , the Apple Harvest stamp set to participate in the Stampin’ Through the Catalog challenge on Instagram and the colors Soft Sea Foam and Cherry Cobbler so I could share it for a Red & Green creative challenge I gave my Sprinkled Ink team.
Speaking of my team…there are just a few days left to take advantage of the Starter Kit+ promotion…just in time to buy your Christmas gifts from yourself as a demonstrator, or jump start a business to earn extra during the holidays 🎁
It’s a risk-free opportunity to join my Sprinkled Ink team and see if your passion for rubber stamps, ink and paper could also be your purpose! Click here to get $30 extra in your starter kit (already an awesome value) and see if you like being a demonstrator.


")
 Designer Series Paper")
 Cardstock")


 Designer Series Paper")
 Glimmer Paper")


")


")


 Designer Series Paper")
 Metallic Woven Ribbon")


")


 Designer Series Paper")


")


 Host Designer Series Paper")
 Sheer Ribbon")
 Soft Polyester Ribbon")


")
 Designer Series Paper")


")


