
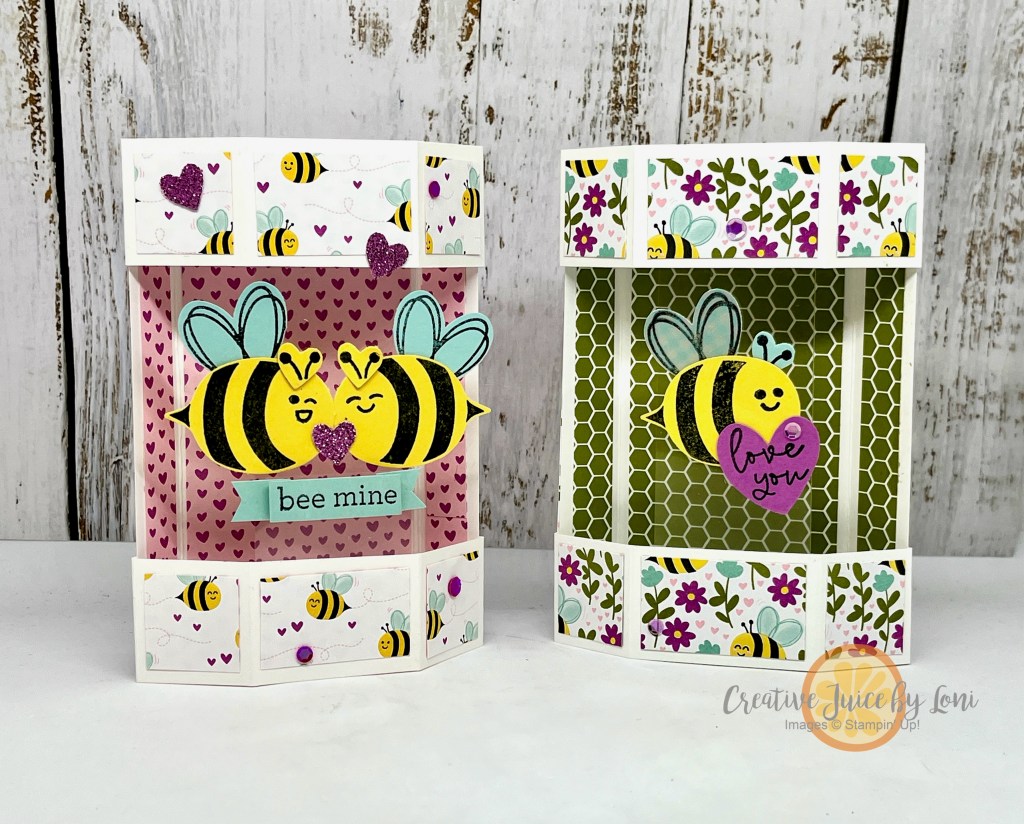
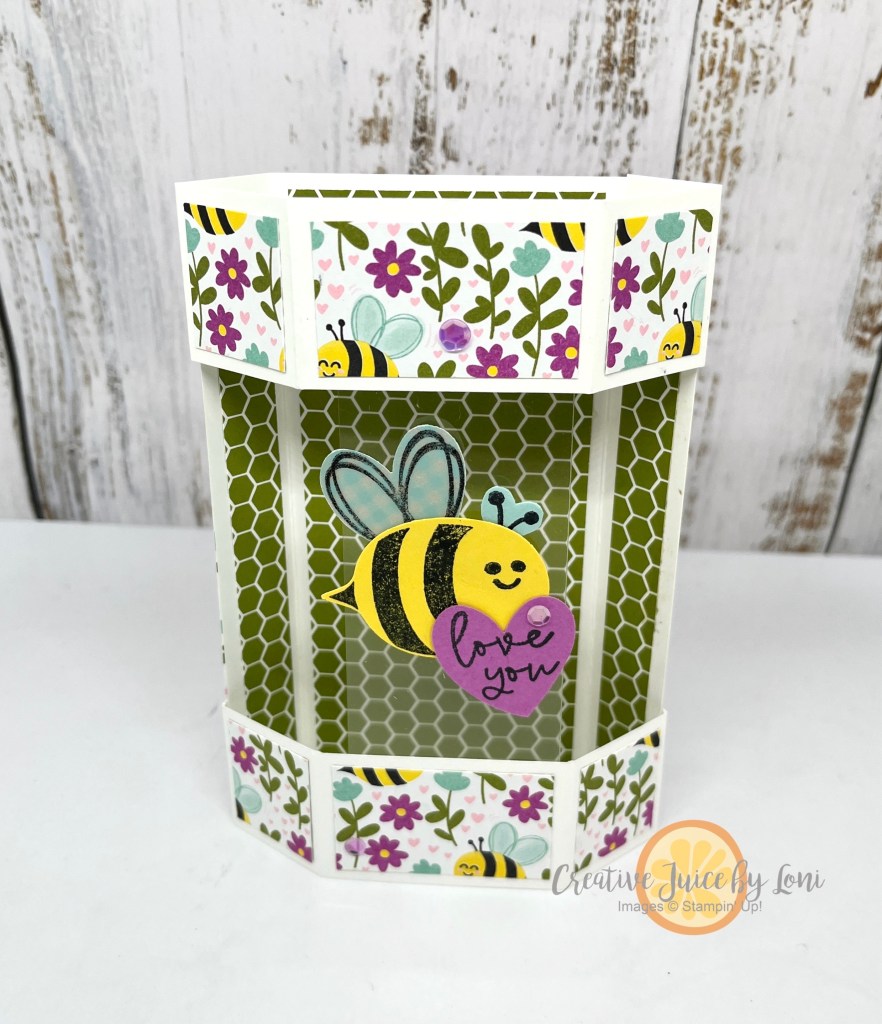
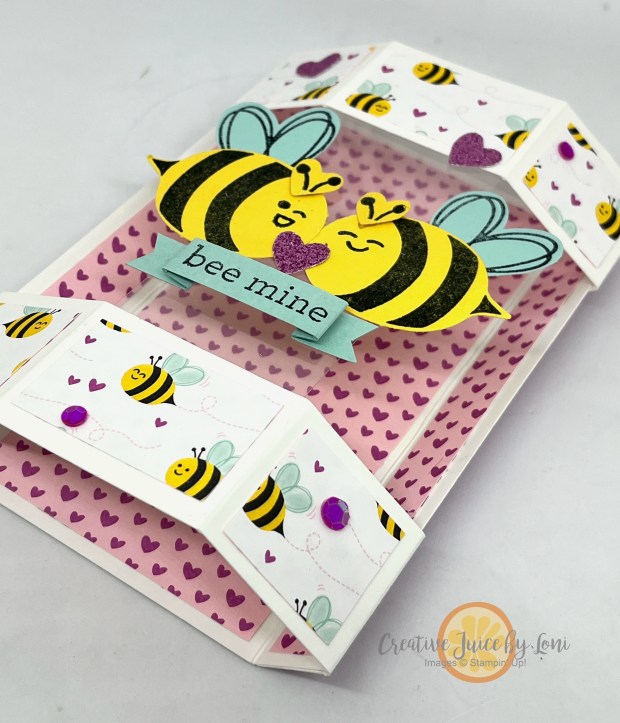
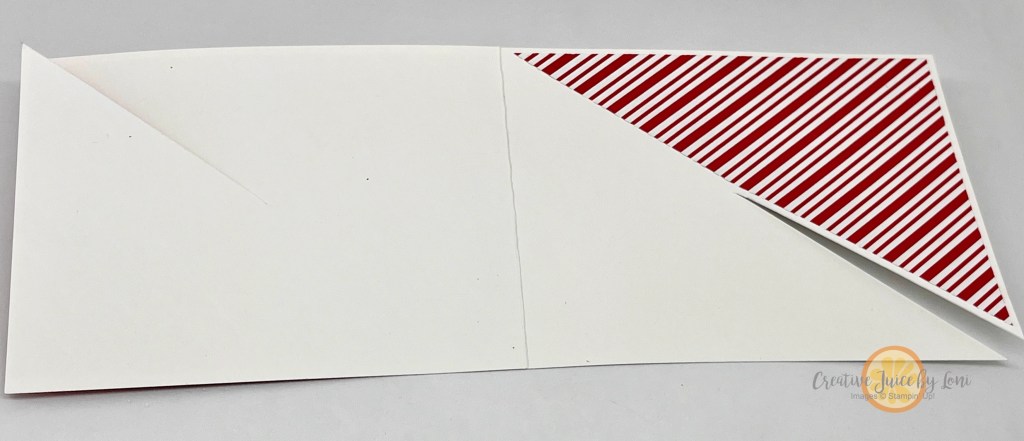
Opening an envelope to have a card pop out with a happy hello is enchanting, so when thinking of a fun-fold to feature for Live Crafting with the Stampin’ Up! Terrific Toadstool bundle (stamps & punch), this front-step pop-up card “popped” to mind!

One thing to QUICKLY NOTE: The Toadstool Gardens Designer Series Paper is a Stampin’ Up! Sale-a-Bration 2025 freebie (one you may choose with a $60 order), but is only available until February 28, 2025…so don’t hesitate to collect it!!
For pop-up cards, this is one of the easiest to make and I’ll walk you through it in this video:
Quick dimensions & measurements:
CARD BASE:
- Card Stock: 11″ x 4-1/4″ scored at 1″, 2-1/4″, 4-1/4″ and 5-1/2″ along long side
- Two pieces of Designer Series Paper: 4″ x 5-1/4″ for background and 4″ x 1-3/4″ for bottom front panel.
POP UP PIECE:
- Card stock: 3″ x 5-1/2″ scored at 1/2″ and 1- 3/4″
- Designer Series Paper: 2-3/4″ x 3-1/2″
Create a place to write your message on the back of the card, then it folds up to fit inside an envelope:


When you shop with a Stampin’ Up! demonstrator like me, you’ll gain a crafty coach and friend! I love sending thank you cards to my customers and when your order is over $50 this month, you’ll also receive a tutorial bundle via email with 38 incredible tutorials to try in your own craft room!

CLICK TO ADD SUPPLIES TO CART:
Product List")
 Designer Series Paper")


![Bee My Valentine Photopolymer Stamp Set (English) [ 162547 ]](https://assets1.tamsnetwork.com/images/EC042017NF/162547s.jpg "Bee My Valentine Photopolymer Stamp Set (English) [ 162547 ]")
![Bee Builder Punch [ 162553 ]](https://assets1.tamsnetwork.com/images/EC042017NF/162553s.jpg "Bee Builder Punch [ 162553 ]")
![Cute As Can Bee 12" X 12" (30.5 X 30.5 Cm) Designer Series Paper [ 166621 ]](https://assets1.tamsnetwork.com/images/EC042017NF/166621s.jpg "Cute As Can Bee 12\" X 12\" (30.5 X 30.5 Cm) Designer Series Paper [ 166621 ]")
![Floral & Gingham Vellum 12" X 12" (30.5 X 30.5 Cm) Specialty Designer Series Paper [ 164713 ]](https://assets1.tamsnetwork.com/images/EC042017NF/164713s.jpg "Floral & Gingham Vellum 12\" X 12\" (30.5 X 30.5 Cm) Specialty Designer Series Paper [ 164713 ]")
![2024–2026 In Color™ Glimmer 12" X 12" (30.5 X 30.5 Cm) Specialty Paper [ 163771 ]](https://assets1.tamsnetwork.com/images/EC042017NF/163771s.jpg "2024–2026 In Color™ Glimmer 12\" X 12\" (30.5 X 30.5 Cm) Specialty Paper [ 163771 ]")
![Basic White 8 1/2" X 11" Thick Cardstock [ 159229 ]](https://assets1.tamsnetwork.com/images/EC042017NF/159229s.jpg "Basic White 8 1/2\" X 11\" Thick Cardstock [ 159229 ]")
![Daffodil Delight 8-1/2" X 11" Cardstock [ 119683 ]](https://assets1.tamsnetwork.com/images/EC042017NF/119683s.jpg "Daffodil Delight 8-1/2\" X 11\" Cardstock [ 119683 ]")
![Pool Party 8-1/2" X 11" Cardstock [ 122924 ]](https://assets1.tamsnetwork.com/images/EC042017NF/122924s.jpg "Pool Party 8-1/2\" X 11\" Cardstock [ 122924 ]")
![Petunia Pop 8 1/2" X 11" Cardstock [ 163801 ]](https://assets1.tamsnetwork.com/images/EC042017NF/163801s.jpg "Petunia Pop 8 1/2\" X 11\" Cardstock [ 163801 ]")
![Window Sheets [ 142314 ]](https://assets1.tamsnetwork.com/images/EC042017NF/142314s.jpg "Window Sheets [ 142314 ]")
![Mini Glue Dots [ 103683 ]](https://assets1.tamsnetwork.com/images/EC042017NF/103683s.jpg "Mini Glue Dots [ 103683 ]")
![Paper Trimmer [ 152392 ]](https://assets1.tamsnetwork.com/images/EC042017NF/152392s.jpg "Paper Trimmer [ 152392 ]")
![Tear & Tape Adhesive [ 154031 ]](https://assets1.tamsnetwork.com/images/EC042017NF/154031s.jpg "Tear & Tape Adhesive [ 154031 ]")
![Tuxedo Black Memento Ink Pad [ 132708 ]](https://assets1.tamsnetwork.com/images/EC042017NF/132708s.jpg "Tuxedo Black Memento Ink Pad [ 132708 ]")
![Petunia Pop Classic Stampin Pad [ 163811 ]](https://assets1.tamsnetwork.com/images/EC042017NF/163811s.jpg "Petunia Pop Classic Stampin Pad [ 163811 ]")

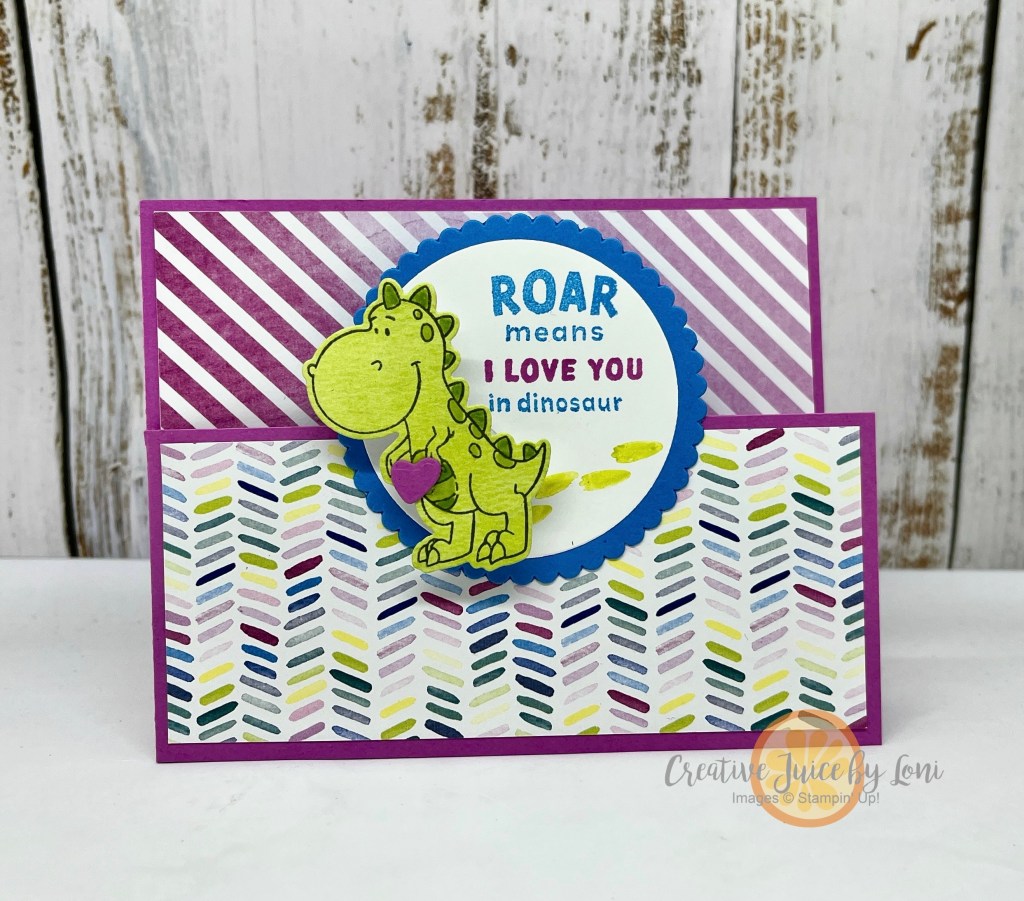


![Darling Dinos Bundle (English) [ 164735 ]](https://assets1.tamsnetwork.com/images/EC042017NF/164735s.jpg "Darling Dinos Bundle (English) [ 164735 ]")
![Bright & Beautiful 6" X 6" (15.2 X 15.2 Cm) Designer Series Paper [ 161449 ]](https://assets1.tamsnetwork.com/images/EC042017NF/161449s.jpg "Bright & Beautiful 6\" X 6\" (15.2 X 15.2 Cm) Designer Series Paper [ 161449 ]")
![Azure Afternoon 8 1/2" X 11" Cardstock [ 161719 ]](https://assets1.tamsnetwork.com/images/EC042017NF/161719s.jpg "Azure Afternoon 8 1/2\" X 11\" Cardstock [ 161719 ]")
![Azure Afternoon Classic Stampin' Pad [ 161663 ]](https://assets1.tamsnetwork.com/images/EC042017NF/161663s.jpg "Azure Afternoon Classic Stampin' Pad [ 161663 ]")
![Brights Stampin' Write Markers [ 161696 ]](https://assets1.tamsnetwork.com/images/EC042017NF/161696s.jpg "Brights Stampin' Write Markers [ 161696 ]")
![Mini Stampin' Cut & Emboss Machine [ 150673 ]](https://assets1.tamsnetwork.com/images/EC042017NF/150673s.jpg "Mini Stampin' Cut & Emboss Machine [ 150673 ]")
![Pumpkin Pie 8-1/2" X 11" Cardstock [ 105117 ]](https://assets1.tamsnetwork.com/images/EC042017NF/105117s.jpg "Pumpkin Pie 8-1/2\" X 11\" Cardstock [ 105117 ]")
![Granny Apple Green 8-1/2" X 11" Cardstock [ 146990 ]](https://assets1.tamsnetwork.com/images/EC042017NF/146990s.jpg "Granny Apple Green 8-1/2\" X 11\" Cardstock [ 146990 ]")
![2 3/8" (6 Cm) Circle Punch [ 161354 ]](https://assets1.tamsnetwork.com/images/EC042017NF/161354s.jpg "2 3/8\" (6 Cm) Circle Punch [ 161354 ]")


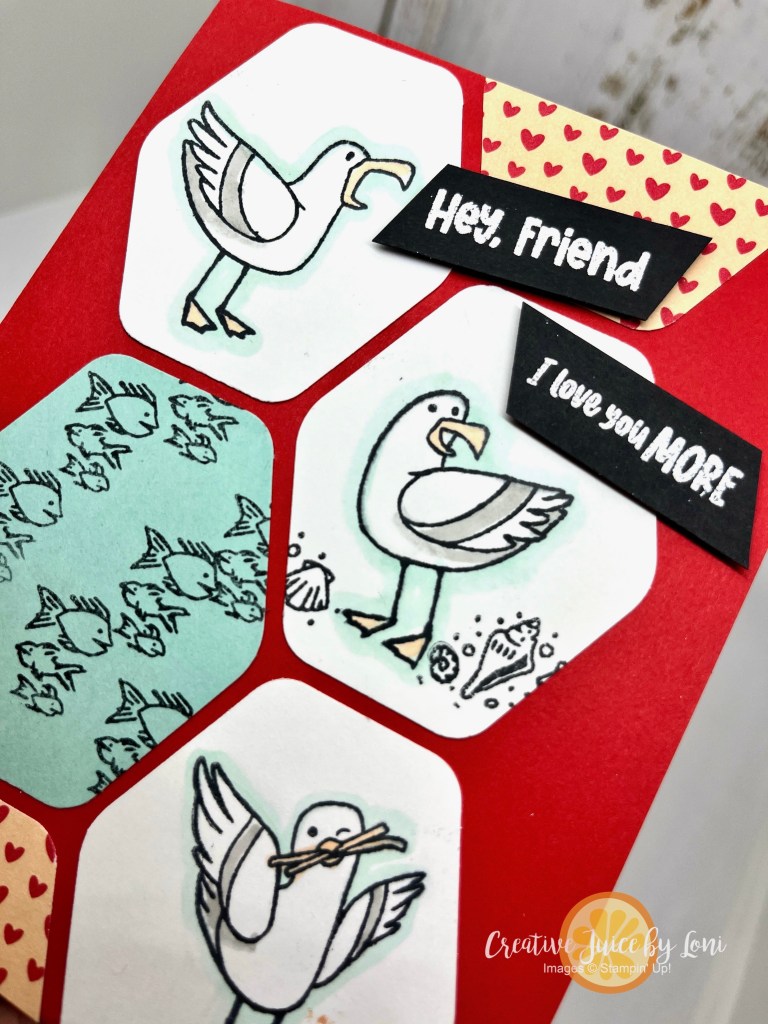

![Friendly Seagulls Photopolymer Stamp Set (English) [ 164961 ]](https://assets1.tamsnetwork.com/images/EC042017NF/164961s.jpg "Friendly Seagulls Photopolymer Stamp Set (English) [ 164961 ]")
![Poppy Parade 8-1/2" X 11" Cardstock [ 119793 ]](https://assets1.tamsnetwork.com/images/EC042017NF/119793s.jpg "Poppy Parade 8-1/2\" X 11\" Cardstock [ 119793 ]")
![Subtles Stampin' Write Markers [ 147156 ]](https://assets1.tamsnetwork.com/images/EC042017NF/147156s.jpg "Subtles Stampin' Write Markers [ 147156 ]")
![Pool Party Stampin' Blends Combo Pack [ 154894 ]](https://assets1.tamsnetwork.com/images/EC042017NF/154894s.jpg "Pool Party Stampin' Blends Combo Pack [ 154894 ]")
![Smoky Slate Stampin' Blends Combo Pack [ 154904 ]](https://assets1.tamsnetwork.com/images/EC042017NF/154904s.jpg "Smoky Slate Stampin' Blends Combo Pack [ 154904 ]")
![Stampin' Blends Color Lifter [ 144608 ]](https://assets1.tamsnetwork.com/images/EC042017NF/144608s.jpg "Stampin' Blends Color Lifter [ 144608 ]")
![Heartfelt Hexagon Punch [ 162888 ]](https://assets1.tamsnetwork.com/images/EC042017NF/162888s.jpg "Heartfelt Hexagon Punch [ 162888 ]")
![Basic Black 8-1/2" X 11" Cardstock [ 121045 ]](https://assets1.tamsnetwork.com/images/EC042017NF/121045s.jpg "Basic Black 8-1/2\" X 11\" Cardstock [ 121045 ]")
![Uninked Stampin’ Craft Pad & Whisper White Refill [ 147277 ]](https://assets1.tamsnetwork.com/images/EC042017NF/147277s.jpg "Uninked Stampin’ Craft Pad & Whisper White Refill [ 147277 ]")
![Basics Wow! Embossing Powder [ 165679 ]](https://assets1.tamsnetwork.com/images/EC042017NF/165679s.jpg "Basics Wow! Embossing Powder [ 165679 ]")
![Heat Tool (Us And Canada) [ 129053 ]](https://assets1.tamsnetwork.com/images/EC042017NF/129053s.jpg "Heat Tool (Us And Canada) [ 129053 ]")
![Forever Plaid 3 D Embossing Folder [ 164049 ]](https://assets1.tamsnetwork.com/images/EC042017NF/164049s.jpg "Forever Plaid 3 D Embossing Folder [ 164049 ]")
![Stampin' Cut & Emboss Machine [ 149653 ]](https://assets1.tamsnetwork.com/images/EC042017NF/149653s.jpg "Stampin' Cut & Emboss Machine [ 149653 ]")
![Black Stampin' Dimensionals Combo Pack [ 150893 ]](https://assets1.tamsnetwork.com/images/EC042017NF/150893s.jpg "Black Stampin' Dimensionals Combo Pack [ 150893 ]")


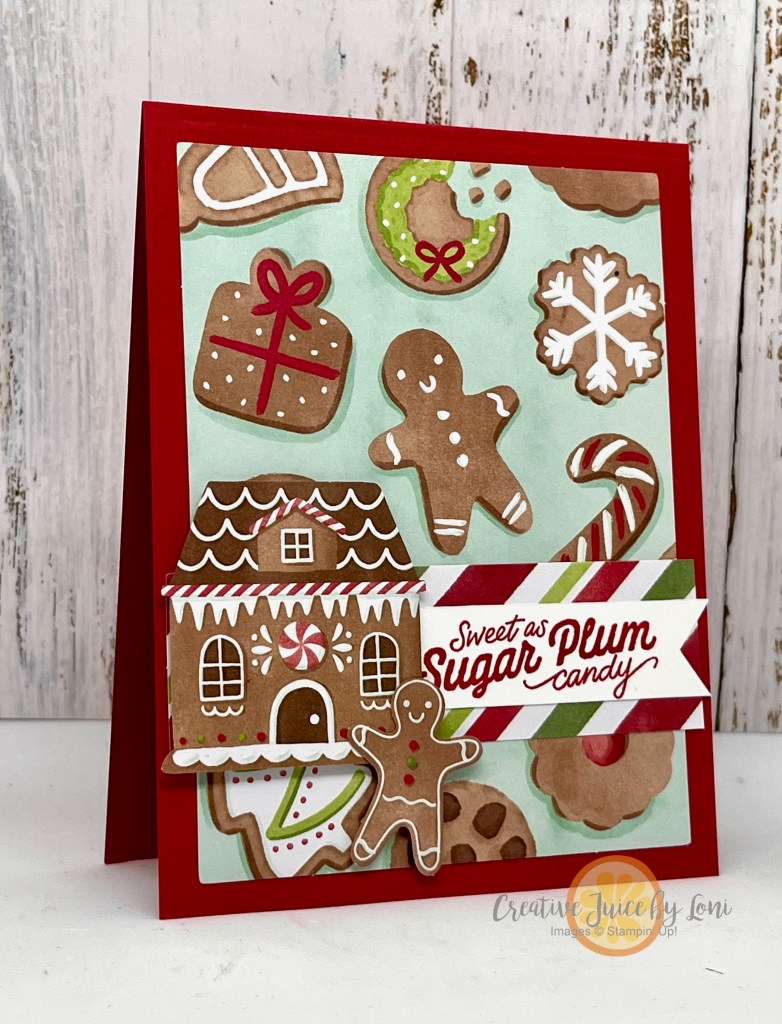


![A Little Bit Festive 12" X 12" (30.5 X 30.5 Cm) Mix & Match Specialty Designer Series Paper [ 164107 ]](https://assets1.tamsnetwork.com/images/EC042017NF/164107s.jpg "A Little Bit Festive 12\" X 12\" (30.5 X 30.5 Cm) Mix & Match Specialty Designer Series Paper [ 164107 ]")
![Real Red 8-1/2" X 11" Cardstock [ 102482 ]](https://assets1.tamsnetwork.com/images/EC042017NF/102482s.jpg "Real Red 8-1/2\" X 11\" Cardstock [ 102482 ]")
![Real Red Classic Stampin' Pad [ 147084 ]](https://assets1.tamsnetwork.com/images/EC042017NF/147084s.jpg "Real Red Classic Stampin' Pad [ 147084 ]")
![Gold Dipped Mix & Match Specialty Cards & Envelopes [ 164108 ]](https://assets1.tamsnetwork.com/images/EC042017NF/164108s.jpg "Gold Dipped Mix & Match Specialty Cards & Envelopes [ 164108 ]")
![Christmas Labels Bundle (English) [ 164101 ]](https://assets1.tamsnetwork.com/images/EC042017NF/164101s.jpg "Christmas Labels Bundle (English) [ 164101 ]")
![Versamark Pad [ 102283 ]](https://assets1.tamsnetwork.com/images/EC042017NF/102283s.jpg "Versamark Pad [ 102283 ]")
![Metallics Wow! Embossing Powder [ 165678 ]](https://assets1.tamsnetwork.com/images/EC042017NF/165678s.jpg "Metallics Wow! Embossing Powder [ 165678 ]")
![Night Of Navy & Gold 1/2" (1.3 Cm) Glittered Ribbon [ 162011 ]](https://assets1.tamsnetwork.com/images/EC042017NF/162011s.jpg "Night Of Navy & Gold 1/2\" (1.3 Cm) Glittered Ribbon [ 162011 ]")


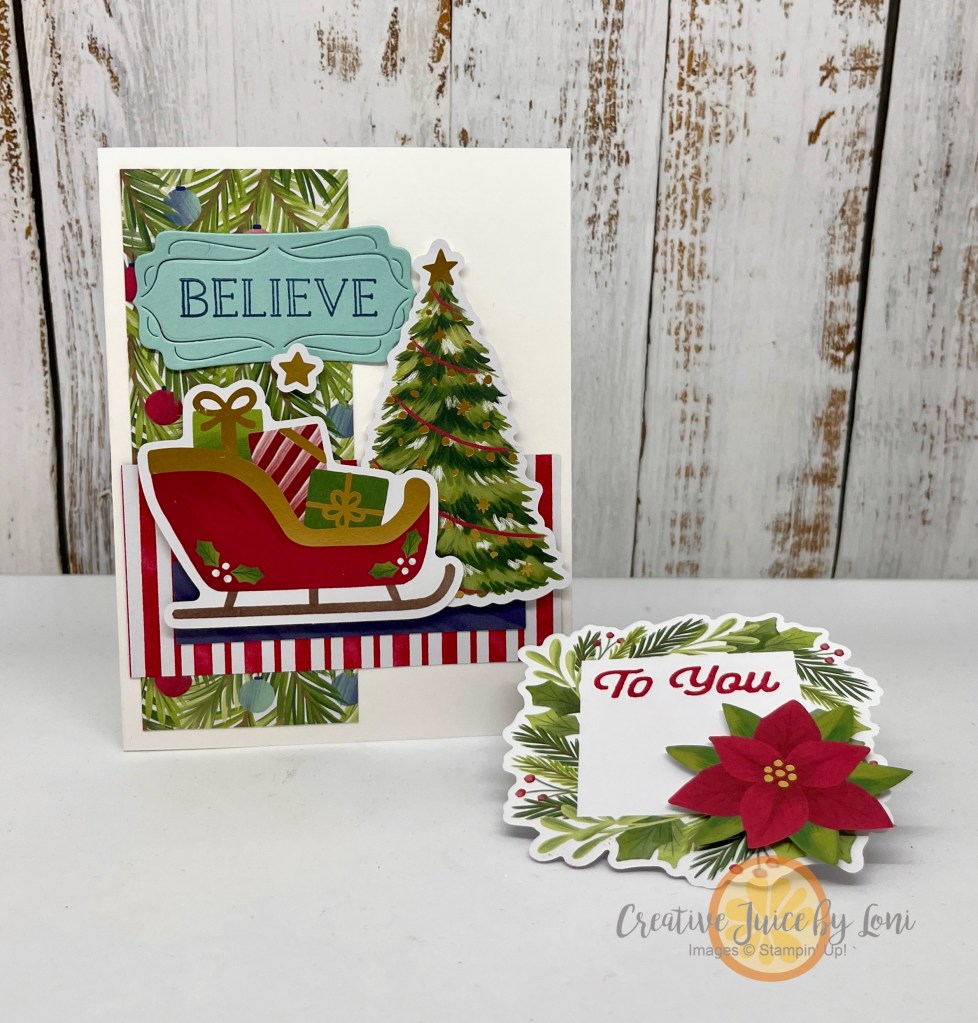
![Winterly Tree Tops Bundle (English) [ 164066 ]](https://assets1.tamsnetwork.com/images/EC042017NF/164066s.jpg "Winterly Tree Tops Bundle (English) [ 164066 ]")
![Nests Of Winter 12" X 12" (30.5 X 30.5 Cm) Designer Series Paper [ 164183 ]](https://assets1.tamsnetwork.com/images/EC042017NF/164183s.jpg "Nests Of Winter 12\" X 12\" (30.5 X 30.5 Cm) Designer Series Paper [ 164183 ]")
![Gray Granite 8-1/2" X 11" Cardstock [ 146983 ]](https://assets1.tamsnetwork.com/images/EC042017NF/146983s.jpg "Gray Granite 8-1/2\" X 11\" Cardstock [ 146983 ]")
![Garden Green 8-1/2" X 11" Cardstock [ 102584 ]](https://assets1.tamsnetwork.com/images/EC042017NF/102584s.jpg "Garden Green 8-1/2\" X 11\" Cardstock [ 102584 ]")
![Garden Green Classic Stampin' Pad [ 147089 ]](https://assets1.tamsnetwork.com/images/EC042017NF/147089s.jpg "Garden Green Classic Stampin' Pad [ 147089 ]")
![Pool Party 5/8" (1.6 Cm) Pompom Ribbon [ 164129 ]](https://assets1.tamsnetwork.com/images/EC042017NF/164129s.jpg "Pool Party 5/8\" (1.6 Cm) Pompom Ribbon [ 164129 ]")
![Earth Tones Shimmer Gems [ 164070 ]](https://assets1.tamsnetwork.com/images/EC042017NF/164070s.jpg "Earth Tones Shimmer Gems [ 164070 ]")
![Multipurpose Liquid Glue [ 110755 ]](https://assets1.tamsnetwork.com/images/EC042017NF/110755s.jpg "Multipurpose Liquid Glue [ 110755 ]")


![Festive Tags Kit [ 162485 ]](https://assets1.tamsnetwork.com/images/EC042017NF/162485s.jpg "Festive Tags Kit [ 162485 ]")
![Festive 12" X 12" (30.5 X 30.5 Cm) Glimmer Paper [ 164106 ]](https://assets1.tamsnetwork.com/images/EC042017NF/164106s.jpg "Festive 12\" X 12\" (30.5 X 30.5 Cm) Glimmer Paper [ 164106 ]")
![Small Blending Brushes [ 160518 ]](https://assets1.tamsnetwork.com/images/EC042017NF/160518s.jpg "Small Blending Brushes [ 160518 ]")
![Shaded Spruce Classic Stampin' Pad [ 147088 ]](https://assets1.tamsnetwork.com/images/EC042017NF/147088s.jpg "Shaded Spruce Classic Stampin' Pad [ 147088 ]")
![Pool Party Classic Stampin' Pad [ 147107 ]](https://assets1.tamsnetwork.com/images/EC042017NF/147107s.jpg "Pool Party Classic Stampin' Pad [ 147107 ]")
![Shaded Spruce 1/2" (1.3 Cm) Satin & Sheer Ribbon [ 164224 ]](https://assets1.tamsnetwork.com/images/EC042017NF/164224s.jpg "Shaded Spruce 1/2\" (1.3 Cm) Satin & Sheer Ribbon [ 164224 ]")
![Pretty In Pink 8 1/2" X 11" Cardstock [ 163793 ]](https://assets1.tamsnetwork.com/images/EC042017NF/163793s.jpg "Pretty In Pink 8 1/2\" X 11\" Cardstock [ 163793 ]")
![Lost Lagoon 8-1/2" X 11" Cardstock [ 133679 ]](https://assets1.tamsnetwork.com/images/EC042017NF/133679s.jpg "Lost Lagoon 8-1/2\" X 11\" Cardstock [ 133679 ]")
![Bubble Bath 8 1/2" X 11" Cardstock [ 161718 ]](https://assets1.tamsnetwork.com/images/EC042017NF/161718s.jpg "Bubble Bath 8 1/2\" X 11\" Cardstock [ 161718 ]")
![Snowflake Sky 3 D Embossing Folder [ 162026 ]](https://assets1.tamsnetwork.com/images/EC042017NF/162026s.jpg "Snowflake Sky 3 D Embossing Folder [ 162026 ]")
![Everyday Details Dies [ 162864 ]](https://assets1.tamsnetwork.com/images/EC042017NF/162864s.jpg "Everyday Details Dies [ 162864 ]")


![Enduring Beauty Photopolymer Stamp Set (English) [ 162670 ]](https://assets1.tamsnetwork.com/images/EC042017NF/162670s.jpg "Enduring Beauty Photopolymer Stamp Set (English) [ 162670 ]")
![Enduring Beauty Decorative Masks [ 162673 ]](https://assets1.tamsnetwork.com/images/EC042017NF/162673s.jpg "Enduring Beauty Decorative Masks [ 162673 ]")
![Enduring Beauty Dies [ 162672 ]](https://assets1.tamsnetwork.com/images/EC042017NF/162672s.jpg "Enduring Beauty Dies [ 162672 ]")
![Very Vanilla 8-1/2" X 11" Cardstock [ 101650 ]](https://assets1.tamsnetwork.com/images/EC042017NF/101650s.jpg "Very Vanilla 8-1/2\" X 11\" Cardstock [ 101650 ]")
![Pecan Pie 8 1/2" X 11" Cardstock [ 161717 ]](https://assets1.tamsnetwork.com/images/EC042017NF/161717s.jpg "Pecan Pie 8 1/2\" X 11\" Cardstock [ 161717 ]")
![Mossy Meadow 8-1/2" X 11" Cardstock [ 133676 ]](https://assets1.tamsnetwork.com/images/EC042017NF/133676s.jpg "Mossy Meadow 8-1/2\" X 11\" Cardstock [ 133676 ]")
![Splendid Autumn 6" X 6" (15.2 X 15.2 Cm) Designer Series Paper [ 164173 ]](https://assets1.tamsnetwork.com/images/EC042017NF/164173s.jpg "Splendid Autumn 6\" X 6\" (15.2 X 15.2 Cm) Designer Series Paper [ 164173 ]")
![Early Espresso Classic Stampin' Pad [ 147114 ]](https://assets1.tamsnetwork.com/images/EC042017NF/147114s.jpg "Early Espresso Classic Stampin' Pad [ 147114 ]")
![Peach Pie Classic Stampin Pad [ 163810 ]](https://assets1.tamsnetwork.com/images/EC042017NF/163810s.jpg "Peach Pie Classic Stampin Pad [ 163810 ]")
![Pecan Pie Classic Stampin' Pad [ 161665 ]](https://assets1.tamsnetwork.com/images/EC042017NF/161665s.jpg "Pecan Pie Classic Stampin' Pad [ 161665 ]")
![Mossy Meadow Classic Stampin' Pad [ 147111 ]](https://assets1.tamsnetwork.com/images/EC042017NF/147111s.jpg "Mossy Meadow Classic Stampin' Pad [ 147111 ]")
![Watercolor Pencils Assortment 1 [ 161700 ]](https://assets1.tamsnetwork.com/images/EC042017NF/161700s.jpg "Watercolor Pencils Assortment 1 [ 161700 ]")
![Blender Pens [ 102845 ]](https://assets1.tamsnetwork.com/images/EC042017NF/102845s.jpg "Blender Pens [ 102845 ]")
![Distressed Tile 3 D Embossing Folder [ 162189 ]](https://assets1.tamsnetwork.com/images/EC042017NF/162189s.jpg "Distressed Tile 3 D Embossing Folder [ 162189 ]")


![Warms My Heart Cling Stamp Set (English) [ 164267 ]](https://assets1.tamsnetwork.com/images/EC042017NF/164267s.jpg "Warms My Heart Cling Stamp Set (English) [ 164267 ]")
![Cajun Craze 8-1/2" X 11" Cardstock [ 119684 ]](https://assets1.tamsnetwork.com/images/EC042017NF/119684s.jpg "Cajun Craze 8-1/2\" X 11\" Cardstock [ 119684 ]")
![Basic Beige 8 1/2" X 11" Cardstock [ 164511 ]](https://assets1.tamsnetwork.com/images/EC042017NF/164511s.jpg "Basic Beige 8 1/2\" X 11\" Cardstock [ 164511 ]")
![Coastal Cabana 8-1/2" X 11" Cardstock [ 131297 ]](https://assets1.tamsnetwork.com/images/EC042017NF/131297s.jpg "Coastal Cabana 8-1/2\" X 11\" Cardstock [ 131297 ]")
![Cajun Craze Classic Stampin' Pad [ 147085 ]](https://assets1.tamsnetwork.com/images/EC042017NF/147085s.jpg "Cajun Craze Classic Stampin' Pad [ 147085 ]")
![Watercolor Pencils Assortment 2 [ 149014 ]](https://assets1.tamsnetwork.com/images/EC042017NF/149014s.jpg "Watercolor Pencils Assortment 2 [ 149014 ]")
![Clear Wink Of Stella Glitter Brush [ 141897 ]](https://assets1.tamsnetwork.com/images/EC042017NF/141897s.jpg "Clear Wink Of Stella Glitter Brush [ 141897 ]")
![Bough Punch [ 157711 ]](https://assets1.tamsnetwork.com/images/EC042017NF/157711s.jpg "Bough Punch [ 157711 ]")
![Nested Essentials Dies [ 161597 ]](https://assets1.tamsnetwork.com/images/EC042017NF/161597s.jpg "Nested Essentials Dies [ 161597 ]")
![Sentimental Christmas 12" X 12" (30.5 X 30.5 Cm) Designer Series Paper [ 164209 ]](https://assets1.tamsnetwork.com/images/EC042017NF/164209s.jpg "Sentimental Christmas 12\" X 12\" (30.5 X 30.5 Cm) Designer Series Paper [ 164209 ]")
![Iridescent Faceted Gems [ 163368 ]](https://assets1.tamsnetwork.com/images/EC042017NF/163368s.jpg "Iridescent Faceted Gems [ 163368 ]")
![Stylish Shapes Dies [ 159183 ]](https://assets1.tamsnetwork.com/images/EC042017NF/159183s.jpg "Stylish Shapes Dies [ 159183 ]")
![Silver & White 1/2" (1.3 Cm) Sheer Ribbon [ 162149 ]](https://assets1.tamsnetwork.com/images/EC042017NF/162149s.jpg "Silver & White 1/2\" (1.3 Cm) Sheer Ribbon [ 162149 ]")
![Natural Tones Linen Thread [ 164071 ]](https://assets1.tamsnetwork.com/images/EC042017NF/164071s.jpg "Natural Tones Linen Thread [ 164071 ]")
![Crushed Curry 8-1/2" X 11" Cardstock [ 131199 ]](https://assets1.tamsnetwork.com/images/EC042017NF/131199s.jpg "Crushed Curry 8-1/2\" X 11\" Cardstock [ 131199 ]")
![Blackberry Bliss 8-1/2" X 11" Cardstock [ 133675 ]](https://assets1.tamsnetwork.com/images/EC042017NF/133675s.jpg "Blackberry Bliss 8-1/2\" X 11\" Cardstock [ 133675 ]")
![Blackberry Bliss Classic Stampin' Pad [ 147092 ]](https://assets1.tamsnetwork.com/images/EC042017NF/147092s.jpg "Blackberry Bliss Classic Stampin' Pad [ 147092 ]")
