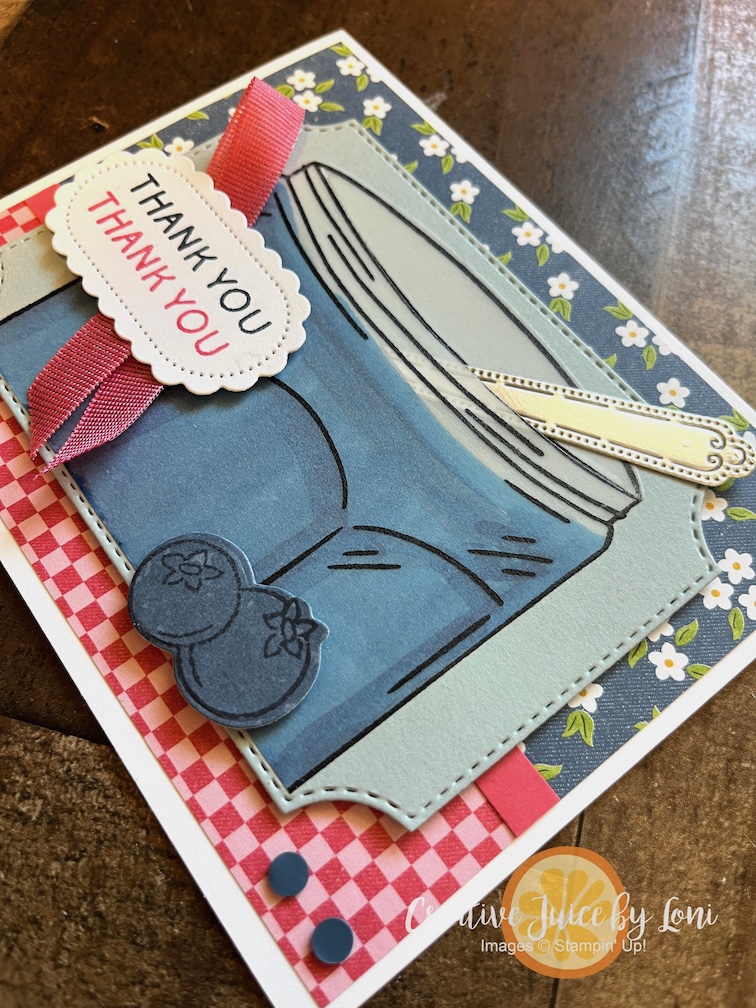
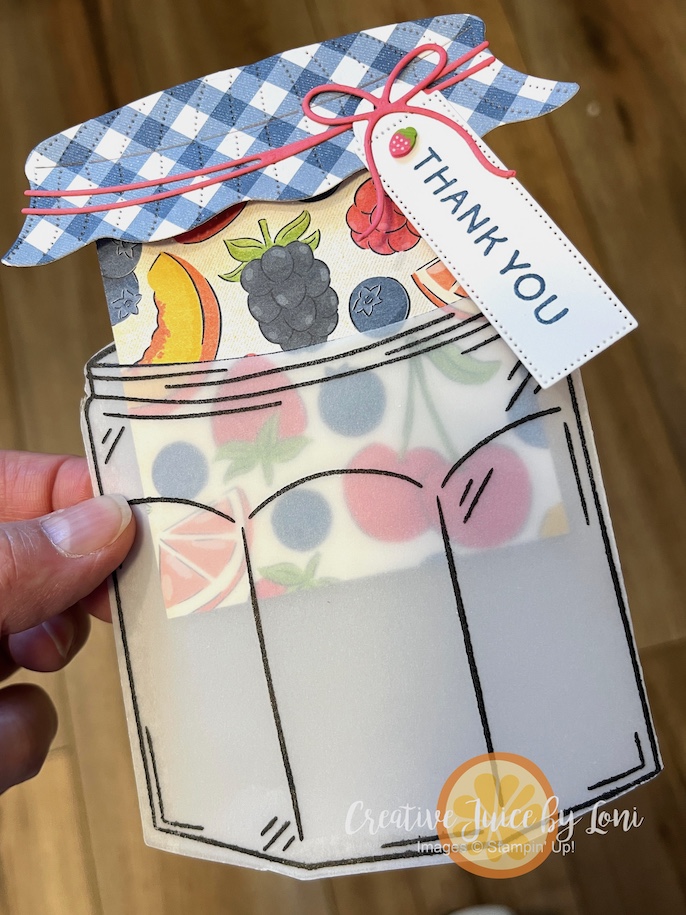
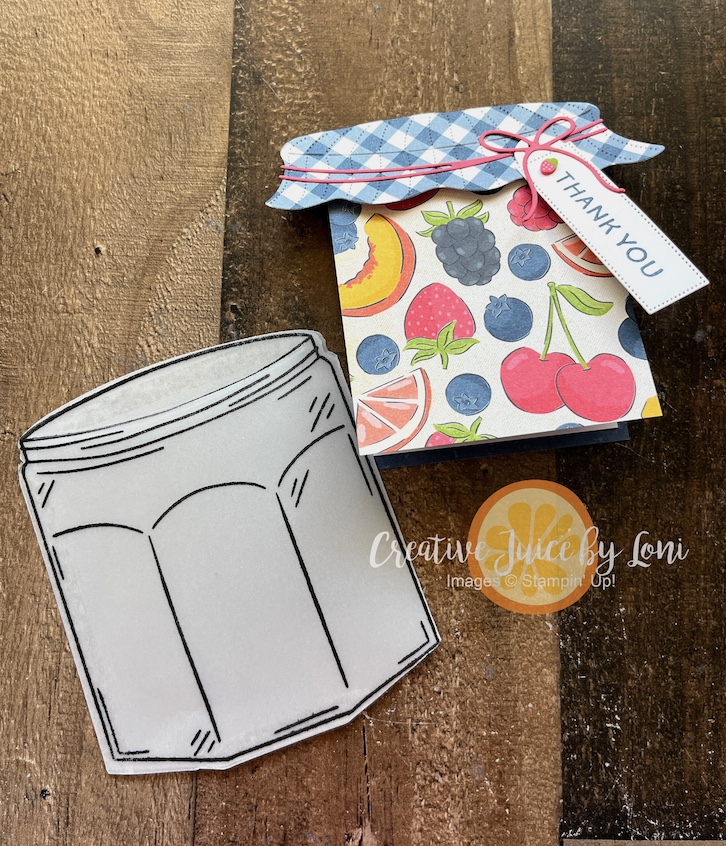
The jar from the Stampin’ Up!®️ Filled with Sweetness bundle is quite large, so I wondered if I could just use part of it on the front of a card, and the answer is YES! Be sure to print the tutorial for this card below
Using Vellum Card stock (like my pull-out fruit jar card), I stamped the jar with STAZ-On ink (to make it quick to dry and not smudge) then colored on the BACK of the vellum to fill the jar with Blueberry Jam.
I remembered to use the curved-line die to create a slit in the top of the jar to slide my spoon handle through! Silver foil sheets really make the handle look like a metal utensil.
Print the instructions to make your own, and the supplies are listed below for easy shopping! If I’ve served you well, I would appreciate your support in my Stampin’ Store 😃 🧡 🍊
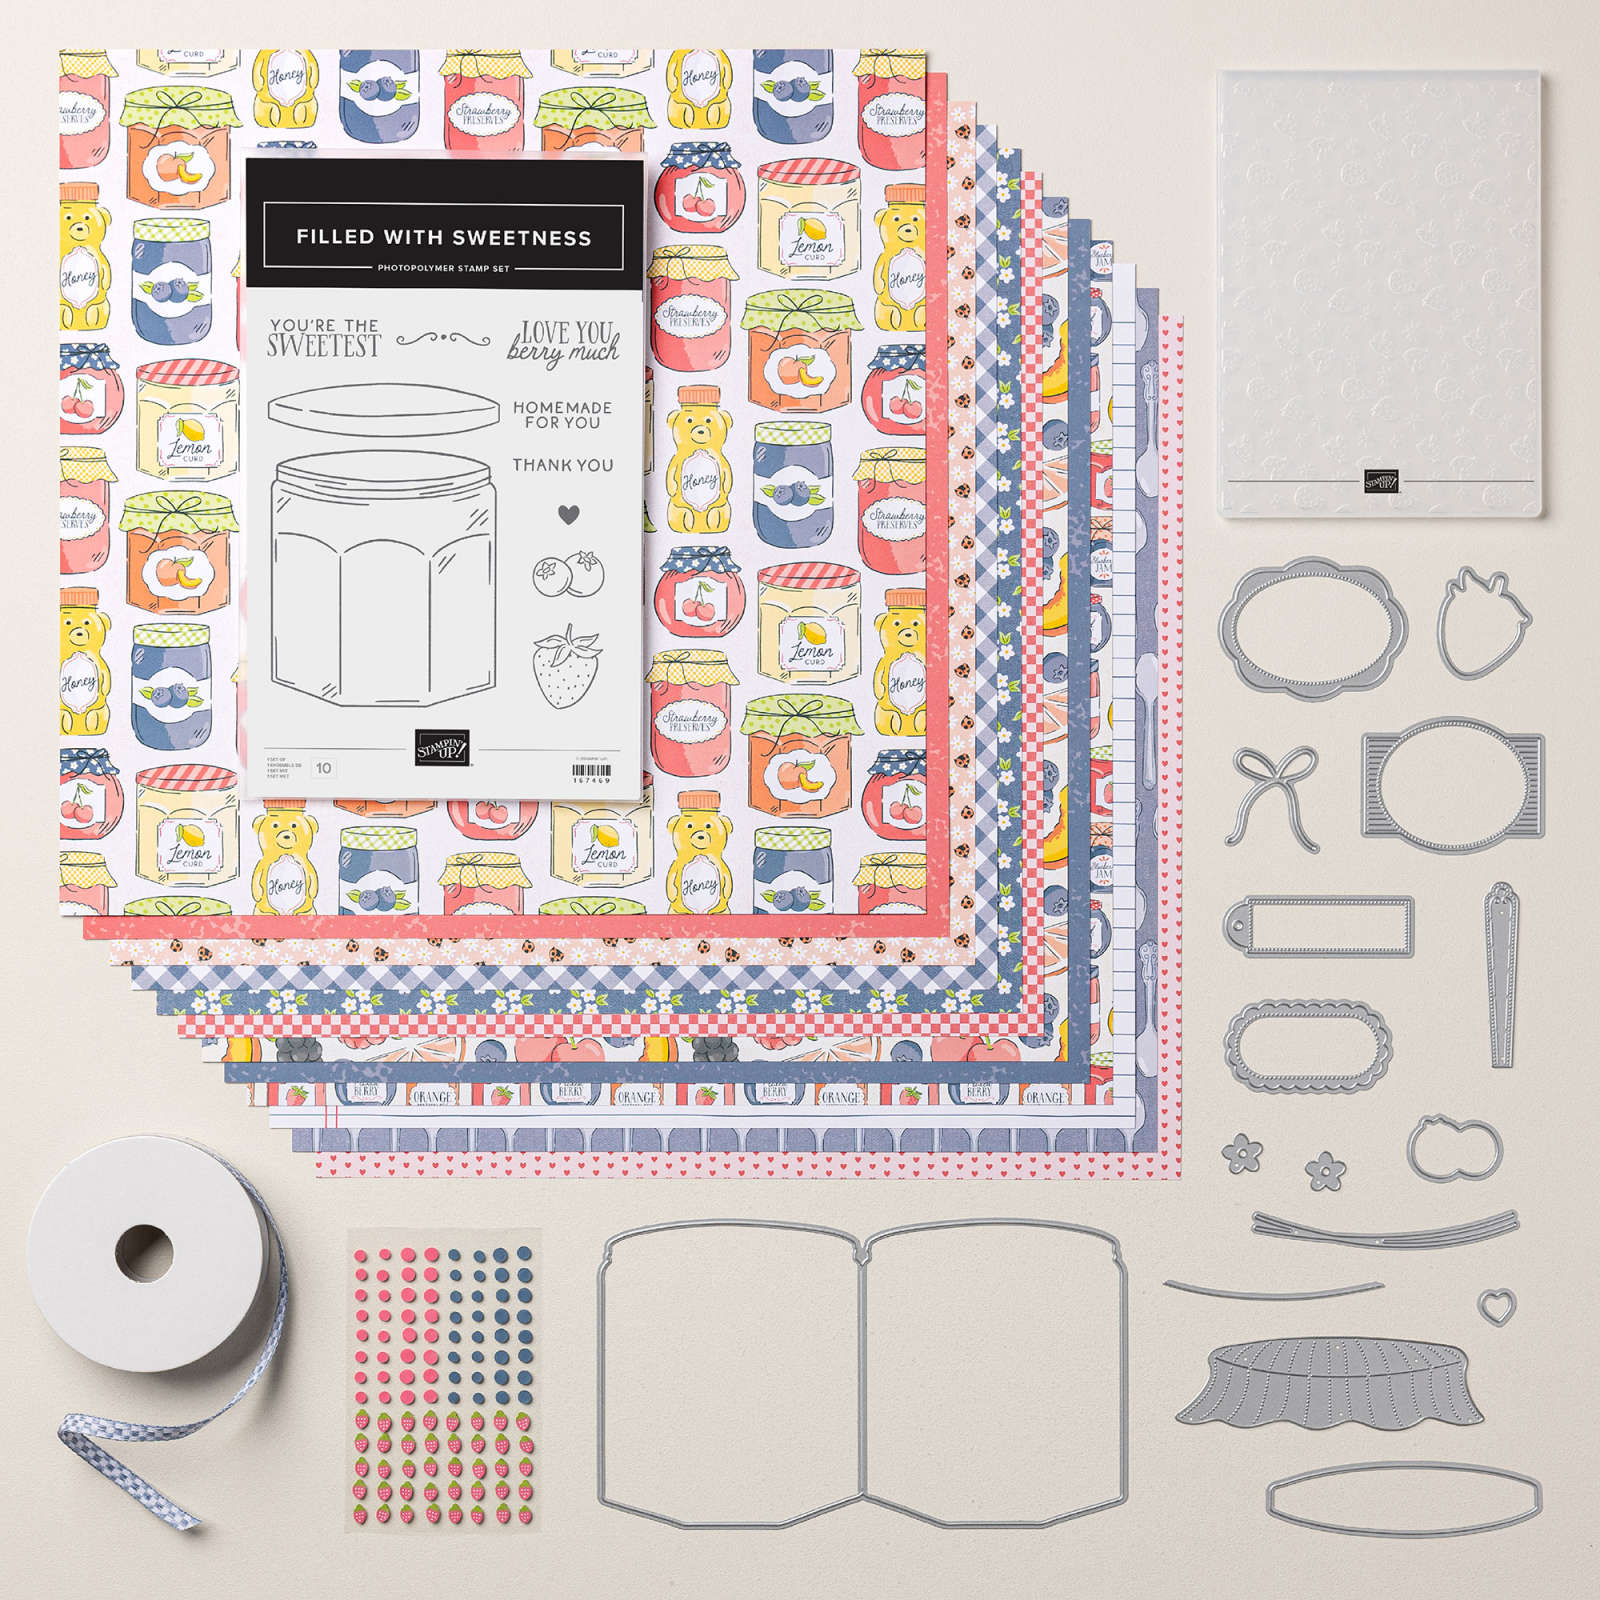
There’s been a bunch of FRESH products drop for March, so let’s create a pull-out card shaped like a jam jar from one of my favorites: the Homemade Sweetness products!
Just because the Ladybug Picnic embossing folder is backordered, don’t fret! The rest of the products ARE AVAILABLE: The Filled with Sweetness stamp and dies are bundled together to save you 10% and the Homemade Sweetness Designer Series Paper, ribbon and embellishments are all ready to come home to your craft room!
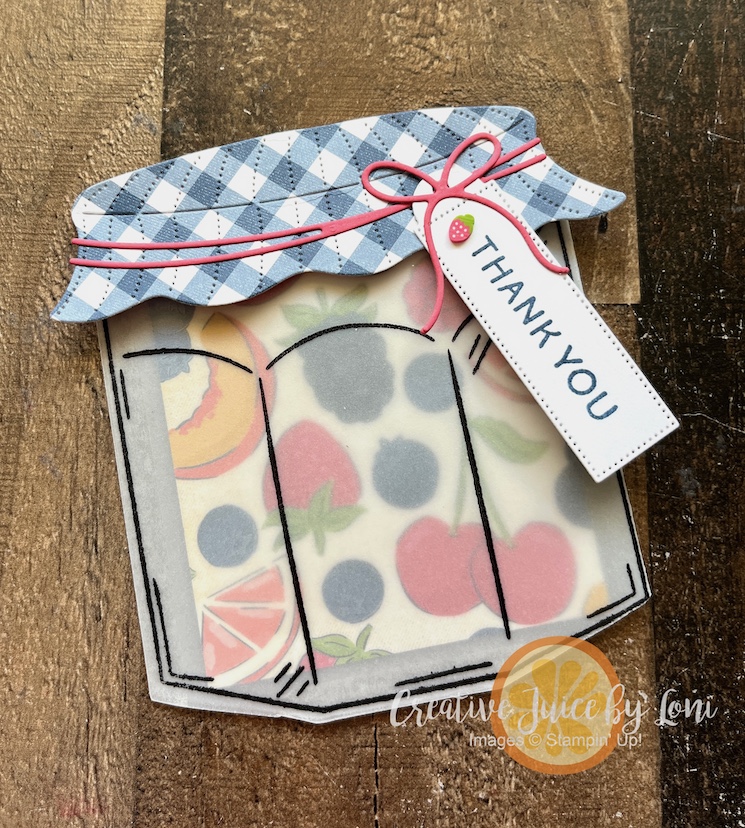
The jar is large enough to create a good sized card – this card is about 4-3/8″ square – and the die cuts a front and back of the card as the same time, with a fold in the middle, so you can make it into a card. I stamped the jar on vellum, die cut it out (including a slit in the top of the jar, and there is a die for that!) then sealed the open side and bottom with tear and tape to create a pocket.
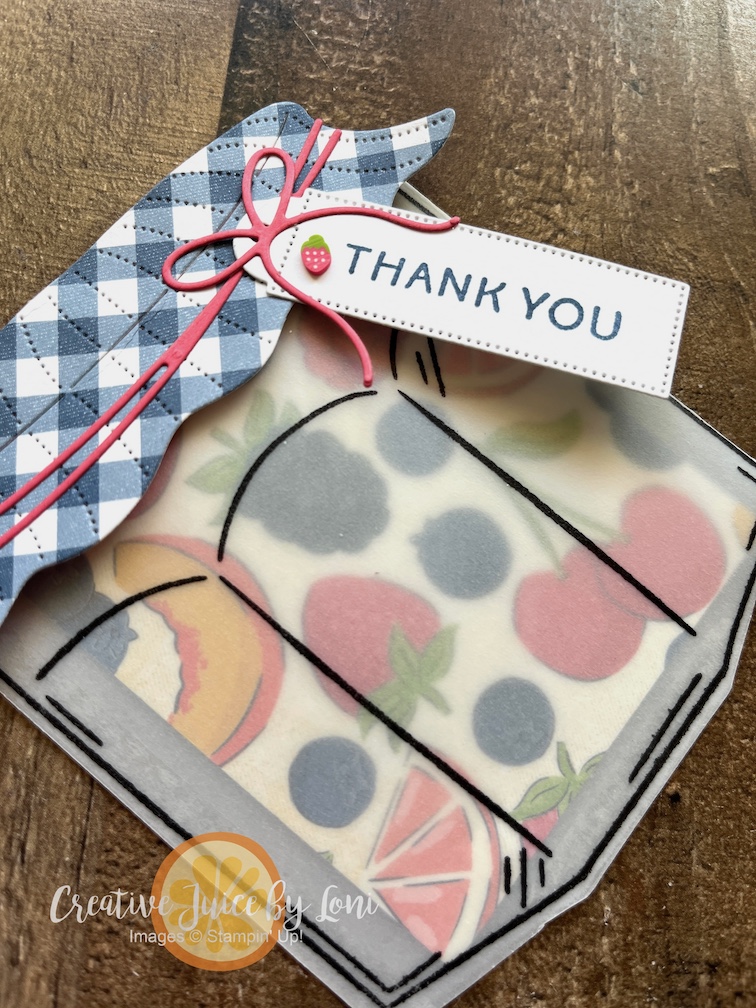
I stamped the jar on vellum with Jet Black StazOn ink (so it dries fast and doesn’t smear), and added the die that makes the slit in the top of the jar as I cut out the card. Fold it in half and seal the open side and bottom with Tear & Tape adhesive, and remember to adhere the top of the jar to the back so the card slides in easily – it’s the part that’s behind the fruit and tag at the top in the photo above!
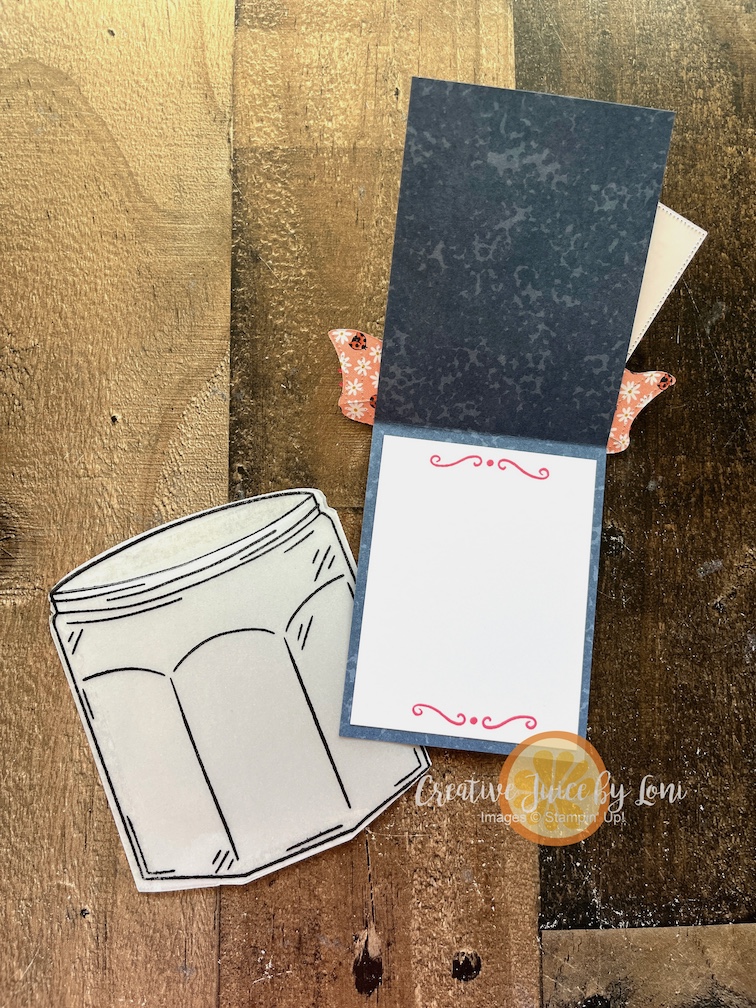
The Designer Series Paper is 2-7/8″ x 7-1/2″, folded in half and adhered to the checkered jar cover. When you open up the card, there is space to write your note of appreciation:
TIP: Because the jar stamp is so large, and can easily stretch out of shape, lay the die on your desktop and “fit” the stamp into it, then lay your clear F BLOCK on top. Then when you stamp, you know the die will cut it out properly!
Take a moment to explore all the NEW ARRIVALS and add the products to make this fun card to your card below!
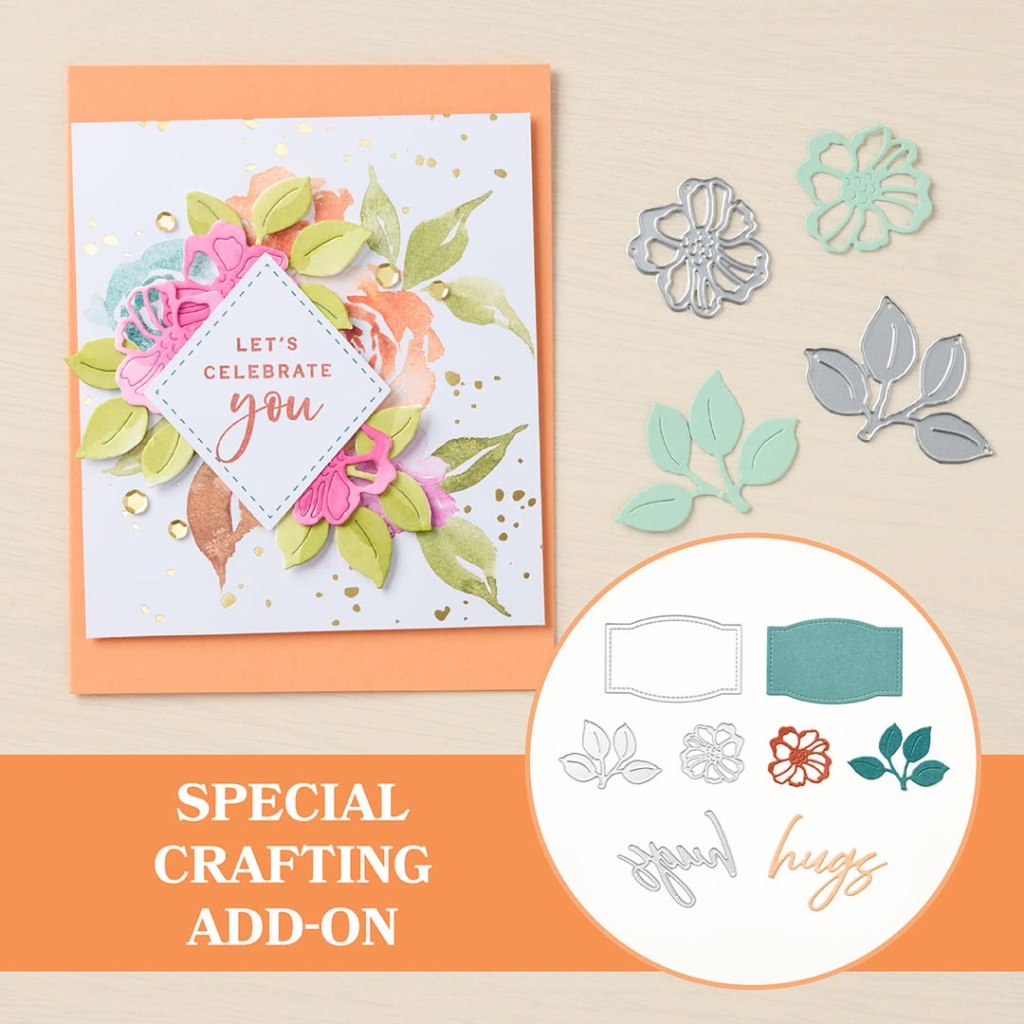
Cleaning off my stamping surface, I found pieces for a card I had started to make showing how lovely Secret Sea and Cloud Cover card stock pair together. Since I had already embossed the background with the Happy Hibiscus Hybrid Embossing folder and stamped the background on the large label, all I had to do was stamp some Hibiscus flowers in Strawberry Slush (also a Stampin’ Up!®️ 2025-2027 In Color).
You can get TWO shades of the same color by stamping off the bold flower filler stamp onto a scrap paper once before stamping it inside the outline (stamped in full strength ink of same color). Do the same for the leaves!
TIP: If you haven’t created an ink spot with a Cloud Cover Ink refill and uninked stampin’ spot (because the ink formula didn’t work correctly for a full-sized foam ink pad), YOU CAN STAMP OFF WITH SECRET SEA for an in-between color, as shown in the leaves on this card. I also used VERSAMARK ink on the Cloud Cover label, which turns the stamped images a shade darker.
To make the background pop a bit, I softly sponged some Whisper White craft ink over the raised images. Top off the card with an elegant Cloud Cover bow and some Rhinestone Jewels in the center of the flowers.
One more suggestion: Make four of the same cards at one time! Why four? For this card, you’ll use two full sheets of Cloud Cover for the card bases, one full sheet of Secret Sea card stock for the 4 backgrounds and almost a full additional sheet of cloud cover for the large label: It makes the best use of your supplies, and takes LESS time to create four of the same cards than to come back later and make the same card another time!
Thank you for ordering the supplies from my Stampin’ Store – you are supporting a home-based business and allowing me the time to bring you more creative ideas!
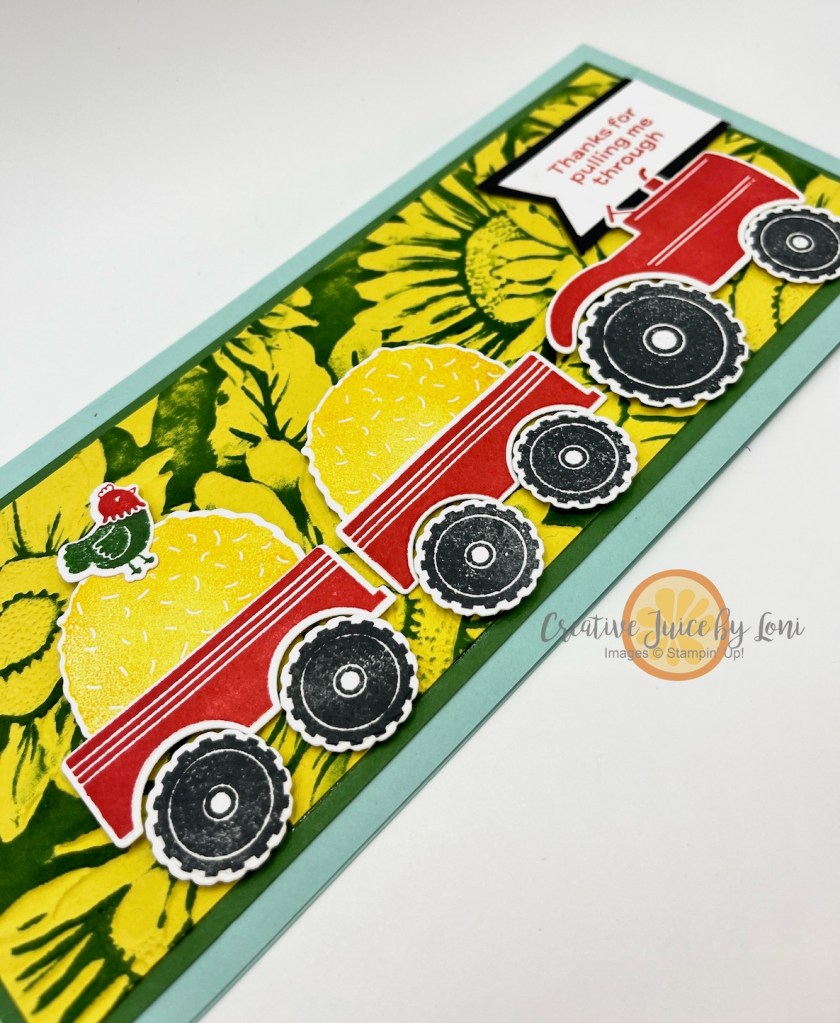
Did you know Stampin’ Up!®️ releases NEW products every other month? July is one of those months, and I wanted to mix two of the new items together for a large slimline card: The Tractor & Co. bundle (photopolymer stamps + dies) and the fabulous Sunflower 3D embossing folder!
To make the sunflowers pop, after you’ve embossed an 8.25″ x 3.25″ of Darling Duckling card stock with this extra-large embossing folder, drag the Garden Green ink pad across the flat side (where the flowers are pushed down, not up).
An 8.5″ x 3.5″ Garden Green Mat behind the sunflowers frames it nicely, and the tractor is popped up with Stampin’ Dimensionals.
The Pool Party card base is 9″ wide and 8″ tall, scored in half at 4″. This fits into a legal sized envelope.
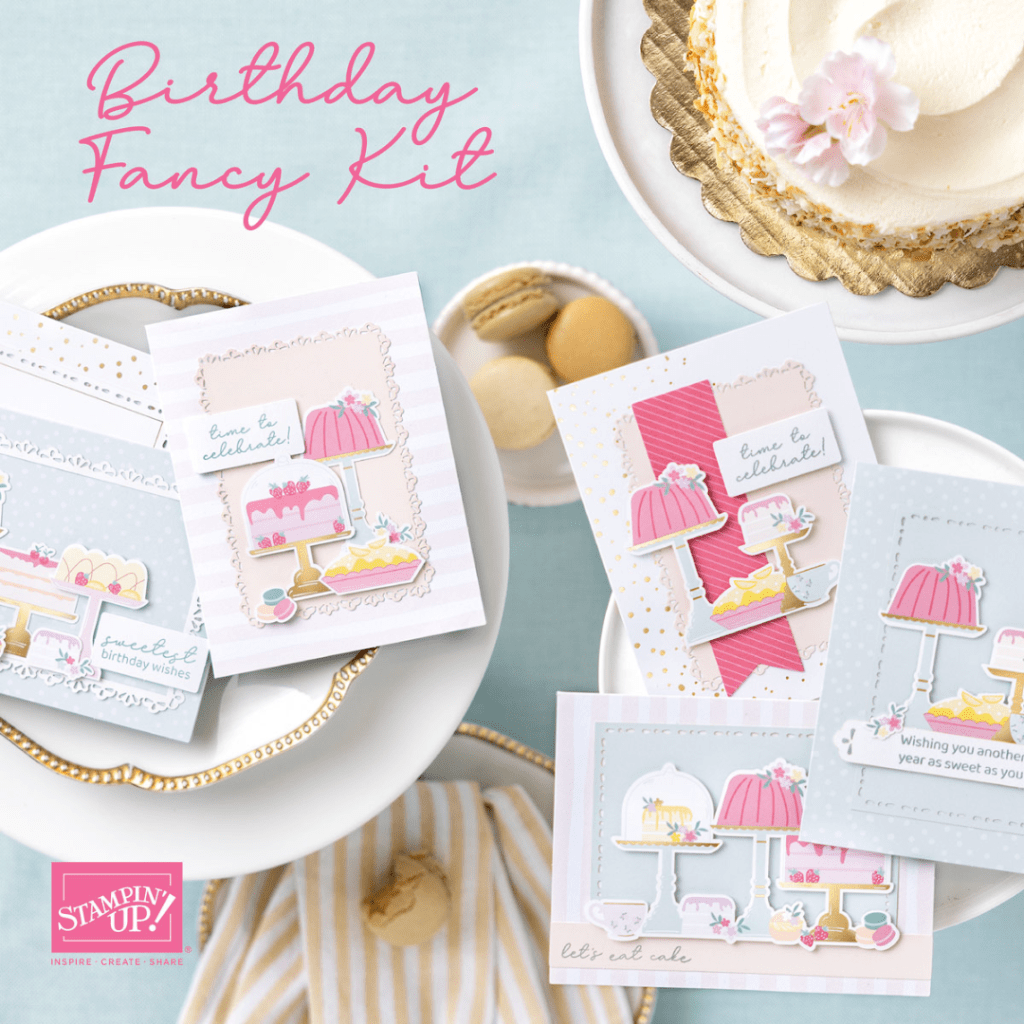
Those are just two of the new products launched yesterday! Also check out the two new KITS for July (click on images to see the kits):
One more thing I’m looking forward to this month is the Sweeter With You Paper Pumpkin kit! In case you aren’t familiar with Paper Pumpkin, it’s a craft kit subscription by mail, and each kit includes an exclusive stamp set, ink spot and all the supplies prepared for you to enjoy a stress-free moment of creativity!
Each quarter, a coordinating set of dies is also offered to Paper Pumpkin subscribers, and they match all the kits released in those three months. The Circle of Seasons die set is only $12 and the strawberry die will also create an acorn (hint at the September kit!):
My Paper Pumpkin subscribers also receive a special email from me on the last week of the month, with ideas to use the stamp set, ink spot and add-on dies AFTER the kit is complete! I know you’d look forward to a kit in your mailbox each month, so give it a try!
Check out all the new products released this month HERE:
Keep your creative juices flowing! 🍊🧡– Loni Spendlove
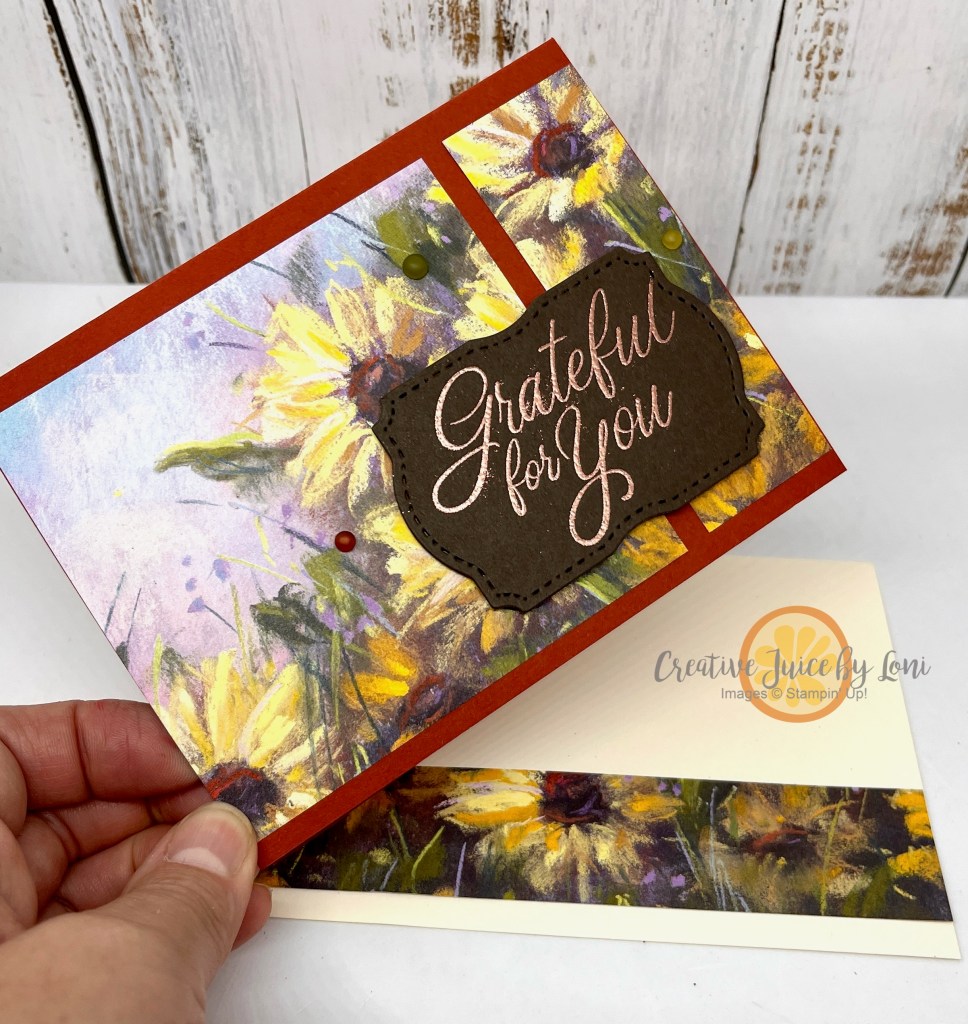
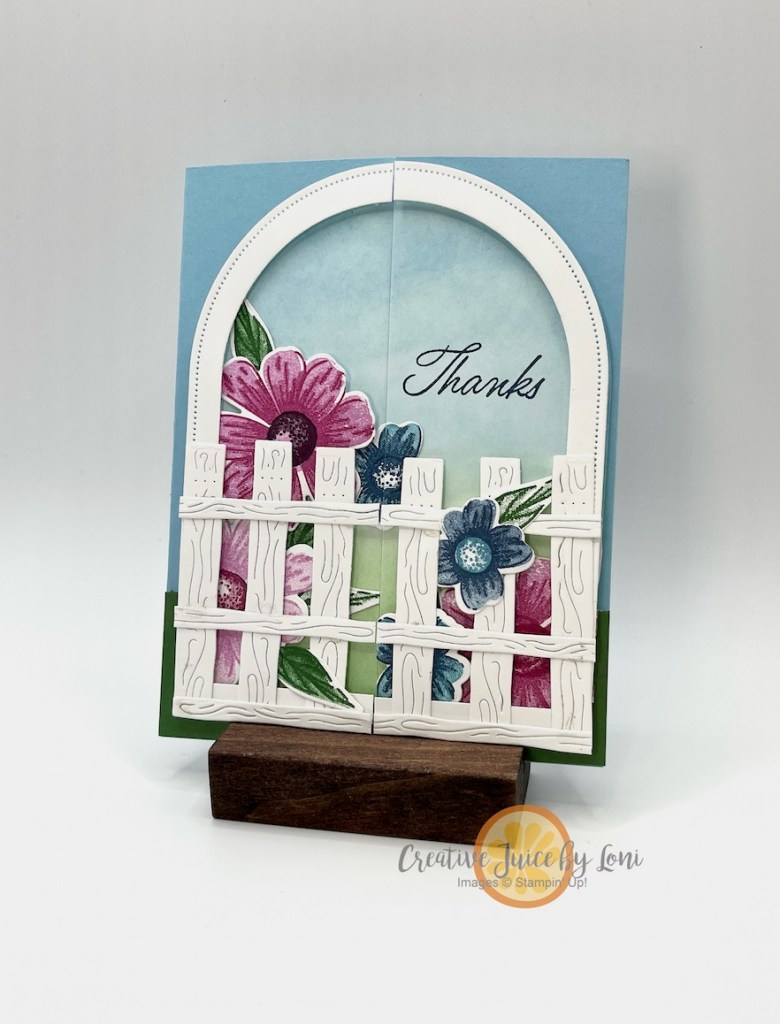
This week’s TGIF Challenge #tgifc531 is “Garden Gates” and I wanted to create a gratitude card that felt like you were walking into a Secret Garden:
After I created my card, I went back to the TGIF post and realized Wendy Weixler and I both had a similar idea for building the gate, but how delightful that both are unique!
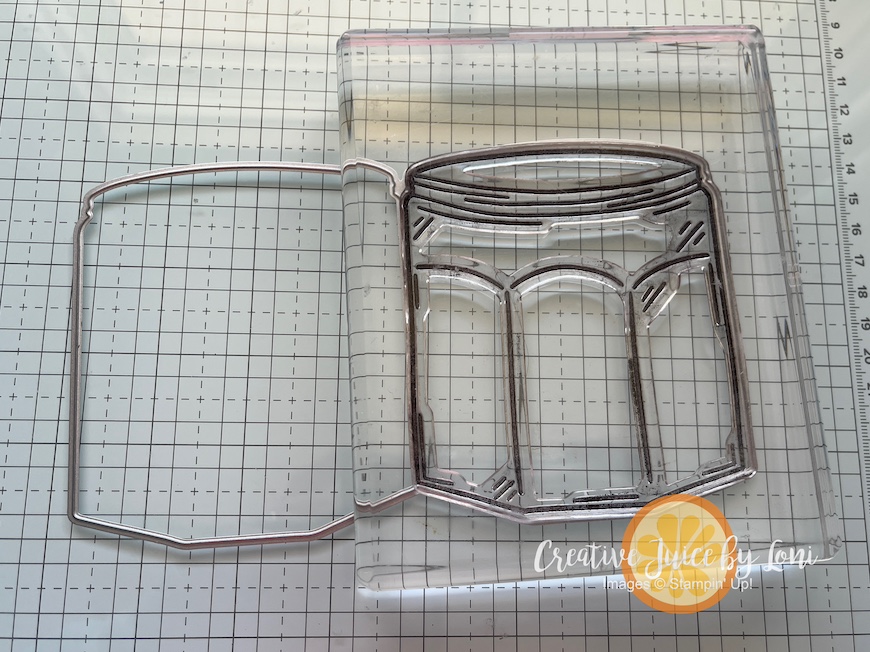
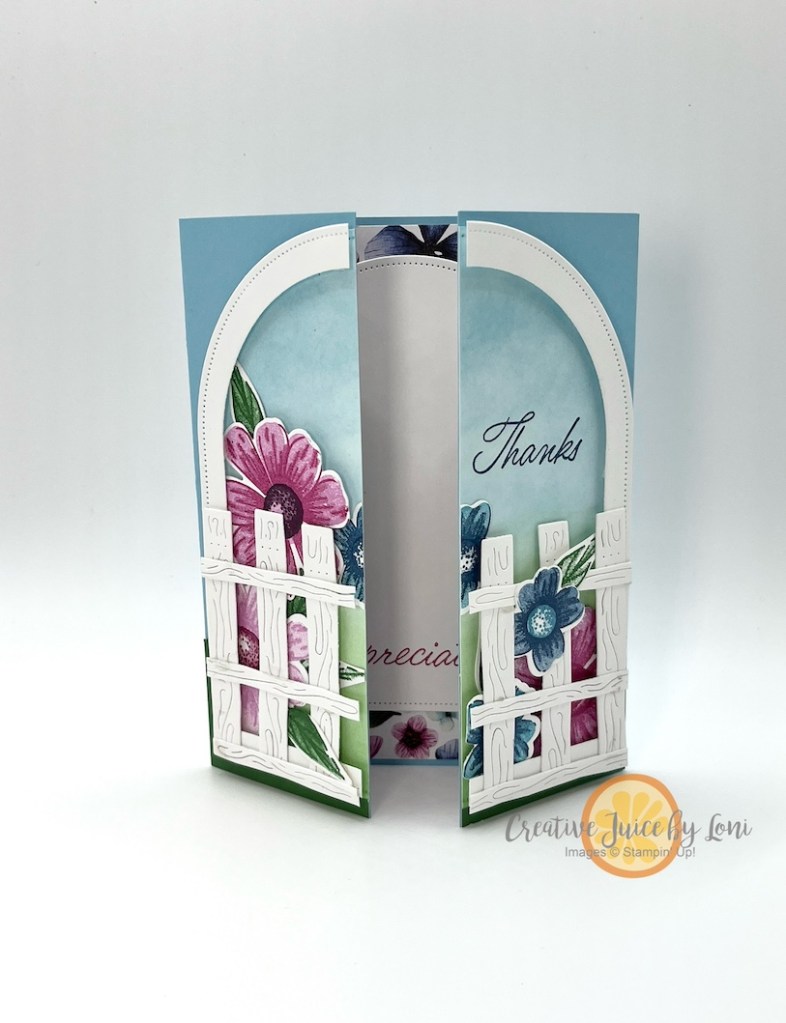
The first type of card I thought of was the appropriately named “Gate Fold” card, so I had to think it through. I ended up cutting my gate in half, so you could enter the garden:
There are only 3 days left of the Suite BOGO Sale, so I chose to use the Impressions Abloom bundle and Designer Series Paper from the Floral Impressions Suite. Each piece of our suites also qualify for the sale, just remember that the lowest price suite or suite product will get the 50% discount!
Now enter the secret garden:
I used the arch die cut from the larger gate (cut for the front) on the inside, and let the profusion of flowers bloom on all sides!
Fun fact: The Secret Garden classic children’s novel by Frances Hodgson Burnett was one of my favorite reads as a child, and though I’m a huge musical nerd, I DON’T really love the Secret Garden musical play. The book is definitely best (and there are a few decent movie adaptations).
This card just gives all the wonder of finding a secret garden behind a locked gate!
Now, if you’ve procrastinated, here’s your reminder to shop the SWEET Suite BOGO Sale.
“Summertime! And the Stampin’ is Easy!” (if you sang that in your mind~ Greetings, fellow musical geek!)
Since Stampin’ Up!®️ Suites (and suite products) are BOGO50 during June, I’ll be sharing some SIMPLE ways to use our current Suites for sensational summer stamping projects. In today’s video, I’m also revealing a BEAUTY SECRET!
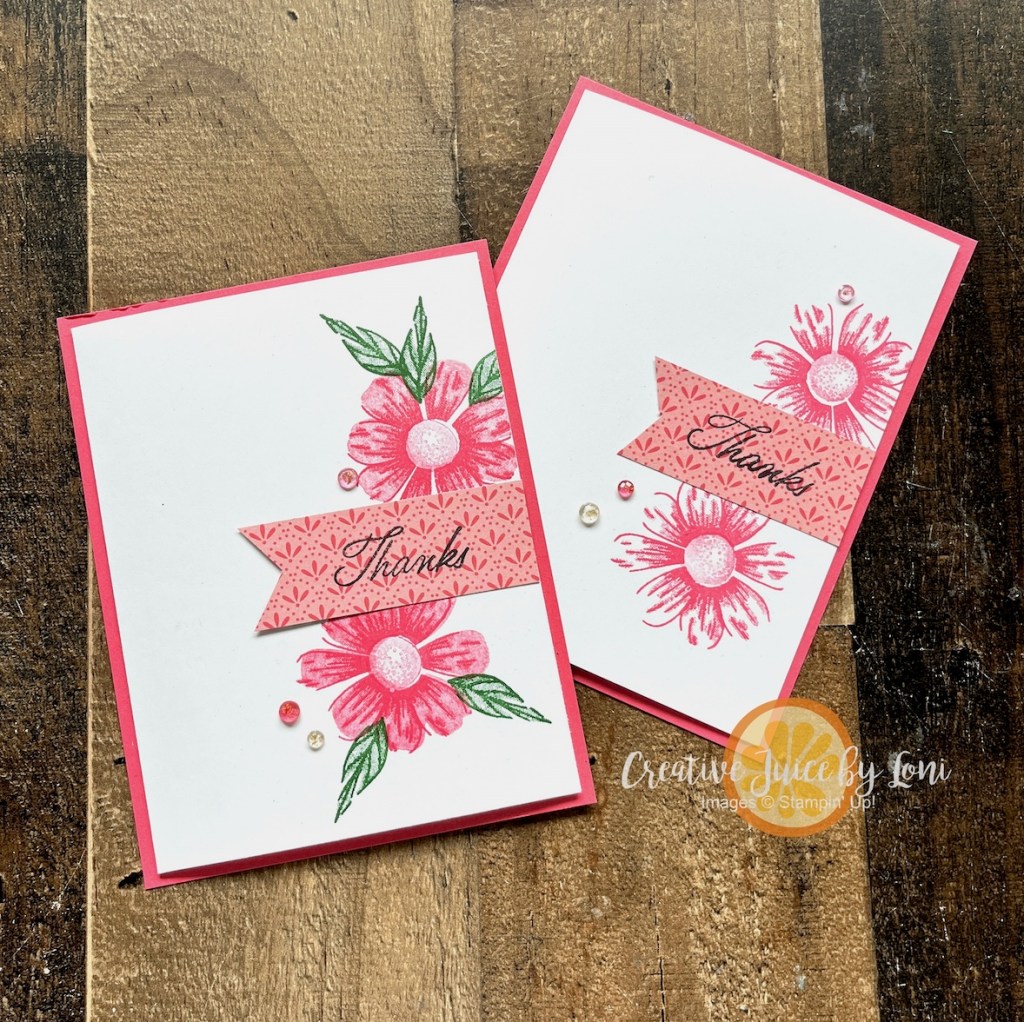
Crafting in June, July & August has to be easy & breezy, so coordinated products in a suite bring a speedy card together in moments. Using the Impressions Abloom stamp set, you can keep this Thanks card ultra simple, or add layers and leaves:
The only thing to stamp on the second card is the sentiment! If you die cut a few extra pieces while catching up on your favorite television episode, you’ll have all the pieces prepared to put an “I appreciate you” card together in seconds:
Embossing a piece of Stampin’ Up!®️ Two-Tone card stock with the Pressed Flowers embossing folder and rubbing it with an emery board to reveal the white center makes this background terrific and touchable.
Some of the Impressions Abloom Dies have detailed inserts, so you can die cut them from cardstock, or remove the details to cut out the stamped image.
TIP:Washi tape keeps both the outline and the details together while you run them through the Stampin’ Cut & Emboss machine.
All these products are part of the Floral Impressions Suite, and can be purchased as a complete collection or individually:
REMEMBER: For the Buy-One-Get-One-50% off special, the LOWEST priced items will receive the discount, so shop smart! Make separate orders and purchase 2 suites together in the first order (to get one suite half price), then use the *Stampin’ Rewards you earned on your first order for an additional discount on your second order, where you may order individual items from other suites (like more Designer Series Paper or embellishments).
*Stampin’ Rewards: Make sure you’ve OPTED IN to earn 10% back each time you shop! Save them or spend your rewards next time!
Scroll back up to the top to the comments (under the posting date) to tell me if you took the beauty secret and tried it!
One more day to SUBSCRIBE and receive the Floral Charm Paper Pumpkin kit in the mail!
Paper Pumpkin is a complete stamping experience in a box, and the June kit actually coordinates with a new Suite coming to my store in July: the Floral Charm Suite. If you are a current subscriber, you will also want to include the Hugs Abloom add-on die set to your next order, as it coordinates with the 2025 April-June kits:
Sometimes you have to invest in your hobby, and when you are ready to do so, may I suggest the Stampin’ Up! Party Banners Dies and Party Alphabet Dies? You’ll save 10% when you bundle them together in one purchase, and, as I mention in the instructional video below, you can claim them as “exercise equipment” 😅
A shaped card is as fun to create as it is to receive! The 5th largest banner die is just about 5.5″ x 4.25″, so these cards fit into the basic white Medium Envelopes:
We made the Pretty Peacock version (left) in the live crafting video, then when we were done, I looked at it and realized that the Damask Designs Embossing folder probably needed to be turned vertically, so created a second with the “Thanks” from a previous Paper Pumpkin kit Add-On die set called “Thanks & Beyond” (shoutout to my PP Craft Kit subscribers!).
This week is high school graduation in southern Utah, and I’m still making cards for grads! This Shy Shamrock card is the banner turned sideways, with letters cut from 2024-2026 In Color Glimmer Paper, and the lock/key/sentiments from Tags to Go.
Finally (for today, at least), I demonstrated this slimline card to remind you of the Eclipse Technique with alphabet dies:
A card for any cake-consumption celebration!
Learn how to make all these banner-themed cards in this video:
If I’ve inspired you to add the Party Die bundle to your list, please shop in my Stampin’ Store!
Better yet…choose these dies as part of a Starter Kit and only pay $99! The other perks of being a demonstrator are even better than the discount: A community of friendly crafters, the opportunity to create a business you love – or a hobby that brings you purpose and passion.
Keep your creative juices flowing! 🍊- Loni Spendlove
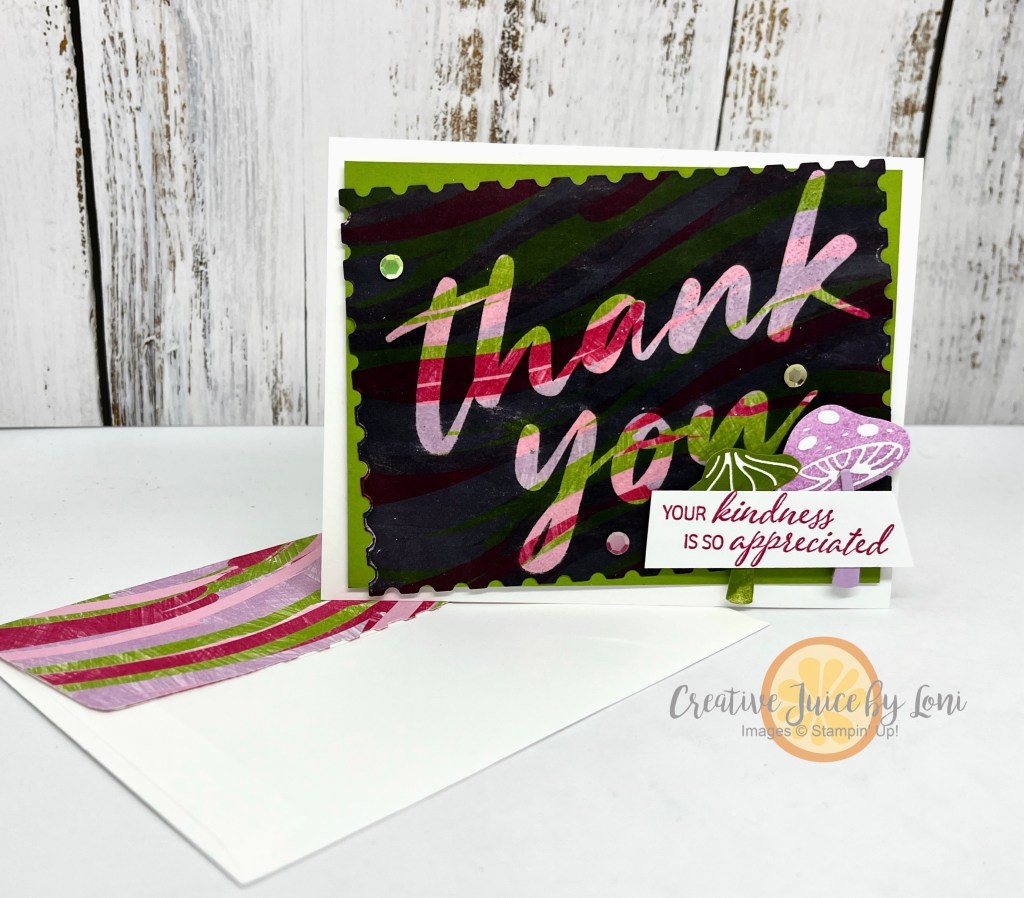
Last summer I taught you the Joseph’s Coat technique with Embossing Folders, so now it’s time to try this cool rubber stamping technique with Stampin’ Up! Designer Series Paper, plus I’ve included a bonus version using Stampin’ Write Markers!
The technique begins by clear embossing a bold image over a pattern, then adding black (or dark ink) over the embossed paper, while the ink “resists” sticking to the clear embossing powder:
I used the graphic designs from the Toadstool Gardens DSP (from Sale-a-Bration 2025), and used the largest Perennial Postage die to cut a unique shape from the pattern, leaving just enough of the paper to add to the flap of my envelope.
The Thanking You stamp is large and bold enough to allow the pattern to be seen well through the embossing once the black ink is smeared all over the Designer Series Paper. You’ll want to use a tissue to wipe off any residue from clear embossed words, and the colorful pattern emerges just like the magic of the famous coat of Joseph in Egypt!
As a BONUS, I showed that you could create a pattern with Stampin’ Write markers to make a custom design, like Red, White and Blue for Independence Day:
Why not try the starter kit and choose Option 1? You’ll get $216 worth of crafting supplies for just $99!
To learn exactly how to do the Joseph’s Coat Technique (and more about Stampin’ Write markers or the opportunity to join), watch this video:
Just 10 days left to collect the Toadstool Garden Designer Series Paper (or another SAB product of your choice) for FREE during Stampin’ Up! Sale-a-Bration 2025! For each $60 you spend, you can choose a free product and many new items were added at the beginning of February.
Thank you for choosing me to serve your creative needs! These are the supplies for the first card, which I demonstrated in the video tutorial:
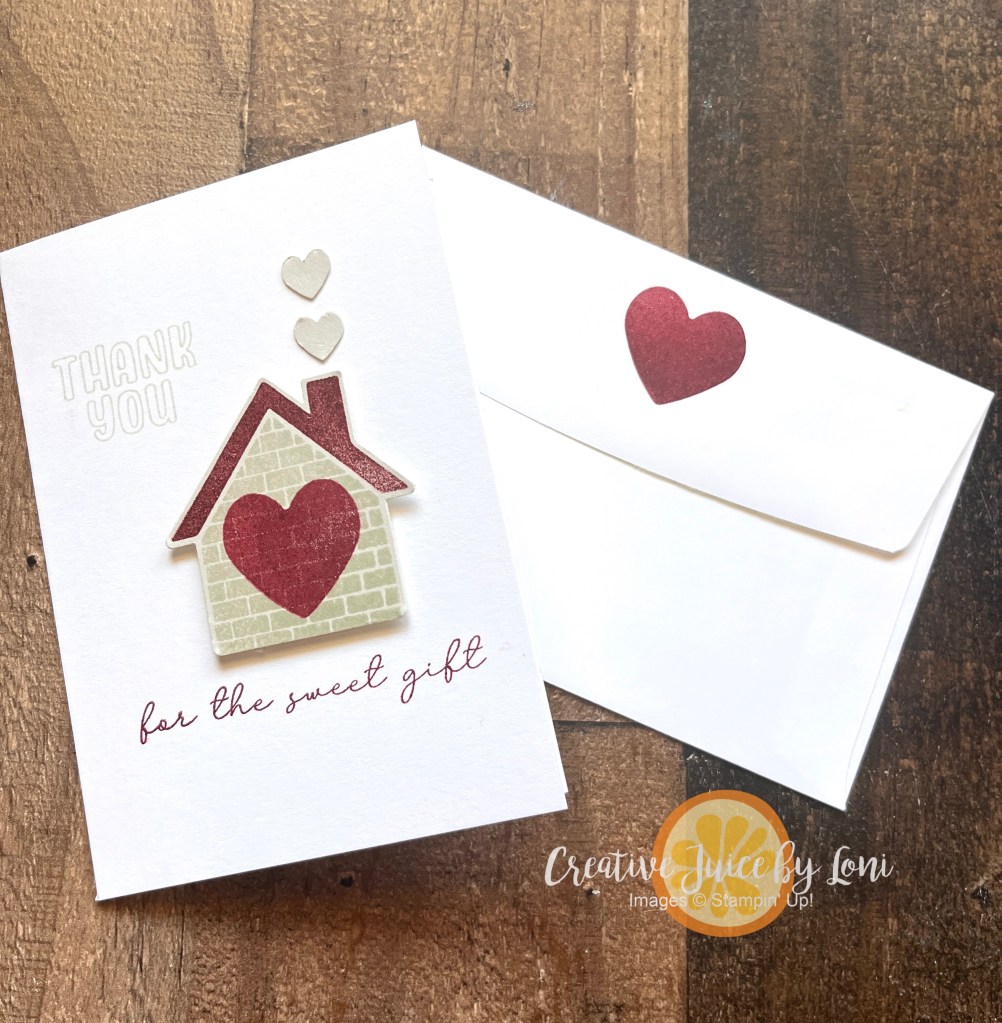
When was the last time you sent a thank you card for a gift you received? (Full transparency: This is something I need to do more of) Since it’s less than a week from Christmas, this is OUR chance to be gracious and grateful.
This Thank You card was designed to be speedy and simple to stamp, plus I’m using Stampin’ Up! Notecards & Envelopes, so they are pre-cut and scored. No excuses here!
The Humble Home bundle includes all the stamps you need, plus the Home Builder Punch. You can literally create a stack of these in just minutes.
To make it easy for you, too, print off the tutorial, then add the supplies you need to your cart below.
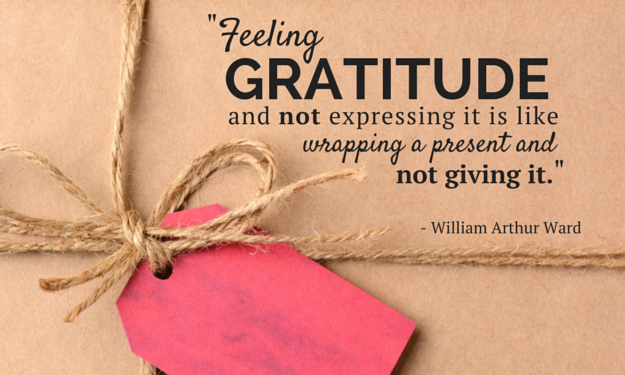
All the research agrees: Being grateful – and showing it – leads to a happier and healthier life.
We already know creating something with your own hands brings joy and satisfaction, so combine the two and crafters are the most joyful folks on the planet!
The Splendid Autumn suite (arriving September 4th) provides the tools to both create and send gorgeous gratitude notes:
This card took only slightly longer to make than the 60 seconds shown in this reel, and uses a full sheet of the 6″ x 6″ Designer Series Paper on the outside, inside and envelope.


![Filled With Sweetness Bundle (English) [ 167475 ]](https://assets1.tamsnetwork.com/images/EC042017NF/167475s.jpg "Filled With Sweetness Bundle (English) [ 167475 ]")
![Homemade Sweetness 12" X 12" (30.5 X 30.5 Cm) Designer Series Paper [ 167467 ]](https://assets1.tamsnetwork.com/images/EC042017NF/167467s.jpg "Homemade Sweetness 12\" X 12\" (30.5 X 30.5 Cm) Designer Series Paper [ 167467 ]")
![Basic White 12" X 12" (30.5 X 30.5 Cm) Thick Cardstock [ 166782 ]](https://assets1.tamsnetwork.com/images/EC042017NF/166782s.jpg "Basic White 12\" X 12\" (30.5 X 30.5 Cm) Thick Cardstock [ 166782 ]")
![Strawberry Slush 8 1/2" X 11" Cardstock [ 165625 ]](https://assets1.tamsnetwork.com/images/EC042017NF/165625s.jpg "Strawberry Slush 8 1/2\" X 11\" Cardstock [ 165625 ]")
![Cloud Cover 8 1/2" X 11" Cardstock [ 165621 ]](https://assets1.tamsnetwork.com/images/EC042017NF/165621s.jpg "Cloud Cover 8 1/2\" X 11\" Cardstock [ 165621 ]")
![Vellum 12" X 12" (30.5 X 30.5 Cm) Specialty Paper [ 167099 ]](https://assets1.tamsnetwork.com/images/EC042017NF/167099s.jpg "Vellum 12\" X 12\" (30.5 X 30.5 Cm) Specialty Paper [ 167099 ]")
![Silver Foil 12" X 12" (30.5 X 30.5 Cm) Specialty Pack [ 163096 ]](https://assets1.tamsnetwork.com/images/EC042017NF/163096s.jpg "Silver Foil 12\" X 12\" (30.5 X 30.5 Cm) Specialty Pack [ 163096 ]")
![Jet Black Stāzon Ink Pad [ 101406 ]](https://assets1.tamsnetwork.com/images/EC042017NF/101406s.jpg "Jet Black Stāzon Ink Pad [ 101406 ]")
![Blueberry Bushel Classic Stampin' Pad [ 147138 ]](https://assets1.tamsnetwork.com/images/EC042017NF/147138s.jpg "Blueberry Bushel Classic Stampin' Pad [ 147138 ]")
![Strawberry Slush Classic Stampin' Pad [ 165286 ]](https://assets1.tamsnetwork.com/images/EC042017NF/165286s.jpg "Strawberry Slush Classic Stampin' Pad [ 165286 ]")
![Misty Moonlight Stampin' Blends Combo Pack [ 153108 ]](https://assets1.tamsnetwork.com/images/EC042017NF/153108s.jpg "Misty Moonlight Stampin' Blends Combo Pack [ 153108 ]")
![Blueberry Bushel Stampin’ Blends Combo Pack [ 161679 ]](https://assets1.tamsnetwork.com/images/EC042017NF/161679s.jpg "Blueberry Bushel Stampin’ Blends Combo Pack [ 161679 ]")
![Strawberry Slush 3/8" (1 Cm) Faux Linen Ribbon [ 165274 ]](https://assets1.tamsnetwork.com/images/EC042017NF/165274s.jpg "Strawberry Slush 3/8\" (1 Cm) Faux Linen Ribbon [ 165274 ]")
![Branching Out Dies [ 165775 ]](https://assets1.tamsnetwork.com/images/EC042017NF/165775s.jpg "Branching Out Dies [ 165775 ]")
![Stampin' Cut & Emboss Machine [ 149653 ]](https://assets1.tamsnetwork.com/images/EC042017NF/149653s.jpg "Stampin' Cut & Emboss Machine [ 149653 ]")
![Multipurpose Liquid Glue [ 110755 ]](https://assets1.tamsnetwork.com/images/EC042017NF/110755s.jpg "Multipurpose Liquid Glue [ 110755 ]")
![Stampin' Dimensionals [ 104430 ]](https://assets1.tamsnetwork.com/images/EC042017NF/104430s.jpg "Stampin' Dimensionals [ 104430 ]")


![Adhesive Sheets [ 152334 ]](https://assets1.tamsnetwork.com/images/EC042017NF/152334s.jpg "Adhesive Sheets [ 152334 ]")
![Tear & Tape Adhesive [ 154031 ]](https://assets1.tamsnetwork.com/images/EC042017NF/154031s.jpg "Tear & Tape Adhesive [ 154031 ]")
![Strawberries & Dots [ 167479 ]](https://assets1.tamsnetwork.com/images/EC042017NF/167479s.jpg "Strawberries & Dots [ 167479 ]")


![Happy Hibiscus Bundle (English) [ 164880 ]](https://assets1.tamsnetwork.com/images/EC042017NF/164880s.jpg "Happy Hibiscus Bundle (English) [ 164880 ]")
![Secret Sea 8 1/2" X 11" Cardstock [ 165624 ]](https://assets1.tamsnetwork.com/images/EC042017NF/165624s.jpg "Secret Sea 8 1/2\" X 11\" Cardstock [ 165624 ]")
![Basic White 8 1/2" X 11" Cardstock [ 166780 ]](https://assets1.tamsnetwork.com/images/EC042017NF/166780s.jpg "Basic White 8 1/2\" X 11\" Cardstock [ 166780 ]")
![Versamark Pad [ 102283 ]](https://assets1.tamsnetwork.com/images/EC042017NF/102283s.jpg "Versamark Pad [ 102283 ]")
![Secret Sea Classic Stampin' Pad [ 165285 ]](https://assets1.tamsnetwork.com/images/EC042017NF/165285s.jpg "Secret Sea Classic Stampin' Pad [ 165285 ]")
![Uninked Stampin’ Craft Pad & Whisper White Refill [ 147277 ]](https://assets1.tamsnetwork.com/images/EC042017NF/147277s.jpg "Uninked Stampin’ Craft Pad & Whisper White Refill [ 147277 ]")
![Sponge Daubers [ 133773 ]](https://assets1.tamsnetwork.com/images/EC042017NF/133773s.jpg "Sponge Daubers [ 133773 ]")
![Cloud Cover 3/8" (1 Cm) Faux Linen Ribbon [ 165271 ]](https://assets1.tamsnetwork.com/images/EC042017NF/165271s.jpg "Cloud Cover 3/8\" (1 Cm) Faux Linen Ribbon [ 165271 ]")
![Rhinestone Basic Jewels [ 144220 ]](https://assets1.tamsnetwork.com/images/EC042017NF/144220s.jpg "Rhinestone Basic Jewels [ 144220 ]")


![Tractor & Co Bundle (English) [ 166116 ]](https://assets1.tamsnetwork.com/images/EC042017NF/166116s.jpg "Tractor & Co Bundle (English) [ 166116 ]")
![Sunflower 3 D Embossing Folder [ 166145 ]](https://assets1.tamsnetwork.com/images/EC042017NF/166145s.jpg "Sunflower 3 D Embossing Folder [ 166145 ]")
![Darling Duckling 8 1/2" X 11" Cardstock [ 165622 ]](https://assets1.tamsnetwork.com/images/EC042017NF/165622s.jpg "Darling Duckling 8 1/2\" X 11\" Cardstock [ 165622 ]")
![Garden Green 8-1/2" X 11" Cardstock [ 102584 ]](https://assets1.tamsnetwork.com/images/EC042017NF/102584s.jpg "Garden Green 8-1/2\" X 11\" Cardstock [ 102584 ]")
![Pool Party 8-1/2" X 11" Cardstock [ 122924 ]](https://assets1.tamsnetwork.com/images/EC042017NF/122924s.jpg "Pool Party 8-1/2\" X 11\" Cardstock [ 122924 ]")
![Basic Black 8-1/2" X 11" Cardstock [ 121045 ]](https://assets1.tamsnetwork.com/images/EC042017NF/121045s.jpg "Basic Black 8-1/2\" X 11\" Cardstock [ 121045 ]")
![Garden Green Classic Stampin' Pad [ 147089 ]](https://assets1.tamsnetwork.com/images/EC042017NF/147089s.jpg "Garden Green Classic Stampin' Pad [ 147089 ]")
![Poppy Parade Classic Stampin' Pad [ 119782 ] (Retired)](https://assets1.tamsnetwork.com/images/EC042017NF/119782s.jpg "Poppy Parade Classic Stampin' Pad [ 119782 ] (Retired)")
![Crushed Curry Classic Stampin' Pad [ 147087 ]](https://assets1.tamsnetwork.com/images/EC042017NF/147087s.jpg "Crushed Curry Classic Stampin' Pad [ 147087 ]")
![Tuxedo Black Memento Ink Pad [ 132708 ]](https://assets1.tamsnetwork.com/images/EC042017NF/132708s.jpg "Tuxedo Black Memento Ink Pad [ 132708 ]")


![Impressions Abloom Bundle (English) [ 165611 ]](https://assets1.tamsnetwork.com/images/EC042017NF/165611s.jpg "Impressions Abloom Bundle (English) [ 165611 ]")
![Everyday Arches Dies [ 164629 ]](https://assets1.tamsnetwork.com/images/EC042017NF/164629s.jpg "Everyday Arches Dies [ 164629 ]")
![Notes & Totes Dies [ 165240 ]](https://assets1.tamsnetwork.com/images/EC042017NF/165240s.jpg "Notes & Totes Dies [ 165240 ]")
![Floral Impressions 12" X 12" (30.5 X 30.5 Cm) Designer Series Paper [ 165603 ]](https://assets1.tamsnetwork.com/images/EC042017NF/165603s.jpg "Floral Impressions 12\" X 12\" (30.5 X 30.5 Cm) Designer Series Paper [ 165603 ]")
![Balmy Blue 8-1/2" X 11" Cardstock [ 146982 ]](https://assets1.tamsnetwork.com/images/EC042017NF/146982s.jpg "Balmy Blue 8-1/2\" X 11\" Cardstock [ 146982 ]")
![Garden Green 12" X 12" (30.5 X 30.5 Cm) Two Tone Cardstock [ 166665 ]](https://assets1.tamsnetwork.com/images/EC042017NF/166665s.jpg "Garden Green 12\" X 12\" (30.5 X 30.5 Cm) Two Tone Cardstock [ 166665 ]")
![Balmy Blue Classic Stampin' Pad [ 147105 ]](https://assets1.tamsnetwork.com/images/EC042017NF/147105s.jpg "Balmy Blue Classic Stampin' Pad [ 147105 ]")
![Misty Moonlight Classic Stampin' Pad [ 153118 ]](https://assets1.tamsnetwork.com/images/EC042017NF/153118s.jpg "Misty Moonlight Classic Stampin' Pad [ 153118 ]")
![Berry Burst Classic Stampin' Pad [ 147143 ]](https://assets1.tamsnetwork.com/images/EC042017NF/147143s.jpg "Berry Burst Classic Stampin' Pad [ 147143 ]")
![Fresh Freesia Classic Stampin' Pad [ 155611 ]](https://assets1.tamsnetwork.com/images/EC042017NF/155611s.jpg "Fresh Freesia Classic Stampin' Pad [ 155611 ]")
![Mini Stampin' Dimensionals [ 144108 ]](https://assets1.tamsnetwork.com/images/EC042017NF/144108s.jpg "Mini Stampin' Dimensionals [ 144108 ]")


![Floral Impressions Suite Collection (English) [ 165617 ]](https://assets1.tamsnetwork.com/images/EC042017NF/165617s.jpg "Floral Impressions Suite Collection (English) [ 165617 ]")
![Stampin' Seal [ 152813 ]](https://assets1.tamsnetwork.com/images/EC042017NF/152813s.jpg "Stampin' Seal [ 152813 ]")


![Toadstool Gardens 6" X 6" (15.2 X 15.2 Cm) Designer Series Paper [ 164942 ]](https://assets1.tamsnetwork.com/images/EC042017NF/164942s.jpg "Toadstool Gardens 6\" X 6\" (15.2 X 15.2 Cm) Designer Series Paper [ 164942 ]")
![Thanking You Photopolymer Stamp Set (English) [ 163718 ]](https://assets1.tamsnetwork.com/images/EC042017NF/163718s.jpg "Thanking You Photopolymer Stamp Set (English) [ 163718 ]")
![Granny Apple Green 8-1/2" X 11" Cardstock [ 146990 ]](https://assets1.tamsnetwork.com/images/EC042017NF/146990s.jpg "Granny Apple Green 8-1/2\" X 11\" Cardstock [ 146990 ]")
![Basic White 8 1/2" X 11" Thick Cardstock [ 159229 ]](https://assets1.tamsnetwork.com/images/EC042017NF/159229s.jpg "Basic White 8 1/2\" X 11\" Thick Cardstock [ 159229 ]")
![Perennial Postage Dies [ 162607 ]](https://assets1.tamsnetwork.com/images/EC042017NF/162607s.jpg "Perennial Postage Dies [ 162607 ]")
![Heat Tool (Us And Canada) [ 129053 ]](https://assets1.tamsnetwork.com/images/EC042017NF/129053s.jpg "Heat Tool (Us And Canada) [ 129053 ]")
![Basics Wow! Embossing Powder [ 165679 ]](https://assets1.tamsnetwork.com/images/EC042017NF/165679s.jpg "Basics Wow! Embossing Powder [ 165679 ]")
![Terrific Toadstools Bundle (English) [ 164790 ]](https://assets1.tamsnetwork.com/images/EC042017NF/164790s.jpg "Terrific Toadstools Bundle (English) [ 164790 ]")
![Melon Mambo Classic Stampin' Pad [ 147051 ]](https://assets1.tamsnetwork.com/images/EC042017NF/147051s.jpg "Melon Mambo Classic Stampin' Pad [ 147051 ]")
![Granny Apple Green Stampin' Pad [ 147095 ]](https://assets1.tamsnetwork.com/images/EC042017NF/147095s.jpg "Granny Apple Green Stampin' Pad [ 147095 ]")


")