
“and the 2025 winner in the Top Die-Cutting Tool category is……EVERYDAY ARCHES!”
Worthy of a standing ovation, the Stampin’ Up! Everyday Arches Dies (and coordinating stamp set) are truly a non-negotiable necessity in everyone’s craft room. Full stop.

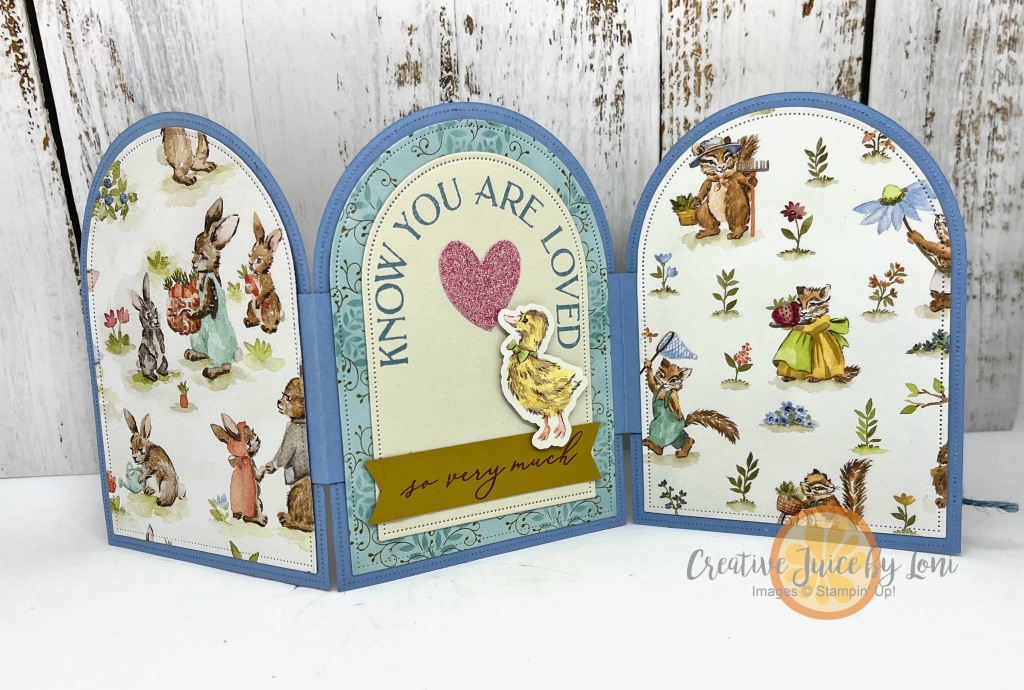
With 10 nesting dies (the largest die is 5-3/16″ x 3-15/16″), you’ll marvel at the full range of crafting abilities of such a basic shape. (In case they are “currently unavailable”, fear not, they’ll be back in stock soon!). I’m here to help you see their potential, starting with the Arched Screen Divider Card:

Don’t arch an eyebrow (ha-ha)…this is just the front. When you open it up, the STAGE IS SET:

As a baby card, you could put a photo of the newborn in the center panel -OR- list their name, birthdate, birth place and vitals (handwritten, if you have lovely writing or print from your computer, if you don’t).
The back side gives more space to add photos or love notes:
What I love best is that the Beatrix Potter vibes make it a perfect decoration on a nursery shelf, or the parents could use each piece in a scrapbook!
A few close ups:


The “Know You are Loved” panel was completed after my demonstration, and it is the perfect fit.
I’ve got different versions to share with you, but first, the instructions in video:
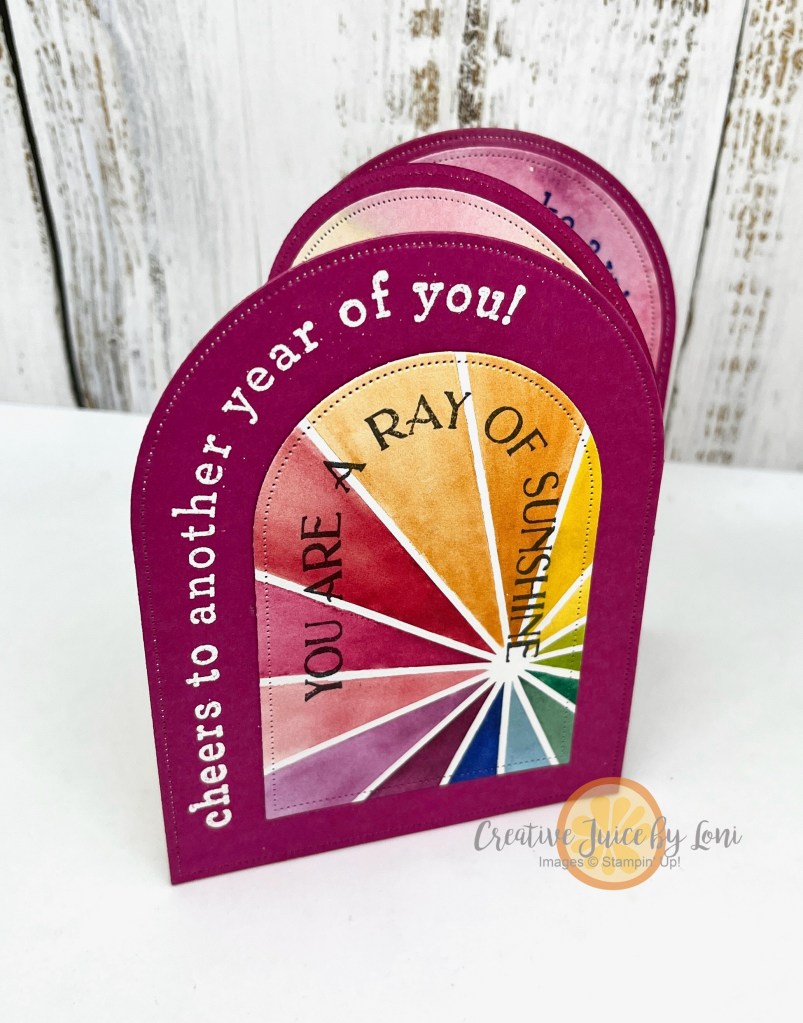
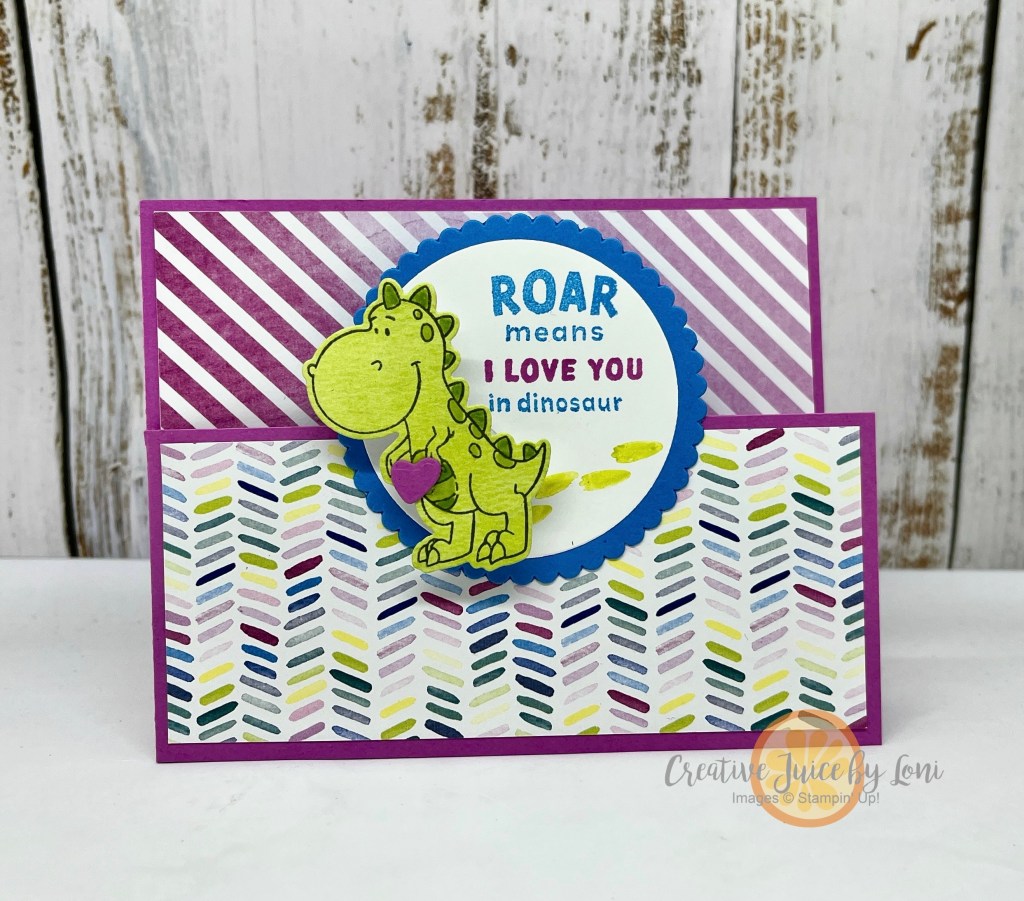
On to the other versions, starting with a birthday card using the Full of Life Designer Series Paper and a sneak peek of the Arched Wishes stamp set, coming in March:


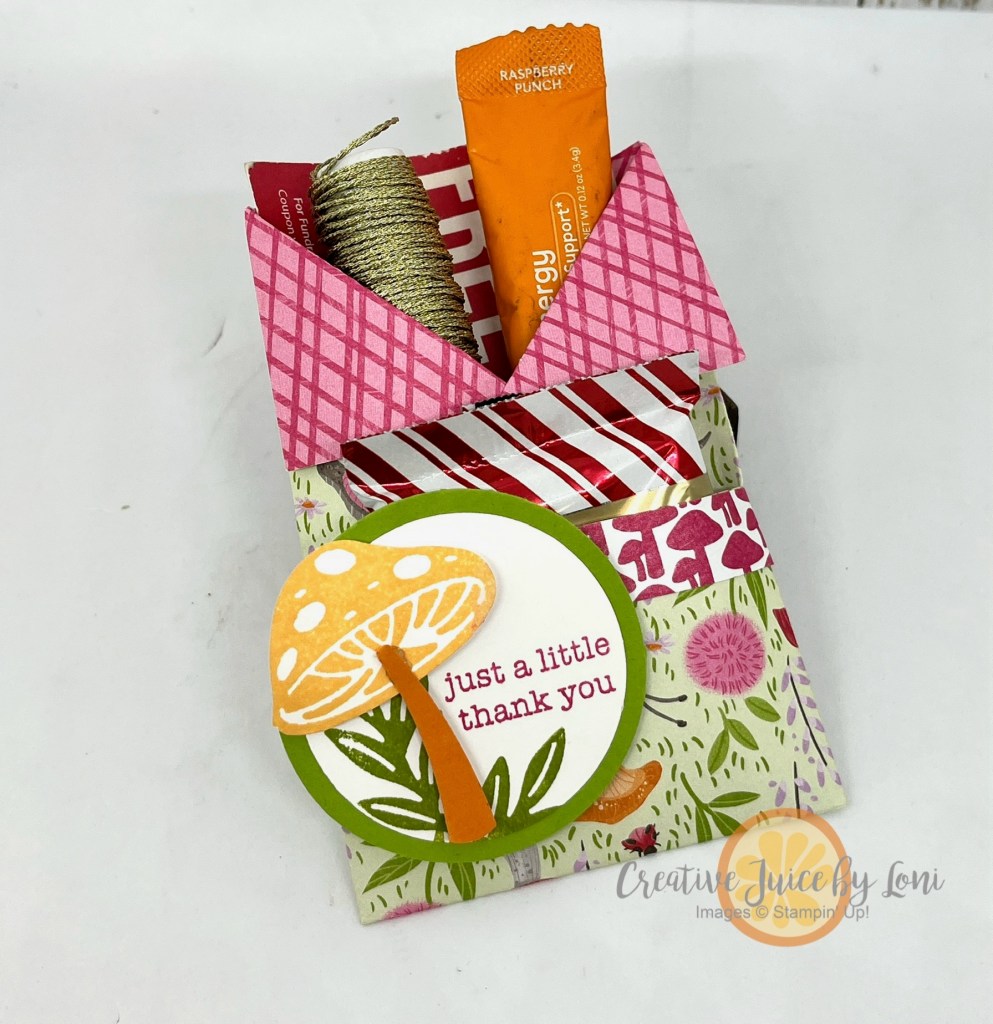
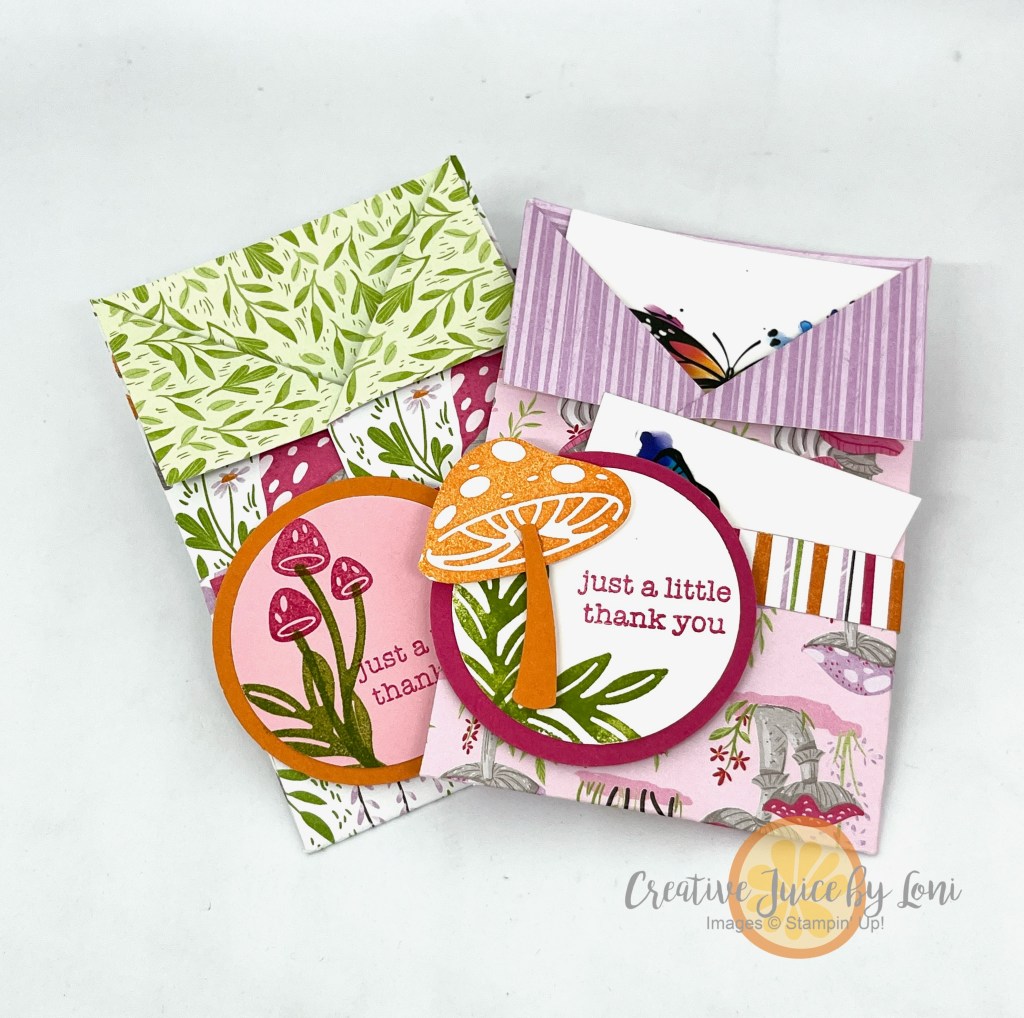
Because there are only 5 days left of Stampin’ Up! Sale-a-Bration, I also had to make an Arched Screen Divider card with one of our freebies:

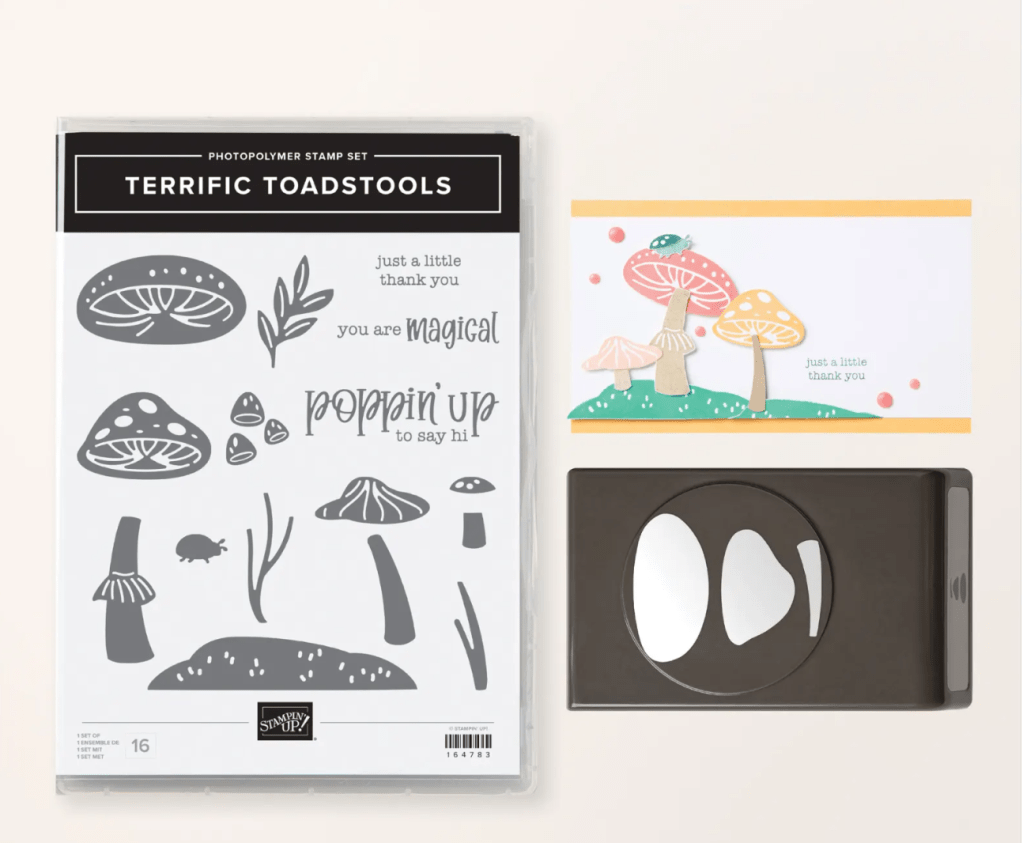
If the Terrific Toadstool bundle is on your list, don’t put off ordering it even one more second, or you’ll miss out on the Toadstool Gardens Designer Series Paper (free choice with $60 purchase by February 28, 2025)!

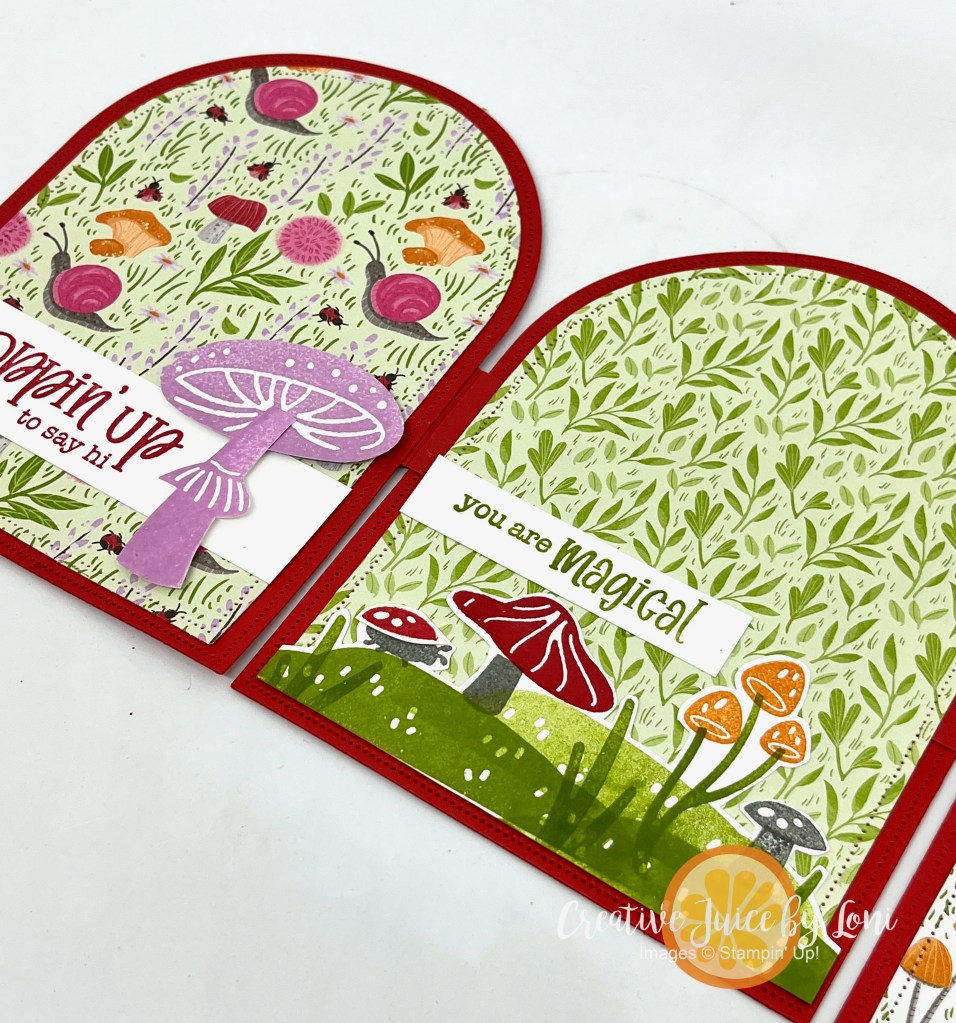
Tell me what you think of this card (comment section at top of post, by title and date posted) and you may receive the toadstool version in the mail!
For the Storybook Moments Baby card, you’ll need:
Product List![Everyday Arches Bundle (English) [ 164630 ]](https://assets1.tamsnetwork.com/images/EC042017NF/164630s.jpg "Everyday Arches Bundle (English) [ 164630 ]")
![Storybook Moments 12" X 12" (30.5 X 30.5 Cm) Specialty Designer Series Paper [ 164662 ]](https://assets1.tamsnetwork.com/images/EC042017NF/164662s.jpg "Storybook Moments 12\" X 12\" (30.5 X 30.5 Cm) Specialty Designer Series Paper [ 164662 ]")
![Boho Blue 8 1/2" X 11" Cardstock [ 161724 ]](https://assets1.tamsnetwork.com/images/EC042017NF/161724s.jpg "Boho Blue 8 1/2\" X 11\" Cardstock [ 161724 ]")
![Copper Clay 8 1/2" X 11" Cardstock [ 161721 ]](https://assets1.tamsnetwork.com/images/EC042017NF/161721s.jpg "Copper Clay 8 1/2\" X 11\" Cardstock [ 161721 ]")
![Basic Beige 8 1/2" X 11" Cardstock [ 164511 ]](https://assets1.tamsnetwork.com/images/EC042017NF/164511s.jpg "Basic Beige 8 1/2\" X 11\" Cardstock [ 164511 ]")
![Wild Wheat 8 1/2" X 11" Cardstock [ 161725 ]](https://assets1.tamsnetwork.com/images/EC042017NF/161725s.jpg "Wild Wheat 8 1/2\" X 11\" Cardstock [ 161725 ]")
![2024–2026 In Color™ Glimmer 12" X 12" (30.5 X 30.5 Cm) Specialty Paper [ 163771 ]](https://assets1.tamsnetwork.com/images/EC042017NF/163771s.jpg "2024–2026 In Color™ Glimmer 12\" X 12\" (30.5 X 30.5 Cm) Specialty Paper [ 163771 ]")
![2022–2024 In Color Baker's Twine Pack [ 159195 ]](https://assets1.tamsnetwork.com/images/EC042017NF/159195s.jpg "2022–2024 In Color Baker's Twine Pack [ 159195 ]")
![Boho Blue Classic Stampin' Pad [ 161650 ]](https://assets1.tamsnetwork.com/images/EC042017NF/161650s.jpg "Boho Blue Classic Stampin' Pad [ 161650 ]")
![Copper Clay Classic Stampin' Pad [ 161647 ]](https://assets1.tamsnetwork.com/images/EC042017NF/161647s.jpg "Copper Clay Classic Stampin' Pad [ 161647 ]")
![Bee Builder Punch [ 162553 ]](https://assets1.tamsnetwork.com/images/EC042017NF/162553s.jpg "Bee Builder Punch [ 162553 ]")
![Stampin' Cut & Emboss Machine [ 149653 ]](https://assets1.tamsnetwork.com/images/EC042017NF/149653s.jpg "Stampin' Cut & Emboss Machine [ 149653 ]")
![Multipurpose Liquid Glue [ 110755 ]](https://assets1.tamsnetwork.com/images/EC042017NF/110755s.jpg "Multipurpose Liquid Glue [ 110755 ]")
![Stampin' Seal+ [ 149699 ]](https://assets1.tamsnetwork.com/images/EC042017NF/149699s.jpg "Stampin' Seal+ [ 149699 ]")
![Stampin' Dimensionals [ 104430 ]](https://assets1.tamsnetwork.com/images/EC042017NF/104430s.jpg "Stampin' Dimensionals [ 104430 ]")
![Brushed Brass Butterflies [ 158136 ]](https://assets1.tamsnetwork.com/images/EC042017NF/158136s.jpg "Brushed Brass Butterflies [ 158136 ]")


")
 Designer Series Paper")
 Circle Punch")
 Circle Punch")


![Thanking You Photopolymer Stamp Set (English) [ 163718 ]](https://assets1.tamsnetwork.com/images/EC042017NF/163718s.jpg "Thanking You Photopolymer Stamp Set (English) [ 163718 ]")
![Basic White 8 1/2" X 11" Thick Cardstock [ 159229 ]](https://assets1.tamsnetwork.com/images/EC042017NF/159229s.jpg "Basic White 8 1/2\" X 11\" Thick Cardstock [ 159229 ]")
![Perennial Postage Dies [ 162607 ]](https://assets1.tamsnetwork.com/images/EC042017NF/162607s.jpg "Perennial Postage Dies [ 162607 ]")
![Versamark Pad [ 102283 ]](https://assets1.tamsnetwork.com/images/EC042017NF/102283s.jpg "Versamark Pad [ 102283 ]")
![Tuxedo Black Memento Ink Pad [ 132708 ]](https://assets1.tamsnetwork.com/images/EC042017NF/132708s.jpg "Tuxedo Black Memento Ink Pad [ 132708 ]")
![Heat Tool (Us And Canada) [ 129053 ]](https://assets1.tamsnetwork.com/images/EC042017NF/129053s.jpg "Heat Tool (Us And Canada) [ 129053 ]")
![Basics Wow! Embossing Powder [ 165679 ]](https://assets1.tamsnetwork.com/images/EC042017NF/165679s.jpg "Basics Wow! Embossing Powder [ 165679 ]")
![Fresh Freesia Classic Stampin' Pad [ 155611 ]](https://assets1.tamsnetwork.com/images/EC042017NF/155611s.jpg "Fresh Freesia Classic Stampin' Pad [ 155611 ]")


 Designer Series Paper")
")
")
")


 Large Check Ribbon")


![Darling Dinos Bundle (English) [ 164735 ]](https://assets1.tamsnetwork.com/images/EC042017NF/164735s.jpg "Darling Dinos Bundle (English) [ 164735 ]")
![Bright & Beautiful 6" X 6" (15.2 X 15.2 Cm) Designer Series Paper [ 161449 ]](https://assets1.tamsnetwork.com/images/EC042017NF/161449s.jpg "Bright & Beautiful 6\" X 6\" (15.2 X 15.2 Cm) Designer Series Paper [ 161449 ]")
![Petunia Pop 8 1/2" X 11" Cardstock [ 163801 ]](https://assets1.tamsnetwork.com/images/EC042017NF/163801s.jpg "Petunia Pop 8 1/2\" X 11\" Cardstock [ 163801 ]")
![Azure Afternoon 8 1/2" X 11" Cardstock [ 161719 ]](https://assets1.tamsnetwork.com/images/EC042017NF/161719s.jpg "Azure Afternoon 8 1/2\" X 11\" Cardstock [ 161719 ]")
![Azure Afternoon Classic Stampin' Pad [ 161663 ]](https://assets1.tamsnetwork.com/images/EC042017NF/161663s.jpg "Azure Afternoon Classic Stampin' Pad [ 161663 ]")
![Petunia Pop Classic Stampin Pad [ 163811 ]](https://assets1.tamsnetwork.com/images/EC042017NF/163811s.jpg "Petunia Pop Classic Stampin Pad [ 163811 ]")
![Brights Stampin' Write Markers [ 161696 ]](https://assets1.tamsnetwork.com/images/EC042017NF/161696s.jpg "Brights Stampin' Write Markers [ 161696 ]")
![Mini Stampin' Cut & Emboss Machine [ 150673 ]](https://assets1.tamsnetwork.com/images/EC042017NF/150673s.jpg "Mini Stampin' Cut & Emboss Machine [ 150673 ]")
![2 3/8" (6 Cm) Circle Punch [ 161354 ]](https://assets1.tamsnetwork.com/images/EC042017NF/161354s.jpg "2 3/8\" (6 Cm) Circle Punch [ 161354 ]")
