10 days left in Stampin’ Up!’s Sale-a-Bration 2024, with your window to choose free gifts narrowing quickly…so today we are taking a look at one of the options I haven’t shown before: The Jungle Pals stamp set.
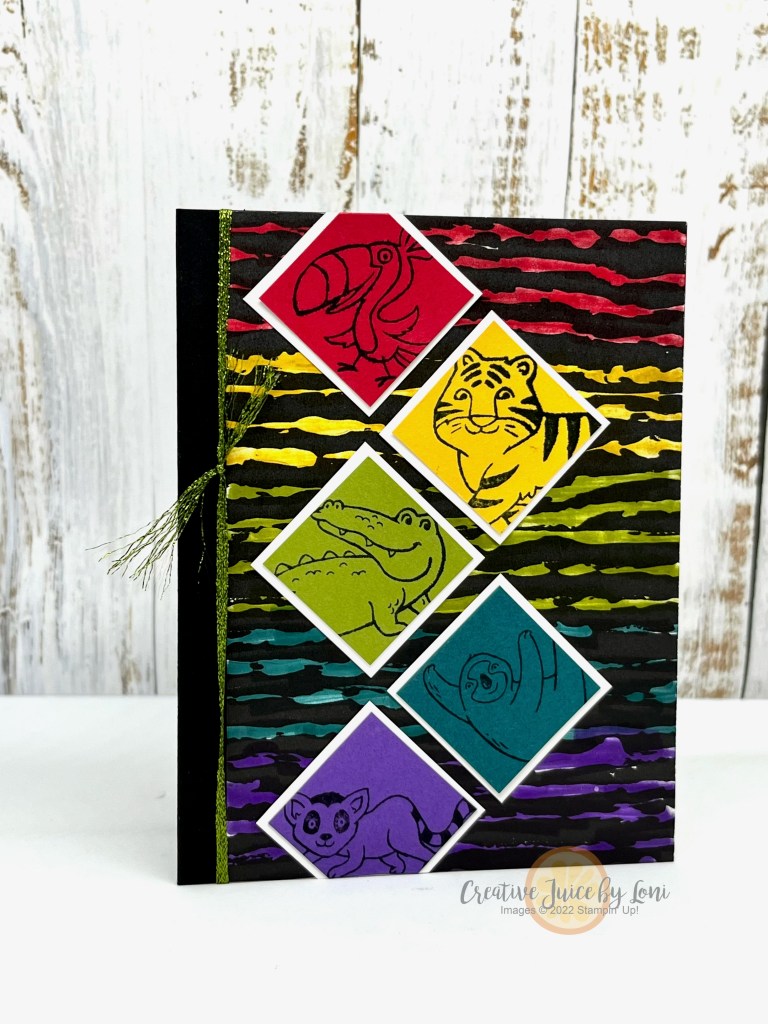
As one of your options to choose with $50 order (until 2/29/24), I wanted to show an easy way to use just the stamp set (there is an additional coordinating die set you could select with another $100 purchase).
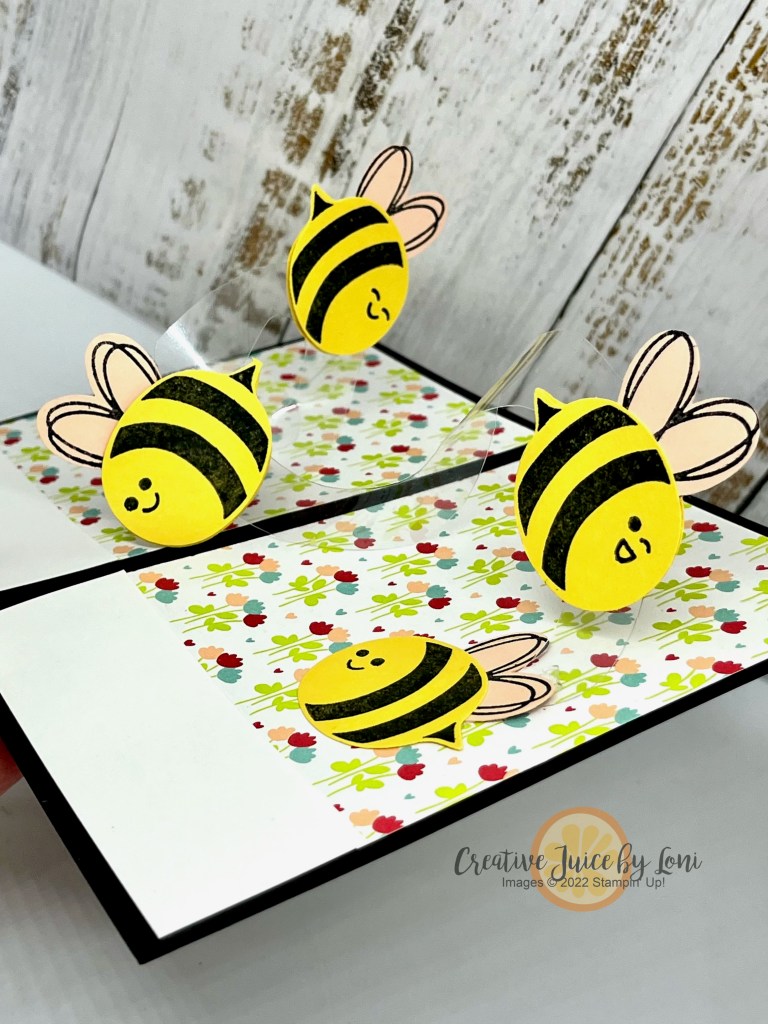
Start with a 5-1/2″ x 4-1/4″ black card stock base. I added a piece of the Rock & Roll Designer Series Paper colored with Stampin’ Write markers to the top right side, and simply stamped the animals on 1-1/4″ square colored card stock pieces. Frame each animal in 1-3/8″ white card stock and tile onto the front of the card.
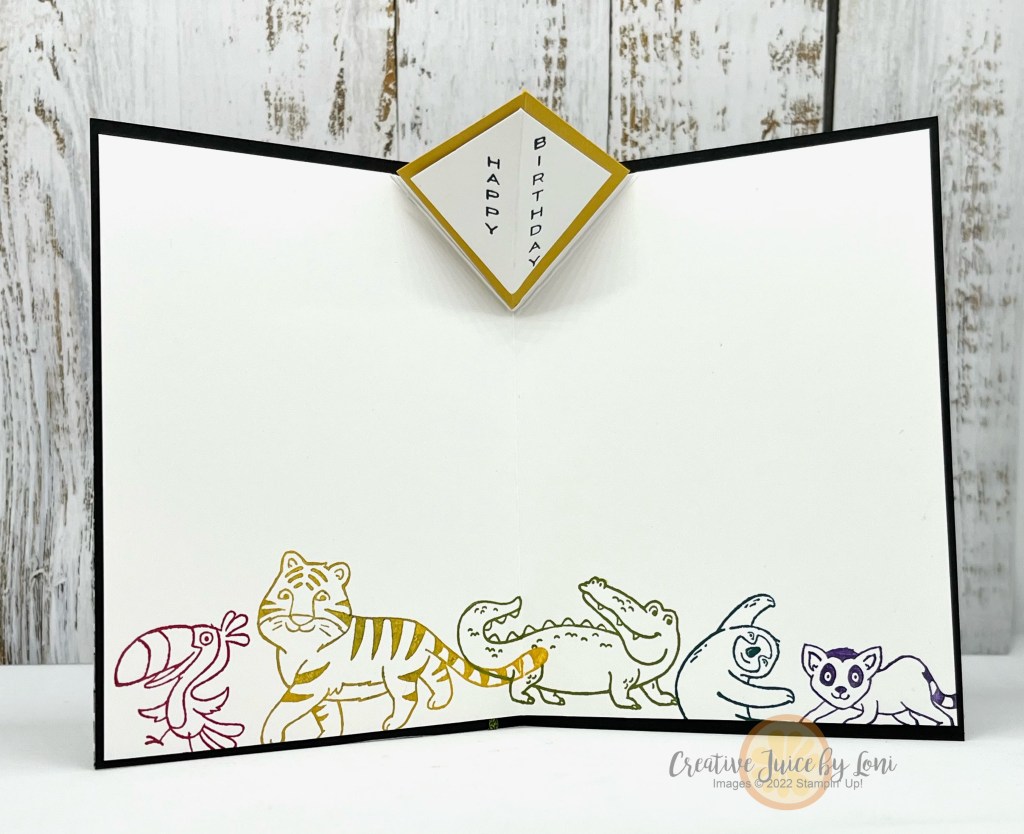
For the inside, you’ll need a 5-1/4″ x 8-1/4″ white card stock. Refer to video tutorial for instructions for easy pop-up mechanism instructions.
Here’s the how to:
This style of card can be created with many different products, and choosing products through my Stampin’ Store helps me to keep bringing you this type of training and teaching. When you support a Stampin’ Up! demonstrator, you are guaranteed quality products, unmatched service and hours of happy creativity!
Product List


 Designer Series Paper")


 Metallic Woven Ribbon")

 Designer Series Paper")

")


")

 Grosgrain Ribbon")
 Crinkle Ribbon")


 Designer Series Paper")


")
")


 Designer Series Paper")
")


")
 Designer Series Paper")


 Circle Punch")
 Circle Punch")