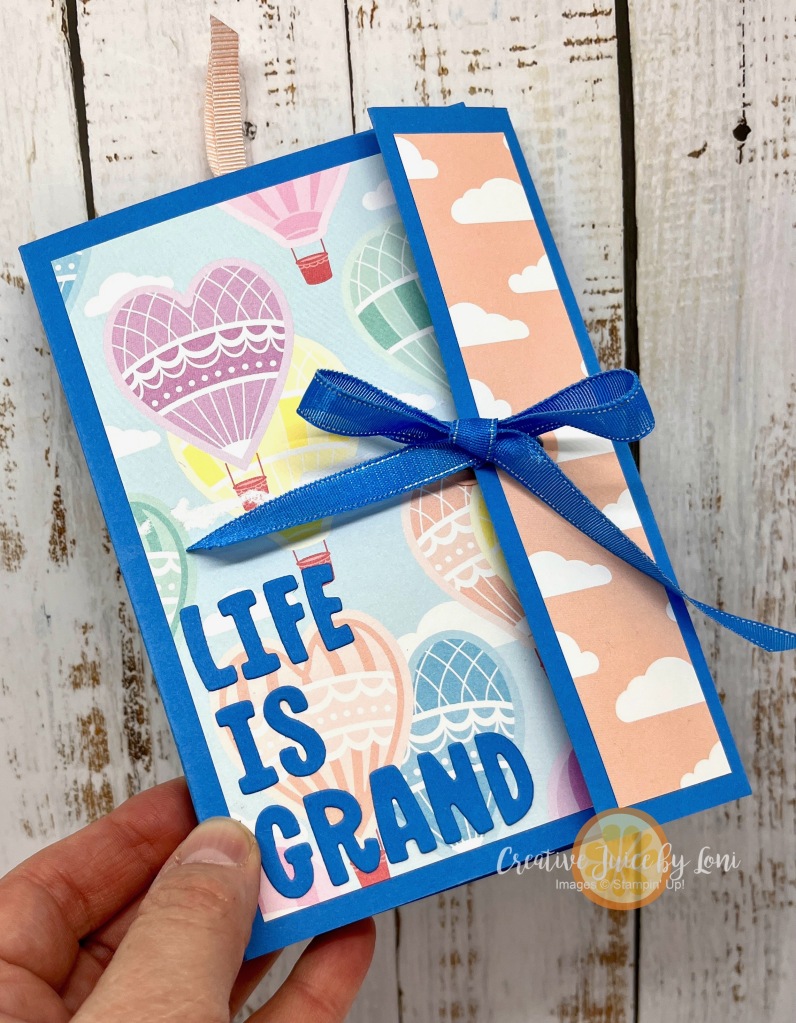
New at SU! – Spell It Out!

With all the awesome alphabet products Stampin’ Up! currently carries, the New at SU! design team is showing up to demonstrate ways to say what you want to say in our March 2023 Blog Hop!

I’ve paired the Alphabet a la Mode dies with the Greatest Journey dies to create a card of encouragement for someone who is working toward a goal:

The trickiest part of this card was making sure I cut out the letters the same distance from the top of each strip of card stock, and to remember to keep the inside of the letter “A” to adhere inside the negative image. I did add an adhesive sheet to the back of each 7/8″ x 4″ piece of card stock before die cutting, so I could easily adhere the strips to the card AND use the letters I cut out for another project.

TIP: Use a piece of washi tape to hold the letters in place as you run the dies through the Cut & Emboss machine!

After that, it was all downhill (so to speak): die cut the runner and mountain from Basic Black, and layer the card onto a black mat.

I stamped the “This Moment” sentiment inside the card, because we don’t always recognize that our hard work now will pay off later.

Now, discover MORE ways to use letters and alphabets in your paper crafting with these ideas from our International New at SU! Group of Demonstrators:

March 2023 New at SU! Blog Hop: Spell It Out!
1.Creative Juice by Loni (US) – Spell it Out, Alphabet a la Mode
2.The Joy of Stampin’ with Rachael (USA)- Playing in the Rain
3.JONi in the Spotlight Stamping (US)-ALPHABET A LA MODE
4.De Kijkkast (NL)- Classic Letters & Sweet Citrus
5.Playing with Papercrafting (CAN) – Spelling Bee
6.Tricia’s Stamping Creations (US) – Spell It Out Alphabest Bundle
7.Stamping Flair (AU) – Love You More Dies with Paradise Palms
8.247Inkspiration (US) – Milkshake Love
9.iHeartCards2 (US) – Spell it Out, Love For You
10.scraphexe (DE) – Angesagtes Alphabet
11.TanjasKartenwelt (DE)- Angesagtes Alphabet
12.Carterie Plus (CA)- Épeler/Spell it out

Powered by blogcarousel.com

Product List

New at SU! Legendary Ride

We took the challenge to show you our favorite bundles from the newest January-April Mini catalog…without using Basic White card stock!

Thanks for pausing along the path of our February New at SU! hop- I’m so glad you’re visiting and hope all the ideas you save or PIN will give you inspiration for your next stamping project.

Basic white is a wonderfully smooth paper to stamp on, but did you know it has a lovely cousin, VERY VANILLA? I’m rarely without a full backup package of either of these stamping staple card stocks, but Vanilla is often overlooked, so I think you’ll see a lot of her today:

The Legendary Ride bundle is part elegant, a bit retro and all high adventure! The glossy black “Ready to Ride” Designer Series Paper that coordinates with the bundle captures it all.

For this card, I embossed the shorter (top) side of a Vanilla card (5-1/4″ x 7-3/4″, scored at 4″) with the Thanks embossing folder, then scored a 5-1/4″ x 4-1/2″ piece of the checkered Designer Series Paper at 1/2″ on the bottom of the directional side (so the images face up when you open it). Next, cut the top with a die from the Basic Borders and adhere it behind the Vanilla card before mounting it to the basic black card stock mat.

Before I cut my letters out, I adhered an adhesive sheet behind a piece of 4″ x 1-3/4″ Very Vanilla card stock and lined up my letters as close as I could. TIP: Hold them in place with a strip of washi tape. Adding the letters to my motorcycle card was easy: Just peel off the adhesive backing and they stick like STICKERS!

BONUS PROJECT:

Then I was left with the negative, which I adhered to a piece of the Sale-a-Bration Favored Flowers Designer Series Paper (a choice free with $50 order before 2/28/23) and cut with the same Basic Borders Die. I added a piece of Gorgeous Grape ribbon (currently in the Clearance Rack in my Stampin’ Store) before attaching it to a Very Vanilla card base:

Die cut once and get two cards!

Now on to more stamping adventures with our design team around the world…click on each one and save your favorites:

February 2023 New at SU! Blog Hop: J-A Mini Catalog Bundles, Without Basic White Cardstock

Powered by blogcarousel.com

If you are in the U.S. and don’t have a demonstrator currently serving you, I’m happy to act as your craft supplier and have listed the items needed for the Legendary Ride card here:

Product List

New at SU! Coming Up Carrots for Sale-a-Bration

It’s Sale-a-Bration time at Stampin’ Up! and everything’s coming up CARROTS!

The New at SU! design team is back to show you some creative ways to use the products you can collect FREE during January-February 2023 (with your qualifying orders). We will show you CARDS & COORDINATING ENVELOPES with Sale-a-Bration products, and I’m showcasing the “Thanks a Bunch” stamp set AND the Dandy Designs Designer Series Paper!

First, did you know carrots come in different colors?

Okay, maybe not Balmy Blue, but while we mostly see orange carrots in grocery stores today, that color only emerged in the 1600s. Purple and yellow were originally the most prevalent colors, and heirloom carrots are making a big comeback in gardens!

For this card, I grabbed the complimentary color across the color wheel from orange (= blue) and used the grid pattern from the Dandy Designs Designer Series Paper to use as my background (and on the flap for my coordinating envelope):

To make space on the front of your envelope for an address, just use a post-it note (cut to 1-1/4″) wide to mask off the center of the envelope and stamp your images over the top, then remove the post-it note:

I couldn’t stop with just one…there are 24 different patterns (48 sheets, 4 each of 12 double-sided designs) in the mega-pack of the Designer Series Paper, so I wanted to show you a few more:

I just had to add the bunny from the “Playing in the Rain” stamp set on that one! It’s a simple card with stripes of the patterned paper as the background and on the envelope. For the bunny’s rain coat, I stamped on a scrap of Mango Melody card stock and fussy cut it out, then glued it on. You could order the Playing in the Rain BUNDLE or SUITE and choose the Thanks a Bunch stamps as your free Sale-a-Bration reward!

All the supplies are listed at the bottom of this post, and if you don’t currently have a US demonstrator, I’m happy to serve you!

Now don’t miss the other Cards + Envelope projects from our talented demonstrator design team:

January New at SU! Hop: Sale-a-Bration + Matching Envelope

Powered by blogcarousel.com

P.S. In case you didn’t hear, The Rain or Shine Suite coordinates with the February 2023 Paper Pumpkin kit! Subscribe by February 10th to get this cute craft kit in the mail:

Product List

New at SU! – Framed & Festive Tags

Let’s wrap up the season with some GIFT TAGS for you to copy or to inspire you! Our global group of demonstrators have some terrific tags, so don’t miss gathering ALL the ideas…or PIN them for next year!

I have a lot of holiday Designer Series Paper left over, and I wanted to pair it with my favorite sentiments from the Framed & Festive set (only available for 2 more weeks!). They can be used for *any* holiday and the sayings fit in the Framed Florets dies (which WILL be in the 2023 January-April mini catalog), so it was speedy to create these:

Each strip of Designer Series Paper was 5-1/2″ x 1-1/2″. I just cut out a Garden Green, Real Red and Basic White Oval Frame, then mixed and matched the colors for stamping or embossing.

A simple tag can really dress up any gift, and these are under the tree, or out for delivery!

I’ll link my supplies below, and I am happy to serve USA Crafters (if you don’t have a demonstrator already), or you can find a demonstrator in your country along our hop:

December New at SU! Hop: Terrific Tags

Powered by blogcarousel.com

Product List

New at SU: This Piggy is Giving a Gift Card

Giving a gift card makes everyone happy: It’s easy for you to buy, and the recipient gets to choose what they want. But if it seems “impersonal”, the New at SU! design team is here to show you how to make gifting (and getting) a gift card EXCITING!

This Birthday Piggy is scooting in on a gift box that doesn’t even hint at what’s inside:

It’s a charming surprise when you open the box and a gift card pops up:

Don’t worry…it’s a simple box to make and the mechanism is a piece of (birthday) cake! Let me show you how:

This is my fancy project sketch and dimensions (bold lines are where you will cut). It may help as you follow along with the video tutorial (feel free to pause the video as you learn). You can get both pieces from one sheet of 8.5″ x 11″ card stock.

Once your box is assembled and decorated, simply attach your gift card to the front panel of the pop-up piece using a few glue dots!

I’ll list the supplies below and am happy to serve you if you are in the U.S. and don’t have a demonstrator. Now make sure you hop along to see the other clever gift card holders our International creative team are sharing…click a link below:

November New at SU! Blog Hop: Give a Gift Card

Powered by blogcarousel.com

Product List

IF GIFT CARDS ARE YOUR JAM, DON’T MISS SUBSCRIBING FOR THE DECEMBER PAPER PUMPKIN KIT!

Create fun gift card holders to help you celebrate your special occasions all year long! Personalize each gift with these reversible boxes and paper bands for a unique design every time. This kit includes:

  • Good Things Come in Small Packages Photopolymer Stamp Set
  • Garden Green Classic Stampin’ Spot
  • 16 gift card holders: 2 each of 8 reversible designs
  • Precut paper pieces, twine, and belly bands to customize all your crafts.
  • Enough adhesive for each project!
  • Finished box size: 3-5/8″ x 2-1/2″ x 1/2″

Coordinating Stampin’ Up! colors for the December Kit: Balmy Blue, Basic Gray, Blushing Bride, Calypso Coral, Crushed Curry, Garden Green, Tahitian Tide

Plus, you can take your crafting even further with a special add-on: Give a gift card box and a personalized card with the Good Things Cards & Envelopes add-on. You get 20 cards (5 each of 4 designs) and 20 coordinating envelopes…while supplies last!

Scottie Dog Loves You- Simple to Stepped Up

Woof! means “Welcome” to the October New at SU! Blog Hop. We really stretched our creativity to bring you not one, but THREE projects this month~ all using the same stamps, but ranging from simple to sensational!

Perhaps you are just starting to stamp, or you need an easy card in a hurry? Or you are ready to add a little “extra” to your card? Don’t worry, avid stampers, I’ve got something for you to make this card “over the top” too!

I’m using the Christmas Scottie bundle (stamps & punch) but with a non-holiday card concept…it could easily be adapted for a Christmas Card just by changing the colors and greeting.

Simple Card: 3″ x 5″ banner (use a 3″ x 1/2″ strip of the other side of the Designer Series Paper for the top), stamp and punch out dog, bow and add greeting. TIP: Remember to stamp your envelope(s) at the same time as you are stamping the card!

Step it up to a Casual Card: Add a 4″ x 5-1/2″ piece of Soft Suede Designer Series Paper to the card background, tie a ribbon around the top of the banner and emboss the greeting on Soft Suede. Tip: Add a 1/2″ wide piece of card stock punched with the Banners Pick-a-Punch behind the heat-embossed sentiment to make it look like a banner:

To step it up to an Avid Card: Score 1-1/4″ from the right edge of the card and fold it back. Add 1″ strips of Designer Series Paper to the flap and inside right edge of card and 2-3/4″ 5-1/4″ panels of Designer Series Paper and basic white card stock to front left side and inside card. Banner: 3-3/4″ x 3″ (DSP) and 3-1/4″ x 4″ Soft Suede. Add Iridescent Rhinestones.

TIP: Only adhere banner to the front flap so it can open like this:

Wherever you are on the Stamping Spectrum, you’ll discover multiple ways to keep it simple OR step it up at all these amazing posts along our October Hop…Pin your favorites to remember them!

Simple to Stepped Up: October New at SU! Hop

Powered by blogcarousel.com
Product List

New at SU!: Cast a Spell With a Magic Card

We are back to inspire you to try fancy fold & fun interactive cards! The International New at SU! Design Team is going to ignite your imagination…try copying one of our creations, or use what you have to make something similar. You’ll have so much fun trying something new!

While a “Magic Card” isn’t a new idea, it felt like the new Best Witches stamp set was a perfect one to use:

If you’ve never made a Magic Card before, give it a go…it’s immensely fun to pull it out and watch the image magically become colored before your eyes! I’ve created a video tutorial, and you can pause it as you craft along with me:

I’ve listed all the supplies you’ll need at the bottom of the page. Go ahead and pin this post to remind you to try a magic card, then hop on over to the other ingenious card ideas from the other design team demonstrators:

Fun Folds for Fall: August New at SU! Blog Hop

Powered by blogcarousel.com

Product List

New at SU! In-Color Happiness

New Catalog, New Colors, New Stamps…and we can’t wait to share it all with you! Today we are featuring the 2022-2024 In-Colors that made their debut this month and as you visit the website of each of our International demonstrator design team, make sure you PIN your favorites to remember for later.

Bright and bold, I adore these new colors, and I wanted to show how lovely three of them (Parakeet Party, Sweet Sorbet and Orchard Oasis) coordinate in WATERCOLOR:

The Happiness Abounds bundle was perfect for this simple technique! Here are the easy steps:

  1. Heat emboss the flowers and leaves with white embossing powder on thick Basic White card stock.
  2. Squeeze your ink pads (while closed) to get a bit of ink inside the lid of your case, then open the ink pad and pick up a bit of ink from the lid using a water painter. (Don’t pick up ink directly from your ink pad). TIP: Start with a light wash of color and add more as desired..
  3. Use the dies to cut out the watercolored flora using the Stampin’ Cut & Emboss machine and add to your project with liquid glue or dimensionals.

Putting these flowers onto one of our new striped Emboss Treat bags makes me ready for the next birthday or wedding gift I need to wrap.

Before you move on to Andrea’s pretty project (or click anywhere on the list to see more In-Color Inspiration), tell me which In-Color matches your personality!? For me, I think it’s going to be Tahitian Tide (which I didn’t even use on this project!).

May 2022 New At SU!: In-Color Inspiration

Powered by blogcarousel.com

If you don’t have a demonstrator serving you in the US, I’m happy to help you! If you live in Canada, Netherlands, Germany or Australia, choose one of our Design Team members in the list above to shop with! Here’s the list of supplies used on my project:

Product List

The BEST way to collect all the new In-Colors is with the In Color Starter Kit in May! Click image below to get started.

New at SU: Beautiful Day for Love

It’s the New at SU! Design Team “Moms, Dads, Brides and Grads” blog hop!

Our international design team wants to help YOU get ready for all the big events coming in the next few months, so visit all the posts and PIN your favorites to try. I had fun creating this card for brides (and grooms) on a wedding day using the Blessings of Home Bundle…and BONUS, it’s perfect for gifting money to the newlyweds as it’s a large slimline card that fits in our coordinating Slimline envelopes

For this size of card, start with a piece of 8.5″ x 7″ card stock and score it in half at 3.5″ (finished card is 8.5″ x 3.5″).

Have you ever tried Stampin’ Up! Watercolor Pencils? They are easier than you’d think to use and they give this card a soft effect, different than my usual preference for Stampin’ Blends. This is literally how I started…just by scribbling color onto my Watercolor Paper:

I do TRY to follow the lines and details of the image, then I use the Water Painters to blend the colors out, working from lightest to darkest. A tip for watercoloring: You will have MUCH better success when using Watercolor Paper or SU! Shimmery White paper, as they hold up to the moisture best and won’t “pill up” when you add water.

Once dry, use the dies to cut out the image for the front of your card. I’ve layered it onto some lovely Designer Series Paper.

I’m also practicing (but not proficient, yet) the art of the double bow, which I call “The Tammy” in honor of fellow demonstrator Tammy Wilson, whose cards are immediately identifiable by her lovely bows. Luckily for you AND me, she’s made a video, which I’ve watched and attempted numerous times on the Stampin’ Up! Facebook page. With enough practice, I’m confident my double bows will get better.

All the supplies I used are listed below, and you are ready to travel on to the next post in our Blog Hop:

Moms, Dads, Brides & Grads: New at SU! April 2022

Powered by blogcarousel.com

Product List
Blessings Of Home Bundle (English)
$51.25
Soft Succulent 8 1/2" X 11" Cardstock
$8.75
Fluid 100 Watercolor Paper
$9.00
Basic Black 8-1/2" X 11" Cardstock
$8.75
2021–2023 In Color 6" X 6" (15.2 X 15.2 Cm) Designer Series Paper
$11.50
Heart & Home 12" X 12" (30.5 X 30.5 Cm) Designer Series Paper
$11.50
Watercolor Pencils
$16.00
Watercolor Pencils Assortment 2
$12.50
Water Painters
$12.00
Basic Borders Dies
$29.00
Stampin' Cut & Emboss Machine
$120.00
Basics Embossing Powders
$18.00
Jet Black Stāzon Ink Pad
$10.00
Uninked Stampin’ Craft Pad & Whisper White Refill
$9.50
Heat Tool (Us And Canada)
$30.00
Tasteful Labels Dies
$31.00
Soft Succulent 3/8" (1 Cm) Open Weave Ribbon
$7.00
Baker's Twine Essentials Pack
$11.00
Stampin' Dimensionals
$4.00
Mini Glue Dots
$5.25
Slimline Envelopes
$10.00

Retirement Parade: So Long, Sweet Peach!

The New at SU! Design Team is bringing you a POP-UP PARADE featuring some of the products we have loved and are sad to see leave as the Retiring List for the Annual Catalog has been released. These items are only while supplies last, so don’t miss your opportunity to order them!

I chose to spotlight my beloved Sweet as a Peach Suite. The Designer Series Paper! The Stamps! The Dies! They have inspired so much creativity in my studio and this is actually the pop-up birthday card I made and sent my team members over the past 12 months:

It opens up to an EXPLOSION of peaches and birthday wishes:

It’s easy to make this explosion insert: Cut a piece of Designer Series Paper 6″ x 6″ and fold in half, then open it up and fold it in half DIAGONALLY in the opposite direction. Unfold it again, tuck the diagonal folds inside and glue the square pieces on the outside of the mechanism to the inside of the card. TIP: Observe the direction of your patterned paper and insert it into your card with the patterns going the right direction.

The best way it fits in your card is by making a binding on the top (or side, depending on orientation) of your card. For this card, I used a piece of 11″ x 4-1/4″ card stock scored at 5-1/2″ and 6-1/2″, then tied that shut with a piece of linen twine, with the second score on the top side of your card to help it open well. It makes the opening smaller than a traditional card and the explosion piece fits nicely inside.

The Sweet as a Peach Bundle (stamps + dies) is on sale through March 21st for 20% off in the Savings are In Bloom sale (along with the Mini Cut & Emboss Machine that the dies fit in), so now is the time to collect it for your craft stash! Retiring items are only while supplies last.

You are now ready to travel through the rest of the Retirement Parade! Hop through all the gorgeous retiring product projects below ~ you won’t want to miss any of the other “last chance” products we’ve loved and collect the fabulous ideas shared!

If you want to add these products to your craft studio before they are gone, you may order them from your demonstrator. Don’t have a demonstrator? Click the links below to shop from my Stampin’ Store!

Product List