
Perhaps it’s the reader in me, but I am a typophile (someone who appreciates a pretty FONT). Stampin’ Up! combined lovely label dies with the gorgeous typography in the Christmas Labels stamp set, and it was a must-have BUNDLE for me.
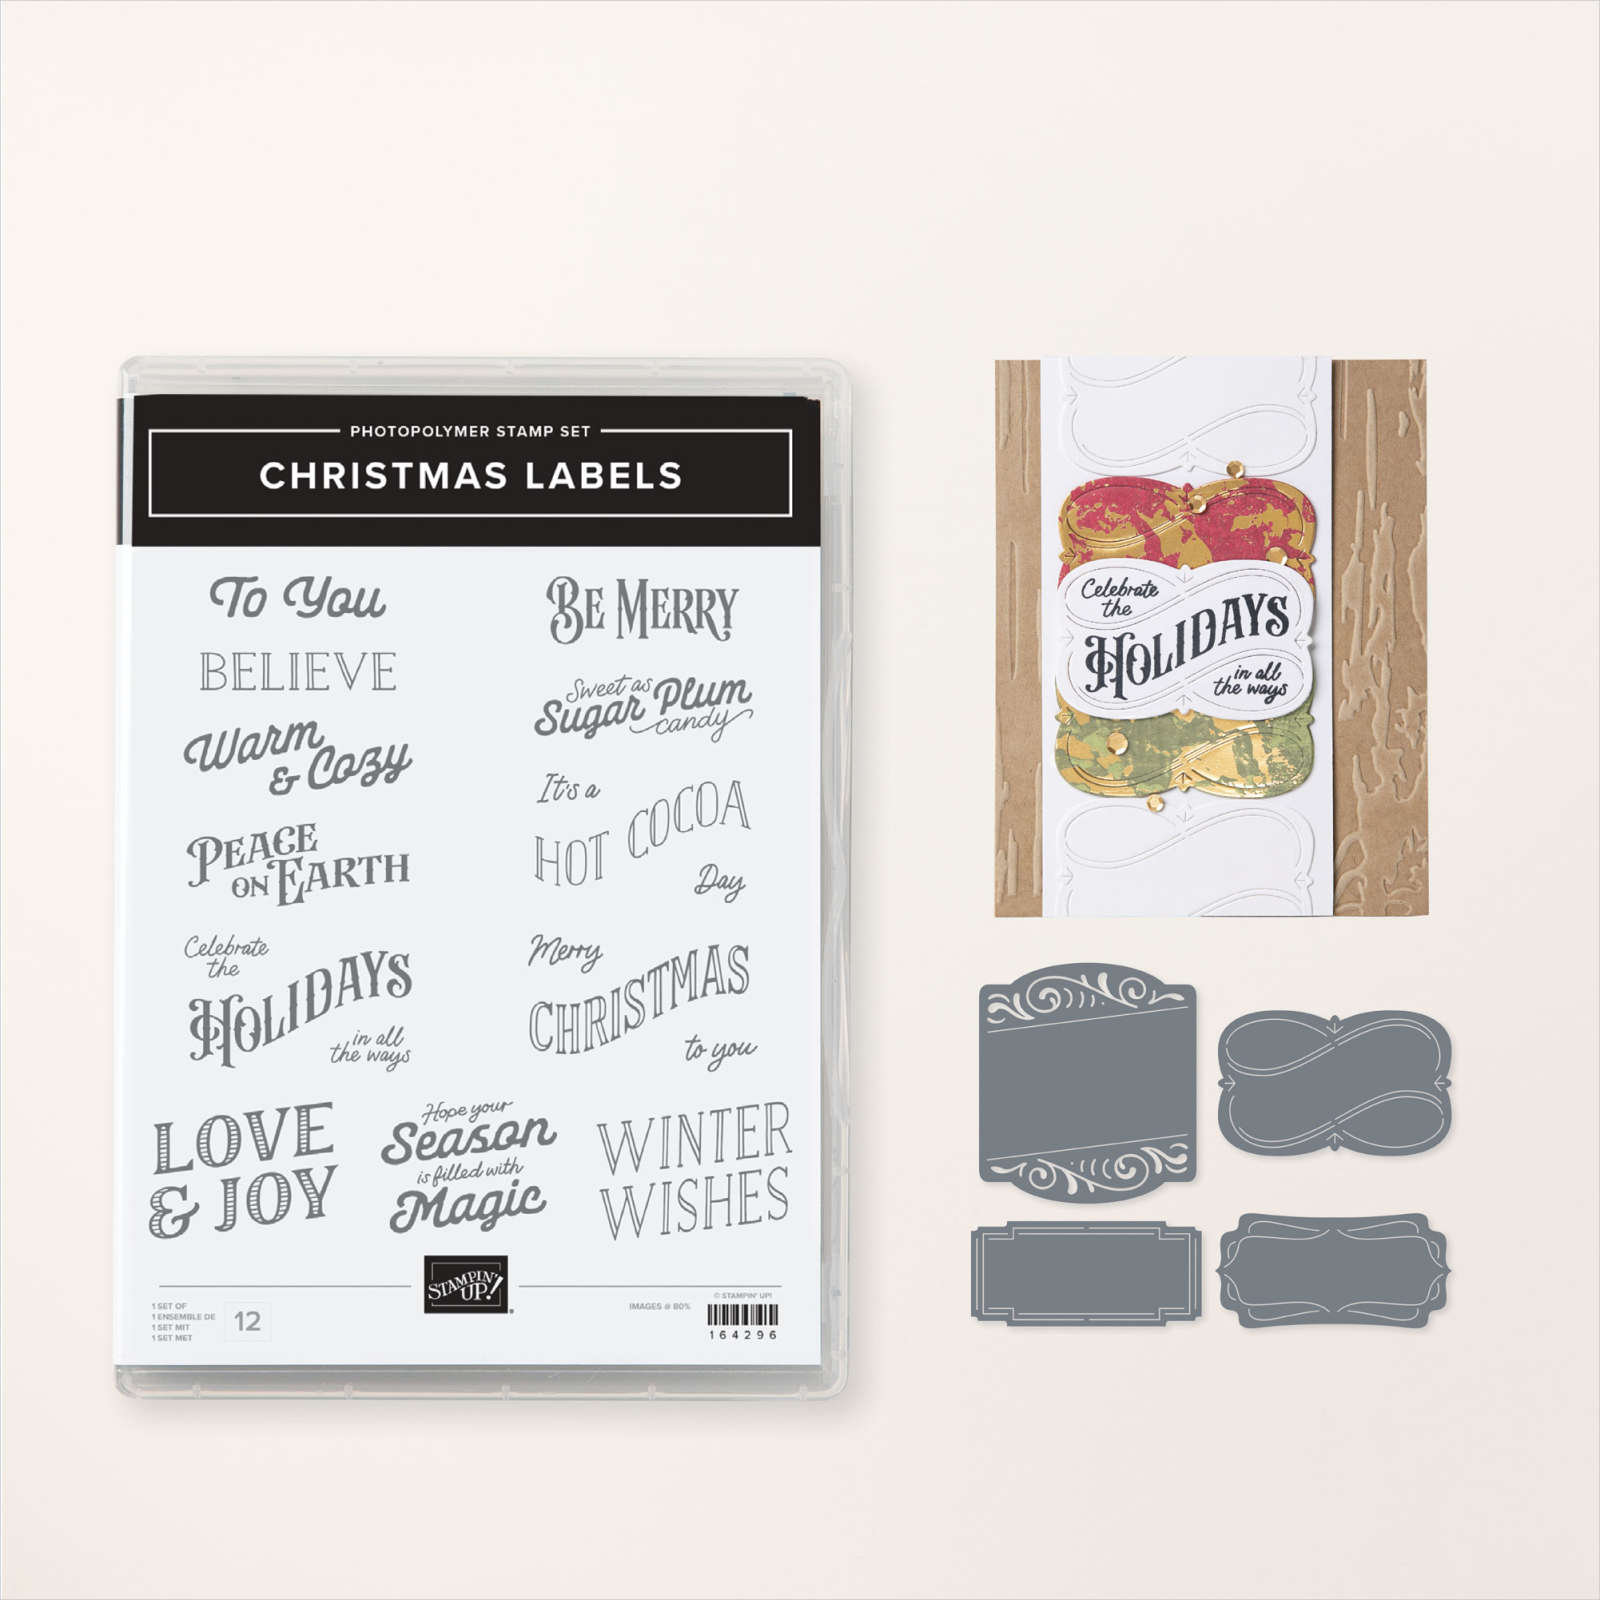
The way a label can elevate a simple card or gift is what I wanted to demonstrate in a video tutorial:
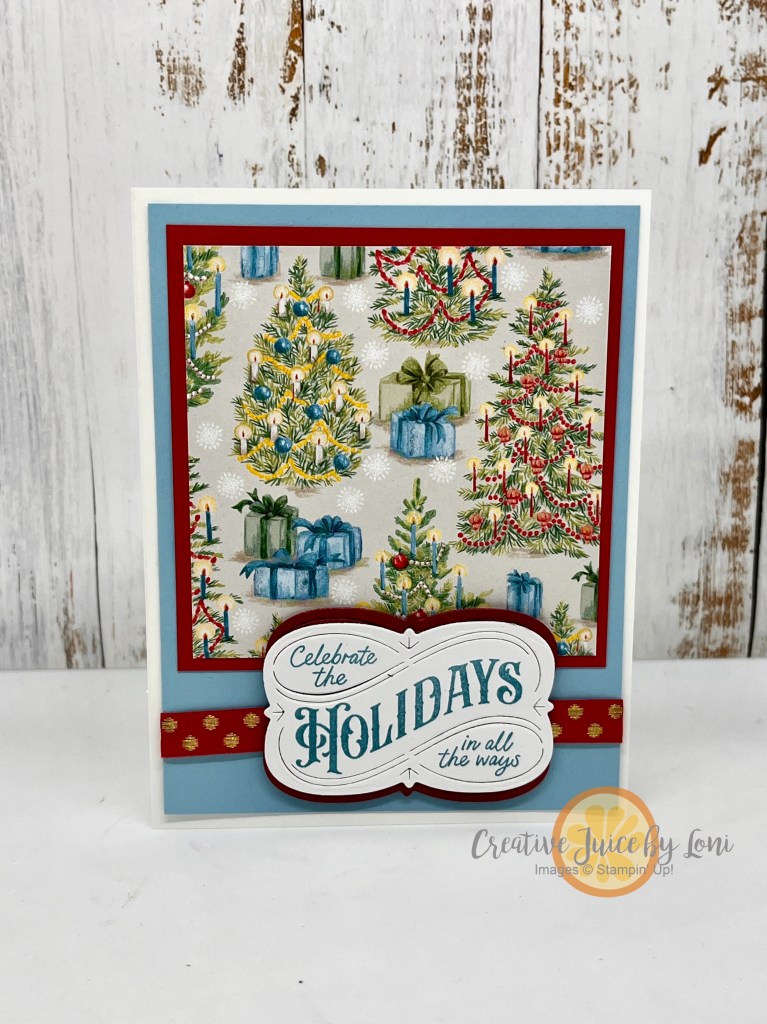
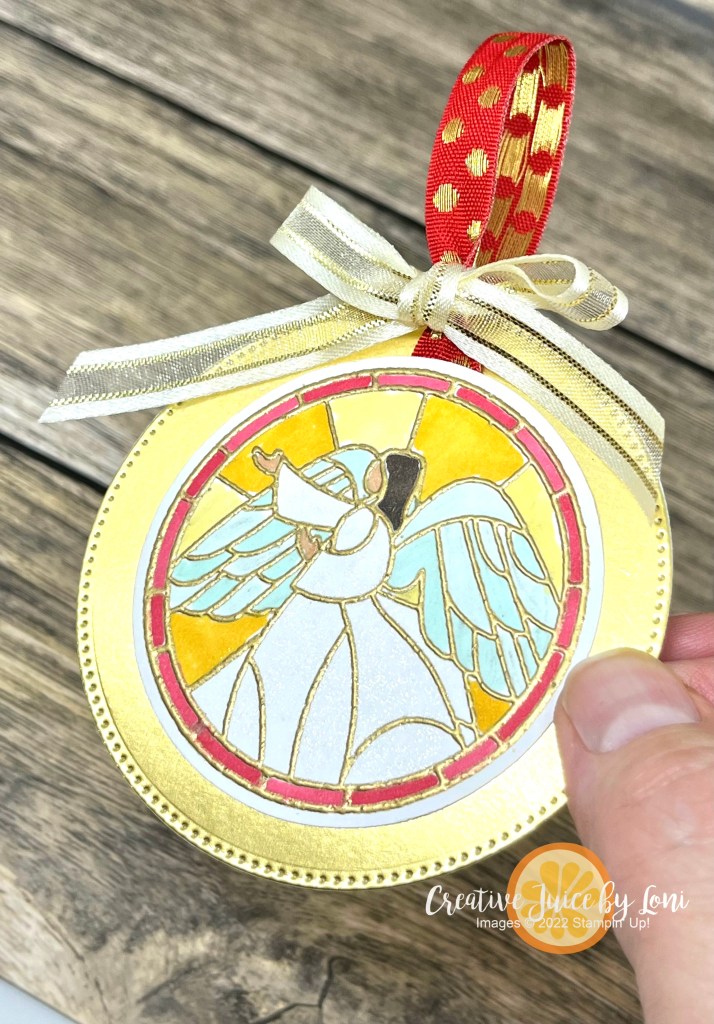
These were the projects made during the video. The first card features the Season of Green & Gold Specialty Designer Series Paper, and the shiny gold accents aren’t as visible in the picture, but can be seen in the video:

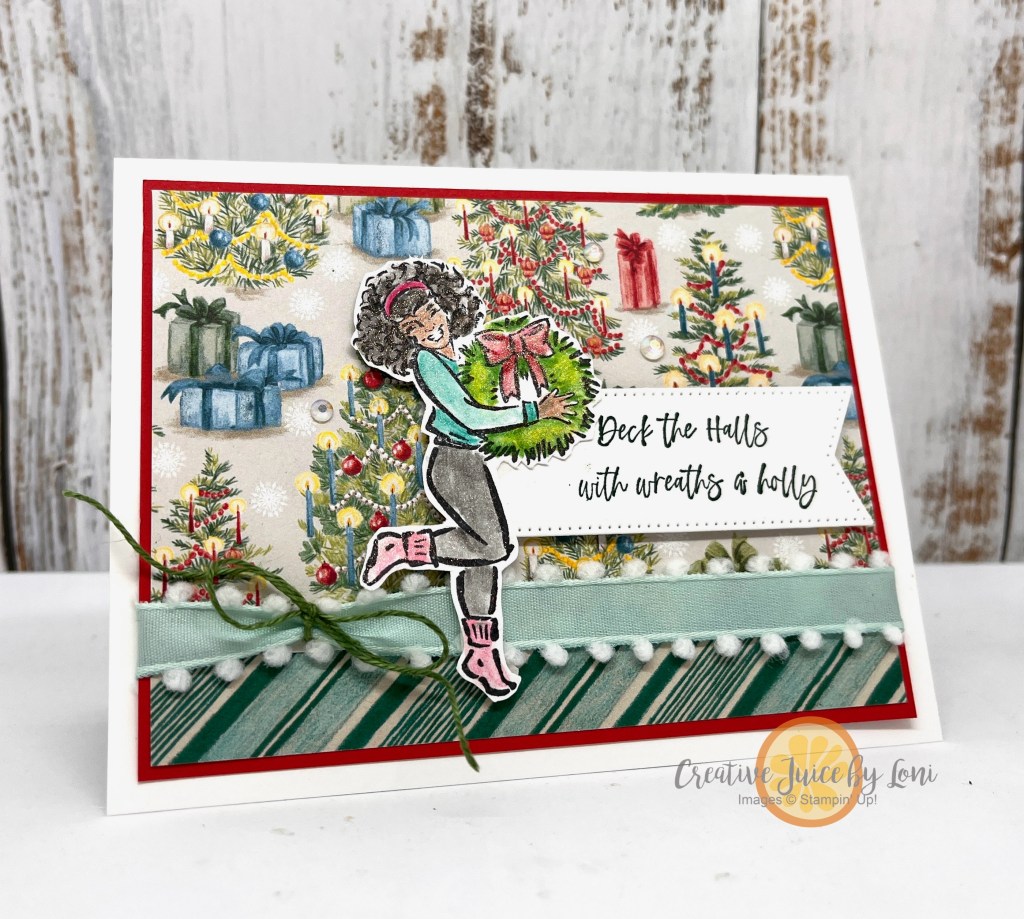
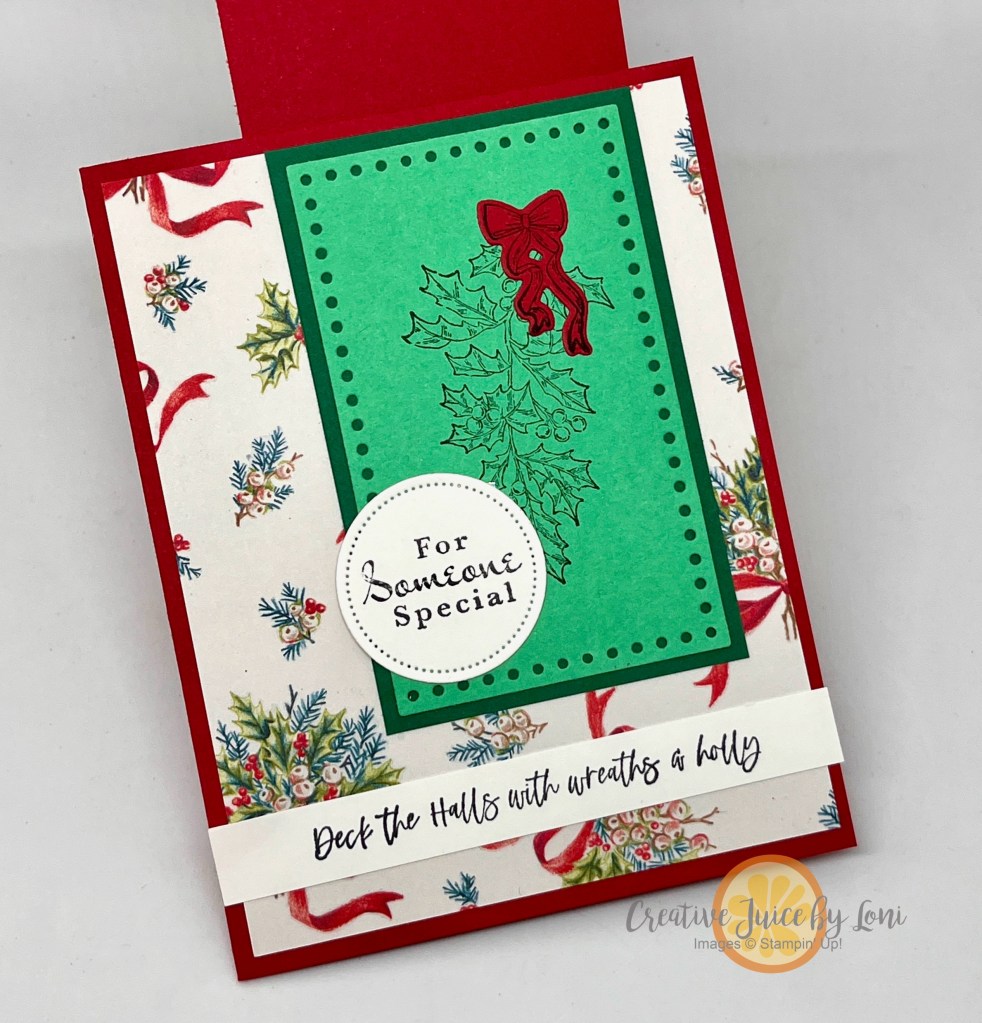
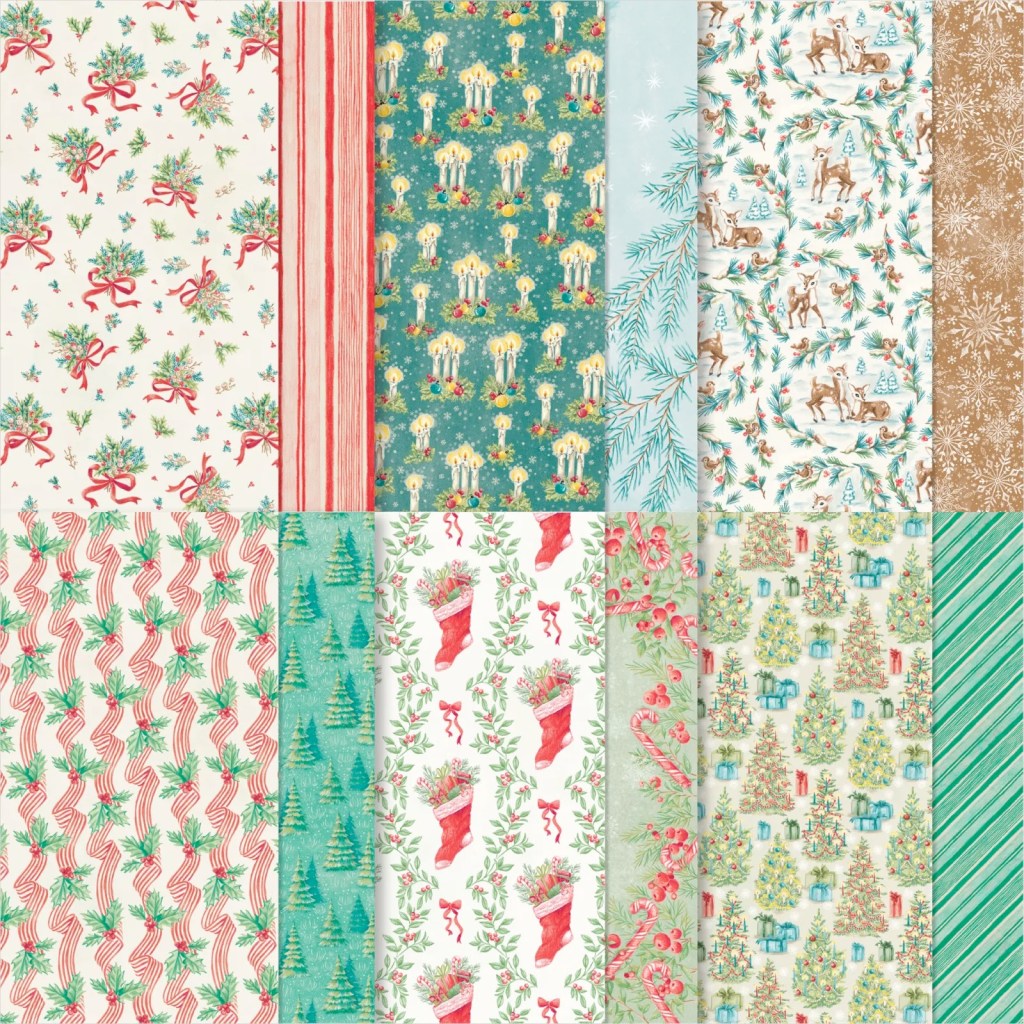
Next is another simple card layout spotlighting a piece of the Sentimental Christmas Designer Series Paper, and showed how to create a contrasting matte behind the label by cutting a second label in half:

I’m sharing easy cards to encourage you to keep your holiday crafting attainable! No need to overthink it, or add stress.
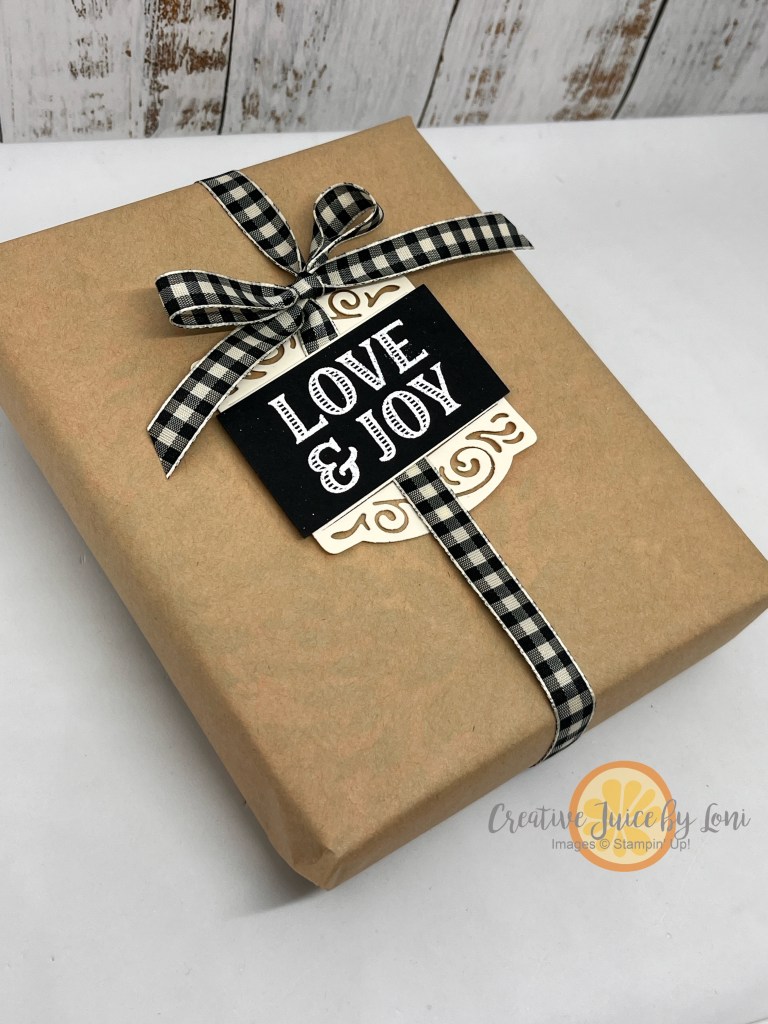
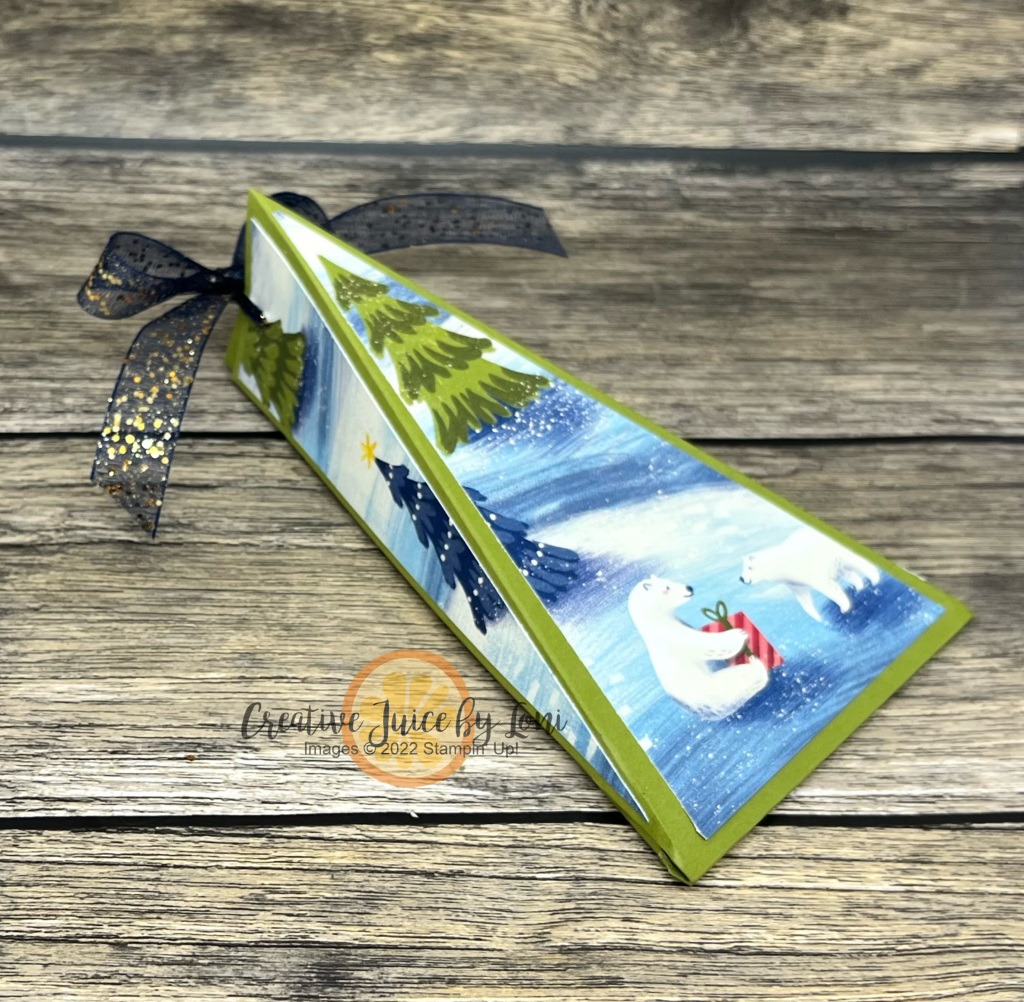
Layer a color over the center of the larger label for a striking contrast, add a coordinating ribbon and the tag makes a basic box beautiful:
When bundles (stamps + dies -OR- stamps + punches) are introduced to my Stampin’ Store, they are 10% off the price of purchasing each product individually. CLARIFICATION: In the video, we thought the Christmas Label bundle and Christmas DSP would be in Seasonal Sale that begins tomorrow (11/13/24), however we learned that only bundles and patterned paper in the Annual catalog are included in the Seasonal sale, along with most ink and card stock:


![Sentimental Wishes Bundle (English) [ 164220 ]](https://assets1.tamsnetwork.com/images/EC042017NF/164220s.jpg "Sentimental Wishes Bundle (English) [ 164220 ]")
![Sentimental Christmas 12" X 12" (30.5 X 30.5 Cm) Designer Series Paper [ 164209 ]](https://assets1.tamsnetwork.com/images/EC042017NF/164209s.jpg "Sentimental Christmas 12\" X 12\" (30.5 X 30.5 Cm) Designer Series Paper [ 164209 ]")
![Greetings Of The Season Dies [ 164112 ]](https://assets1.tamsnetwork.com/images/EC042017NF/164112s.jpg "Greetings Of The Season Dies [ 164112 ]")
![Nested Essentials Dies [ 161597 ]](https://assets1.tamsnetwork.com/images/EC042017NF/161597s.jpg "Nested Essentials Dies [ 161597 ]")
![Mini Stampin' Cut & Emboss Machine [ 150673 ]](https://assets1.tamsnetwork.com/images/EC042017NF/150673s.jpg "Mini Stampin' Cut & Emboss Machine [ 150673 ]")
![Pool Party 8-1/2" X 11" Cardstock [ 122924 ]](https://assets1.tamsnetwork.com/images/EC042017NF/122924s.jpg "Pool Party 8-1/2\" X 11\" Cardstock [ 122924 ]")
![Shaded Spruce 8-1/2" X 11" Cardstock [ 146981 ]](https://assets1.tamsnetwork.com/images/EC042017NF/146981s.jpg "Shaded Spruce 8-1/2\" X 11\" Cardstock [ 146981 ]")
![Real Red 8-1/2" X 11" Cardstock [ 102482 ]](https://assets1.tamsnetwork.com/images/EC042017NF/102482s.jpg "Real Red 8-1/2\" X 11\" Cardstock [ 102482 ]")
![Basic White 8 1/2" X 11" Cardstock [ 159276 ]](https://assets1.tamsnetwork.com/images/EC042017NF/159276s.jpg "Basic White 8 1/2\" X 11\" Cardstock [ 159276 ]")
![Shaded Spruce Classic Stampin' Pad [ 147088 ]](https://assets1.tamsnetwork.com/images/EC042017NF/147088s.jpg "Shaded Spruce Classic Stampin' Pad [ 147088 ]")
![Real Red Classic Stampin' Pad [ 147084 ]](https://assets1.tamsnetwork.com/images/EC042017NF/147084s.jpg "Real Red Classic Stampin' Pad [ 147084 ]")
![Tuxedo Black Memento Ink Pad [ 132708 ]](https://assets1.tamsnetwork.com/images/EC042017NF/132708s.jpg "Tuxedo Black Memento Ink Pad [ 132708 ]")
![Watercolor Pencils Assortment 1 [ 161700 ]](https://assets1.tamsnetwork.com/images/EC042017NF/161700s.jpg "Watercolor Pencils Assortment 1 [ 161700 ]")
![Blender Pens [ 102845 ]](https://assets1.tamsnetwork.com/images/EC042017NF/102845s.jpg "Blender Pens [ 102845 ]")
![Shaded Spruce 1/2" (1.3 Cm) Satin & Sheer Ribbon [ 164224 ]](https://assets1.tamsnetwork.com/images/EC042017NF/164224s.jpg "Shaded Spruce 1/2\" (1.3 Cm) Satin & Sheer Ribbon [ 164224 ]")
![Gold & Silver 1/8" (3.2 Mm) Trim Combo Pack [ 161633 ]](https://assets1.tamsnetwork.com/images/EC042017NF/161633s.jpg "Gold & Silver 1/8\" (3.2 Mm) Trim Combo Pack [ 161633 ]")
![Pool Party 5/8" (1.6 Cm) Pompom Ribbon [ 164129 ]](https://assets1.tamsnetwork.com/images/EC042017NF/164129s.jpg "Pool Party 5/8\" (1.6 Cm) Pompom Ribbon [ 164129 ]")


![Warms My Heart Cling Stamp Set (English) [ 164267 ]](https://assets1.tamsnetwork.com/images/EC042017NF/164267s.jpg "Warms My Heart Cling Stamp Set (English) [ 164267 ]")
![Forever Plaid 3 D Embossing Folder [ 164049 ]](https://assets1.tamsnetwork.com/images/EC042017NF/164049s.jpg "Forever Plaid 3 D Embossing Folder [ 164049 ]")
![Cajun Craze 8-1/2" X 11" Cardstock [ 119684 ]](https://assets1.tamsnetwork.com/images/EC042017NF/119684s.jpg "Cajun Craze 8-1/2\" X 11\" Cardstock [ 119684 ]")
![Basic Beige 8 1/2" X 11" Cardstock [ 164511 ]](https://assets1.tamsnetwork.com/images/EC042017NF/164511s.jpg "Basic Beige 8 1/2\" X 11\" Cardstock [ 164511 ]")
![Coastal Cabana 8-1/2" X 11" Cardstock [ 131297 ]](https://assets1.tamsnetwork.com/images/EC042017NF/131297s.jpg "Coastal Cabana 8-1/2\" X 11\" Cardstock [ 131297 ]")
![Pumpkin Pie 8-1/2" X 11" Cardstock [ 105117 ]](https://assets1.tamsnetwork.com/images/EC042017NF/105117s.jpg "Pumpkin Pie 8-1/2\" X 11\" Cardstock [ 105117 ]")
![Mossy Meadow 8-1/2" X 11" Cardstock [ 133676 ]](https://assets1.tamsnetwork.com/images/EC042017NF/133676s.jpg "Mossy Meadow 8-1/2\" X 11\" Cardstock [ 133676 ]")
![Cajun Craze Classic Stampin' Pad [ 147085 ]](https://assets1.tamsnetwork.com/images/EC042017NF/147085s.jpg "Cajun Craze Classic Stampin' Pad [ 147085 ]")
![Watercolor Pencils Assortment 2 [ 149014 ]](https://assets1.tamsnetwork.com/images/EC042017NF/149014s.jpg "Watercolor Pencils Assortment 2 [ 149014 ]")
![Clear Wink Of Stella Glitter Brush [ 141897 ]](https://assets1.tamsnetwork.com/images/EC042017NF/141897s.jpg "Clear Wink Of Stella Glitter Brush [ 141897 ]")
![Earth Tones Shimmer Gems [ 164070 ]](https://assets1.tamsnetwork.com/images/EC042017NF/164070s.jpg "Earth Tones Shimmer Gems [ 164070 ]")
![Bough Punch [ 157711 ]](https://assets1.tamsnetwork.com/images/EC042017NF/157711s.jpg "Bough Punch [ 157711 ]")
![Iridescent Faceted Gems [ 163368 ]](https://assets1.tamsnetwork.com/images/EC042017NF/163368s.jpg "Iridescent Faceted Gems [ 163368 ]")
![Stylish Shapes Dies [ 159183 ]](https://assets1.tamsnetwork.com/images/EC042017NF/159183s.jpg "Stylish Shapes Dies [ 159183 ]")
![Silver & White 1/2" (1.3 Cm) Sheer Ribbon [ 162149 ]](https://assets1.tamsnetwork.com/images/EC042017NF/162149s.jpg "Silver & White 1/2\" (1.3 Cm) Sheer Ribbon [ 162149 ]")
![Splendid Autumn 6" X 6" (15.2 X 15.2 Cm) Designer Series Paper [ 164173 ]](https://assets1.tamsnetwork.com/images/EC042017NF/164173s.jpg "Splendid Autumn 6\" X 6\" (15.2 X 15.2 Cm) Designer Series Paper [ 164173 ]")
![Natural Tones Linen Thread [ 164071 ]](https://assets1.tamsnetwork.com/images/EC042017NF/164071s.jpg "Natural Tones Linen Thread [ 164071 ]")
![Snowflake Sky 3 D Embossing Folder [ 162026 ]](https://assets1.tamsnetwork.com/images/EC042017NF/162026s.jpg "Snowflake Sky 3 D Embossing Folder [ 162026 ]")
![Poppy Parade 8-1/2" X 11" Cardstock [ 119793 ]](https://assets1.tamsnetwork.com/images/EC042017NF/119793s.jpg "Poppy Parade 8-1/2\" X 11\" Cardstock [ 119793 ]")
![Pretty In Pink 8 1/2" X 11" Cardstock [ 163793 ]](https://assets1.tamsnetwork.com/images/EC042017NF/163793s.jpg "Pretty In Pink 8 1/2\" X 11\" Cardstock [ 163793 ]")
![Crushed Curry 8-1/2" X 11" Cardstock [ 131199 ]](https://assets1.tamsnetwork.com/images/EC042017NF/131199s.jpg "Crushed Curry 8-1/2\" X 11\" Cardstock [ 131199 ]")
![Blackberry Bliss 8-1/2" X 11" Cardstock [ 133675 ]](https://assets1.tamsnetwork.com/images/EC042017NF/133675s.jpg "Blackberry Bliss 8-1/2\" X 11\" Cardstock [ 133675 ]")
![Pecan Pie Classic Stampin' Pad [ 161665 ]](https://assets1.tamsnetwork.com/images/EC042017NF/161665s.jpg "Pecan Pie Classic Stampin' Pad [ 161665 ]")
![Blackberry Bliss Classic Stampin' Pad [ 147092 ]](https://assets1.tamsnetwork.com/images/EC042017NF/147092s.jpg "Blackberry Bliss Classic Stampin' Pad [ 147092 ]")


![Shy Shamrock 8 1/2" X 11" Cardstock [ 163795 ]](https://assets1.tamsnetwork.com/images/EC042017NF/163795s.jpg "Shy Shamrock 8 1/2\" X 11\" Cardstock [ 163795 ]")
![Everyday Details Dies [ 162864 ]](https://assets1.tamsnetwork.com/images/EC042017NF/162864s.jpg "Everyday Details Dies [ 162864 ]")
![Pretty In Pink Stampin’ Blends Combo Pack [ 163824 ]](https://assets1.tamsnetwork.com/images/EC042017NF/163824s.jpg "Pretty In Pink Stampin’ Blends Combo Pack [ 163824 ]")
![Shaded Spruce Combo Pack Stampin' Blends [ 147938 ] (Retired)](https://assets1.tamsnetwork.com/images/EC042017NF/147938s.jpg "Shaded Spruce Combo Pack Stampin' Blends [ 147938 ] (Retired)")
![Real Red Stampin' Blends Combo Pack [ 154899 ]](https://assets1.tamsnetwork.com/images/EC042017NF/154899s.jpg "Real Red Stampin' Blends Combo Pack [ 154899 ]")
![Pretty Peacock Stampin’ Blends Combo Pack [ 161676 ]](https://assets1.tamsnetwork.com/images/EC042017NF/161676s.jpg "Pretty Peacock Stampin’ Blends Combo Pack [ 161676 ]")


")


")


")
 Designer Series Paper")


 Circle Punch")
 Circle Punch")


 Designer Series Paper")
 Cardstock")

 Glittered Ribbon")
")
")
 Specialty Paper")


")
 Specialty Designer Series Paper")


")
")


 Dotted Ribbon")
 Satin Edged Ribbon")


