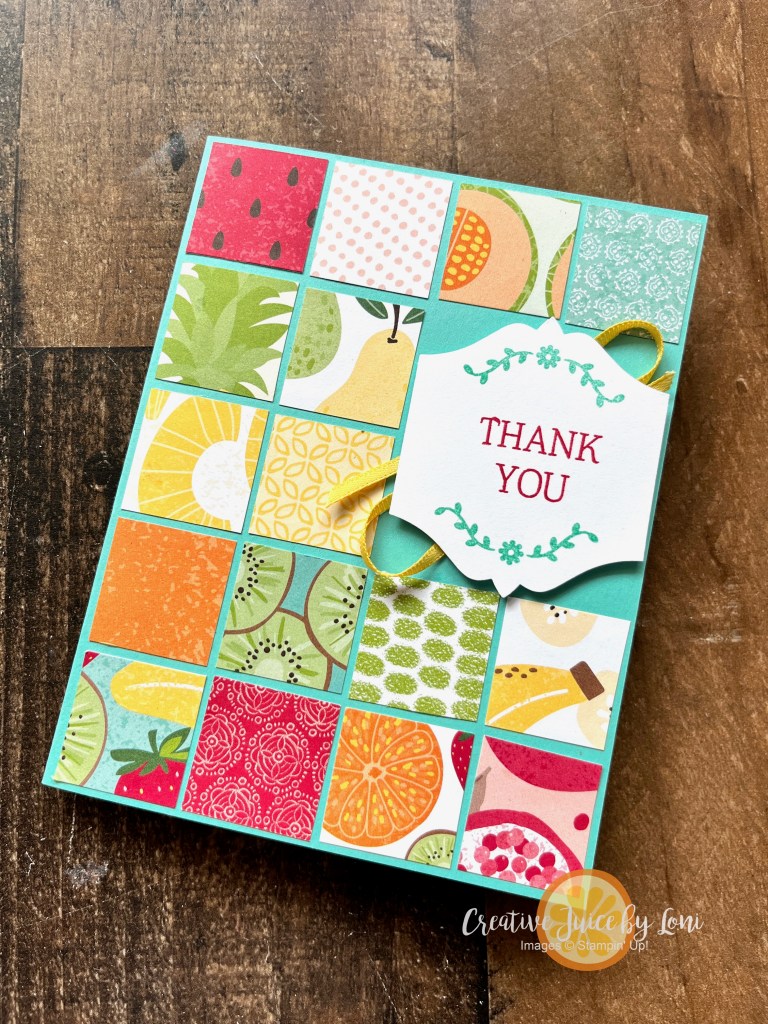
Welcome back! What can you do with scraps of Stampin’ Up! Designer Series Paper as small as 1″ square? Try this tiled card technique:
These are the Sale-a-Bration Fruit Salad DSP squares left over from using an entire piece of 6″ x 6″ paper yesterday to create 2 cards, and as promised, we’ve used EVERY PIECE! You might have to trim down the pieces on one side to fit them all across the front of a 4.25″ card, but no one will notice if they aren’t perfectly square.
The fun thing about the tiled card layout is that you can move your focal point around, or use larger squares like the 1-1/4″ Cute as Can Bee pieces here:
Hope you find this solution for small scraps to be helpful!
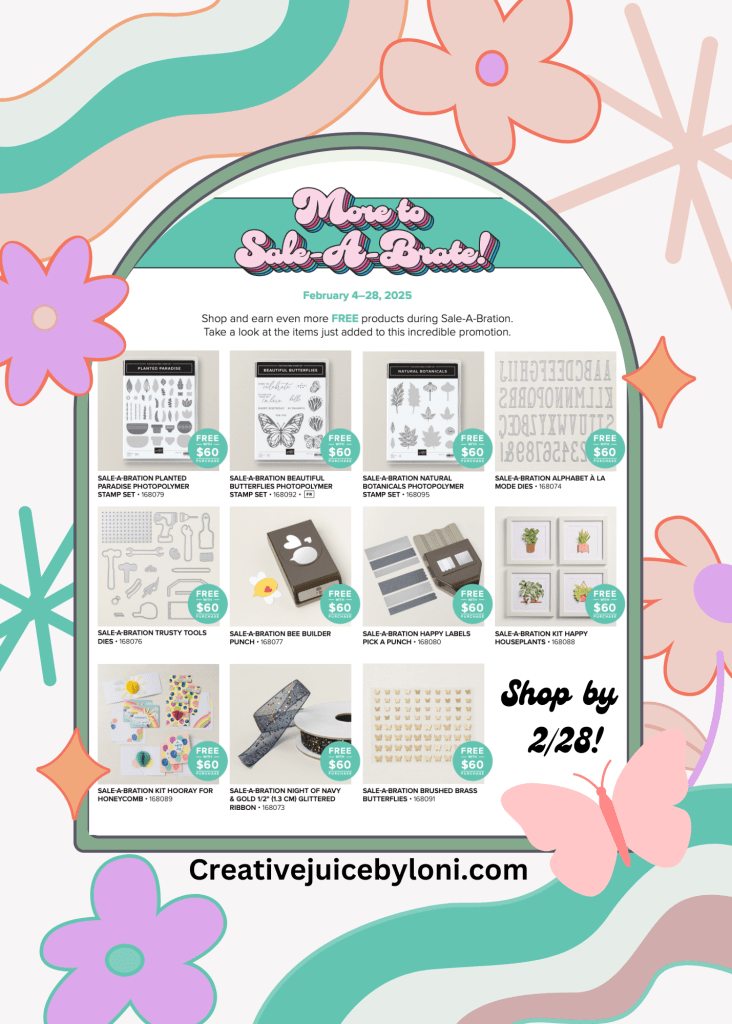
Guess what else? NEW products were added today for Sale-a-Bration freebies! Now is the time to collect products you’ll love free with each $60 order (ends 2/28/25)…including the Bee Builder punch I used on the card above! Click image or “Shop 24/7” from the menu at the top of this website.
If you create cards, you know the satisfaction of using EVERY. INCH. of patterned paper! Let me use the Stampin’ Up! Fruit Salad Designer Series Paper for Sale-a-Bration to show you how to quickly cut a sheet of 6″ x 6″ paper to make TWO cards!
The first cut you make will be 1″ off the side, then turn your DSP 90 degrees and cut an inch off the other side (you’ll have a 5″ x 5″ piece left over):
The third cut you make will be to cut your 5″ square into two 2.5″ sections. BEFORE YOU CUT, make sure you know which orientation you want your card to be, if there is a direction in the pattern! Watch the video below to see me explain.
The last cut is to take 1″ off the 6″ x 1″ strip, but DON’T THROW THAT TINY SQUARE AWAY!
Once you have your two sets of paper pieces, lay them onto a 4″ x 5.25″ card stock, leaving space in between them. Embellish, then mount the layers onto a card base:
Video instructions:
Here are the cards I created or showed using the Fruit Salad paper and the cutting guide. Add ribbon, a greeting, a focal point, a strip of card stock:
This pattern/layout is good for most double sided paper, especially when one side has a bold pattern and the back side has more subtle pattern. Try mixing up patterns from a package, like this card using the Sale-a-Bration Toadstool Gardens paper:
A sentiment stamp set and coordinating punch make finishing these greeting cards speedy, or create a scene (like the toadstools) on a 2″ x 3-1/4″ rectangle. Alternatively, fussy cut an image from the paper itself:
Don’t miss the chance to get some lovely paper free during Sale-a-Bration! Only 4 weeks left.
Come back tomorrow to see what you can do with all the last inches left over from your DSP!
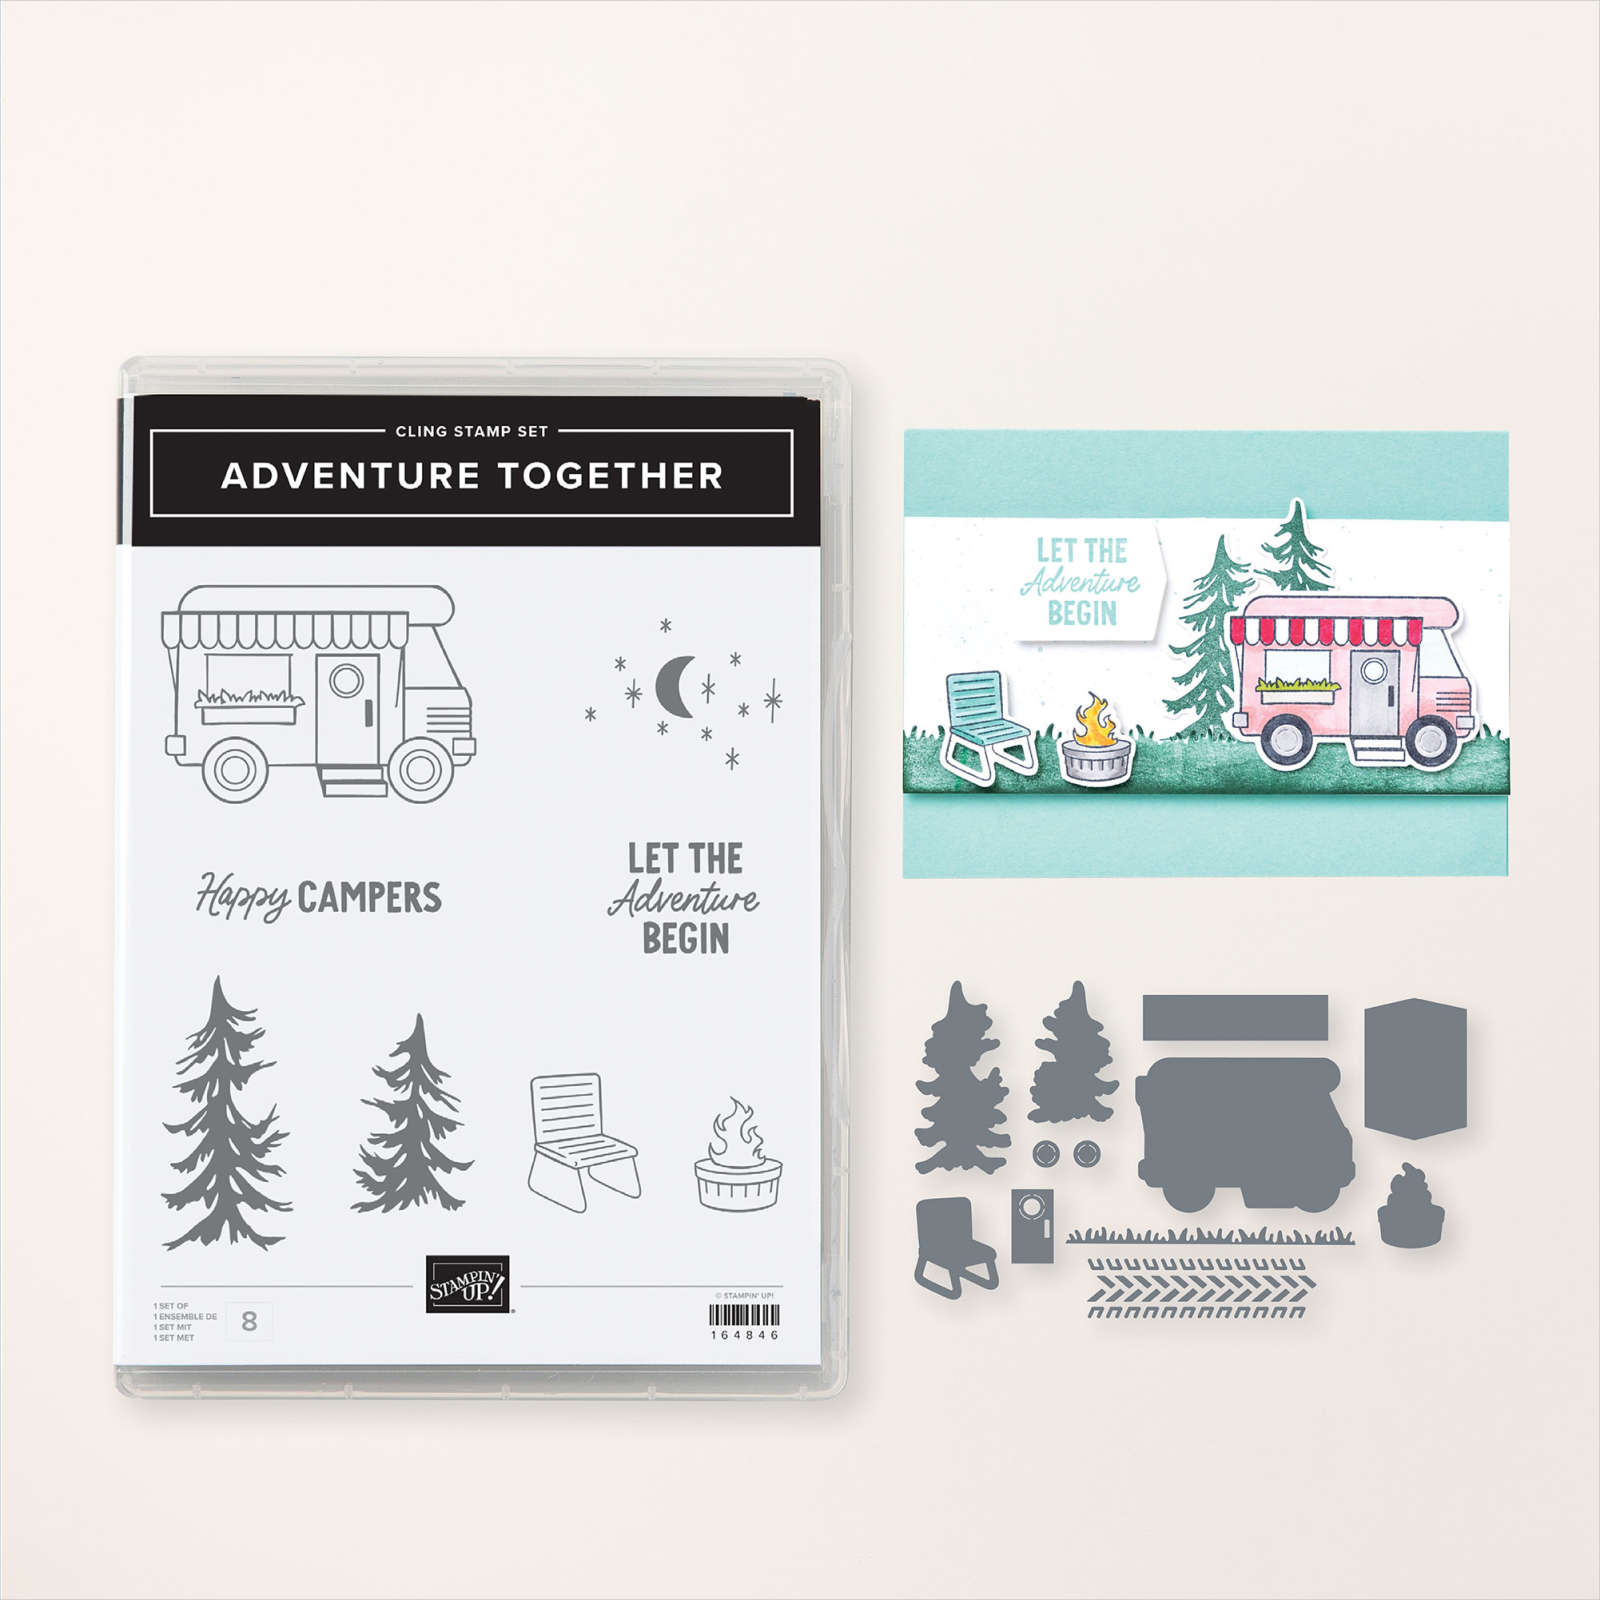
Have you browsed through the Online Exclusive section of my Stampin’ Up! store recently??! There are so many hidden treasures there, and THIS is one of them:
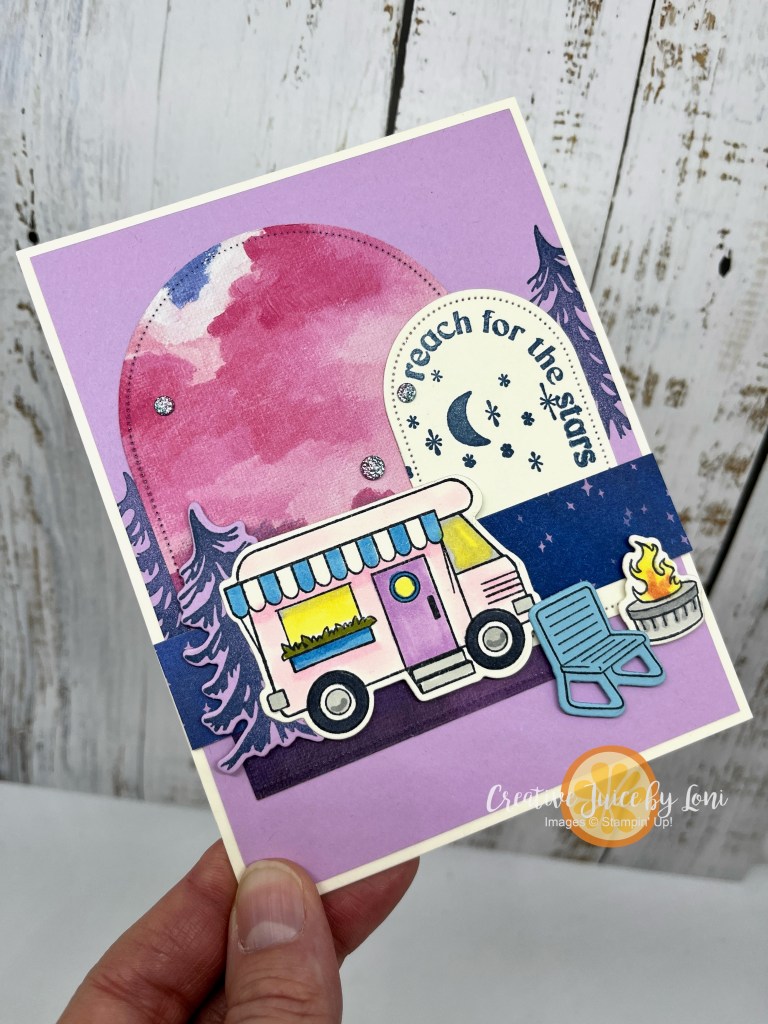
I loved the little camper so much that I used it for the last card swap with my Sprinkled Ink team!
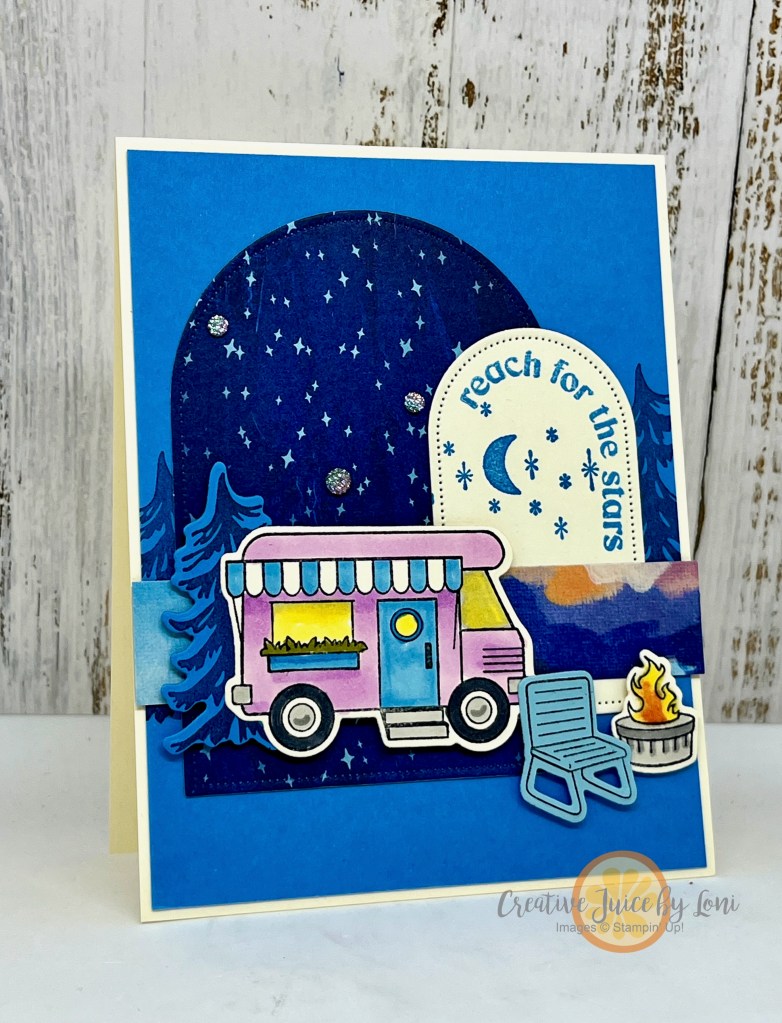
This card paired the Stampin’ Up! Adventure Together bundle with the Everyday Skies Suite Collection (another Online Exclusive must-have) for a snapshot of camping under the stars and stories around a fire. Doesn’t it make you yearn for warmer weather?
It was wonderful to see how it paired with many of the designs in the Everyday Skies Designer Series Paper, and this one shows a different color combination and skyscape:
Which do you prefer- The blue night sky filled with stars or the purple clouds of the evening sunset? Comments are at the top of the post near the date!
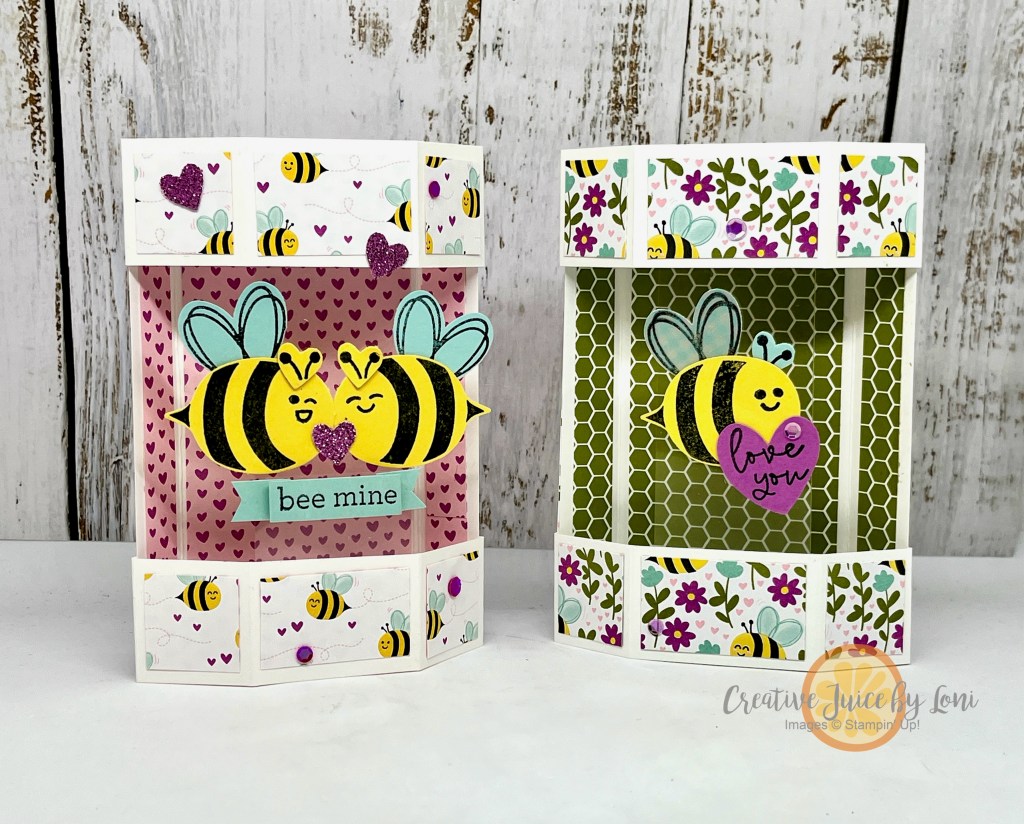
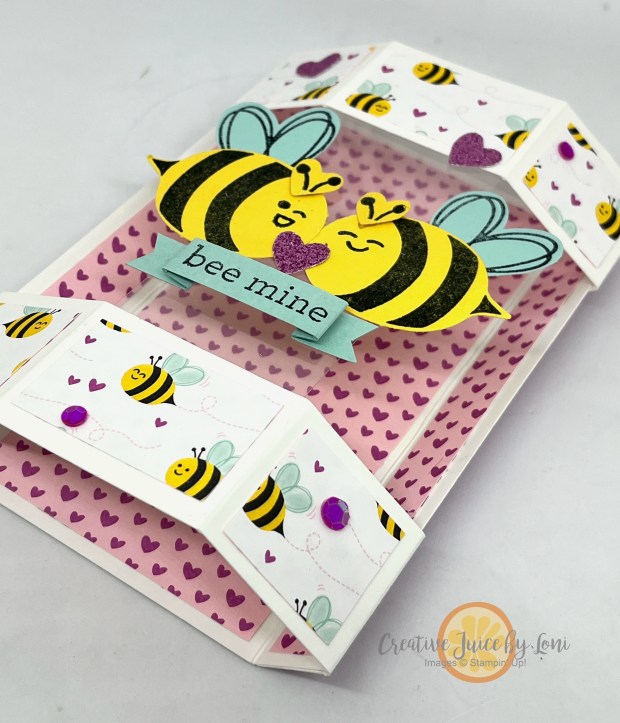
These are called “Floating Vertical Bandstand Pop-up” cards, and when I watched Susan Campfield’s tutorial video, the bees popped into my mind and off to the craft studio I ran!
First: YES, these cards fit inside an envelope:
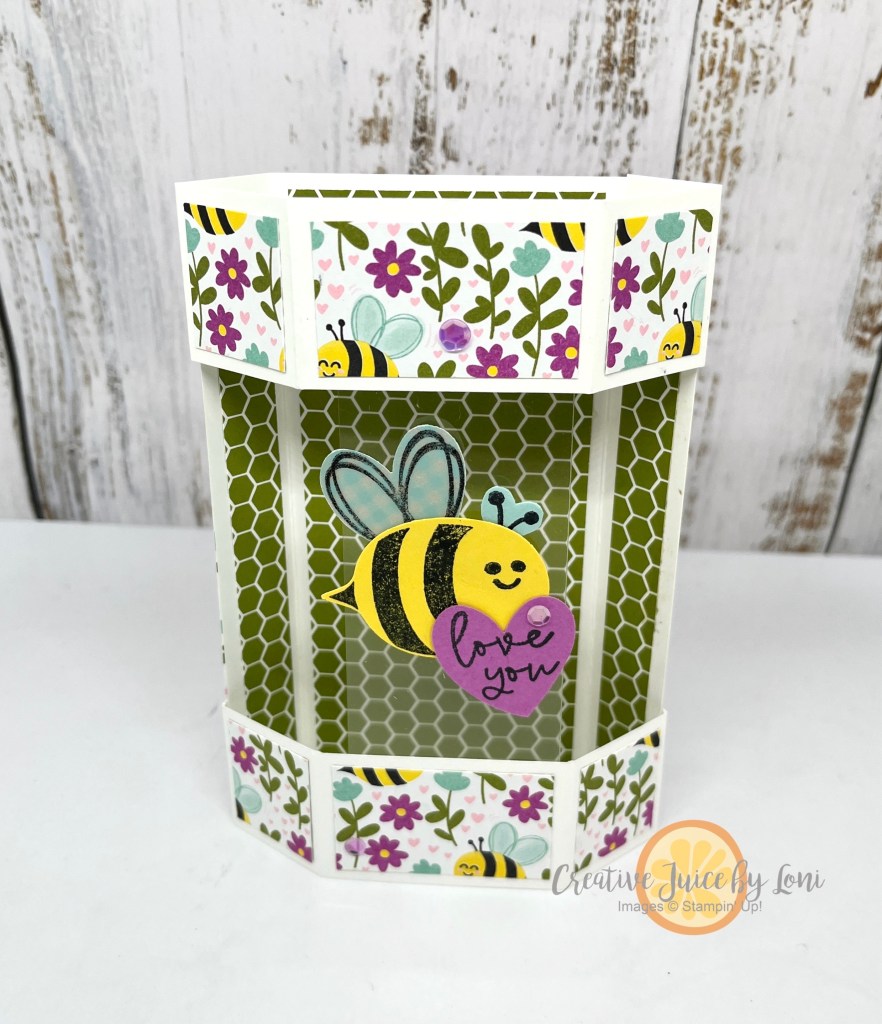
Once you take them out, they pop up, and the elements “float” in front of the stage:
“But where do you write on these cards?” you ask? On the back panel!
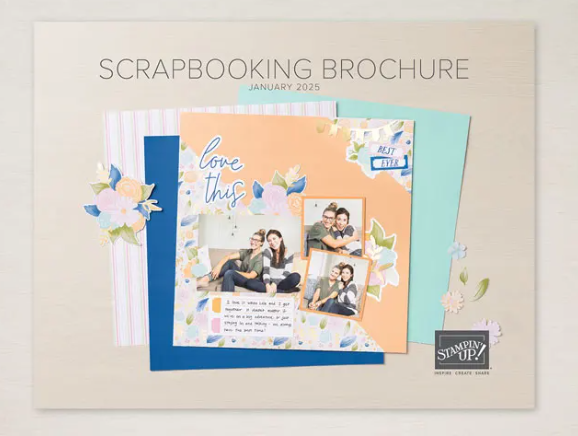
Whether you choose one bee or two, you’ll love the newly re-colored “Cute as Can Bee” Designer Series Paper released in the Stampin’ Up! Scrapbooking brochure. TIP:If you are planning to make valentines for 2025…THIS WEEKEND is the latest you should be ordering supplies to create them!
While I used the Bee My Valentine stamp set and Bee Builder punch (shopping links below), DON’T MISS the new Meant to Bee Bundle with two sizes of bees and NEW dies!
The Sale-a-Bration Purple Adhesive-Backed Sequins are a pretty way to add some sparkle, and they are a free option when your order reaches $60 before 2/28/25. I sprinkled them on the cards, along with a few hearts punched from the Petunia Pop glimmer paper:
Good to see you here again – or for the first time! We have an international group of Stampin’ Up! demonstrators dedicated to bringing you “What’s New” at SU! each month and our January 2025 hop is all about Sale-a-Bration Coordination!
Sale-a-Bration is Stampin’ Up!’s biggest event of the year, where you can shop, host and join with EXTRA PERKS. We are focusing on the products you can choose FREE, and combining them with items from our other offerings to show you how they mix & match beautifully. I’ll show you how the Fruit Salad Designer Series Paper (a free Sale-a-Bration item with a qualifying order in your market) can be used with the Everyday Arches bundle just released in the Online Exclusives!
Yum…fresh pineapple takes the stage in this card! Isn’t it spectacular how the back side of this paper makes a mouth-watering background, while the pineapple fussy cut from the front stands tall as the focal point on the layered arches?
For card #2, I wanted to feature as much of the fruit as possible, so to make the mat a bit smaller, I traced the inside of the arch die just larger than the one I used to cut the patterned paper and hand-trimmed it so I could get one two on the front with the sentiment. Sure to bring sunshine to a friend:
Next, I created a trio of arches for this Thank You card using a few different fruits from the paper:
The last card shows the versatility of the dies ~ You can even create OVALS!
Living up to their name, you can mix up the fruits and patterns of this paper for a delicious, refreshing recipe every time. You’ll be seeing more of this paper from me as I squeeze the most out of my Creative Juice! Next, move on to Annette’s post featuring the “Dance with Me” Sale-a-Bration stamp set and remember to save or Pin your favorites along the way!
January 2025 New at SU! Blog Hop: Sale-a-Bration Coordination
“I don’t want free crafting products” – said NO STAMPER EVER
Yesterday was the first day of Stampin’ Up! Sale-a-Bration 2025, and if you don’t know, that means customers get to choose exclusive products (such as rubber stamps, Designer Series Paper, ribbon, embellishments, etc) FREE with a qualifying purchase now through February 28th!
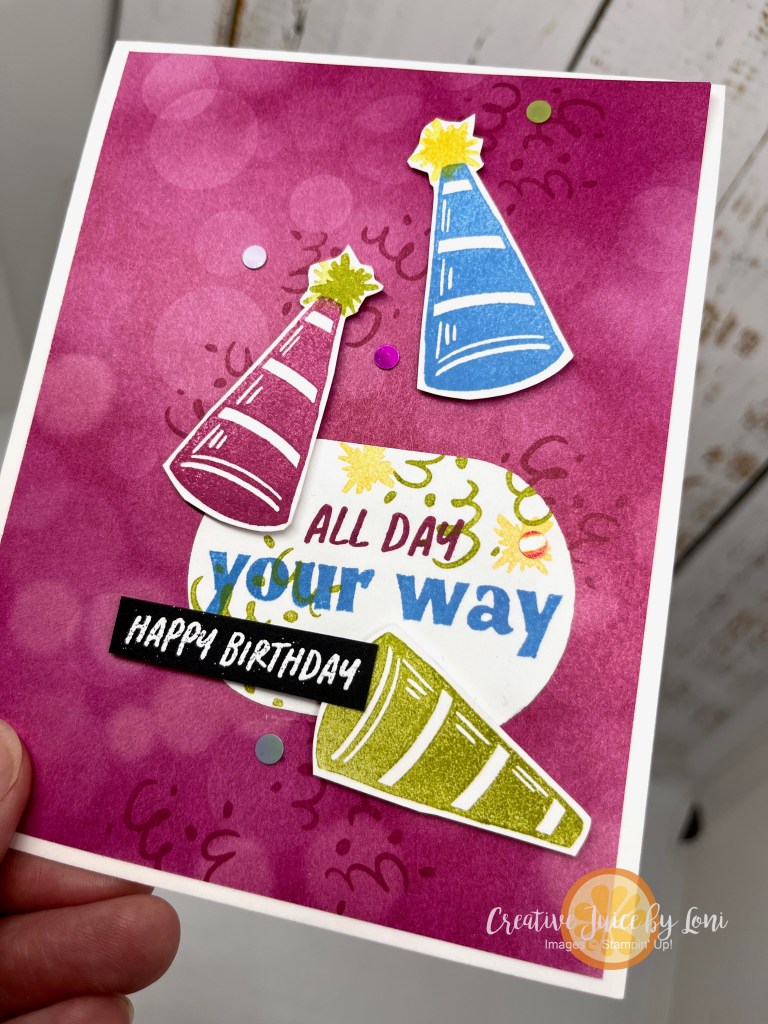
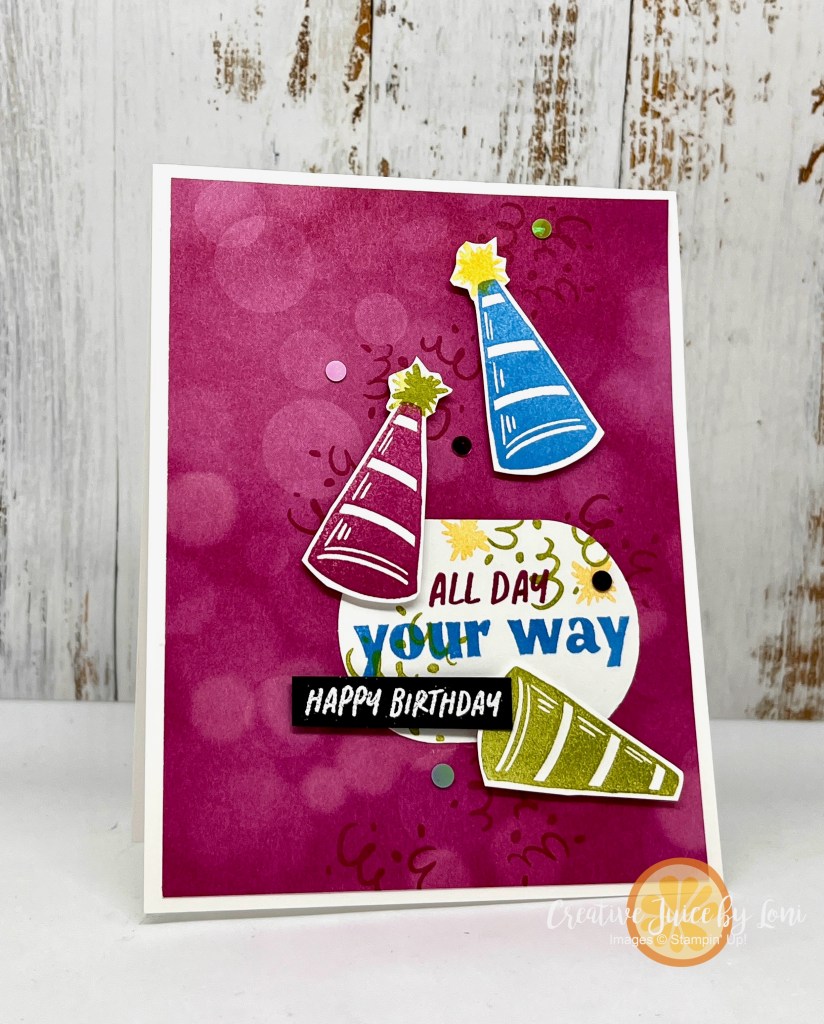
One of the Sale-a-Bration choices is the “Day to Celebrate” photopolymer stamp set, and it is primed to party for anything you want to commemorate! This birthday card shows how one of the stamps could be used as a party hat OR a megaphone, and paired with the Beautiful Bokeh paper just released in the 2025 January-April mini catalog, it feels celebratory, indeed.
The Day to Celebrate stamp set is just one of 12 choices you have when your cart reaches $60, PLUS there are two more products you might select if your total is $120! You can earn as many as you’d like during this crafting jubilee. Click to view the full brochure:
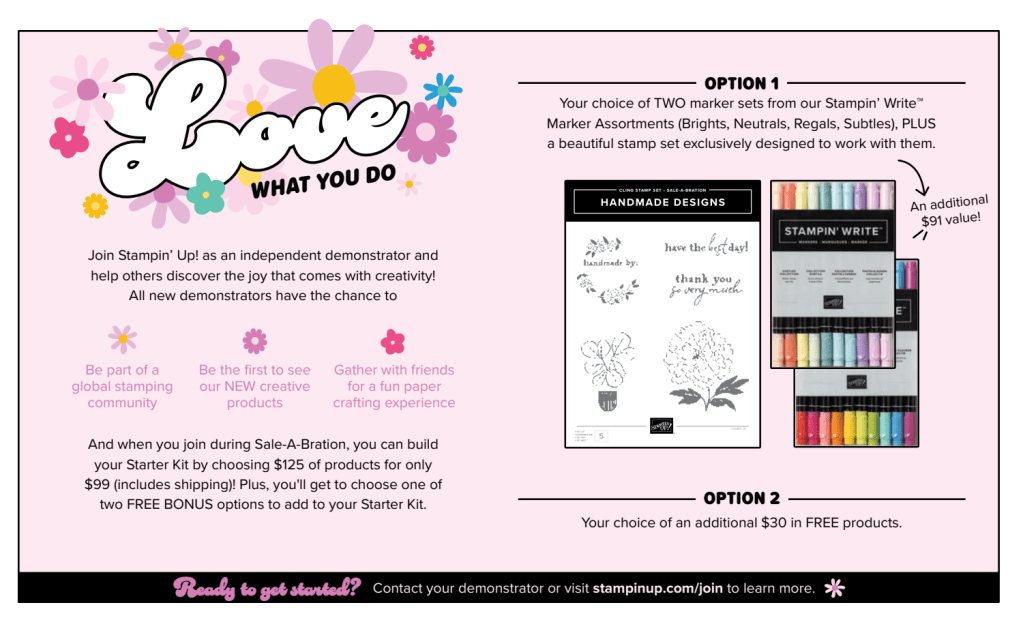
Ready to start a Stampin’ Up! business of your own? Join during Sale-a-Bration and build your own starter kit PLUS choose one of the two BONUS OPTIONS:
This decorating trend is called a “fault line” cake, and after watching a few short videos (activating my sweet tooth), it occurred to me that the concept would translate into card making (minus the calories!).
Let’s try it using the December Paper Pumpkin“Notes from the Heart” stamp set from paired with card stock and Designer Series Paper to create these Fault Line greeting cards,starting with a thank you card:
I roughed-up the edges along the “fault line”, reminiscent of my Busted Canvas card, by rolling back the torn edges. It really gives the card character!
Next, a Basic Beige Birthday Card, with the Timeless Plaid Designer Series Paper (from the Stampin’ Up! 2025 January-April mini catalog) peeking through:
Since I hadn’t opened the Nature’s Sweetness Specialty DSP package, I ended my stamping spree with this shiny Congrats Card. The gold foil and embossing are gorgeous, so I’ll probably make a whole stack of these to have on hand! The Adhesive-Backed Heart Sequins will be available on January 7th:
Here are the materials needed for the Fault Line card:
4.25″ x 9.5″ card stock base, scored at 5.5″
4.25″ x 5.5″ card stock, same color (inside the front of the card to give it stability and cover DSP)
Designer Series Paper 4.25″ x 4″ -the main image showing through
Designer Series Paper -OR- card stock 4.25″ x 3″
Stamps, Ink pad, embellishments (as desired)
Learn how to make this fault line card (with a twist) on Monday 12/30 during Lunchtime Live Crafting on my Facebook Page and YouTube channel at 12:30 MT. The replay will be posted here on my website later that day.
Don’t miss a Paper Pumpkin kit! The January kit Hearts for You will be oh-so-loveable, and I always share exclusive alternate projects using just the stamp set and ink (similar to these) with my subscribers in my Paper Pumpkin Patch email. Subscribe NOW by clicking the image or link above:
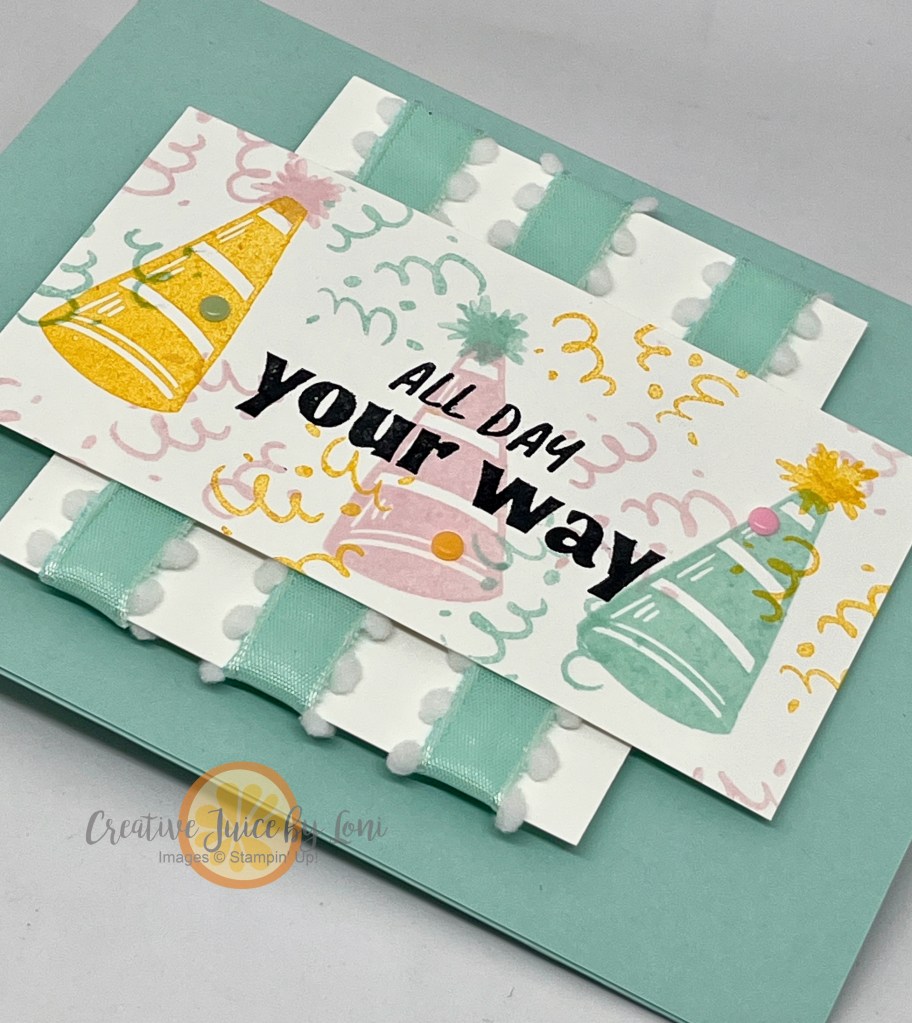
Are you in a rut of tying a ribbon around a card in the SAME WAY all the time? With so many unique ways to use ribbon on your hand-stamped creations, let’s explore just a few ideas! VIDEO TUTORIAL BELOW
First, try using your ribbon as a background: This Pool Party pompom ribbon is in the “Last Chance” section of my Stampin’ Store, and I’ve paired it with a Sale-a-Bration 2025 stamp set “Day to Celebrate” for this celebratory card. Consider planning ahead, because you’ll want some of this ribbon on hand once you can select this stamp set free (with a $60 order) in January!
Next, there are plenty of crafters who despise having to tie a bow! Weird, but true. So this one is a FAUX BOW and so easy to do (see video). NO BOW TYING REQUIRED. This non-traditional valentine is a second peek at a bundle coming in the January-April 2025 mini catalog called “Hugs for Love” and comes with the To The Point Label punch. The Cherry Cobbler & Gold ribbon looks lovely on Wild Wheat card stock, and gives it a use beyond Christmas:
Next up, not only is it pretty to have two different ribbon types, when you use twine to tie the second bow, it is less bumpy to mail! However, this project may get a little bumpy when you add a package of flower seeds to the pocket:
Another preview of some products coming soon…and the good news is that the Storybook Moments Specialty Designer Series Paper, Timeless Plaid Designer Series Paper AND the Petal Pink 3/8″ Scalloped Ribbon are all part of my Designer Series Paper & Ribbon Share
You’ll receive SIXTY-ONE 6″ x 6″ pieces of every Designer Series Paper in the Jan-Apr Mini Catalog AND January Online Exclusive products (not all paper is shown, just a sample). BONUS: Add a sampler of the 4 new ribbons (2.5 yards each), and you’ll have plenty of coordinating products to play with.
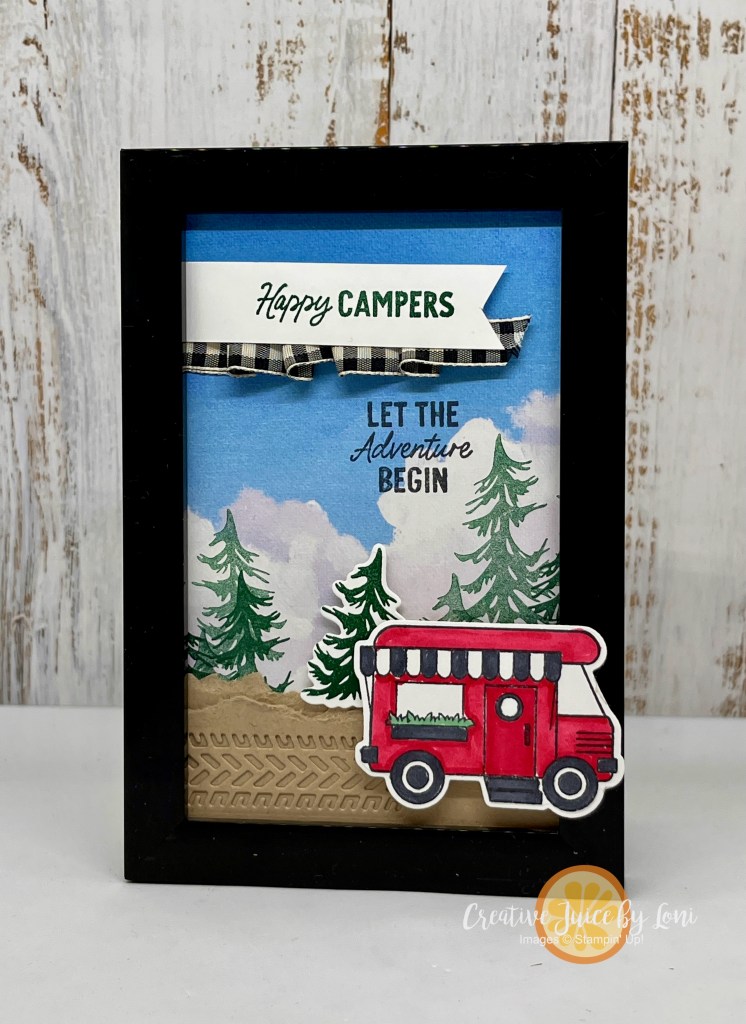
Have you ever created a gathered edge with a ribbon? Let it peek out from below a sentiment like this Black & Vanilla Large Check RIbbon ruffle on a piece of home-sweet-camper framed decor:
Yep- that’s another “first look” at the Adventure Together bundle (a January Online Exclusive) AND the Everyday Skies Designer Series Paper (included in the Paper Share).
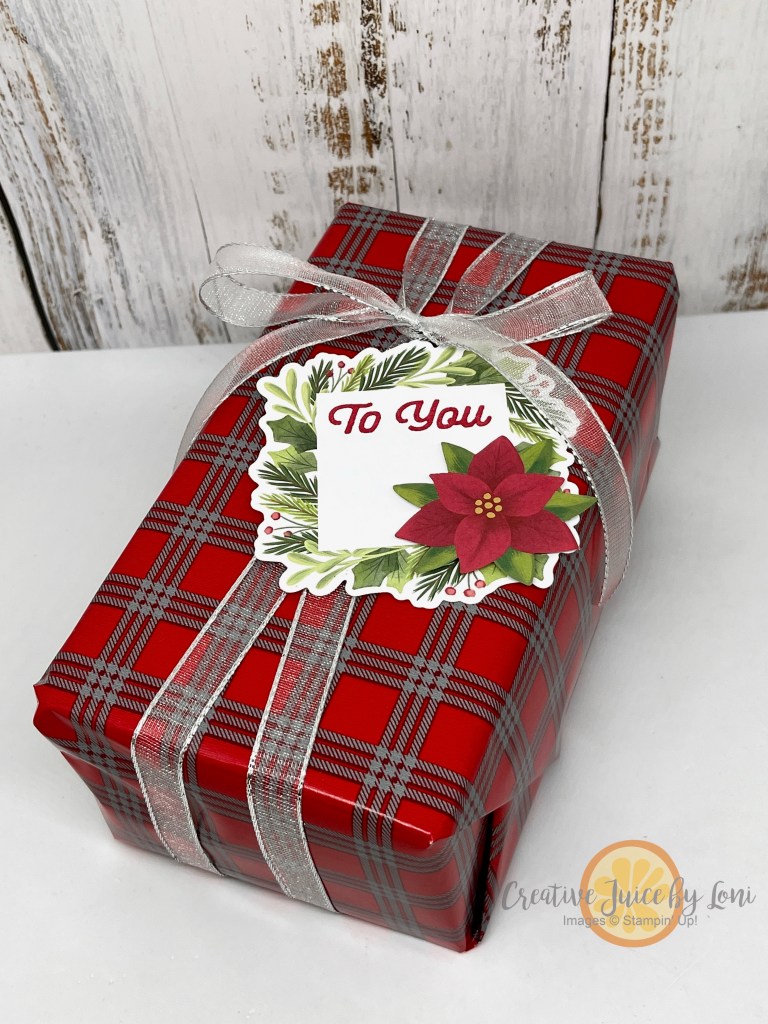
And finally (or at first in the demonstration video), a unique way to tie a bow on a gift box- FAST. Just wait until you see how the bow keeps the ribbon in place! I used the Silver & White Sheer Ribbon:
AT LAST! Here’s the tutorial to watch:
Really looking forward to hearing what you think of these ideas of ways to use Stampin’ Up! ribbon on handmade greeting cards, gifts and more.
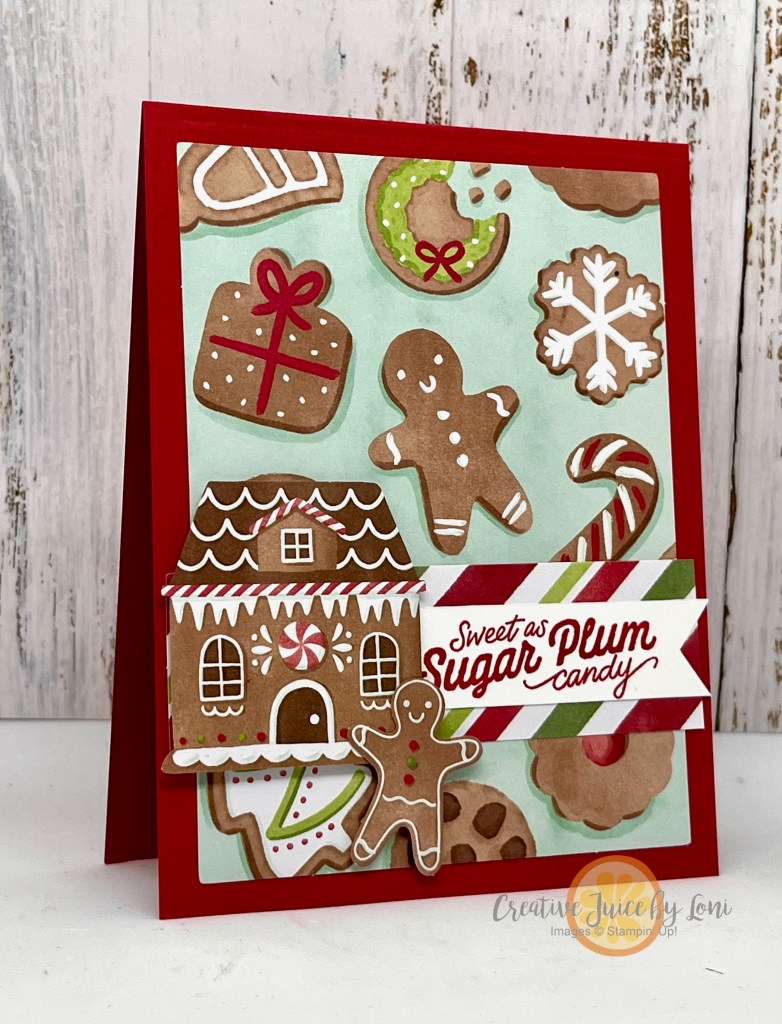
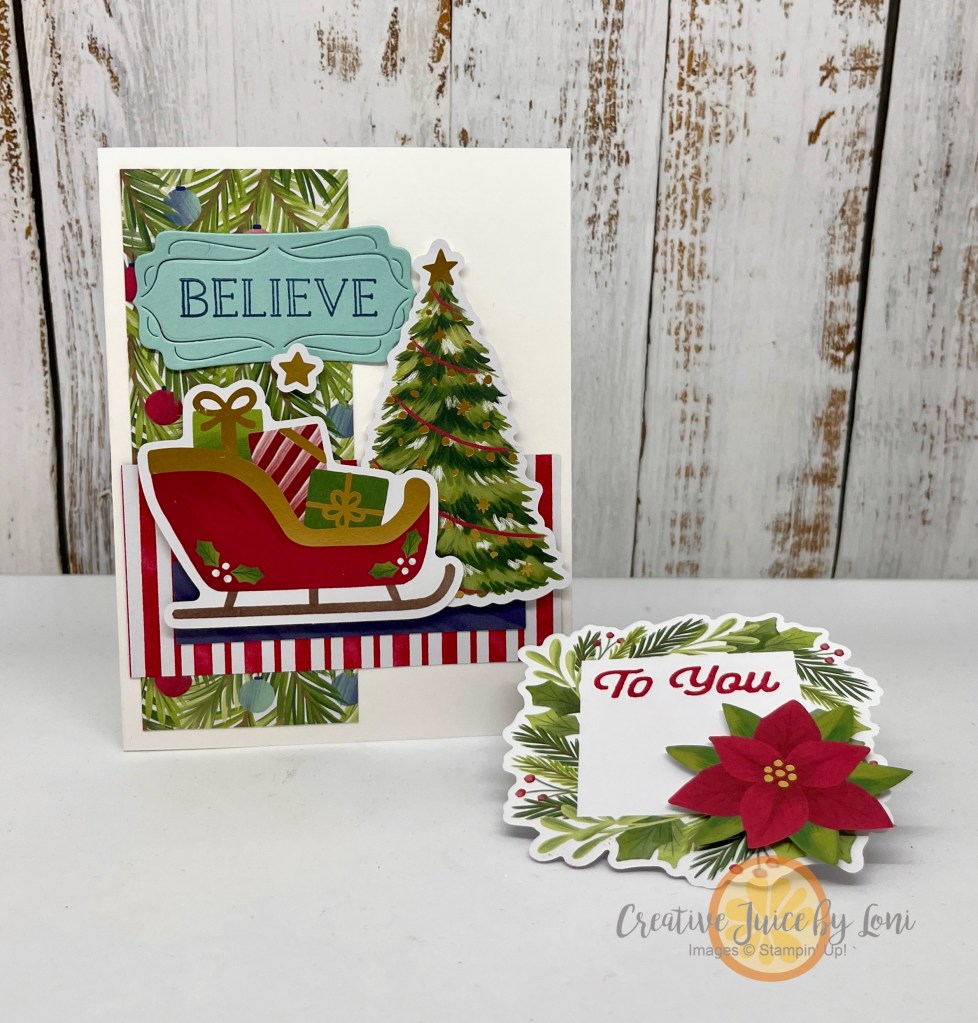
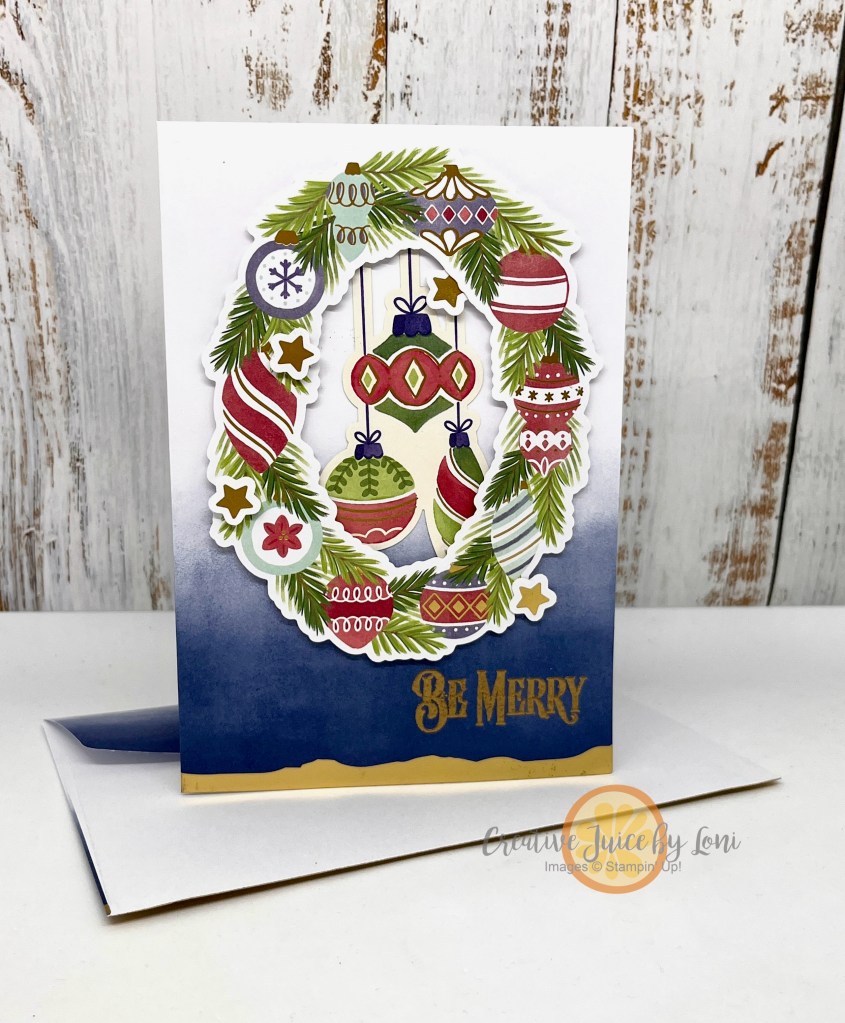
The holidays should be festive and fun, NOT stressful! These fast last-minute projects meet both requirements because the thoughtfully patterned paper AND ready-to-use elements are simply delightful to mix and match:
A Little Bit Festive Designer Series Paper pack is in the LAST CHANCE list and some folks claim to have created up to 30 Christmas cards from the pack, just by added card stock bases, as shown above. They will all be unique, as there are no duplicate images.
Step up your card creations with the Gold-Dipped Cards & Envelope pack: All you have to do is fold them in half and add your focal points! Heat embossing a greeting is one way to add more shine, and many of the Little Bit Festive ephemera pieces also have gold foil details:
Easier to see the shine in the demonstration video:
Two more projects I created with this pack were:
An 8.5″ x 11″ scrapbook page layout. This was still very simple to make, and I could write a whole journal about my hot cocoa obsession…just need to take a few photos and add them!
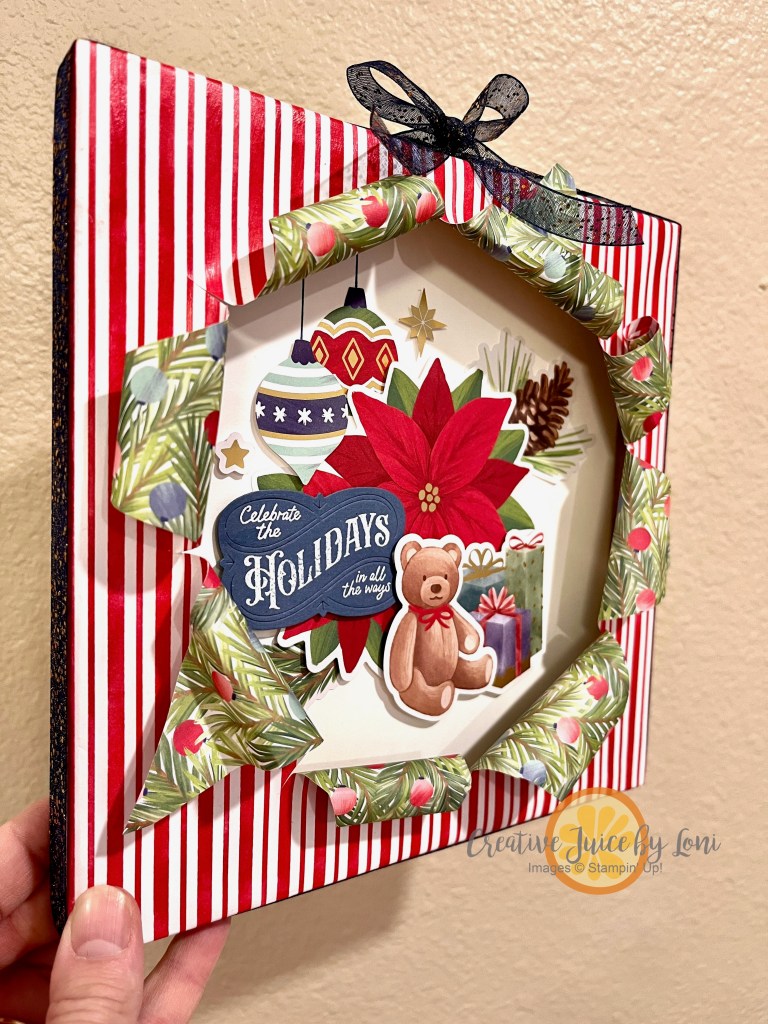
And finally, this true “Busted Canvas” home decor piece! While not quite as quick as the other projects, it really didn’t take much longer to create, once the Mod Podge was dried on the front.
Grouping a bunch of the die cuts together makes an adorable vignette of all things Christmas!
Celebrating the 500th TGIF Challenge with a birthday card I made for a dear friend, and my longest team member. Ann, if you see this, just act surprised when you open your mail!
Tearing – or ripping – paper was one of the first techniques I remember being taught at an EARLY crafting convention I attended. It’s so simple, and adds terrific texture, and while many things have changed in paper crafting styles, this technique has just grown more sophisticated.
To be honest, there were a few times I almost threw out this card to begin again, but I persevered, and surprisingly, I think the end result is “tres shabby chic”!
With a whopping 6 (or more) layers of card stock, Designer Series Paper, ribbon, and the birds (also die cut from the patterned paper, so I didn’t have to color them), this was much more detailed than I usually do, but the card needed all the fussy stuff, and Ann deserves a very special card.
Luckily, most of the elements came from the Nests of Winter Suite, so all I had to add was the pretty pompom ribbon. These items can also be ordered individually, which I will include in the supply list below.
Added a few more torn patterns to the inside of the card and the envelope!
Next time you are crafting, give Torn Paper a try. #tgifc500


 Designer Series Paper")
")

")
")


")
 Large Check Ribbon")
")


![Adventure Together Bundle (English) [ 164850 ]](https://assets1.tamsnetwork.com/images/EC042017NF/164850s.jpg "Adventure Together Bundle (English) [ 164850 ]")
![Everyday Arches Bundle (English) [ 164630 ]](https://assets1.tamsnetwork.com/images/EC042017NF/164630s.jpg "Everyday Arches Bundle (English) [ 164630 ]")
![Everyday Skies 6" X 6" (15.2 X 15.2 Cm) Designer Series Paper [ 164622 ]](https://assets1.tamsnetwork.com/images/EC042017NF/164622s.jpg "Everyday Skies 6\" X 6\" (15.2 X 15.2 Cm) Designer Series Paper [ 164622 ]")
![Azure Afternoon 8 1/2" X 11" Cardstock [ 161719 ]](https://assets1.tamsnetwork.com/images/EC042017NF/161719s.jpg "Azure Afternoon 8 1/2\" X 11\" Cardstock [ 161719 ]")
![Fresh Freesia 8 1/2" X 11" Cardstock [ 155613 ]](https://assets1.tamsnetwork.com/images/EC042017NF/155613s.jpg "Fresh Freesia 8 1/2\" X 11\" Cardstock [ 155613 ]")
![Pool Party 8-1/2" X 11" Cardstock [ 122924 ]](https://assets1.tamsnetwork.com/images/EC042017NF/122924s.jpg "Pool Party 8-1/2\" X 11\" Cardstock [ 122924 ]")
![Azure Afternoon Classic Stampin' Pad [ 161663 ]](https://assets1.tamsnetwork.com/images/EC042017NF/161663s.jpg "Azure Afternoon Classic Stampin' Pad [ 161663 ]")
![Misty Moonlight Classic Stampin' Pad [ 153118 ]](https://assets1.tamsnetwork.com/images/EC042017NF/153118s.jpg "Misty Moonlight Classic Stampin' Pad [ 153118 ]")
![Fresh Freesia Stampin' Blends Combo Pack [ 155518 ]](https://assets1.tamsnetwork.com/images/EC042017NF/155518s.jpg "Fresh Freesia Stampin' Blends Combo Pack [ 155518 ]")
![Bubble Bath Stampin’ Blends Combo Pack [ 161675 ]](https://assets1.tamsnetwork.com/images/EC042017NF/161675s.jpg "Bubble Bath Stampin’ Blends Combo Pack [ 161675 ]")
![Azure Afternoon Stampin’ Blends Combo Pack [ 161672 ]](https://assets1.tamsnetwork.com/images/EC042017NF/161672s.jpg "Azure Afternoon Stampin’ Blends Combo Pack [ 161672 ]")
![Lemon Lolly Stampin’ Blends Combo Pack [ 161673 ]](https://assets1.tamsnetwork.com/images/EC042017NF/161673s.jpg "Lemon Lolly Stampin’ Blends Combo Pack [ 161673 ]")
![Smoky Slate Stampin' Blends Combo Pack [ 154904 ]](https://assets1.tamsnetwork.com/images/EC042017NF/154904s.jpg "Smoky Slate Stampin' Blends Combo Pack [ 154904 ]")
![Basic Black Stampin' Blends Combo Pack [ 154843 ]](https://assets1.tamsnetwork.com/images/EC042017NF/154843s.jpg "Basic Black Stampin' Blends Combo Pack [ 154843 ]")
![Old Olive Stampin' Blends Combo Pack [ 154892 ]](https://assets1.tamsnetwork.com/images/EC042017NF/154892s.jpg "Old Olive Stampin' Blends Combo Pack [ 154892 ]")
![Stampin' Cut & Emboss Machine [ 149653 ]](https://assets1.tamsnetwork.com/images/EC042017NF/149653s.jpg "Stampin' Cut & Emboss Machine [ 149653 ]")
![Stampin' Seal [ 152813 ]](https://assets1.tamsnetwork.com/images/EC042017NF/152813s.jpg "Stampin' Seal [ 152813 ]")
![Stampin' Dimensionals [ 104430 ]](https://assets1.tamsnetwork.com/images/EC042017NF/104430s.jpg "Stampin' Dimensionals [ 104430 ]")
![Two Tone Sparkle Gems [ 164633 ]](https://assets1.tamsnetwork.com/images/EC042017NF/164633s.jpg "Two Tone Sparkle Gems [ 164633 ]")


![Bee My Valentine Photopolymer Stamp Set (English) [ 162547 ]](https://assets1.tamsnetwork.com/images/EC042017NF/162547s.jpg "Bee My Valentine Photopolymer Stamp Set (English) [ 162547 ]")
![Bee Builder Punch [ 162553 ]](https://assets1.tamsnetwork.com/images/EC042017NF/162553s.jpg "Bee Builder Punch [ 162553 ]")
![Cute As Can Bee 12" X 12" (30.5 X 30.5 Cm) Designer Series Paper [ 166621 ]](https://assets1.tamsnetwork.com/images/EC042017NF/166621s.jpg "Cute As Can Bee 12\" X 12\" (30.5 X 30.5 Cm) Designer Series Paper [ 166621 ]")
![Floral & Gingham Vellum 12" X 12" (30.5 X 30.5 Cm) Specialty Designer Series Paper [ 164713 ]](https://assets1.tamsnetwork.com/images/EC042017NF/164713s.jpg "Floral & Gingham Vellum 12\" X 12\" (30.5 X 30.5 Cm) Specialty Designer Series Paper [ 164713 ]")
![2024–2026 In Color™ Glimmer 12" X 12" (30.5 X 30.5 Cm) Specialty Paper [ 163771 ]](https://assets1.tamsnetwork.com/images/EC042017NF/163771s.jpg "2024–2026 In Color™ Glimmer 12\" X 12\" (30.5 X 30.5 Cm) Specialty Paper [ 163771 ]")
![Basic White 8 1/2" X 11" Thick Cardstock [ 159229 ]](https://assets1.tamsnetwork.com/images/EC042017NF/159229s.jpg "Basic White 8 1/2\" X 11\" Thick Cardstock [ 159229 ]")
![Daffodil Delight 8-1/2" X 11" Cardstock [ 119683 ]](https://assets1.tamsnetwork.com/images/EC042017NF/119683s.jpg "Daffodil Delight 8-1/2\" X 11\" Cardstock [ 119683 ]")
![Petunia Pop 8 1/2" X 11" Cardstock [ 163801 ]](https://assets1.tamsnetwork.com/images/EC042017NF/163801s.jpg "Petunia Pop 8 1/2\" X 11\" Cardstock [ 163801 ]")
![Window Sheets [ 142314 ]](https://assets1.tamsnetwork.com/images/EC042017NF/142314s.jpg "Window Sheets [ 142314 ]")
![Purple Adhesive Backed Sequins [ 164970 ]](https://assets1.tamsnetwork.com/images/EC042017NF/164970s.jpg "Purple Adhesive Backed Sequins [ 164970 ]")
![Mini Glue Dots [ 103683 ]](https://assets1.tamsnetwork.com/images/EC042017NF/103683s.jpg "Mini Glue Dots [ 103683 ]")
![Tear & Tape Adhesive [ 154031 ]](https://assets1.tamsnetwork.com/images/EC042017NF/154031s.jpg "Tear & Tape Adhesive [ 154031 ]")
![Tuxedo Black Memento Ink Pad [ 132708 ]](https://assets1.tamsnetwork.com/images/EC042017NF/132708s.jpg "Tuxedo Black Memento Ink Pad [ 132708 ]")
![Petunia Pop Classic Stampin Pad [ 163811 ]](https://assets1.tamsnetwork.com/images/EC042017NF/163811s.jpg "Petunia Pop Classic Stampin Pad [ 163811 ]")


![Early Espresso 8-1/2" X 11" Cardstock [ 119686 ]](https://assets1.tamsnetwork.com/images/EC042017NF/119686s.jpg "Early Espresso 8-1/2\" X 11\" Cardstock [ 119686 ]")
![Coastal Cabana 8-1/2" X 11" Cardstock [ 131297 ]](https://assets1.tamsnetwork.com/images/EC042017NF/131297s.jpg "Coastal Cabana 8-1/2\" X 11\" Cardstock [ 131297 ]")
![Pecan Pie Classic Stampin' Pad [ 161665 ]](https://assets1.tamsnetwork.com/images/EC042017NF/161665s.jpg "Pecan Pie Classic Stampin' Pad [ 161665 ]")
![Early Espresso Classic Stampin' Pad [ 147114 ]](https://assets1.tamsnetwork.com/images/EC042017NF/147114s.jpg "Early Espresso Classic Stampin' Pad [ 147114 ]")
![Adhesive Backed Shiny Sequins [ 163484 ]](https://assets1.tamsnetwork.com/images/EC042017NF/163484s.jpg "Adhesive Backed Shiny Sequins [ 163484 ]")
![Daffodil Delight 1/8" (3.2 Mm) Satin Ribbon [ 164715 ]](https://assets1.tamsnetwork.com/images/EC042017NF/164715s.jpg "Daffodil Delight 1/8\" (3.2 Mm) Satin Ribbon [ 164715 ]")


![Whisper White 8-1/2" X 11" Cardstock [ 100730 ]](https://assets1.tamsnetwork.com/images/EC042017NF/100730s.jpg "Whisper White 8-1/2\" X 11\" Cardstock [ 100730 ]")
![Basic Beige 8 1/2" X 11" Cardstock [ 164511 ]](https://assets1.tamsnetwork.com/images/EC042017NF/164511s.jpg "Basic Beige 8 1/2\" X 11\" Cardstock [ 164511 ]")
![Cajun Craze 8-1/2" X 11" Cardstock [ 119684 ]](https://assets1.tamsnetwork.com/images/EC042017NF/119684s.jpg "Cajun Craze 8-1/2\" X 11\" Cardstock [ 119684 ]")
![Mediterranean Blooms 12" X 12" (30.5 X 30.5 Cm) Designer Series Paper [ 163284 ]](https://assets1.tamsnetwork.com/images/EC042017NF/163284s.jpg "Mediterranean Blooms 12\" X 12\" (30.5 X 30.5 Cm) Designer Series Paper [ 163284 ]")
![Nature's Sweetness 12" X 12" (30.5 X 30.5 Cm) Specialty Designer Series Paper [ 162616 ]](https://assets1.tamsnetwork.com/images/EC042017NF/162616s.jpg "Nature's Sweetness 12\" X 12\" (30.5 X 30.5 Cm) Specialty Designer Series Paper [ 162616 ]")
![Night Of Navy Classic Stampin' Pad [ 147110 ]](https://assets1.tamsnetwork.com/images/EC042017NF/147110s.jpg "Night Of Navy Classic Stampin' Pad [ 147110 ]")
![Cajun Craze Classic Stampin' Pad [ 147085 ]](https://assets1.tamsnetwork.com/images/EC042017NF/147085s.jpg "Cajun Craze Classic Stampin' Pad [ 147085 ]")
![Versamark Pad [ 102283 ]](https://assets1.tamsnetwork.com/images/EC042017NF/102283s.jpg "Versamark Pad [ 102283 ]")
![Metallics Wow! Embossing Powder [ 165678 ]](https://assets1.tamsnetwork.com/images/EC042017NF/165678s.jpg "Metallics Wow! Embossing Powder [ 165678 ]")
![Faux Glass Dots [ 164060 ]](https://assets1.tamsnetwork.com/images/EC042017NF/164060s.jpg "Faux Glass Dots [ 164060 ]")


![A Little Bit Festive 12" X 12" (30.5 X 30.5 Cm) Mix & Match Specialty Designer Series Paper [ 164107 ]](https://assets1.tamsnetwork.com/images/EC042017NF/164107s.jpg "A Little Bit Festive 12\" X 12\" (30.5 X 30.5 Cm) Mix & Match Specialty Designer Series Paper [ 164107 ]")
![Gold Dipped Mix & Match Specialty Cards & Envelopes [ 164108 ]](https://assets1.tamsnetwork.com/images/EC042017NF/164108s.jpg "Gold Dipped Mix & Match Specialty Cards & Envelopes [ 164108 ]")
![Christmas Labels Bundle (English) [ 164101 ]](https://assets1.tamsnetwork.com/images/EC042017NF/164101s.jpg "Christmas Labels Bundle (English) [ 164101 ]")
![Night Of Navy & Gold 1/2" (1.3 Cm) Glittered Ribbon [ 162011 ]](https://assets1.tamsnetwork.com/images/EC042017NF/162011s.jpg "Night Of Navy & Gold 1/2\" (1.3 Cm) Glittered Ribbon [ 162011 ]")


![Winterly Tree Tops Bundle (English) [ 164066 ]](https://assets1.tamsnetwork.com/images/EC042017NF/164066s.jpg "Winterly Tree Tops Bundle (English) [ 164066 ]")
![Nests Of Winter 12" X 12" (30.5 X 30.5 Cm) Designer Series Paper [ 164183 ]](https://assets1.tamsnetwork.com/images/EC042017NF/164183s.jpg "Nests Of Winter 12\" X 12\" (30.5 X 30.5 Cm) Designer Series Paper [ 164183 ]")
![Gray Granite 8-1/2" X 11" Cardstock [ 146983 ]](https://assets1.tamsnetwork.com/images/EC042017NF/146983s.jpg "Gray Granite 8-1/2\" X 11\" Cardstock [ 146983 ]")
![Garden Green 8-1/2" X 11" Cardstock [ 102584 ]](https://assets1.tamsnetwork.com/images/EC042017NF/102584s.jpg "Garden Green 8-1/2\" X 11\" Cardstock [ 102584 ]")
![Pool Party 5/8" (1.6 Cm) Pompom Ribbon [ 164129 ]](https://assets1.tamsnetwork.com/images/EC042017NF/164129s.jpg "Pool Party 5/8\" (1.6 Cm) Pompom Ribbon [ 164129 ]")
![Earth Tones Shimmer Gems [ 164070 ]](https://assets1.tamsnetwork.com/images/EC042017NF/164070s.jpg "Earth Tones Shimmer Gems [ 164070 ]")
![Multipurpose Liquid Glue [ 110755 ]](https://assets1.tamsnetwork.com/images/EC042017NF/110755s.jpg "Multipurpose Liquid Glue [ 110755 ]")
