Celebrating the 500th TGIF Challenge with a birthday card I made for a dear friend, and my longest team member. Ann, if you see this, just act surprised when you open your mail!
Tearing – or ripping – paper was one of the first techniques I remember being taught at an EARLY crafting convention I attended. It’s so simple, and adds terrific texture, and while many things have changed in paper crafting styles, this technique has just grown more sophisticated.
To be honest, there were a few times I almost threw out this card to begin again, but I persevered, and surprisingly, I think the end result is “tres shabby chic”!
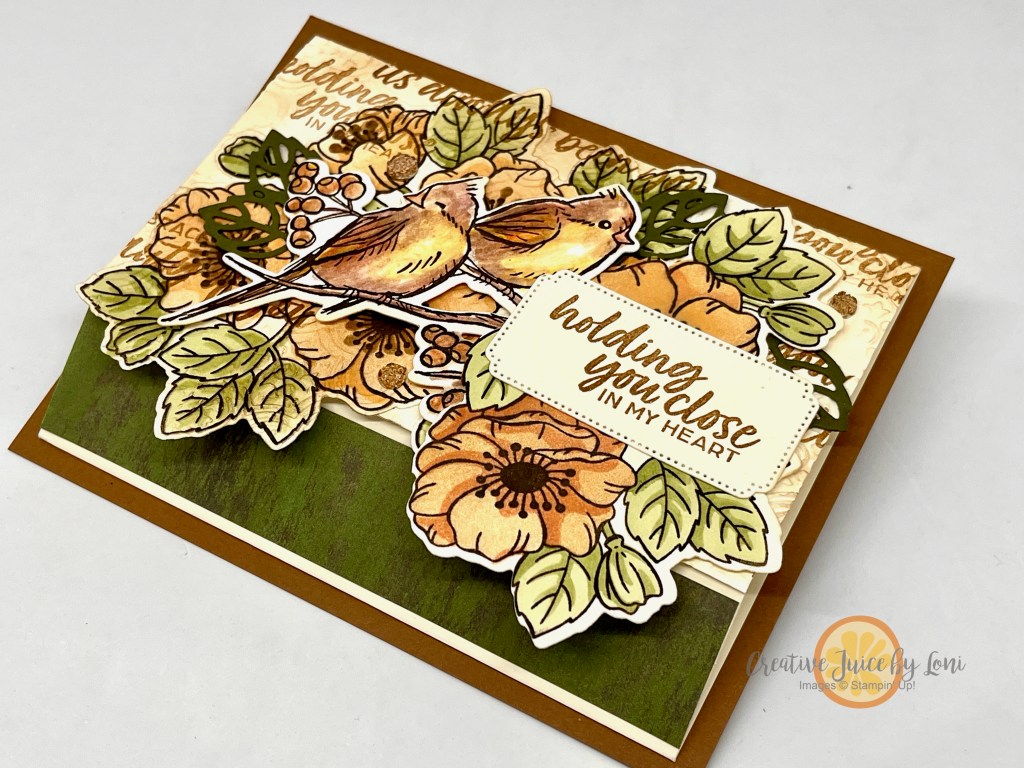
With a whopping 6 (or more) layers of card stock, Designer Series Paper, ribbon, and the birds (also die cut from the patterned paper, so I didn’t have to color them), this was much more detailed than I usually do, but the card needed all the fussy stuff, and Ann deserves a very special card.
Luckily, most of the elements came from the Nests of Winter Suite, so all I had to add was the pretty pompom ribbon. These items can also be ordered individually, which I will include in the supply list below.
Added a few more torn patterns to the inside of the card and the envelope!
Next time you are crafting, give Torn Paper a try. #tgifc500
Using this reverse masking concept with blending & stamping to give your hand-crafted projects the look of layers without the bulk of extra paper! While I’m sharing projects used mostly with the November “Filled with Joy” Paper Pumpkin kit, I know you’ll find ways to try it with what you have.
Watch the video tutorial, then see the finished projects below.
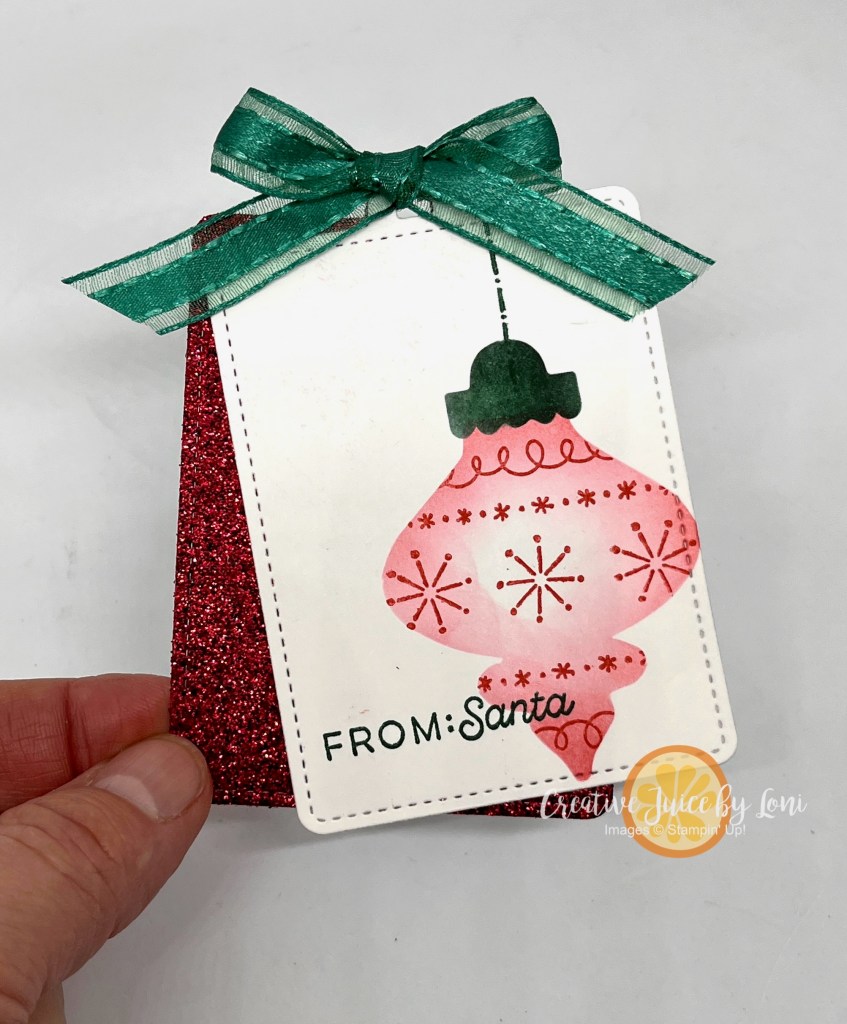
A good paper crafter looks for new ways to use every piece of a kit, such as the piece that we popped the ornaments from in the kit – I used it as a stencil for blending ink onto this tag (from the coordinating Merry Tags & More dies), then stamped through the stencil before removing it:
Voila! A new ornament! Same technique on a card:
These stockings were included in the “Filled with Joy” kit – there were still some refills available to Paper Pumpkin subscribers at the time of this post – and DID YOU KNOW you could add texture to fabric by running it through an embossing folder?! The Eyelet 3D folder was adorable on these and the tag was another alternative idea that wasn’t shown in the video:
I’ll stuff these with some goodies for my primary class at church and for the sisters I minister to. That’s 8 gifts wrapped, thanks to a kit!
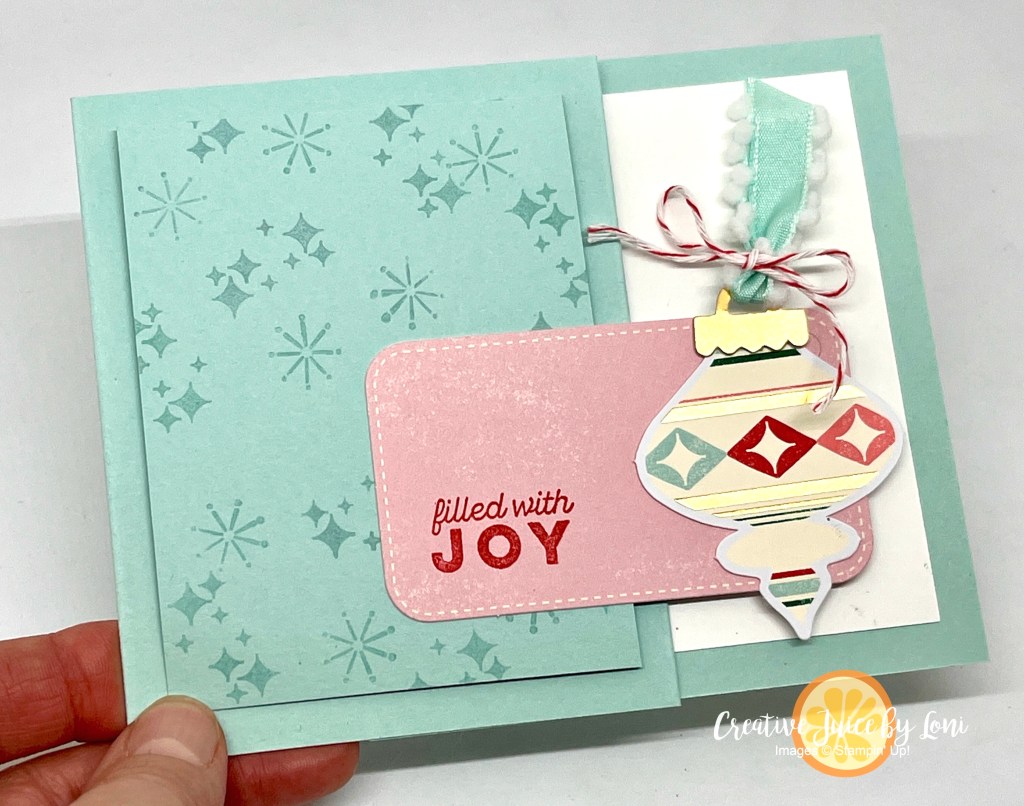
You can “think outside the box” and use the supplies from a kit for different projects, like this quick gift card holder (demonstrated in the video):
If you missed subscribing for the November Paper Pumpkin kit, don’t worry…you could make the same gift card holder idea with the Festive Tags kit, which is available a la carte in the Kit Collection!
While you can order from the Kit Collection ANYTIME (new kits are added monthly!), you may not want to miss a month of our premium craft kit subscription…the December kit is called “Notes from the Heart” and here’s a sneak peek:
Fans of fun-fold cards, you’ll love the simplicity of this idea, which I call a Diagonal-Lock card, because of the way the front of the card locks into the back of the card. Don’t miss the video tutorial in this post!
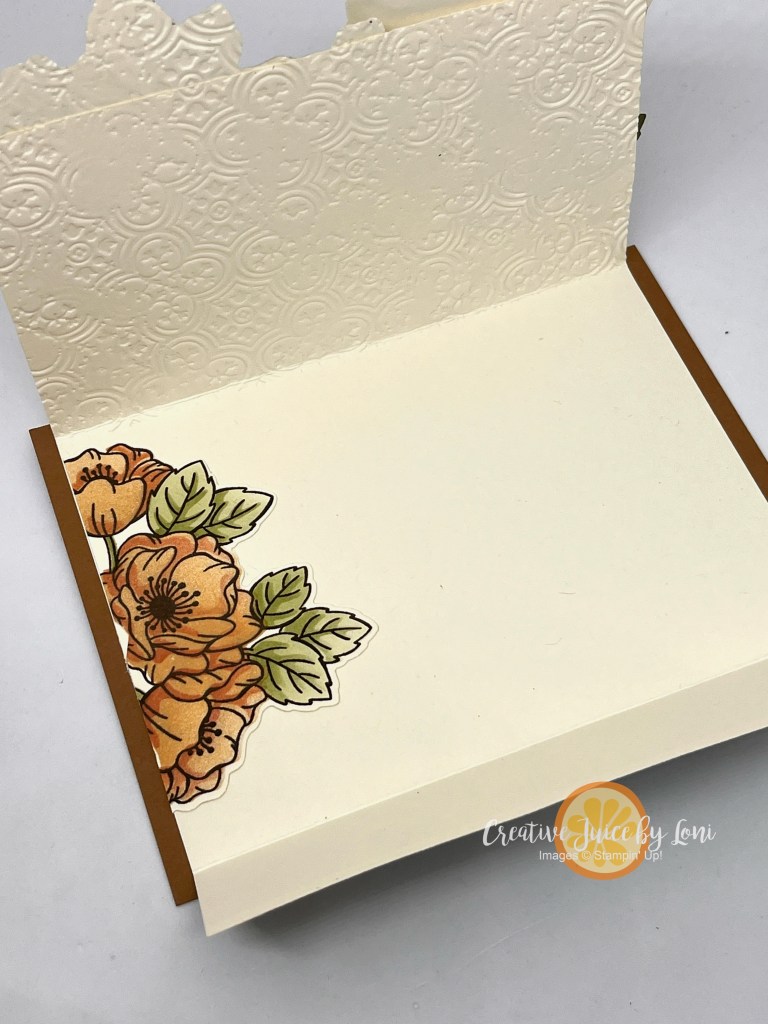
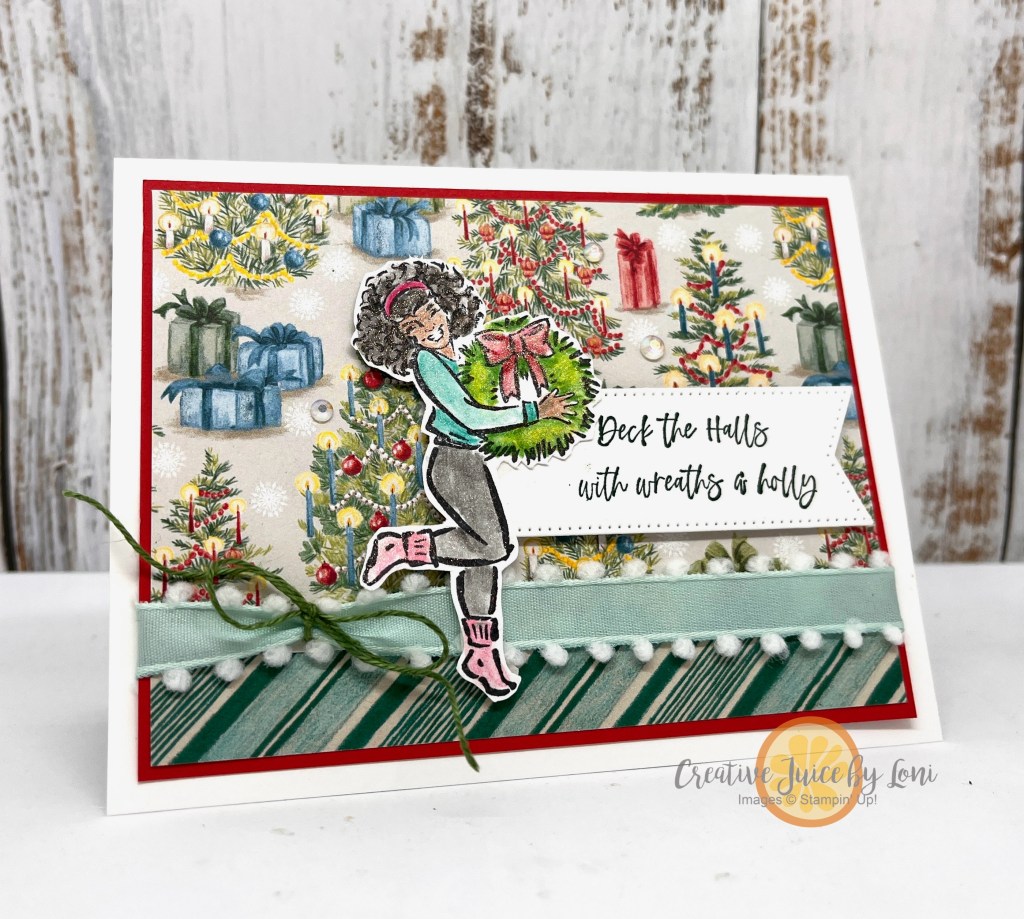
For this first version, I paired a muted piece of the Sweet Days of Autumn Designer Series Paper pattern that I could write a message on for the INSIDE of the card, while using the fun forest friends on the front of the card. The leaves and sentiment adorning the front are from the Changing Leaves bundle.
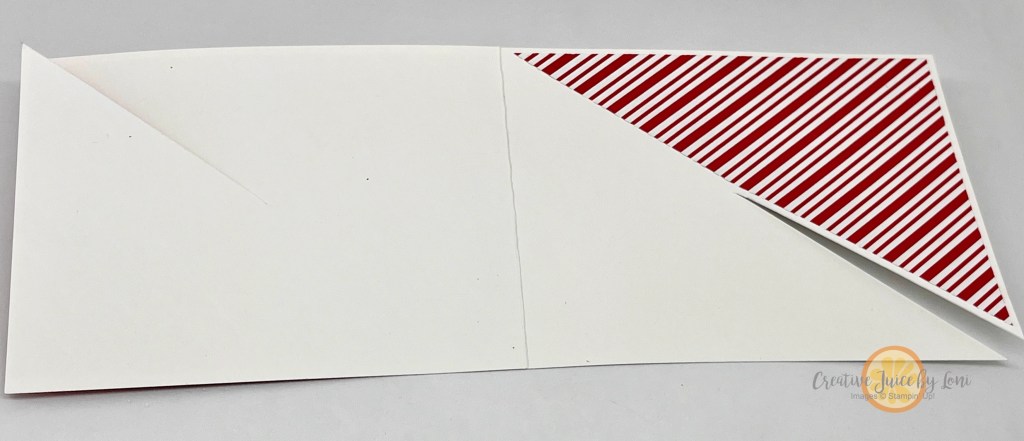
The recipient will “unlock” the card to open and this is what the inside looks like:
Basic card instructions:
Start with an 11″ x 4.25″ card, scored in half at 5.5″.
Adhere a 5.5″ x 4.25″ piece of Designer Series Paper to the front AND inside of the card.
Make a small mark in the center of the front and BACK of the card (at 3.5″ for this A2 card size).
Cut diagonally from opposite corners of the open card in to the mark.
The next version for any holiday celebration (this would be a sweet December birthday card) has a 5.25″ x 4″ Designer Series Paper layer for the front, and a diagonally cut HALF piece for the inside, which leaves a mat around the card which frames it nicely. This time I used my beloved More Than Autumn bundle with the Take A Bow patterned paper:
By using half a sheet on the inside, there is still room to write, even when the pattern is bold. PLUS, you can use the other half for a second card:
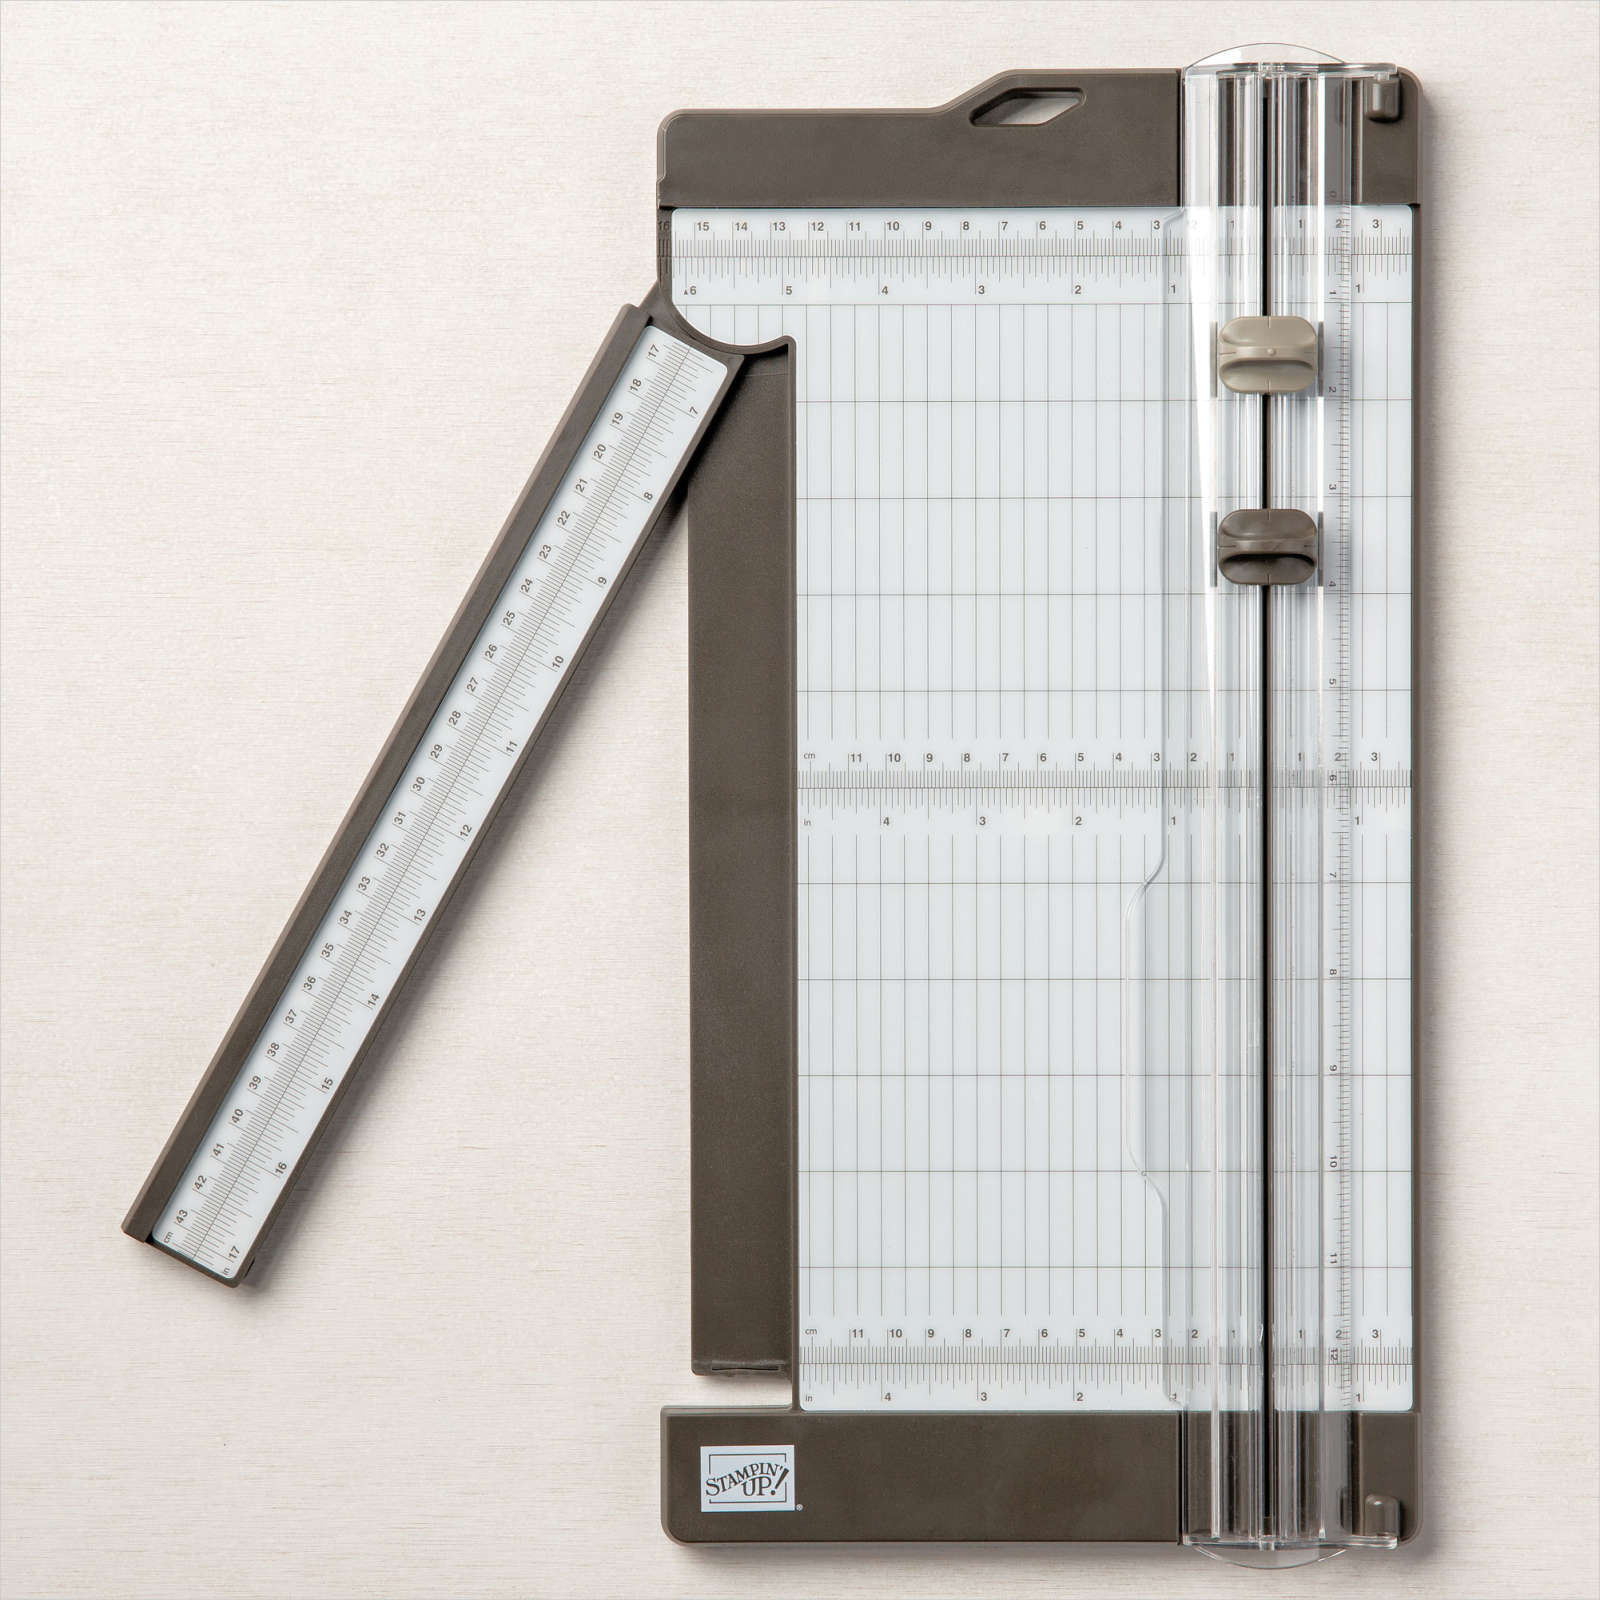
Grab a sheet of card stock and paper trimmer to craft along with this video tutorial to make a template for this card to keep in your “fun-fold” file:
Finally, since the Nests of Winter paper was sitting on my table, I used the Winterly Tree Top Dies to die cut the bird duo and fussy cut the small bird to craft this version:
Click any link to order supplies and create cards of your own!
I love hearing from you~ scroll to top to leave me a comment.
Don’t forget a Paper Trimmer, which also makes a wonderful gift for a teacher, a budding crafter or a student:
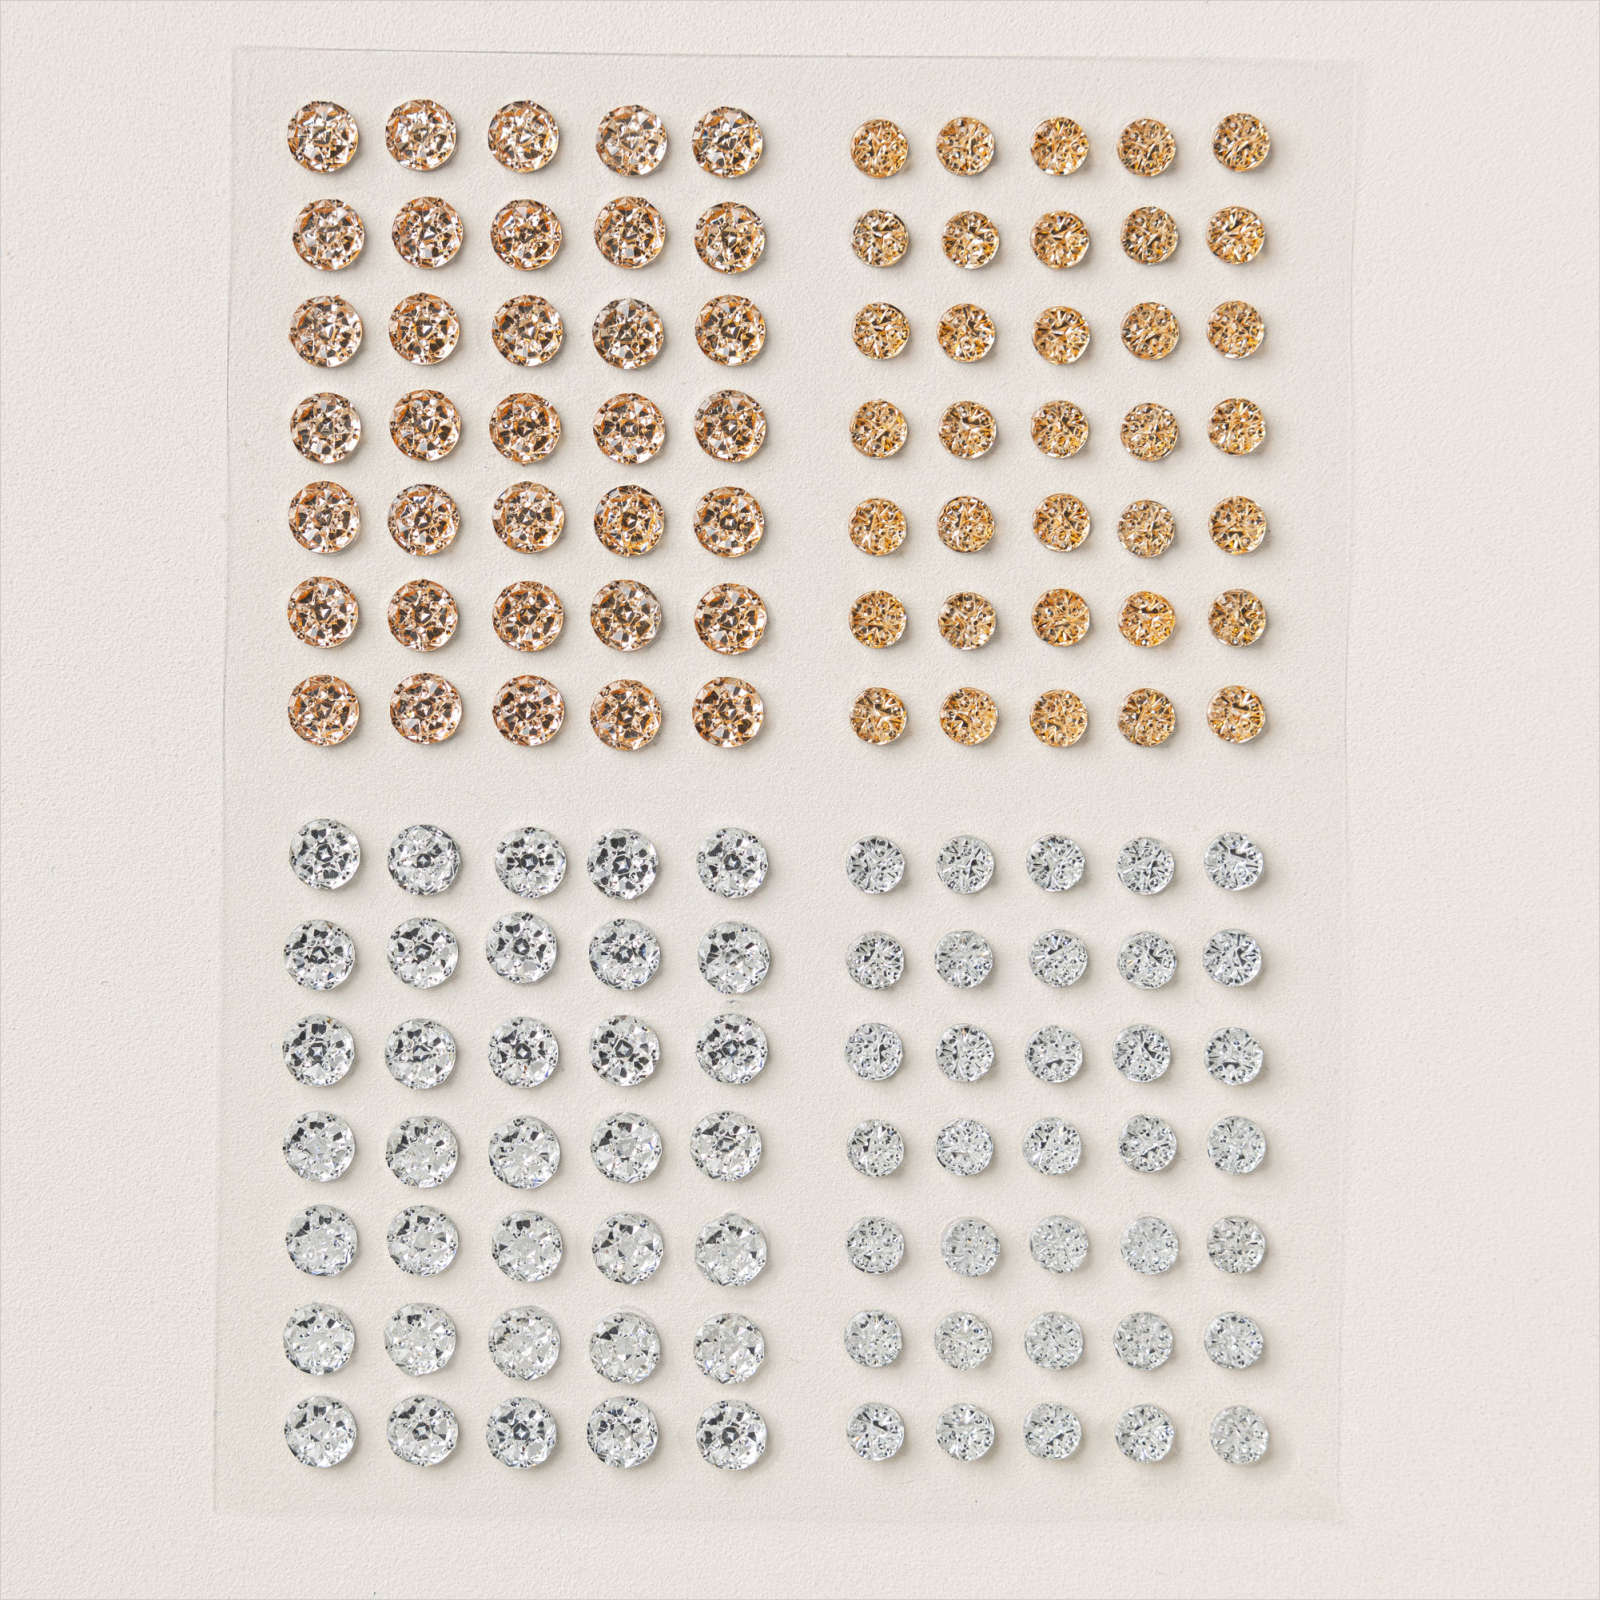
I wanted to give it a fall vibe, so picked a palette of Pecan Pie, Very Vanilla, Peach Pie, and Mossy Meadow (almost sounds like a recipe!). With a lot of layers and texture, it feels vintage and the sprinkle of three Drusy Embellishments adds a bit of glittery elegance.
TRIVIA TIME: “DRUSY” is an adjective that means “covered in minute crystals” and can describe the inside of a rock cavity that is lined with tiny crystals. These embellishments are truly gorgeous, but not easily mailable, as they do make the card quite bumpy. It needs a padded envelope if you are mailing it!
Peek inside the card:
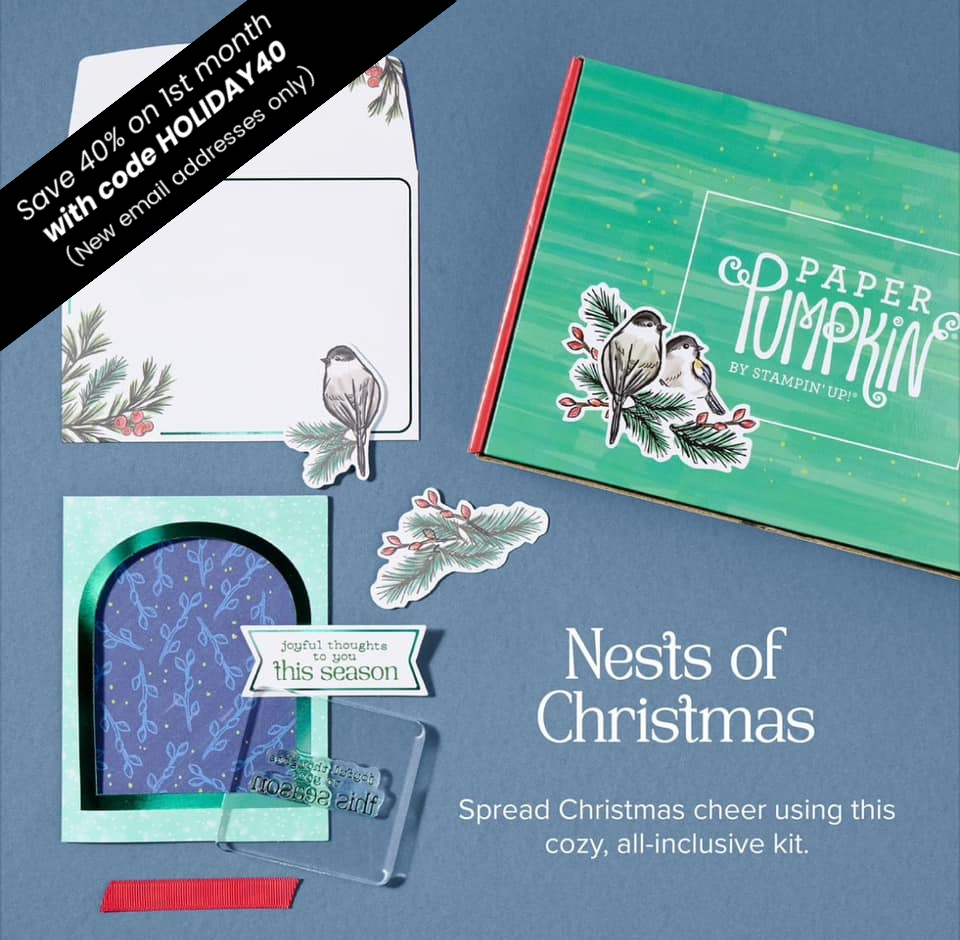
Winterly Tree Tops is a part of the larger Nests of Winter Suite and features the beautiful birds. You may be interested in the coordinating craft kit called Nests of Christmas that is part of our crafting subscription service (Paper Pumpkin). It’s only available if you subscribe by October 10th, and if you use promo code HOLIDAY40 as a first-time subscriber, you’ll get your first kit at 40% off!
Now that the card is finished and shared with you, I’m looking forward to a nap!
A stamp set that covers multiple seasons and occasions is a good investment, and when it’s as cute as the Warms My Heart images & sentiments, there are so many stories to tell with it!
Do you remember the “Choose Your Own Adventure” book series? That’s what we did today during my Monday LIVE video on my Facebook Page & YouTube! I let those who were watching in real time CHOOSE the season, the background, the colors and the label shape for the card we created, and THIS is the result:
If you want to watch us make this card, here’s the video, and if you want to see some alternate options, keep reading:
This style of card would be just as cute with Designer Series Paper for the background, and created for Christmas!
With both of these cards (and the next) I colored the stamped images with Watercolor Pencils and blended them together with Wink of Stella, which is every crafters FAVORITE tool for adding a wash of SHIMMER & SHINE. However, it’s very difficult to capture in a photo! This one is as close as I could get: The texture you can see is really specks of sparkle!
Another option, still keeping it simple with the sentiment on a banner, but without the need to fussy cut (there are no coordinating dies for this set, FYI):
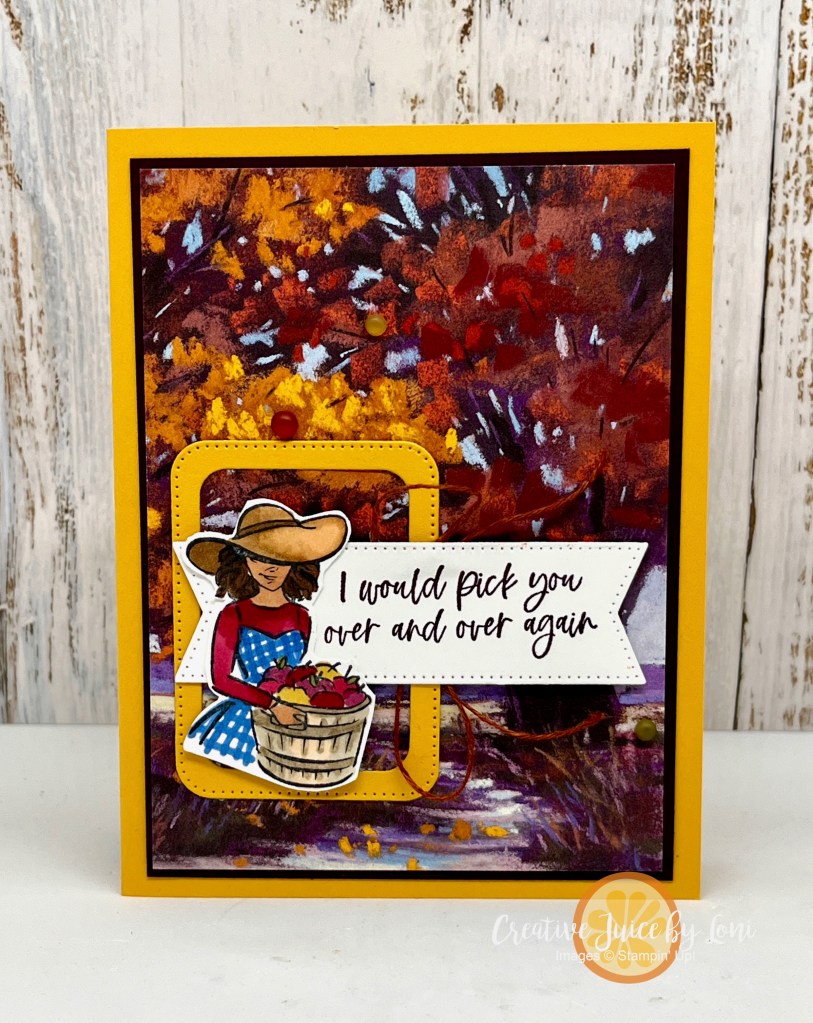
Just so we’ve used every piece of this set, here’s an autumn apple-picking version, in portrait:
When I taught piano lessons, I’d tell my students “Practice trumps talent when talent doesn’t practice”. If you’ve ever thought, “I’m not creative,” believe me when I say CREATIVITY CAN BE LEARNED!!
The easiest way to become more artistic is to have a starting point. Paper Pumpkin – a monthly craft box kit subscription – gives you a place to practice. Let me show you how:
On the left is a card created as designed for the September Paper Pumpkin Kit (“Autumn Abundance”). It took me less than 5 minutes to make it, following the instructions in the box. I thought the colors were so pretty, I chose to use the same palette on another card. Using Cajun Craze, Crushed Curry and Night of Navy ink pads, I followed a sketch from the Stampin’ Up! Sept-Dec Mini Catalog (pg. 16) to make the second card. It was simply stamped on Very Vanilla card stock and used the Labeled with Love punch to make the trio of panels.
Each quarter, there is a coordinating die set available to add-on to the kits, so I used the same sketch & colors to create a second version with the die-cut leaves using the dies for last quarter. They are sold out, but you CAN order the Merry Tags & More Dies (which coordinate with the Oct-Dec 2024 kits) while supplies last.
Next, this Thank You card in the kit (left) had a beautiful base. What if you needed a small gift package?
Make it into a box, of course! I’m teaching you how to make all these alternate projects in today’s video, so watch here for instructions:
Also included in the kit this month was this third card project- it was a 4″ x 4″ Autumn card, then I looked at the window and it made me think of a shaker card:
The snail and leaves shake around inside!
The kit is terrific to get your creative juices flowing, and making the projects as intended, you will learn the basics of paper crafting. You can always make different projects with the supplies you have in the box, and I send an EXCLUSIVE email each month to my Paper Pumpkin subscribers with ways to use the stamp set and ink spot after the kit is complete!
HERE’S THE DEAL:
Try a Paper Pumpkin craft kit subscription with 40% off your first month (new subscribers only)! Use promo code HOLIDAY40 when you subscribe HERE by October 10, 2024!
You are peeking at the “Nest of Christmas” October Kit, which coordinates with the Nests of Winter Suite in the Sept-Dec Mini catalog, and you could try it at a discount! This kit will make 10 Christmas Cards.
While the September Autumn Abundance kit isn’t available as a full kit, the refill IS available in my store (limited supplies available) and you could use other stamps and ink pads you already have to make it. You must be a current Paper Pumpkin subscriber to order refills or add-ons, so sign up and then start shopping the extras, using the same email you subscribed with.
So many marvelous Designer Series Papers, so little time? This technique for cutting a stack of patterned paper will have you making multiple cards at ONE TIME!
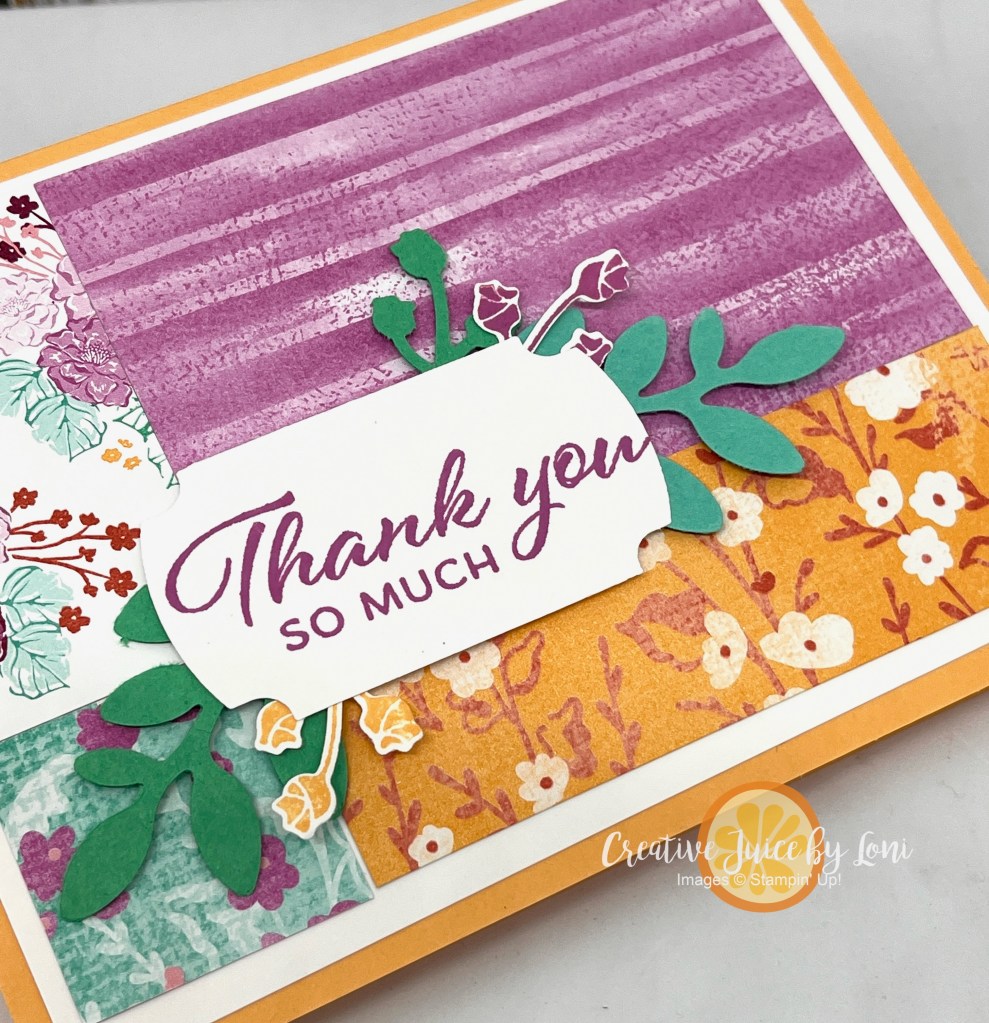
Begin by selecting 4 patterns of Designer Series Paper- I suggest using a maximum of two busy or bold patterns and add a subtle design and a tiny or monochromatic print, in 4 different colors (or different shades of the same hue). This will give you the CONTRAST you need when piecing them back together.
You can adhere the shuffled pieces edge-to-edge (as on the card, left) or leave a small space between them, giving a window-pane look (card on right). You may find that a design on the BACK of your paper works well, so go ahead and flip it over, if needed.
I used the Unbounded Beauty 12″ x 12″ pack- it’s part of the Designer Series Paper SALE this month, August 2024 and showcases the 2024-2026 In Colors, which are lovely together. With the few scraps left over, I added a piece to the inside layer and to the flap of my envelope.
Grab your patterned paper and follow along with me here, as you practice your cardmaking:
If you paper is directional, you’ll need to decide if you are creating PORTRAIT cards (tall) or LANDSCAPE cards (wide) **before** you cut your paper, and make sure it’s oriented the correct way.
The Unbounded Beauty cards were landscape, but I also needed some sympathy cards, and the blues in the Countryside Inn Designer Series Paper (also 15% off in August) seemed fitting. These are portrait versions of the Stack, Cut, Shuffle technique:
Inside the cards:
I’ll list supplies for both versions, starting with the Unbounded Beauty demonstrated in the how-to video:
Curious about how a “Hybrid Embossing Folder” works? Allow me to demonstrate how-to using the new Online Exclusive Changing Leaves bundle.
The embossing folder creates amazingly detailed leaves which are beautiful both embossed (raised) and debossed (recessed). Here is a “raised” example in Granny Apple Green using the embossed design for a background on a card:
Flip the embossed paper over and paint into the recessed images using water painters and ink refills -OR- water painters with Metallic Enamel Effects for shine:
Simply stamping the images and die cutting them to use on your projects is also an option. Watch for the tip to lining up all three leaf images in the correct spot, making them easier to die cut at the beginning of this video, in which I also demonstrate all the techniques I’m sharing:
I used my stamped/die cut leaves on a floating frame card:
Finally – and this is the HYBRID VERSION – the dies snap into the embossing folder! All you have to do is add your paper, run it through the Stampin’ Cut & Emboss Machine, and out come die-cut, embossed accents! This is a bonus project that shows the detail:
I borrowed the sentiment from another Online Exclusive stamp set called Comforting Thoughts for an occasion when there are just no words to express what you are feeling for someone’s heartache.
Try dragging your ink pad across the top of an embossed/cut leaf to bring out the details (or use a brayer rolled in ink), like the Pretty Peacock leaf on the card:
The Changing Leaves bundle is $54 (US) so it qualifies for a $5 BONUS DAYS coupon when you purchase it during July 2024. Collect coupons July 3-31st, then redeem them during August!
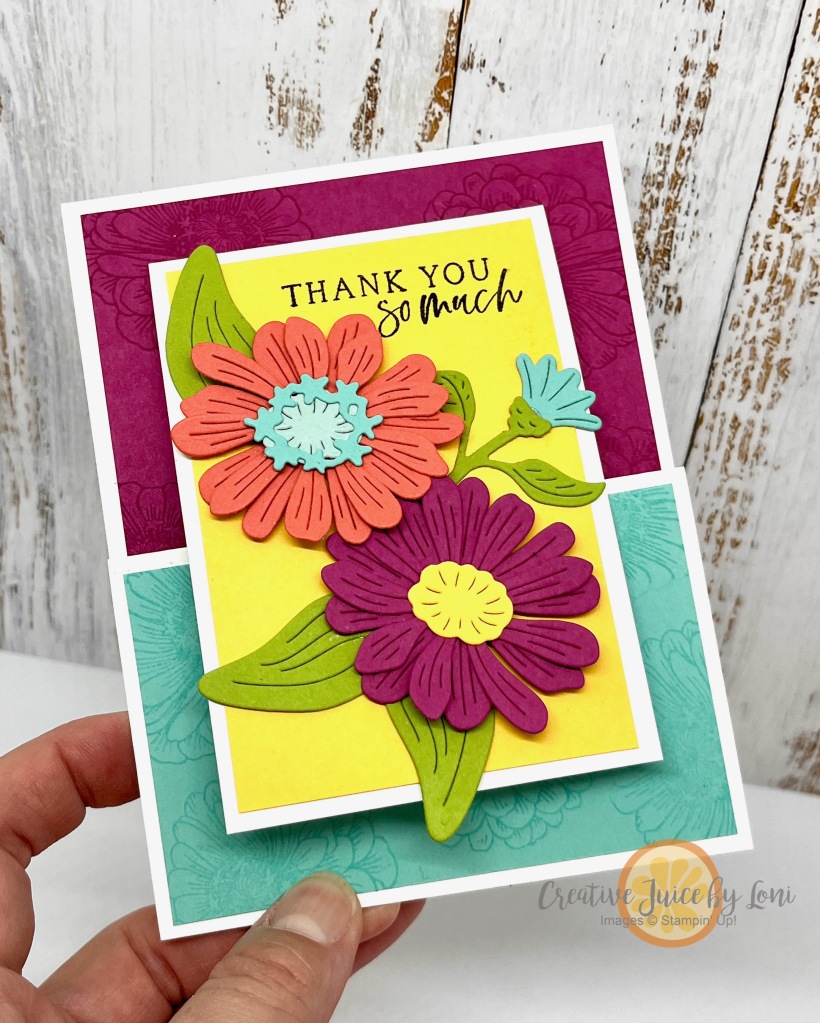
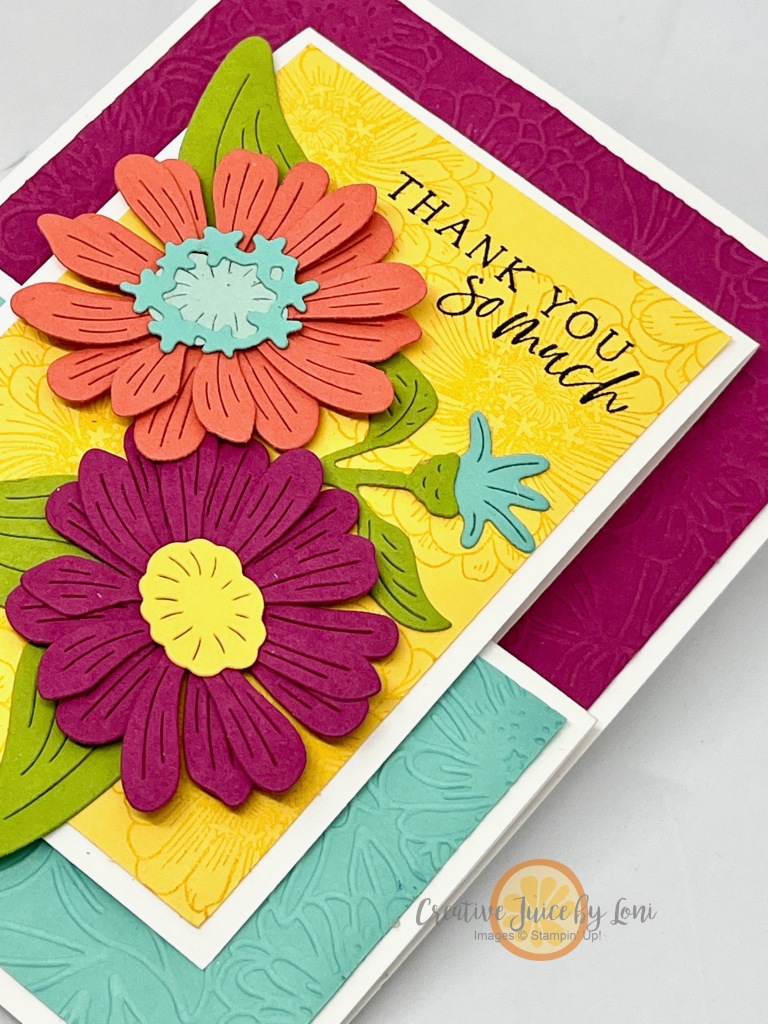
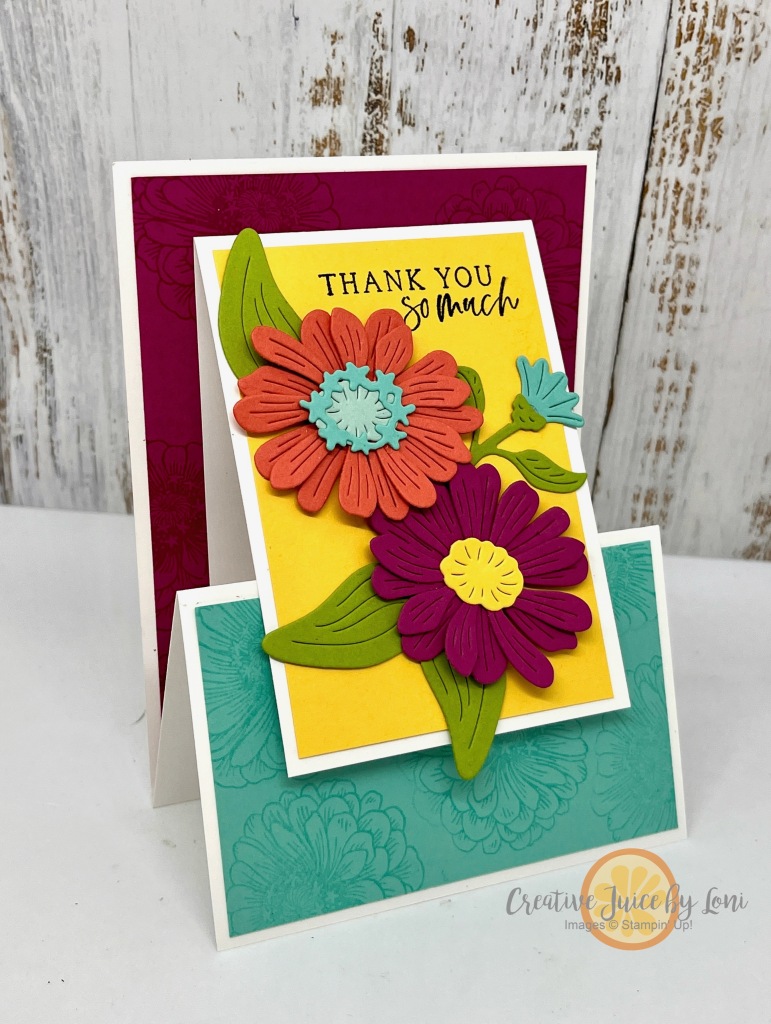
Bright colored flowers shout “I LOVE YOU” as well as “THANK YOU” and “YOU’RE THE BEST!” Zinnias lead the garden in bold flower-power during the summer, so a color-blocked card that stands to display seemed like the one to craft today:
The Simply Zinnia stamp & die bundle is an Online Exclusive that you can NOT miss! For my demonstration, I used Versamark ink to stamp the zinnia image on both the Berry Burst and Coastal Cabana card stock pieces that fit on the card base.
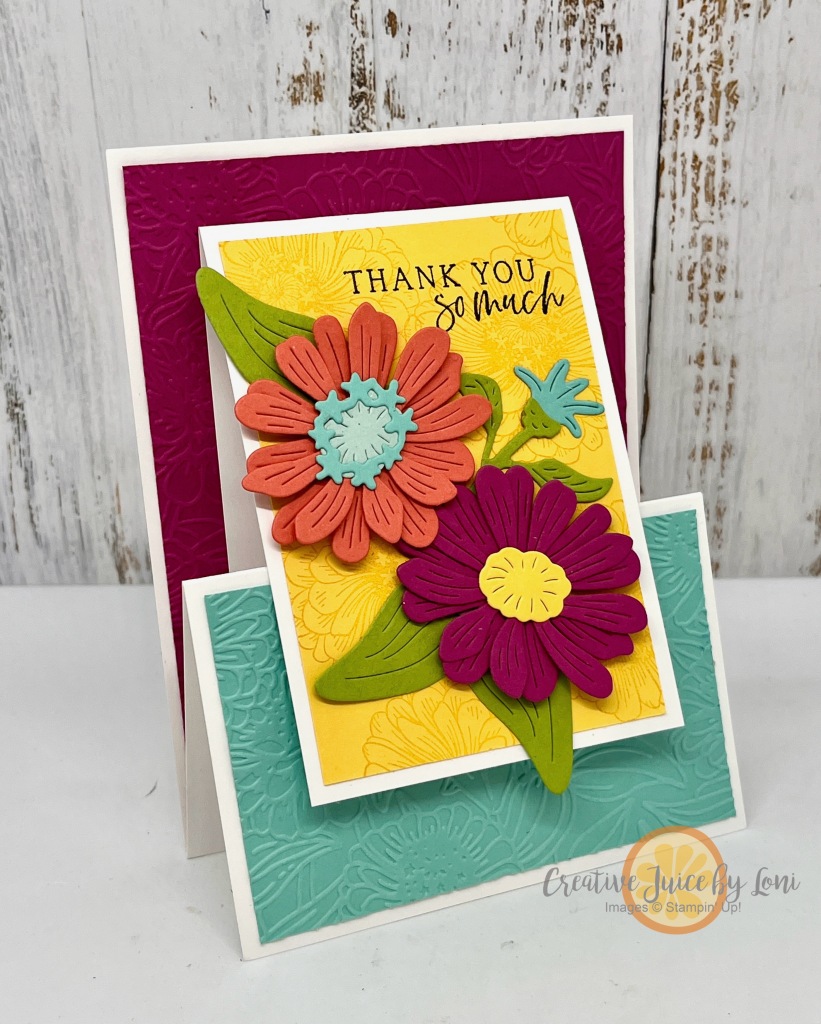
However, the Zinnia bundle IS part of a larger Flowering Zinnia SUITE of products, which includes the Zinnia 3-D Embossing folder…so I also did a version of this card using it to make a “touchable” raised background.
This is how they stand:
There is a HELPFUL TIP for layering the petal dies in today’s video tutorial, which will save you time in assembly. Remember, you can click on the gear in the bottom right of the video and change the speed to make any tutorial play faster, if you are an impatient crafter like me!
Just a few more days to collect the Stamp + Die bundles you love, or the Cut & Emboss machines, for an ADDITIONAL 10% off.
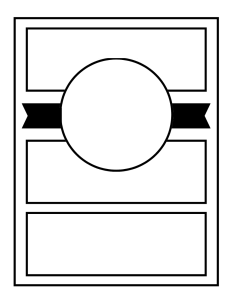
You’re here to see how Stampin’ Up! card sketches from the 2024-2025 catalog (pg 22) can improve your cardmaking skills, and our International #NewAtSU design team is taking the assignment seriously!
This is the sketch I chose:
Here is how it inspired me:
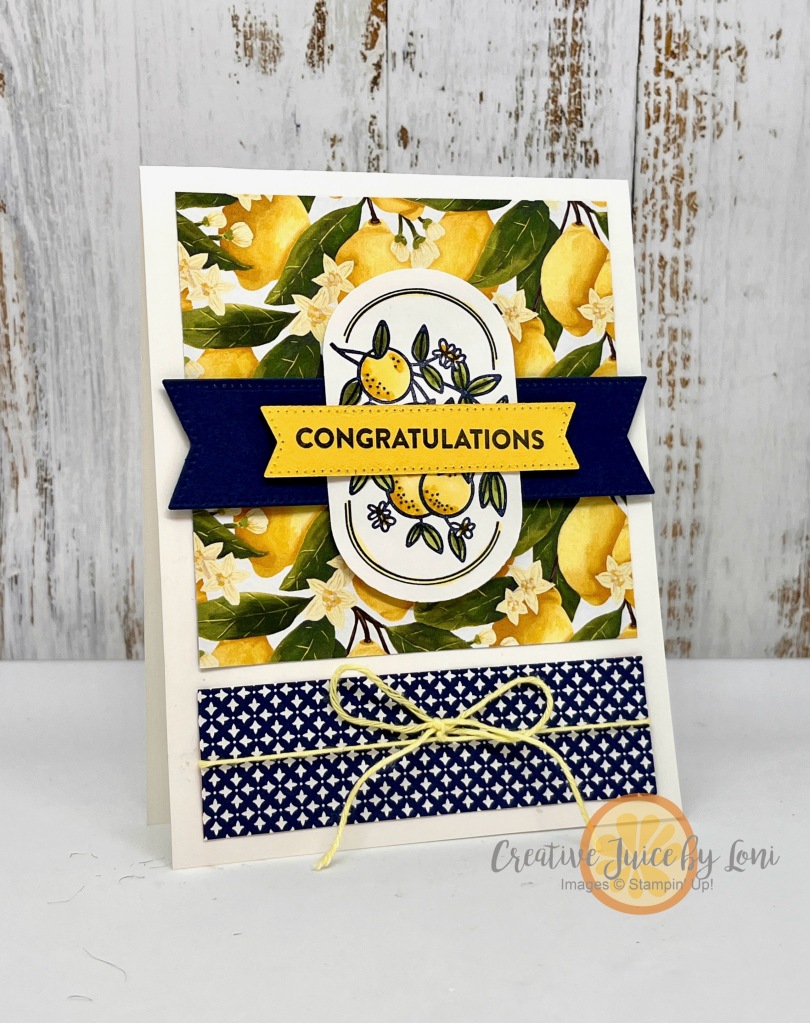
You’ll notice that I didn’t use 3 panels, but allowed my banner to visually divide the lemon Designer Series Paper. That’s the thing about a sketch =it’s there to give you a place to start, then run in whichever direction your heart takes you!
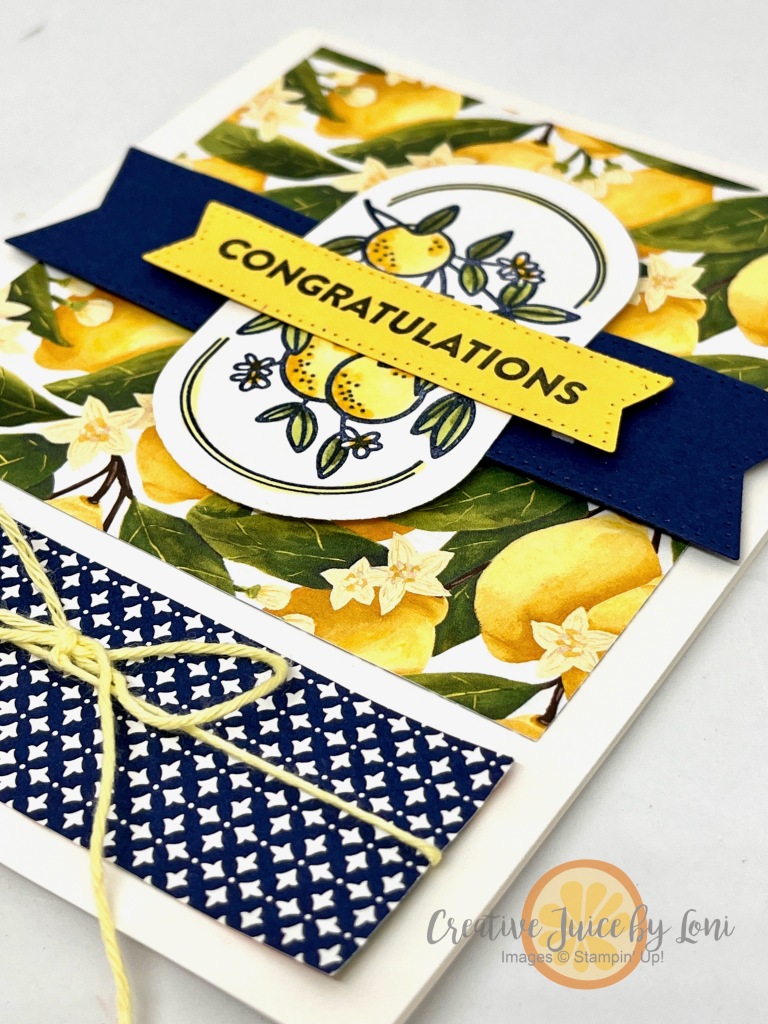
Try mixing up products, too! I thought the Mediterannean Blooms lemon paper would make a fabulous backdrop for the image from the Filled with Happiness set, and it did. That Navy & Yellow combination is summery and sweet.
I cut both the navy banner and the lemon oval in half to stretch across the card and give room for the Congratulations sentiment. This would be a unique baby congrats card, or a wedding celebration! It’s just generic enough to fit any occasion.
Once you’ve left me a comment and have filled your cup with creative juice (and your cart with supplies), move along to see how all the other stampers used these wonderful sketches, then TRY ONE YOURSELF.
June 2024 New at SU! Blog Hop: Catalog Sketch Inspiration – Visit them all!
Did you know the Boho Blue Mini Cut & Emboss Machine is less expensive than the white mini machine, with the same performance? AND all the machines are 10% off through June 30th – don’t miss it!


![Winterly Tree Tops Bundle (English) [ 164066 ]](https://assets1.tamsnetwork.com/images/EC042017NF/164066s.jpg "Winterly Tree Tops Bundle (English) [ 164066 ]")
![Nests Of Winter 12" X 12" (30.5 X 30.5 Cm) Designer Series Paper [ 164183 ]](https://assets1.tamsnetwork.com/images/EC042017NF/164183s.jpg "Nests Of Winter 12\" X 12\" (30.5 X 30.5 Cm) Designer Series Paper [ 164183 ]")
![Gray Granite 8-1/2" X 11" Cardstock [ 146983 ]](https://assets1.tamsnetwork.com/images/EC042017NF/146983s.jpg "Gray Granite 8-1/2\" X 11\" Cardstock [ 146983 ]")
![Garden Green 8-1/2" X 11" Cardstock [ 102584 ]](https://assets1.tamsnetwork.com/images/EC042017NF/102584s.jpg "Garden Green 8-1/2\" X 11\" Cardstock [ 102584 ]")
![Pool Party 8-1/2" X 11" Cardstock [ 122924 ]](https://assets1.tamsnetwork.com/images/EC042017NF/122924s.jpg "Pool Party 8-1/2\" X 11\" Cardstock [ 122924 ]")
![Garden Green Classic Stampin' Pad [ 147089 ]](https://assets1.tamsnetwork.com/images/EC042017NF/147089s.jpg "Garden Green Classic Stampin' Pad [ 147089 ]")
![Pool Party 5/8" (1.6 Cm) Pompom Ribbon [ 164129 ]](https://assets1.tamsnetwork.com/images/EC042017NF/164129s.jpg "Pool Party 5/8\" (1.6 Cm) Pompom Ribbon [ 164129 ]")
![Earth Tones Shimmer Gems [ 164070 ]](https://assets1.tamsnetwork.com/images/EC042017NF/164070s.jpg "Earth Tones Shimmer Gems [ 164070 ]")
![Stampin' Cut & Emboss Machine [ 149653 ]](https://assets1.tamsnetwork.com/images/EC042017NF/149653s.jpg "Stampin' Cut & Emboss Machine [ 149653 ]")
![Multipurpose Liquid Glue [ 110755 ]](https://assets1.tamsnetwork.com/images/EC042017NF/110755s.jpg "Multipurpose Liquid Glue [ 110755 ]")
![Stampin' Dimensionals [ 104430 ]](https://assets1.tamsnetwork.com/images/EC042017NF/104430s.jpg "Stampin' Dimensionals [ 104430 ]")


![Festive Tags Kit [ 162485 ]](https://assets1.tamsnetwork.com/images/EC042017NF/162485s.jpg "Festive Tags Kit [ 162485 ]")
![Festive 12" X 12" (30.5 X 30.5 Cm) Glimmer Paper [ 164106 ]](https://assets1.tamsnetwork.com/images/EC042017NF/164106s.jpg "Festive 12\" X 12\" (30.5 X 30.5 Cm) Glimmer Paper [ 164106 ]")
![Basic White 8 1/2" X 11" Cardstock [ 159276 ]](https://assets1.tamsnetwork.com/images/EC042017NF/159276s.jpg "Basic White 8 1/2\" X 11\" Cardstock [ 159276 ]")
![Small Blending Brushes [ 160518 ]](https://assets1.tamsnetwork.com/images/EC042017NF/160518s.jpg "Small Blending Brushes [ 160518 ]")
![Poppy Parade Classic Stampin' Pad [ 147050 ]](https://assets1.tamsnetwork.com/images/EC042017NF/147050s.jpg "Poppy Parade Classic Stampin' Pad [ 147050 ]")
![Shaded Spruce Classic Stampin' Pad [ 147088 ]](https://assets1.tamsnetwork.com/images/EC042017NF/147088s.jpg "Shaded Spruce Classic Stampin' Pad [ 147088 ]")
![Pool Party Classic Stampin' Pad [ 147107 ]](https://assets1.tamsnetwork.com/images/EC042017NF/147107s.jpg "Pool Party Classic Stampin' Pad [ 147107 ]")
![Shaded Spruce 1/2" (1.3 Cm) Satin & Sheer Ribbon [ 164224 ]](https://assets1.tamsnetwork.com/images/EC042017NF/164224s.jpg "Shaded Spruce 1/2\" (1.3 Cm) Satin & Sheer Ribbon [ 164224 ]")
![Poppy Parade 8-1/2" X 11" Cardstock [ 119793 ]](https://assets1.tamsnetwork.com/images/EC042017NF/119793s.jpg "Poppy Parade 8-1/2\" X 11\" Cardstock [ 119793 ]")
![Pretty In Pink 8 1/2" X 11" Cardstock [ 163793 ]](https://assets1.tamsnetwork.com/images/EC042017NF/163793s.jpg "Pretty In Pink 8 1/2\" X 11\" Cardstock [ 163793 ]")
![Lost Lagoon 8-1/2" X 11" Cardstock [ 133679 ]](https://assets1.tamsnetwork.com/images/EC042017NF/133679s.jpg "Lost Lagoon 8-1/2\" X 11\" Cardstock [ 133679 ]")
![Bubble Bath 8 1/2" X 11" Cardstock [ 161718 ]](https://assets1.tamsnetwork.com/images/EC042017NF/161718s.jpg "Bubble Bath 8 1/2\" X 11\" Cardstock [ 161718 ]")
![Snowflake Sky 3 D Embossing Folder [ 162026 ]](https://assets1.tamsnetwork.com/images/EC042017NF/162026s.jpg "Snowflake Sky 3 D Embossing Folder [ 162026 ]")
![Everyday Details Dies [ 162864 ]](https://assets1.tamsnetwork.com/images/EC042017NF/162864s.jpg "Everyday Details Dies [ 162864 ]")


![Enduring Beauty Photopolymer Stamp Set (English) [ 162670 ]](https://assets1.tamsnetwork.com/images/EC042017NF/162670s.jpg "Enduring Beauty Photopolymer Stamp Set (English) [ 162670 ]")
![Enduring Beauty Decorative Masks [ 162673 ]](https://assets1.tamsnetwork.com/images/EC042017NF/162673s.jpg "Enduring Beauty Decorative Masks [ 162673 ]")
![Enduring Beauty Dies [ 162672 ]](https://assets1.tamsnetwork.com/images/EC042017NF/162672s.jpg "Enduring Beauty Dies [ 162672 ]")
![Very Vanilla 8-1/2" X 11" Cardstock [ 101650 ]](https://assets1.tamsnetwork.com/images/EC042017NF/101650s.jpg "Very Vanilla 8-1/2\" X 11\" Cardstock [ 101650 ]")
![Pecan Pie 8 1/2" X 11" Cardstock [ 161717 ]](https://assets1.tamsnetwork.com/images/EC042017NF/161717s.jpg "Pecan Pie 8 1/2\" X 11\" Cardstock [ 161717 ]")
![Mossy Meadow 8-1/2" X 11" Cardstock [ 133676 ]](https://assets1.tamsnetwork.com/images/EC042017NF/133676s.jpg "Mossy Meadow 8-1/2\" X 11\" Cardstock [ 133676 ]")
![Splendid Autumn 6" X 6" (15.2 X 15.2 Cm) Designer Series Paper [ 164173 ]](https://assets1.tamsnetwork.com/images/EC042017NF/164173s.jpg "Splendid Autumn 6\" X 6\" (15.2 X 15.2 Cm) Designer Series Paper [ 164173 ]")
![Early Espresso Classic Stampin' Pad [ 147114 ]](https://assets1.tamsnetwork.com/images/EC042017NF/147114s.jpg "Early Espresso Classic Stampin' Pad [ 147114 ]")
![Peach Pie Classic Stampin Pad [ 163810 ]](https://assets1.tamsnetwork.com/images/EC042017NF/163810s.jpg "Peach Pie Classic Stampin Pad [ 163810 ]")
![Pecan Pie Classic Stampin' Pad [ 161665 ]](https://assets1.tamsnetwork.com/images/EC042017NF/161665s.jpg "Pecan Pie Classic Stampin' Pad [ 161665 ]")
![Mossy Meadow Classic Stampin' Pad [ 147111 ]](https://assets1.tamsnetwork.com/images/EC042017NF/147111s.jpg "Mossy Meadow Classic Stampin' Pad [ 147111 ]")
![Watercolor Pencils Assortment 1 [ 161700 ]](https://assets1.tamsnetwork.com/images/EC042017NF/161700s.jpg "Watercolor Pencils Assortment 1 [ 161700 ]")
![Blender Pens [ 102845 ]](https://assets1.tamsnetwork.com/images/EC042017NF/102845s.jpg "Blender Pens [ 102845 ]")
![Distressed Tile 3 D Embossing Folder [ 162189 ]](https://assets1.tamsnetwork.com/images/EC042017NF/162189s.jpg "Distressed Tile 3 D Embossing Folder [ 162189 ]")


![Warms My Heart Cling Stamp Set (English) [ 164267 ]](https://assets1.tamsnetwork.com/images/EC042017NF/164267s.jpg "Warms My Heart Cling Stamp Set (English) [ 164267 ]")
![Forever Plaid 3 D Embossing Folder [ 164049 ]](https://assets1.tamsnetwork.com/images/EC042017NF/164049s.jpg "Forever Plaid 3 D Embossing Folder [ 164049 ]")
![Cajun Craze 8-1/2" X 11" Cardstock [ 119684 ]](https://assets1.tamsnetwork.com/images/EC042017NF/119684s.jpg "Cajun Craze 8-1/2\" X 11\" Cardstock [ 119684 ]")
![Basic Beige 8 1/2" X 11" Cardstock [ 164511 ]](https://assets1.tamsnetwork.com/images/EC042017NF/164511s.jpg "Basic Beige 8 1/2\" X 11\" Cardstock [ 164511 ]")
![Coastal Cabana 8-1/2" X 11" Cardstock [ 131297 ]](https://assets1.tamsnetwork.com/images/EC042017NF/131297s.jpg "Coastal Cabana 8-1/2\" X 11\" Cardstock [ 131297 ]")
![Pumpkin Pie 8-1/2" X 11" Cardstock [ 105117 ]](https://assets1.tamsnetwork.com/images/EC042017NF/105117s.jpg "Pumpkin Pie 8-1/2\" X 11\" Cardstock [ 105117 ]")
![Cajun Craze Classic Stampin' Pad [ 147085 ]](https://assets1.tamsnetwork.com/images/EC042017NF/147085s.jpg "Cajun Craze Classic Stampin' Pad [ 147085 ]")
![Watercolor Pencils Assortment 2 [ 149014 ]](https://assets1.tamsnetwork.com/images/EC042017NF/149014s.jpg "Watercolor Pencils Assortment 2 [ 149014 ]")
![Clear Wink Of Stella Glitter Brush [ 141897 ]](https://assets1.tamsnetwork.com/images/EC042017NF/141897s.jpg "Clear Wink Of Stella Glitter Brush [ 141897 ]")
![Bough Punch [ 157711 ]](https://assets1.tamsnetwork.com/images/EC042017NF/157711s.jpg "Bough Punch [ 157711 ]")
![Nested Essentials Dies [ 161597 ]](https://assets1.tamsnetwork.com/images/EC042017NF/161597s.jpg "Nested Essentials Dies [ 161597 ]")
![Sentimental Christmas 12" X 12" (30.5 X 30.5 Cm) Designer Series Paper [ 164209 ]](https://assets1.tamsnetwork.com/images/EC042017NF/164209s.jpg "Sentimental Christmas 12\" X 12\" (30.5 X 30.5 Cm) Designer Series Paper [ 164209 ]")
![Iridescent Faceted Gems [ 163368 ]](https://assets1.tamsnetwork.com/images/EC042017NF/163368s.jpg "Iridescent Faceted Gems [ 163368 ]")
![Stylish Shapes Dies [ 159183 ]](https://assets1.tamsnetwork.com/images/EC042017NF/159183s.jpg "Stylish Shapes Dies [ 159183 ]")
![Silver & White 1/2" (1.3 Cm) Sheer Ribbon [ 162149 ]](https://assets1.tamsnetwork.com/images/EC042017NF/162149s.jpg "Silver & White 1/2\" (1.3 Cm) Sheer Ribbon [ 162149 ]")
![Natural Tones Linen Thread [ 164071 ]](https://assets1.tamsnetwork.com/images/EC042017NF/164071s.jpg "Natural Tones Linen Thread [ 164071 ]")
![Crushed Curry 8-1/2" X 11" Cardstock [ 131199 ]](https://assets1.tamsnetwork.com/images/EC042017NF/131199s.jpg "Crushed Curry 8-1/2\" X 11\" Cardstock [ 131199 ]")
![Blackberry Bliss 8-1/2" X 11" Cardstock [ 133675 ]](https://assets1.tamsnetwork.com/images/EC042017NF/133675s.jpg "Blackberry Bliss 8-1/2\" X 11\" Cardstock [ 133675 ]")
![Blackberry Bliss Classic Stampin' Pad [ 147092 ]](https://assets1.tamsnetwork.com/images/EC042017NF/147092s.jpg "Blackberry Bliss Classic Stampin' Pad [ 147092 ]")


 Designer Series Paper")
")


 Circle Punch")


 Designer Series Paper")
")


 Diagonal Trim Combo Pack")


")


")
 Designer Series Paper")