“The hot and the cold are just so intense, put ’em together, it just makes sense!” -Olaf ⛄️
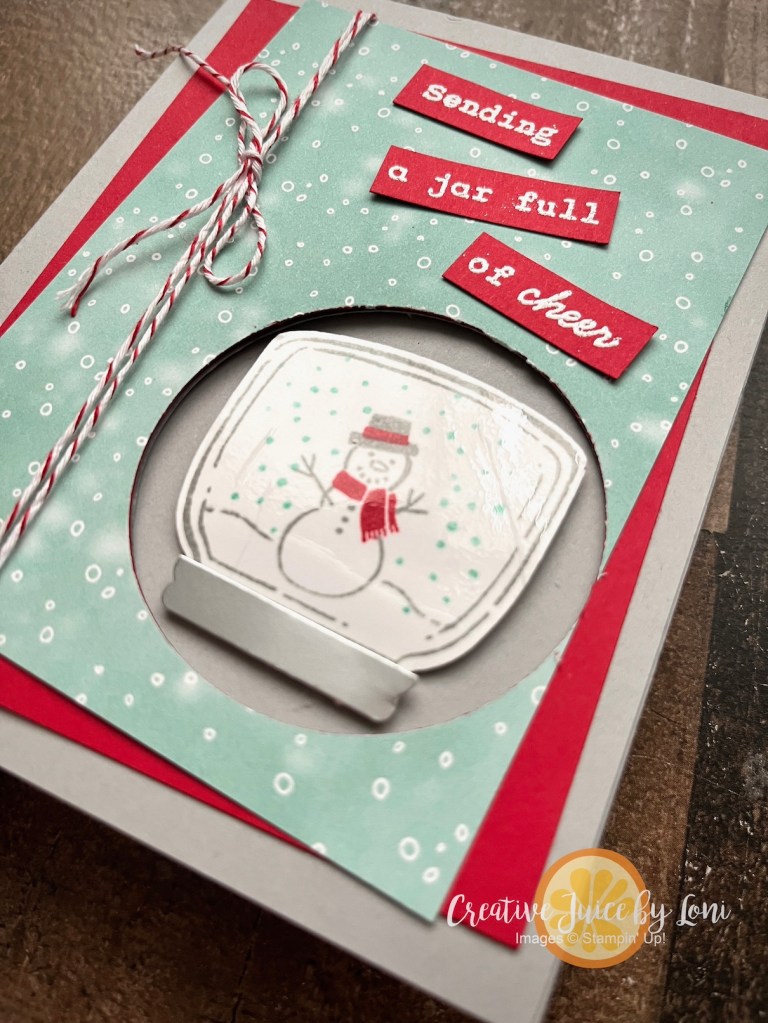
Get ahead of the holidays by starting your Christmas cards now! The Jar of Joy stamp set (which coordinates with the Sweet Jar builder punch) will have you shaking up snow during the heat of summer:
Layers: 3.5″ x 4.75″ Designer Series Paper, 3.75″ x 5″ Real Red Card Stock
The way to make the jar shiny is by laying a piece of packing tape over the stamped image before punching it out (did the same for the sunglasses on my pop-up tote card here).
The way the snow globe pops through the front of the card from the inside is a delightful detail that gives the open card charm, as well.
This video shows how to create this card from start to finish in 90 seconds:
I am enjoying playing along with the Global Design Project “Christmas in July” #gdp507 challenge with this card! It’s simple enough you could easily make multiples at one time, too.
This was the #tgifc479 challenge to start our creative cogs turning:
The So Very Merry stamp set is not in the catalog, but *IS* still in the Online Exclusive section of my Stampin’ Store, and I embossed the gingerbread house on a banner cut from the Nested Essentials dies, then colored it with watercolor pencils and added Wink of Stella to the candy for sparkle (all supplies listed below). Though it’s hard to see in a photo, trust me that the treats glisten in the light!
Speaking of Online Exclusives, there are NEW ADDITIONS to that section of my store, and you’ll have a hard time choosing between the frightfully fun Halloween, the elegant Autumn or the gorgeous Holiday offerings. You have my permission to choose all of them! And there is MORE than just these shown.
Back to my gingerbread house card, the supplies I used are below and feel free to use the idea for your holiday mail, if you love it!
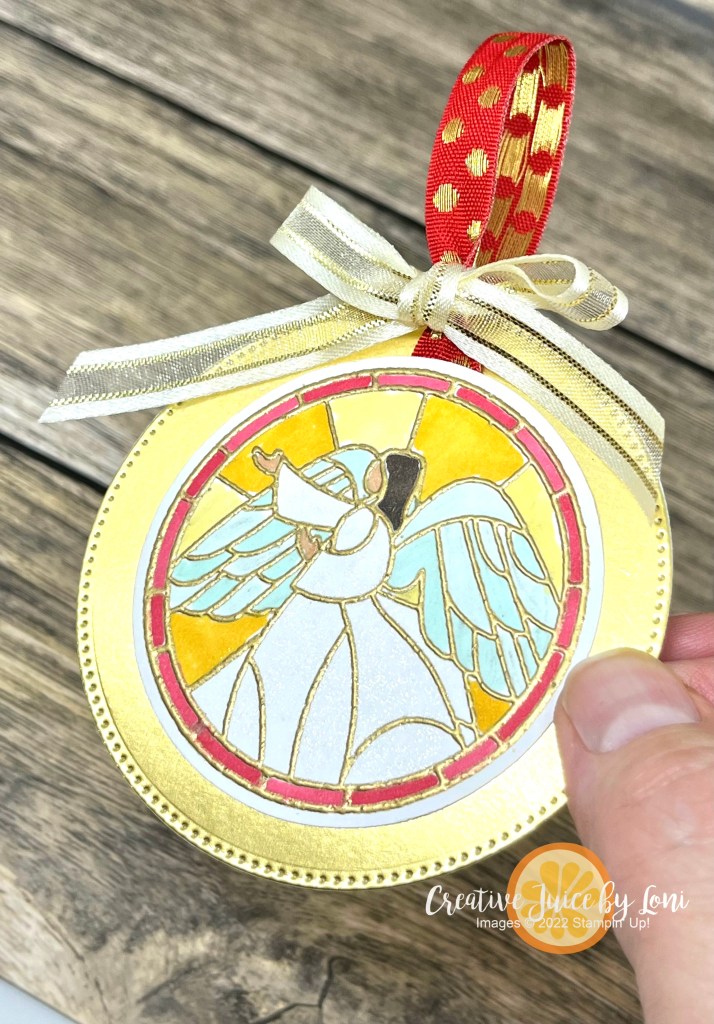
Each Monday, I think about what I can create to serve you, my crafting community. It wouldn’t be lying to say sometimes I loose sleep over it! But I count it as a blessing to bring you inspiration, so I took the opportunity to figure out a Christmas Card that would also have an ornament to hang on the tree because I know that things may be tight for some folks right now, and this pretty card + gift is a thoughtful way to share some light this season with friends and neighbors without breaking the bank.
The card is very simple: A 8.5″ x 5.5″ Wild Wheat card base with a 3.5″ x 4.75″ Pool Party stamped layer on top of a 3.75″ x 5″ Real Red layer.
Thick white card stock is needed for the banner at the top, but as I explained in the video tutorial (below), you can also cut out two banners and glue them together for more stability. I only added dimensionals to the left side, so you can slide the ornament off the right side. Remember to slide the card into the envelope fold-first, so when the recipient pulls it out, the ornament comes with it!
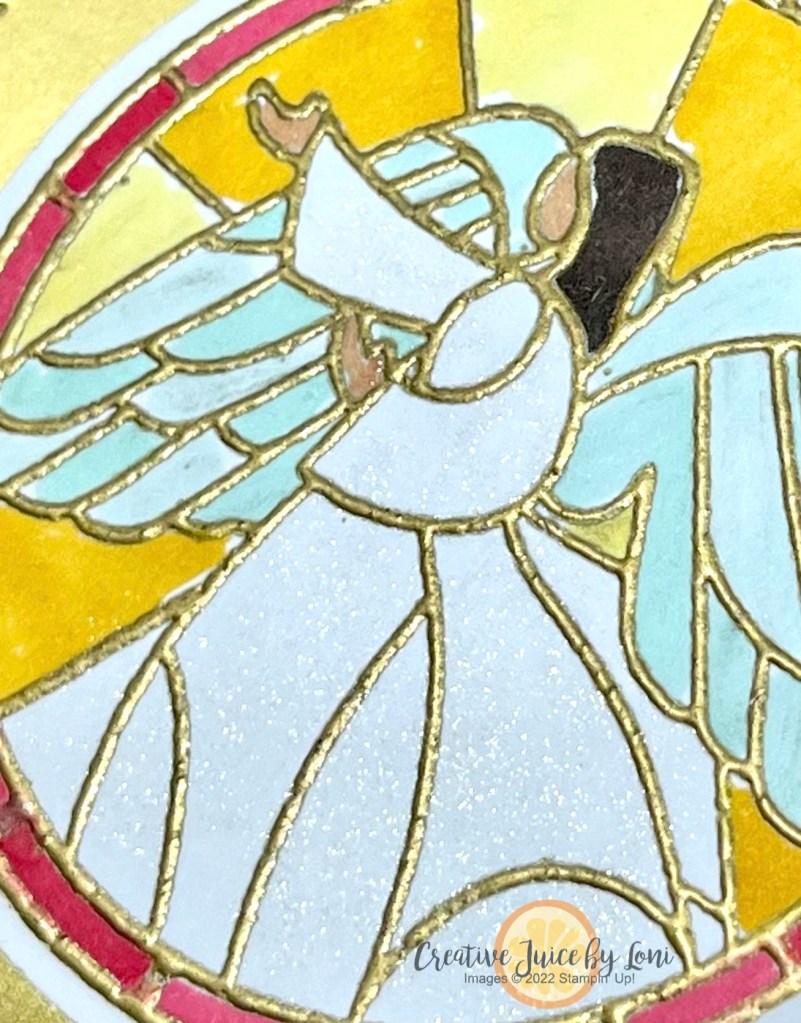
Embossing the angel image makes coloring with Stampin’ Blends (or watercolors) really easy to stay inside the lines, because they are raised! Plus, the gold makes it look LUXE! I left the angel’s dress white and just added Wink of Stella for a subtle shimmer.
Watch the video tutorial, then I would appreciate you ordering any of the supplies you need from my Stampin’ Store, if this inspired you to make some!
Good news if you are finding this soon after it’s posted: The Seasonal Sale begins tomorrow, Tuesday, November 14th, 2023 and ends on 11/16/23 at 11:59 PM MST.
The SEASONAL SALE includes:
10% off ribbons and trims.
15% off inks, including pads, refills, markers, and Blends. Bundles are not included.
20% off papers, including cardstock, specialty paper, and Designer Series Paper.
Shop online to see the full selection of discounted products. Discounts are automatically applied when sale items are added to any order, including Starter Kits.
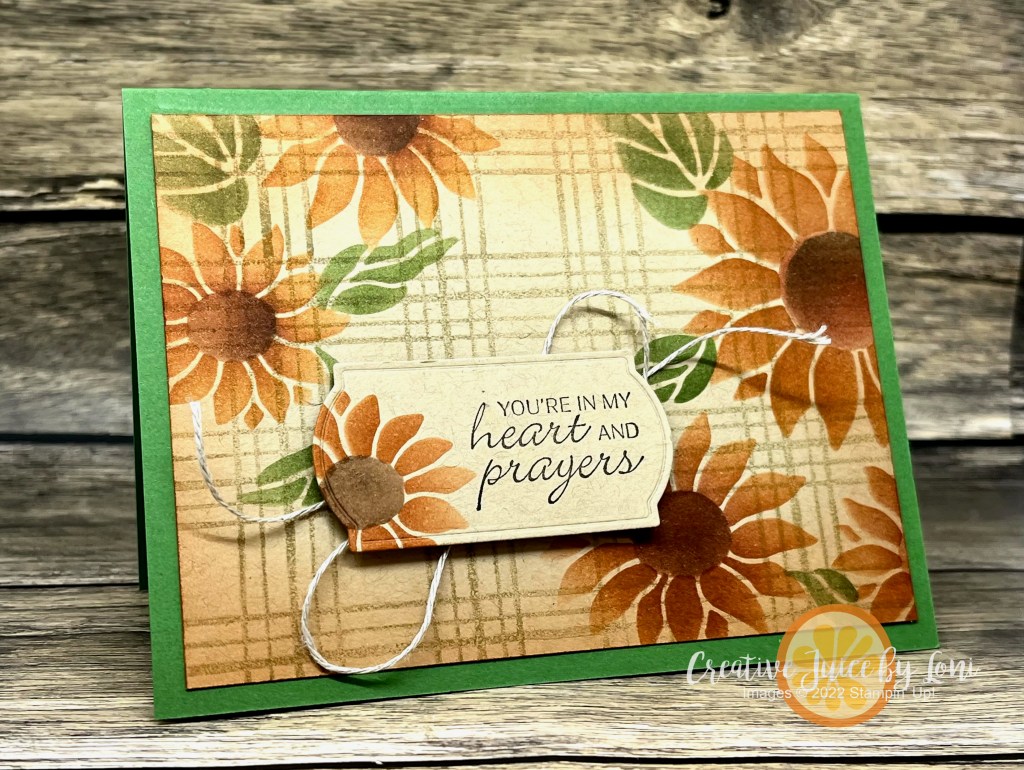
…let your creativity flow free! An excellent all-purpose stamp does more than just one thing, and the Sketched Plaid background is that versatile stamping staple that will elevate your card making. Let me show you 4 different ways to use it (with a few links to bonus projects).
First, you can stamp the Sketched Plaid onto a card layer with the same color of ink (like this Best Wishes card previously stamped) ~ for today’s example, I blotted off the Crumb Cake ink once before stamping it a second time onto Crumb Cake card stock, making it a subtle canvas for masking my flowers onto:
Second, try stamping a small image inside the empty spaces, like the snowflake from the Beary Cute stamp set:
Third: Use a Stampin’ Blends or Stampin’ Write marker and a ruler to draw more lines in between the spaces, for a two-color plaid. You could adjust the thickness of these lines for a completely different look! This card also uses the So Very Merry stamp set, an online exclusive in my store.
Fourth, stamp the plaid in black (or emboss in black!) and color in some of the sections with Stampin’ Blends (I used the 2022-2024 In Colors, plus Daffodil Delight). I get such a KICK out of the groovy Curved Occasions bundle and with this kaleidoscope of color, the roller skates felt fitting:
Ready to watch HOW-TO? Here’s today’s demonstration to teach you how:
ONE MORE idea to share with you for visiting my page today: There is nothing that’s stopping you from cutting up your plaid layer and using it like I did with this card earlier this year…
After my Live Video (join me each Monday at 12:30 PM MT on my Facebook page or YouTube channel), I added a few embellishments to a few of the cards, including some retired In Color Matte Dots to the roller skate birthday card, and some of the new Adhesive-Backed Glimmer Paper from my store to the Santa Stained Glass card:
Remember- you can add any/all of these products to a Starter Kit this month and save 35% off the regular price OR get 35% more product FREE! Only 8 days left to get that special offer…click image below to choose what you’ll get in your Starter Kit:
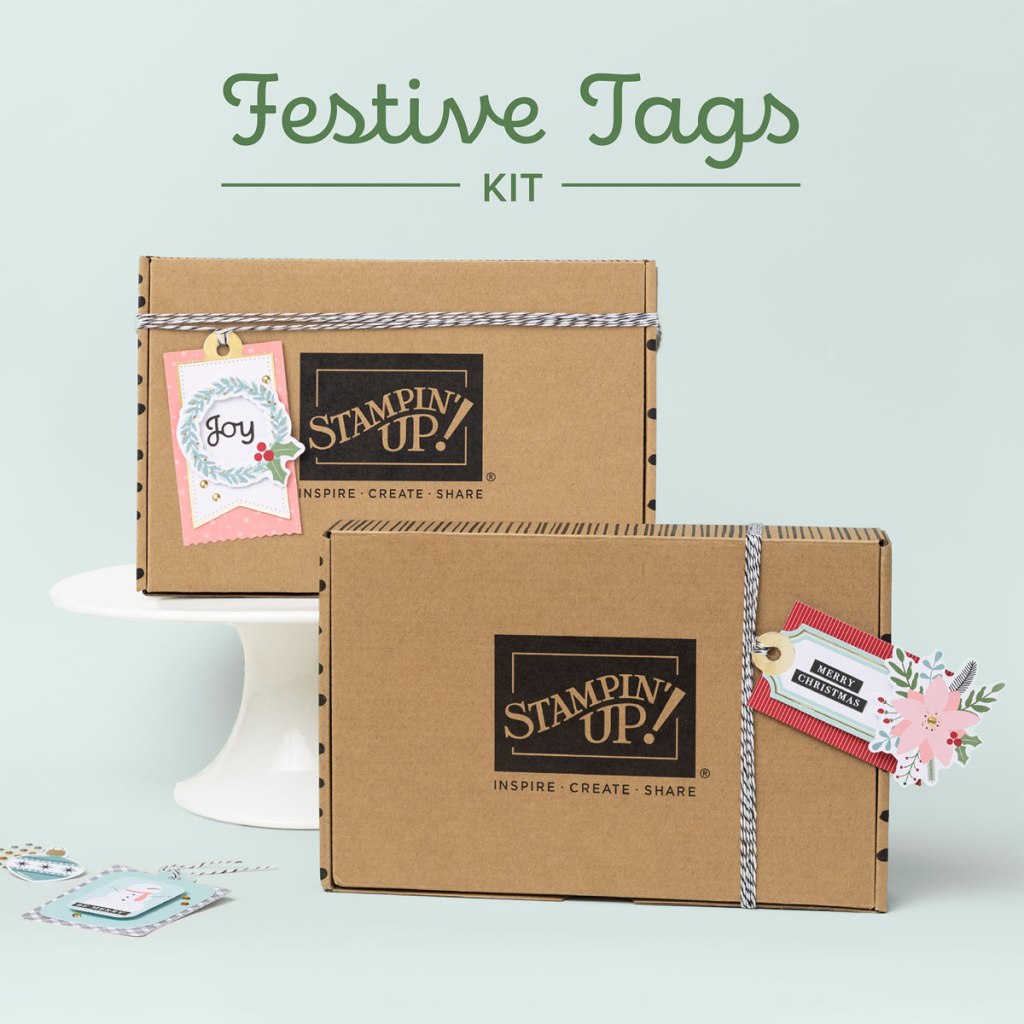
…and they are super speedy to put together! These tags will dress up your holiday gift PLUS they are terrific as elements on cards:
Wild Wheat is growing on me as a GOLD color of card stock, and pulls the color from the shiny foiled elements on the tag. Watch this short video where I demonstrate the card AND a clever way to give a set of tags as a gift!
You can make 3 “Tag Pouches” to give as gifts from one kit, and each pouch would have 5 tags:
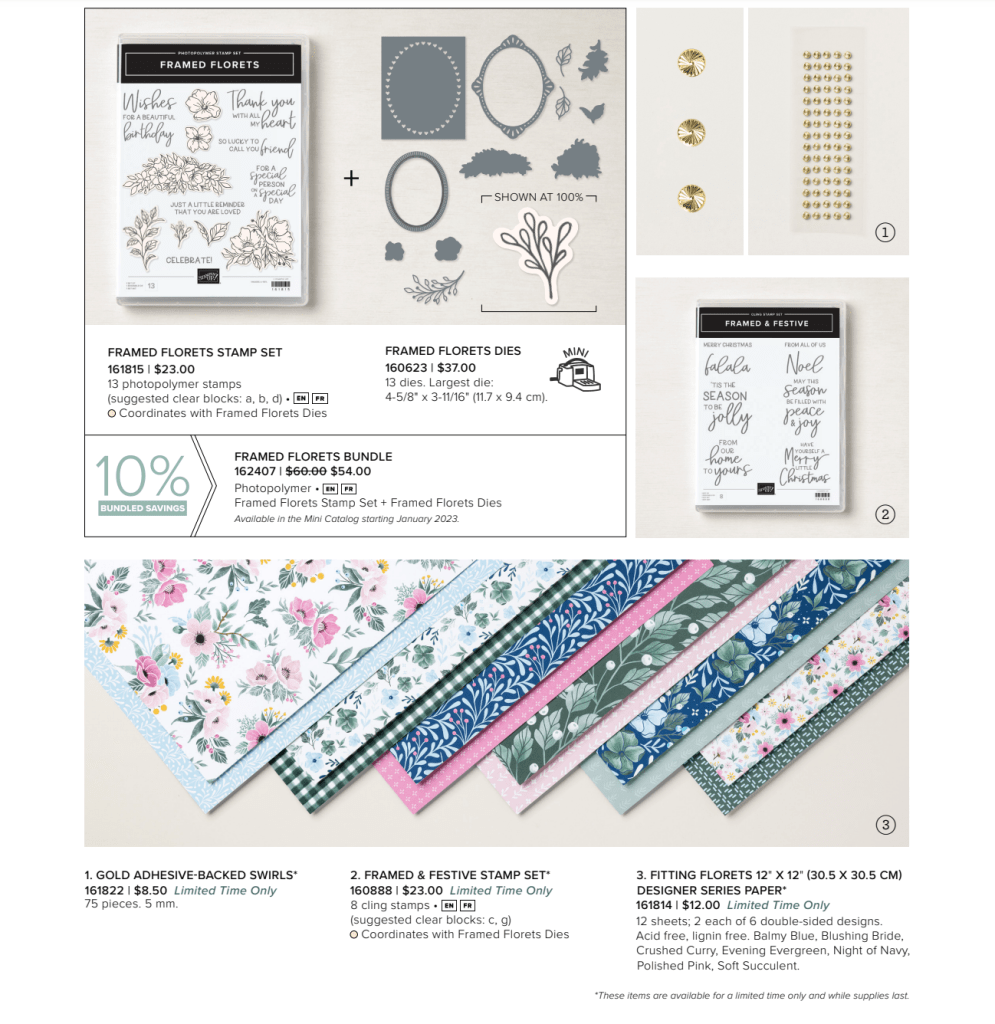
Starting TODAY, the Fitting Florets Collection (a pre-release from Stampin’ Up!’s 2023 January-June Mini Catalog) is ready to add to cart – with some of the limited time products only available while supplies last! The BUNDLE will be available through June 2023, but you’ll want to get the whole collection ASAP to use through the holiday season.
To make this fold, you need a piece of 8.5″ x 5.5″ card stock and score at 3″ and 7.25″ along the longer side with the Simple Scored board (or your paper trimmer and scoring blade). Layer on a piece of 5.25″ x 2.75″ Fitting Florets Designer Series Paper (available only while supplies last) on the front left side of card and a 1″ x 5.25″ piece on the front right flap.
The Framed & Festive stamp set could be combined with ANY Christmas paper, stamps and accessories and the font makes is playful and perfect.
One way to play with this new collection will be to attend the Christmas Card Class THIS SATURDAY, November 5th at 3 pm in Hurricane, Utah:
You’ll create 8 gorgeous greeting cards for the holiday (2 each of 4 different designs, including envelopes) for just $20, and one of the cards is designed with the Fitting Florets collection. Remember to bring scissors and adhesive, but if you forget or need more, we’ll have both scissors & adhesive + refills available for purchase at the class.
Reserve your spot by November 2nd by clicking the button below, or send Venmo to Loni-Spendlove
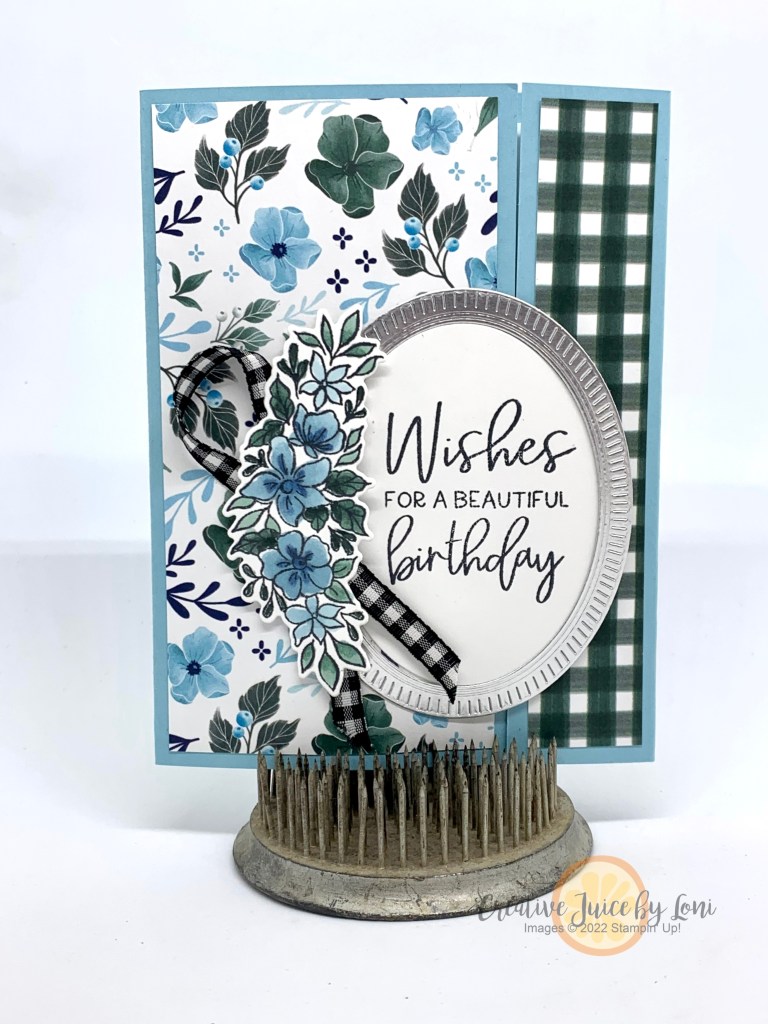
This week’s TGIF Challenge #tgifc388 was a tricky one indeed! A card WITHOUT a sentiment?! Who does that?
I couldn’t even wrap my head around it, until I found a loophole: No sentiment…on the FRONT.
Inspired by a project my friend Sue designed for our Fall StampFest, I pulled out the SANTA EXPRESS suite and die cut images from the Designer Series Paper to follow my “train” of thought:
See? No sentiment! Even the signpost has stars instead of words.
But untie the top and extend it out and the rest of the idea follows:
NOW we are cooking with coal! Isn’t that adorable? The only thing I did stamp was the sentiment, then punched it out with the Label Me Lovely punch and attached them all with Stampin’ Dimensionals.
Some folks like to create cards without a sentiment on the front so they may add the appropriate words when they need to use it. For me, it’s like singing a familiar song and STOPPING just before the last word! The suspense just *hangs* in the air until the final note is sung.
Hopefully, this card meets the requirements AND finishes the last note, once opened. I’ve listed the supplies after the announcements.
HEY! If you read all the way through on the day this post was published (Tuesday, October 4th), I’ve got one more surprise for you: FREE SHIPPING on orders over $75 today only! If your order is less than $150, enter host code XJM43JKB in your cart as you check out and you’ll be entered into my monthly host code drawing.
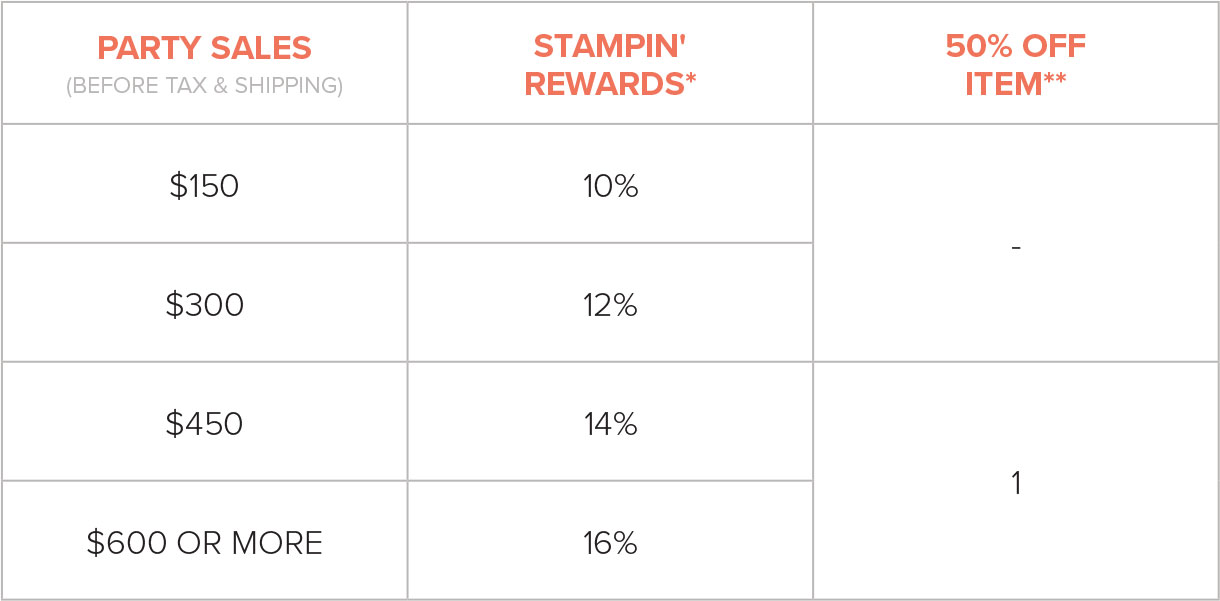
If you are ordering MORE than $150 dollars, you can be your own host and earn Stampin’ Rewards immediately:
I wouldn’t be doing my job if I didn’t let you know that there is also a fabulous Starter Kit offer in October: Choose $155 in products for just $99 (the starter kit always includes free shipping!): START HERE
I know it’s only July, but summertime is the BEST time to get your Christmas cards stamped and ready for a busy holiday season…and you needed to see how adorable this new bundle in the July-December Mini catalog is!
Of course a coordinating punch is a tool I love, and this one just begs to be loved! I actually created this card for my team card swap (we have a swap with each new publication) and by working assembly-line style, I made 14 cards in less than 2 hours, and watched a movie while working, so it was an enjoyable way to spend a day!
Try this at home:
Have you browsed the new mini catalog? Click the button to check it out:
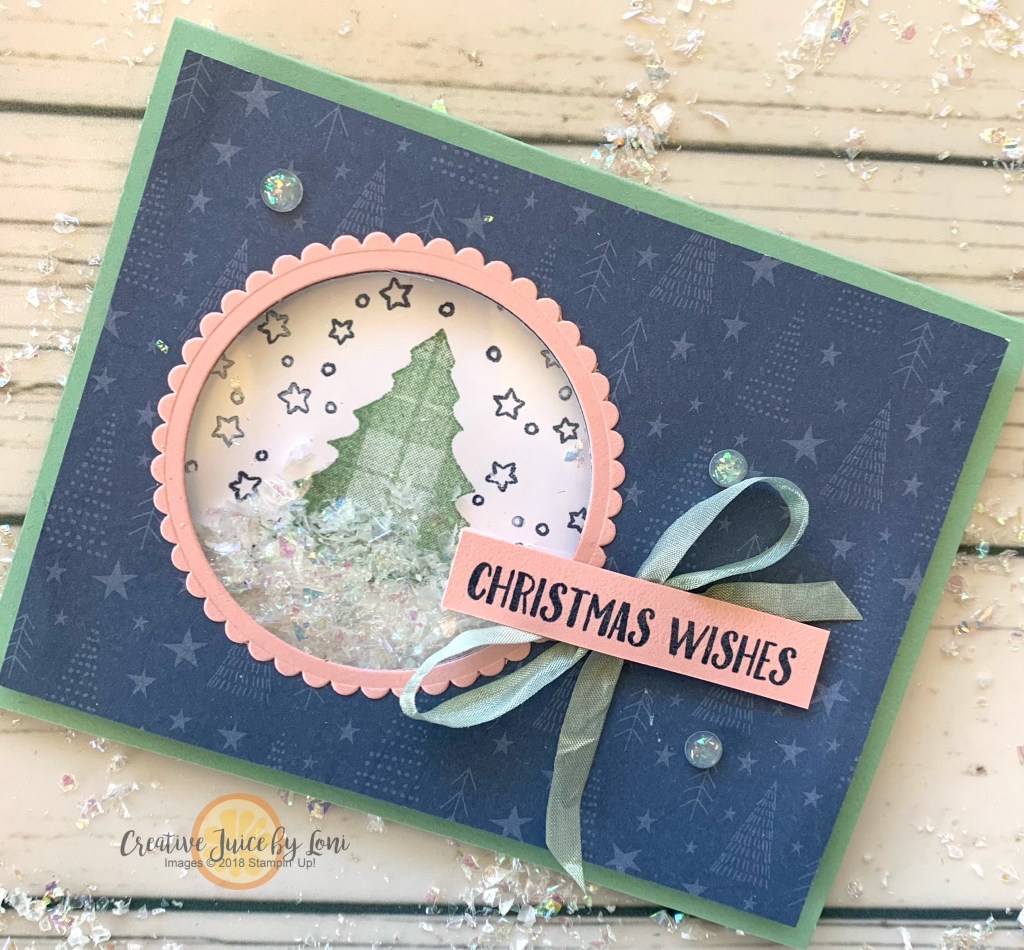
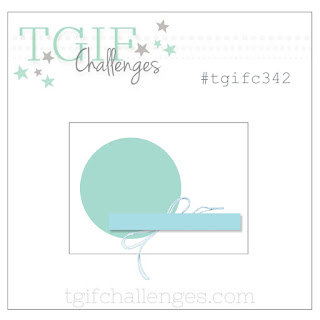
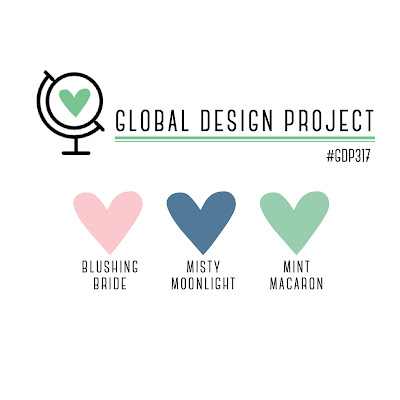
The first idea that came to mind was a shaker card when I saw the #tgifc342 sketch, and the second idea was that it would be lovely in the #gdp317 color challenge:
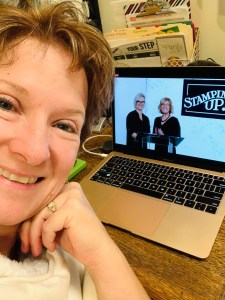
I am participating in Stampin’ Up!’s virtual convention #onstageathome so as I was listening to a class, I had time to put my ideas to paper, so to speak!
I used Faux Snow from Dollar Tree inside my shaker and colored the white seam binding ribbon with my dark Mint Macaron Stampin’ Blend marker. Sometimes you have to pull pieces from multiple stamp sets to create what you imagined in your head, so the. sentiment is from the Banner Year stamp set (all supplies listed below) and stars came from the beloved Seasons of Fun set (remember to choose it as part of your host rewards when your order is over $150).
A heartfelt THANK YOU to all my stamping friends who have supported my business. I earned the following awards this year and it’s all courtesy of your friendship and loyalty. YOU are the best reward I could ever ask for!
When a stamp set works for more than one holiday, it’s a great investment…and when you can get it at a discount, that’s a no brainer!
The Seasons of Fun stamp set is one you can choose as part of your Stampin’ Rewards for just $12 when you host a party!
Did you know that an order of $150 or more COUNTS as a party? That’s right…you don’t have to invite people over to qualify for the benefits of hosting, you can just gather orders or place your own qualifying order in my Stampin’ Store.
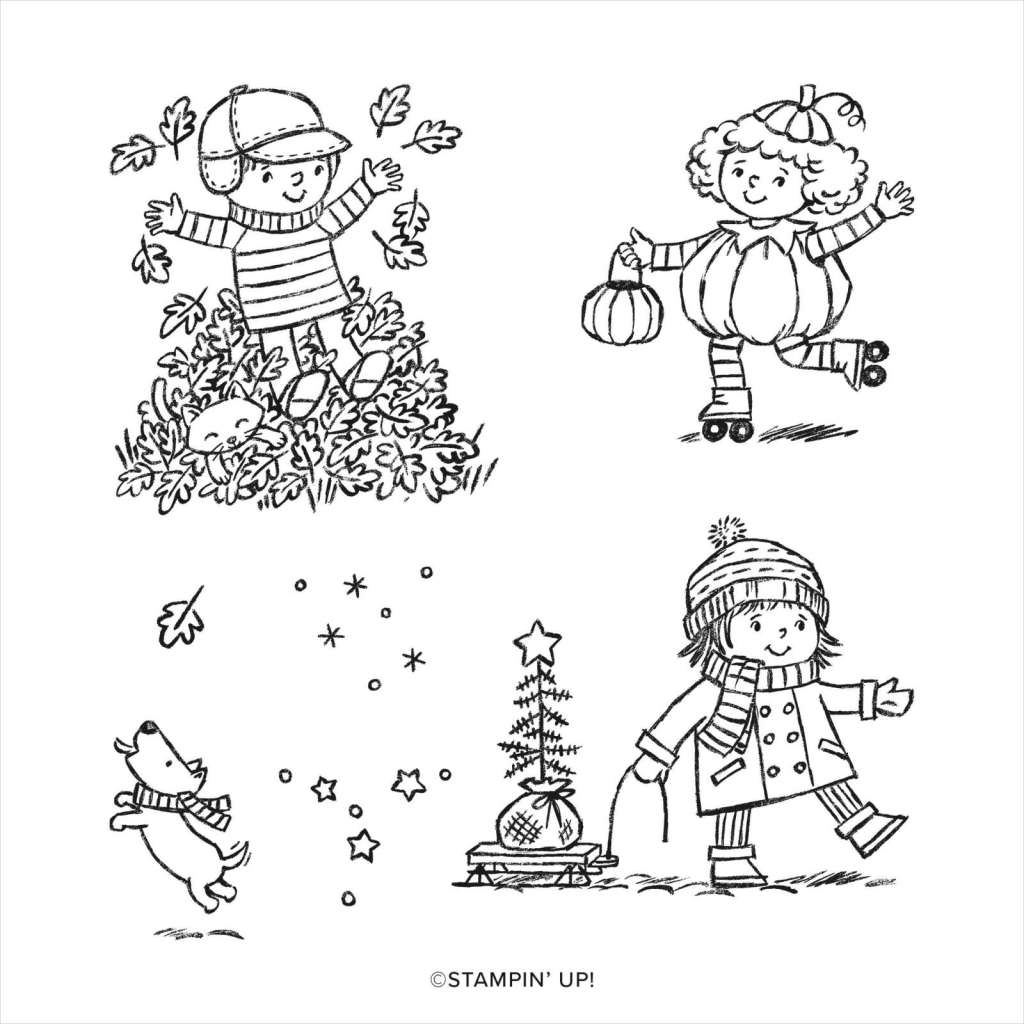
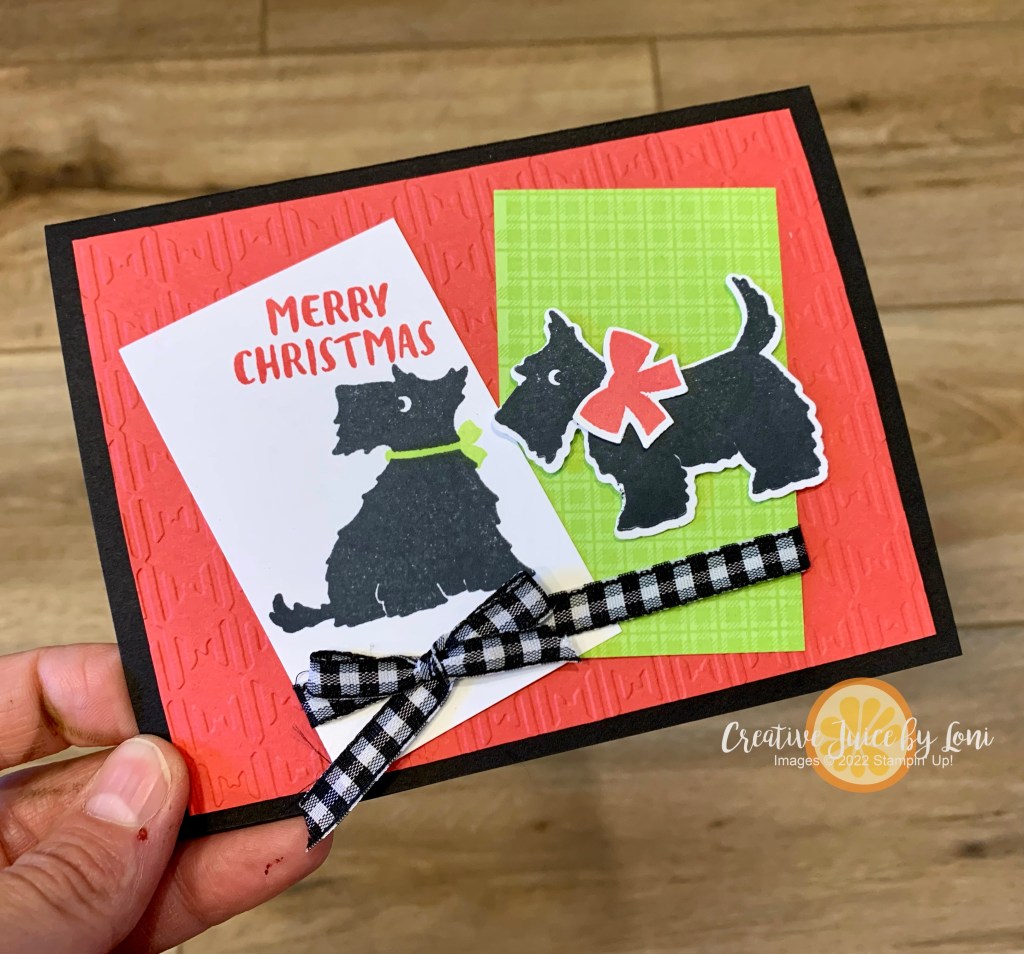
With this set of cards, I used the SAME LAYOUT and made a card for Halloween, Fall and Christmas. Because the Seasons of Fun stamp set doesn’t have any words, I paired it with the very versatile Banner Year stamp set for the greetings:
Turn the layout and add strips of Designer Series Paper instead of just one piece:
Or swap sides:
Aren’t these kids the cutest? It’s fun to color them with Stampin’ Blends and easy to celebrate all the Fall-idays.
This host-exclusive set is only available during the current mini catalog period…one more reason to host a party (or place a qualifying order) before the Seasons of Fun stamp set retires on January 3, 2022. I’ll help you host an event online or in your home ~ let’s plan it!


![Jar Of Joy Photopolymer Stamp Set (English) [ 166176 ]](https://assets1.tamsnetwork.com/images/EC042017NF/166176s.jpg "Jar Of Joy Photopolymer Stamp Set (English) [ 166176 ]")
![Sweet Jar Builder Punch [ 165506 ]](https://assets1.tamsnetwork.com/images/EC042017NF/165506s.jpg "Sweet Jar Builder Punch [ 165506 ]")
![Nests Of Winter 12" X 12" (30.5 X 30.5 Cm) Designer Series Paper [ 164183 ]](https://assets1.tamsnetwork.com/images/EC042017NF/164183s.jpg "Nests Of Winter 12\" X 12\" (30.5 X 30.5 Cm) Designer Series Paper [ 164183 ]")
![Smoky Slate 8-1/2" X 11" Cardstock [ 131202 ]](https://assets1.tamsnetwork.com/images/EC042017NF/131202s.jpg "Smoky Slate 8-1/2\" X 11\" Cardstock [ 131202 ]")
![Real Red 8-1/2" X 11" Cardstock [ 102482 ]](https://assets1.tamsnetwork.com/images/EC042017NF/102482s.jpg "Real Red 8-1/2\" X 11\" Cardstock [ 102482 ]")
![Basic White 8 1/2" X 11" Cardstock [ 166780 ]](https://assets1.tamsnetwork.com/images/EC042017NF/166780s.jpg "Basic White 8 1/2\" X 11\" Cardstock [ 166780 ]")
![Silver 12" X 12" (30.5 X 30.5 Cm) Foil Sheets [ 163387 ]](https://assets1.tamsnetwork.com/images/EC042017NF/163387s.jpg "Silver 12\" X 12\" (30.5 X 30.5 Cm) Foil Sheets [ 163387 ]")
![Smoky Slate Classic Stampin' Pad [ 147113 ]](https://assets1.tamsnetwork.com/images/EC042017NF/147113s.jpg "Smoky Slate Classic Stampin' Pad [ 147113 ]")
![Real Red Classic Stampin' Pad [ 147084 ]](https://assets1.tamsnetwork.com/images/EC042017NF/147084s.jpg "Real Red Classic Stampin' Pad [ 147084 ]")
![Coastal Cabana Classic Stampin' Pad [ 147097 ]](https://assets1.tamsnetwork.com/images/EC042017NF/147097s.jpg "Coastal Cabana Classic Stampin' Pad [ 147097 ]")
![Real Red & White Baker's Twine [ 164051 ]](https://assets1.tamsnetwork.com/images/EC042017NF/164051s.jpg "Real Red & White Baker's Twine [ 164051 ]")
![2 3/8" (6 Cm) Circle Punch [ 161354 ]](https://assets1.tamsnetwork.com/images/EC042017NF/161354s.jpg "2 3/8\" (6 Cm) Circle Punch [ 161354 ]")
![Stampin' Dimensionals [ 104430 ]](https://assets1.tamsnetwork.com/images/EC042017NF/104430s.jpg "Stampin' Dimensionals [ 104430 ]")
![Uninked Stampin’ Craft Pad & Whisper White Refill [ 147277 ]](https://assets1.tamsnetwork.com/images/EC042017NF/147277s.jpg "Uninked Stampin’ Craft Pad & Whisper White Refill [ 147277 ]")
![Basics Wow! Embossing Powder [ 165679 ]](https://assets1.tamsnetwork.com/images/EC042017NF/165679s.jpg "Basics Wow! Embossing Powder [ 165679 ]")
![Heat Tool (Us And Canada) [ 129053 ]](https://assets1.tamsnetwork.com/images/EC042017NF/129053s.jpg "Heat Tool (Us And Canada) [ 129053 ]")


")


")
")


 Dotted Ribbon")
 Satin Edged Ribbon")


")
 Designer Series Paper")


 Crinkled Seam Binding Ribbon")


")
")


 Specialty Designer Series Paper")