Coming Home for Holidays & EVERY Day

“If I ever go looking for my heart’s desire again, I shouldn’t look any further than my own backyard.” – Dorothy of Oz

Since there is “No Place Like Home”, I have two fun fold (and fairly simple) cards to share with you today using the Stampin’ Up! Coming Home bundle (which is retiring SOON!):

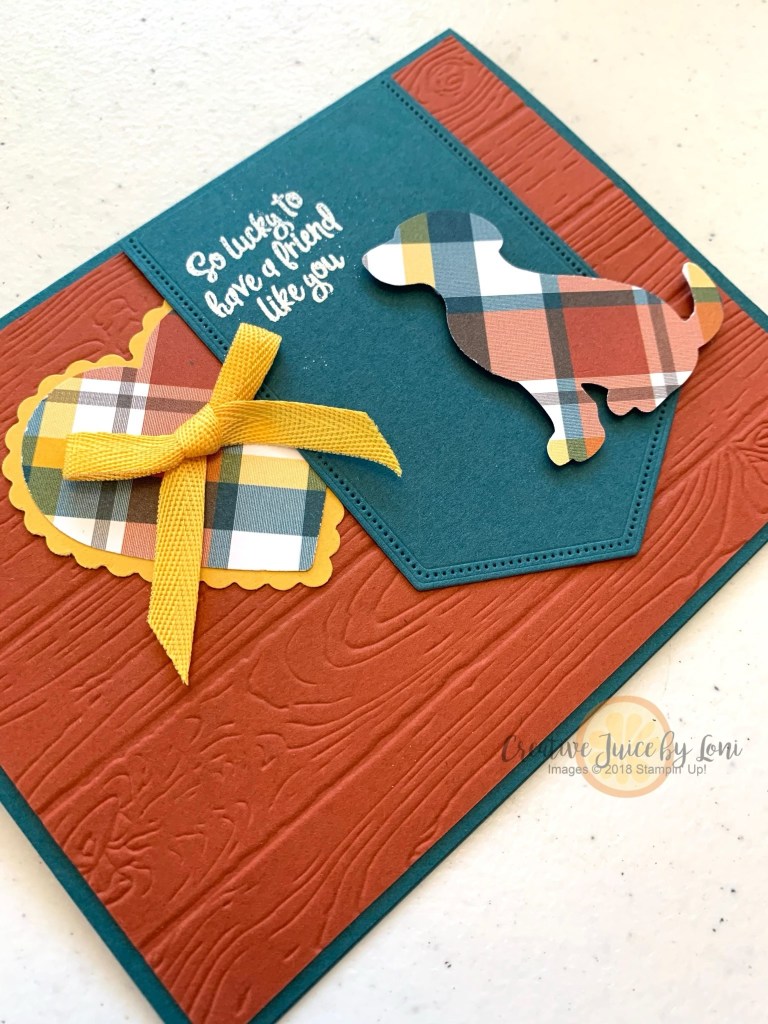
Use the tree and hill die (shown below) to cut off the top third of the front of your side-fold card, then stamp the houses in black on various colors of card stock, cut out and layer on the front of your card.

Coming Home Bundle

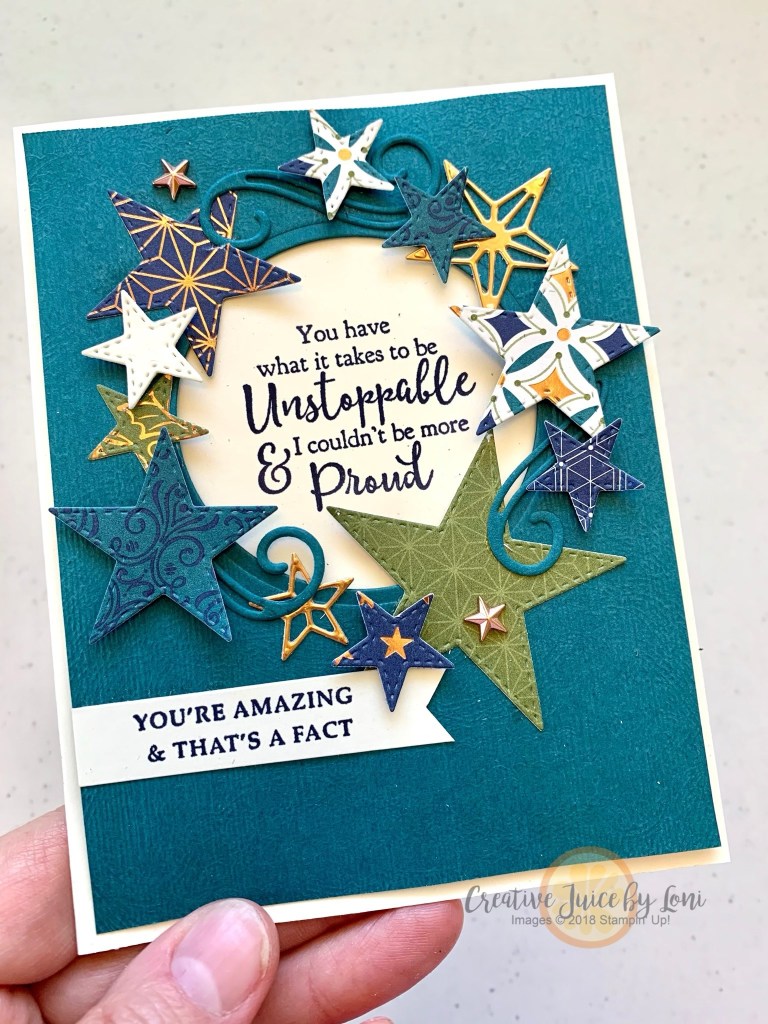
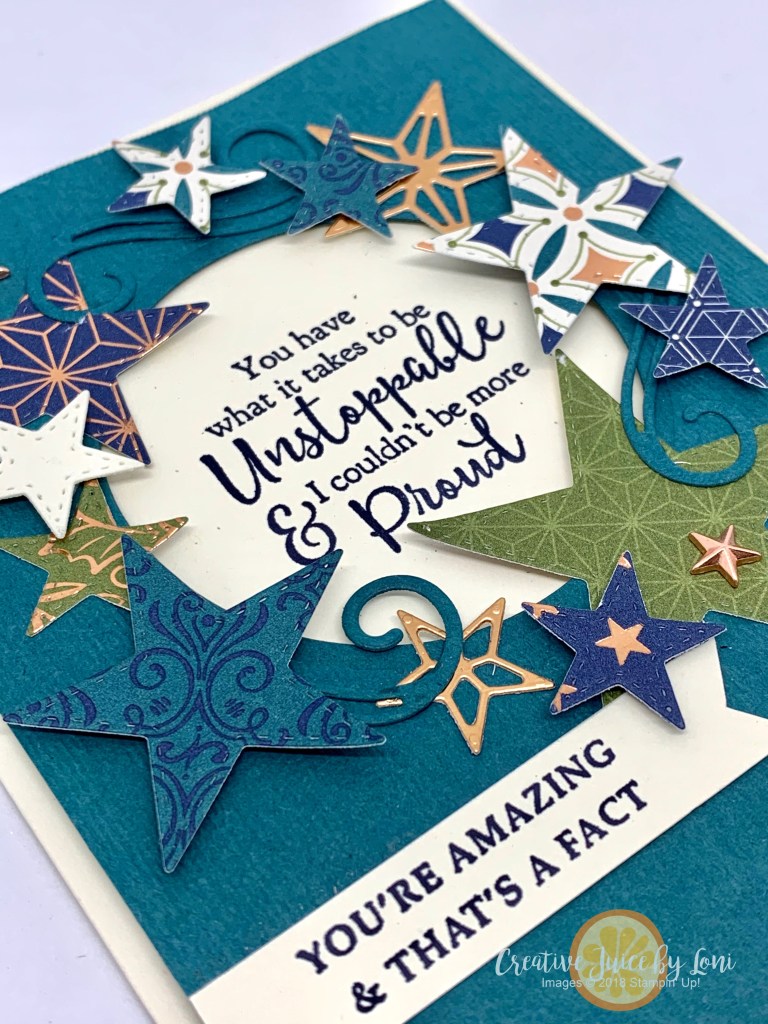
The second card is the same layout with different colors for a thoughtful welcome home card for a new neighbor:

The card opens to reveal the message, so you could change the sentiment and say “Welcome Home” for a missionary or someone coming home from a long time away.

I’ve created a .pdf tutorial for you to download with instructions and the supplies listed:

Curvy Celebrations: December 3 for Free

Introducing my December “Three for Free” kit: Featuring the Curvy Celebrations Early Release Bundle! When you order the Quite Curvy Early-Release bundle (from the January-June Catalog) OR the Quite Curvy Variety bundle (which includes the limited-release Curvy Christmas stamp set and Classic Christmas Designer Series Paper), I will send you a .pdf tutorial for THREE fabulous cards AND the supplies to create those cards in the mail!

Whether you are a “simple stamper” or a “sensational stamper”, you’ll find yourself reaching for these new stamping supplies when you want to send a sweet card or greeting! These are two extra ideas for you:

This next card is a mash-up of card elements I borrowed from other cards I had seen:

  • The label (from the Wild Rose Dies) was a lovely background for the spray of flowers
  • Embossing the flowers on colored card stock
  • Taking the colors from the Flowers For Every Season Designer Series Paper
  • Using two of the curvy edge dies brings a lot of movement
  • Wrapping the ribbon around the top layers in the center of the card made me happy

I hope this Curvy Bundle ends up on your list in December…or put it on your wish list for Santa!

New at SU!: Be Merry Card & Bag

Warm Holiday Wishes~ We are a group of Stampin’ Up! demonstrators from around the world who are Hoppin’ with Holiday Crafting ideas to share with you!

During GIFTING season, use your stampin’ supplies to package a pretty present:

Adding a card to the outside of a gift bag dresses it up and this one really rings with good cheer.

Did you know Stampin’ Up!’s “Tis the Season” Designer Series Paper (DSP) has patterns that match many of the stamps in our Holiday Catalog that don’t have their own coordinating papers? While the jingle bell paper is perfect for the Cherish The Season bundle, I paired it with the Banner Year bundle and it’s petite holly image.

To make the tab to hang the card from: you’ll need a piece of 2-1/2′ x 5-1/2″ Designer Series Paper and the Classic Label Punch: Push the paper all the way into the punch (with the edge of the punch lining up with the short edge of the paper) and punch all the way across until the other edge of the paper lining up with the other side of the punch. Adhere the *top* of the Designer Series Paper to the bag with Tear & Tape, leaving the punched side unattached so as to slide your card through.

NOTE: The card needs to open from the top hinge to be able to hang from the tab!

Hop along to Rochelle’s post for MORE MERRY crafting, but before you go, tell me what you learned here!

Product List

November 2020 New at SU! Roll

Tricia’s Stamping Creations – Christmas Means More

Sugar & Scraps – Merry Moose

Carterie Plus – Snowman Gift Tower

Moore Fun Stamping – Gift Wrapped

Creative Juice by Loni – Banner Year

Stamping Flair – Wishes & Wonder

Gifted Hands Ink – Snowflake Splendlor

Playing with Papercrafting – Pine Woods

Stampin’ Scrapper – Snowman Season

247Inkspiration – Coming Home

Scraphexe – In the Pines

Embrace The Curves

Curvy Celebrations

Embrace your CURVES: Especially in your craft room! These NEW curvy stamps and dies are the perfect twist to take your projects beyond the ordinary. 

You can begin creating NOW with the early-release of the Quite Curvy Variety Bundle, part of which will be available January 5th… but you don’t want to wait and here’s why: 

Through January 4th only, you can get the Quite Curvy Variety Bundle that includes two additional, exclusive, coordinating Christmas themed goodies and save 10% on it all!

Taking the curves into Christmas, I used the coordinating “Classic Christmas” Designer Series Paper stack to pull the theme all the way through, even though it stays with a monochromatic (Shaded Spruce) palette.

Another holiday card: The decorated edges really dress up the edge of a card…or make a pretty banner!

You won’t be able to get the Curvy Christmas stamp set or Classic Christmas 6″ x 6″ Designer Series Paper once it goes live with the 2021 January-June Mini Catalog; They are only available as part of this special pre-order period (or while supplies last) so don’t delay~ add a curvy touch to your Christmas projects while you can. 

QUITE CURVY VARIETY BUNDLE


QUITE CURVY VARIETY BUNDLE

QUITE CURVY VARIETY BUNDLE

QUITE CURVY BUNDLE


QUITE CURVY BUNDLE

QUITE CURVY BUNDLE


FLyer

DOWNLOAD FLYER FOR FULL DETAILS


Peace & Joy: 3 for Free Class

With a new month comes a new class in the mail: November’s 3 for Free class showcases some fancy typography in the Peace & Joy Bundle!

When you order the bundle from my Stampin’ Store during November 2020, you’ll receive 3 tutorials via email along with the consumable supplies to make the projects in your mail box!

What else will you need to make the cards this month?

  • Stampin’ Up! Ink Pads: Versamark or white craft ink, Highland Heather, Shaded Spruce, Granny Apple, Poppy Parade and Cherry Cobbler (some other colors can be substituted if needed)
  • Adhesive and scissors
  • Stampin’ Cut & Emboss (or compatible die cutting machine)
  • Clear or white embossing powder and heat tool.

I demonstrated this card as a bonus idea yesterday! It’s a good overview of what is included in the bundle, so take a moment to watch:

You are really going to enjoy creating the projects I’m sure there will be some you want to make in multiples, so grab your Peace & Joy bundle and message me with your favorite project!

3 for Free: Banner Year

Yes, I know it’s half-way through October…and I’ll let you in on the 3 for Free virtual classes for November and December at a the end of this post, but for now, here’s my 3 for FREE offer for this month:

When you order the Banner Year Bundle from my Stampin’ Store in October, I’ll email you a .pdf with 3 tutorials and send you the consumable supplies in the mail to make one of each!

Other supplies you will need to complete these projects (you can order them at the same time or substitute with what you have on hand):

  • Ink Pads: Shaded Spruce, Real Red, Seaside Spray, Rich Razzleberry, Melon Mambo, Early Espresso and Terracotta Tile
  • 1-1/2″ circle punch, small circle punch (1/8″)
  • Scissors, Adhesive and Dimensionals

This bundle is very versatile and covers 6 months of holiday (Halloween through Valentines) with the stamp set and Banners Pick-A-Punch which can punch banners 1/2″, 3/4″ or 1″ wide:

You’ll enjoy getting your bundle and completing 3 lovely cards for 3 different seasons right off the bat!

Here’s another card you can create with your bundle and the 2020-2022 In Color Designer Series Paper:

As promised: My 3 FOR FREE offer for November will be for the Peace & Joy Bundle and December will be for the Curvy Celebrations Bundle – a pre-order opportunity you are going to turn cartwheels over!

New at SU! Banner Year Halloween Door Hanger

We are back to celebrate the Fall-idays with more festive projects from our international group of Stampin’ Up! Demonstrators~ Take a moment to hop through and tell us what you like, and pin your favorites to your boards to remember later.

My project turns Halloween upside down by LEAVING a treat instead of taking one!

To create this door hanger, you’ll need a sheet of 8.5″ x 11″ card stock. Score from the short side at 2.5″ and 3.25″, then rotate the sheet 90 degrees and score at 1.75″, 2.5″, 6″ and 6.75″. Cut off the largest rectangles on both sides and fold along the score (dotted) lines and cut along the solid lines as shown:

It’s easiest to do any stamping you wish at this point while it’s flat, then fold the sides in, then up and adhere the lower outside rectangles to the front of the largest rectangle, creating a pocket. Punch a large circle at the top, embellish and fill with treats!

I used the circle I punched out at the top for the moon behind the cat:

I’ll post my supply list below, but if you are ready to skip to the next blog, here’s the button to take you to Heather’s blog where you’ll Have a Hoot!

Product List

October 2020 New at SU! Roll

Chase and Main – Gather Together

Tricia’s Stamping Creations – Don’t Stop Believin’

Stamping Flair – Plaid Tidings

Carterie Plus – Merry Moose

Sugar & Scraps – Gilded Autumn

Stampin’ Scrapper – Banner Year/Stitched Leaves

247Inkspiration – Tree Angle

Moore Fun Stamping – Celebration Tidings

Stamping with the Copper Cropper – Gilded Autumn

Creative Juice by Loni – Banner Year. YOU ARE HERE

Heather Cooper – Have a Hoot

Gifted Hands Ink – In the Pines/Festive Corners

Give Me Plaid!

The coziness of plaid is made for Autumn…and fall crafting!

When your stamp table is covered in scraps, grab a punch and start punching shapes…you’ll find ways to use them! That’s the origin story of this greeting card.

Try the color combination for your own Autumnal stamping: Pretty Peacock, Cajun Craze and Bumblebee.

Product List

Oh My Stars!

When a member of my team promotes to a new title, it’s time to make a fuss over their accomplishment, and I needed a special card for my promoting demonstrators. I’ve also been mulling over the #tgifc282 inspiration challenge:

I pulled out my Stitched Stars dies along with the Strong & Beautiful stamp set to create a circle of STARS:

If you’d like to see me make this card in action, you can see it on my Lunchtime Live Crafting FB Live video.

I can’t wait to pair this card with a little gift to celebrate my team promotions and hope it will remind them that they are making a difference by sharing their creativity. I’m always welcoming new team members who want a discount, need a delightful way to make extra income or crave adult connection…and you could even choose a Stampin’ Cut & Emboss machine ($120) in your starter kit ($99)! What a great discount!

Product List

So Much Love for Color

Have you ever looked at a color combination and have a stamp set jump into your mind? It happened to me today when I saw the #TGIF280 Color Palette:

So Much Love is a delicate and feminine cling stamp set, and in my imagination, this card appeared…I think it turned out even more lovely than I had hoped:

I wanted it to be a #simplestamping card with just stamps, ink and paper. It always astounds me that with just 3 ingredients, you can make such beautiful things!

GOOD NEWS: The So Much Love set is actually one of 2 FREE sets that are included in the Get & Go Starter Kit promotion this month (September 2020)! Along with the free stamp sets come 2 packages of ready-to-go card kits that can be used for your first party!

It’s a wonderful opportunity to get the best deal AND start off strong for the holiday season!

Now you have another SIMPLE card idea to create with your new supples:

And it didn’t take long to make the card: Maybe 8 minutes? 4 of those minutes were fussy-cutting out the flower! This is a card ANYONE can make in a moment…and you’ll get one from me in your welcome package when you join my Stampin’ Family in September,.