A Dusting of Diamonds and Non-Traditional Christmas Colors!

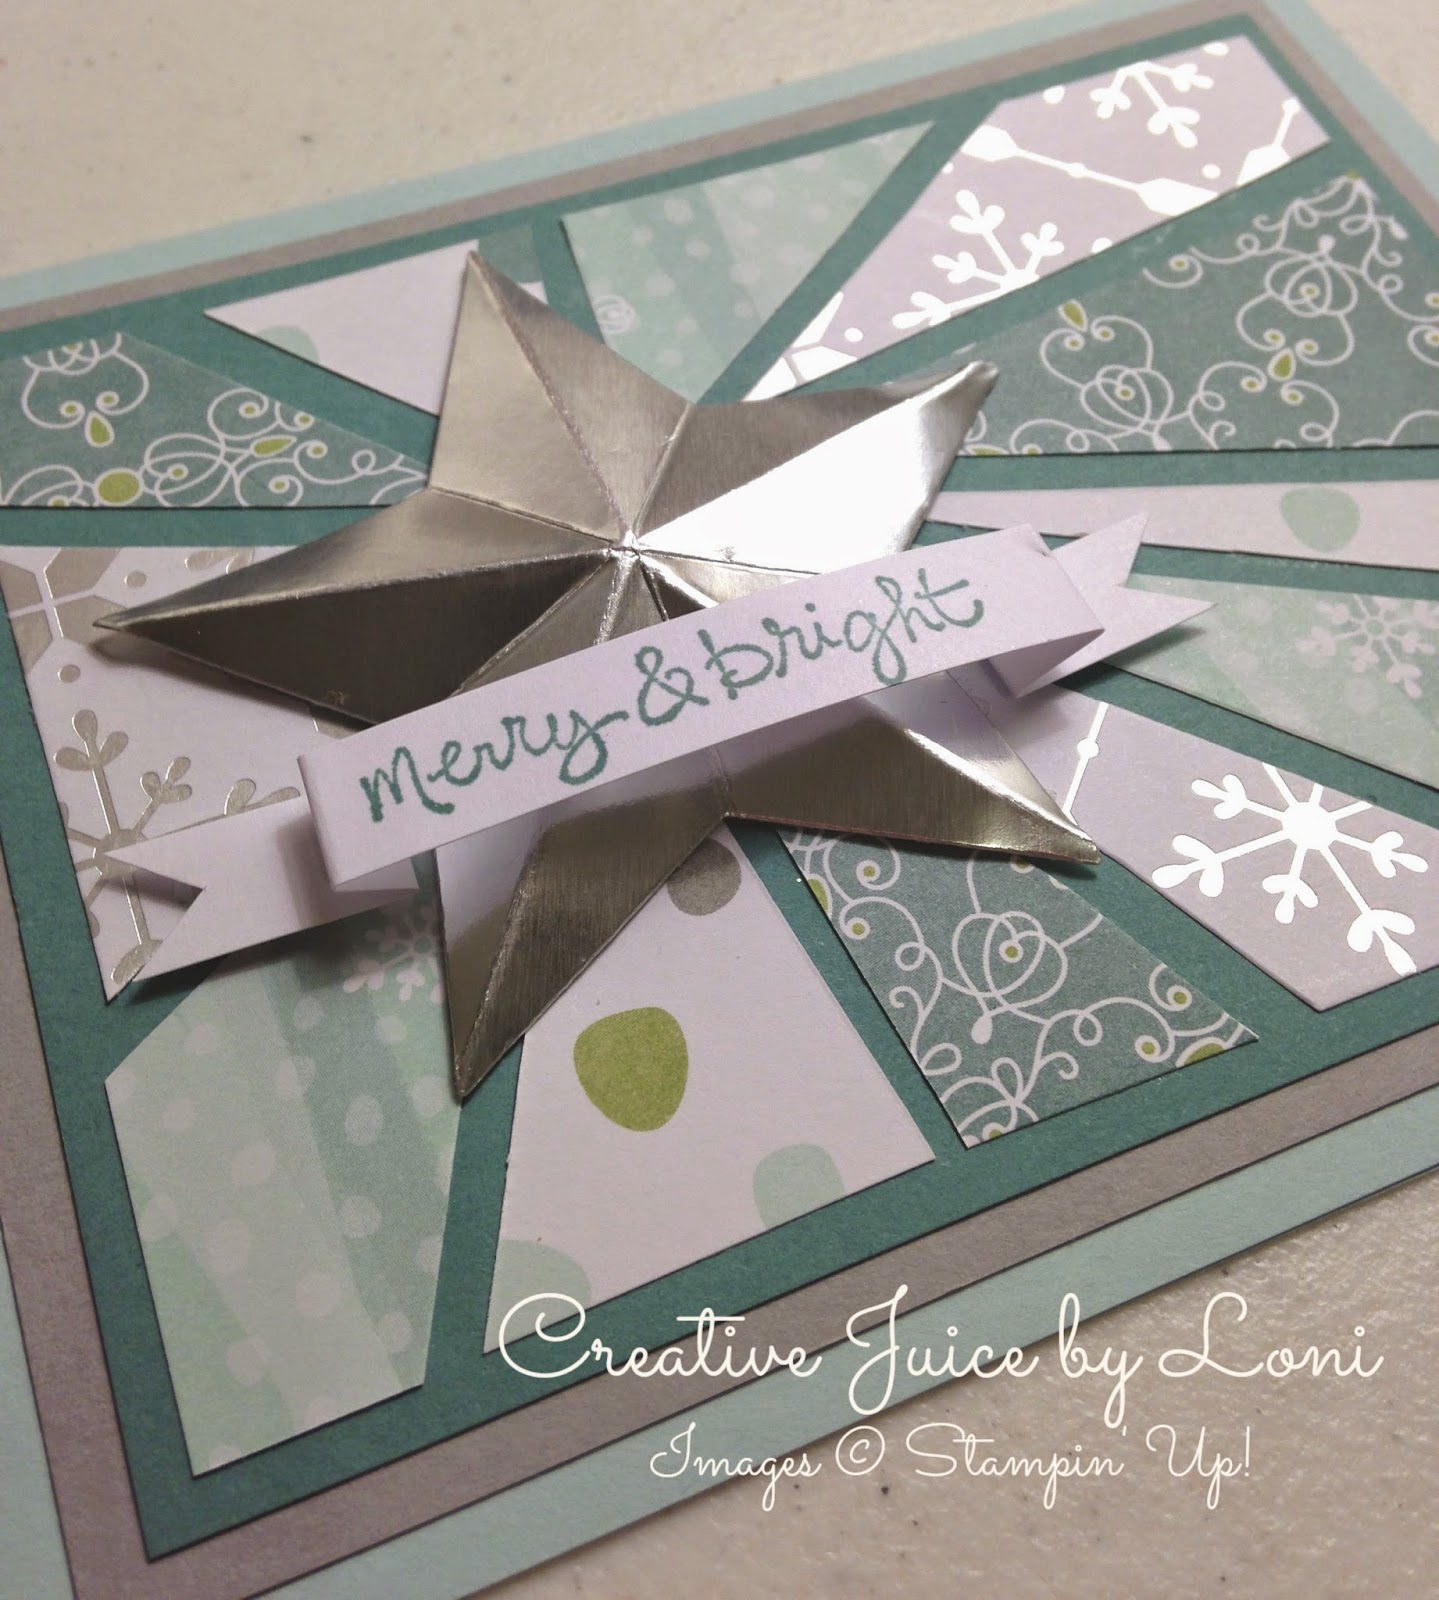
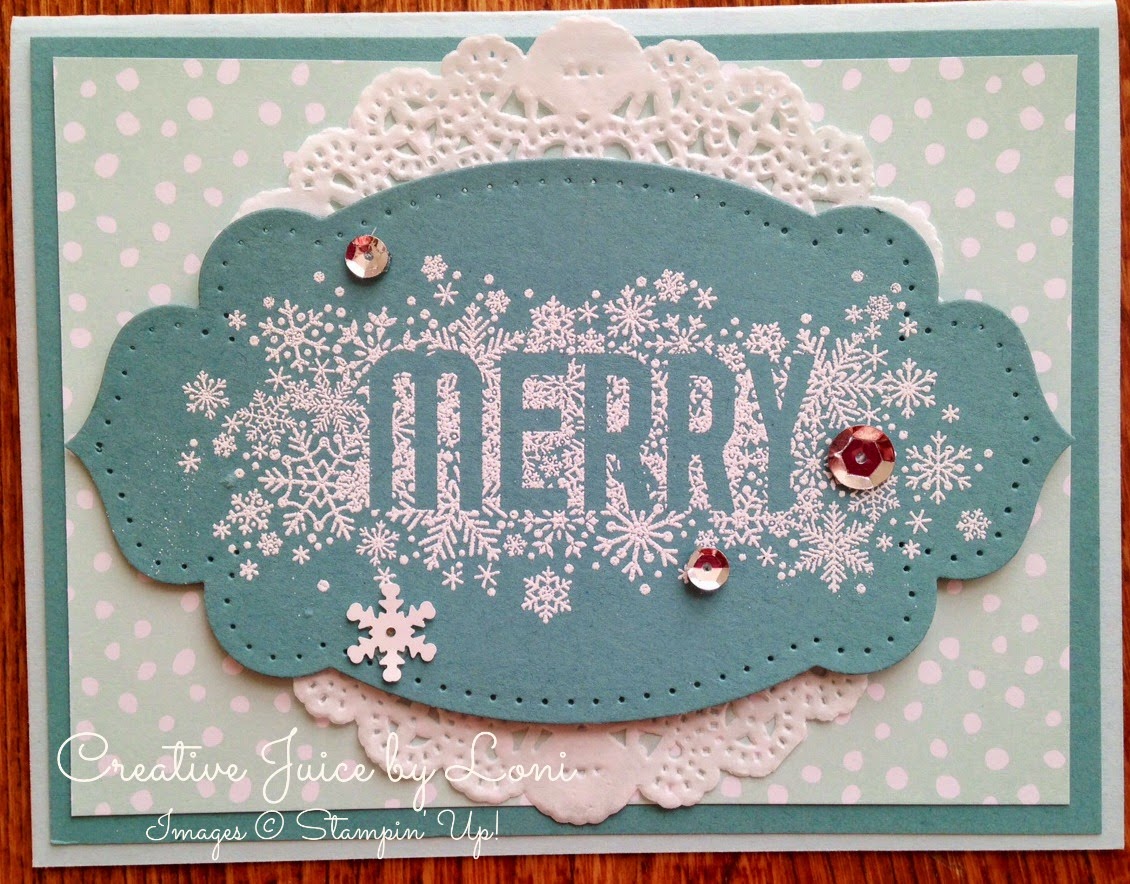
Getting ready for my last Christmas Card Class and I saw the Friday Mashup from last week, so I decided to use it as inspiration for one of the cards we’ll be creating: It uses some non-traditional holiday colors (Island Indigo, Garden Green and Rich Razzleberry) but turned out pretty festive! I hope you can see the Faux Diamonds (or Diamond Dust technique) over the “Merry”…I’ve told you about this super easy sparkly technique before here and here.  Just can’t get enough of it because the BLING sings to me!

If you are in the Utah County area and would like to come to my Christmas Card Class this Saturday morning (November 15, 2014), please RSVP before Thursday night!
post signature

Welcoming Fall: A Good Reason to Send a Card

Do you think you need to wait for a special occasion to send a handmade card? Forget that! Don’t the most delightful surprises come at the most UNEXPECTED times? You are always looking for a Valentine or Birthday card, but wouldn’t it be more fun to get one of these…just because it’s fall?https://drive.google.com/file/d/0B6ayDVkGE0aMY0tKNmdIQjFPcE0/view?usp=sharing

Original card by Janice O’Quinn Urke

I can’t decide if I love this sweet autumnal greeting because of the rich texture or the little stamped leaves on the ground most…to create your own, download the .pdf tutorial by clicking on the card!

post signature

Warm and Glowing Gratitude: Candle Wrap Tutorial

I love using my stampin’ supplies to create home decor and this fall candle wrap makes me feel warm and positively glowing with gratitude for things like batteries, pumpkin chocolate chip cookies and spectacularly colored autumn leaves!

Grateful For All Things Candle Wrap Tutorial

To get the tutorial for this project, click on the picture for a .pdf to print. And if you need the supplies listed, you can order them in my online store here.

Since this is a battery-powered candle (and won’t melt down) you can create a wrap for different seasons and enjoy the glow all year round!

P.S. The candles are on sale at Costco right now 🙂
post signature

Starburst: Merry & Bright

Ooops…I missed last week’s Tuesday Tutorial, so I’ll share two this week (kind of).

It was my pleasure to demonstrate the Starburst (or Sunburst) technique last week at Jill Olsen’s Stamp Together in St. George and these are some of the cards I showed how to make:

Wanna know what’s cool about these cards? I made 4 starbursts all at the same time by cutting a stack of 4 pieces of paper! I used the awesome tutorial by Sharon Cheng here. Seriously easy…go watch it now and remember the measurements for the DSP are 3″x4″. The first card stock layer is 4-7/8″ x 3-5/8″, and the next layer is usually 5-1/4″ x 4″, then the card itself (a half sheet of 8.5″ x 11″ paper, folded in half). 

I cut the star with the Stars Framelits and Big Shot, then scored with my Simply Scored board (on the silver side) of the star from point to opposite indentation, on all points. Then just fold and mount on some Stampin’ Dimensionals 🙂 So shiny!

They are even sparklier in person!

In case you can’t get enough stars, check out the new Many Merry Stars Kit from the new Holiday Supplement…and the fun project ideas for this and other products on the Pinterest board HERE.

post signature

Christmas Card Buffet and Planning Guide

Sending warm wishes for the holidays? Now is the time to plan and prepare! 
(Click image to download planning guide)
Helping to make your holidays happier, I’m holding my first Christmas Card class 
next week in Spanish Fork, UT and you have two times to choose from: 
Tuesday, October 14 at 7 p.m. or Wednesday, October 15 at 10 a.m.
You’ll create 4 different cards for $10* and I’ll have everything prepared for you to stamp and assemble, all you need to bring are scissors and adhesive! 
*4 cards isn’t enough? RSVP for two sets and save $2

Call or text me at 801-376-8685 to reserve your spot and one for a friend by October 12th

post signature

Stamp, Shop & Save and Free Paper

Breaking news: I had planned a drop-in card class for World Card-Making Day this Saturday evening, but my husband’s grandma passed away and we will be attending her funeral services instead. Check back tomorrow for other ways to celebrate WCMD with me and mark your calendar for my Christmas Card Buffet Oct. 14 @ 7 p.m. or Oct. 15 @ 10 a.m.

Stampin’ Up! is helping you fill the mailboxes of those you love with beautiful handmade greeting cards by offering discounts on stamps, ink, envelopes and paper…all the essential elements for a great card (including the BIG NEWS stamp set that was featured in my Tuesday Tutorial yesterday).

https://drive.google.com/file/d/0B6ayDVkGE0aMTzEwR0g0VHRjLWs/view?usp=sharing

TAKE NOTE: This special sale only lasts through October 6, 2014 so take advantage and stock up in my Stampin’ Up! Store ASAP! If you place and order and use Hostess Code TMDTH6QN, you will have a chance to win the Good Greetings Stamp Set (also available when you host your own party in October, with a minimum $300 party)

http://bit.ly/startstampin

If you are addicted to patterned paper, you may want to consider becoming a Stampin’ Up! demonstrator this month because you will get to choose a free pack of SU! Designer Series Paper for the next 6 months! It’s an awesome time to start a business and share creativity with your friends through the holidays and beyond…

And what do you get when you combine the Stamp, Stock and Save sale with the Pick-a-Pack-of-Paper promotion? A really cute card like this:

post signature

Tuesday Tutorial: Big News Birthday

Here’s a hint for all you card crafters: Have you ever noticed that when you cut a piece of card stock in half to create a card, you are left with a piece to make ANOTHER card? 
And when you cut a piece of paper in quarters to layer on top of your creation, you have THREE (3) more quarters left over…
 (stick with me here)
…so as long as you are creating ONE card, why not make them in sets of FOUR?  
 Mind blowing, really. It’s my job. 
Original Card by Kimberly Myers
So the hint applies here: People keep having birthdays, so you may as well make up 4 (or 8 or 12) 
of these polka-dot darlings so you are ready for the next month.
Stick a $10 bill in the card and voila: It’s a gift, too!
Click here for the tutorial and tell me you love it. And as always, thank you for shopping for the supplies in my Stampin’ Up! store 🙂

post signature

Tuesday Tutorial: Ghost in the Graveyard

Have you ever played Ghost in the Graveyard? Here’s the game version on a card!

As I was putting this card together, I noticed that the Scalloped Tag Topper punch looked like a gravestone, so I sponged the edges to give it a stone look… then pull on the ribbon and a stack of Jack (o’lanterns) appears! I’ve made a printable tutorial so you can make one in your own stampin’ studio 🙂

Don’t forget that the Good Greetings stamp set is only available FREE to hostesses through October 31 with a $300 workshop..and I have just a few days left to host your own craft party 🙂

post signature