UPDATED 6/6/12: Thanks to Mary Fish of Stampin’ Pretty, she let me know that the minimum envelope width for mailing is 3 1/2″ and she suggested a few adjustments to the envelope measurements, which are now reflected in the following instructions!
When you cut a piece of 12×12 card stock into quarters, you can create FOUR 6×3 cards, like this one created from a new set called “Betsy’s Blossoms”

And here is how to create a beautiful envelope to match!
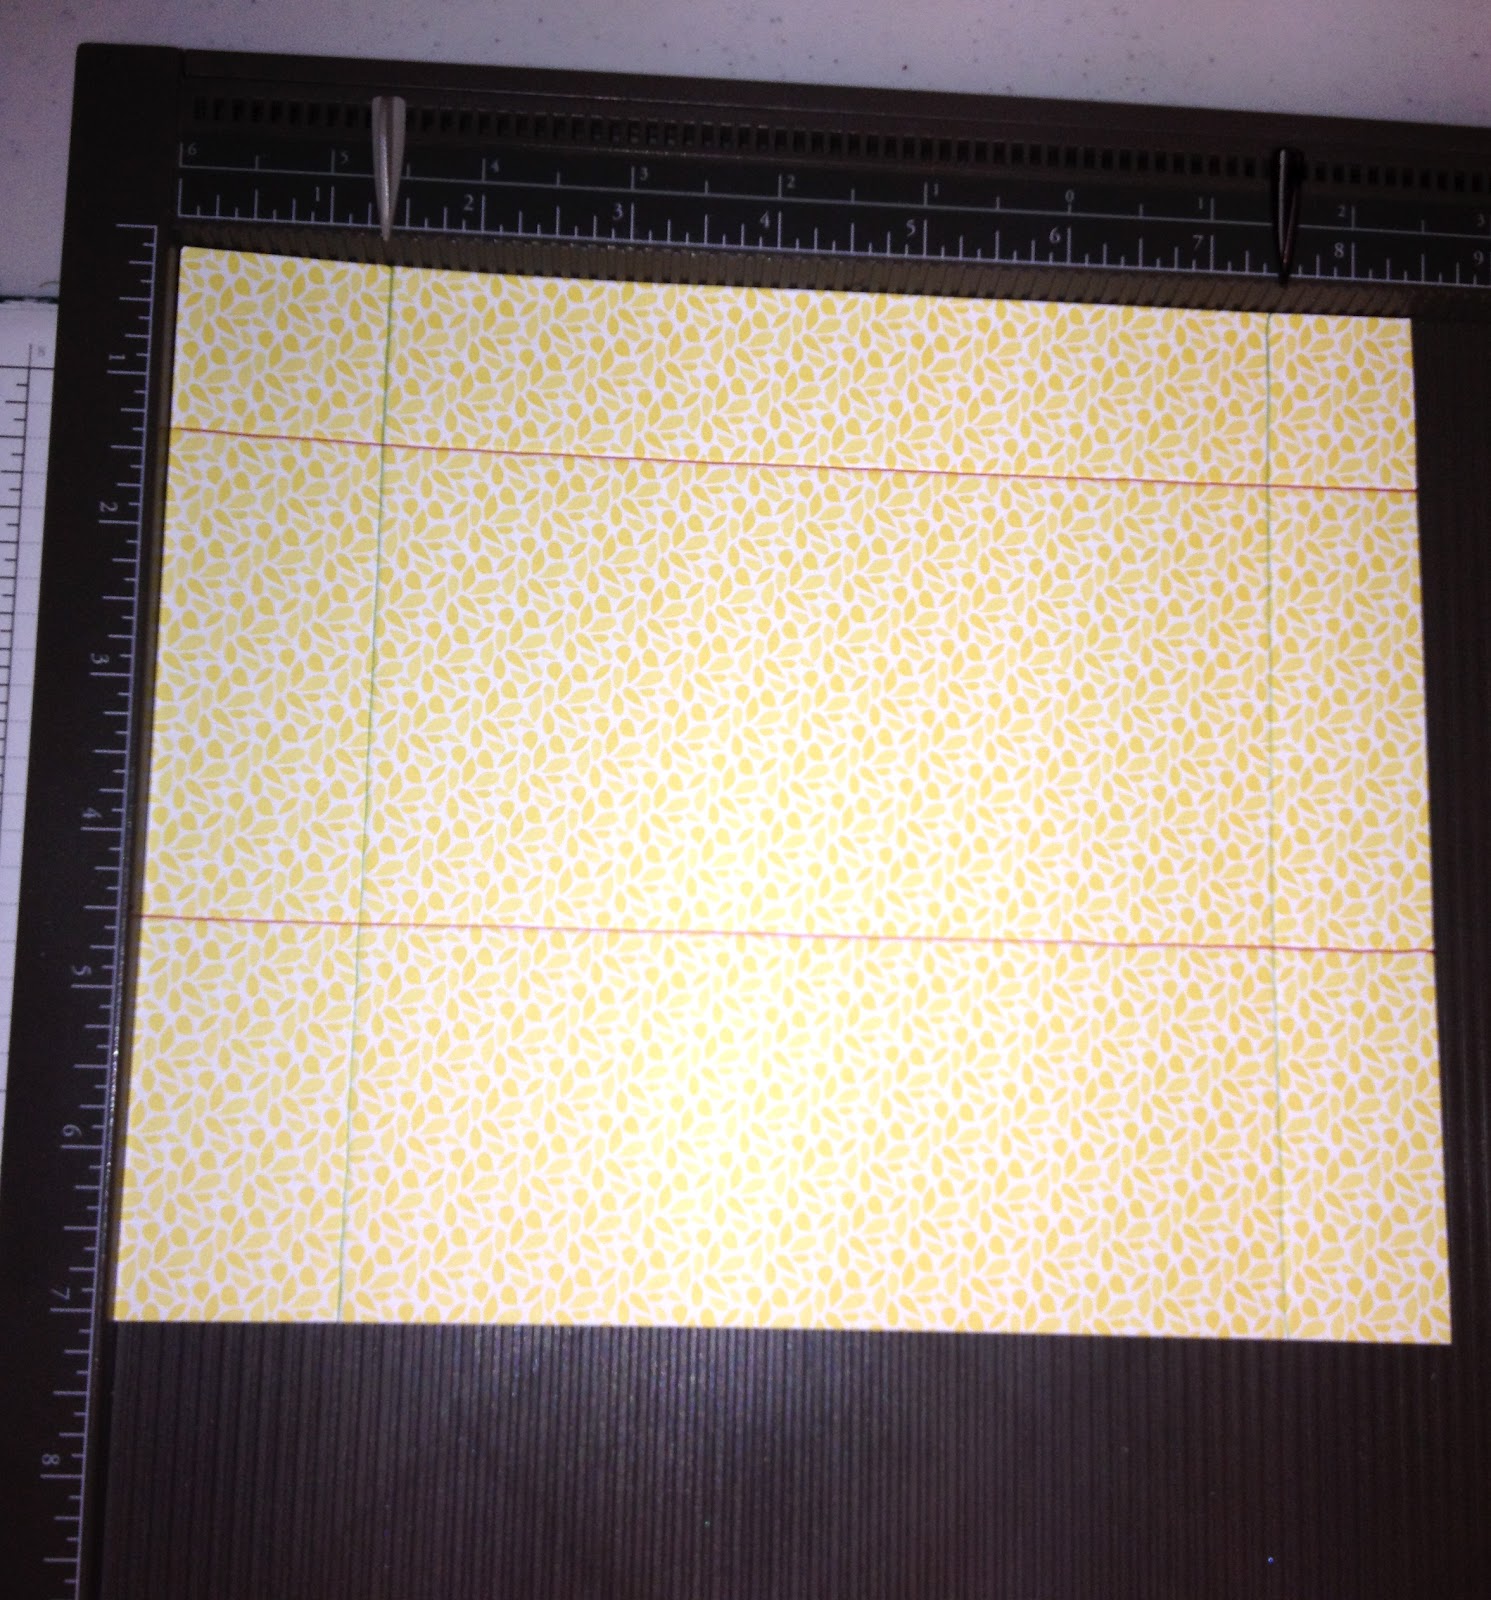
First, cut a piece of Designer Series Paper 7.5 “x8.5″ (this sample created with the new Floral District DSP). With the 7.5″ side along the top of your Simply Scored tool, score at 1 3/8″ and 4 7/8”
(red lines shown below)
Hint: the Simply Scored tool has grooves and marks every 1/8 inch!

Turn the paper so the 8.5″ is along the top of the Simply Scored tool and score at 1″ and 7 1/8″
(Green lines shown below)

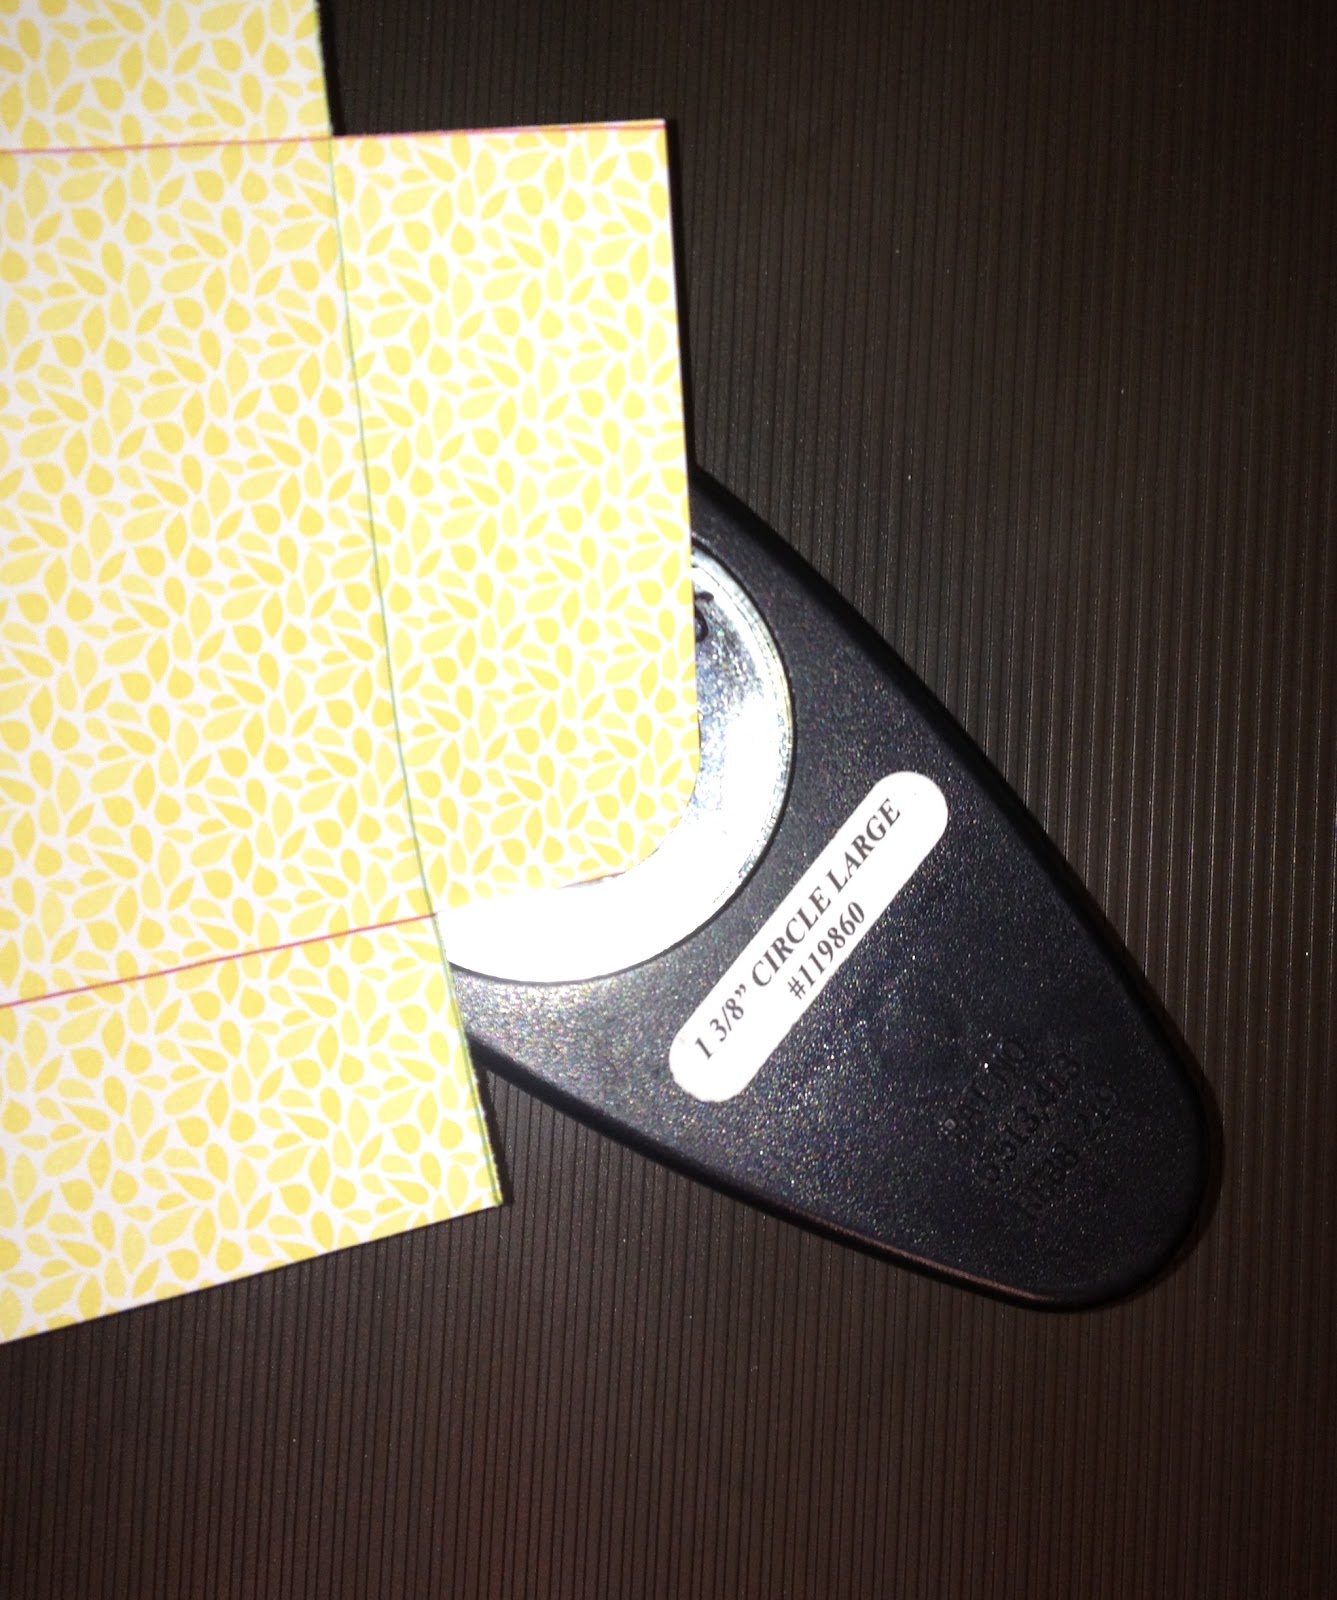
Now you can trim off each corner along the score marks (or use the 1 3/8″ square punch…it works perfectly!)

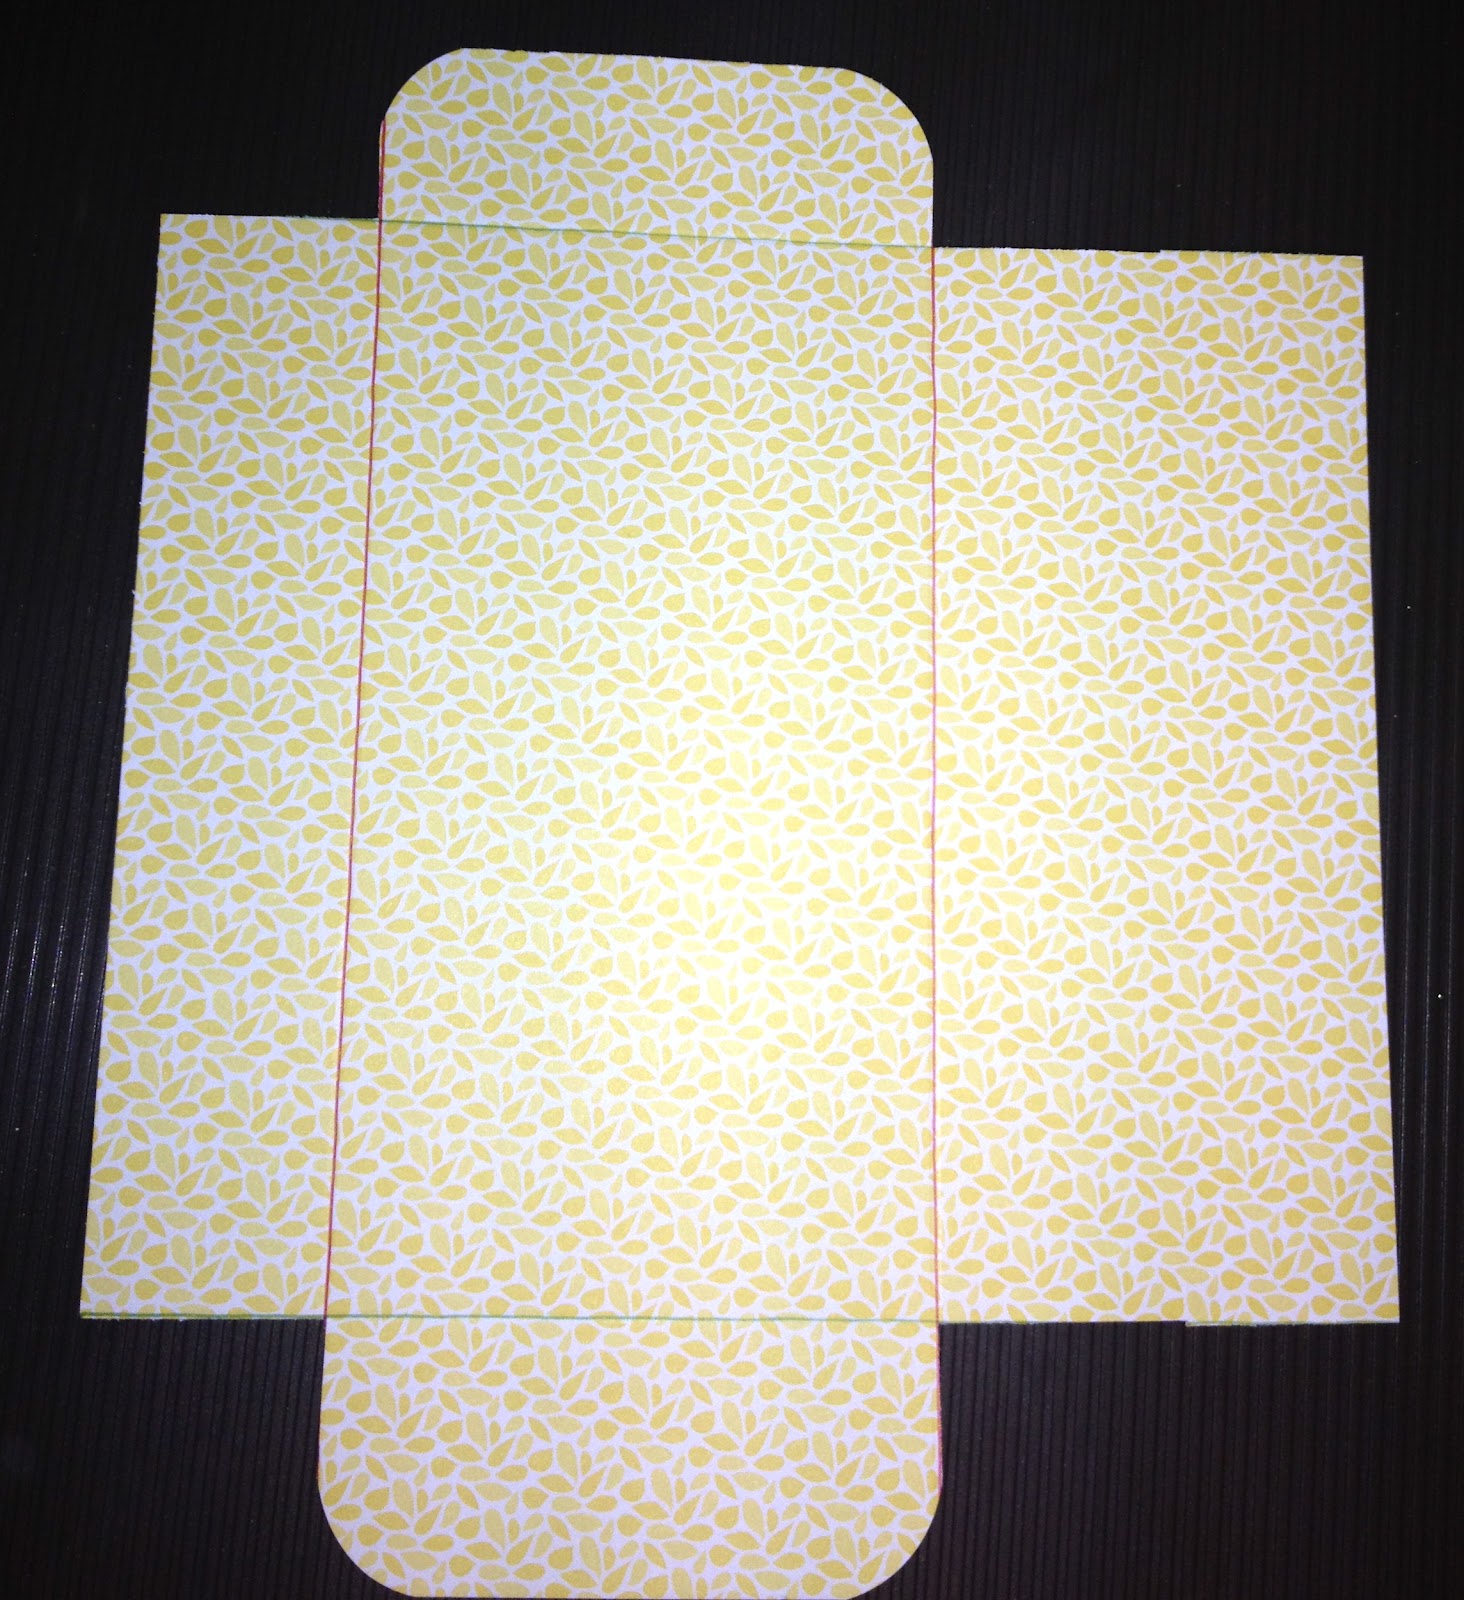
Your envelope will now look like this:

Optional: Use the 1 3/8″ circle punch and insert the top and bottom tab corners in the back to round the corners like this:

Now it looks like this:

Fold over the side pieces and adhere first, then the bottom flap folds up:

Voila! it fits your 6×3 card perfectly!

(Finished Envelope size is now 3.5″ x 6 1/8″)
your card and envie are perfection. love the “quartet” of colorful flowers. thanks for doing the engineering on the envelope. i can't way to try it! hugs, mary
Hopping over from Mary's blog. What a fantastic card, envelope and tutorial! Thanks so much for sharing! I love how you used the punches as well! Fabulous!