Christmas Stamp Camp

Christmas Stamp Camp
Saturday, November 17th
1-4 p.m.

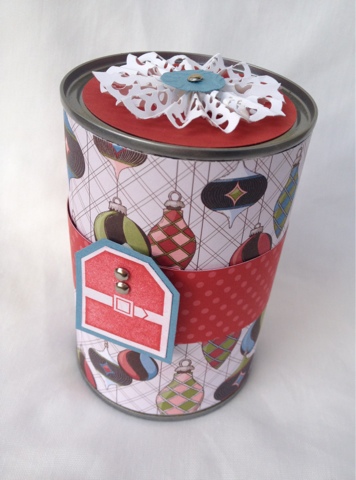
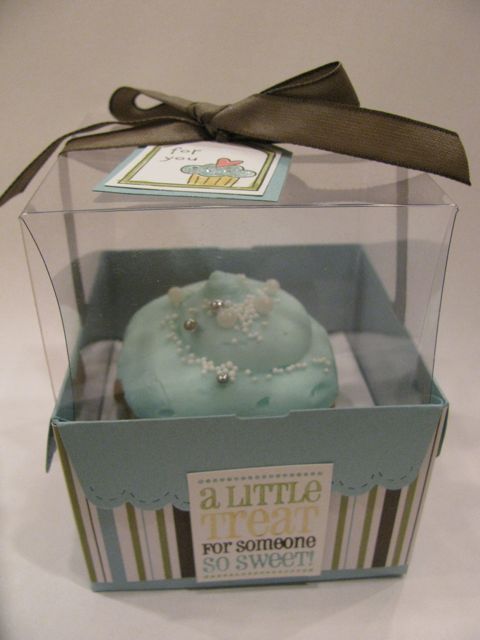
This adorable tote holds a chapstick and a candy “kiss”: A thoughtful gift for anyone planning to spend a lot of time under the mistletoe this holiday season! And it is one of the 4 clever and crafty gift and home decor projects you’ll create at my Christmas Stamp Camp next Saturday in Spanish Fork. I know you can’t see it in this picture, but it’s also covered in **sparkles** for the holidays! 

Here’s the deal: You’ll need to RSVP by WEDNESDAY to save your spot…and of course, stamping is always MERRIER when you bring a friend, so call your BFF and make it a girl’s day!

Cost: $20. Bring SNAIL and Sticky Strip adhesive (order refills when registering, if necessary) along with your scissors. All other supplies will be provided.

BONUS: My retired stamps and supplies will be available to shop from…all 25-75% off!

Tin Cans and Tasty Treats

 I had started this post a few weeks ago, but have been so busy at the bookstore I wasn’t able to post before now…but don’t fret! You can can gifts ANYTIME of the year 🙂 This is just a sample of one way to decorate a tin can that contains an unexpected surprise…and read the whole post for a tasty treat that you can make quickly to put inside if you don’t happen to have pearls or diamonds to put into the can (which happen to fit nicely, or gift cards, or other small gifts)
The easiest way to make these is to use a clean-edge can opener and open the bottom of the can, clean it out and take off the wrapper (so you can add your own). Once the can is dry, put your gift in and use a thin line of Crystal Effects (from Stampin’ Up! of course!) around the edge of the lid you removed and press down to re-seal can. Add a decorative cover and voila! A canned gift!
Interestingly, the gals over at Our Best Bites were sharing the same idea this week and if you want to just print off a label, click on the picture below for a link to their post and a free printable 🙂
Now ONE MORE TREAT for you…this is my favorite Christmas Candy, but be WARNED! It is EXTREMELY ADDICTING:
 Caramel Snowman Poop!
2 cups Butter
1 cup Honey
4 cups Sugar
1 cup Cream (I used whipping cream)
Combine all ingredients and cook, stirring frequently to soft ball stage. Pour over 2 large Tupperware bowls of popcorn, Chex or ~my favorite~ a large bag of puffed corn cereal (they sell it this time of year in a big bag at the grocery story, which reminds me to make some and then give it all away or else I would eat it all myself).

Doing the Belly-(band) Dance

Sometimes all it takes to go from boring to WOW!  is a little belly(band) dance!
For instance, take a kraft box and wrap a strip of Stampin’ Up! Designer Series Paper (DSP) around it and voila! A simply elegant gift without wrapping paper! A perfectly placed stamped tag always covers the seam perfectly, too.

By the way, this little box (from the Holiday Mini catalog) is the perfect size for giving a stack of cookies made with the new Cookie Press Stamps).

Consider the elegance of the belly-band as it dresses up a jar of homemade Apple Pie Filling:

And of course, a gate-fold card kept closed with the versatile and stylish belly-band wrap just piques interest as to what holiday message could be hiding within:

So if you find yourself needing a little “dancing” this holiday season, try the Belly-Band Dance…and then share a link in the comments showing off your own!

Stamping Show and Tell

At the Stitched Stampers quarterly meeting last week, we had a “Shoebox Swap” and “Show-and-Tell” so today I’m sharing some of the really cute ideas. However, I’m saving one **unbelievably adorable idea** for my April workshops, so if you want to make the CUTEST little spring project, you should call me ASAP to book a party!!!

We’ll start with Pam’s card: This lovely monochromatic card displays the versatility of brown!

Sally’s card is next: The tip she shared is to start with a 3″x3″ square of White card stock and using the Dotted Scallop Ribbon Border punch, simply insert your card into the punch in the middle on all four sides, creating a perfect frame!

And to finish off today’s fashion show, Hop the Easter Bunny presents some darling dotted Easter Milk Cartons in their stylish container, courtesy of Pam! (Hop had to be in the picture because those sweet little creatures showed up halfway through the swap, and they were the focus of attention from the moment they arrived!). I’ll be happy to show you how to create these cute containers at YOUR party 🙂

"Recycle" Christmas Cards: How To Make Boxes!

Obviously, I love to keep hand-crafted cards to remember and inspire me, but what do I do with all the “other” cards I get at Christmas time? I re-purpose them into gift boxes!

Here is how to do it in 8 easy steps:
  1. Cut card in half along fold.
  2. Using back half of card first, fold so long edges meet in middle (important to do this step first)
  3. Open and fold short edges to meet in the middle.
  4. Open and cut edges from short edges to the first fold.
  5. Fold short “arms” into the inside of box.
  6. Fold top edges of larger tab over the short arms and tape down to inside of box. This creates the BOTTOM of the box.
  7. Repeat steps 1-6 for the TOP of the box using the front half of card, leaving a small space between edges when folding (this makes the top a bit bigger to fit over the bottom). Remember to keep the pretty side facing OUT when folding the box, so you can see the design!
  8. Fit box together, place gift inside and add ribbon!

Cupcake, Baby!

This is the “Cupcake Box” that we taught at the Late Night Stampers Reunion Party last week before convention (We: Sue Stratton and I with special thanks to Sally Hadley who stepped in to help at the last minute!) As promised, here are the instructions! Supplies needed (from Stampin’ Up!):
  • 4 Scallop Envelopes cut from card stock using the Big Shot
  • Coordinating strip of Designer Series Paper, 12″ x 2″ (Nursery Suite Specialty paper, shown)
  • Window sheet or card stock Vellum, 8 1/5″ x 11″
  • White card stock (+scrap of matching card stock) for tag
  • White card stock 3″ x 5″, scored 1″ from each end (for cupcake insert)
  • 30″ Taffeta ribbon
  • Markers, Dazzling Diamonds Glitter, 2-way Glue, adhesive, Large & Small Tag punches, 2 3/8″ Scallop Circle punch, Horizontal Slot punch, paper trimmer/scorer
Take your scallop envelopes and glue flaps corner to corner, with one flap on the inside and the other flap on the outside (don’t worry, your DSP will cover the flaps on the outside and nobody will see them). Hint: Sticky Strip works best for adhering 3-D projects together!
Finish the box like this, then you can glue down bottom flaps and inside flaps:
To keep the cupcake in place inside the box, take your 3″ x 5″ white card stock and punch a hole in between the scored lines, fold in insert into the bottom of the box with the 1″ sides down:
Now you can cover the outside of the box (under the flaps) by wrapping the DSP strip around and leaving the gap in the front~the gap is covered by the stamped sentiment “A Little Treat for Someone Sweet” from the Got Treats stamp set. Stamp and punch out tag (tag shown from the Birthday Bakery Hostess Level 1 Stamp Set…earn this FREE when you host a workshop!). Add a little Dazzling Diamonds to the tag to give it some bling!
Use the Horizontal Slot punch along the top edge of each side of the box and slip the taffeta ribbon through/under each side scallop and under the bottom of the box. To create the cover, score your window sheet or vellum card stock at 2 3/4″ from each long side and 4″ from each short edge, then cut out the corners so it looks like this:
Fold along score lines and insert over cupcake into box and tie off the ribbon on the top, add tag!
Share with a friend 🙂

Do the Can-Can

Looking for a unique way to present a gift or gift card this Valentine’s Day? Do the Can-Can!

 
These are fun and simple to make: Use a clean-edge can opener (from Pampered Chef) to open any soup/fruit/vegetable can, wash and dry the can. Cans with the pop-top lid are fun to use and easy for the recipient to open…don’t pop the lid open, just remove the whole lid using the can opener!

Cover the can with Designer Series Paper and/or roll an image (shown here using the I {Love} Love Jumbo Stampin’ Around Wheel). Spray adhesive is good for applying your paper to the can.

Add glitter, ribbon, accessories, etc. Don’t forget to decorate the top of the can, too!
 
And since it says Hugs & Kisses (from the Love You Much stamp set), what better way than to encourage that display of affection with the contents of the can:
  
Once you have filled the can with your gift, seal the lid back on the can using Crystal Effects (from Stampin’ Up!, of course). The recipient will have to open the can again with a can opener 🙂

Talk Like a Pirate Day, September 19

Avast, ye scurvy knaves! ‘Tis the day of pirate-ish speech, it is! Thus it be I feel compelled to be sharing this with ye:Should it be that ye be hankerin’ to make one of yer’ own, this be made with the Big Shot top note die…but of course I’d be happy to teach all ye land-lubbers how to secure the riggin’s should ye be callin’ me for a cruise on the bounty main (translation: book a workshop in October and I’ll bring this sample to show you).

Wouldn’t that be a marvelous thing to be sharin’ with all the little rugrats who come a–knockin’ at yer door on the 31st of October? Or perhaps ye be wishin’ to hang ’em high (the candy, that is, not the kids) on the door of yer neighbor afore they be beggin’ ye for one. A pre-emptive strike…that be the best way to be usin’ yer noggin!

You Take the Cake

I have been going through a cupcake obsession…both on paper and in true sugar-coated mass, so this On A Pedestal stamp set has sung it’s siren song to me once again! The best thing? It contains a Birthday Cake for ONE! A Granny B’s Original Pink Sugar Cookie…
Truth in advertising: Let’s be honest…did you know the label for this cookie reads 4 (yep that’s FOUR) servings per container? A serving is actually 1/4 of the cookie, which contains 130 calories, 6 grams fat and 17 carbs (good to know if, in my case, you are the mother of a diabetic). I guess that on your birthday, reading the Nutrition Facts would reduce the pleasure of the expected sugar rush, so don’t bring that up to the person you would give this to 😀