
BREAKING NEWS: FREE SHIPPING day just announced! Set an alarm for Wednesday, June 21st and earn free shipping on your orders over $75 that day only!
Paper crafters pride themselves on using scraps, so when we find a way to NOT WASTE A PIECE of pretty paper, we must give it a try!
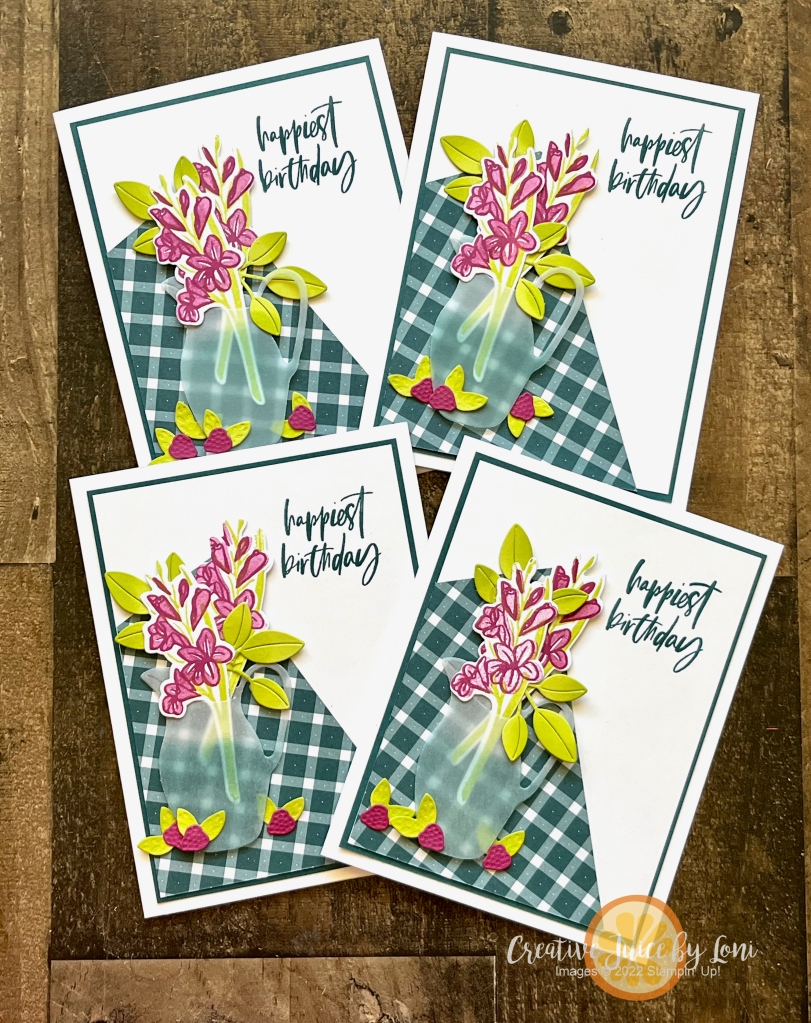
I appreciated this idea from fellow demonstrator Rachel Tessman, and with the Glorious Gingham Designer Series Paper ON SALE through June, knew it was time to share it with you! It’s a fabulous way to get 4 angled corner backgrounds from one 6″ x 6″ piece of Designer Series Paper, and you’ll love how simple it is.
Lay a ruler down and mark 1-1/2″ on each bottom right corner as you rotate the paper 90-degrees four times. Mark it on the BACK SIDE of the paper you want to use, then you don’t have to worry about erasing lines! Then connect the marks across from each other like this:

Use your Paper Trimmer to cut along each of your lines and you’ll have 4 angled pieces to put in the corners of your card fronts:

My card base is Thick Basic White Card stock: 5-1/2″ x 8-1/2″, scored in half at 4-1/4″
Pretty Peacock card stock: 5-1/8″ x 3-7/8″
Basic White card stock: 5″ x 3-3/4″
I used the So Refreshing Bundle to complete my cards, and here’s a video to watch & learn how to:

Let me know if you try it, or share your version in my Creative Corner Facebook Group for my V.I.C.’s (Very Important Crafters). Now turn up the alarm to remind you to order on Free Shipping Day and add these supplies to your cart:
Product List Designer Series Paper")


One thought on “4 Backgrounds from 6×6 Paper: Corner Angle Layer Card”